Release 5.5.0
Copyright © 2022 DF/Net Research, Inc.
All rights reserved. No part of this publication may be re-transmitted in any form or by any means, electronic, mechanical, photocopying, recording, or otherwise, without the prior written permission of DF/Net Research, Inc. Permission is granted for internal re-distribution of this publication by the license holder and their employees for internal use only, provided that the copyright notices and this permission notice appear in all copies.
The information in this document is furnished for informational use only and is subject to change without notice. DF/Net Research, Inc. assumes no responsibility or liability for any errors or inaccuracies in this document or for any omissions from it.
All products or services mentioned in this document are covered by the trademarks, service marks, or product names as designated by the companies who market those products.
Google Play and the Google Play logo are trademarks of Google LLC. Android is a trademark of Google LLC.
App Store is a trademark of Apple Inc.
Sep 01, 2022
Table of Contents
- Preface
- I. Preliminaries
- 1. Introduction
- 2. ATK Worksheet
- 2.1. Using the Worksheet
- 2.2. Module 1. Installation and Initialization
- 2.3. Module 2. DFdiscover Client Applications
- 2.4. Module 3. Study Setup
- 2.5. Module 4. eCRF Creation for DFdiscover
- 2.6. Module 5. Custom Properties
- 2.7. Module 6. Subject Alias
- 2.8. Module 7. EDC Data Entry
- 2.9. Module 8. Image Data Entry
- 2.10. Module 9. User-defined Query Category Types
- 2.11. Module 10. Multiple Queries Per Field
- 2.12. Module 11. Data Review
- 2.13. Module 12. External Query Reports
- 2.14. Module 13. Replying to EDC Queries, eSignatures
- 2.15. Module 14. Re-submitting Query Corrections
- 2.16. Module 15. Data Export and DFsas
- 2.17. Module 16. PDF File Creation
- 2.18. Module 17. DFweb Data Entry
- 2.19. Module 18. DFcollect Mobile Data Collection
- 3. Discrepancy Report
- II. Modules
- 1. Module 1. Installation and Initialization
- 1.1. Tests & Requirements
- 1.2. Confirm version information can be obtained for DFdiscover.
- 1.3. Obtain super-user privileges and remove older Acceptance Test Study, if one exists.
- 1.4. Install the Acceptance Test Study.
- 1.5. Define Acceptance Test Study to the DFdiscover server.
- 1.6. Create a role and permissions for
datafax. - 1.7. Creating study roles and permissions.
- 1.8. Creating user accounts and assigning study permissions.
- 1.9. Enable high definition imaging.
- 1.10. Start the Acceptance Test Study Control Panel application.
- 2. Module 2. DFdiscover Client Applications
- 2.1. Tests & Requirements
- 2.2. Begin Module 2. DFdiscover Client Applications.
- 2.3. Send PDF images to DFexplore.
- 2.4. Verify the online user documentation. Open the Image Router and verify the appearance of the Welcome Image.
- 2.5. Open the Acceptance Test Study and verify the standard DFexplore views.
- 2.6. Start DFsetup and verify version information.
- 2.7. Verify the online setup documentation. Open the Acceptance Test Study setup and verify the standard DFsetup views.
- 2.8. End Module 2. DFdiscover Client Applications.
- 3. Module 3. Study Setup
- 3.1. Tests & Requirements
- 3.2. Begin Module 3. Study Setup.
- 3.3. Permitted users can gain exclusive access to DFsetup to modify a study setup.
- 3.4. Define Global study preferences and apply settings to DFsetup.
- 3.5. Create and modify a new style (Comment).
- 3.6. Create and modify a new module (Death).
- 3.7. Assign Field definitions to a newly created module.
- 3.8. Assign a module's field definitions to a plate.
- 3.9. Correct field ordering on the current plate to set field traversal order for data entry.
- 3.10. Use copy and paste to create repeating module and field references on a plate.
- 3.11. Create user-defined query category codes.
- 3.12. Submit a copy of the newly defined Plate 11 into the study database and retrieve the page in DFexplore Image View.
- 3.13. Enter and save all data on the submitted plate 11.
- 3.14. End Module 3. Study Setup.
- 4. Module 4. eCRF Creation for DFdiscover
- 5. Module 5. Custom Properties
- 5.1. Tests & Requirements
- 5.2. Begin Module 5. Custom Properties.
- 5.3. Defining Custom Properties in DFsetup.
- 5.4. Adding Global Custom Property values.
- 5.5. Adding Plate, Module and Variable level Custom Property values
- 5.6. Exporting Custom Properties in DFsetup.
- 5.7. Edit checks execution of Custom Properties.
- 5.8. Creating subject data lists and exporting data views.
- 5.9. DFexplore Database Definition Report exporting.
- 5.10. End Module 5. Custom Properties.
- 6. Module 6. Subject Alias
- 7. Module 7. EDC Data Entry
- 7.1. Tests & Requirements
- 7.2. Begin Module 7. EDC Data Entry.
- 7.3. Login to DFexplore and inspect the list of sites, subjects and visits in the record list window.
- 7.4. Enter and save new data using EDC data entry for Subject 99007.
- 7.5. Add reasons to explain entered data values.
- 7.6. Enter and save Plate 3, Subject 99007 as a pending record.
- 7.7. Mark and save unavailable data as missed. Unmark available data as missed.
- 7.8. Retrieve and modify existing data using a predefined task and save modifications to the database.
- 7.9. Confirm audit trail information for entered and modified data.
- 7.10. End Module 7. EDC Data Entry.
- 8. Module 8. Image Data Entry
- 8.1. Tests & Requirements
- 8.2. Begin Module 8. Image Data Entry
- 8.3. Send PDF images to DFexplore.
- 8.4. Login to DFexplore and confirm the receipt of new pages in the Status View.
- 8.5. Login to the Image Router and route a misidentified page to the Acceptance Test Study new record queue.
- 8.6. Login to DFexplore and confirm receipt of the routed page in the Status View.
- 8.7. Retrieve new images in DFexplore Image View.
- 8.8. Enter Plate 1 (Form 1) for Subject 99002.
- 8.9. Enter Plate 2 (Form 2) for Subject 99002.
- 8.10. Enter Plate 3 (Form 3) for Subject 99002.
- 8.11. Enter Plate 4 (Form 4) for Subject 99002.
- 8.12. Compare the resolutions between Standard Definition (SD) and High Definition (HD).
- 8.13. Edit an existing query.
- 8.14. Delete an existing query.
- 8.15. Change data and record a reason for data change.
- 8.16. Batch validate all opened pages for Subject 99002 to level 2.
- 8.17. Confirm the status of entered pages in Status View.
- 8.18. End Module 8. Image Data Entry.
- 9. Module 9. User-defined Query Category Types
- 9.1. Tests & Requirements
- 9.2. Begin Module 9. User-defined Query Category Types.
- 9.3. Retrieve an existing data record in DFexplore.
- 9.4. Apply a user-defined Category query.
- 9.5. Add a reason for Data Value to explain entered data.
- 9.6. Edit an existing query.
- 9.7. Delete a user-defined Query Category that is used by an existing query.
- 9.8. Delete a user-defined Category query.
- 9.9. End Module 9. User-defined Query Category Types.
- 10. Module 10. Multiple Queries Per Field
- 10.1. Tests & Requirements
- 10.2. Begin Module 10. Multiple Queries Per Field.
- 10.3. Submit PDF images to DFdiscover.
- 10.4. Enable multiple queries per field in DFsetup.
- 10.5. Retrieve submitted CRF in DFexplore Image View.
- 10.6. Enter Plate 9 for Subject 99002.
- 10.7. Apply multiple queries to a field.
- 10.8. Select and edit an existing query in a field that has multiple queries.
- 10.9. Select and reply to an existing query in a field that has multiple queries.
- 10.10. Select and delete an existing query in a field that has multiple queries.
- 10.11. End Module 10. Multiple Queries Per Field
- 11. Module 11. Data Review
- 11.1. Tests & Requirements
- 11.2. Begin Module 11. Data Review.
- 11.3. Retrieve all data for Site 99 that exists at level 3.
- 11.4. Review and approve a pending reason for data value, and approve a selected query in a field that has multiple queries.
- 11.5. Review and move approved reasons for data values to a higher workflow level, and review queries in a field that has multiple queries.
- 11.6. Data review and add a query to inconsistent data.
- 11.7. Review and complete pending data for Subject 99007.
- 11.8. Confirm audit trail information for reviewed and modified data.
- 11.9. Run batch edit checks to verify data integrity.
- 11.10. Use a data expression to retrieve specific subject information.
- 11.11. Use cross-plate data criteria to retrieve specific subject information.
- 11.12. End Module 11. Data Review.
- 12. Module 12. External Query Reports
- 12.1. Tests & Requirements
- 12.2. Begin Module 12. External Query Reports.
- 12.3. Obtain database query metrics and details using Status and List Views to review all outstanding queries prior to query report creation.
- 12.4. Run database integrity check report DF_XXkeys to export all key fields and visit dates from required plates in the database.
- 12.5. Use Data View to check, and if necessary correct, illegal visit dates by retrieving the problems keys identified by DF_XXkeys.
- 12.6. Execute DF_QCupdate to update the query database and lock all records for query report generation.
- 12.7. Execute DF_QCreports to create a standard, 3-part external query report for a study site.
- 12.8. Confirm the status of external queries following query report creation.
- 12.9. Execute DF_QCstatus to verify that a new query report was created by listing all reports in the QC/NEW directory.
- 12.10. Execute DF_QCview to display the newly created query report.
- 12.11. Execute DF_QCprint to print the query report from the QC/NEW directory.
- 12.12. Comparing several examples from the printed query report against their corresponding queries in the study database.
- 12.13. Execute DF_QCfax to email the query report to a valid email account.
- 12.14. Verify the status of the queries in the sent report.
- 12.15. End Module 12. External Query Reports.
- 13. Module 13. Replying to EDC Queries, eSignatures
- 13.1. Tests & Requirements
- 13.2. Begin Module 13. Replying to EDC Queries, eSignatures.
- 13.3. Determine a count of outstanding/outstanding queries in Status View.
- 13.4. Review outstanding queries in Queries View.
- 13.5. Using EDC, locate and reply to outstanding clarification queries.
- 13.6. Add an Electronic Signature (eSign) to a set of completed subject records.
- 13.7. Verify removal and Re-applicaton of eSignatures.
- 13.8. End Module 13. Replying to EDC Queries, eSignatures.
- 14. Module 14. Re-submitting Query Corrections
- 14.1. Tests & Requirements
- 14.2. Begin Module 14. Re-submitting Query Corrections.
- 14.3. Submit PDF images to DFdiscover.
- 14.4. Verify that all CRFs have arrived successfully in Image view.
- 14.5. Retrieve submitted CRFs using DFexplore Image View.
- 14.6. Enter Form 2, Subject 99001, resolve outstanding queries, and save the corrected CRF to the database.
- 14.7. Enter Form 2, Subject 99002, resolve outstanding queries, and save the corrected CRF to the database.
- 14.8. Enter Form 4, Subject 99004.
- 14.9. Enter Form 2, Subject 99004, resolve outstanding queries, and save the corrected CRF to the database.
- 14.10. Select and resolve a query in a field that has multiple queries.
- 14.11. Review and approve a pending query reply for Form 1 for Subject 99002.
- 14.12. Review, correct and approve a pending query reply for Form 1, Subject 99007.
- 14.13. Confirm query resolution by examining the database status.
- 14.14. End Module 14. Re-submitting Query Corrections.
- 15. Module 15. Data Export and DFsas
- 15.1. Tests & Requirements
- 15.2. Begin Module 15. Data Export and DFsas.
- 15.3. Export date values in calender format and save the exported data to a file on the local computer.
- 15.4. Export date values from the database and save the exported data to a file on the local computer.
- 15.5. Examining data values according to user-specified criteria.
- 15.6. Query the database for specific data values.
- 15.7. Create a DFsas job file according to user-specified criteria.
- 15.8. Create a SAS job file and data files using the DFsas job file criteria.
- 15.9. Compare the contents of SAS data files with the actual data in the database.
- 15.10. End Module 15. Data Export and DFsas.
- 16. Module 16. PDF File Creation
- 16.1. Tests & Requirements
- 16.2. Begin Module 16. PDF File Creation.
- 16.3. Retrieve existing data according to user-specified criteria.
- 16.4. Saving DFexplore data to a standard PDF document.
- 16.5. Saving DFexplore blank CRF books to a standard PDF document.
- 16.6. Viewing a standard PDF data file using a PDF viewer application.
- 16.7. Saving DFexplore data to an encrypted bookmarked PDF file.
- 16.8. Open and view an encrypted bookmarked PDF file using a PDF viewer application.
- 16.9. Create a complete subject package PDF file that includes data records, CRF images and audit trail.
- 16.10. Open and view a PDF subject package using a PDF viewer application.
- 16.11. End Module 16. PDF File Creation.
- 17. Module 17. DFweb Data Entry
- 17.1. Introduction
- 17.2. Tests & Requirements
- 17.3. Begin Module 17. DFweb Data Entry.
- 17.4. Verify DFweb version information, logging into DFweb and DFweb site certificate verification.
- 17.5. Copying URL and changing user passwords.
- 17.6. Creating a new subject, entering subject data.
- 17.7. Adding, modifying and resolving queries.
- 17.8. Adding, reviewing and downloading subject documents.
- 17.9. Add an Electronic Signature (eSign) to a set of completed subject records.
- 17.10. Verify removal and Re-applicaton of eSignatures.
- 17.11. Verify DFweb saves eSignature task data to the specified save level.
- 17.12. End Module 17. DFweb.
- 18. Module 18. DFcollect Mobile Data Collection
- 18.1. Introduction
- 18.2. Tests & Requirements
- 18.3. Begin Module 18. DFcollect Mobile Data Collection.
- 18.4. Installation, App preferences and initial DFcollect login.
- 18.5. Online data record creation.
- 18.6. Download subject data for offline use.
- 18.7. Create data records in offline mode, query resolution and adding reasons for data values.
- 18.8. Sync data collected offline to your DFdiscover server.
- 18.9. Clearing DFcollect cache.
- 18.10. Adding, reviewing and downloading subject documents.
- 18.11. Confirming data sent to the server using DFexplore.
- 18.12. Add an Electronic Signature (eSign) to a set of completed subject records.
- 18.13. Verify removal and Re-applicaton of eSignatures.
- 18.14. Verify DFcollect saves eSignature task data to the specified level.
- 18.15. End Module 18. DFcollect.
- A. Copyrights - Acknowledgments
- A.1. External Software Copyrights
- A.1.1. DCMTK software package
- A.1.2. Jansson License
- A.1.3. Mimencode
- A.1.4. RSA Data Security, Inc., MD5 message-digest algorithm
- A.1.5. mpack/munpack
- A.1.6. TIFF
- A.1.7. PostgreSQL
- A.1.8. OpenSSL License
- A.1.9. Original SSLeay License
- A.1.10. gawk
- A.1.11. Ghostscript
- A.1.12. MariaDB and FreeTDS
- A.1.13. QtAV
- A.1.14. FFmpeg
- A.1.15. c3.js
- A.1.16. d3.js
Table of Contents
For software support, please contact the DFdiscover team:
via email,
<help@dfnetresearch.com>;visit our website, www.dfnetresearch.com.
A number of conventions have been used throughout this document.
Any freestanding sections of code are generally shown like this:
# this is example code
code = code + overhead;
If a line starts with # or %, this
character denotes the system prompt and is not typed by the user.
Text may also have several styles:
Emphasized words are shown as follows: emphasized words.
Filenames appear in the text like so:
dummy.c.Code, constants, and literals in the text appear like so:
main.Variable names appear in the text like so:
nBytes.Text on user interface labels or menus is shown as: Printer name, while buttons in user interfaces are shown as .
Menus and menu items are shown as: > .
Table of Contents
- 1. Introduction
- 2. ATK Worksheet
- 2.1. Using the Worksheet
- 2.2. Module 1. Installation and Initialization
- 2.3. Module 2. DFdiscover Client Applications
- 2.4. Module 3. Study Setup
- 2.5. Module 4. eCRF Creation for DFdiscover
- 2.6. Module 5. Custom Properties
- 2.7. Module 6. Subject Alias
- 2.8. Module 7. EDC Data Entry
- 2.9. Module 8. Image Data Entry
- 2.10. Module 9. User-defined Query Category Types
- 2.11. Module 10. Multiple Queries Per Field
- 2.12. Module 11. Data Review
- 2.13. Module 12. External Query Reports
- 2.14. Module 13. Replying to EDC Queries, eSignatures
- 2.15. Module 14. Re-submitting Query Corrections
- 2.16. Module 15. Data Export and DFsas
- 2.17. Module 16. PDF File Creation
- 2.18. Module 17. DFweb Data Entry
- 2.19. Module 18. DFcollect Mobile Data Collection
- 3. Discrepancy Report
Table of Contents
The objective of the Acceptance Test Kit (ATK) is to provide DFdiscover clients with an acceptance test plan which can be executed to:
Verify the correct installation of the DFdiscover software in their own environment.
Confirm the core DFdiscover functionality in their own environment.
Demonstrate, by means of passed tests, correct operation of tested functionality and core requirements of the DFdiscover software.
The Acceptance Test Kit has these features:
Functional approach - i.e., based on meeting data management objectives.
Follows a logical data flow and processing path from user's viewpoint.
Starts with a complete study already setup using the DFdiscover software.
A series of tests organized within modules, are linked to the core requirements of the DFdiscover software. These modules are core to the use of the ATK. Each module has a start action, a detailed script of user steps and an end action.
User is given defined input and expected output for objective verification.
Not an exhaustive test of every button, menu or GUI in every DFdiscover application.
The Acceptance Test Kit contains:
Manual: descriptions of tests, organized within functional modules.
Control Panel application and instructions for setting the study to base state. The Control Panel application controls the start, stop and interim states of all modules.
Study: simple blood pressure study already setup, which includes plate definitions, edit checks and look-up tables.
Database: includes several completed subject cases existing at various states (i.e., entered data, submitted and awaiting data entry, awaiting outbound transmission, or EDC data entry).
Case Report Forms.
To perform the Acceptance Test Kit:
Module 1 provides instructions on installation and initialization. Module 1 must be completed first.
The Control Panel application sets each module to a known base state. Use the button to start each module.
Modules are presented in logical order from study setup to data entry and reviews. Any module, beginning with module 2, can be skipped if it deals with topics that are not relevant to your use of the software.
Within each module, tests must be executed in order.
Execute module completion, by clicking once all module tests have been performed.
Complete test summary and, if necessary, discrepancy reports.
Every module uses DFATK and must be run as
datafax. Refer to Module 1 (Installation & Initialization).References to DFdiscover Server value will be the name of your DFdiscover server.
Images in this manual are of the applications running in the Windows 10 operating system. If you are running the applications on macOS, the appearance of the windows, dialogs and default button layouts will differ slightly from those shown here.
Screen colors may appear as a black background with a white CRF foreground. These are the DFsetup default colors. The colors in illustrations have been modified (reversed) for clarity.
If you do not have a printer connected to the DFdiscover server (e.g. if you are a hosted client), a valid email address is required for
data_coordinator, data_manager, site_monitor or site_investto receive all module specific PDF files. Refer to Creating a role and permissions fordata_coordinator, data_manager, site_monitor or site_invest, Step 5.
Start DFATK. DFATK is also known as the Control Panel, in the DFATK login dialog, enter the name for DFdiscover Server that has been provided by your administrator. (This will differ from the value shown here.). As the Control Panel must be run as
datafax, the Username field cannot be edited. Enter the previously specified password fordatafaxand click .
Start DFexplore. In the DFexplore login dialog, enter the name for DFdiscover Server that has been provided by your administrator. (This will differ from the value shown here.) Enter
data_coordinator, data_manager, site_monitor or site_investin the Username field and the previously assigned password in the Password field. Click to login.
-
During the first login of
data_coordinator, data_manager, site_monitor or site_investa new password must be chosen. Choose and enter a new password in both the New Password and Confirm Password fields. Click to set the new password and dismiss the dialog. Choose 254 Acceptance Test Study, click . If your DFdiscover server does not allow the re-use of previous passwords, you will be required to set eitherdata_coordinator, data_manager, site_monitor or site_invest's password to something other than the initial password chosen previously. The password you choose must satisfy the password requirements specific to your DFdiscover server and will be needed in the remainder of the modules.
Start DFsetup. In the DFsetup login dialog, enter the name for DFdiscover Server that has been provided by your administrator. (This will differ from the value shown here.) Enter
data_managerin the Username field and the previously assigned password in the Password field. Click to login.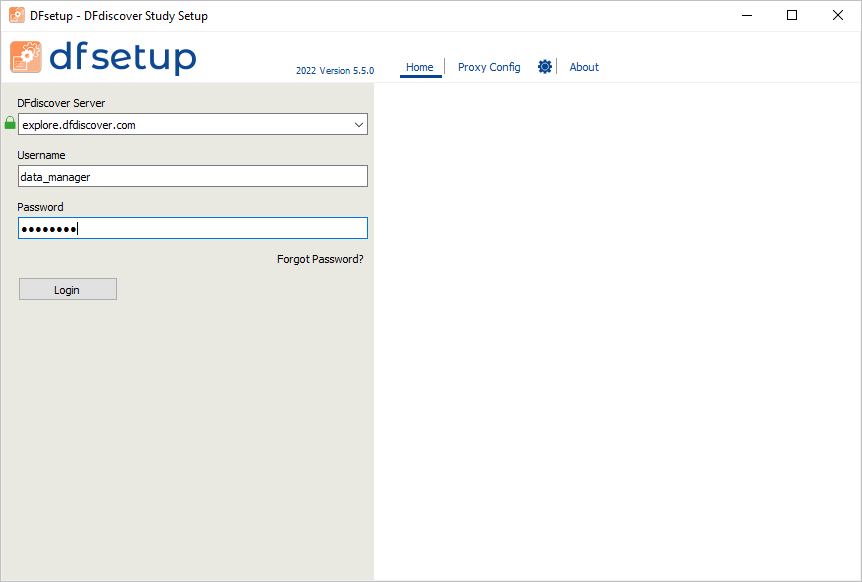
-
In the studies selection dialog, highlight the entry for 254 Acceptance Test Study. Click to continue.
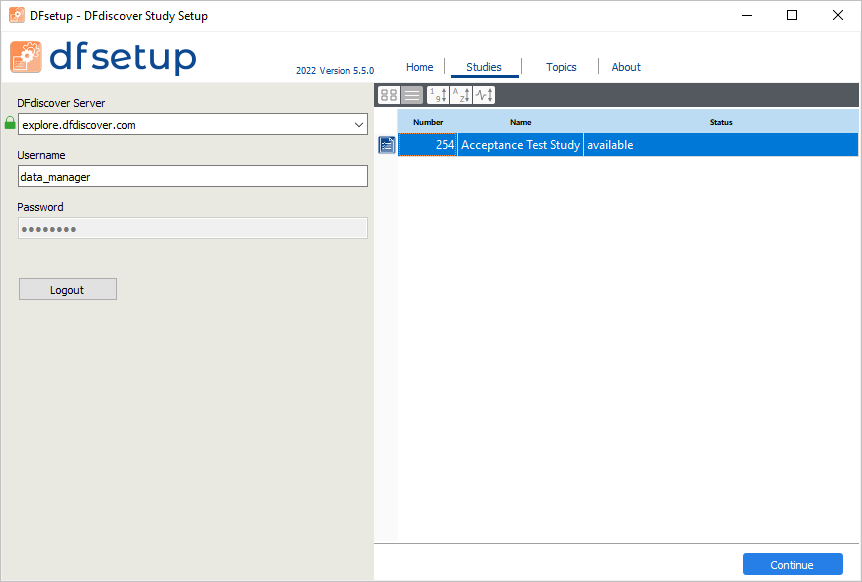
Start DFsend. In the DFsend login dialog, enter the name for DFdiscover Server that has been provided by your administrator. (This will differ from the value shown here.) Enter
data_coordinator, data_manager, site_monitor or site_investin the Username field and the previously assigned password in the Password field. Click to login.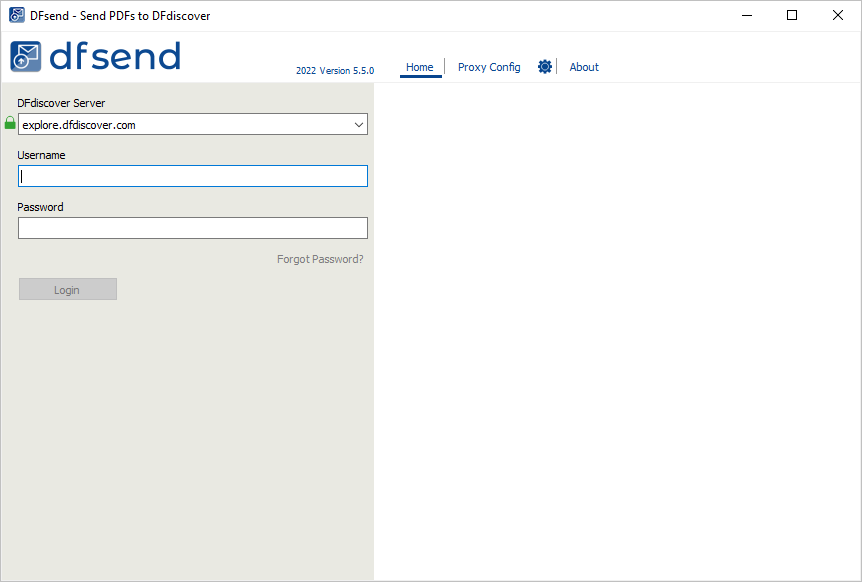
Table of Contents
- 2.1. Using the Worksheet
- 2.2. Module 1. Installation and Initialization
- 2.3. Module 2. DFdiscover Client Applications
- 2.4. Module 3. Study Setup
- 2.5. Module 4. eCRF Creation for DFdiscover
- 2.6. Module 5. Custom Properties
- 2.7. Module 6. Subject Alias
- 2.8. Module 7. EDC Data Entry
- 2.9. Module 8. Image Data Entry
- 2.10. Module 9. User-defined Query Category Types
- 2.11. Module 10. Multiple Queries Per Field
- 2.12. Module 11. Data Review
- 2.13. Module 12. External Query Reports
- 2.14. Module 13. Replying to EDC Queries, eSignatures
- 2.15. Module 14. Re-submitting Query Corrections
- 2.16. Module 15. Data Export and DFsas
- 2.17. Module 16. PDF File Creation
- 2.18. Module 17. DFweb Data Entry
- 2.19. Module 18. DFcollect Mobile Data Collection
As you work through the ATK, you may find it beneficial to have a worksheet to keep track of which modules you have completed.
For that purpose, print this chapter and mark the steps and modules as you progress.
After completion of the ATK, keep the printed worksheet together with your installation and qualification materials.
Confirm version information can be obtained for DFdiscover.
Obtain super-user privileges and remove older Acceptance Test Study, if one exists.
Install the Acceptance Test Study.
Define Acceptance Test Study to the DFdiscover server.
Create a role and permissions for
datafax.Creating study roles and permissions.
Creating user accounts and assigning study permissions.
Enable high definition imaging.
Start the Acceptance Test Study Control Panel application.
| Completed By (print name) | |
| Title | |
| Completed By (signature) | |
| Signature Date |
Verify the online user documentation. Open the Image Router and verify the appearance of the Welcome Image.
Open the Acceptance Test Study and verify the standard DFexplore views.
Start DFsetup and verify version information.
Verify the online setup documentation. Open the Acceptance Test Study setup and verify the standard DFsetup views.
| Completed By (print name) | |
| Title | |
| Completed By (signature) | |
| Signature Date |
Permitted users can gain exclusive access to DFsetup to modify a study setup.
Define Global study preferences and apply settings to DFsetup.
Create and modify a new style (Comment).
Create and modify a new module (Death).
Assign Field definitions to a newly created module.
Assign a module's field definitions to a plate.
Correct field ordering on the current plate to set field traversal order for data entry.
Use copy and paste to create repeating module and field references on a plate.
Create user-defined query category codes.
Submit a copy of the newly defined Plate 11 into the study database and retrieve the page in DFexplore Image View.
Enter and save all data on the submitted plate 11.
| Completed By (print name) | |
| Title | |
| Completed By (signature) | |
| Signature Date |
| Completed By (print name) | |
| Title | |
| Completed By (signature) | |
| Signature Date |
Defining Custom Properties in DFsetup.
Adding Global Custom Property values.
Adding Plate, Module and Variable level Custom Property values
Exporting Custom Properties in DFsetup.
Edit checks execution of Custom Properties.
Creating subject data lists and exporting data views.
DFexplore Database Definition Report exporting.
| Completed By (print name) | |
| Title | |
| Completed By (signature) | |
| Signature Date |
Importing and Modifying Subject Alias Map using DFsetup.
Subject Alias Tracking (Reports).
Exporting Subject Alias data.
| Completed By (print name) | |
| Title | |
| Completed By (signature) | |
| Signature Date |
Login to DFexplore and the Acceptance Test Study and confirm the list of sites, subjects and assessments in the record list window.
Enter and save new data using EDC data entry for Subject 99007.
Add reasons to explain entered data values.
Enter and save Plate 3, Subject 99007 as a pending record.
Mark and save unavailable data as missed. Unmark available data as missed.
Retrieve and modify existing data using a predefined task and save modifications to the database.
Confirm audit trail information for entered and modified data.
| Completed By (print name) | |
| Title | |
| Completed By (signature) | |
| Signature Date |
Submit PDF images to DFexplore.
Login to DFexplore and confirm the receipt of new pages in the Status View.
Login to the Image Router and route a misidentified page to the Acceptance Test Study new record queue.
Login to DFexplore and confirm receipt of the routed page in the Status View.
Retrieve new images in DFexplore Image View.
Enter Plate 1 (Form 1) for Subject 99002.
Enter Plate 2 (Form 2) for Subject 99002.
Enter Plate 3 (Form 3) for Subject 99002.
Enter Plate 4 (Form 4) for Subject 99002.
Compare the resolutions between Standard Definition (SD) and High Definition (HD).
Edit an existing query.
Delete an existing query.
Change data and record a reason for data change.
Batch validate all opened pages for Subject 99002 to level 2.
Confirm the status of entered pages in Status View.
| Completed By (print name) | |
| Title | |
| Completed By (signature) | |
| Signature Date |
Retrieve an existing data record in DFexplore.
Apply a user-defined Category query.
Add a reason for Data Value to explain entered data.
Edit an existing query.
Delete a user-defined Query Category that is used by an existing query.
Delete a user-defined Category query.
| Completed By (print name) | |
| Title | |
| Completed By (signature) | |
| Signature Date |
Submit PDF images to DFdiscover.
Enable multiple queries per field in DFsetup.
Retrieve submitted CRF in DFexplore Image View.
Enter Plate 9 for Subject 99002.
Apply multiple queries to a field.
Select and edit an existing query in a field that has multiple queries.
Select and reply to an existing query in a field that has multiple queries.
Select and delete an existing query in a field that has multiple queries.
| Completed By (print name) | |
| Title | |
| Completed By (signature) | |
| Signature Date |
Retrieve all data for Site 99 that exists at level 3.
Review and approve a pending reason for data value, and approve a selected query in a field that has multiple queries.
Review and move approved reasons for data values to a higher workflow level, and review queries in a field that has multiple queries.
Data review and add a query to inconsistent data.
Review and complete pending data for Subject 99007.
Confirm audit trail information for reviewed and modified data.
Run batch edit checks to verify data integrity.
Use a data expression to retrieve specific subject information.
Use cross-plate data criteria to retrieve specific subject information.
| Completed By (print name) | |
| Title | |
| Completed By (signature) | |
| Signature Date |
Obtain database query metrics and details using Status and List Views to review all outstanding queries prior to query report creation.
Run database integrity check report DF_XXkeys to export all key fields and visit dates from required plates in the database.
Use Data View to check, and if necessary correct, illegal visit dates by retrieving the problems keys identified by DF_XXkeys.
Execute DF_QCupdate to update the query database and lock all records for query report generation.
Execute DF_QCreports to create a standard, 3-part external query report for a study site.
Confirm the status of external queries following query report creation.
Execute DF_QCstatus to verify that a new query report was created by listing all reports in the QC/NEW directory.
Execute DF_QCview to display the newly created query report.
Execute DF_QCprint to print the query report from the QC/NEW directory.
Comparing several examples from the printed query report against their corresponding queries in the study database.
Execute DF_QCfax to email the query report to a valid email account.
Verify the status of the queries in the sent report.
| Completed By (print name) | |
| Title | |
| Completed By (signature) | |
| Signature Date |
-
Determine a count of outstanding/outstanding queries in Status View.
-
Review outstanding queries in Queries View.
-
Using EDC, locate and reply to outstanding clarification queries.
-
Add an Electronic Signature (eSign) to a set of completed subject records.
-
Verify removal and Re-applicaton of eSignatures.
| Completed By (print name) | |
| Title | |
| Completed By (signature) | |
| Signature Date |
Submit PDF images to DFdiscover.
Verify that all CRFs have arrived successfully in Image view.
Retrieve submitted CRFs using DFexplore Image View.
Enter Form 2, Subject 99001, resolve outstanding queries, and save the corrected CRF to the database.
Enter Form 2, Subject 99002, resolve outstanding queries, and save the corrected CRF to the database.
Enter Form 4, Subject 99004.
Enter Form 2, Subject 99004, resolve outstanding queries, and save the corrected CRF to the database.
Select and resolve a query in a field that has multiple queries.
Review and approve a pending query reply for Form 1 for Subject 99002.
Review, correct and approve a pending query reply for Form 1, Subject 99007.
Confirm query resolution by examining the database status.
| Completed By (print name) | |
| Title | |
| Completed By (signature) | |
| Signature Date |
Export date values in calender format and save the exported data to a file on the local computer.
Export date values from the database and save the exported data to a file on the local computer.
Examining data values according to user-specified criteria.
Query the database for specific data values.
Create a DFsas job file according to user-specified criteria.
Create a SAS job file and data files using the DFsas job file criteria.
Compare the contents of SAS data files with the actual data in the database.
| Completed By (print name) | |
| Title | |
| Completed By (signature) | |
| Signature Date |
Retrieve existing data according to user-specified criteria.
Saving DFexplore data to a standard PDF document.
Saving DFexplore blank CRF books to a standard PDF document.
Viewing a standard PDF data file using a PDF viewer application.
Saving DFexplore data to an encrypted bookmarked PDF file.
Open and view an encrypted bookmarked PDF file using a PDF viewer application.
Create a complete subject package PDF file that includes data records, CRF images and audit trail.
Open and view a PDF subject package using a PDF viewer application.
| Completed By (print name) | |
| Title | |
| Completed By (signature) | |
| Signature Date |
Verify DFweb version information, logging into DFweb and DFweb site certificate verification.
Copying URL and changing user passwords.
Creating a new subject, entering subject data.
Adding, modifying and resolving queries.
Adding, reviewing and downloading subject documents.
Add an Electronic Signature (eSign) to a set of completed subject records.
Verify removal and Re-applicaton of eSignatures.
Verify DFweb saves eSignature task data to the specified save level.
| Completed By (print name) | |
| Title | |
| Completed By (signature) | |
| Signature Date |
Installation, App preferences and initial DFcollect login.
Online data record creation.
Download subject data for offline use.
Create data records in offline mode, query resolution and adding reasons for data values.
Sync data collected offline to your DFdiscover server.
Clearing DFcollect cache.
Adding, reviewing and downloading subject documents.
Confirming data sent to the server using DFexplore.
Add an Electronic Signature (eSign) to a set of completed subject records.
Verify removal and Re-applicaton of eSignatures.
Verify DFcollect saves eSignature task data to the specified level.
| Completed By (print name) | |
| Title | |
| Completed By (signature) | |
| Signature Date |
Table of Contents
Discrepancy Reports should be completed whenever an unexpected result is obtained during the execution of the ATK. A discrepancy may be a difference in the actual result from the expected result, a system malfunction, an error in the ATK documentation, or an error in the ATK Control Panel or study setup. Complete one report per incident.
Assign each report a unique Discrepancy Report Number. You may want to simply sequentially number the reports starting at 1, or you may want to use a more elaborate numbering system.
Record the particulars about your system. This includes the DFdiscover Release being tested at your site (e.g., 5.5.0 ), the Server Operating System and Version.
Record the Test Number that you were executing when the problem occurred. This is the number that identifies the current step in the plan (e.g., 6.4.5).
Describe, as accurately and as completely as possible, the problem that occurred. Include any error messages that appeared on screen. Can someone who was not sitting at the computer when the problem occurred understand your description?
If you were able to work around the problem and continue, describe the workaround that was used.
Record your name, title, signature and the current date on the report. Sign it.
If the discrepancy appears to be an error that needs resolution by DFnet, forward the report to DFnet via email to
<help@dfnetresearch.com>. Record that a copy of the report has been sent to DFnet and the date that it was sent.If a resolution to the problem becomes available, either internally, or from DFnet provide a description of that resolution and the date.
Table of Contents
- 1. Module 1. Installation and Initialization
- 1.1. Tests & Requirements
- 1.2. Confirm version information can be obtained for DFdiscover.
- 1.3. Obtain super-user privileges and remove older Acceptance Test Study, if one exists.
- 1.4. Install the Acceptance Test Study.
- 1.5. Define Acceptance Test Study to the DFdiscover server.
- 1.6. Create a role and permissions for
datafax. - 1.7. Creating study roles and permissions.
- 1.8. Creating user accounts and assigning study permissions.
- 1.9. Enable high definition imaging.
- 1.10. Start the Acceptance Test Study Control Panel application.
- 2. Module 2. DFdiscover Client Applications
- 2.1. Tests & Requirements
- 2.2. Begin Module 2. DFdiscover Client Applications.
- 2.3. Send PDF images to DFexplore.
- 2.4. Verify the online user documentation. Open the Image Router and verify the appearance of the Welcome Image.
- 2.5. Open the Acceptance Test Study and verify the standard DFexplore views.
- 2.6. Start DFsetup and verify version information.
- 2.7. Verify the online setup documentation. Open the Acceptance Test Study setup and verify the standard DFsetup views.
- 2.8. End Module 2. DFdiscover Client Applications.
- 3. Module 3. Study Setup
- 3.1. Tests & Requirements
- 3.2. Begin Module 3. Study Setup.
- 3.3. Permitted users can gain exclusive access to DFsetup to modify a study setup.
- 3.4. Define Global study preferences and apply settings to DFsetup.
- 3.5. Create and modify a new style (Comment).
- 3.6. Create and modify a new module (Death).
- 3.7. Assign Field definitions to a newly created module.
- 3.8. Assign a module's field definitions to a plate.
- 3.9. Correct field ordering on the current plate to set field traversal order for data entry.
- 3.10. Use copy and paste to create repeating module and field references on a plate.
- 3.11. Create user-defined query category codes.
- 3.12. Submit a copy of the newly defined Plate 11 into the study database and retrieve the page in DFexplore Image View.
- 3.13. Enter and save all data on the submitted plate 11.
- 3.14. End Module 3. Study Setup.
- 4. Module 4. eCRF Creation for DFdiscover
- 5. Module 5. Custom Properties
- 5.1. Tests & Requirements
- 5.2. Begin Module 5. Custom Properties.
- 5.3. Defining Custom Properties in DFsetup.
- 5.4. Adding Global Custom Property values.
- 5.5. Adding Plate, Module and Variable level Custom Property values
- 5.6. Exporting Custom Properties in DFsetup.
- 5.7. Edit checks execution of Custom Properties.
- 5.8. Creating subject data lists and exporting data views.
- 5.9. DFexplore Database Definition Report exporting.
- 5.10. End Module 5. Custom Properties.
- 6. Module 6. Subject Alias
- 7. Module 7. EDC Data Entry
- 7.1. Tests & Requirements
- 7.2. Begin Module 7. EDC Data Entry.
- 7.3. Login to DFexplore and inspect the list of sites, subjects and visits in the record list window.
- 7.4. Enter and save new data using EDC data entry for Subject 99007.
- 7.5. Add reasons to explain entered data values.
- 7.6. Enter and save Plate 3, Subject 99007 as a pending record.
- 7.7. Mark and save unavailable data as missed. Unmark available data as missed.
- 7.8. Retrieve and modify existing data using a predefined task and save modifications to the database.
- 7.9. Confirm audit trail information for entered and modified data.
- 7.10. End Module 7. EDC Data Entry.
- 8. Module 8. Image Data Entry
- 8.1. Tests & Requirements
- 8.2. Begin Module 8. Image Data Entry
- 8.3. Send PDF images to DFexplore.
- 8.4. Login to DFexplore and confirm the receipt of new pages in the Status View.
- 8.5. Login to the Image Router and route a misidentified page to the Acceptance Test Study new record queue.
- 8.6. Login to DFexplore and confirm receipt of the routed page in the Status View.
- 8.7. Retrieve new images in DFexplore Image View.
- 8.8. Enter Plate 1 (Form 1) for Subject 99002.
- 8.9. Enter Plate 2 (Form 2) for Subject 99002.
- 8.10. Enter Plate 3 (Form 3) for Subject 99002.
- 8.11. Enter Plate 4 (Form 4) for Subject 99002.
- 8.12. Compare the resolutions between Standard Definition (SD) and High Definition (HD).
- 8.13. Edit an existing query.
- 8.14. Delete an existing query.
- 8.15. Change data and record a reason for data change.
- 8.16. Batch validate all opened pages for Subject 99002 to level 2.
- 8.17. Confirm the status of entered pages in Status View.
- 8.18. End Module 8. Image Data Entry.
- 9. Module 9. User-defined Query Category Types
- 9.1. Tests & Requirements
- 9.2. Begin Module 9. User-defined Query Category Types.
- 9.3. Retrieve an existing data record in DFexplore.
- 9.4. Apply a user-defined Category query.
- 9.5. Add a reason for Data Value to explain entered data.
- 9.6. Edit an existing query.
- 9.7. Delete a user-defined Query Category that is used by an existing query.
- 9.8. Delete a user-defined Category query.
- 9.9. End Module 9. User-defined Query Category Types.
- 10. Module 10. Multiple Queries Per Field
- 10.1. Tests & Requirements
- 10.2. Begin Module 10. Multiple Queries Per Field.
- 10.3. Submit PDF images to DFdiscover.
- 10.4. Enable multiple queries per field in DFsetup.
- 10.5. Retrieve submitted CRF in DFexplore Image View.
- 10.6. Enter Plate 9 for Subject 99002.
- 10.7. Apply multiple queries to a field.
- 10.8. Select and edit an existing query in a field that has multiple queries.
- 10.9. Select and reply to an existing query in a field that has multiple queries.
- 10.10. Select and delete an existing query in a field that has multiple queries.
- 10.11. End Module 10. Multiple Queries Per Field
- 11. Module 11. Data Review
- 11.1. Tests & Requirements
- 11.2. Begin Module 11. Data Review.
- 11.3. Retrieve all data for Site 99 that exists at level 3.
- 11.4. Review and approve a pending reason for data value, and approve a selected query in a field that has multiple queries.
- 11.5. Review and move approved reasons for data values to a higher workflow level, and review queries in a field that has multiple queries.
- 11.6. Data review and add a query to inconsistent data.
- 11.7. Review and complete pending data for Subject 99007.
- 11.8. Confirm audit trail information for reviewed and modified data.
- 11.9. Run batch edit checks to verify data integrity.
- 11.10. Use a data expression to retrieve specific subject information.
- 11.11. Use cross-plate data criteria to retrieve specific subject information.
- 11.12. End Module 11. Data Review.
- 12. Module 12. External Query Reports
- 12.1. Tests & Requirements
- 12.2. Begin Module 12. External Query Reports.
- 12.3. Obtain database query metrics and details using Status and List Views to review all outstanding queries prior to query report creation.
- 12.4. Run database integrity check report DF_XXkeys to export all key fields and visit dates from required plates in the database.
- 12.5. Use Data View to check, and if necessary correct, illegal visit dates by retrieving the problems keys identified by DF_XXkeys.
- 12.6. Execute DF_QCupdate to update the query database and lock all records for query report generation.
- 12.7. Execute DF_QCreports to create a standard, 3-part external query report for a study site.
- 12.8. Confirm the status of external queries following query report creation.
- 12.9. Execute DF_QCstatus to verify that a new query report was created by listing all reports in the QC/NEW directory.
- 12.10. Execute DF_QCview to display the newly created query report.
- 12.11. Execute DF_QCprint to print the query report from the QC/NEW directory.
- 12.12. Comparing several examples from the printed query report against their corresponding queries in the study database.
- 12.13. Execute DF_QCfax to email the query report to a valid email account.
- 12.14. Verify the status of the queries in the sent report.
- 12.15. End Module 12. External Query Reports.
- 13. Module 13. Replying to EDC Queries, eSignatures
- 13.1. Tests & Requirements
- 13.2. Begin Module 13. Replying to EDC Queries, eSignatures.
- 13.3. Determine a count of outstanding/outstanding queries in Status View.
- 13.4. Review outstanding queries in Queries View.
- 13.5. Using EDC, locate and reply to outstanding clarification queries.
- 13.6. Add an Electronic Signature (eSign) to a set of completed subject records.
- 13.7. Verify removal and Re-applicaton of eSignatures.
- 13.8. End Module 13. Replying to EDC Queries, eSignatures.
- 14. Module 14. Re-submitting Query Corrections
- 14.1. Tests & Requirements
- 14.2. Begin Module 14. Re-submitting Query Corrections.
- 14.3. Submit PDF images to DFdiscover.
- 14.4. Verify that all CRFs have arrived successfully in Image view.
- 14.5. Retrieve submitted CRFs using DFexplore Image View.
- 14.6. Enter Form 2, Subject 99001, resolve outstanding queries, and save the corrected CRF to the database.
- 14.7. Enter Form 2, Subject 99002, resolve outstanding queries, and save the corrected CRF to the database.
- 14.8. Enter Form 4, Subject 99004.
- 14.9. Enter Form 2, Subject 99004, resolve outstanding queries, and save the corrected CRF to the database.
- 14.10. Select and resolve a query in a field that has multiple queries.
- 14.11. Review and approve a pending query reply for Form 1 for Subject 99002.
- 14.12. Review, correct and approve a pending query reply for Form 1, Subject 99007.
- 14.13. Confirm query resolution by examining the database status.
- 14.14. End Module 14. Re-submitting Query Corrections.
- 15. Module 15. Data Export and DFsas
- 15.1. Tests & Requirements
- 15.2. Begin Module 15. Data Export and DFsas.
- 15.3. Export date values in calender format and save the exported data to a file on the local computer.
- 15.4. Export date values from the database and save the exported data to a file on the local computer.
- 15.5. Examining data values according to user-specified criteria.
- 15.6. Query the database for specific data values.
- 15.7. Create a DFsas job file according to user-specified criteria.
- 15.8. Create a SAS job file and data files using the DFsas job file criteria.
- 15.9. Compare the contents of SAS data files with the actual data in the database.
- 15.10. End Module 15. Data Export and DFsas.
- 16. Module 16. PDF File Creation
- 16.1. Tests & Requirements
- 16.2. Begin Module 16. PDF File Creation.
- 16.3. Retrieve existing data according to user-specified criteria.
- 16.4. Saving DFexplore data to a standard PDF document.
- 16.5. Saving DFexplore blank CRF books to a standard PDF document.
- 16.6. Viewing a standard PDF data file using a PDF viewer application.
- 16.7. Saving DFexplore data to an encrypted bookmarked PDF file.
- 16.8. Open and view an encrypted bookmarked PDF file using a PDF viewer application.
- 16.9. Create a complete subject package PDF file that includes data records, CRF images and audit trail.
- 16.10. Open and view a PDF subject package using a PDF viewer application.
- 16.11. End Module 16. PDF File Creation.
- 17. Module 17. DFweb Data Entry
- 17.1. Introduction
- 17.2. Tests & Requirements
- 17.3. Begin Module 17. DFweb Data Entry.
- 17.4. Verify DFweb version information, logging into DFweb and DFweb site certificate verification.
- 17.5. Copying URL and changing user passwords.
- 17.6. Creating a new subject, entering subject data.
- 17.7. Adding, modifying and resolving queries.
- 17.8. Adding, reviewing and downloading subject documents.
- 17.9. Add an Electronic Signature (eSign) to a set of completed subject records.
- 17.10. Verify removal and Re-applicaton of eSignatures.
- 17.11. Verify DFweb saves eSignature task data to the specified save level.
- 17.12. End Module 17. DFweb.
- 18. Module 18. DFcollect Mobile Data Collection
- 18.1. Introduction
- 18.2. Tests & Requirements
- 18.3. Begin Module 18. DFcollect Mobile Data Collection.
- 18.4. Installation, App preferences and initial DFcollect login.
- 18.5. Online data record creation.
- 18.6. Download subject data for offline use.
- 18.7. Create data records in offline mode, query resolution and adding reasons for data values.
- 18.8. Sync data collected offline to your DFdiscover server.
- 18.9. Clearing DFcollect cache.
- 18.10. Adding, reviewing and downloading subject documents.
- 18.11. Confirming data sent to the server using DFexplore.
- 18.12. Add an Electronic Signature (eSign) to a set of completed subject records.
- 18.13. Verify removal and Re-applicaton of eSignatures.
- 18.14. Verify DFcollect saves eSignature task data to the specified level.
- 18.15. End Module 18. DFcollect.
Table of Contents
- 1.1. Tests & Requirements
- 1.2. Confirm version information can be obtained for DFdiscover.
- 1.3. Obtain super-user privileges and remove older Acceptance Test Study, if one exists.
- 1.4. Install the Acceptance Test Study.
- 1.5. Define Acceptance Test Study to the DFdiscover server.
- 1.6. Create a role and permissions for
datafax. - 1.7. Creating study roles and permissions.
- 1.8. Creating user accounts and assigning study permissions.
- 1.9. Enable high definition imaging.
- 1.10. Start the Acceptance Test Study Control Panel application.
Confirm version information can be obtained for DFdiscover.
Obtain super-user privileges and remove older Acceptance Test Study, if one exists.
Install the Acceptance Test Study.
Define Acceptance Test Study to the DFdiscover server.
Create a role and permissions for
datafax.Creating study roles and permissions.
Creating user accounts and assigning study permissions.
Enable high definition imaging.
Start the Acceptance Test Study Control Panel application.
Estimate of Time Required: 30 Minutes
-
Confirm the Acceptance Test Kit is installed on the following Linux operating system:
Red Hat / CentOS
SUSE
-
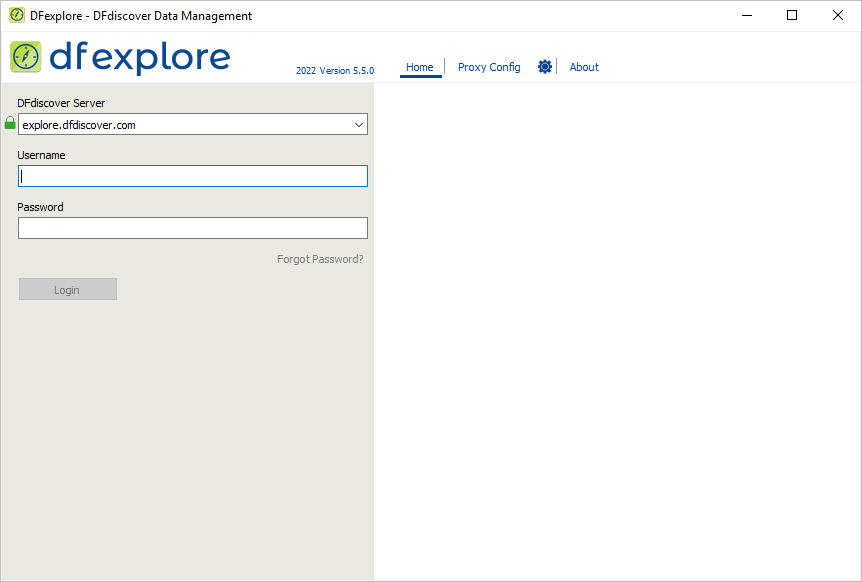
Confirm DFdiscover version information by starting DFexplore.
-
In the login dialog, click . Confirm that the version information in the dialog matches the installed software Version 5.5.X.
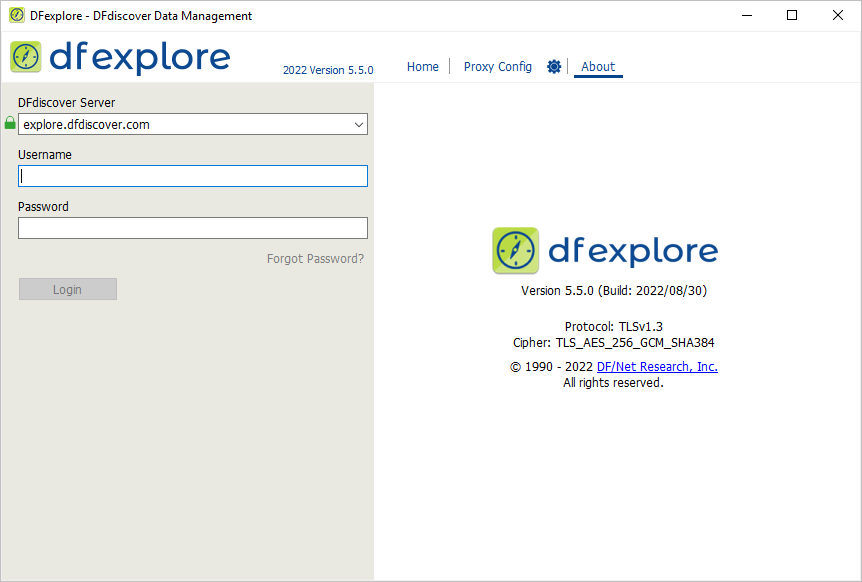
If the version is not DFdiscover 2022 Version 5.5.0, you must stop at this point. The Acceptance Test Kit is specifically designed for release DFdiscover 2022 Version 5.5.0.
Exit DFexplore.
![[Note]](../../imagedata/note.png) | Note |
|---|---|
This step is required only if 254 Acceptance Test Study already exists on your DFdiscover server. If it does not currently exist on your DFdiscover server, skip this section and continue with Section 1.4, “Install the Acceptance Test Study. ”. If an earlier version does exist on your server, delete it prior to installation by following these steps. |
-
Start DFadmin. Login to your DFdiscover Server as
datafax.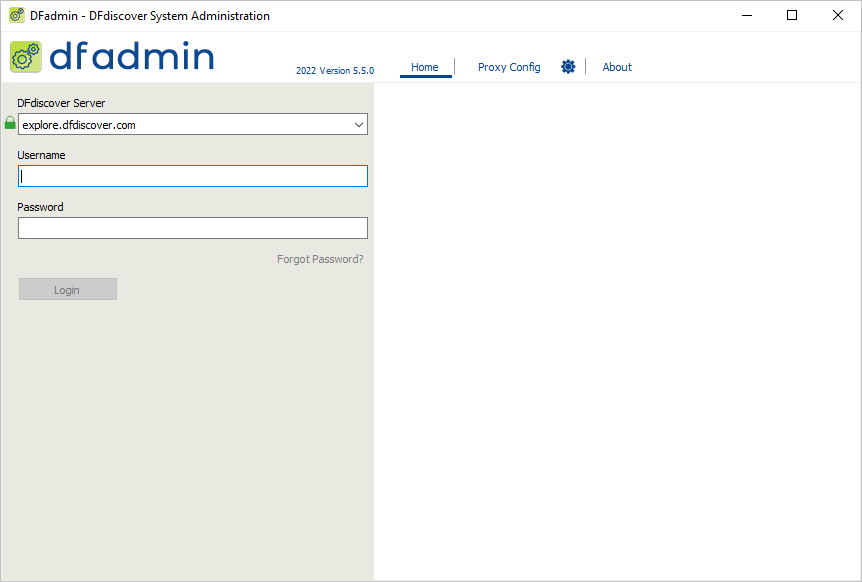
-
Specify a Username of
datafax, and the assigned user password in the Password field. Click to complete login and continue.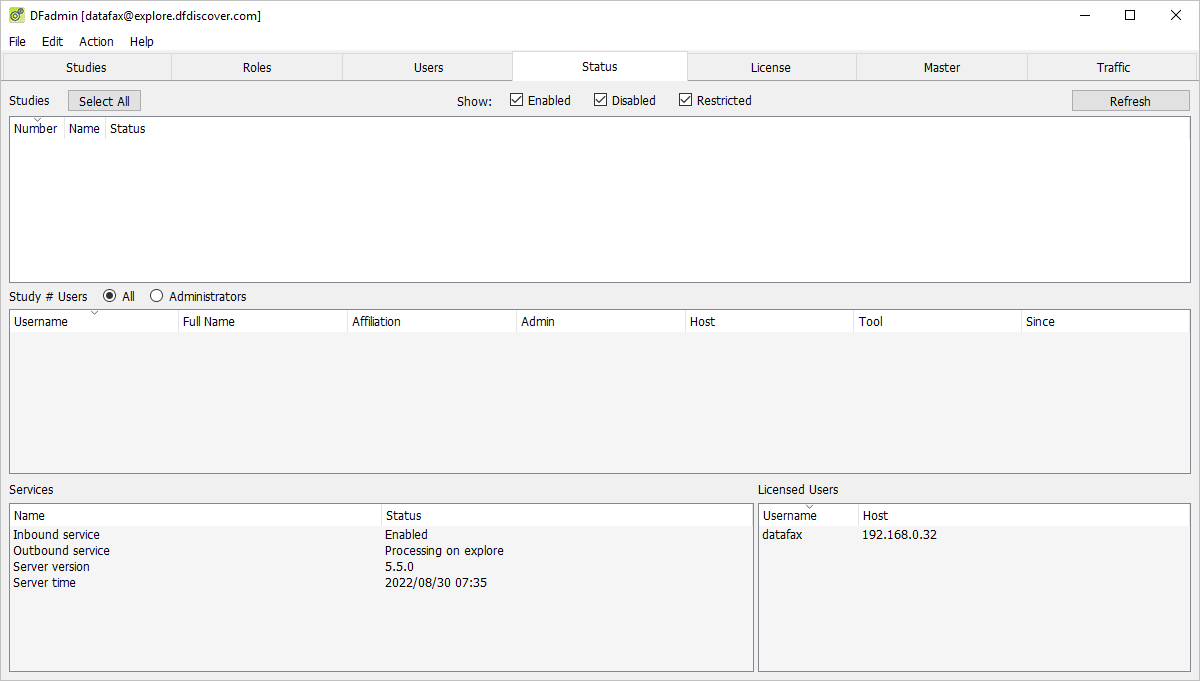
Click Status Tab.
The list of studies defined on your DFdiscover Server will be displayed in the studies list.
-
Select the entry for 254 Acceptance Test Study from the list of studies. Select > . In the confirmation dialog, enter the text
Study Removal.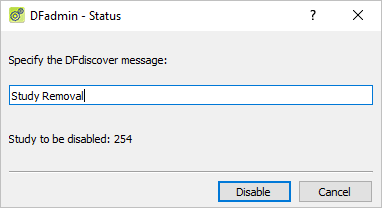
-
Click to disable the Acceptance Test Kit.
-
Click Studies tab. Select the entry for 254 Acceptance Test Study if it is not already highlighted. Click .
From the 3 delete options, choose Remove Study from DFdiscover.
-
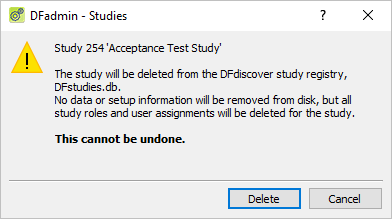
Click in the confirmation dialog to continue with the delete.
-
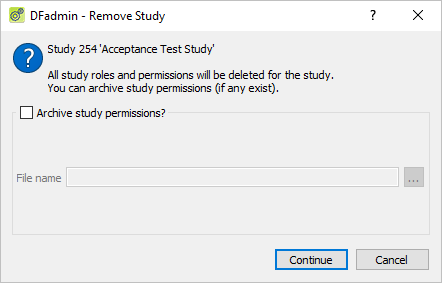
In the Remove Study dialog, de-select (disable) Archive Study Permissions and click .
-
To confirm, enter the password for
datafaxand click . Close the study removal confirmation dialog by clicking .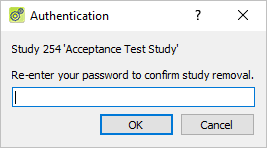
| Note |
|---|---|
Existing Acceptance Test Kit directories,
If the directories are present at this time, installation of the DFdiscover 2022 Version 5.5.0 Acceptance Test Kit will create a TAR file of the existing installation and re-install the updated DFdiscover 2022 Version 5.5.0 |
-
The DFATK-5.5-X.x86_64.rpm file can be found on www.dfnetresearch.com in the Support section. After downloading the DFATK-5.5-X.x86_64.rpm execute the installation using rpm on OpenSUSE & RHEL operating systems. The installation defaults to the
/opt/studiesdirectory, this can be changed using the rpm --prefix=NEWPATH flag.New installations using rpm, which will automatically download and install any dependencies required:
#rpm -ivh DFATK-5.5-X.x86_64.rpmOR, specify an alternative installation location:
#rpm -ivh --prefix=NEWPATH DFATK-5.5-X.x86_64.rpmNote Use of rpm --prefix=NEWPATH does not alter current definitions of
DFstudyspaces.dborDFstudies.db. These files must be manually updated to include the specified prefix pathing.Confirm the presence of 254 Acceptance Test Study with the command:
#ls -d /opt/studies/val254/opt/studies/val254
-
Return to DFadmin, select the Studies tab. Add a definition for 254 Acceptance Test Study. Click and complete the dialog with the following values:
Study Number:
254Study Name:
Acceptance Test StudyStudy Space:
opt_studies(or the name of the Study Space for the /opt/studies directory)Study Folder:
val254Select Restore previous Study at this location
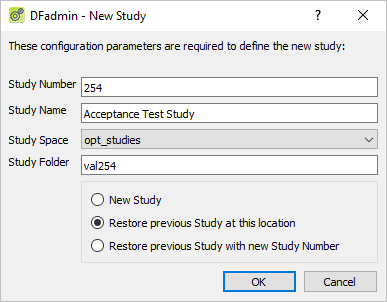
Note The name of your Study Space may differ from that shown here if the Study Space is something other than
opt_studieson your DFdiscover server. Click to confirm the action and add an entry for 254 Acceptance Test Study to the list of studies.
-
Verify configuration information and set the Preset Printer. Select the newly added 254 Acceptance Test Study entry from the list of studies. Click Configurations tab and enter the name of a networked printer in the Preset Printer field.
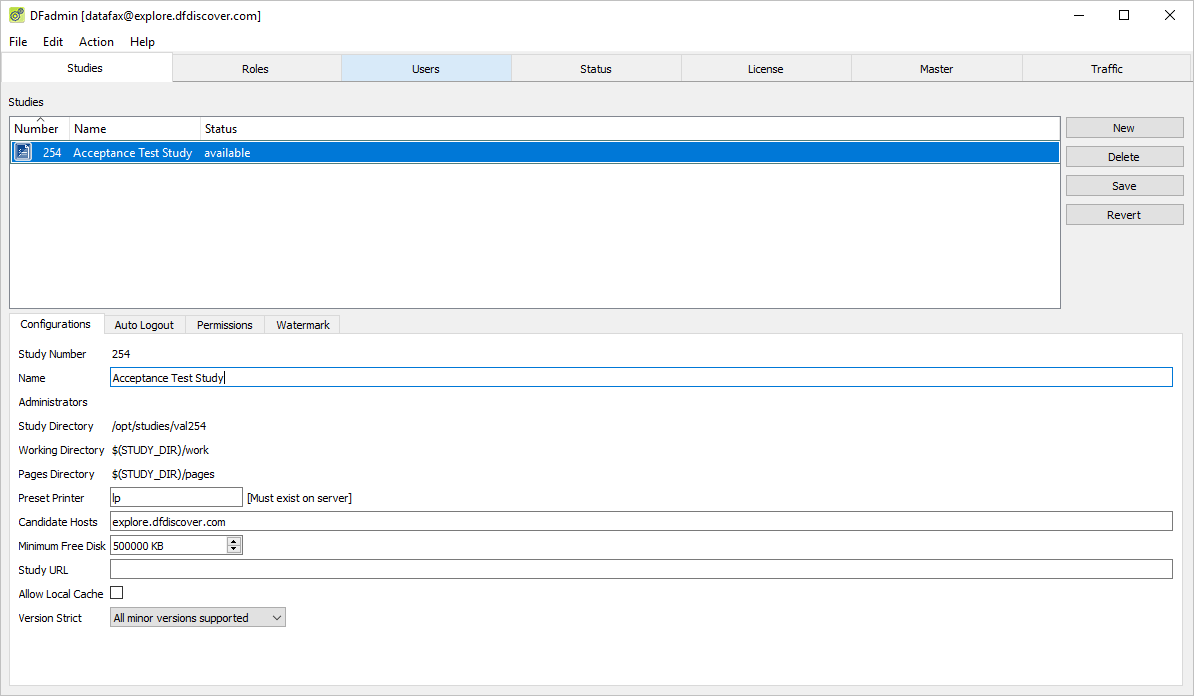
Choose All minor versions supported from the Version Strict drop-down.
Select > or click to save the configuration information.
User datafax is already defined on your DFdiscover installation, however, you must grant user datafax a role and permissions to be able to access 254 Acceptance Test Study.
-
Click Users tab. Confirm that user
datafaxis present in the Username column for one user row.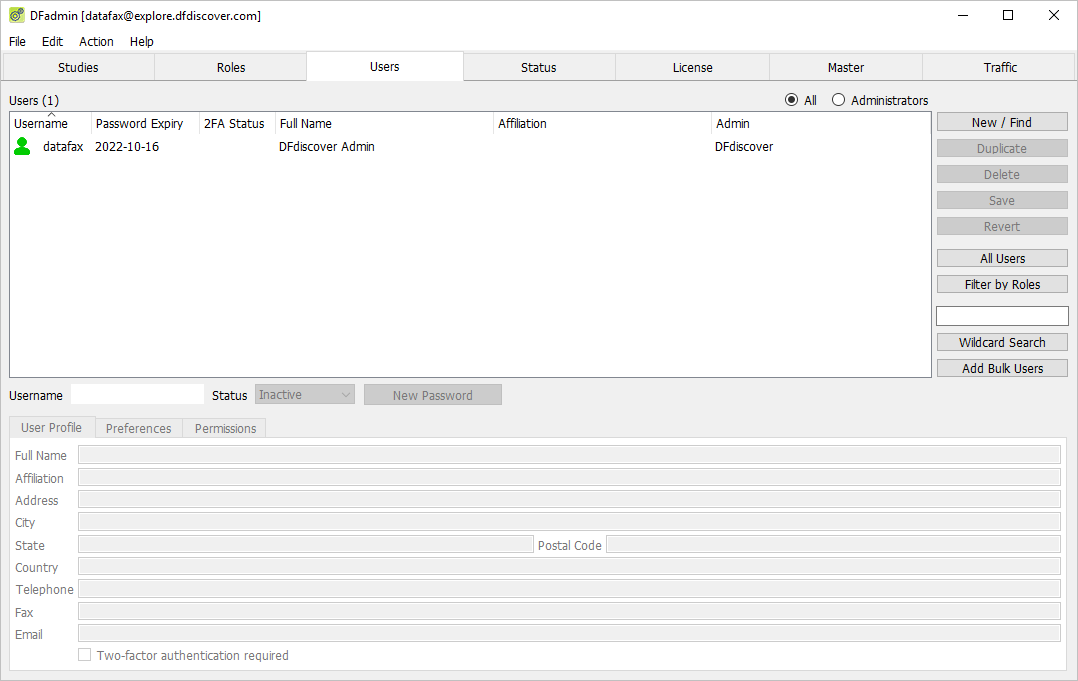
-
Create a Role for user
datafax. Begin this task by clicking the Roles tab.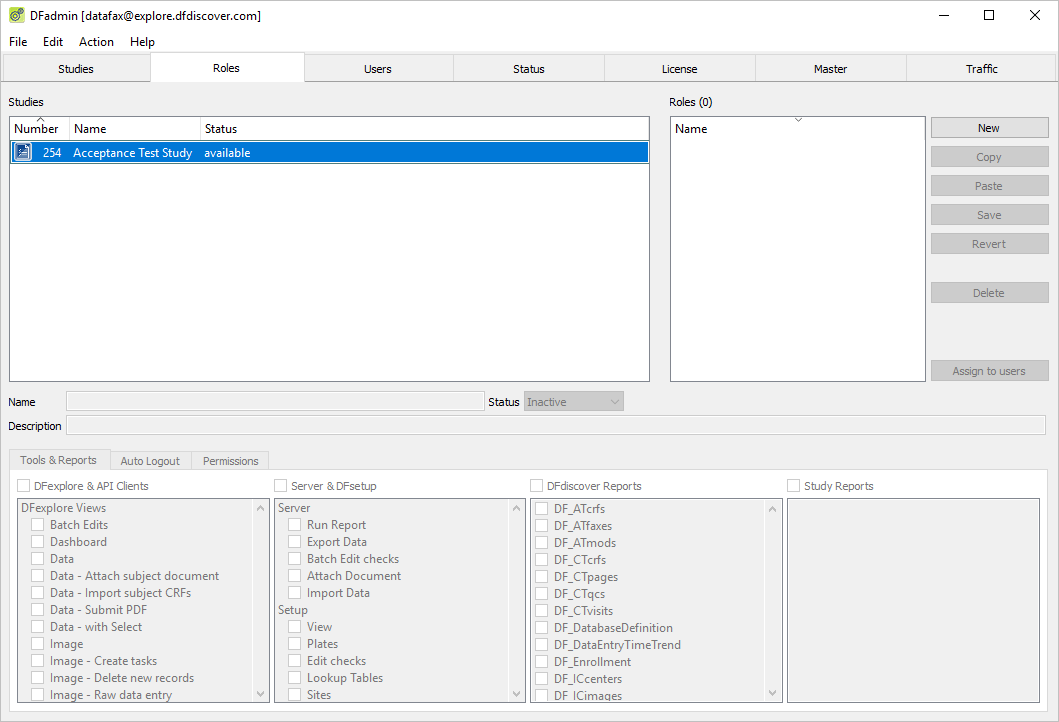
-
Within the list of studies, locate and choose the entry for 254 Acceptance Test Study. Click to add a new user role. In the dialog, enter the role name
Unrestricted.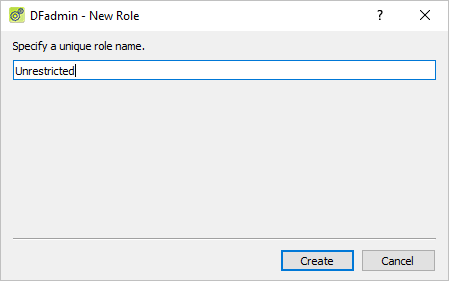
-
Click to create the new role
Unrestricted.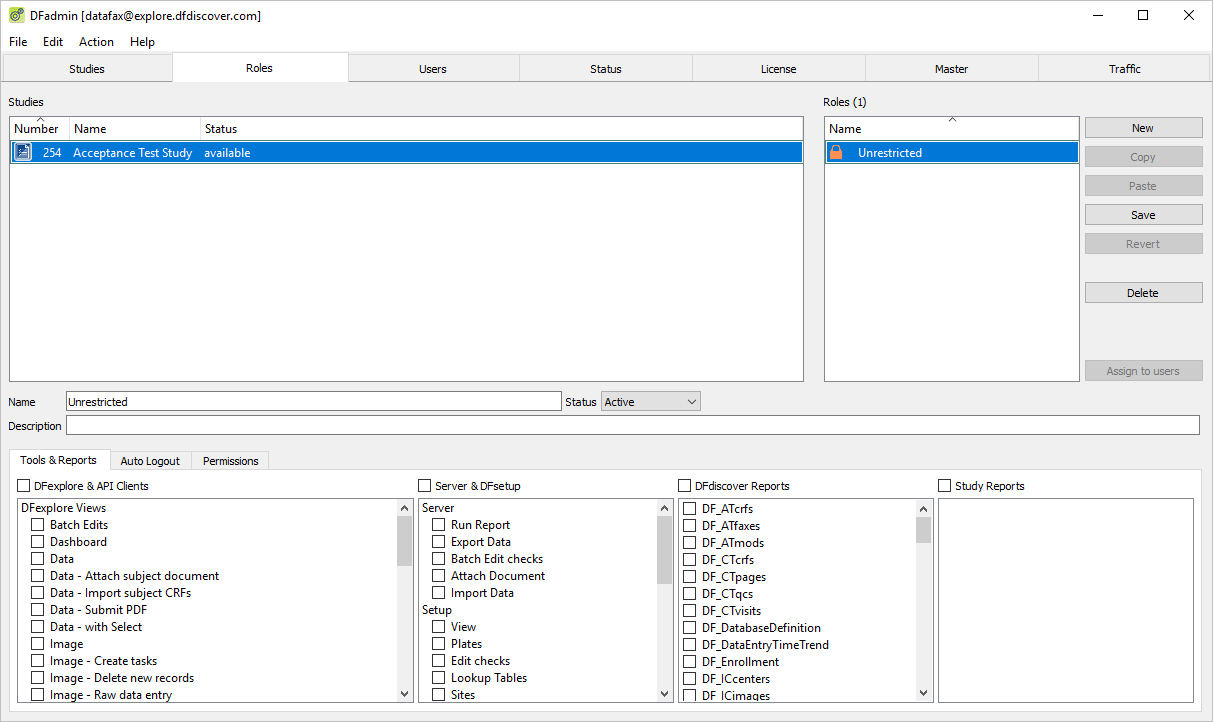
-
Define Tools & Reports permissions for the
Unrestrictedrole. HighlightUnrestrictedin the Roles list to make it the active role. EnterFull Permissionsin the Description field.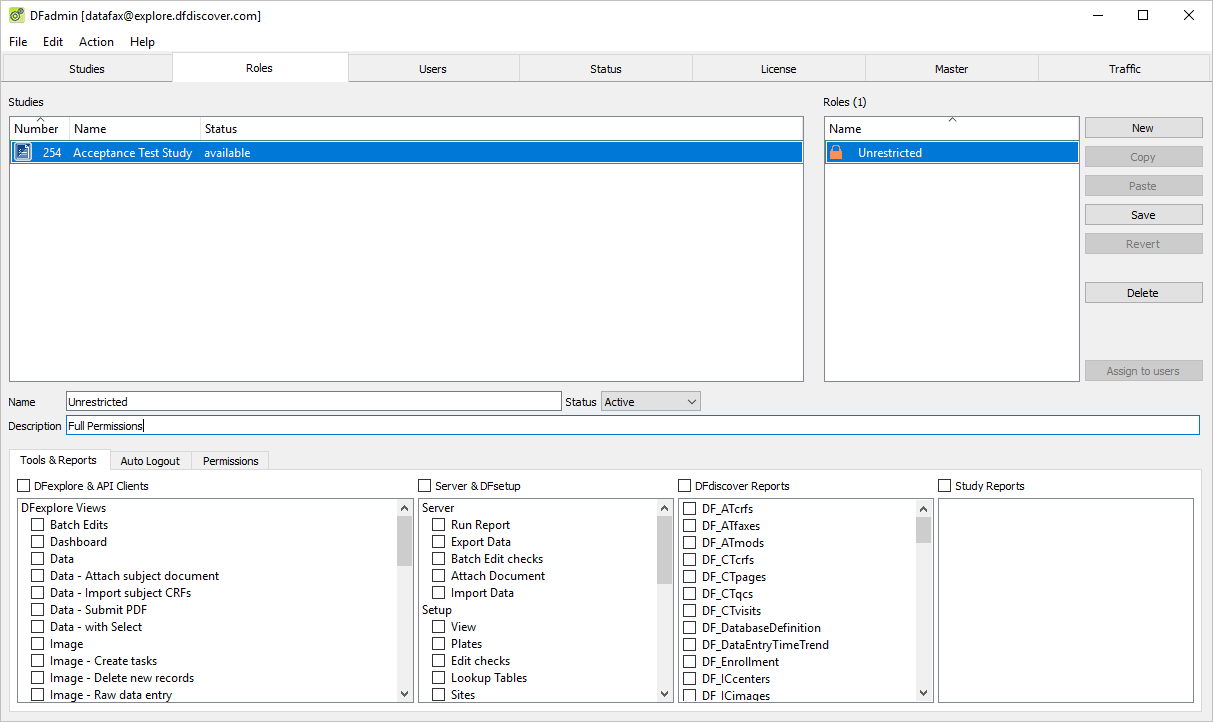
-
Click Tools & Reports tab below the Description field. Check (enable) each of the following: DFexplore & API Clients, Server & DFsetup, DFdiscover Reports, and Study Reports.
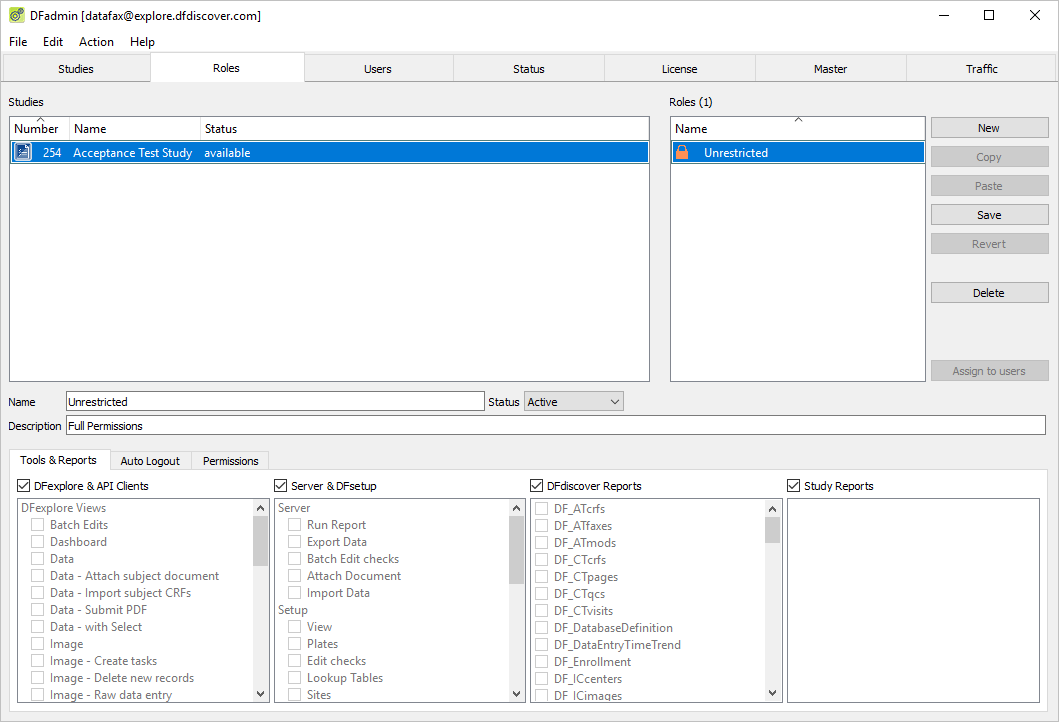
-
Click Auto Logout tab. If not already enabled, check (enable) the Inherit from Study box to override the default Auto Logout settings with those of the ATK study.
-
Click Permissions tab.
-
Set data permissions as follows:
Visits =
ALLPlates =
ALLLevels =
ALLCheck (enable) Show Hidden Fields
Check (enable) Show Int. Queries
Modify =
0-7Write Levels =
0-7Data = Check (enable) CMDL (Create, Modify, Delete, Missed), but not P (Password)
Queries = Check (enable) CMDAR (Create, Modify, Delete, Approve, Reject)
Reasons = Check (enable) CMDA (Create, Modify, Delete, Approve)
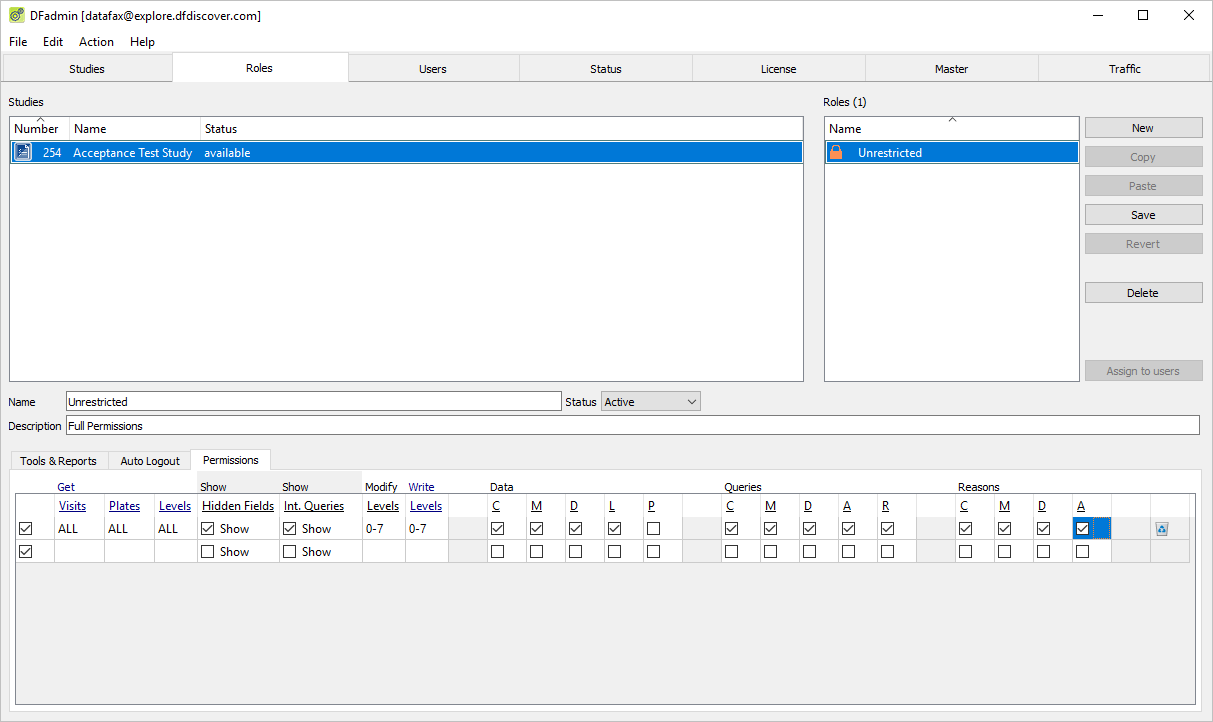
Select > or click to save settings for role
Unrestricted.Still as
datafaxand with the DFadmin application open, click Users tab.-
Set permissions for
datafax. Click the entry fordatafaxfrom the list of users to make it active. Click Permissions tab. Check (enable) Allow access to Image Router.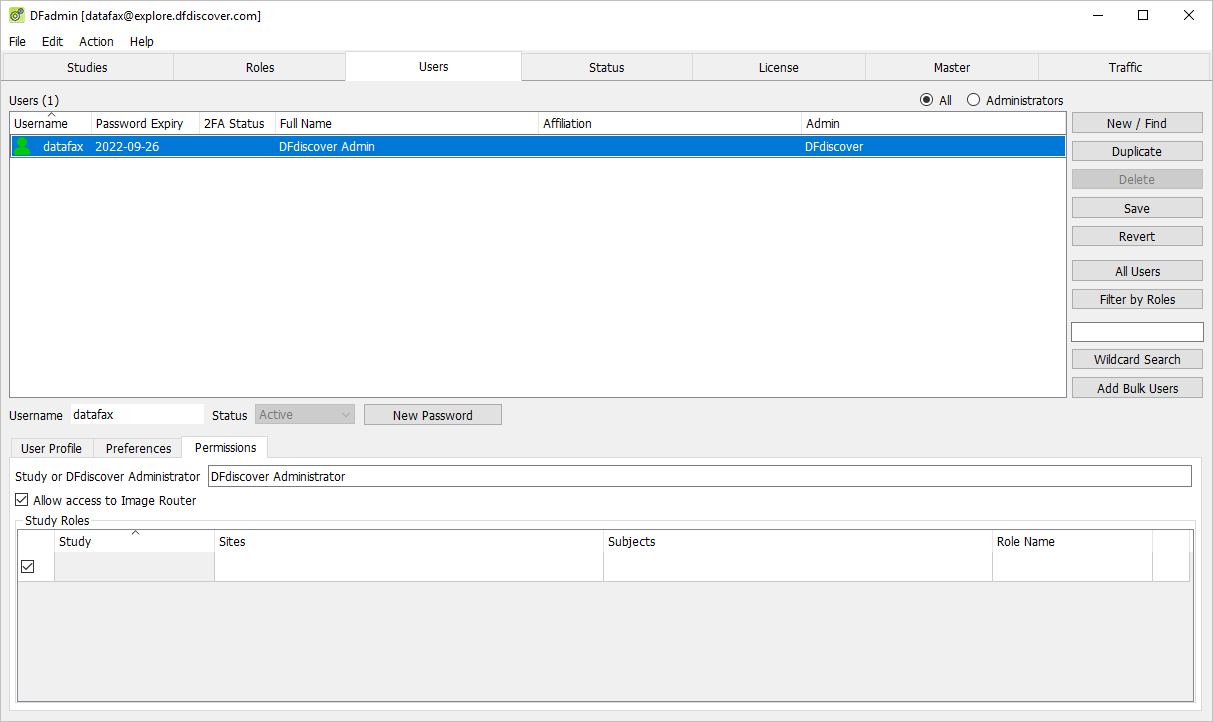
-
To assign a study to
datafax, click the blank area below the Study heading. Select 254 Acceptance Test Study from the Study drop-down. Set:Sites =
AllSubjects =
AllRole Name = Unrestricted
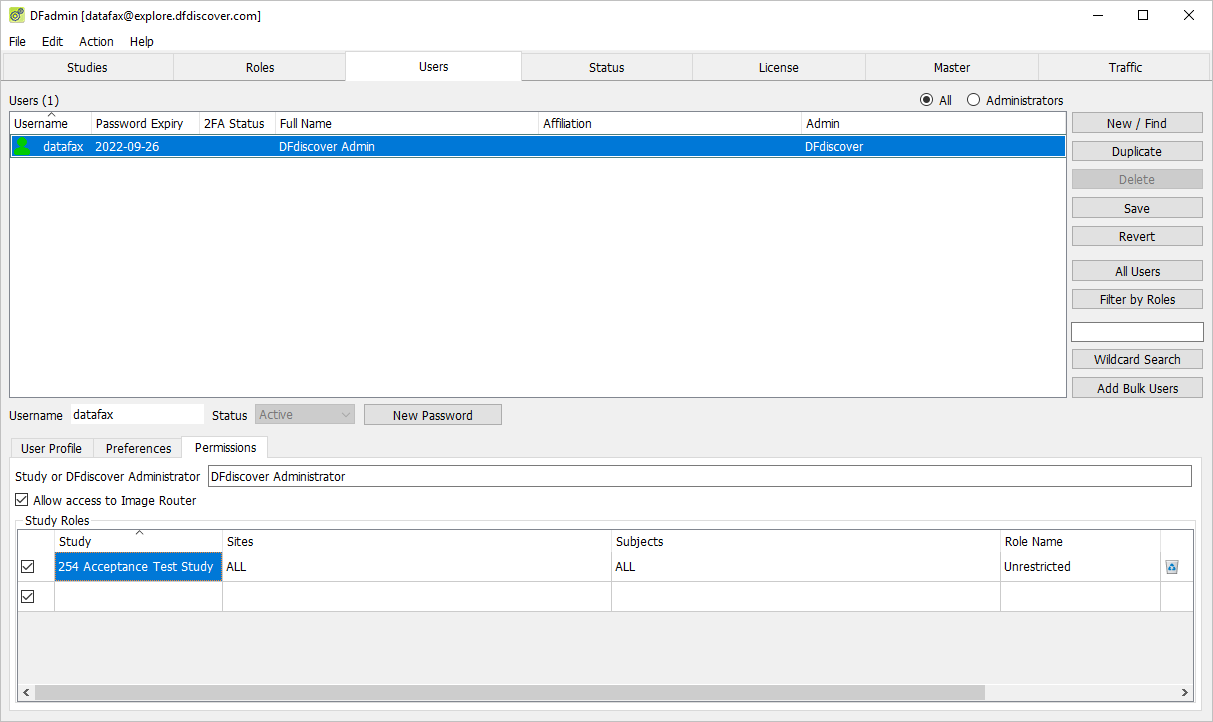
Click to save the role and permissions for
datafax.
-
Create a Role for user
data_coordinator. Begin this task by clicking the Roles tab.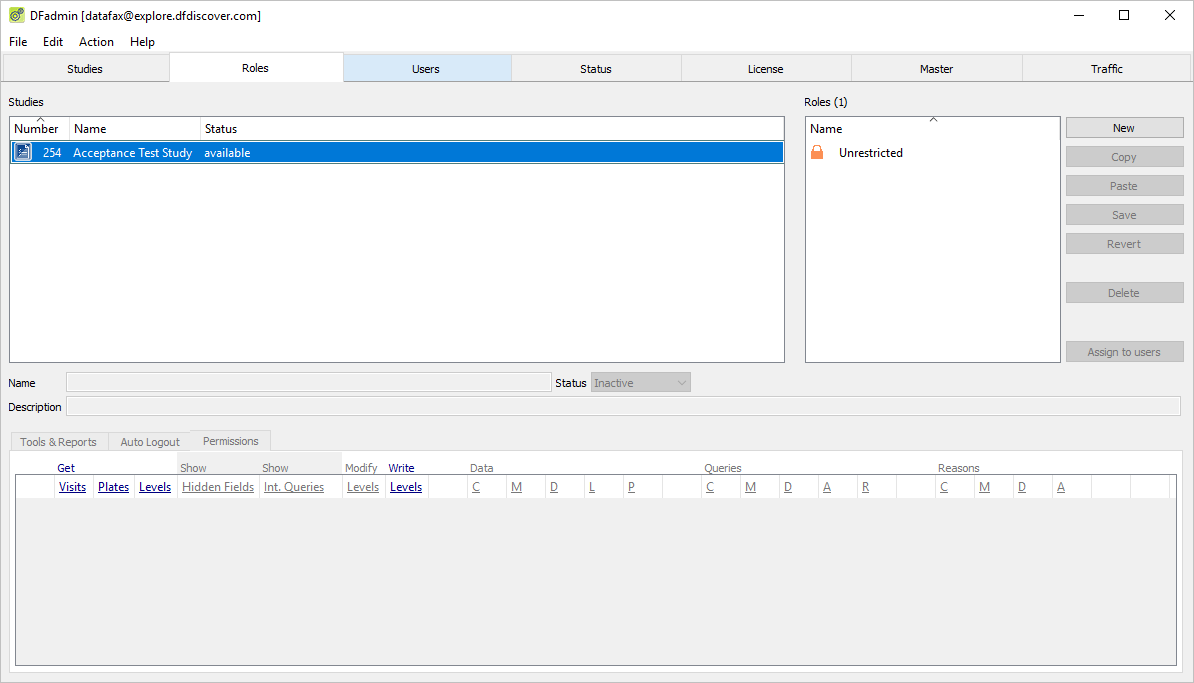
-
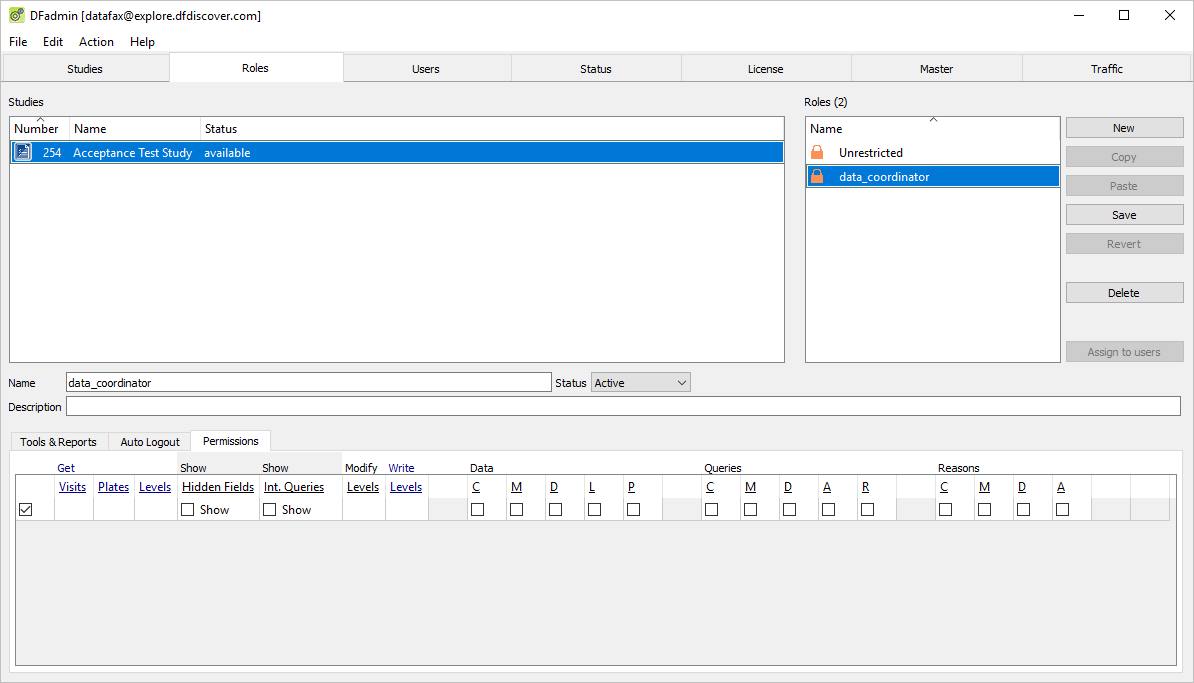
In the list of studies, locate and choose 254 Acceptance Test Study. Click to add a new user role. In the confirmation dialog, enter the role name
data_coordinator.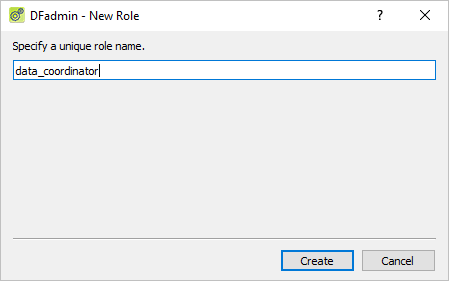
-
Click in the New Role dialog to apply the role name.
-
In the Description field enter:
Levels 0-4, data entry and meta data.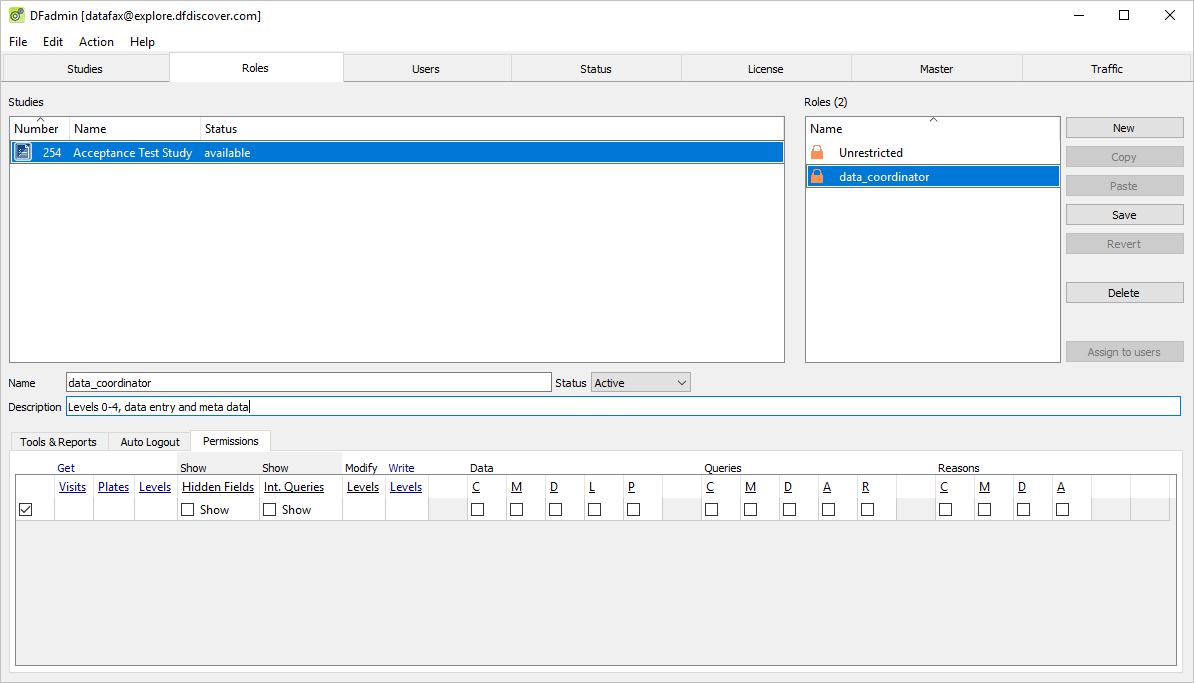
-
Click Tools & Reports tab. Check (enable) each of the following: DFexplore & API Clients, Server & DFsetup, DFdiscover Reports, and Study Reports.
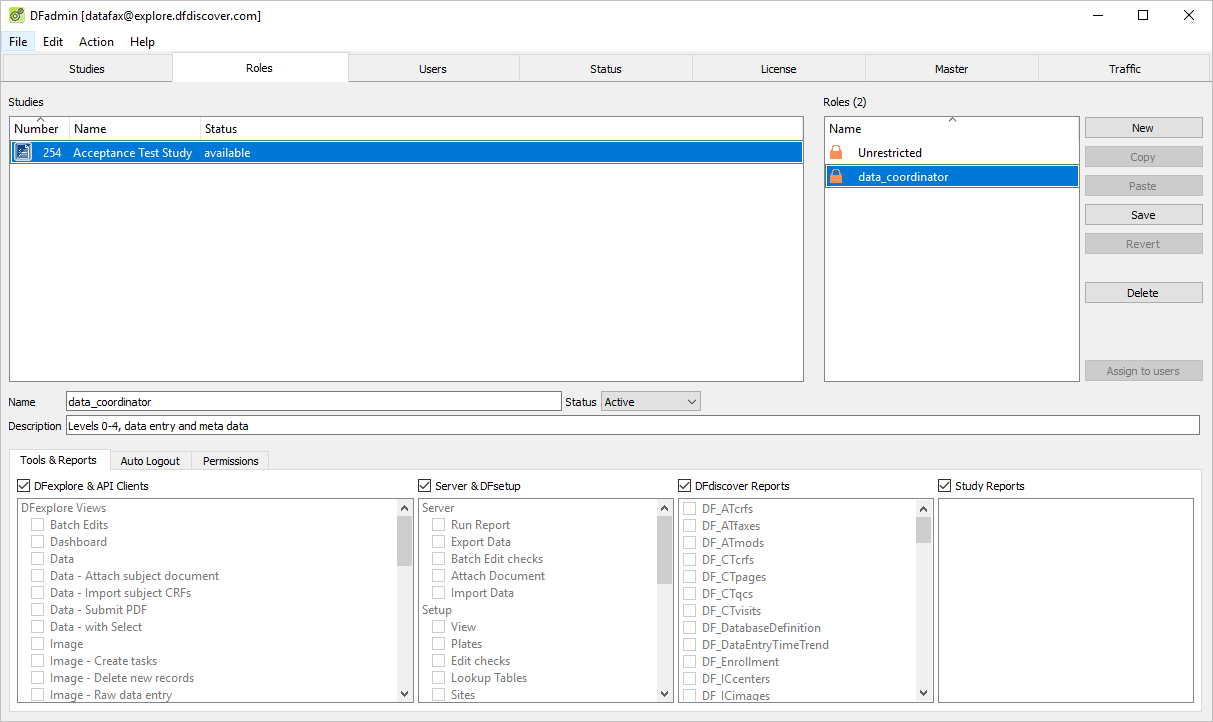
-
Click Auto Logout tab. If not already checked (enabled), check Inherit from Study to override the default Auto Logout setting with the study setting.
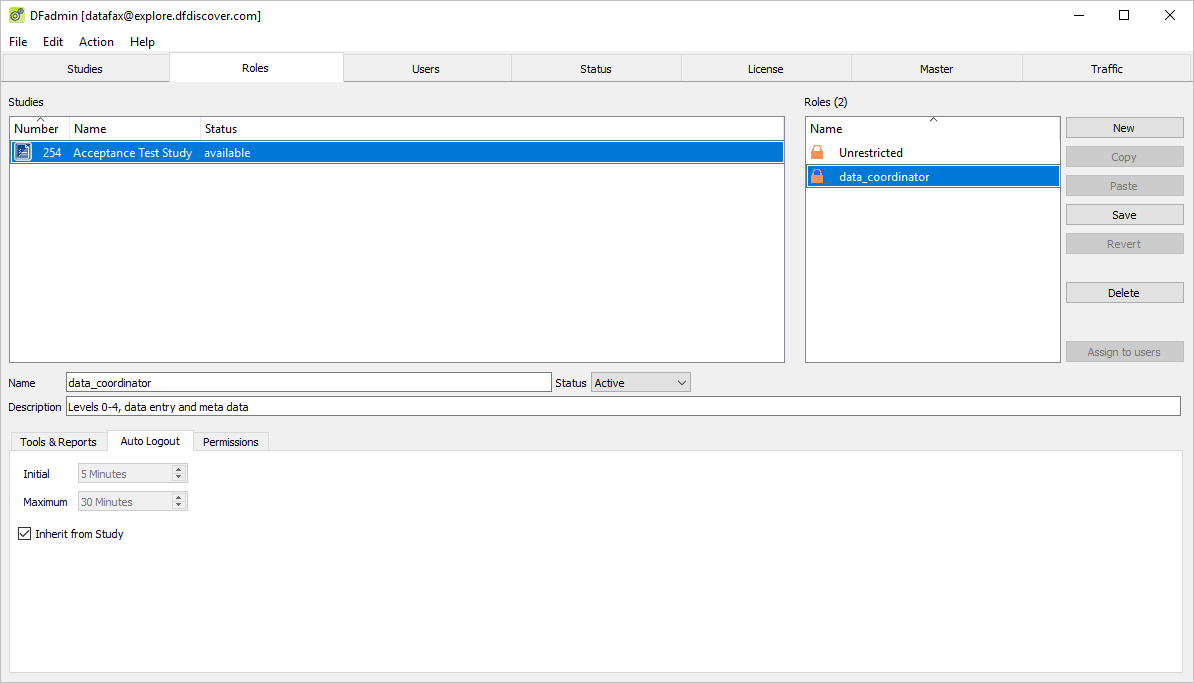
-
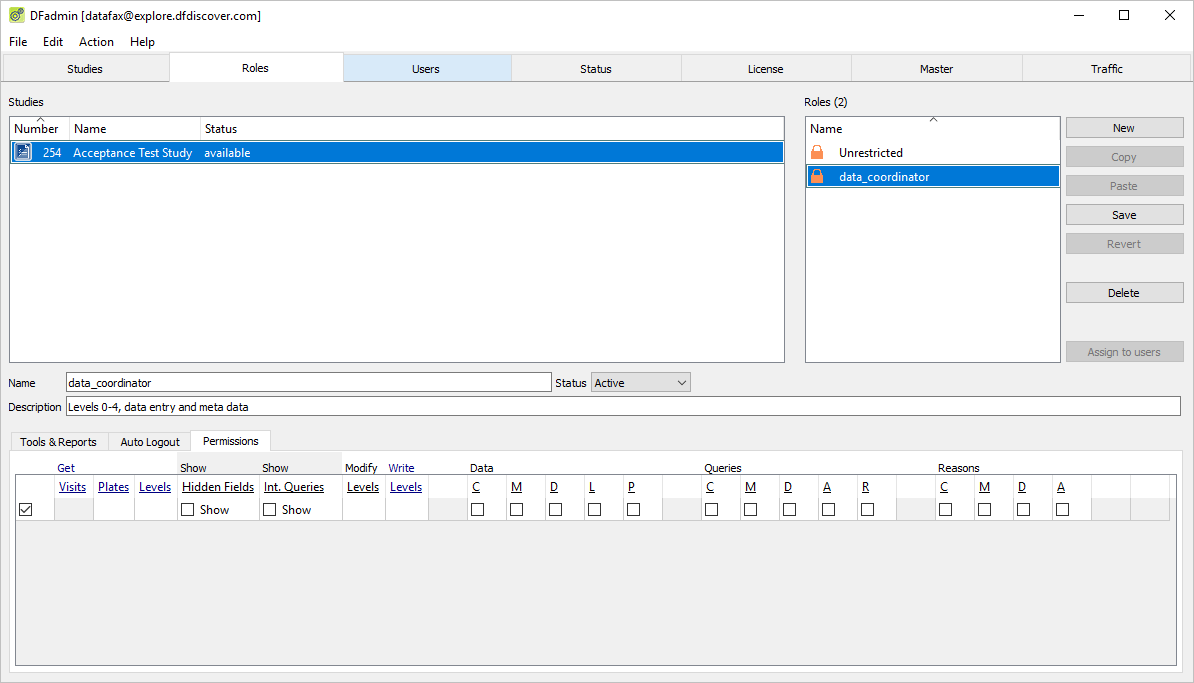
Click Permissions tab.
-
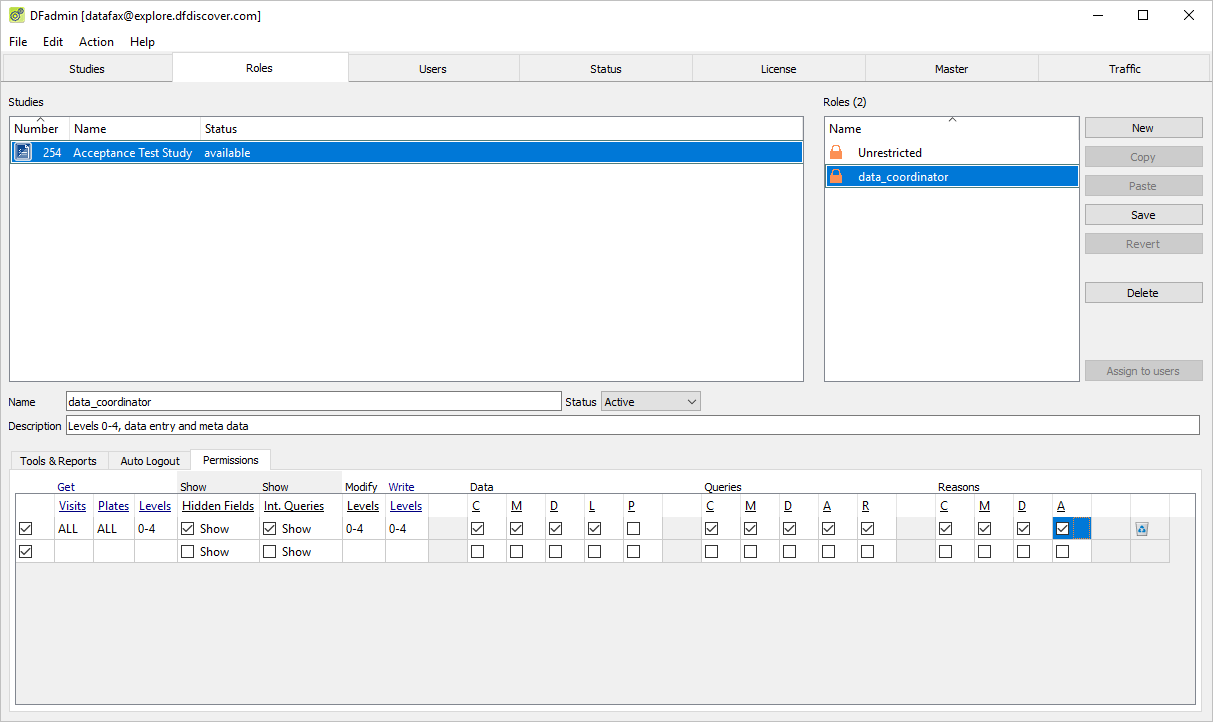
Set data permissions with the following settings:
Visits =
ALLPlates =
ALLLevels =
0-4Check (enable) Show Hidden Fields
Check (enable) Show Int. Queries
Modify Levels =
0-4Write =
0-4Data Check (enable) = CMDL (Create, Modify, Delete, Lost), but not P (Password).
Queries Check (enable) = CMDAR (Create, Modify, Delete, Approve, Reject)
Reasons Check (enable) = CMDA (Create, Modify, Delete, Approve)
-
Click to save the role.
-
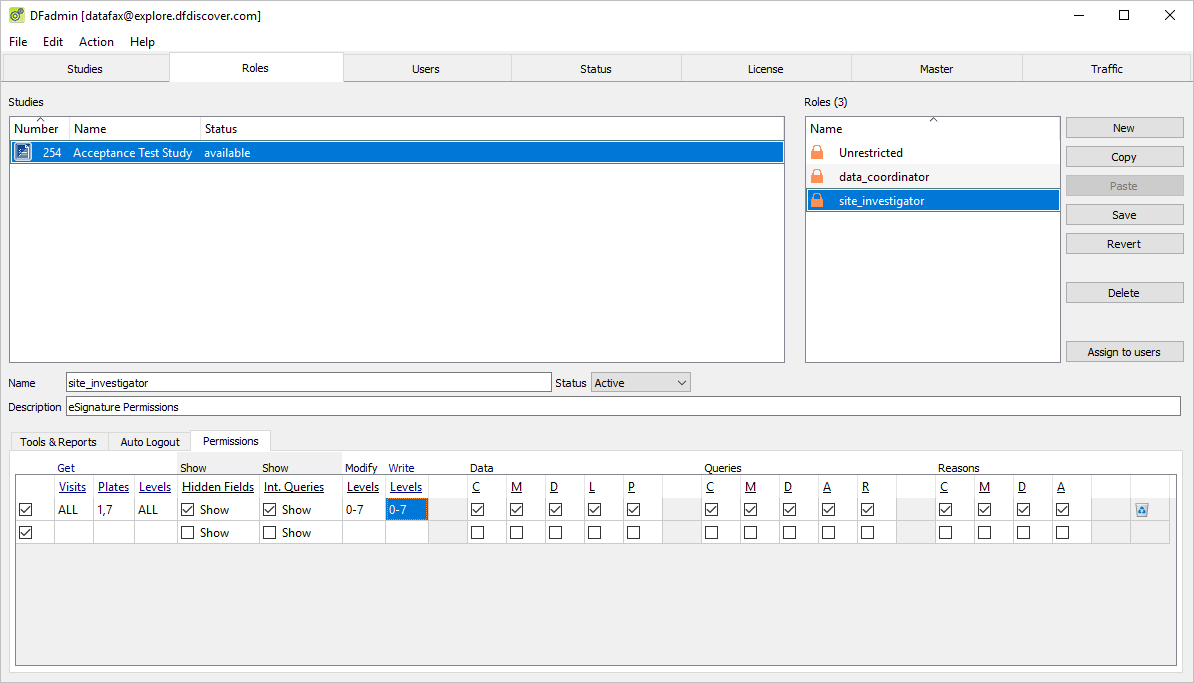
Click then , specify a role name of
site_investigator. Click . -
Click Permissions tab.
-
Enter a Description of
eSignature Permissions. Set data permissions as follows:Visits =
ALLPlates =
1,7Levels =
ALLCheck (enable) Show Hidden Fields
Check (enable) Show Int. Queries
Modify =
0-7Write Levels =
0-7Data = Check (enable) CMDLP (Create, Modify, Delete, Lost, Password)
Queries = Check (enable) CMDAR (Create, Modify, Delete, Approve, Reject)
Reasons = Check (enable) CMDA (Create, Modify, Delete, Approve)
Click .
Still as
datafaxand with the DFadmin application open, click Users tab to open the user definition window.-
Determine if user
data_coordinatorhas already been defined. Review the list of users to determine if an entry exists for userdata_coordinator. -
Click to add a DFdiscover account for user
data_coordinator. In the dialog, select Create new user enter the Usernamedata_coordinatoras shown.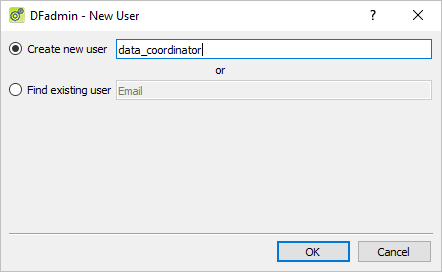
Click to add
data_coordinatorto the list of users. An empty icon representsdata_coordinator, the status ofdata_coordinatoris set to Inactive.-
Choose the
data_coordinatorentry from the list of users if it is not already highlighted. Click User Profile tab. Enter these settings:Full Name =
data_coordinatorAffiliation =
DFnetEmail =
Your email address
Note A valid email address is required to receive module specific PDF files if you have not specified a printer in the Master view.
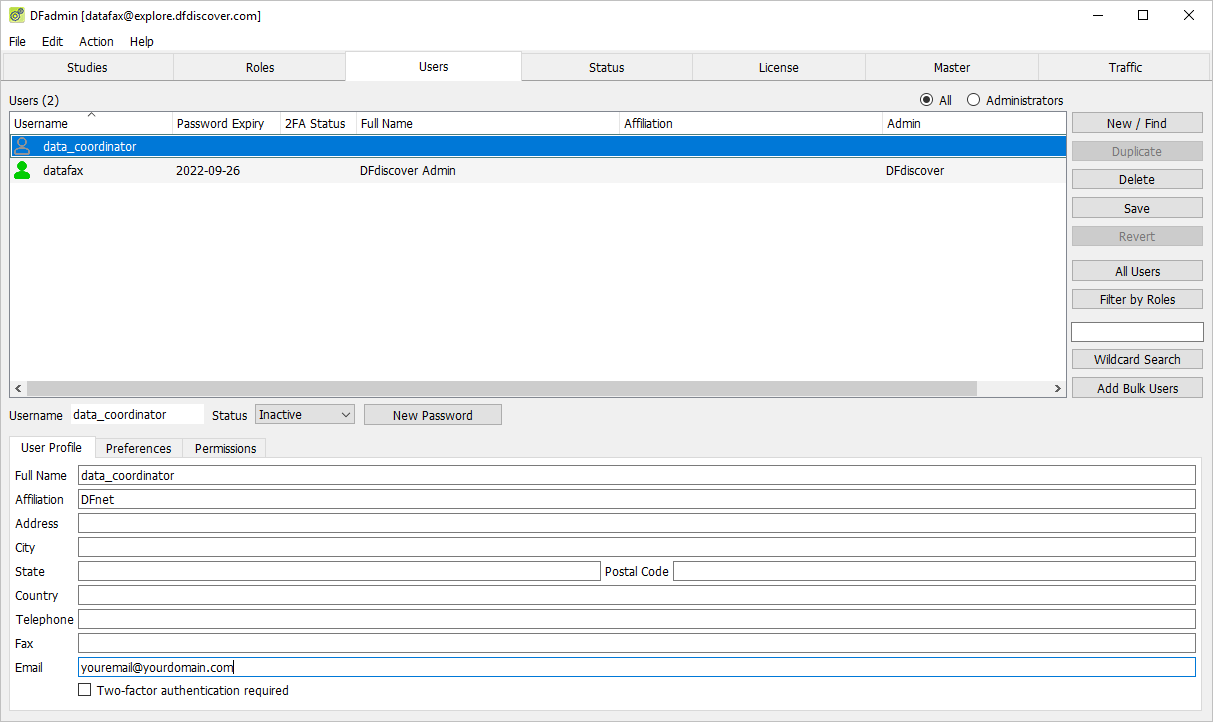
No further user profile information is needed. Click .
-
With user
data_coordinatorstill as the active user, click Permissions tab. Check (enable) Allow access to Image Router.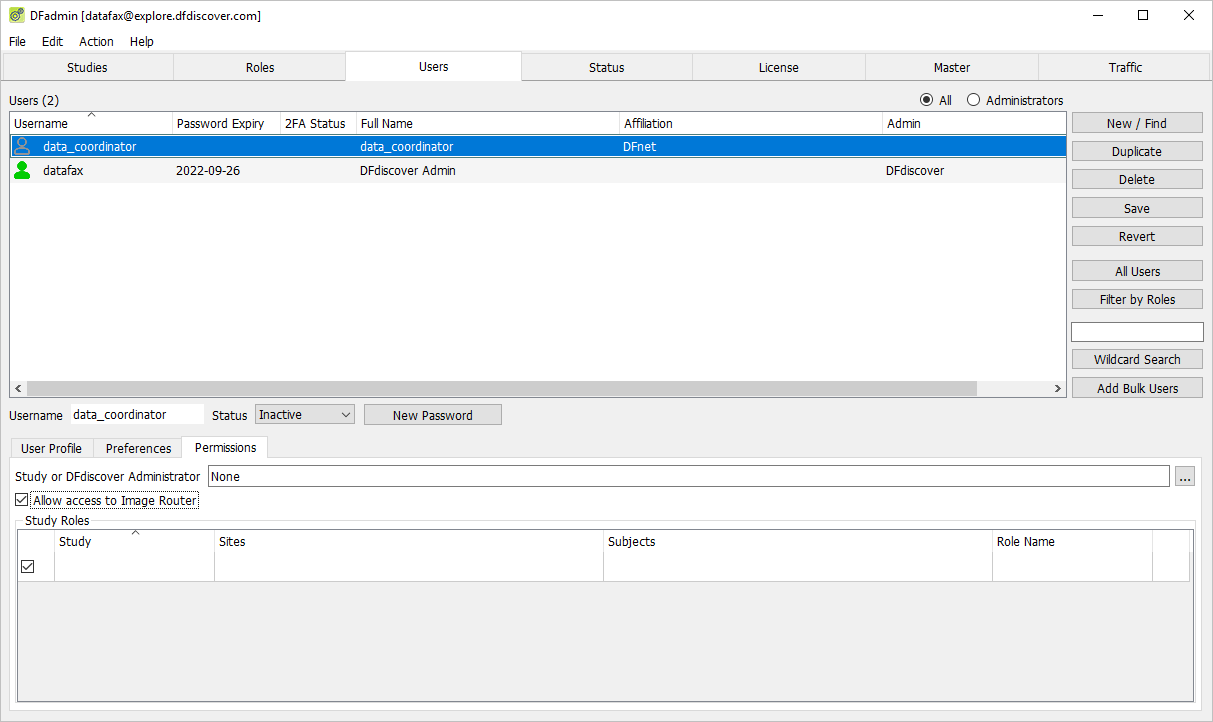
-
To assign a study to
data_coordinator, click the blank area below the Study heading. Select 254 Acceptance Test Study from the Study drop-down. Set:Sites =
AllSubjects =
AllRole Name = data_coordinator
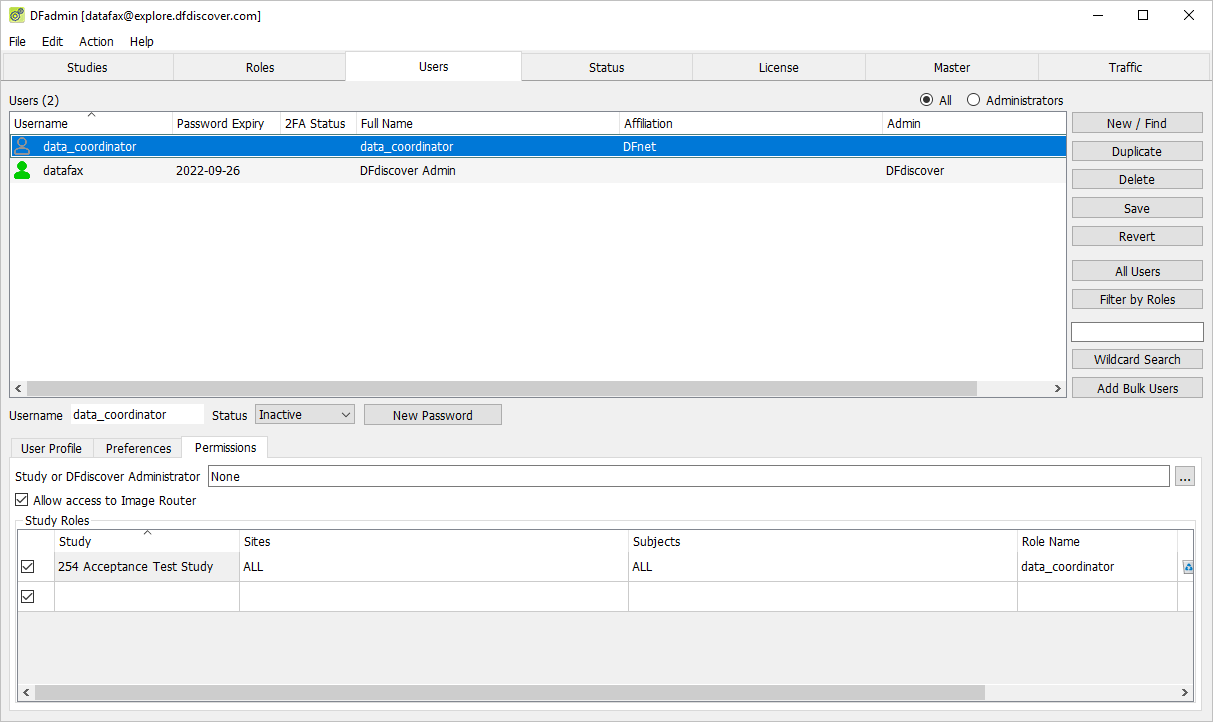
-
Select Active from the Status drop-down list to change the status from Inactive to Active for user
data_coordinator.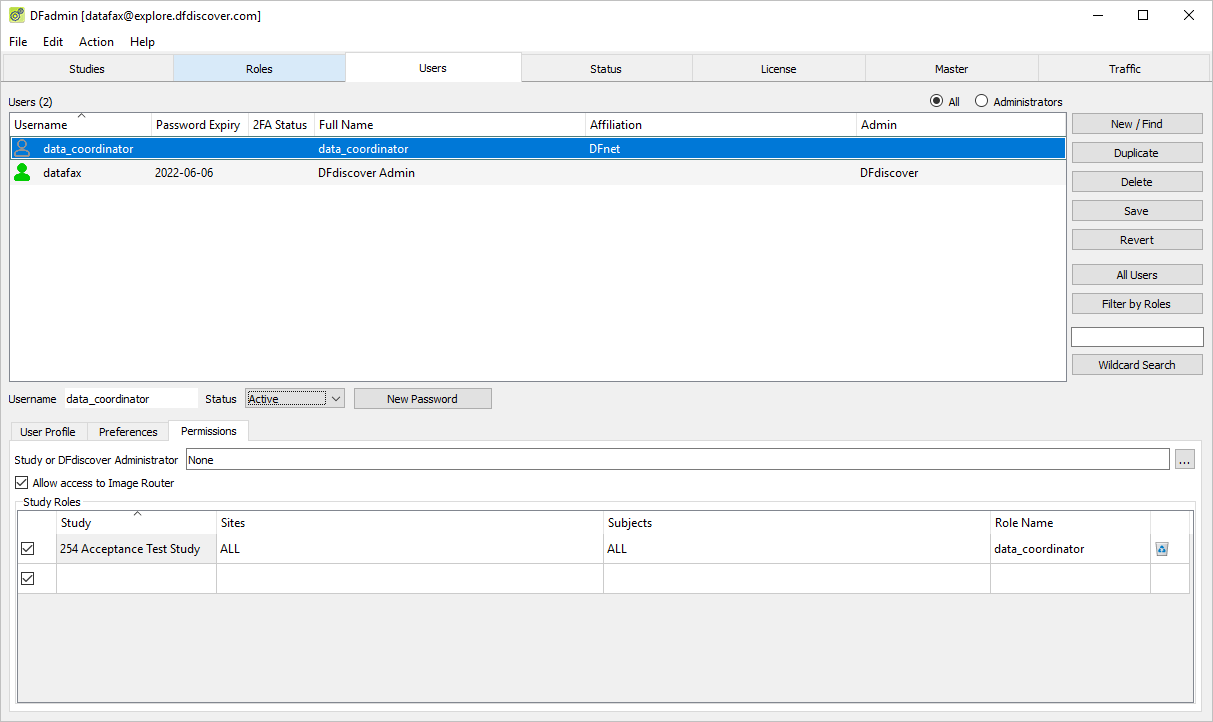
-
Assign a DFdiscover password for
data_coordinatorby clicking . Enter a password of your choice in place of the auto-generated system password.Note Remember the password assigned in this step as it is needed in future tests.
Save all previously entered permissions, roles and password by clicking .
-
Locate and choose the entry for user
data_coordinatorin the list of users. Click Permissions tab and confirm the following settings. If any of the following permissions do not appear as shown below, set them now.Allow access to Image Router box is checked (enabled)
254 Acceptance Test Study is assigned to user
data_coordinator.Sites =
ALLSubjects =
ALLRole Name = data_coordinator
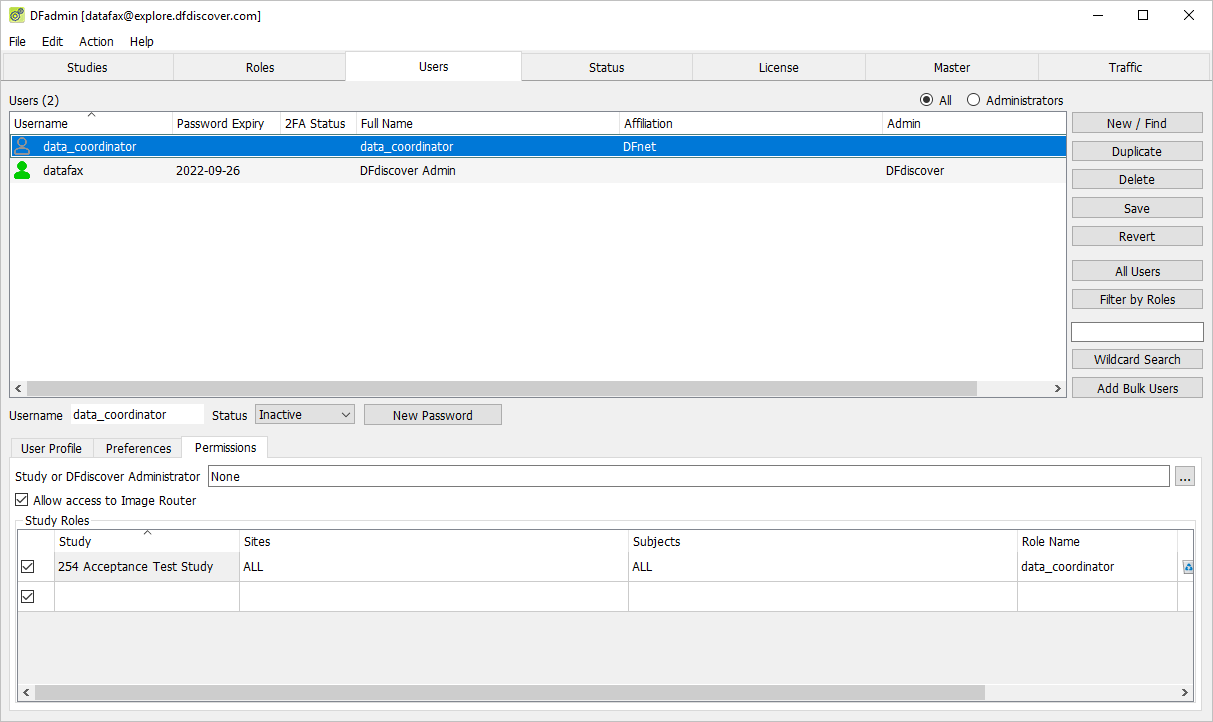
Verify the status for
data_coordinator. Ifdata_coordinatoris set to Inactive, select Active from the Status drop-down list.-
Assign a DFdiscover password for
data_coordinatorby clicking . Enter a password of your choice in place of the auto-generated system password.Note Remember the password assigned in this test step as it is needed in future tests.
Save all previously entered permissions, roles and password by clicking .
-
With
data_coordinatoras the active user, click . In the dialog enter a username ofdata_manager. Click . -
Specify a Full Name of
data_manager. Click Permissions tab, then within the Study or DFdiscover Administrator. Select Study Admin for Selected Studies, check (enable) 254 Acceptance Test Study. Click .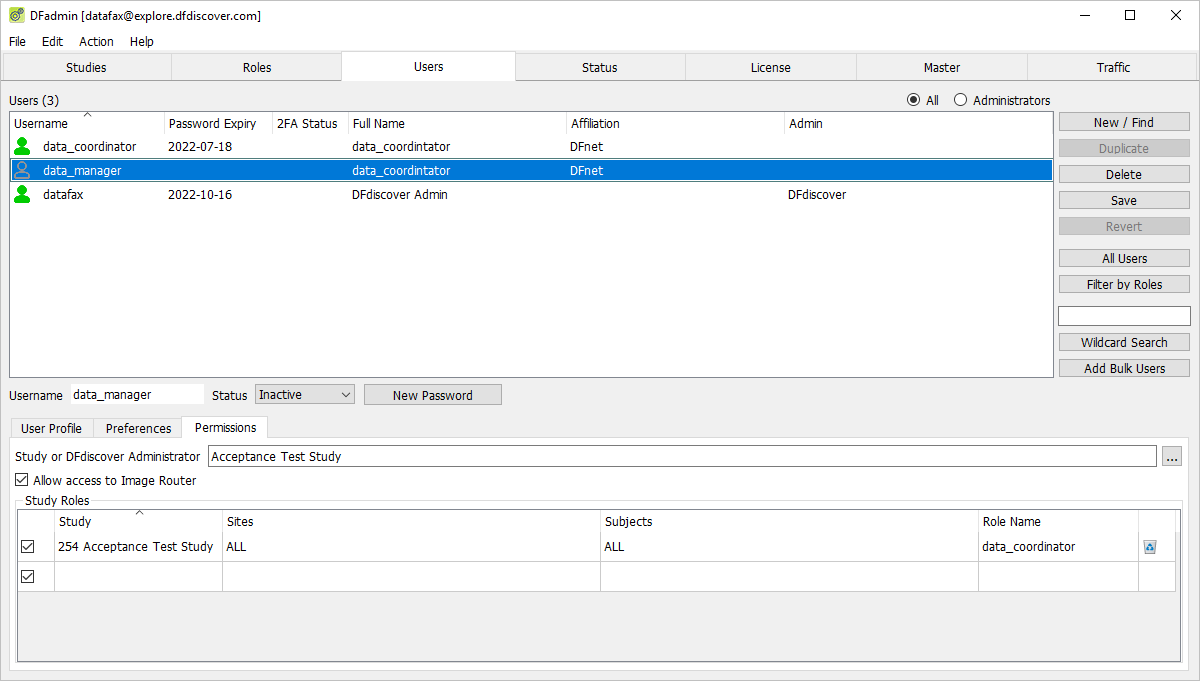
-
Confirm the Study Roles permissions. If any of the following permissions do not appear as shown below, set them now.
Allow access to Image Router box is checked (enabled)
254 Acceptance Test Study is assigned to user
data_manager.Sites =
ALLSubjects =
ALLRole Name = Unrestricted
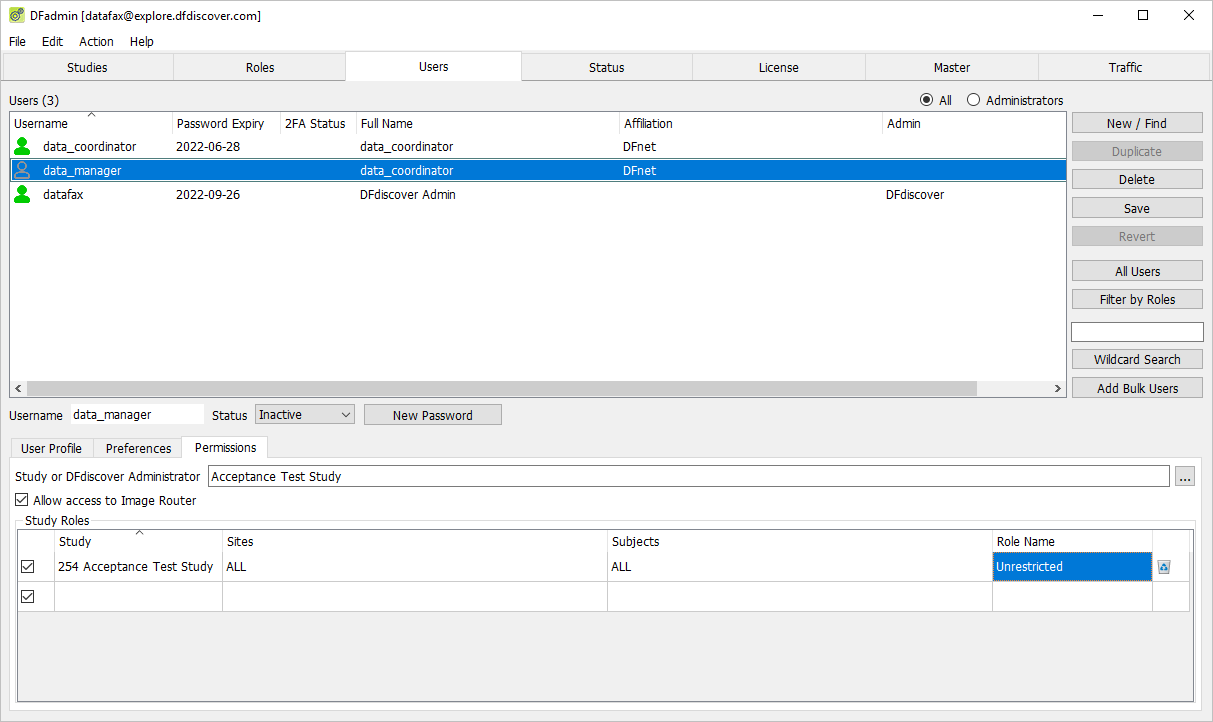
Verify the status for
data_manager. Ifdata_manageris set to Inactive, select Active from the Status drop-down list.-
Assign a DFdiscover password for
data_managerby clicking . Enter a password of your choice in place of the auto-generated system password. Click .Note Remember the password assigned in this test step as it is needed in future tests.
-
Click
data_coordinatorto make it the active user. Click . In the dialog enter a username ofsite_monitor. Click -
Specify a Full Name of
site_monitor. Click Permissions tab and confirm the following settings. If any of the following permissions do not appear as shown below, set them now.Allow access to Image Router box is unchecked (disabled)
254 Acceptance Test Study is assigned to user
site_monitor.Sites =
99Subjects =
ALLRole Name = data_coordinator
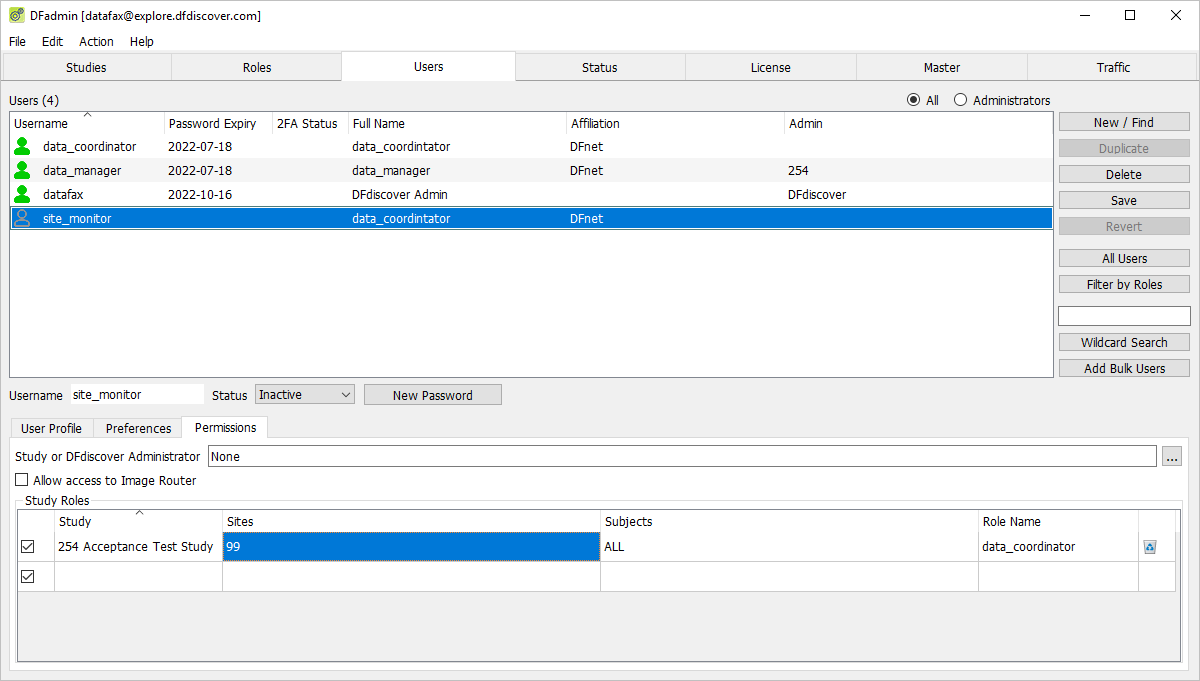
Verify the status for
site_monitor. Ifsite_monitoris set to Inactive, select Active from the Status drop-down list.-
Assign a DFdiscover password for
site_monitorby clicking . Enter a password of your choice in place of the auto-generated system password. Click .Note Remember the password assigned in this test step as it is needed in future tests.
-
With
site_monitoras the active user, click . In the dialog enter a username ofsite_invest. Click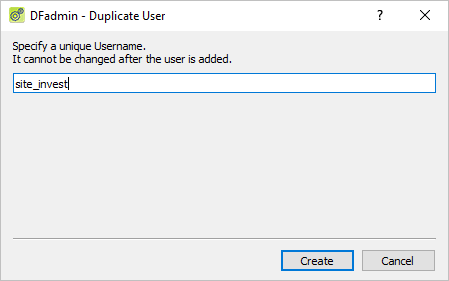
-
Specify a Full Name of
site_investigator. Check (enable) Two-factor authentication required.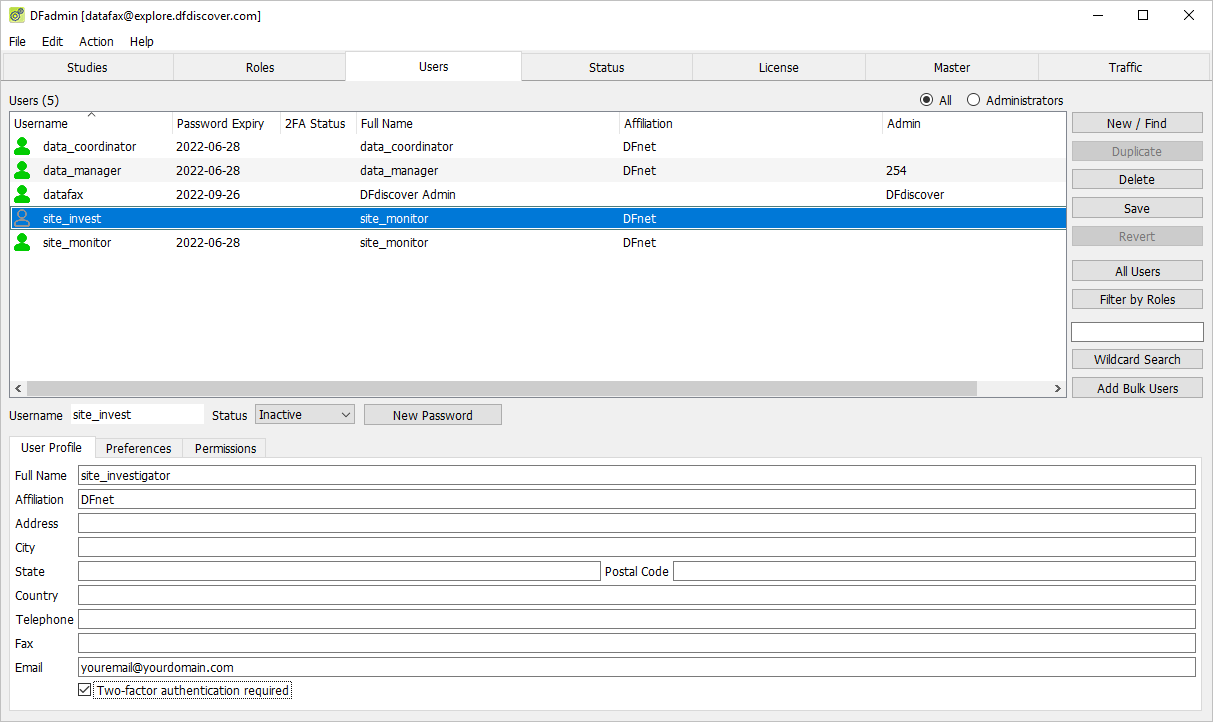
-
Click Permissions tab and confirm the following settings. If any of the following permissions do not appear as shown below, set them now.
Allow access to Image Router box is unchecked (disabled)
254 Acceptance Test Study is assigned to user
site_invest.Sites =
99Subjects =
ALLRole Name = site_investigator
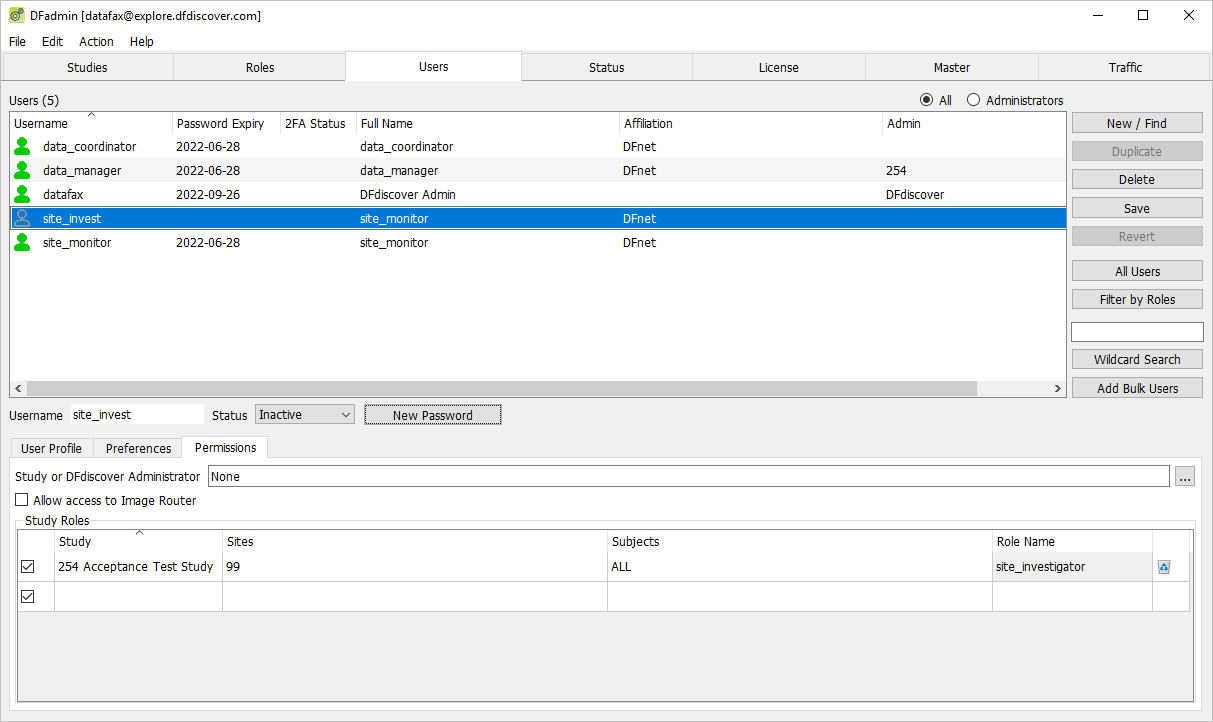
Verify the status for
site_invest. Ifsite_investis set to Inactive, select Active from the Status drop-down list.-
Assign a DFdiscover password for
site_investby clicking . Enter a password of your choice in place of the auto-generated system password. Click .Note Remember the password assigned in this test step as it is needed in future tests.
-
The remaining steps in this module require
datafaxprivileges. Open the DFATK (Control Panel) login dialog. -
Enter the name of the DFdiscover Server on which the Acceptance Test Kit has been installed. As the Acceptance Test Kit Control Panel must be run as
datafax, the Username field cannot be edited. Enter the previously specified password fordatafaxand click .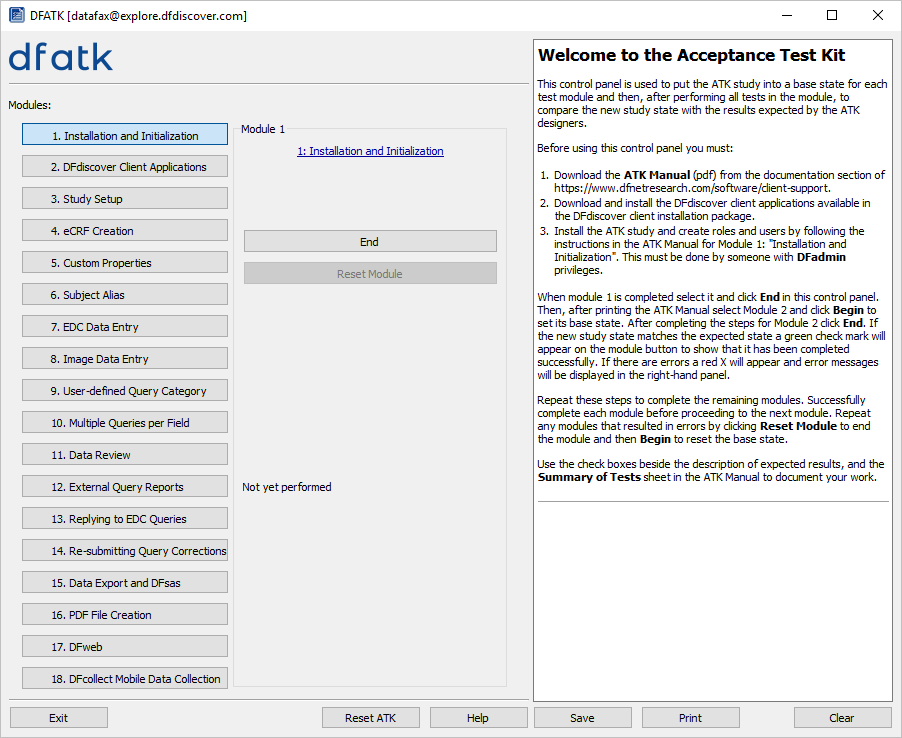
-
In the Control Panel, confirm that Module is the current module and that its status is Not yet performed.
Click to complete Module 1. Installation and Initialization.
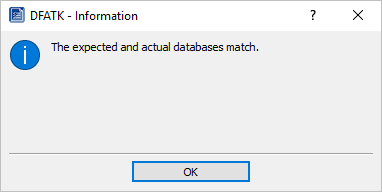
Table of Contents
- 2.1. Tests & Requirements
- 2.2. Begin Module 2. DFdiscover Client Applications.
- 2.3. Send PDF images to DFexplore.
- 2.4. Verify the online user documentation. Open the Image Router and verify the appearance of the Welcome Image.
- 2.5. Open the Acceptance Test Study and verify the standard DFexplore views.
- 2.6. Start DFsetup and verify version information.
- 2.7. Verify the online setup documentation. Open the Acceptance Test Study setup and verify the standard DFsetup views.
- 2.8. End Module 2. DFdiscover Client Applications.
Verify the online user documentation. Open the Image Router and verify the appearance of the Welcome Image.
Open the Acceptance Test Study and verify the standard DFexplore views.
Start DFsetup and verify version information.
Verify the online setup documentation. Open the Acceptance Test Study setup and verify the standard DFsetup views.
Estimate of Time Required: 20 minutes
-
Start DFATK as described in Module 1 (Installation & Initialization).
-
Click followed by to begin this module.
-
Click to email a copy of Welcome_Fax.pdf to
site_monitor. Clicking more than once will result in multiple pages arriving to your email inbox.Note Save the Welcome_Fax.pdf file received via email to your local computer. This file is required to complete the remainder of this module. Refer to Section 1.8, “Creating user accounts and assigning study permissions.” as a valid email address is required for
site_monitorto receive the module specific PDF files. -
Start DFsend, login as user
site_monitoras described in Section 1.9, “How to start DFsend”. -
Click . From the Select PDF Files file selection dialog, locate the previously saved Welcome_Fax.pdf file. Select the file, Click .
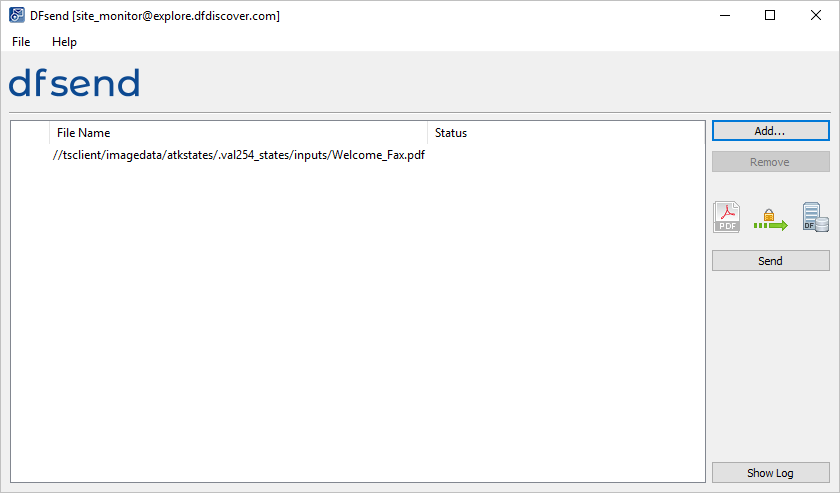
Note Alternatively documents can also be added by dragging-and-dropping the desired PDF files from a local file folder into the list area.
-
Click . In Verify Password dialog, enter
site_monitorin the Username field and the previously assigned password in the Password field. Click .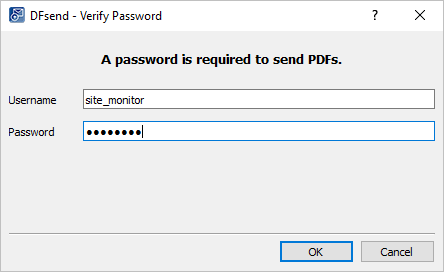
-
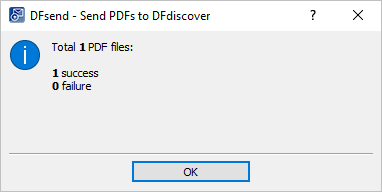
In the resulting Send PDFs to DFdiscover dialog, confirm 1 success and 0 failure are shown. Click .
-
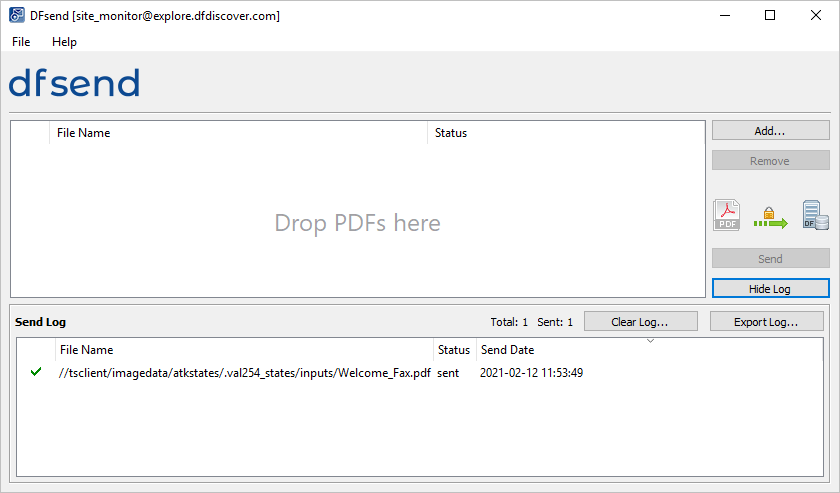
Click to review the DFsend transmission history.
-
Select > .
Note Wait 2-3 minutes prior to proceeding to DFexplore.
-
Start DFexplore, login as user
data_managerand choose 254 Acceptance Test Study as described in Section 1.7, “How to start DFexplore”. -
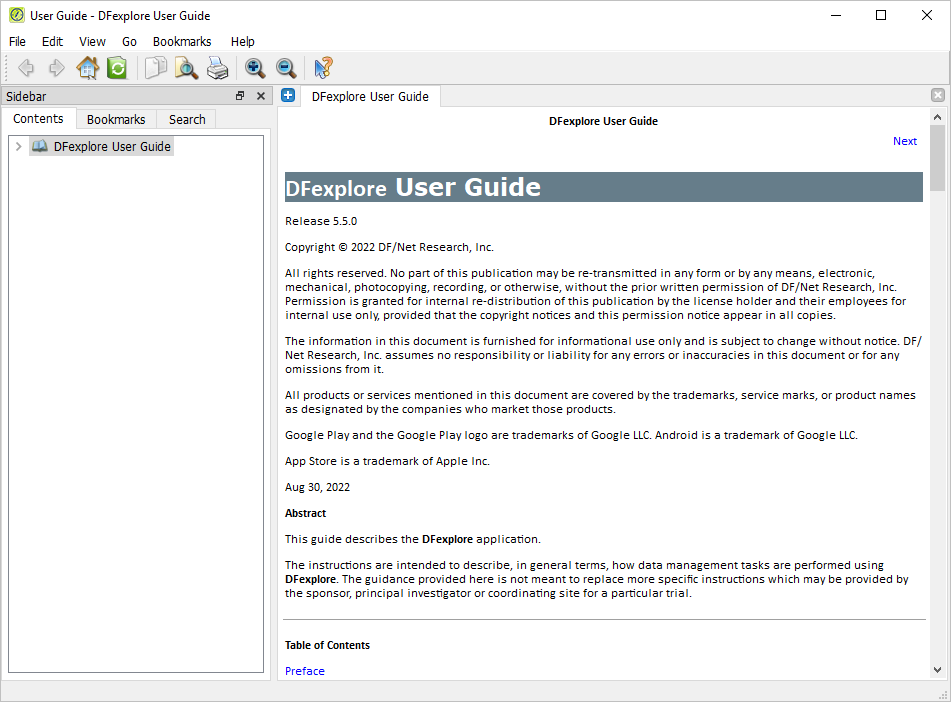
Select > to access the documentation. In the documentation window, confirm the documentation version number. Select > to dismiss the documentation window.
-
Select > to exit the study.
-
In the DFexplore login dialog, Click to start the Image Router. Locate the Welcome image by selecting the page from the list of documents in the CRF ID panel.
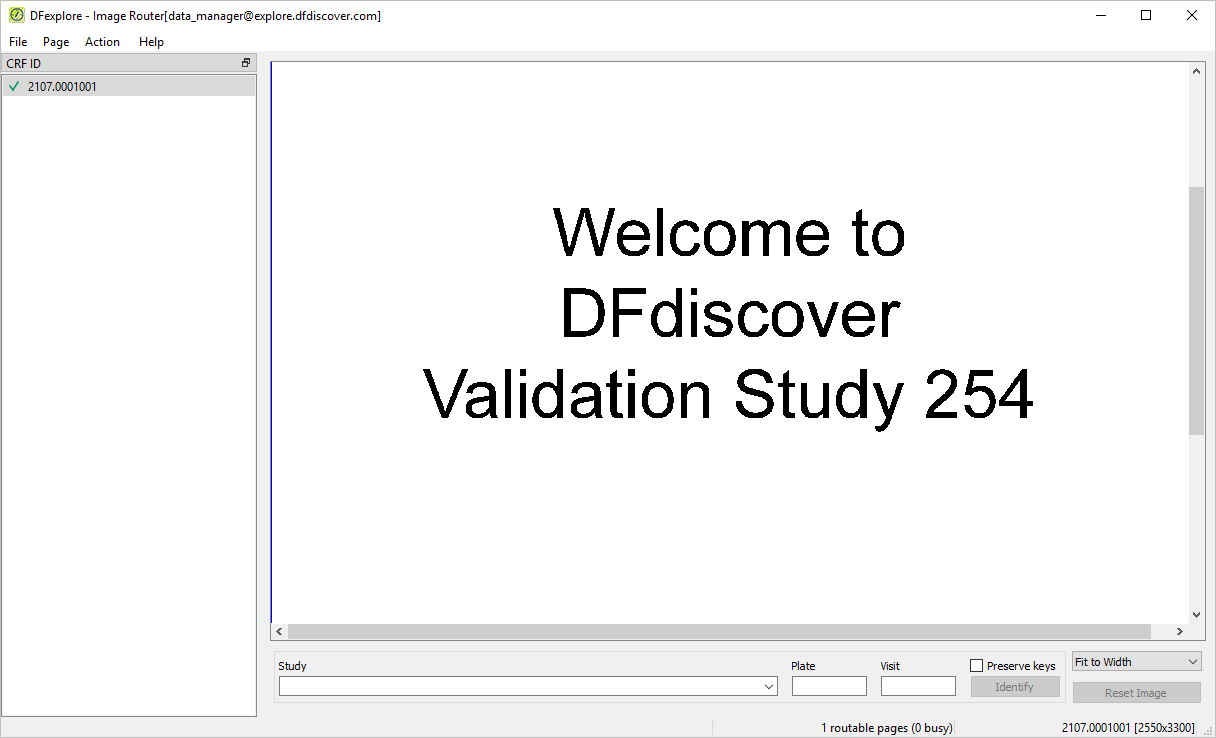
Note Any pages that have been received and which DFdiscover could not identify as CRFs for any of the studies registered at your site, will be found in the Image Router. The Welcome image is added during initialization of the module. If there are more pages than the Welcome image in your Image Router window, you may need to locate the Welcome image in the list of images in the CRF ID panel.
-
Print the Welcome image from the Image Router by selecting > . Choose your locally installed printer, choose All for Page Range, and click .
-
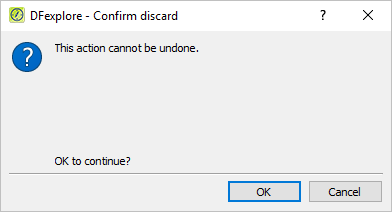
Delete the Welcome image from the Image Router by selecting > . Click to confirm the discard action.
-
Select > to exit the Image Router.
The study selection dialog is presented.
-
In the study selection dialog, highlight the entry for 254 Acceptance Test Study. Click .
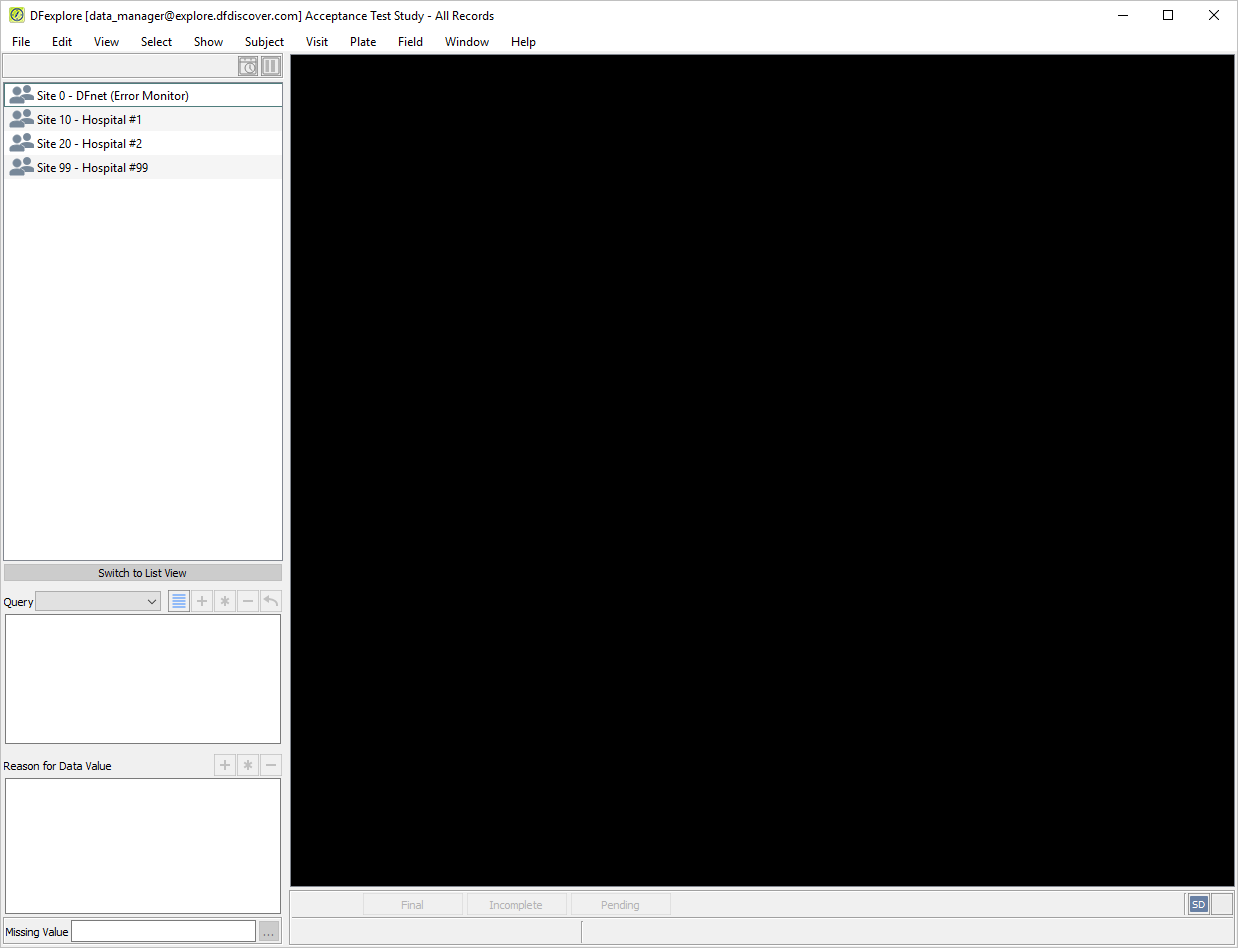
Note If this step is performed within 60 seconds of closing the Image Router window, the Username, Password and list of studies are still visible. If more than 60 seconds have elapsed, you will first need to re-enter the Password for
data_manager, and click to view the study selection dialog. Then highlight the entry for 254 Acceptance Test Study and click . -
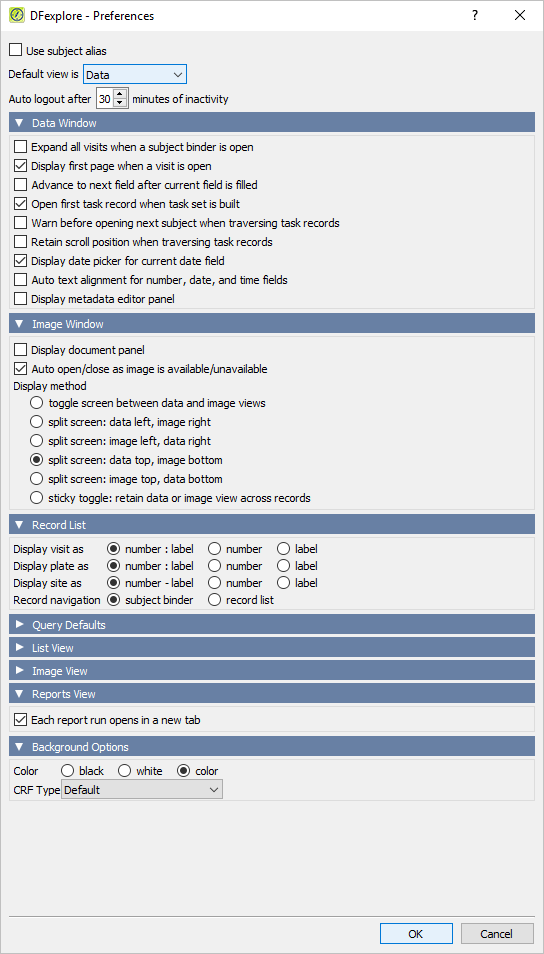
Select > . In the Preferences dialog, open each panel and set the options exactly as illustrated. When finished, click to save the settings and close the dialog.
-
Select > to make Image view the current view. Set Quantity = 25. Do not change any other settings in the Automatic Retrieval dialog and click to retrieve the new documents.
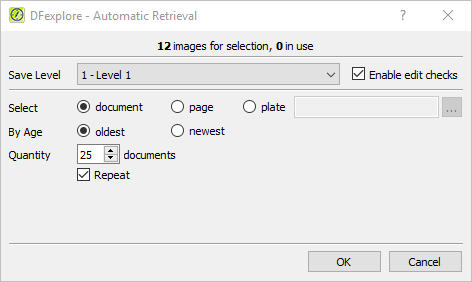
Note The record retrieval dialog displays the last retrieval mode from the session preferences for each user on each computer. If
data_managerpreviously used DFexplore in another mode, you may not see the Automatic Retrieval dialog that is illustrated. You may see a different record retrieval dialog. When this happens, click in that record retrieval dialog. Then select > and, as necessary, correct the settings in the resulting dialog so that they match the illustration. -
Image view becomes the current view, 12 new records are displayed in the record list panel, and the first record is highlighted. The main window displays the data record in the top pane and document image in the bottom pane.
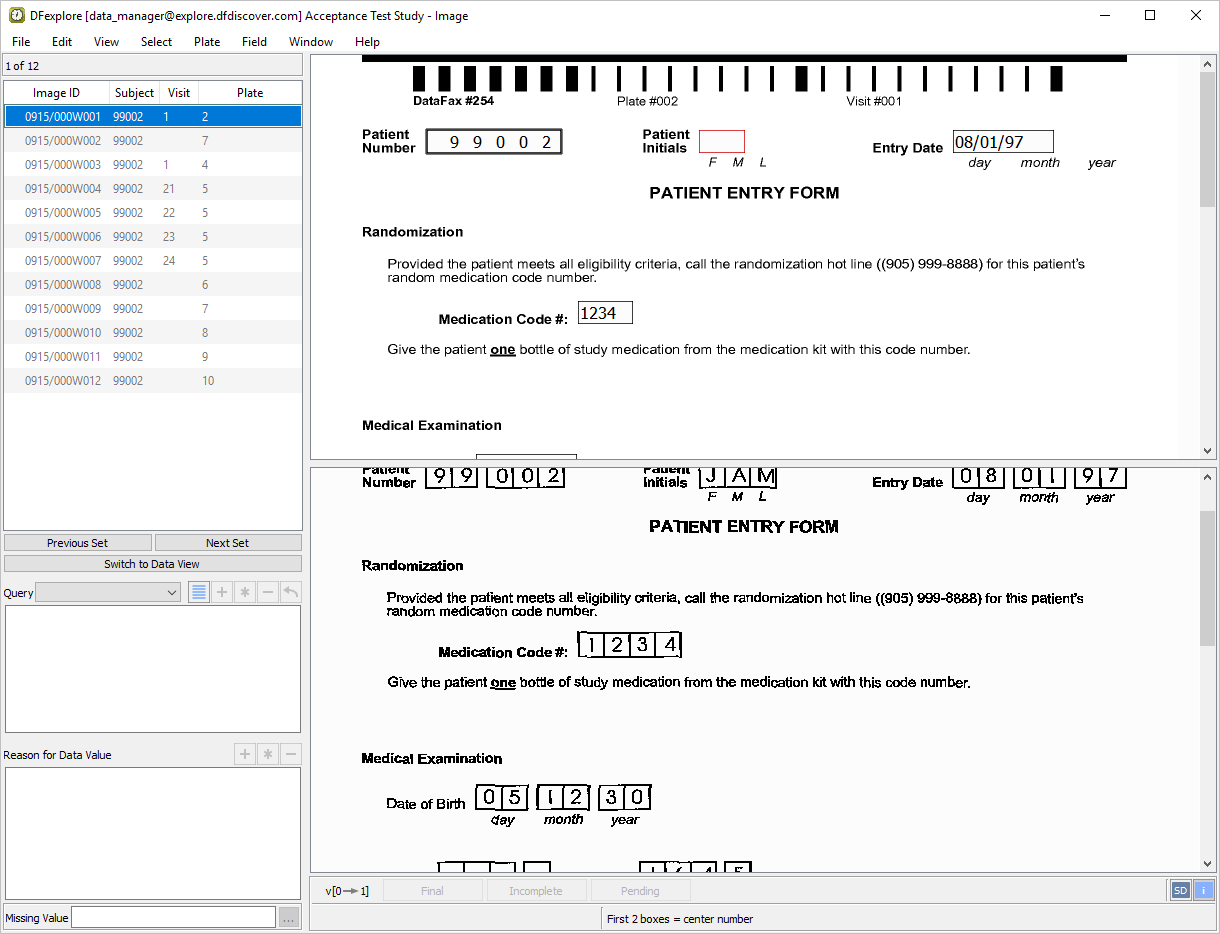
-
Select > to change to Data view. In the confirmation dialog, click to release the set of image records.
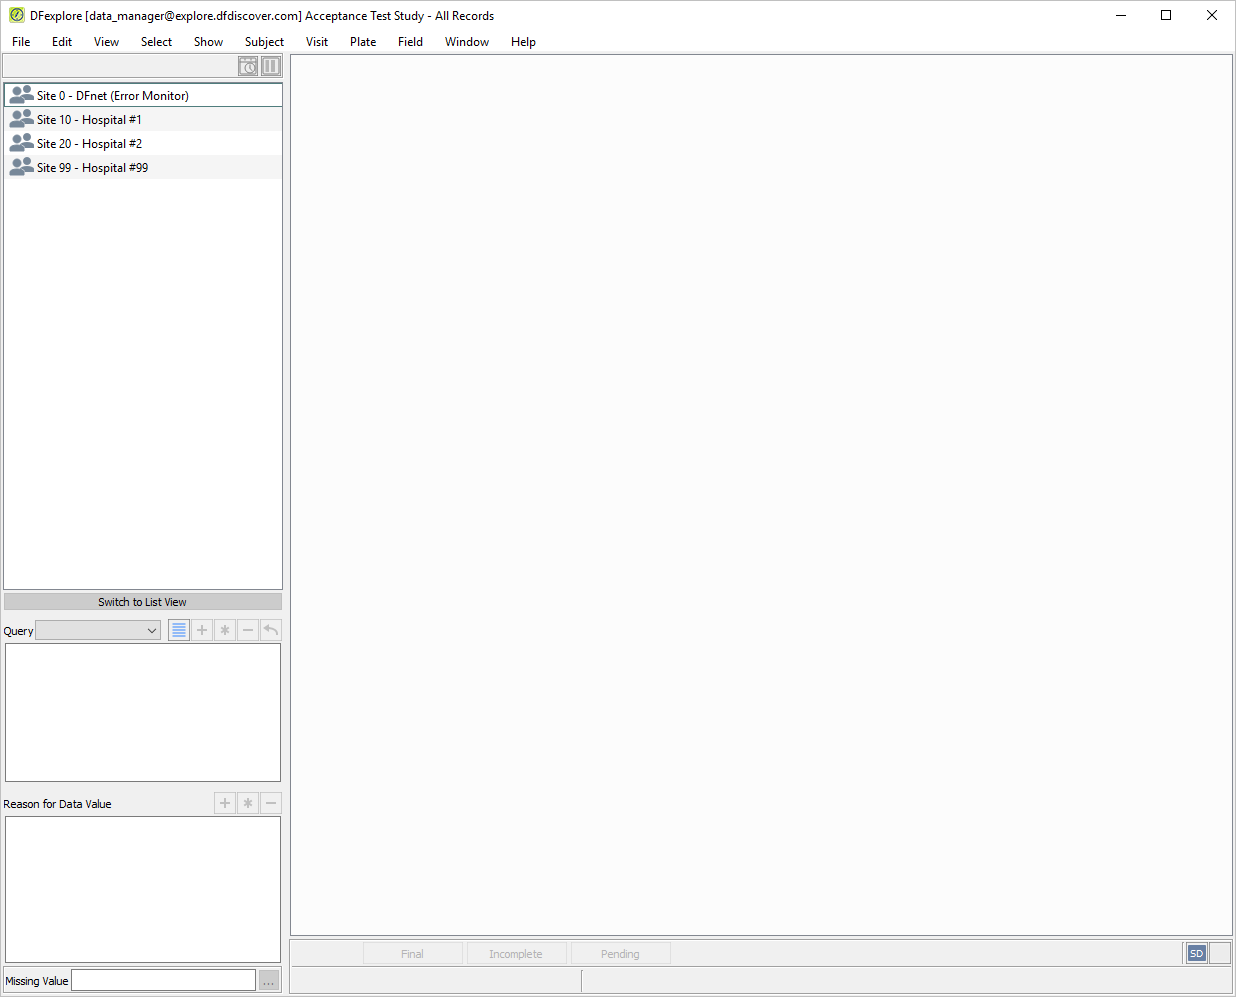
-
Double-click the entry for Site 99 - Hospital #99 in the record list panel. The site opens to display the subject list. The subject list displays all enrolled subjects and the next 5 potential subjects for the site.
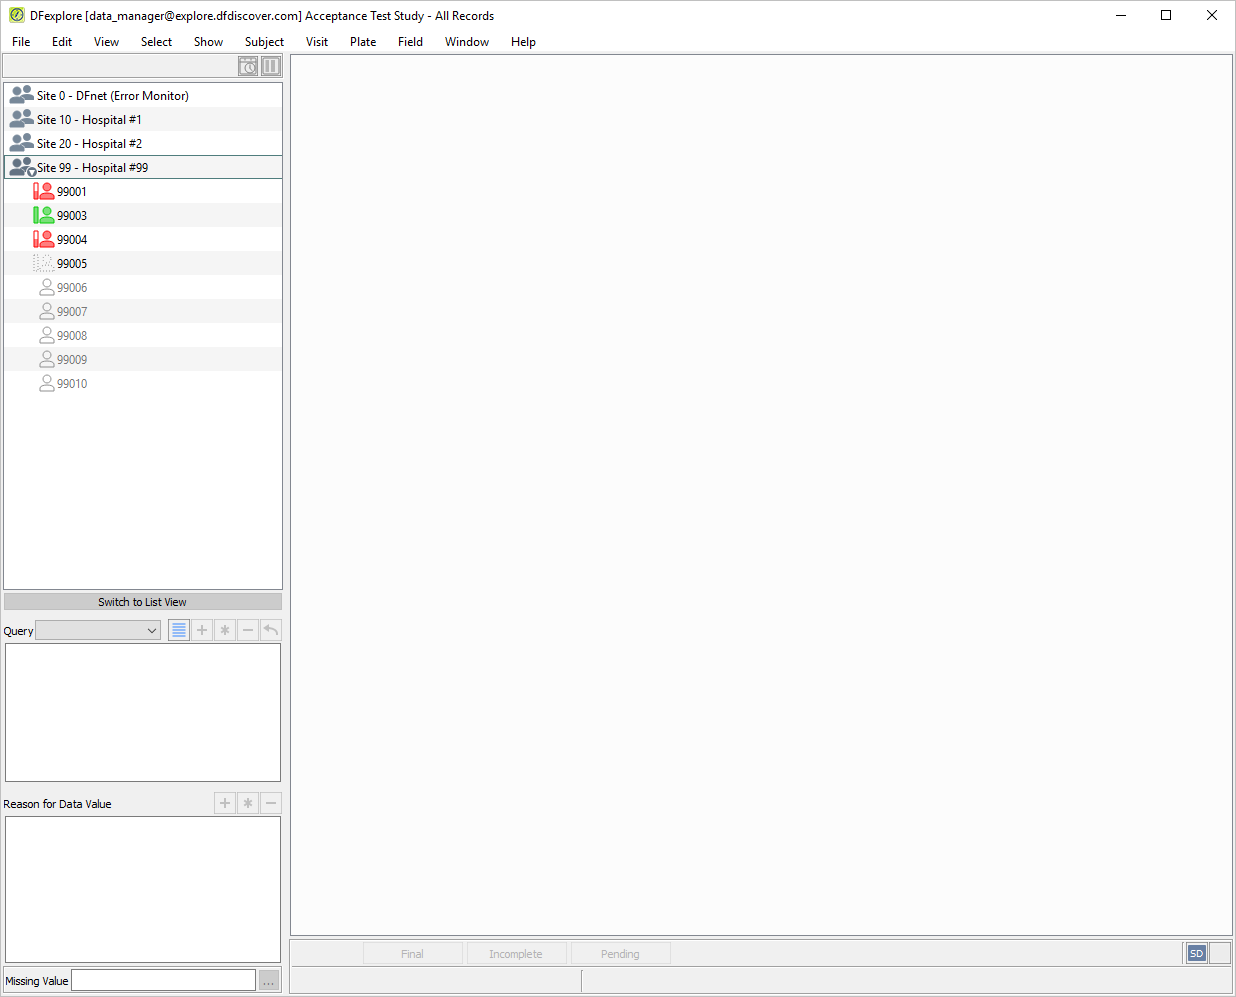
-
Double-click the entry for Subject 99004 to list all visits for that subject. Select > . In the record list panel, locate the 6: Form 6 entry belonging to the 30 : Study Termination visit. Click it to make it the active page in the main data window.
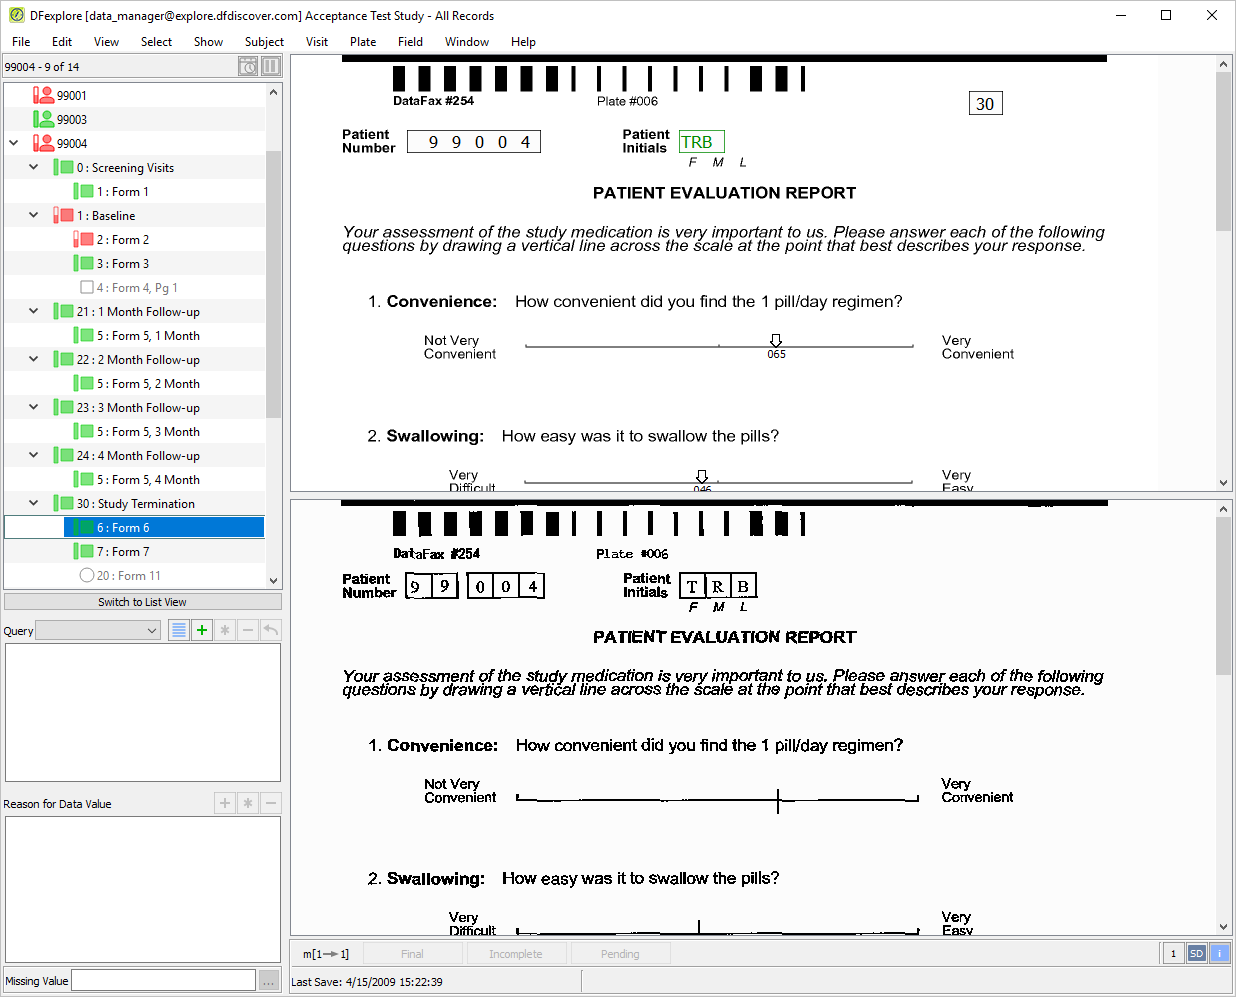
-
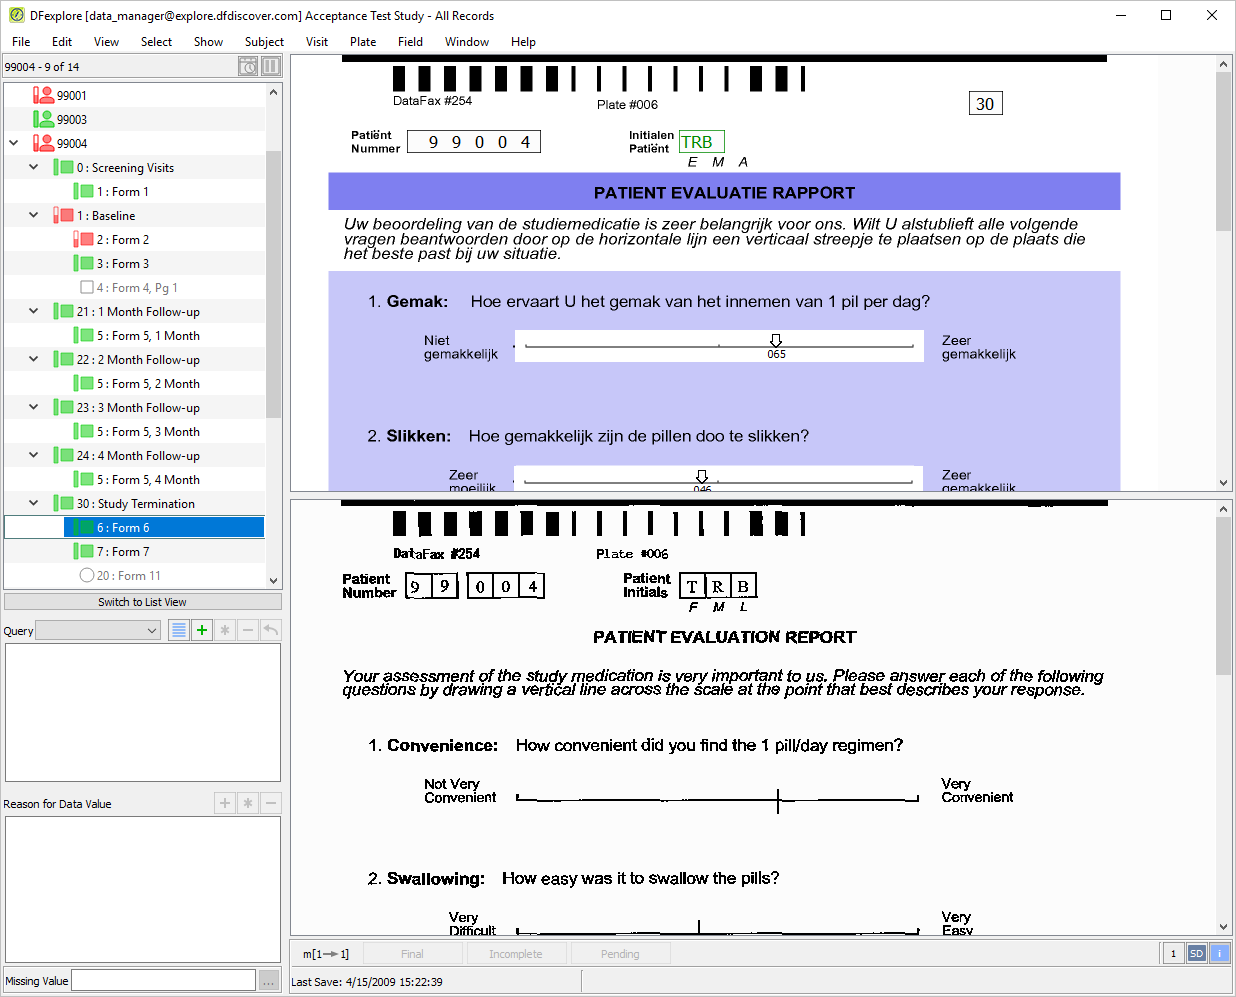
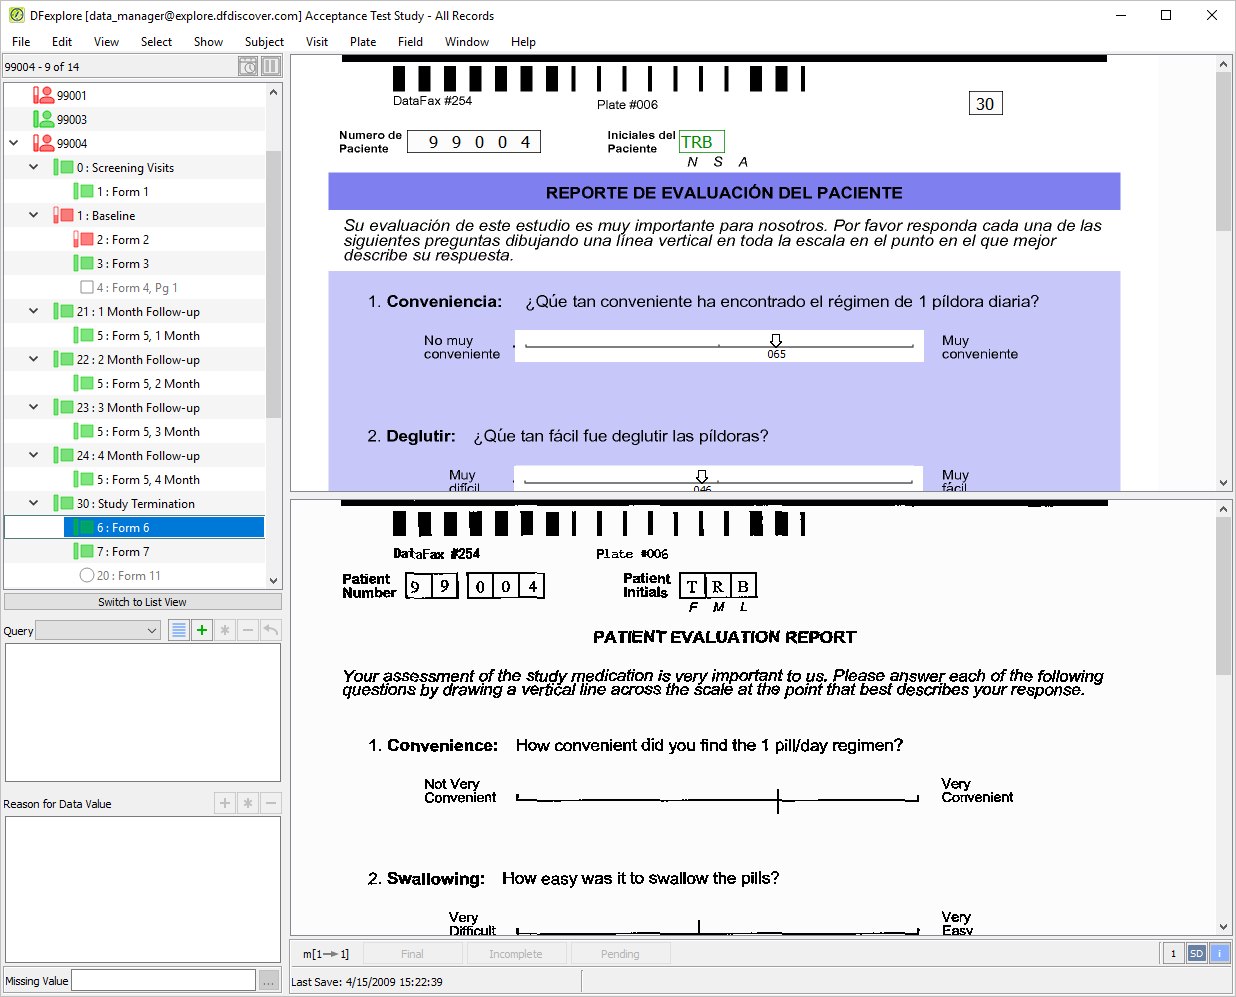
6: Form 6 has been defined in the study setup with colored, multi-language backgrounds as well as the default black/white English background for the data entry screen. Select > . In the Preferences dialog, change:
CRF Type from Default to Dutch
Click to save the preferences and close the dialog. Confirm that the background CRF in the data window has refreshed to the Dutch version.
-
Re-select > . Change the Background Options choice for CRF Type from Dutch to Spanish. Click to apply the preferences and close the dialog.
-
Re-select > . Reset the Background Options for CRF Type to Default. Click to save the preferences and close the dialog.

-
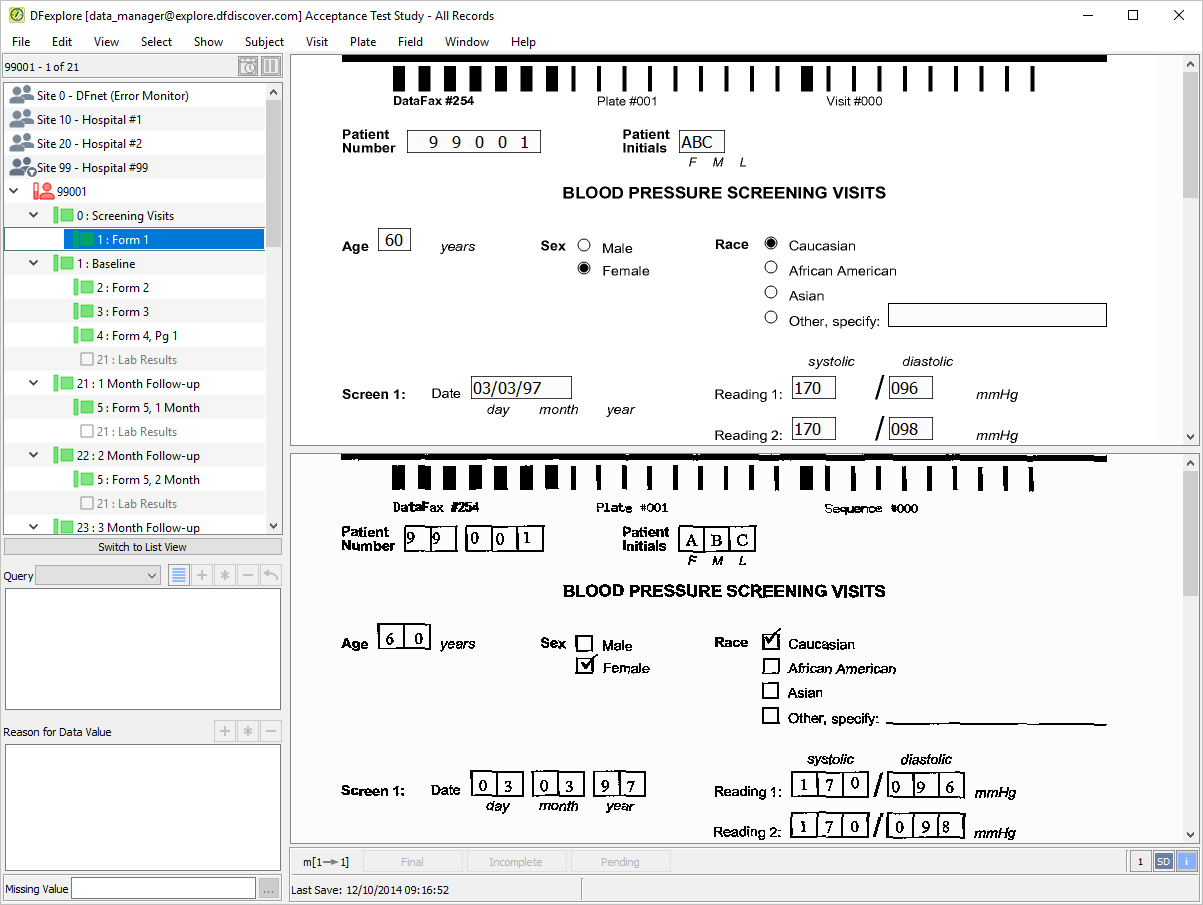
Double-click the entry for 99001. This closes 99004 and opens the list of visits for 99001. Select > to open all visits and pages for subject 99001. In the record list panel, locate 1: Form 1 under 0 : Screening Visits. Click it to open the page in the main data window.
-
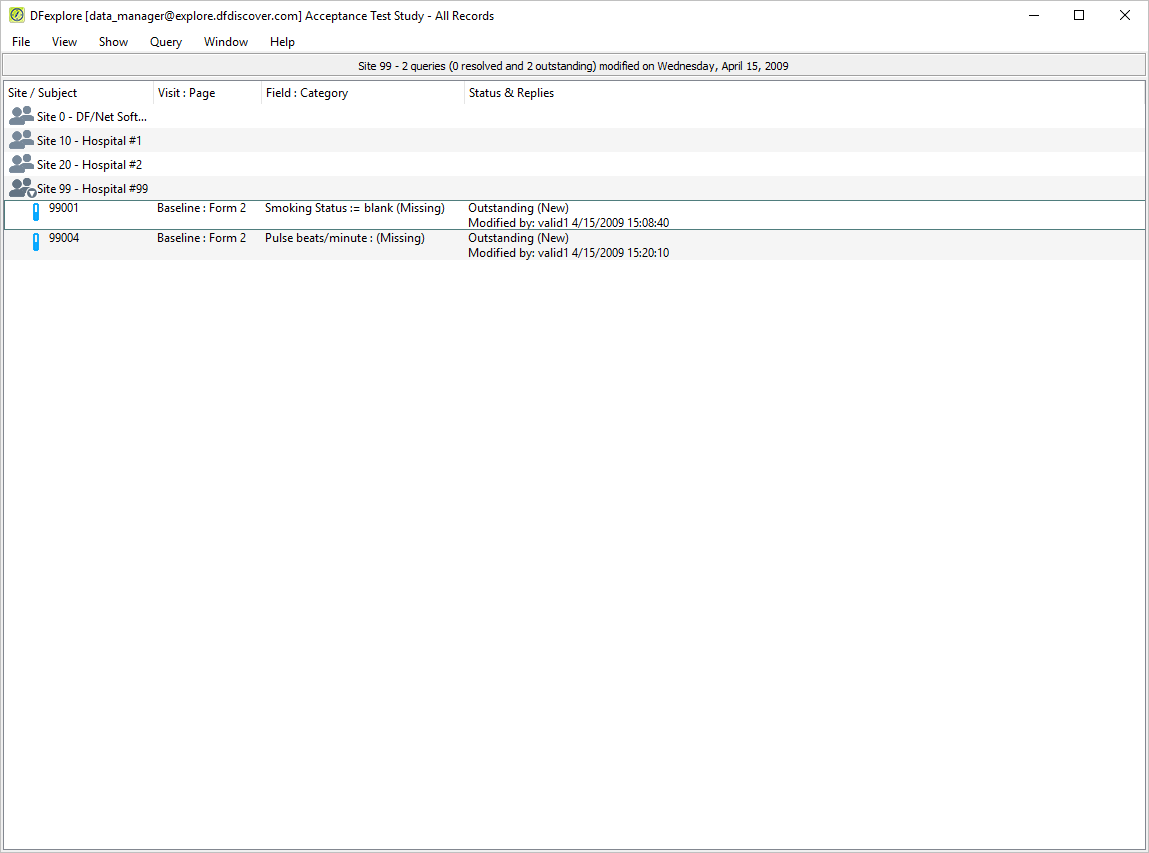
Select > to switch to Queries View. Select > to display all queries for the current subject.
-
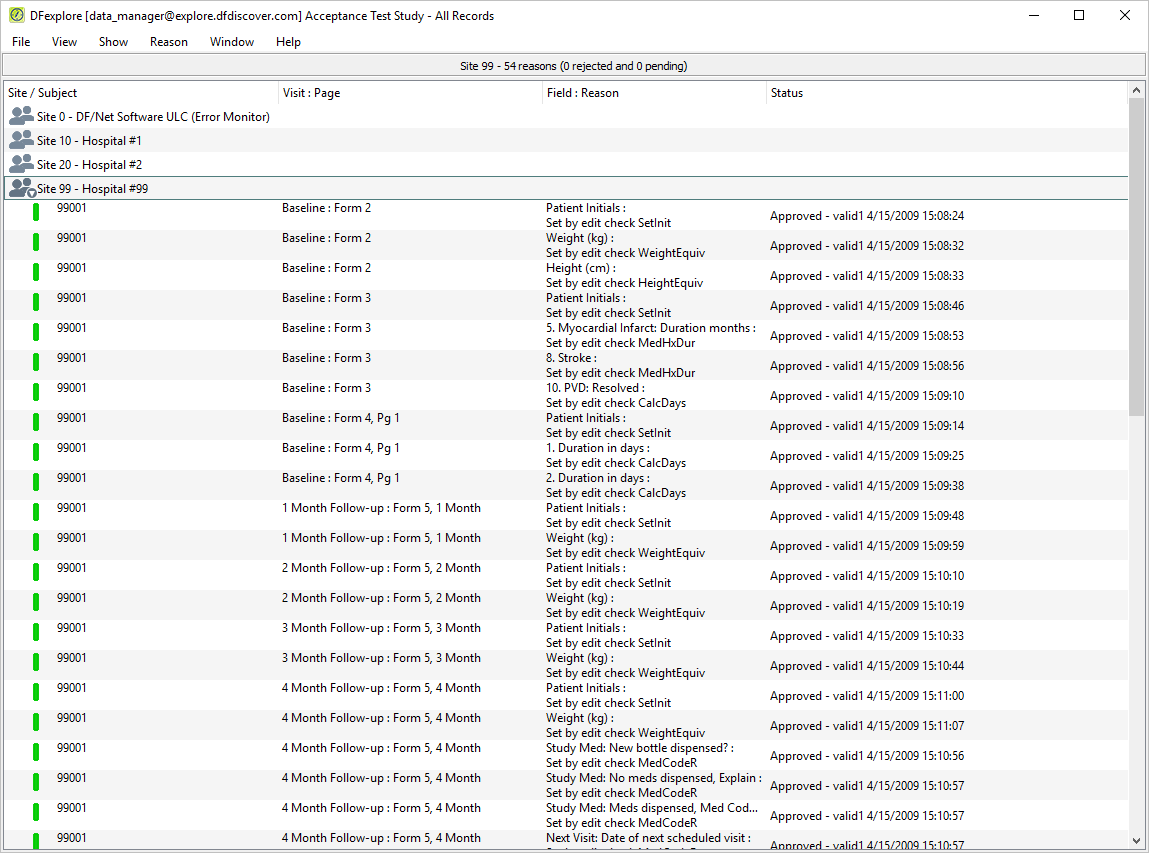
Select > to switch to Reasons View. Select > .
-
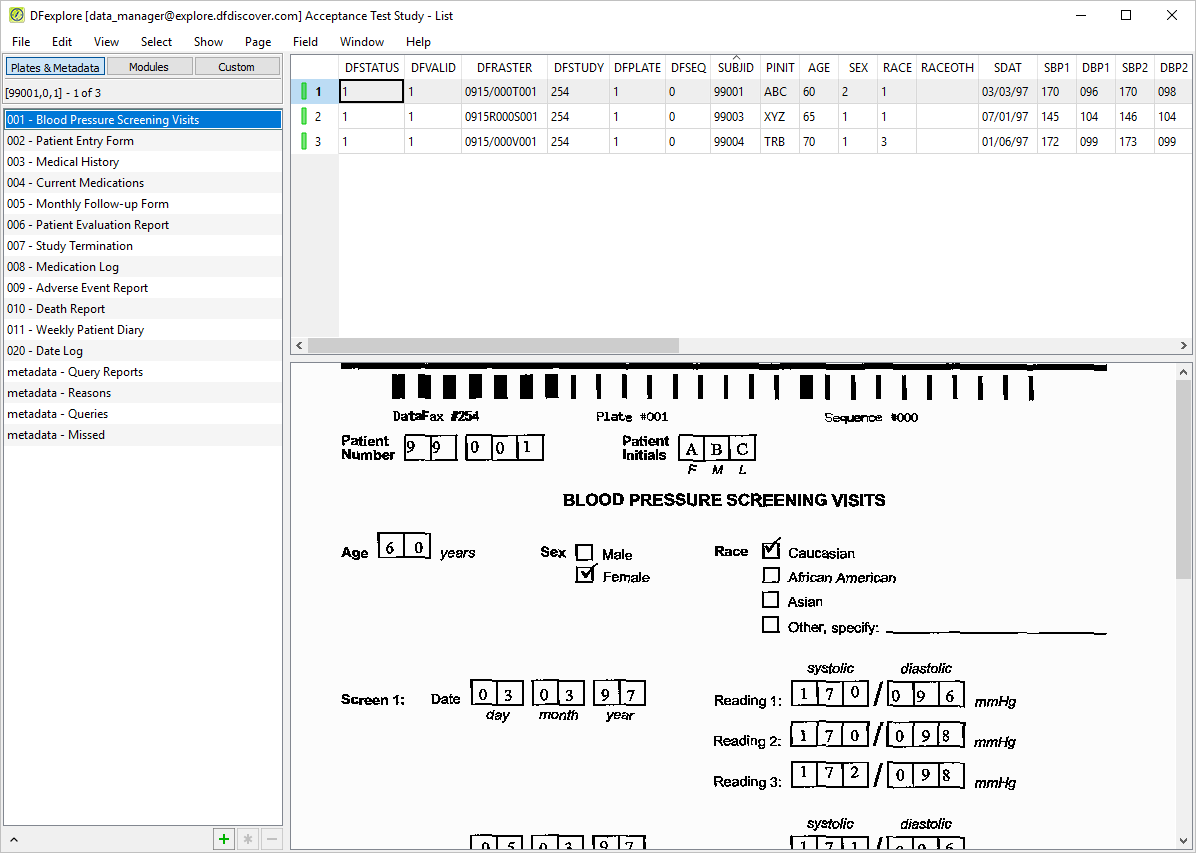
Select > to switch to List View. Confirm that the Plates & Metadata tab is highlighted at the top of the record list panel. Click 001 - Blood Pressure Screening Visits from the list of plates.
-
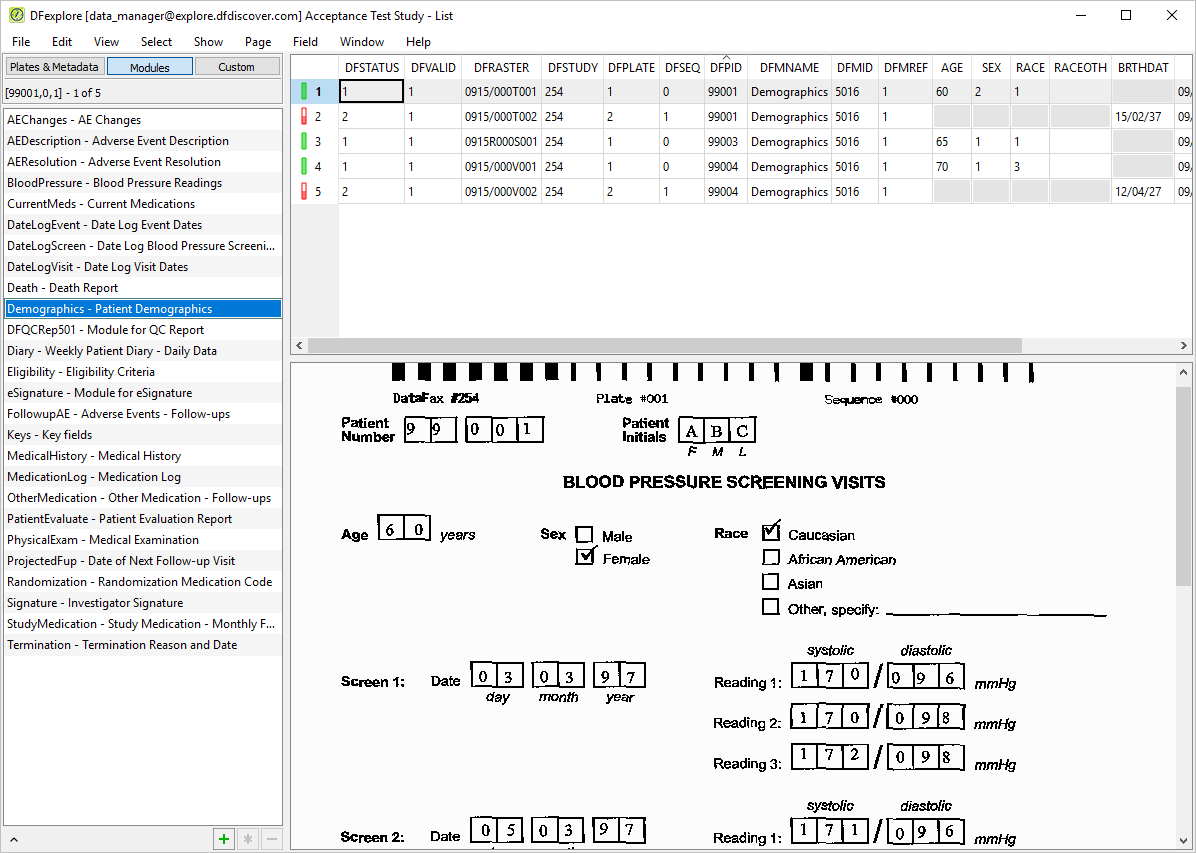
Choose the Modules tab at the top of the list panel to display a list of all modules defined for the study. Click Demographics - Patient Demographics module.
-
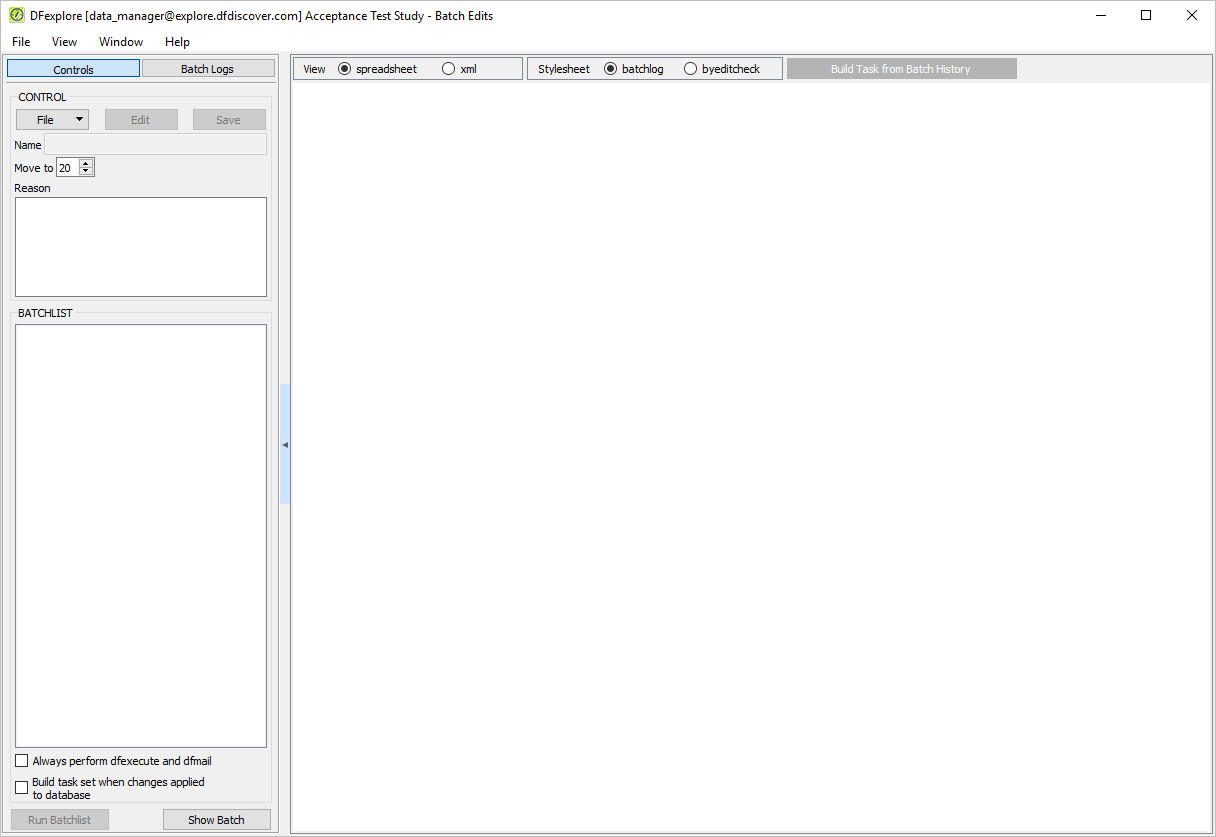
Select > to switch to Batch Edits View.
-
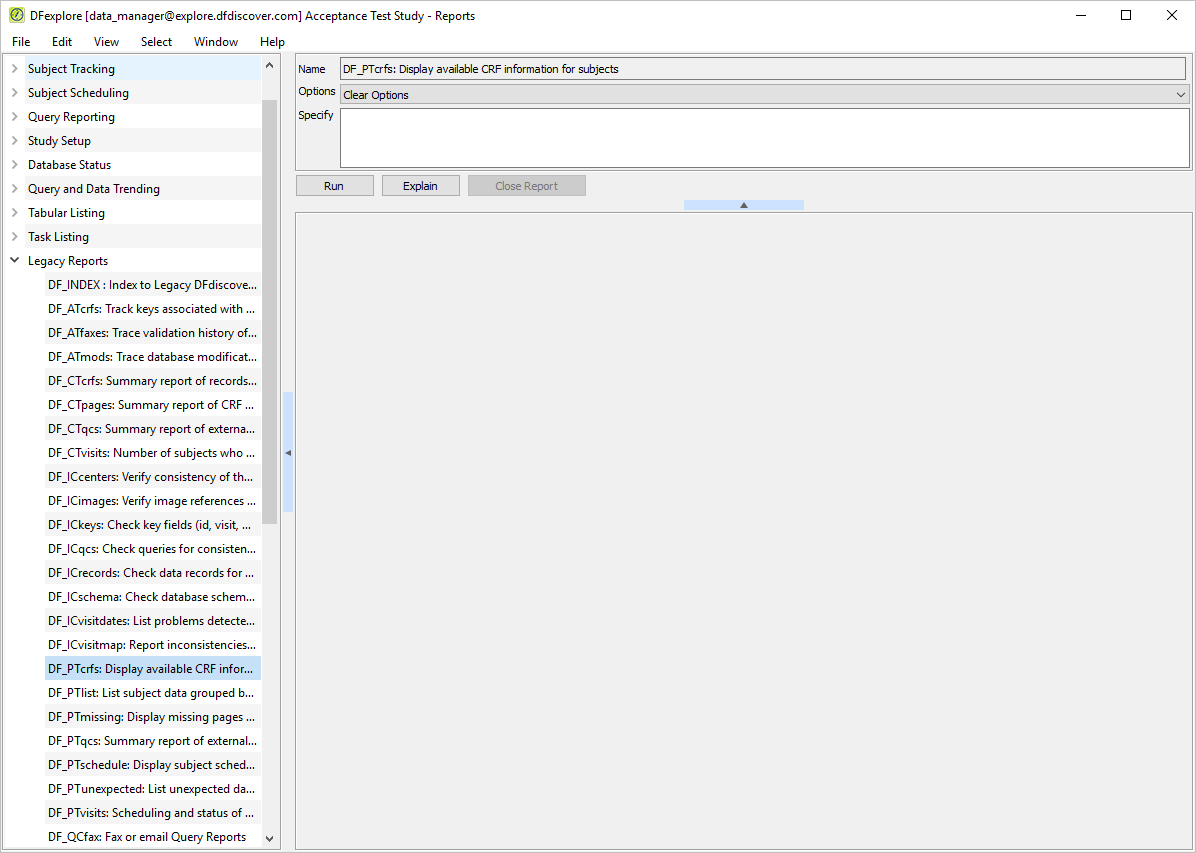
Select > to switch to Reports View. In the reports list panel, double-click DFdiscover Reports followed by Legacy Reports. Highlight the report DF_PTcrfs from the list of Legacy Reports.
-
In the Specify field, enter the report option
-i 99001. Click to run the report for subject 99001. Examine the output displayed in the output window.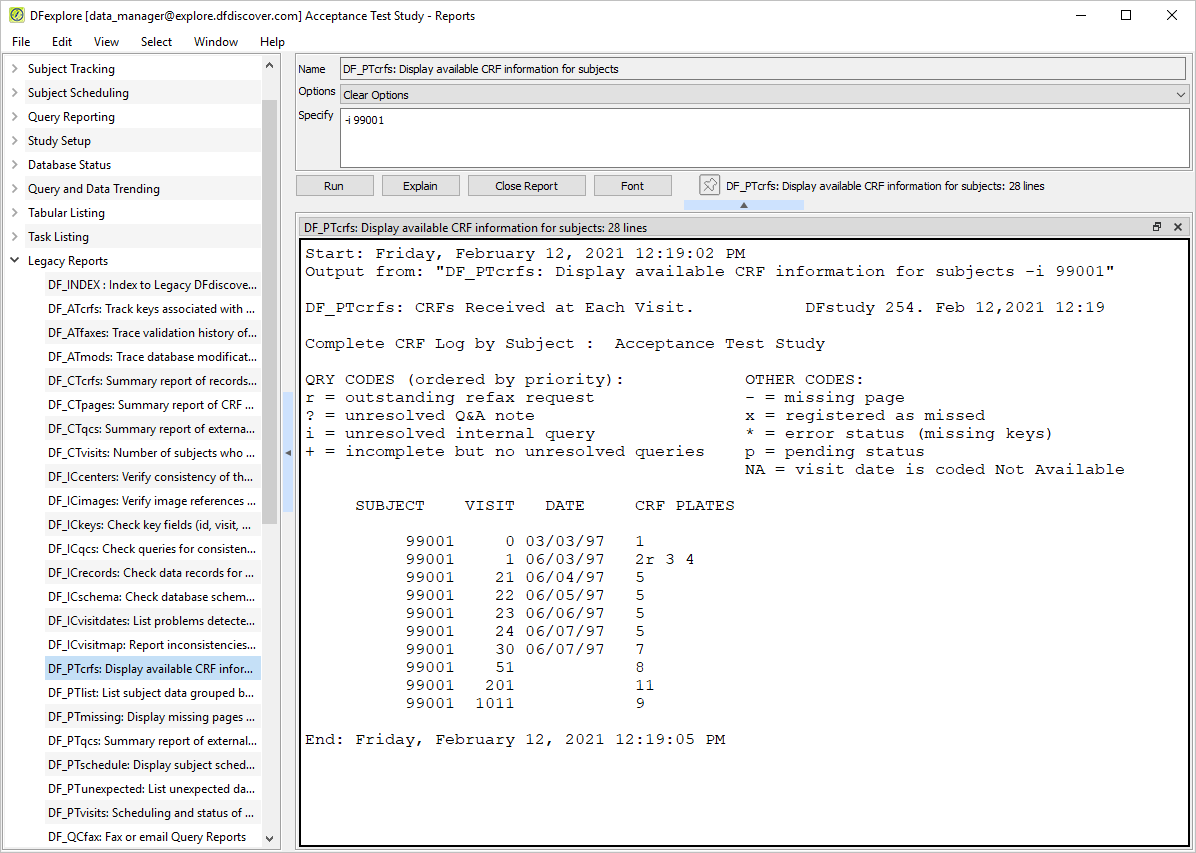
-
Select > to switch to Status View.
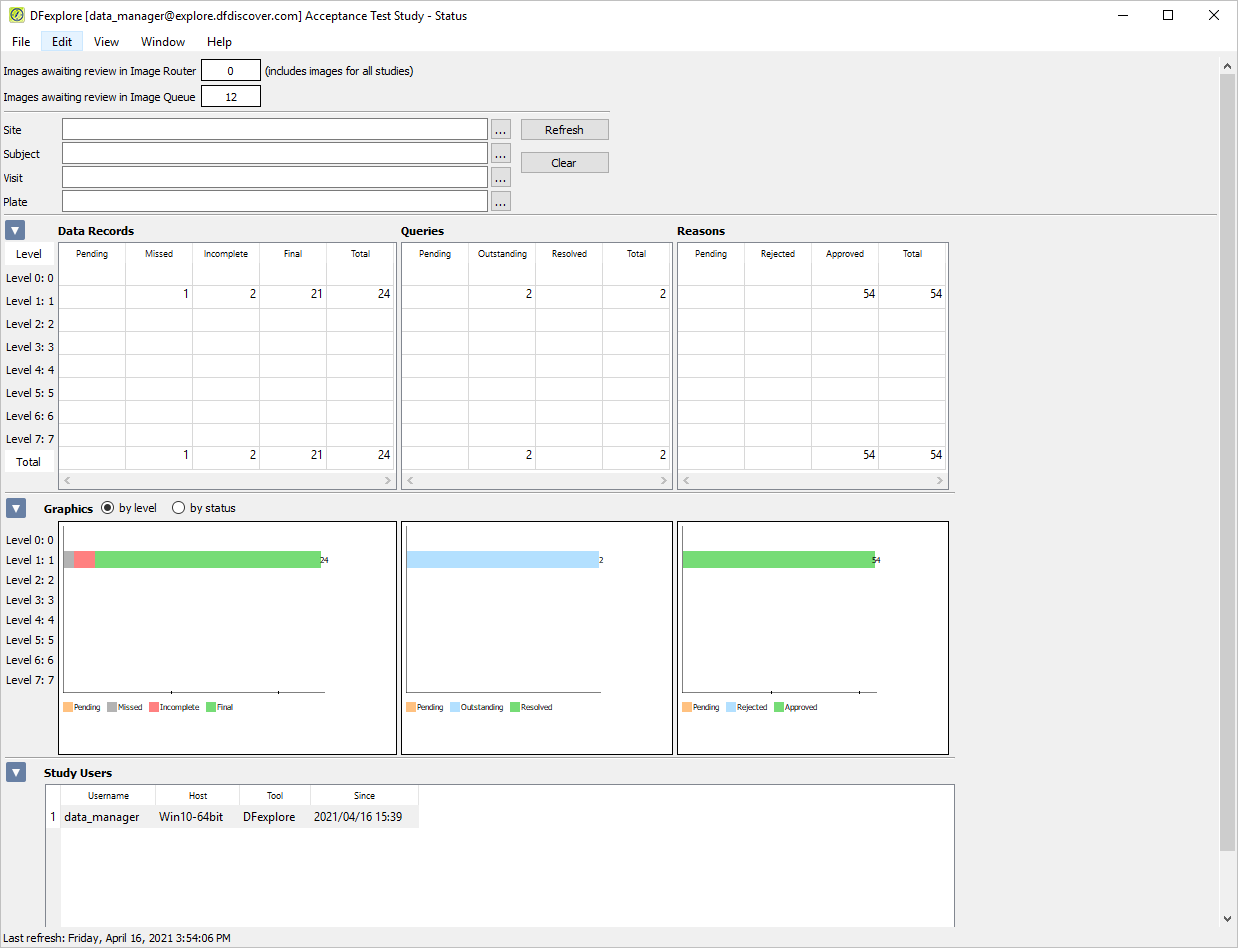
Note Any pages that have been received and which DFdiscover could not identify as study CRFs will be found in the Image Router. As a result, the number of Images awaiting review in Image Router may differ from what is shown here.
-
Select > to display the Dashboard View. Click , select Record status tabular view and Record status chart. Click .
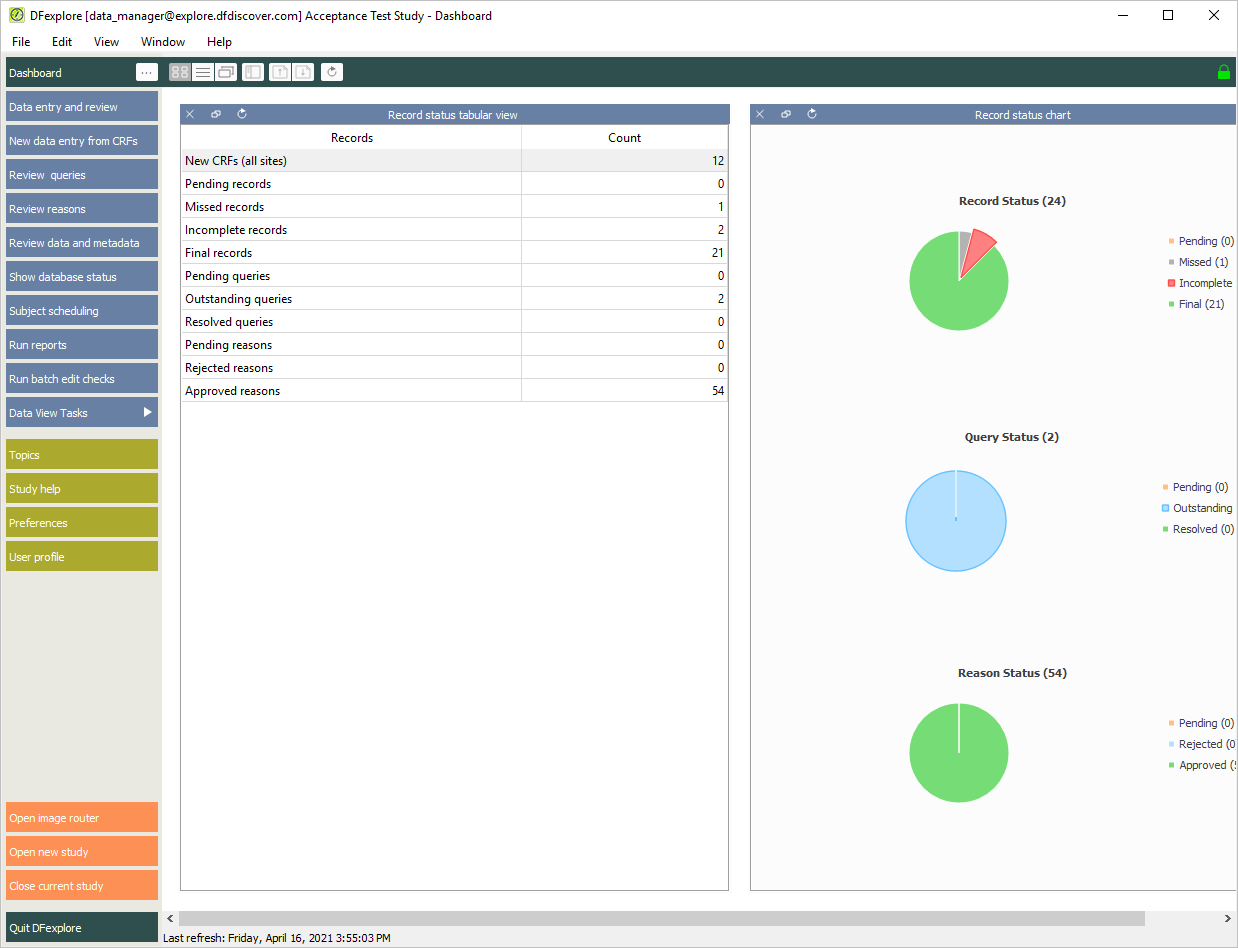
-
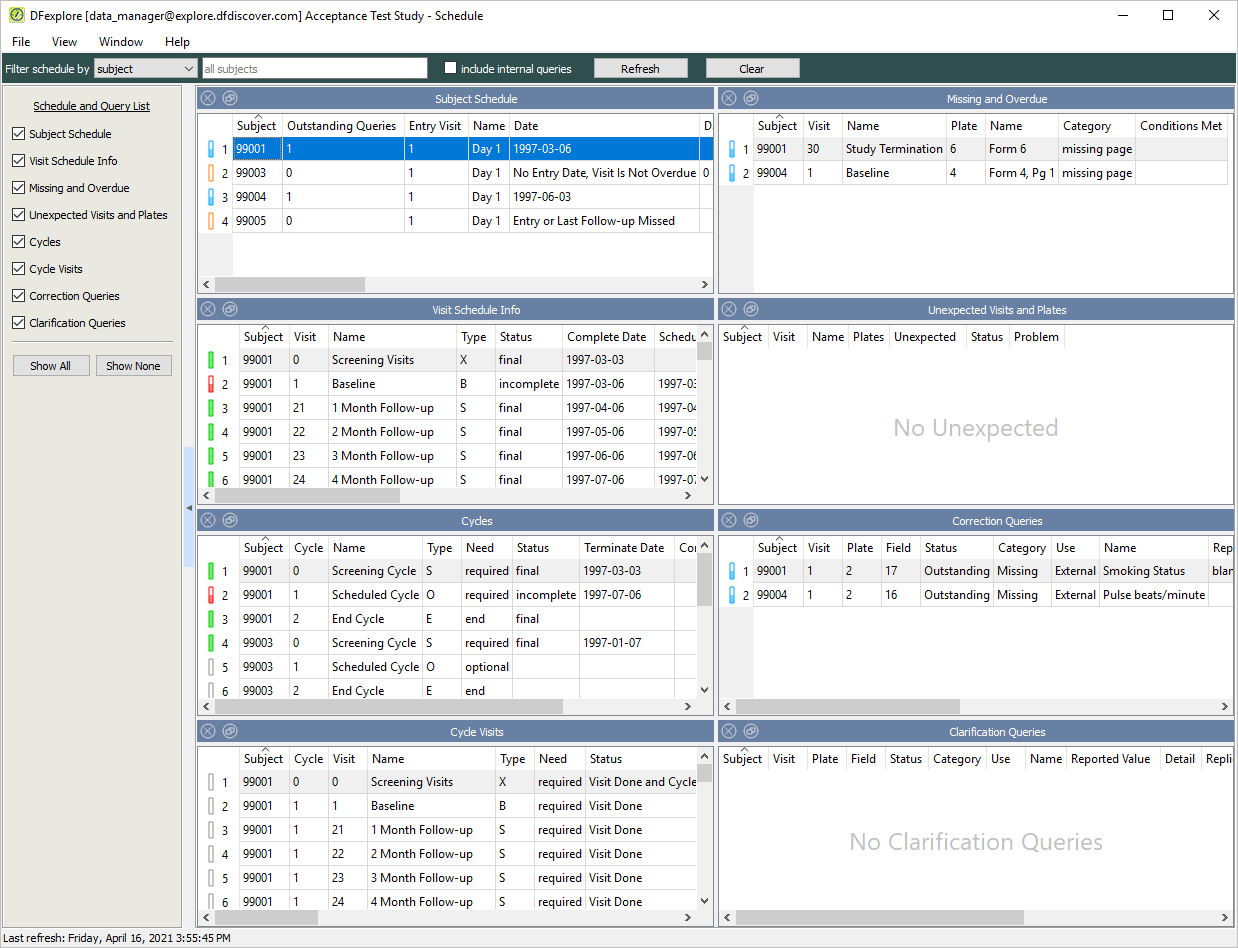
Select > to display the Schedule View. Click to display the scheduling information.
-
Start DFsetup, login as
data_manageras described in Section 1.8, “How to start DFsetup”. -
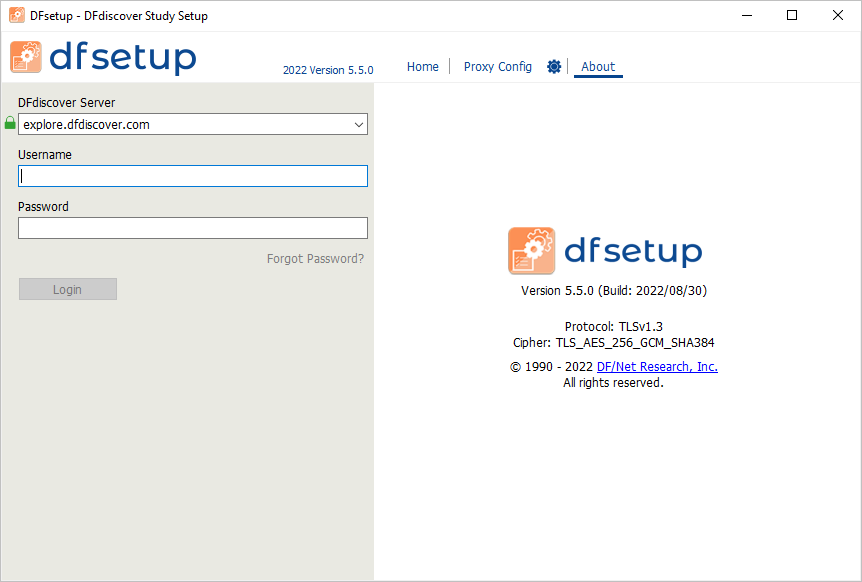
In the login dialog, click . Confirm that the version information in the dialog matches the installed software Version 5.5.X.
-
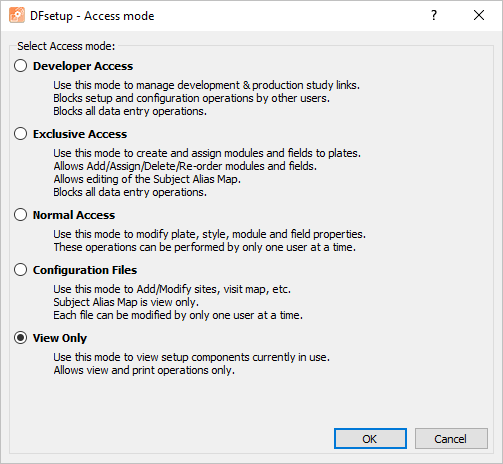
Choose 254 Acceptance Test Study, select View Only and click to continue. The main DFsetup window opens.
-
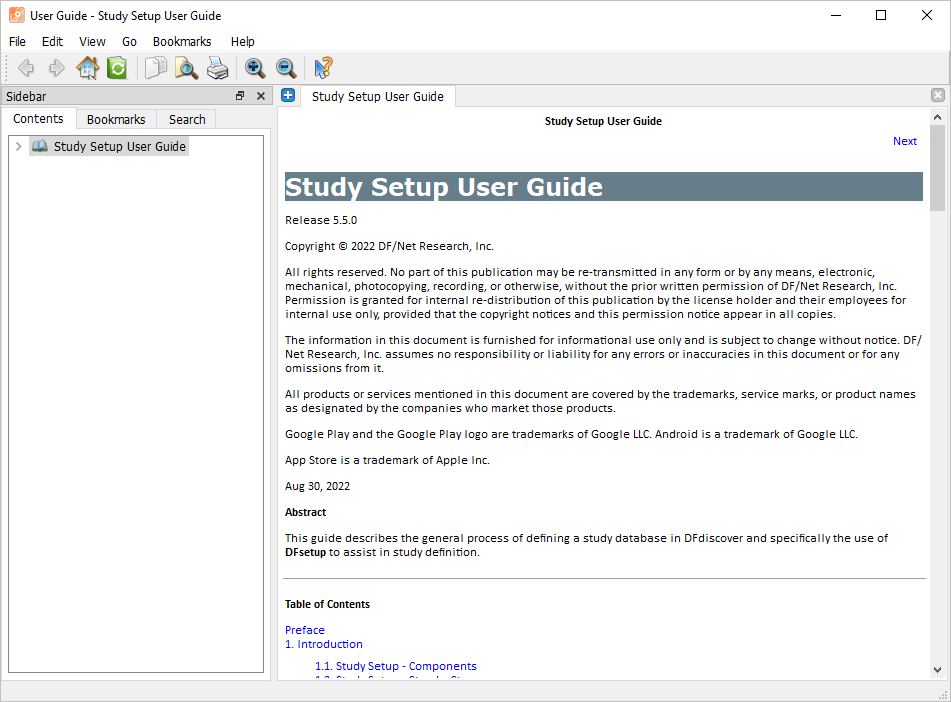
Select > to access the documentation. In the documentation window, confirm the documentation version number. Select > to dismiss the documentation window.
-
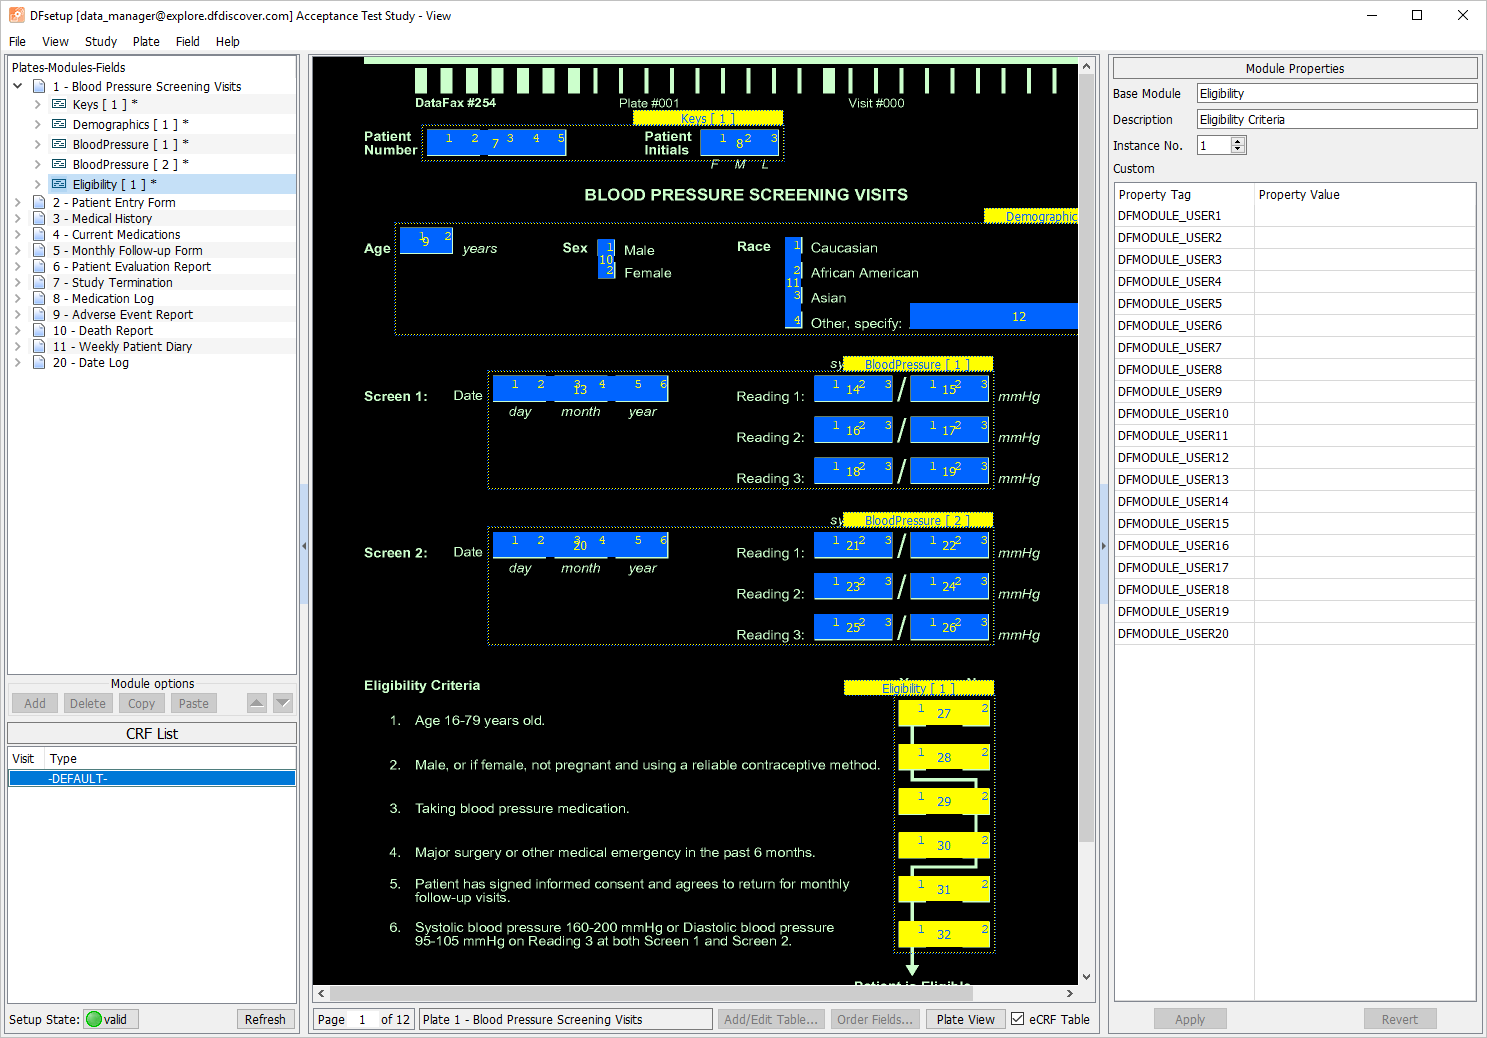
Select any plate entry in the Plates-Modules-Fields list panel to make that plate the active plate. The main window is refreshed with the CRF view of the plate definition, which includes widgets for all modules and fields. Click any field widget on the current plate to make that field the active field.
Note DFsetup remembers the last active plate from your previous DFsetup session so your main DFsetup window may display a different plate as the active plate.
-
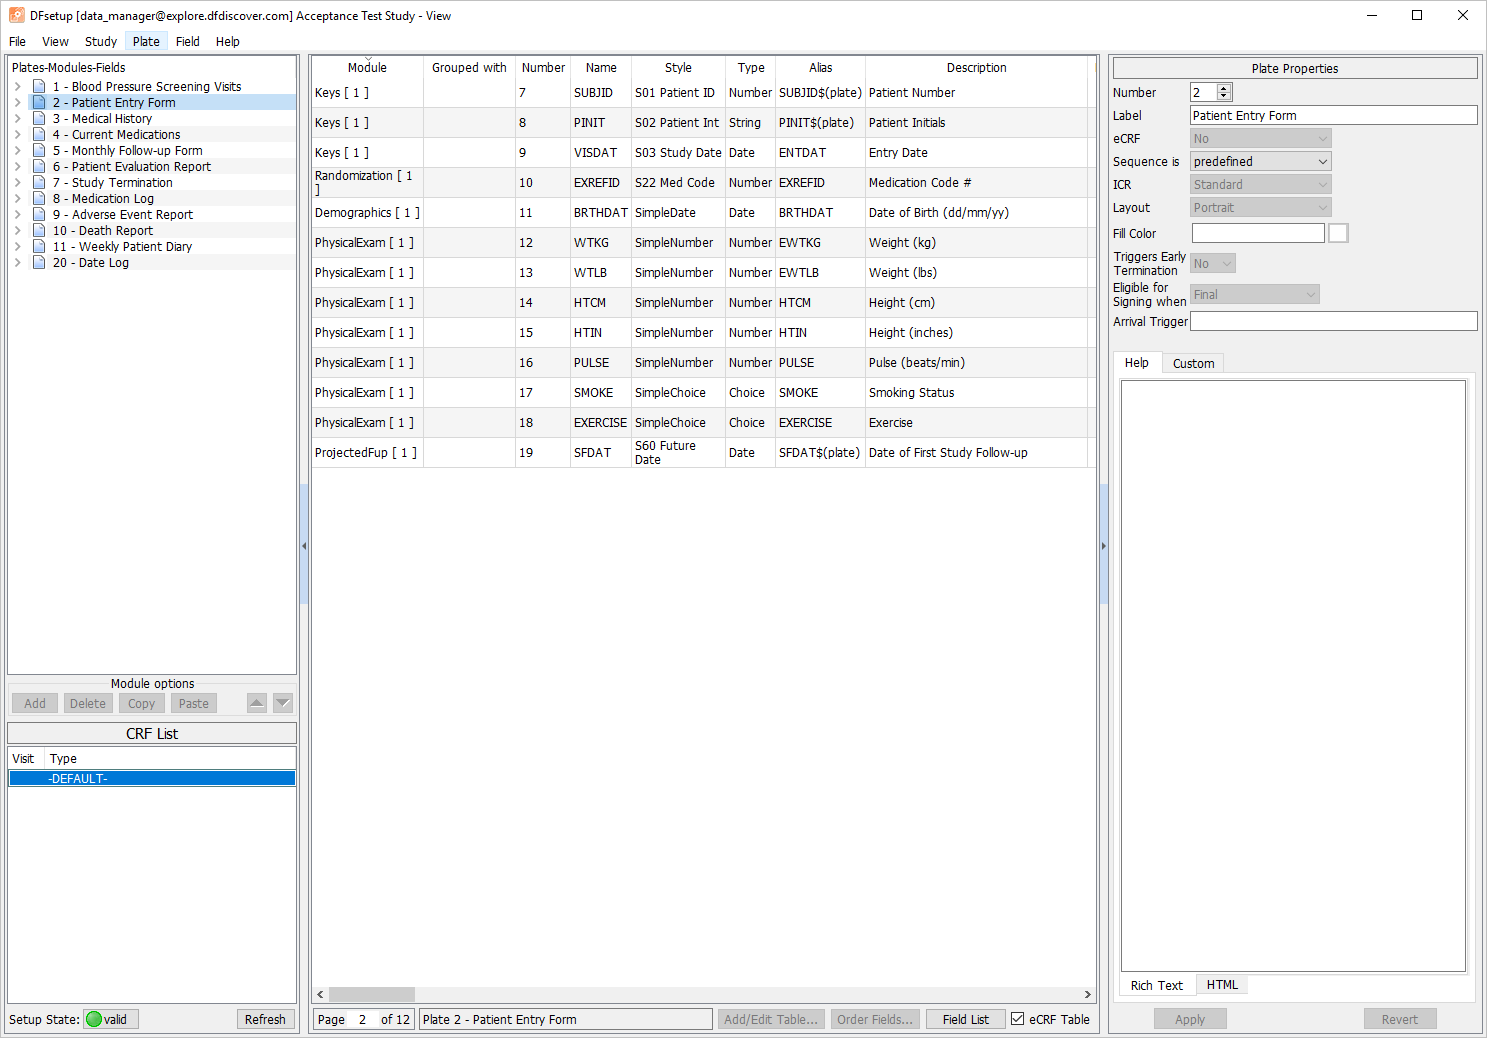
Select the 2 - Patient Entry Form entry from the list panel to make plate 2 the active plate. Click > to replace the Plate view with a listing of all plate 2 fields and their properties. Click > to return to the Plate view of plate 2.
-
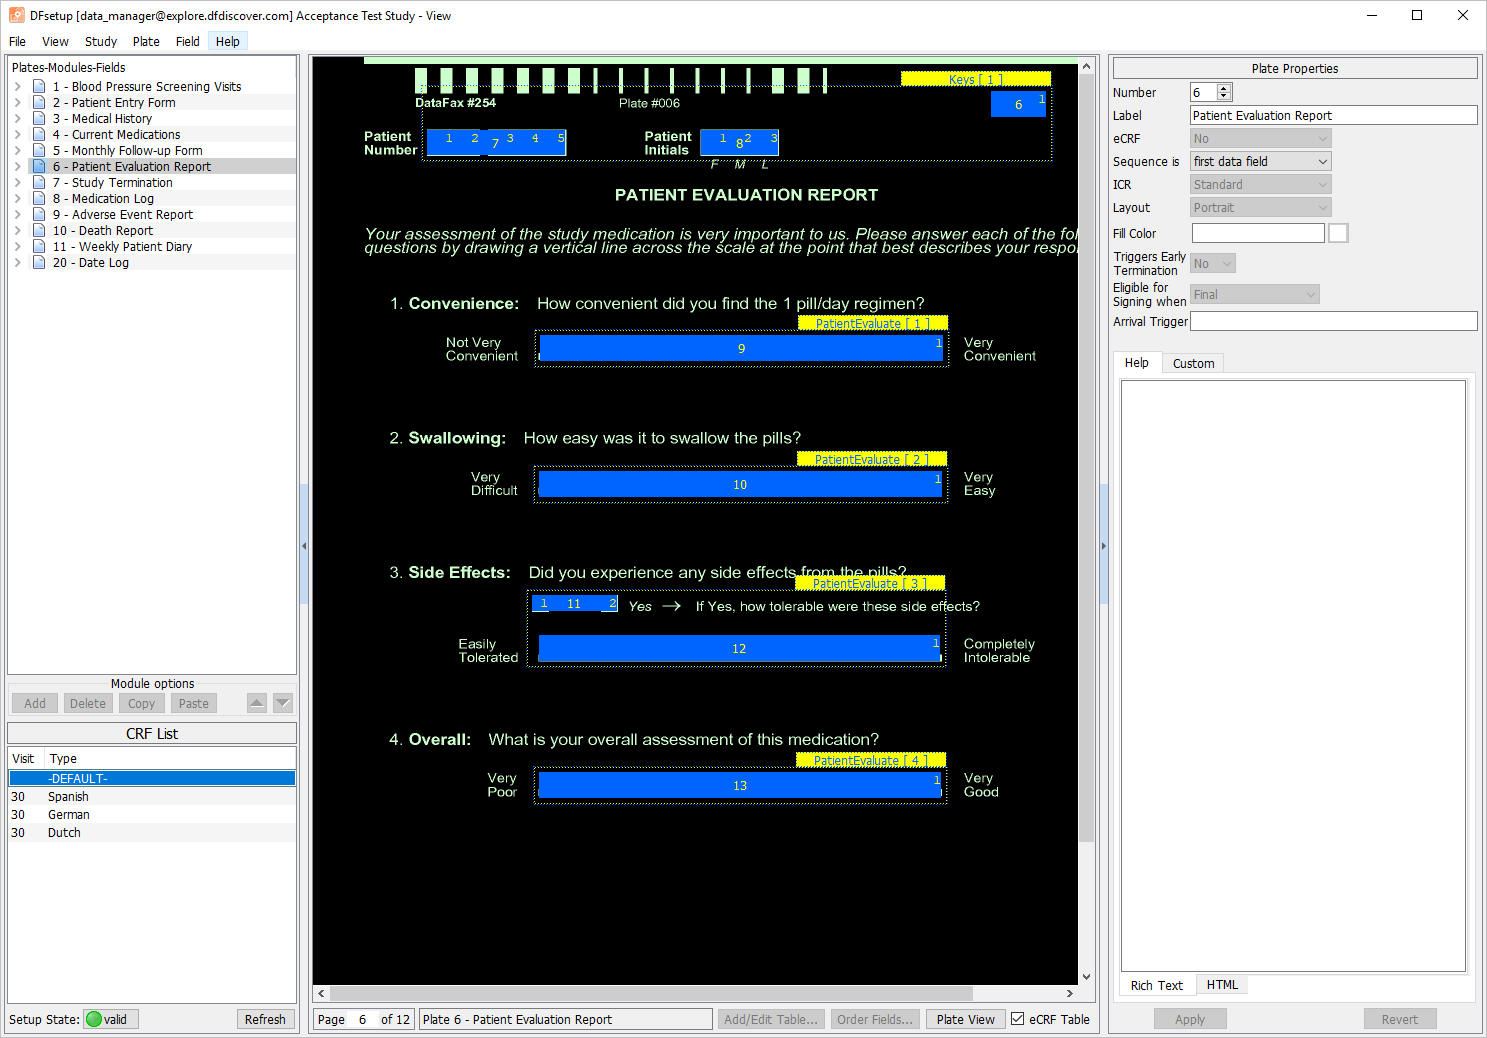
Select the entry for 6 - Patient Evaluation Report from the list panel to make plate 6 the active plate. Examine the CRF List panel displayed in the bottom-left of the screen. Each entry represents a unique multi-language color background associated with plate 6. This study database has been defined to include colored, multi-language CRF backgrounds for plate 6, with the default background being black/white English. The default English background and some of these multi-language backgrounds were accessed previously in Section 2.5, “Open the Acceptance Test Study and verify the standard DFexplore views.”.
-
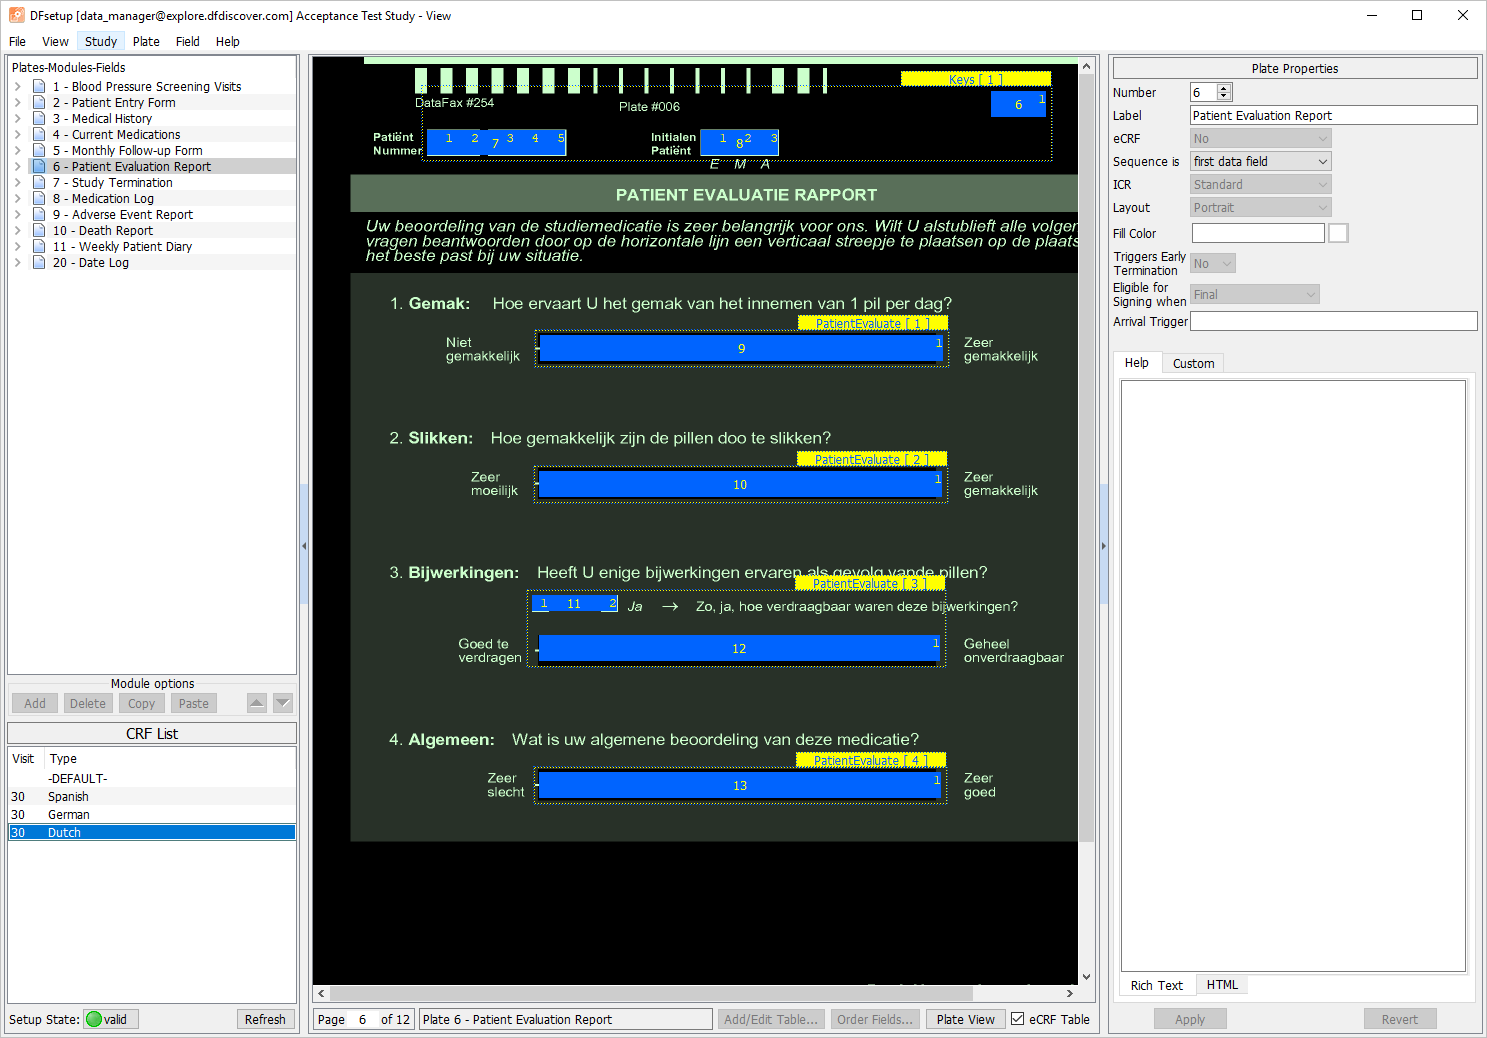
From the CRF List panel, choose the entry 30 Dutch.
-
Select > . In the Preferences dialog, choose Color for Background Color. Click to close the Preferences dialog.
-
From the CRF List panel, choose the entry 30 Spanish.
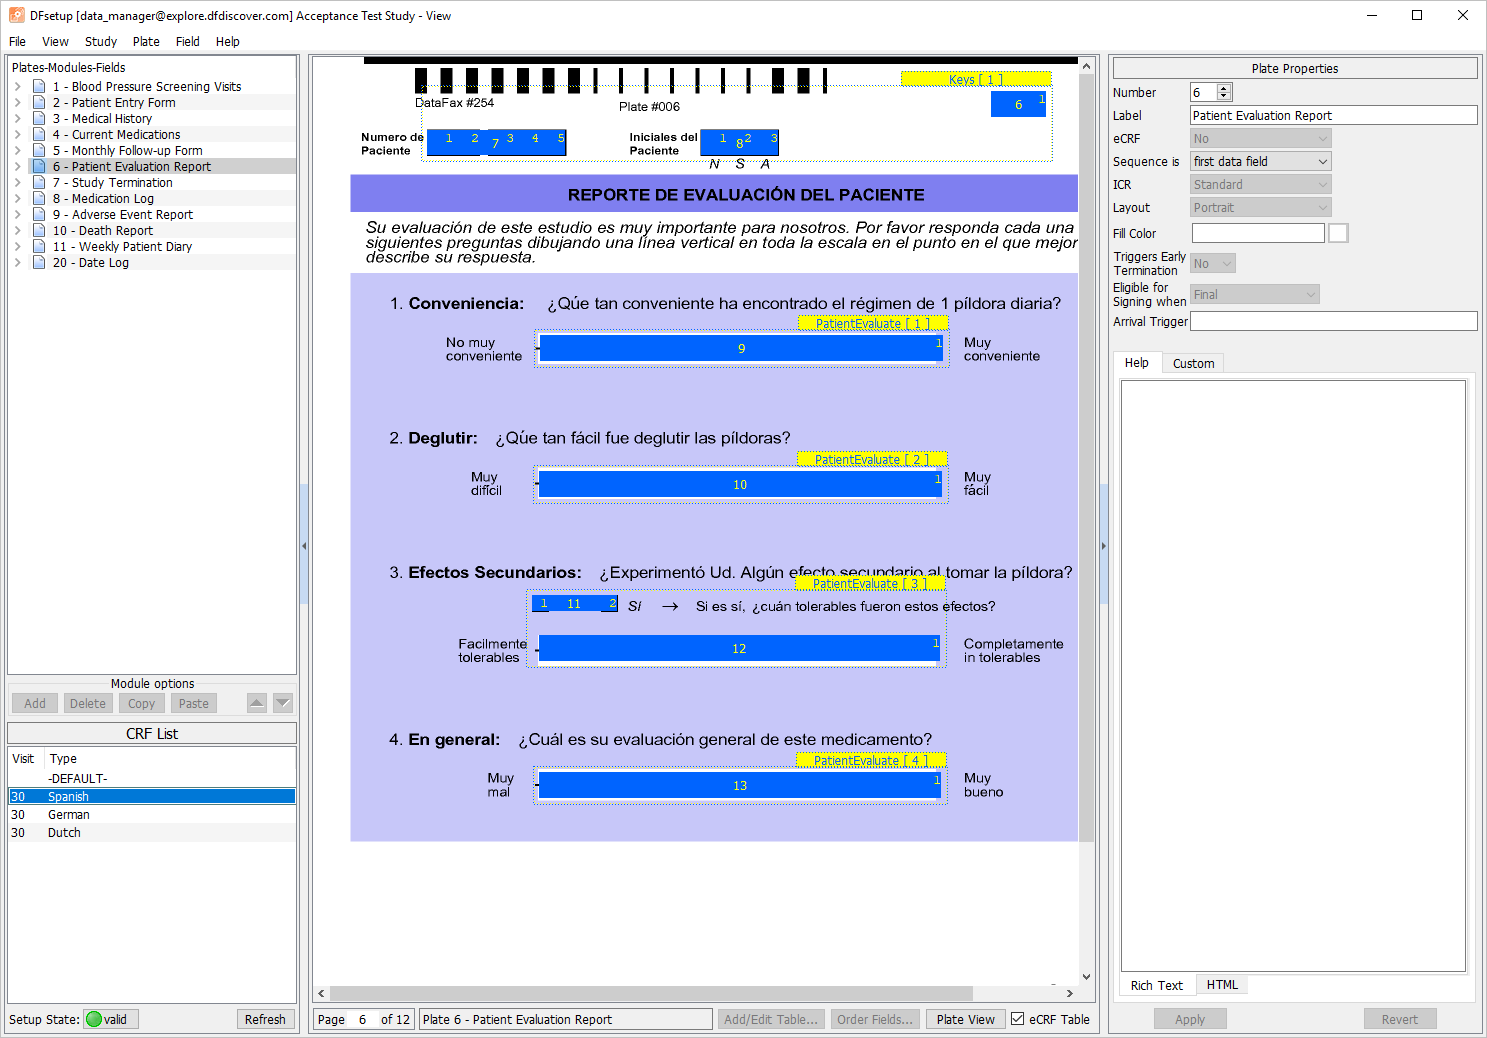
-
Return to the default (English) CRF background for plate 6 by choosing DEFAULT in the CRF List panel.
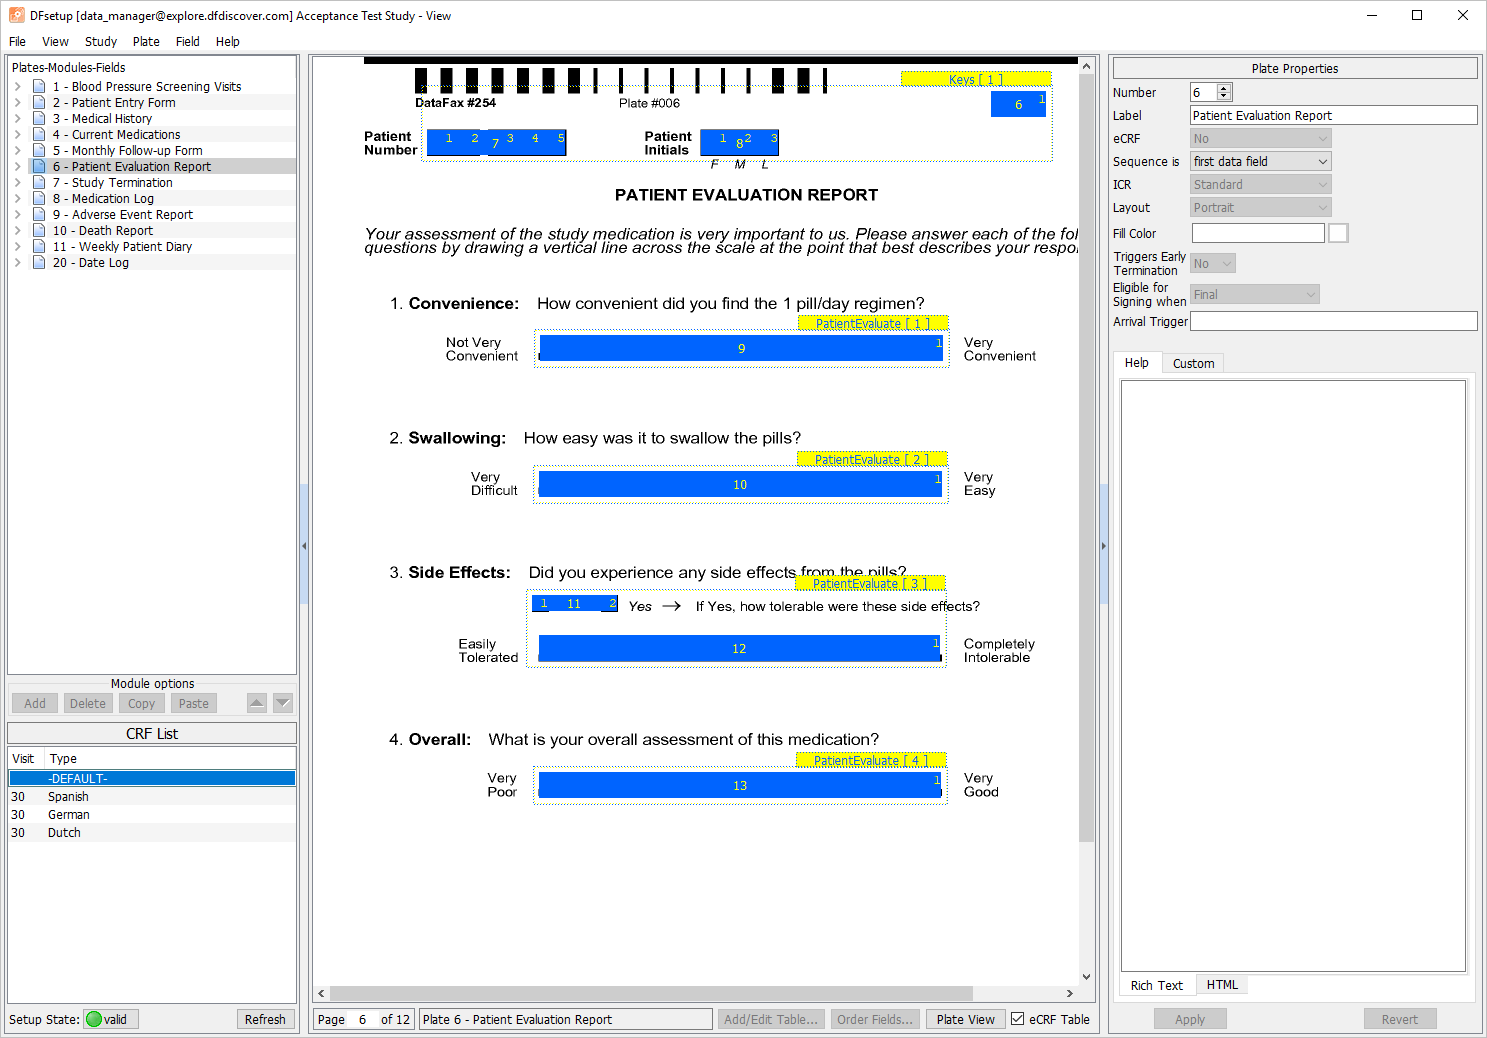
-
Select > to open the Sites editor. Review the contents.
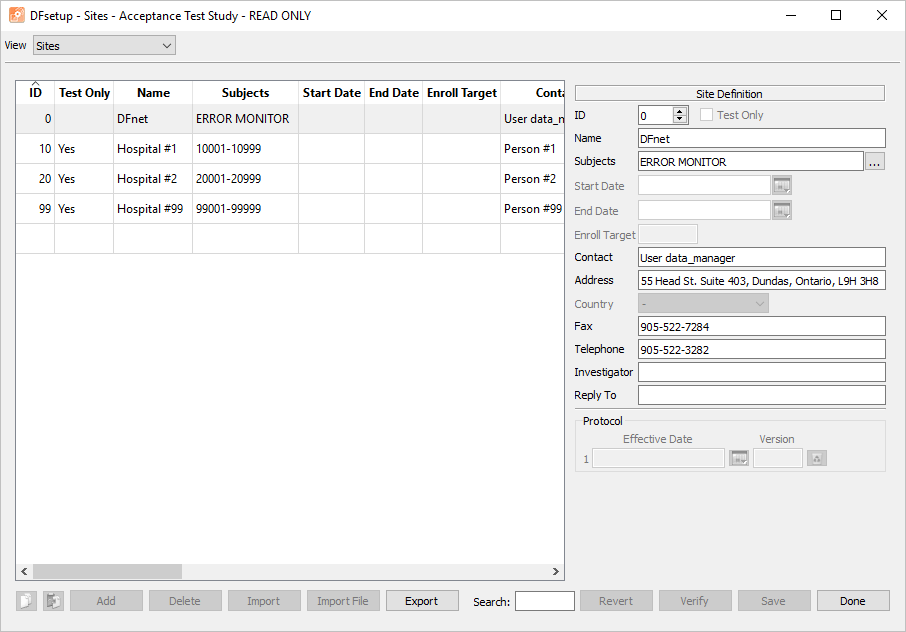
-
Select > to open the Visit Map editor. Visually confirm that the expected contents are displayed. Click to close the editor.
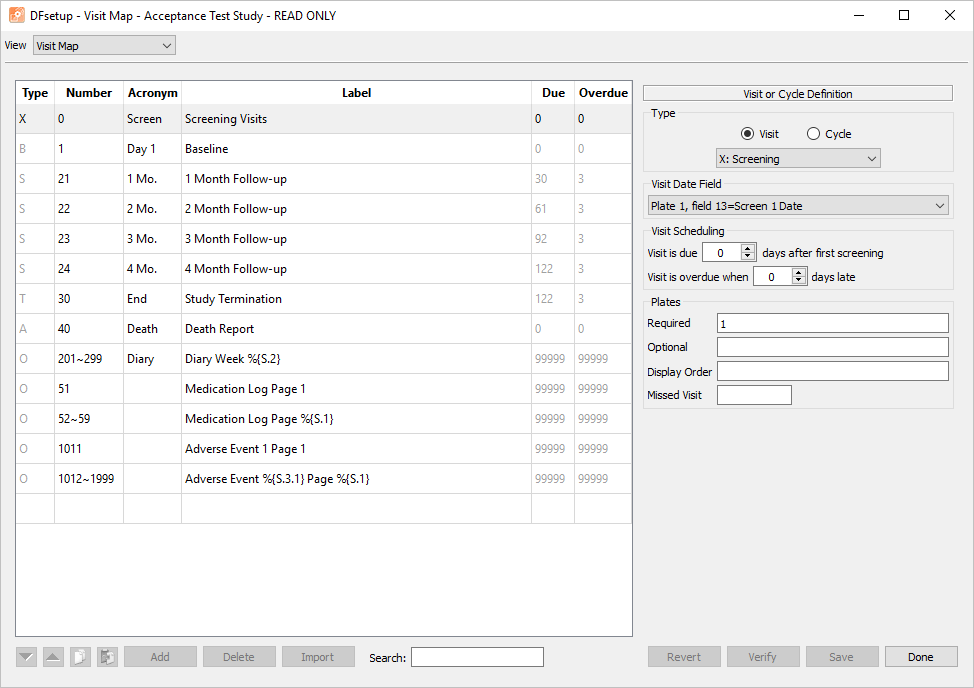
Table of Contents
- 3.1. Tests & Requirements
- 3.2. Begin Module 3. Study Setup.
- 3.3. Permitted users can gain exclusive access to DFsetup to modify a study setup.
- 3.4. Define Global study preferences and apply settings to DFsetup.
- 3.5. Create and modify a new style (Comment).
- 3.6. Create and modify a new module (Death).
- 3.7. Assign Field definitions to a newly created module.
- 3.8. Assign a module's field definitions to a plate.
- 3.9. Correct field ordering on the current plate to set field traversal order for data entry.
- 3.10. Use copy and paste to create repeating module and field references on a plate.
- 3.11. Create user-defined query category codes.
- 3.12. Submit a copy of the newly defined Plate 11 into the study database and retrieve the page in DFexplore Image View.
- 3.13. Enter and save all data on the submitted plate 11.
- 3.14. End Module 3. Study Setup.
Permitted users can gain exclusive access to DFsetup to modify a study setup.
Define Global study preferences and apply settings to DFsetup.
Create and modify a new style (Comment).
Create and modify a new module (Death).
Assign Field definitions to a newly created module.
Assign a module's field definitions to a plate.
Correct field ordering on the current plate to set field traversal order for data entry.
Use copy and paste to create repeating module and field references on a plate.
Create user-defined query category codes.
Submit a copy of the newly defined Plate 11 into the study database and retrieve the page in DFexplore Image View.
Enter and save all data on the submitted plate 11.
Estimate of Time Required: 20 Minutes
-
Start DFATK as described in Module 1 (Installation & Initialization).
-
Click followed by to begin this module.
-
This module requires user
data_managerto have exclusive access to the 254 Acceptance Test Study database, the Control Panel must be closed. Click . -
Start DFsetup, login as
data_managerand choose 254 Acceptance Test Study as described in Section 1.8, “How to start DFsetup”. Choose Exclusive Access and click . Exclusive Access allows you to create and modify plates, styles and fields, and to define all setup configuration files.
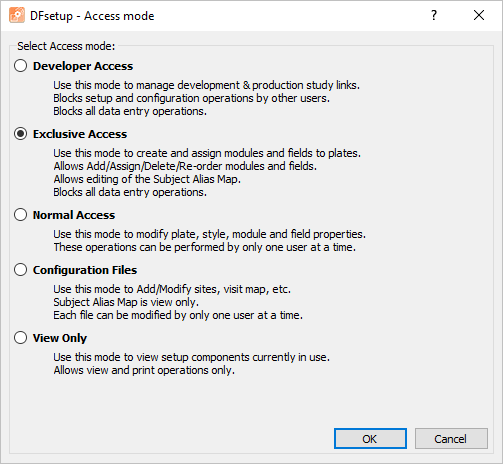
-
Select > to open the Preferences dialog. Set:
Exit after __ minutes of inactivity = 5
Background Color = Color
Click to save and close the dialog.
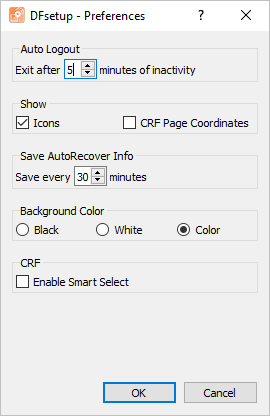
-
Select > to open the Global Settings dialog. Click Global tab. Confirm that:
Study launched in the year = 1990
Reasons for data change are required = per field
Show next __ New Subject binders = 5
Check (enable) Enable New Subject creation
Uncheck (disable) Run Edit checks in View mode
If these options are not set this way, modify them now and click .
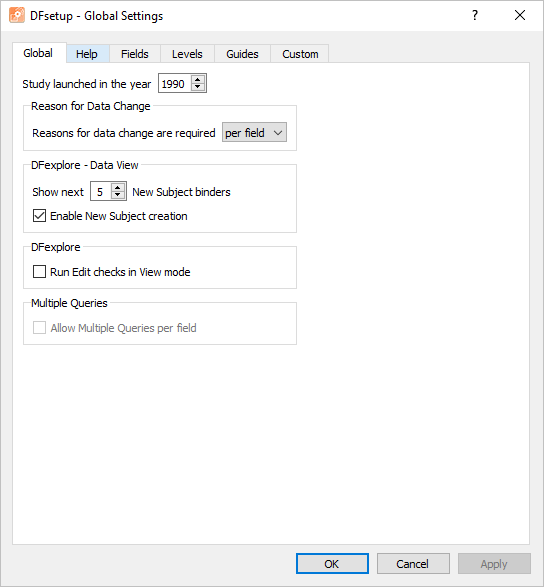
-
Click . Select HTML tab. Enter the following:
            <html>

            <center>

            <h2>Welcome to the Acceptance Test Study.</h2>

            <p>For assistance please contact <strong>1-XXX-XXX-XXXX</strong>.</p>

            </center>

            </html>
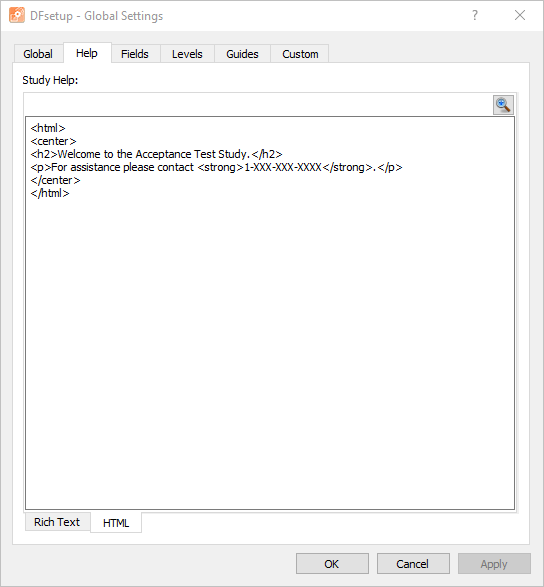
-
Click Fields tab, and set:
Descriptions = 40 characters
Start year (for two digit years) = 1925
Imputation (for partial dates) = Never
Check (enable) Auto Generate Help
Uncheck (disable) Field Name must be unique across all module definitions
Do not edit Fill Color
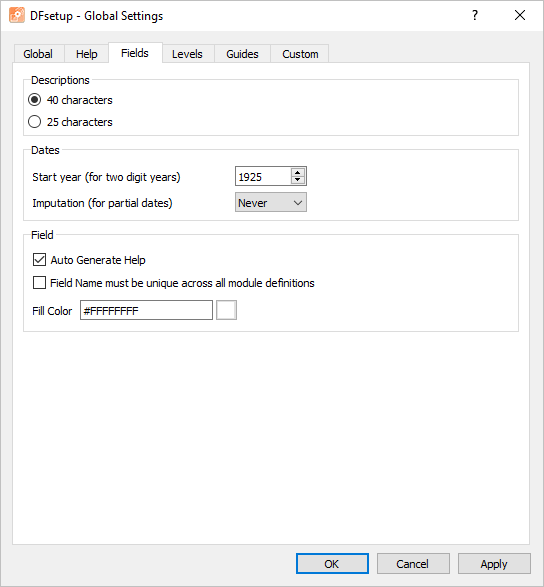
-
Click Levels tab. Confirm that the workflow labels of
Level 0,Level 1, and through toLevel 7are used.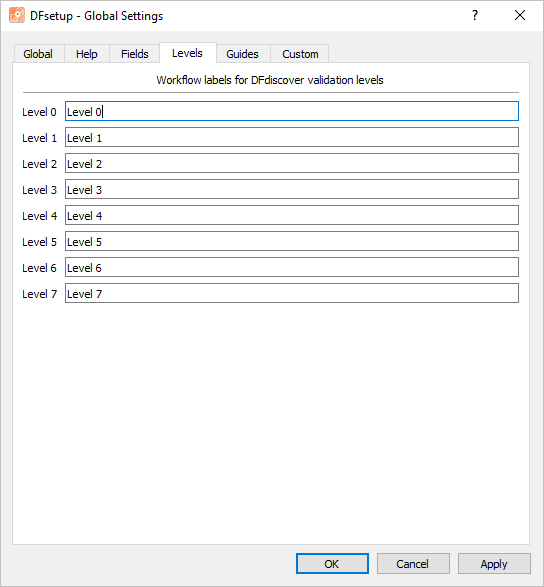
-
Click Guides tab. Confirm/change:
Check (enable) Enable Snap
Check (enable) Display CRF
Check (enable) Display Fields
Set Maximum Box Height = 25
No changes are required to Colors Fields or Foreground
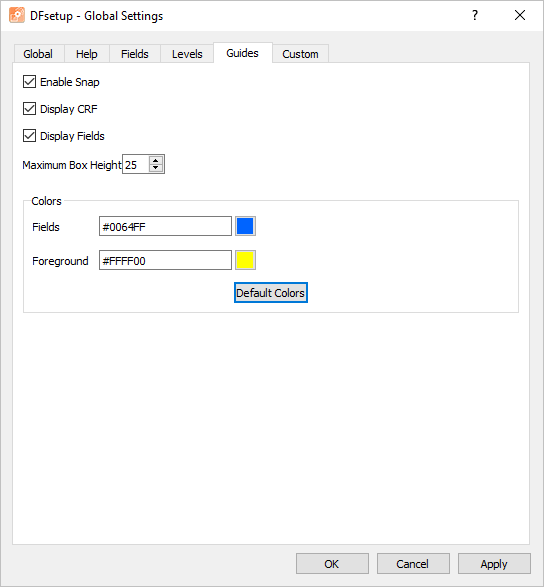
-
Click Custom tab. Confirm that all Property Values are blank.
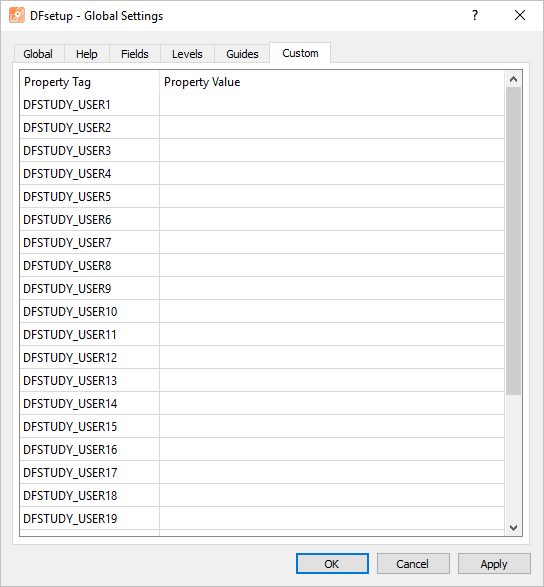
-
Click to save changes and exit the dialog.
-
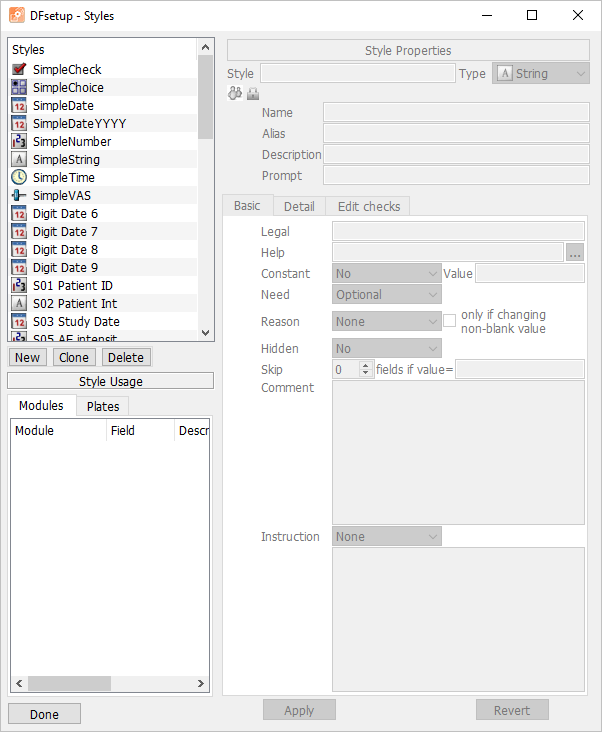
Note The style names and information appearing in your Styles dialog may be different from those shown here. You should see the standard DFdiscover Simple styles.
-
Within the DFsetup-Styles dialog, locate the style name SimpleString. Click SimpleString to select it as the current style. Click to duplicate this style.
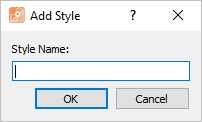
-
Provide a Style name of
Commentin the Style dialog and click . -
Click Comment to make it active, and confirm the Style Properties Basic tab displays the style properties as shown.
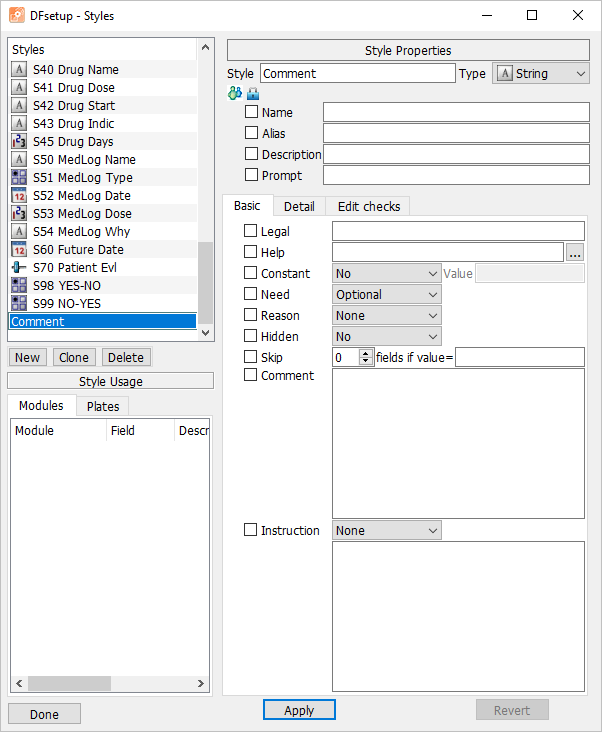
-
Click Detail tab, Change the Store property from
1to200. Check (enable) the to the left of the Store property to lock this setting in the Comment style. Click to apply the modifications. Click to close the Style Properties dialog.
Choose 10 - Death Report entry from the Plates-Modules-Fields list panel to make plate 10 the active plate. Select > to open the module definition dialog.
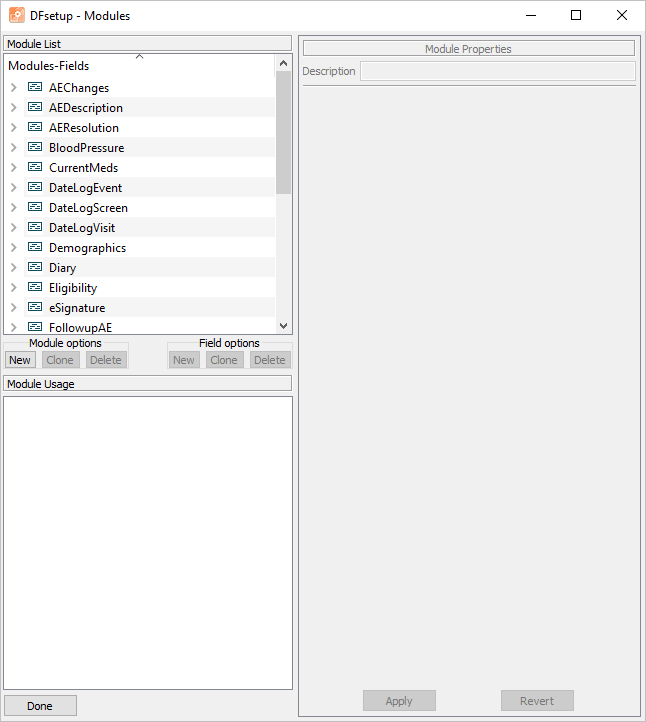
Click Module options .
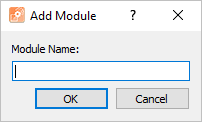
Enter a name of
Deathin the Add Module dialog. Click to save.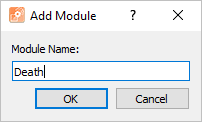
With the Death module selected as the active module, confirm that the Name
Deathappears in the Module Properties window. In the Description field, enterDeath Report. Click .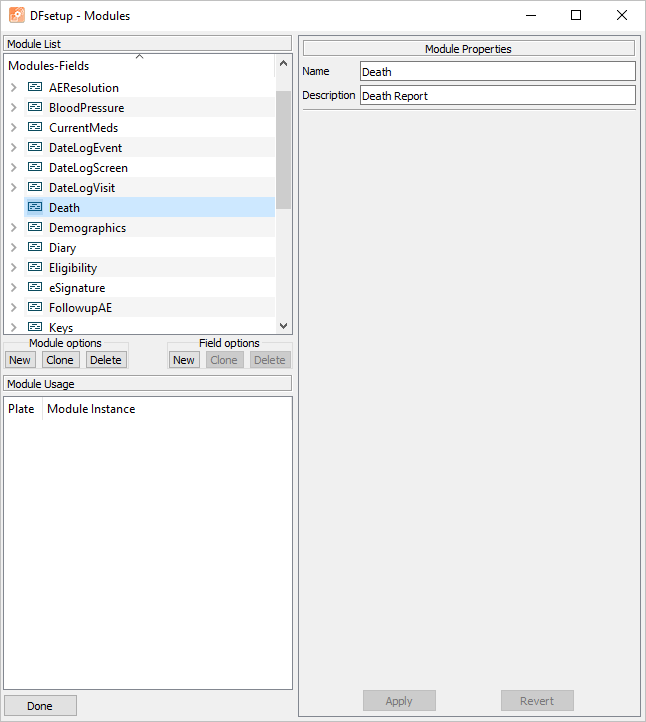
-
Choose Death module defined in Section 3.6, “Create and modify a new module (Death).” to make it the active module. Click Field options .
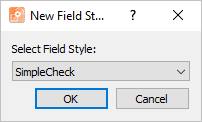
-
To create a field definition for “Cause of Death”, choose Comment from the Style pull-down list, click .
-
Enter the name
DEATHfor the Field Name: and click .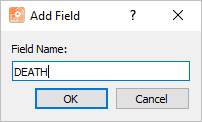
-
Within the Field Properties, enter a Description of
Cause of Death?. Click .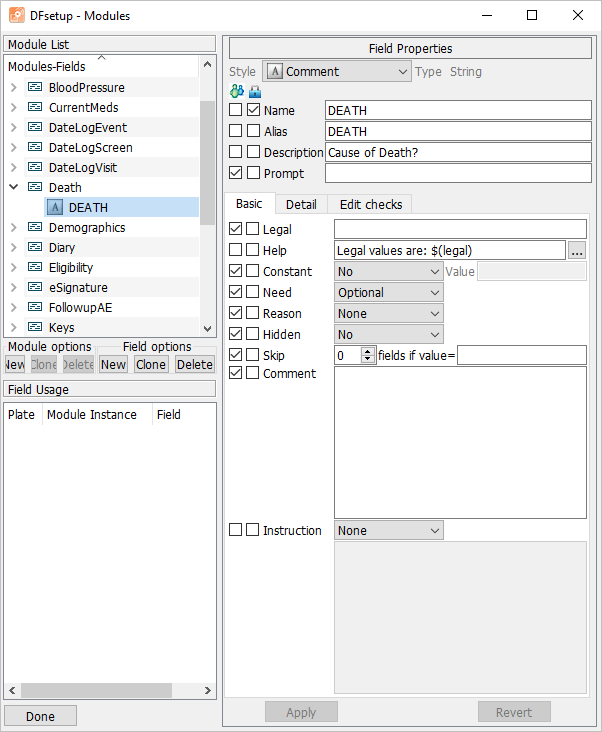
-
Click Field options . In the resulting New Field Style dialog, choose S99 NO-YES from the Styles pull-down list. Click .
-
Enter the name
AUTOPSYfor the Field Name: and click .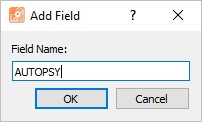
-
Within the Field Properties, enter a Description of
Was an autopsy performed?. Click .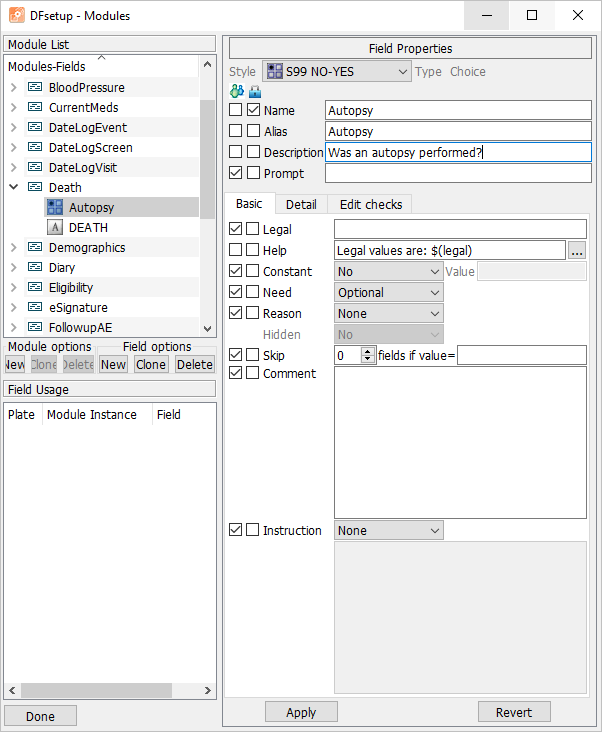
-
Click .
-
Still with 10 - Death Report as the active plate, create the field references (layouts) for the Cause of death and autopsy fields defined in Section 3.7, “Assign Field definitions to a newly created module.”. First add the Death module to plate 10-Death Report by clicking from the Module options. Locate and choose Death module from the list of modules.
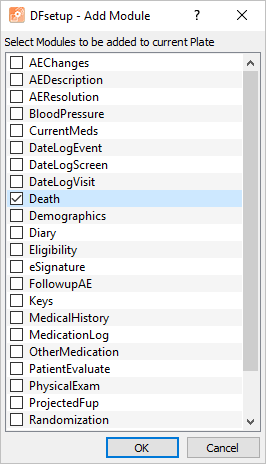
Click to add the Death module to plate 10-Death Report.
-
Click
 to the left of Death [1] module entry in the Plates-Modules-Fields list to show all field definitions within the Death [1] module.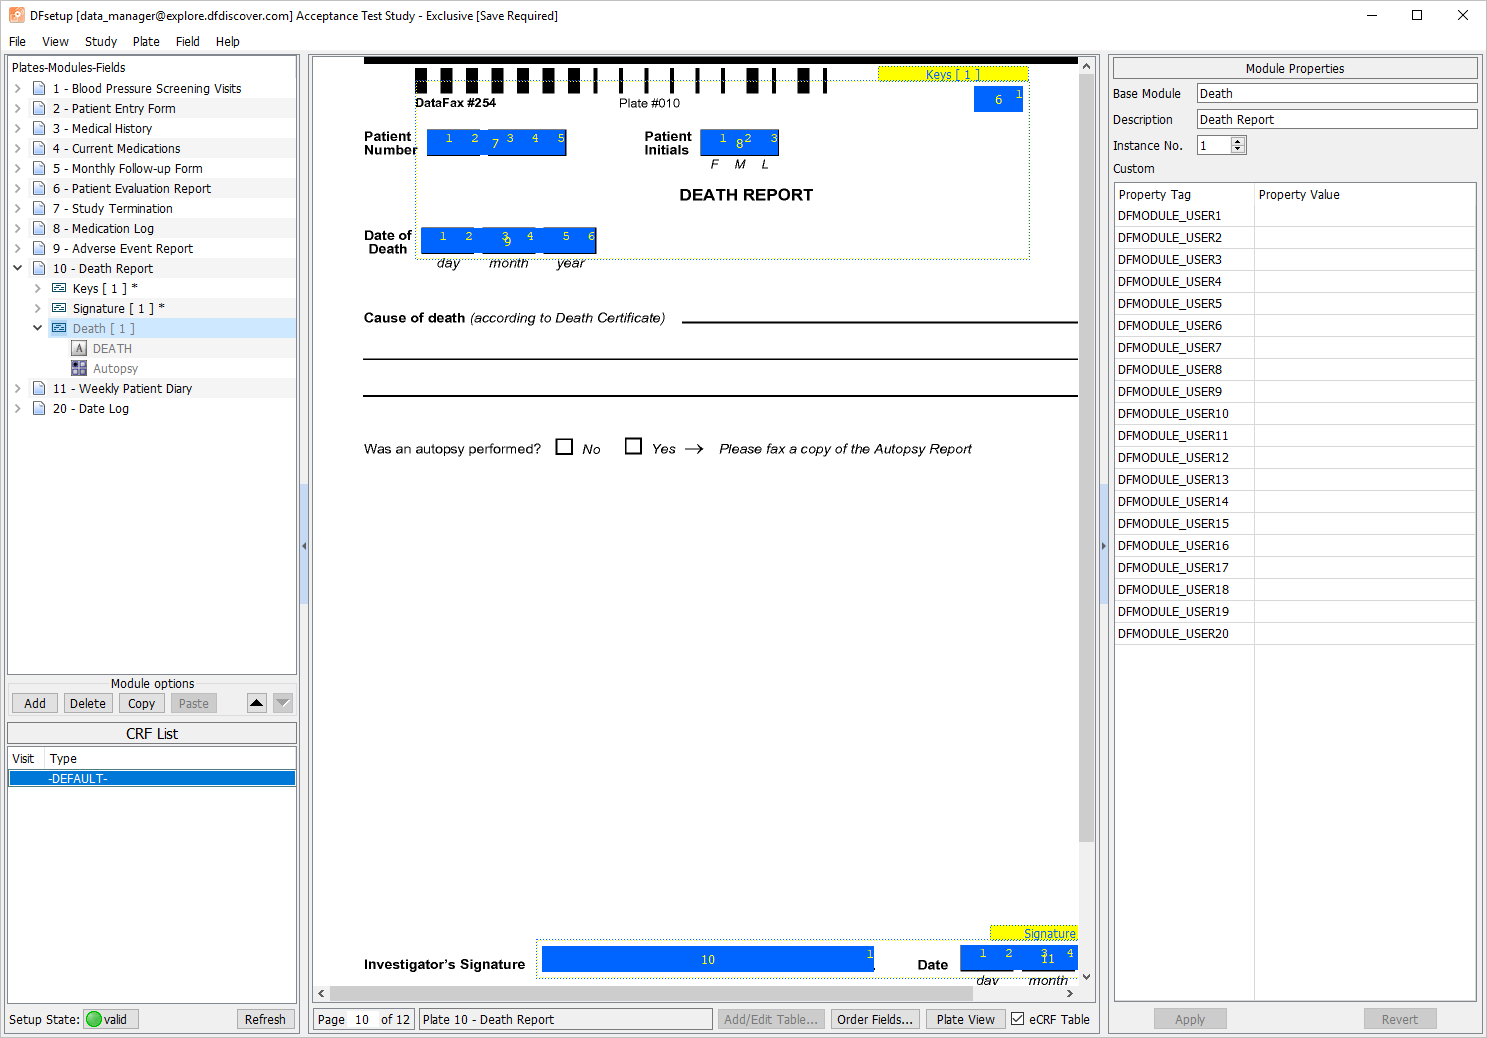
-
Create a field reference for the Cause of Death. Using the mouse, select the leftmost end of the second longest lines on the plate background. Holding down the mousebutton and Control, drag up and across to the rightmost end of the line. Release the mousebutton to create a string field widget.
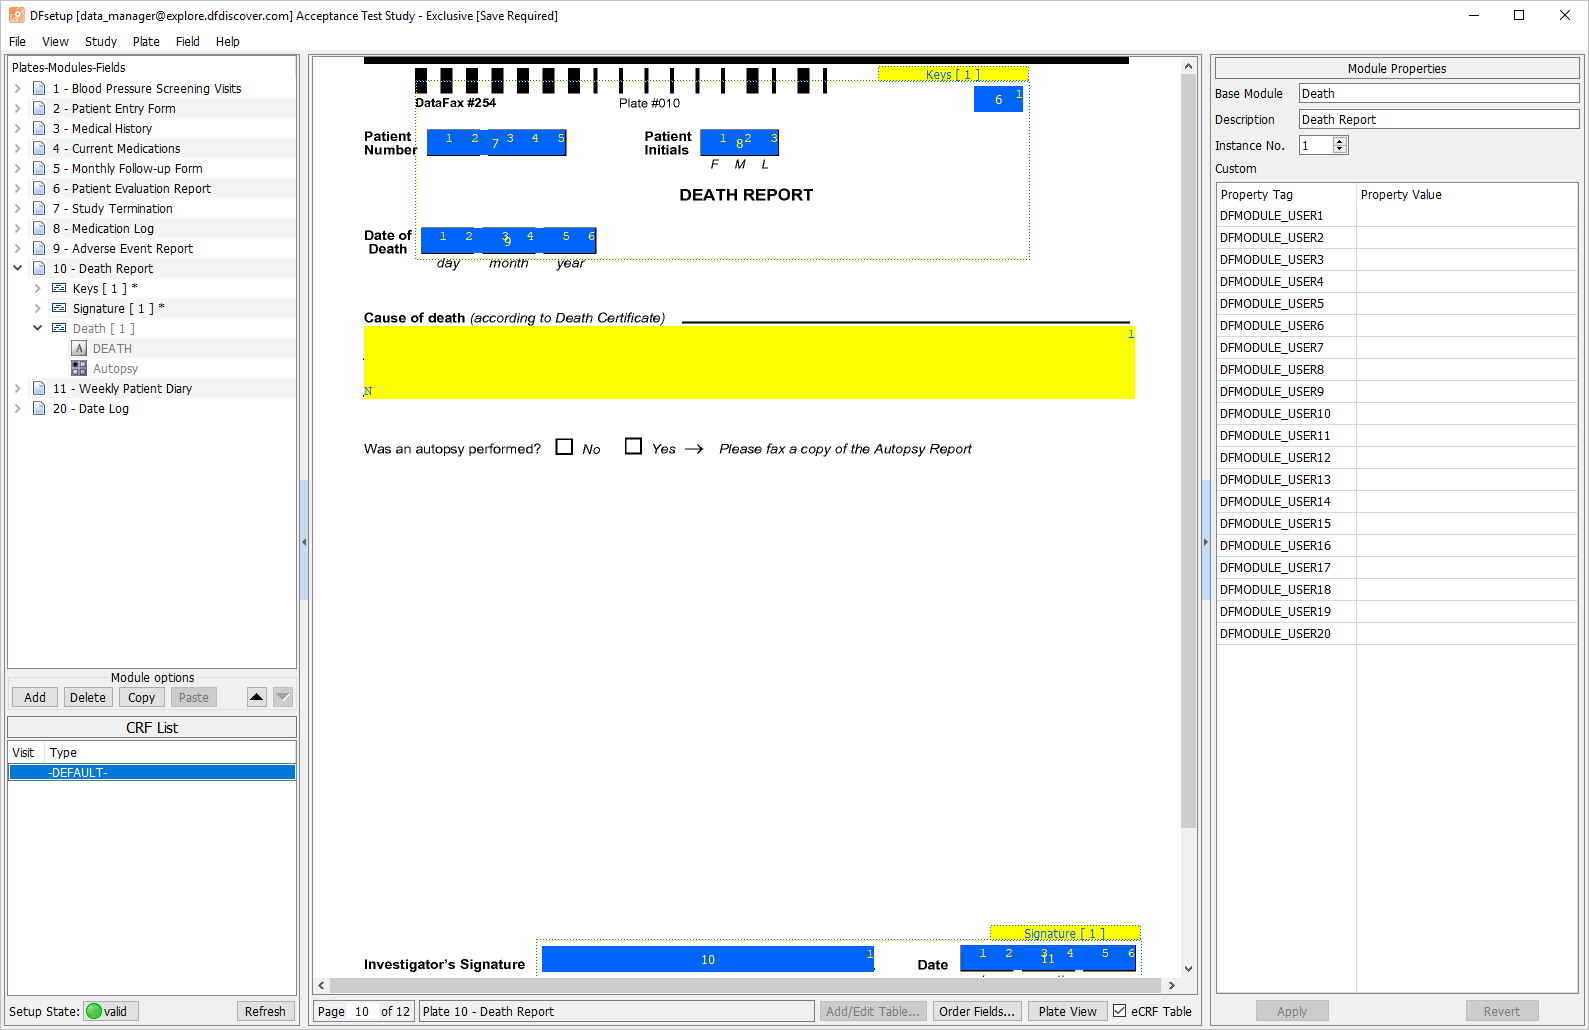
-
Select the DEATH field in the Plates-Modules-Fields listing to assign a field definition.
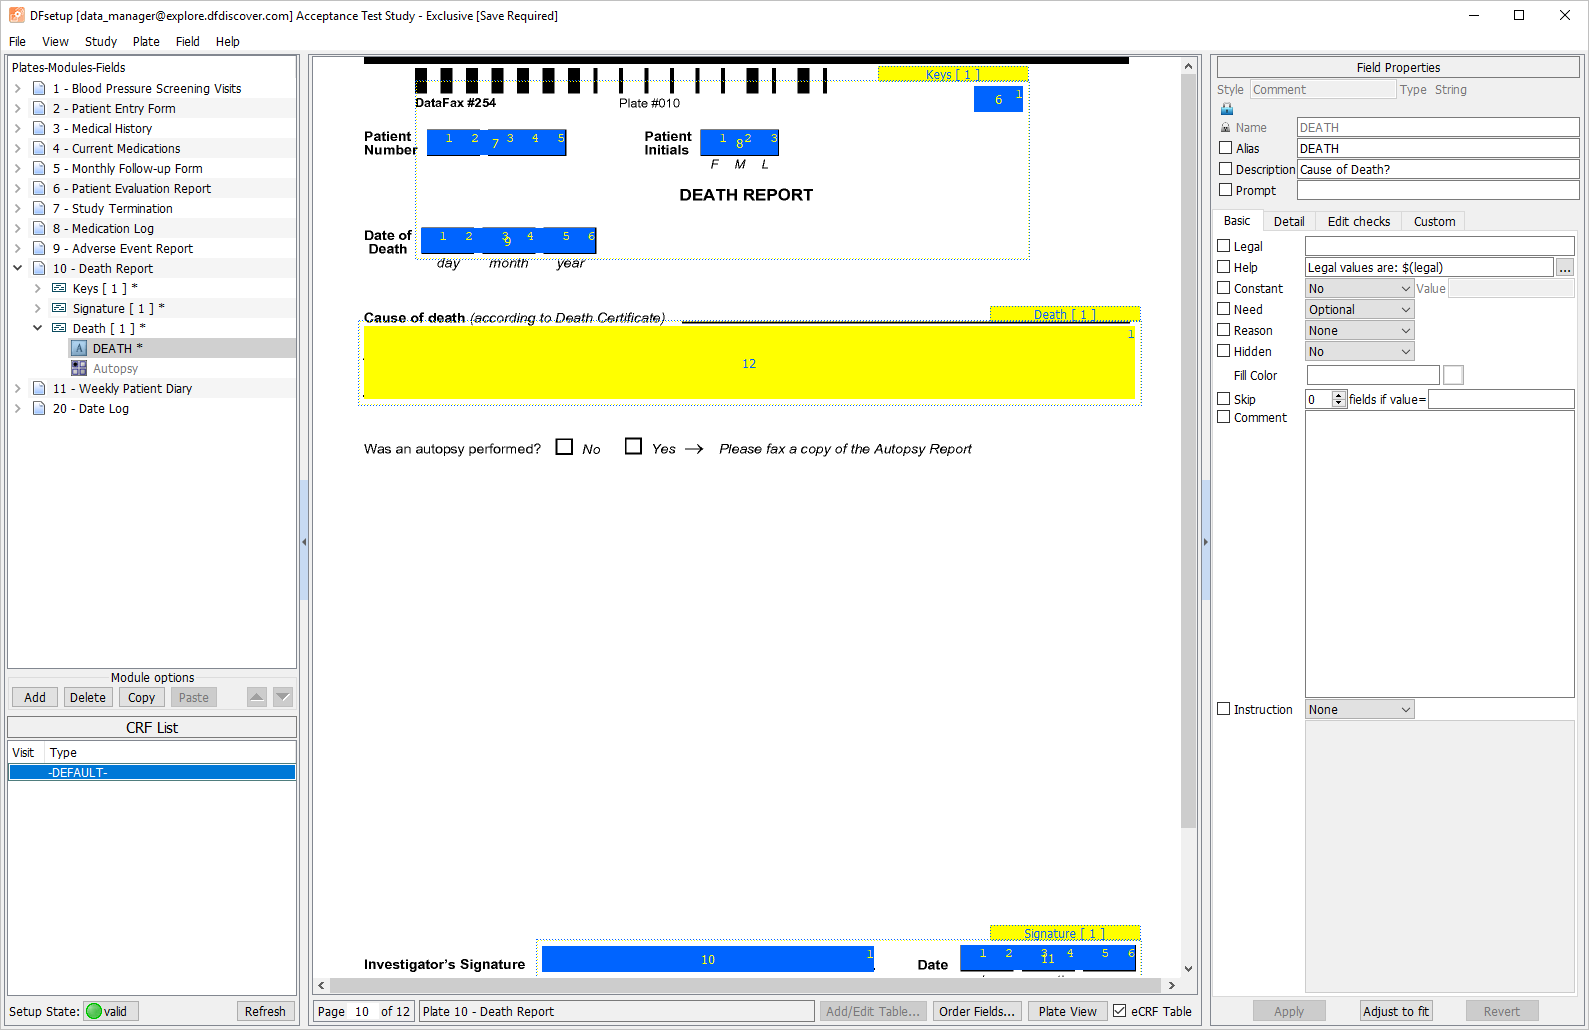
-
Create a field reference for the Was an autopsy performed? field. Using the mouse, the middle of the No box on the plate background. Next the middle of the Yes box on the plate background. This defines the position of each response option for the AUTOPSY field.
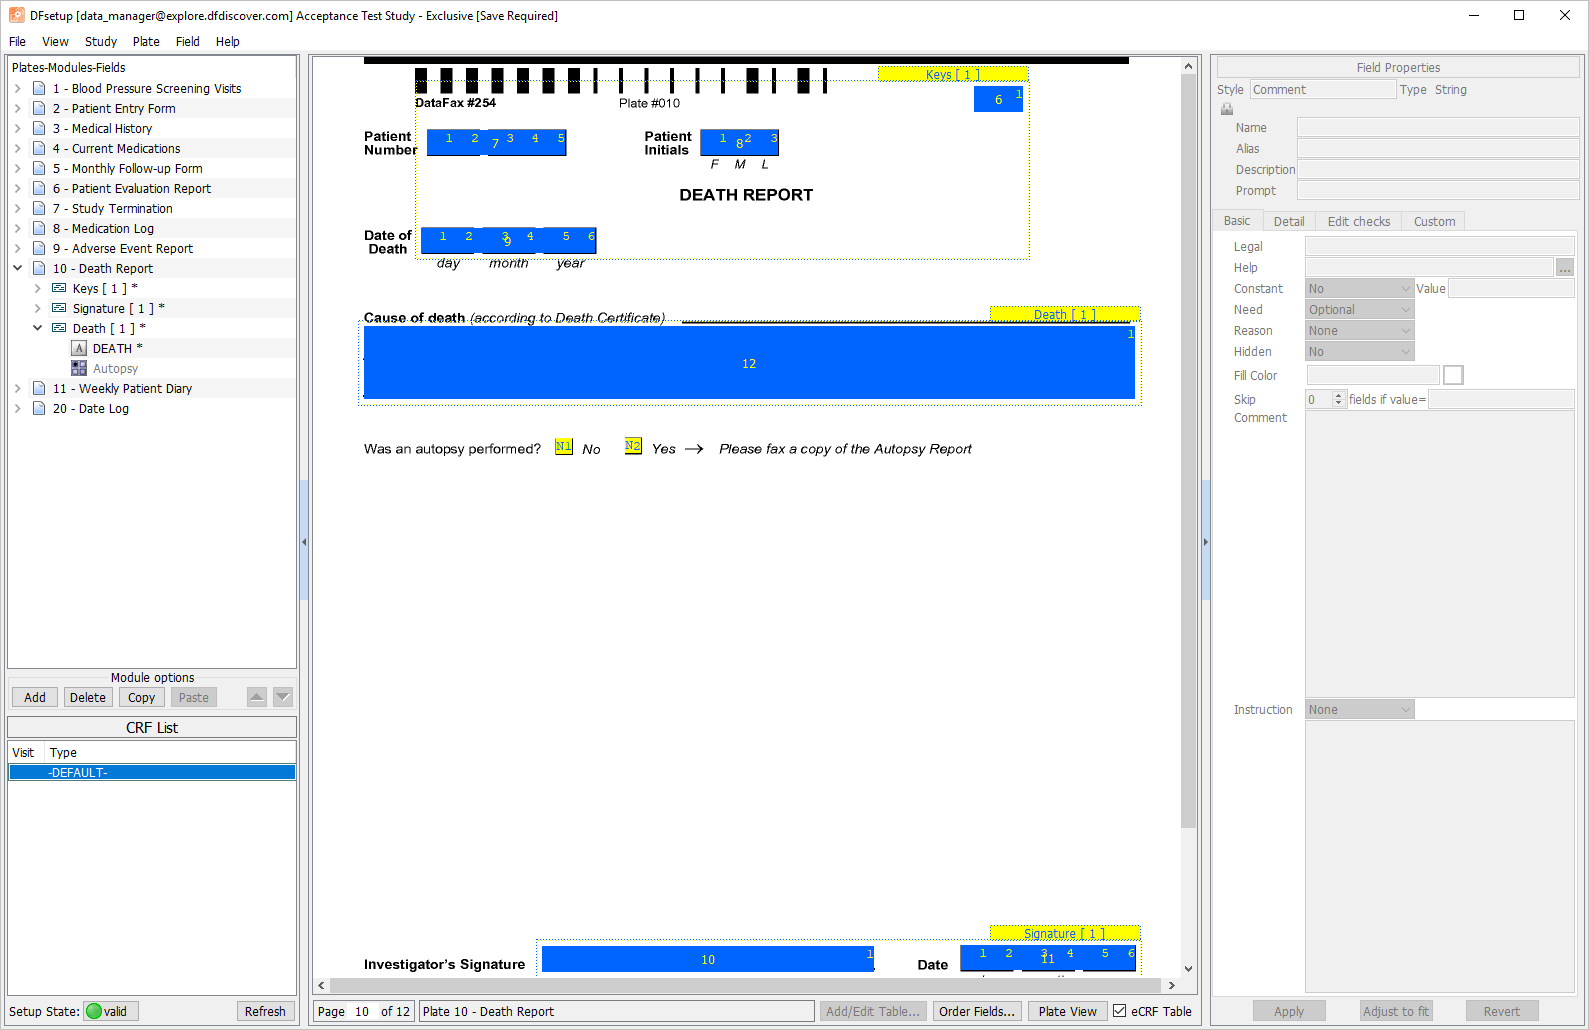
-
Select the AUTOPSY field in the Plates-Modules-Fields listing to assign a field definition.
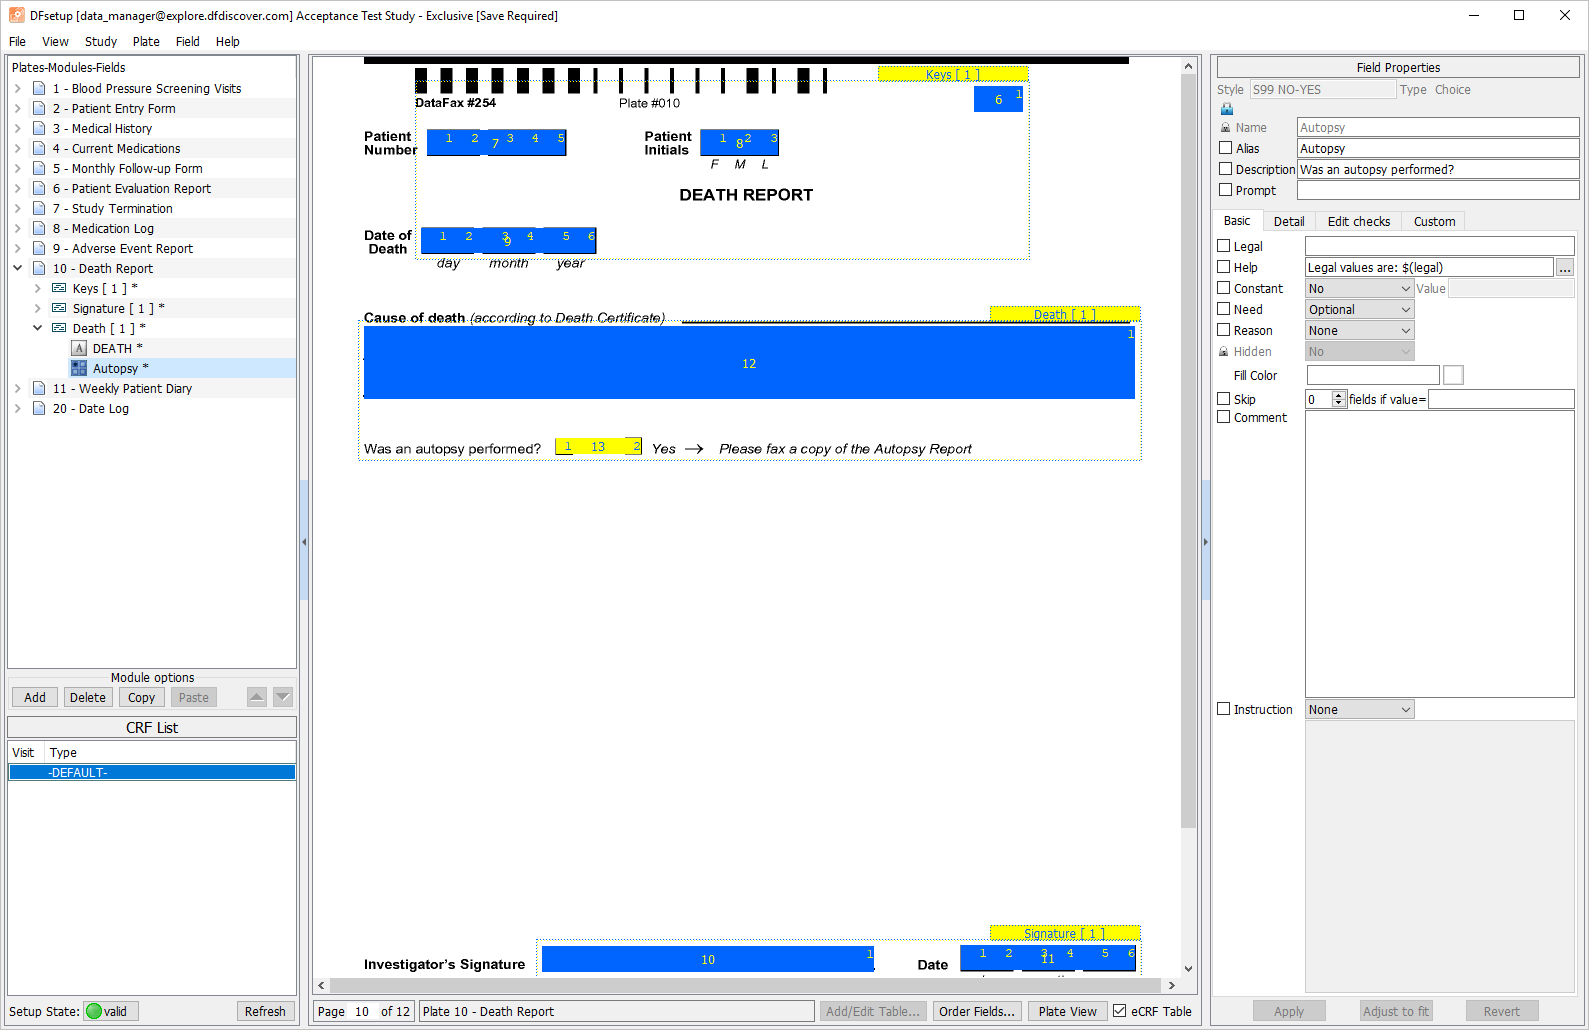
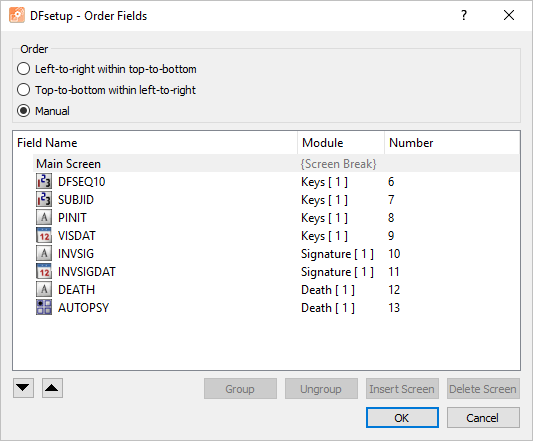
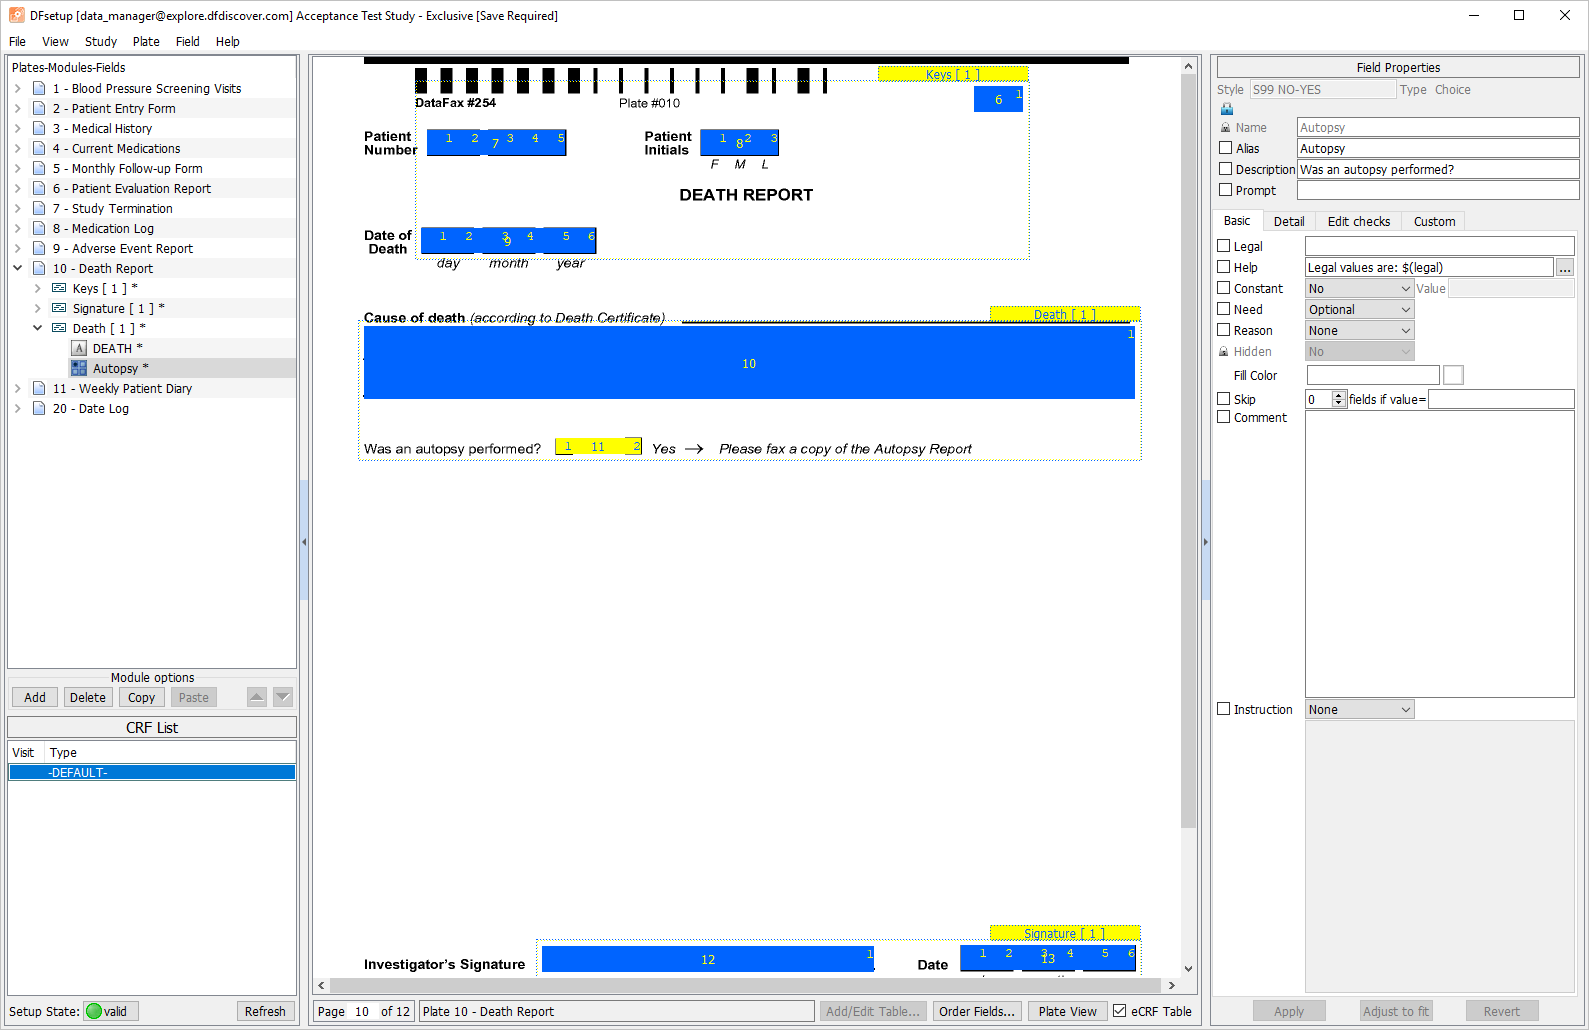

-
Click 11 - Weekly Patient Diary to make it the active plate. Scroll to view all module and field references on the plate.
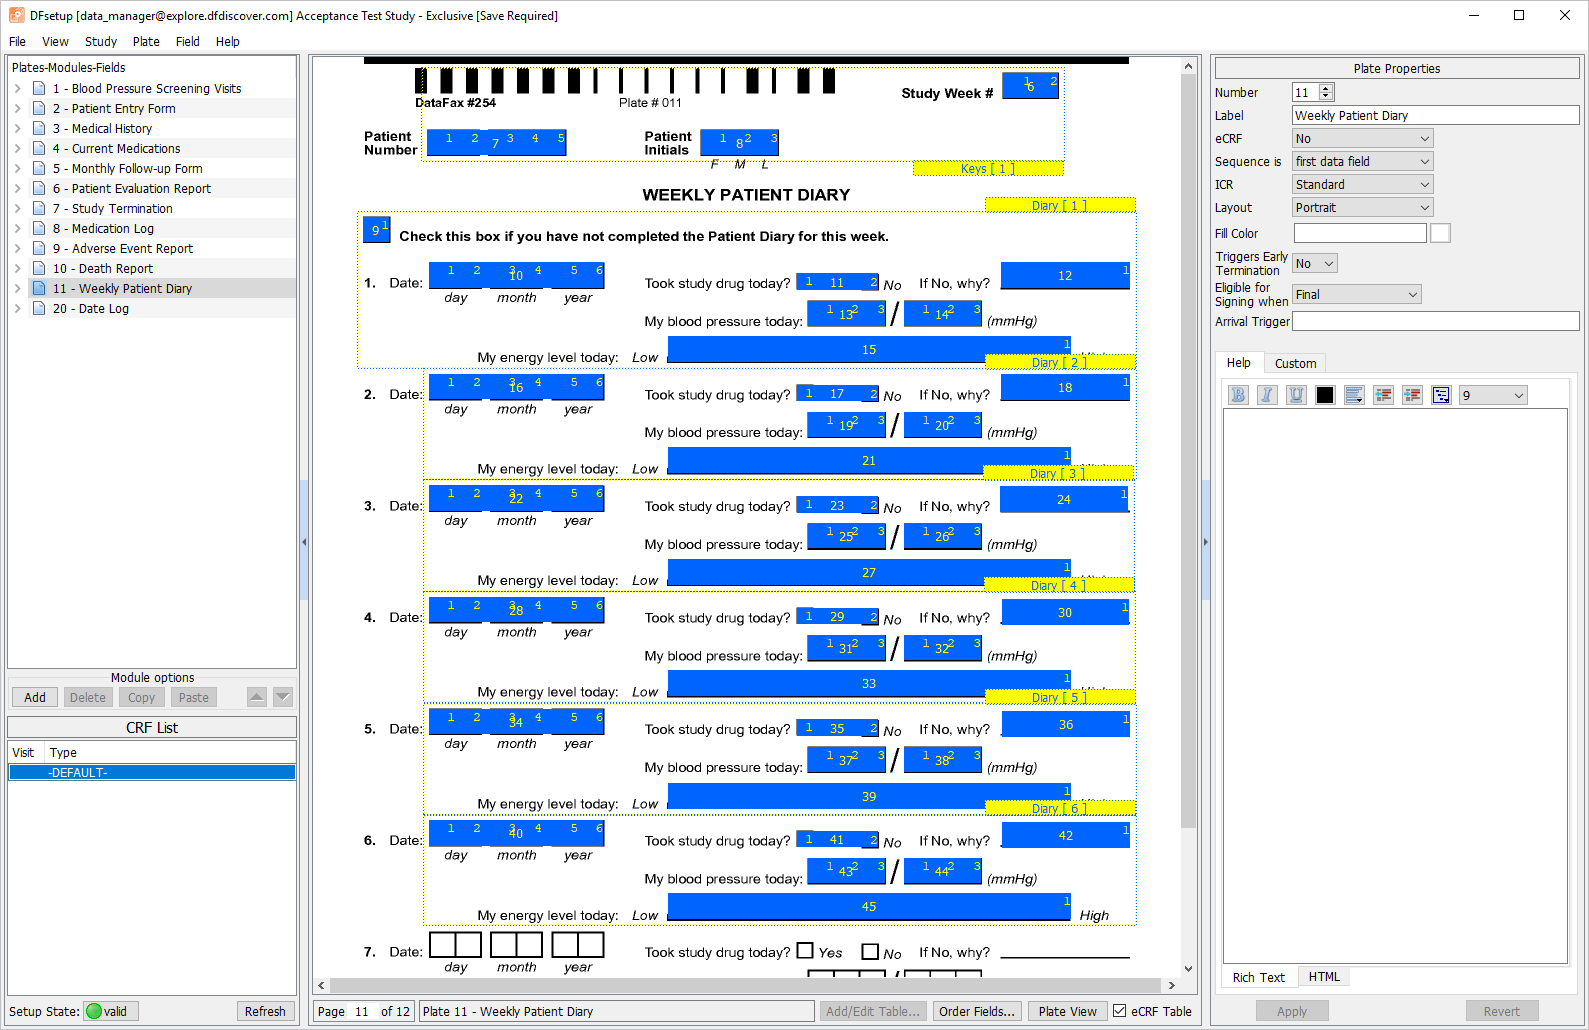
-
Click
to the left of 11-Weekly Patient Diary to expand the list of modules defined on the current plate. Choose Diary[6] from the list.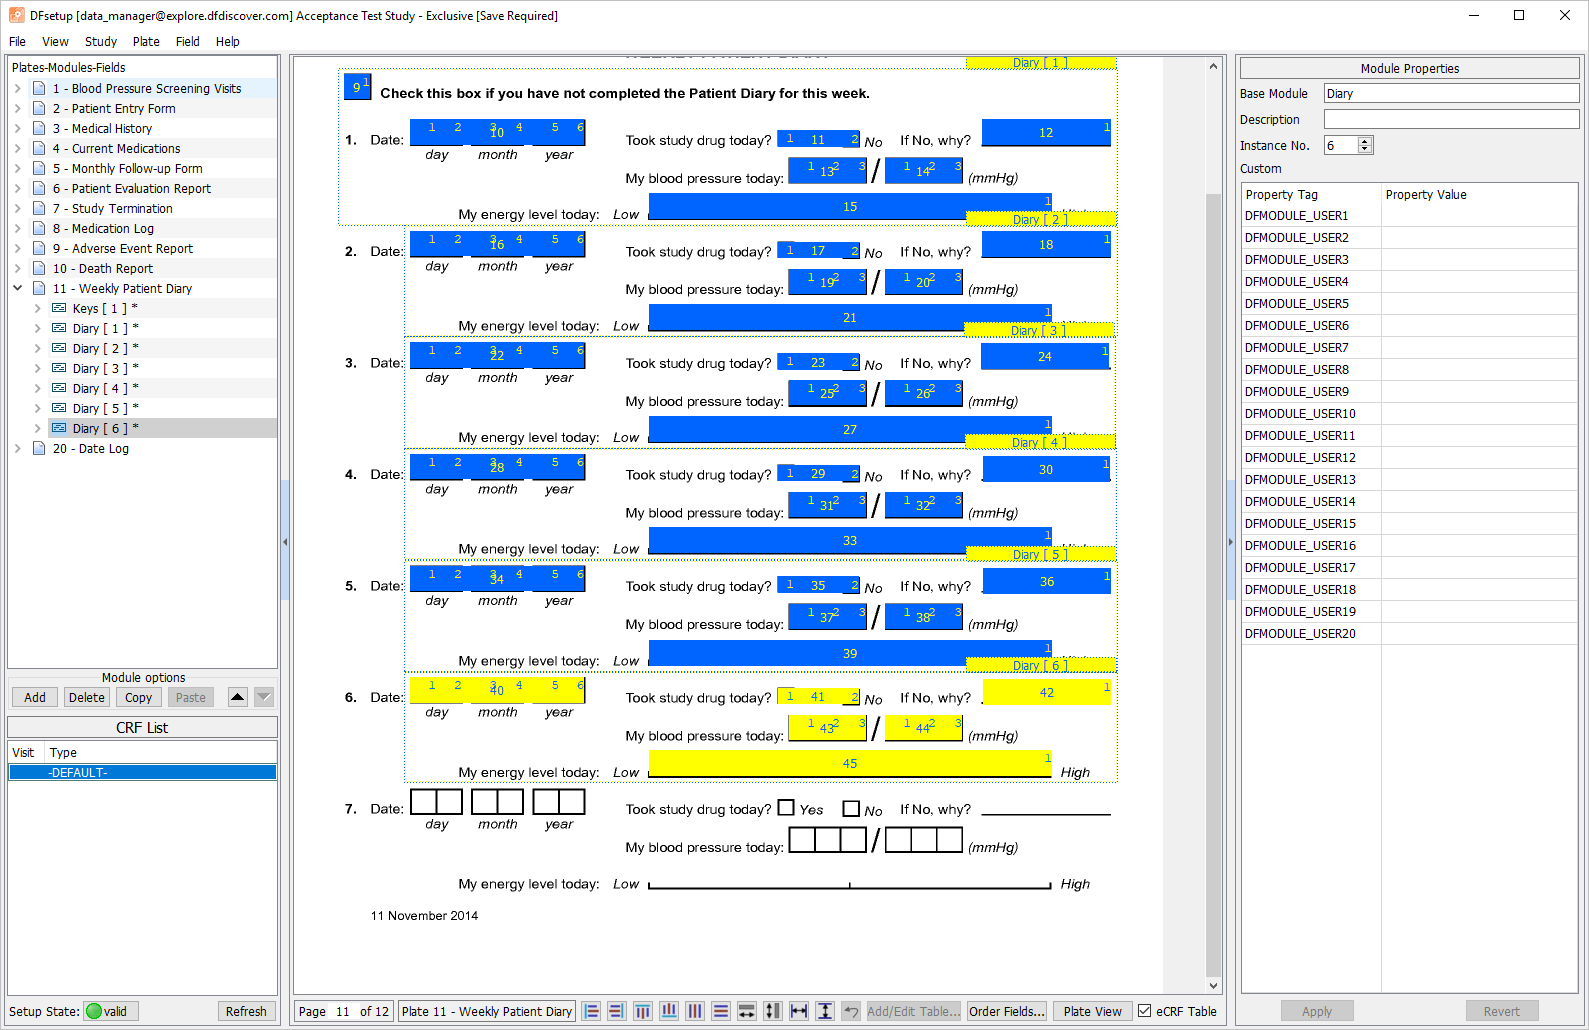
-
Click from the Module options.
-
Click from the Module options.
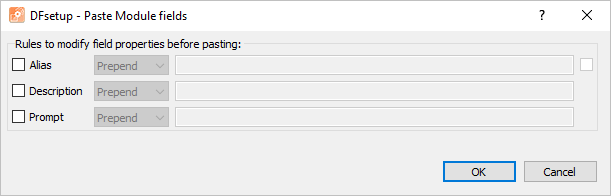
-
In the Paste Module fields dialog specify the substitution shown, which modifies the Alias and Description fields.
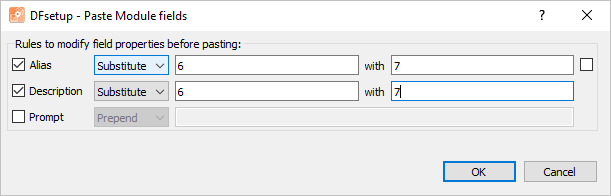
-
Click in the Paste Module fields dialog to perform the paste operation.
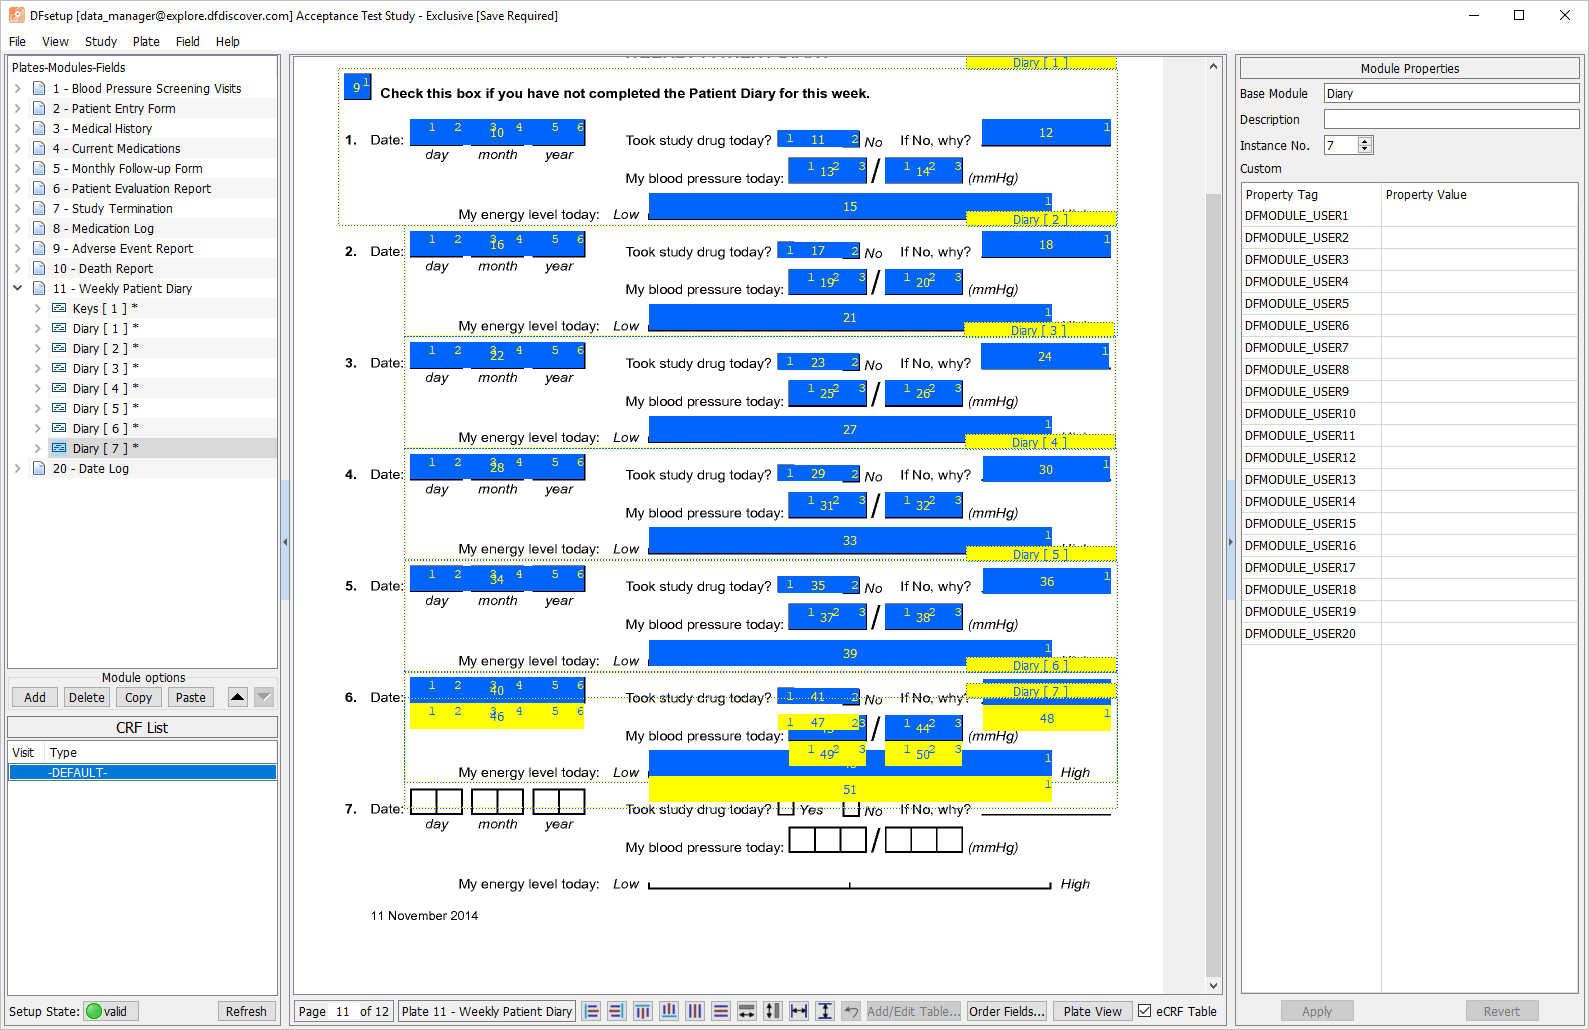
-
With the block of fields still highlighted, use the mouse to drag the block of field reference widgets and position them over top of their respective field outlines on the plate background. anywhere on the plate background to release the pasted block.
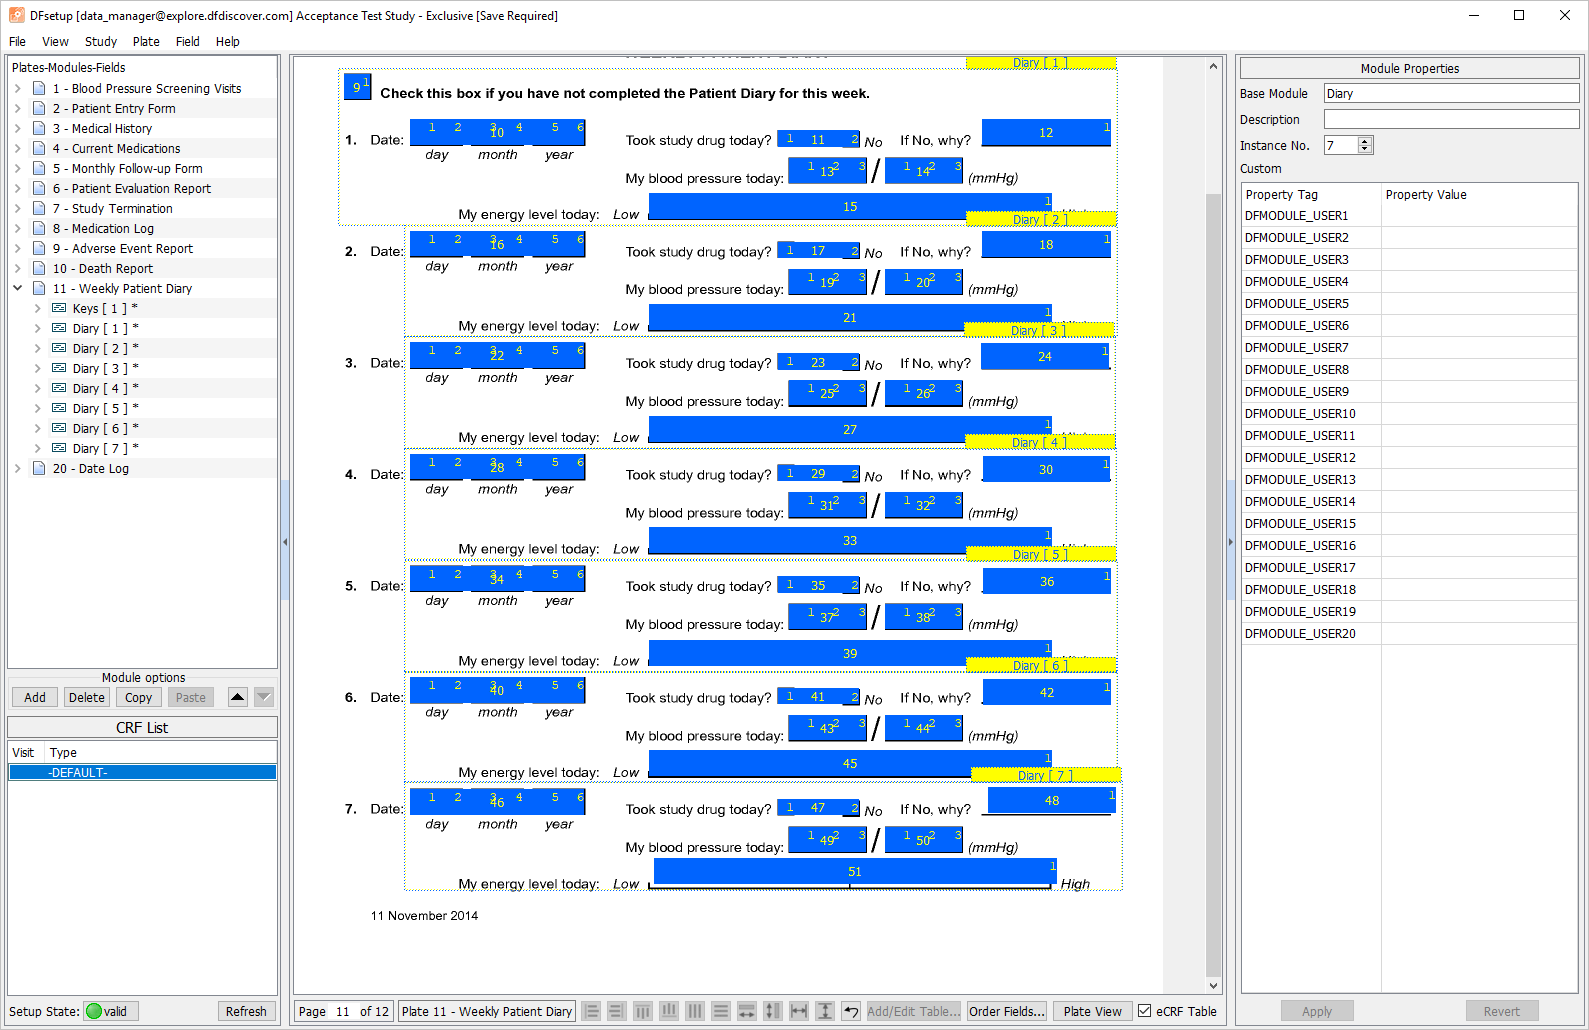
-
One by one select each Diary[7] field reference widget. Examine the Field Properties window for each and confirm that the Alias and Description properties contain the correct substitution character of
7.
-
Select > .
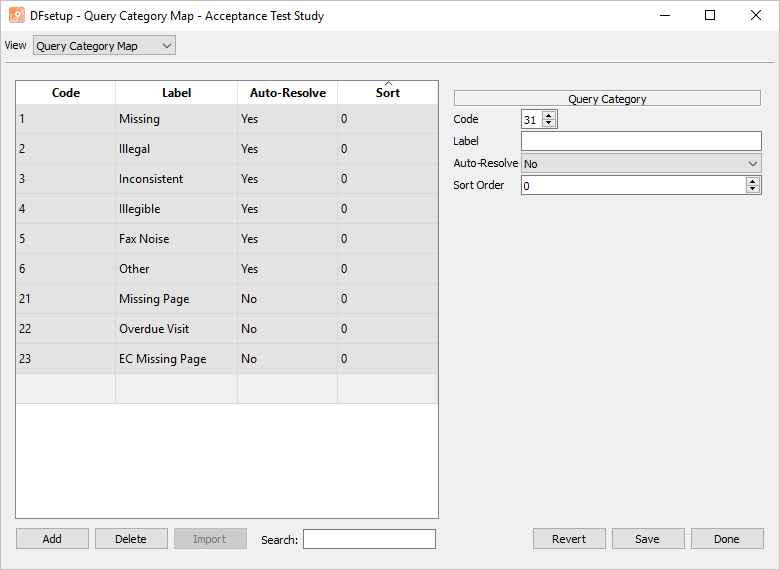
-
Click . The Code field is auto-filled with a value of
30. Press Tab to advance to the Label field. EnterTestfor the Label field. SelectYesfrom the Auto-Resolve drop-down. Set Sort Order to5.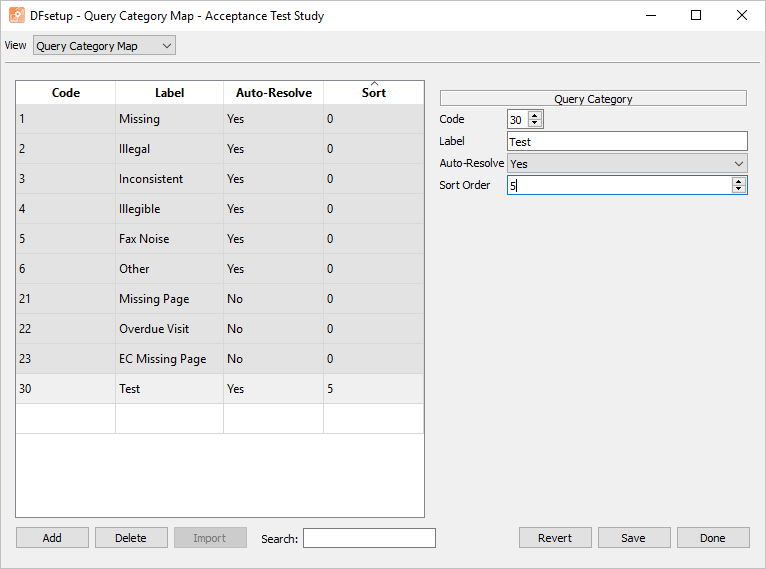
-
Click . The Code field is auto-filled with a value of
31. Without altering the code number, enterMonitorfor the Label field. SelectYesfrom the Auto-Resolve drop-down. Set Sort Order to3.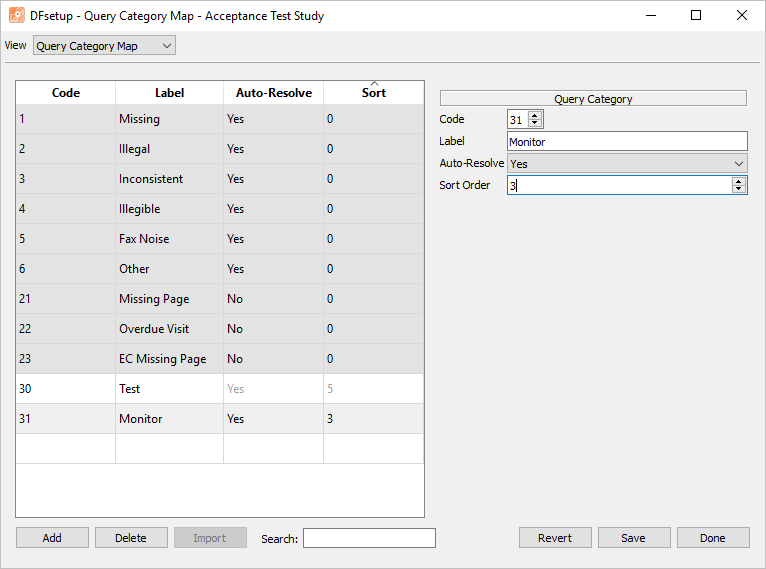
-
Click . Without altering the code number, enter
Clinical QCfor the Label field. SelectNofrom the Auto-Resolve drop-down. Set Sort Order to10.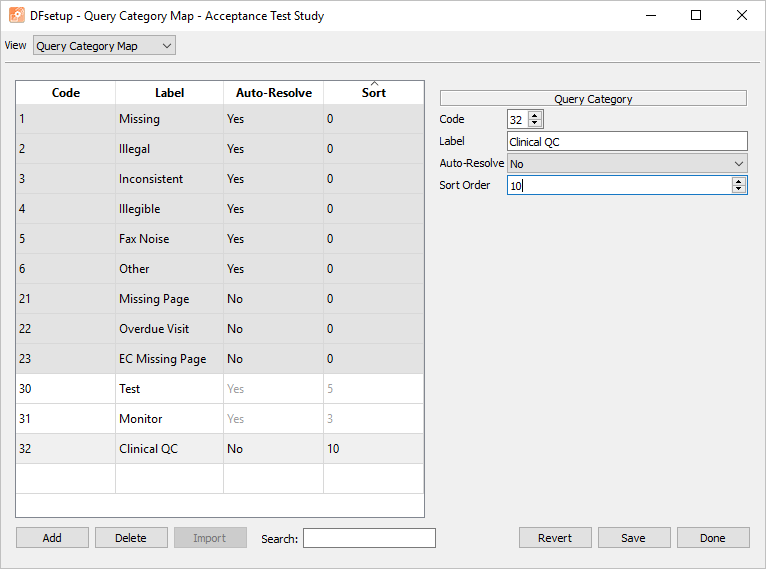
-
Click followed by to close the dialog.
-
Select > to save all modifications. Click in the warning dialog. Select > to close DFsetup.
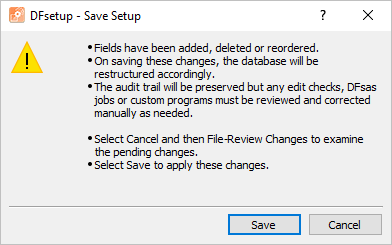
-
To complete the remainder of Module 3. Study Setup, the Control Panel is needed. Start the Control Panel as
datafaxas described in Module 1 (Installation & Initialization). -
Click to email a copy of ID99006.pdf to
site_monitor. Clicking more than once will result in multiple pages arriving to your email inbox.Note Save the ID99006.pdf file received via email to your local computer. This file is required to complete the remainder of this module. Refer to Section 1.8, “Creating user accounts and assigning study permissions.” as a valid email address is required for
site_monitorto receive the module specific PDF files. -
Start DFsend and login as user
site_monitor, as described in Section 1.9, “How to start DFsend”. -
Click . From the Select PDF Files file selection dialog, locate the previously saved ID99006.pdf file. Select the file and click .
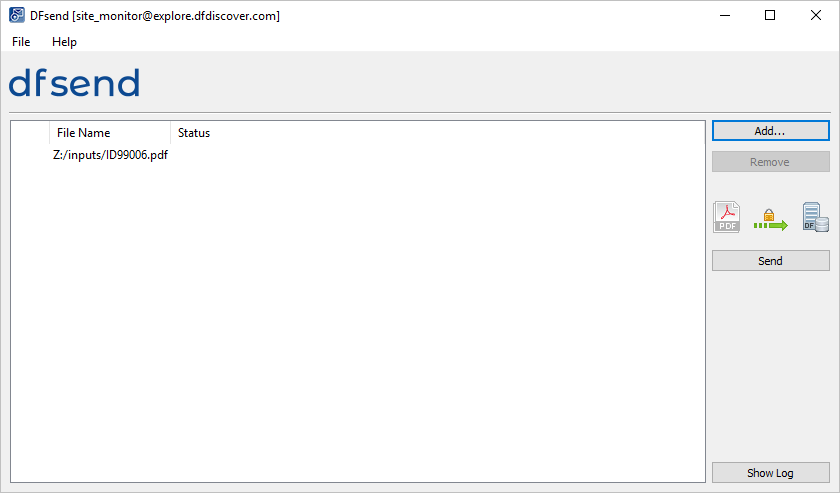
Note Documents can also be added by dragging-and-dropping the desired PDF files from a local file folder into the list area.
-
Click . In Verify Password dialog, enter
site_monitorin the Username field and the previously assigned password in the Password field. Click . -
In the resulting Send PDFs to DFdiscover dialog, confirm 1 success and 0 failure are shown. Click .
-
Click to review the DFsend transmission history.
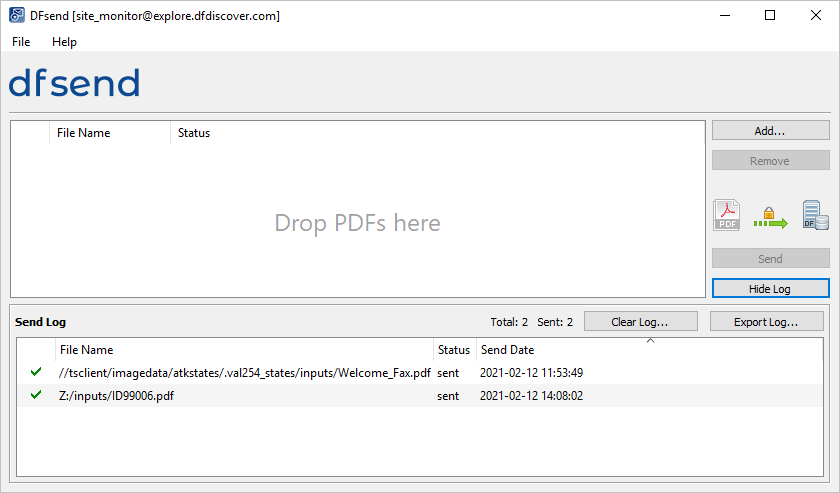
-
Select > .
Note Wait 2-3 minutes prior to proceeding to DFexplore.
-
Start DFexplore, login as user
data_managerand choose 254 Acceptance Test Study as described in Section 1.7, “How to start DFexplore”. -
Select > .
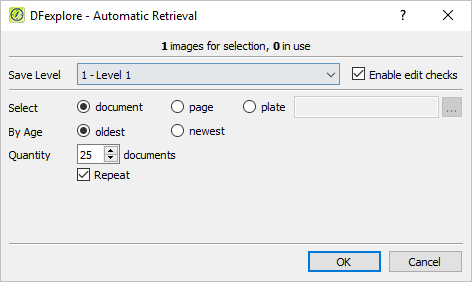
-
Do not change any settings in the Automatic Retrieval dialog, click to retrieve the image.
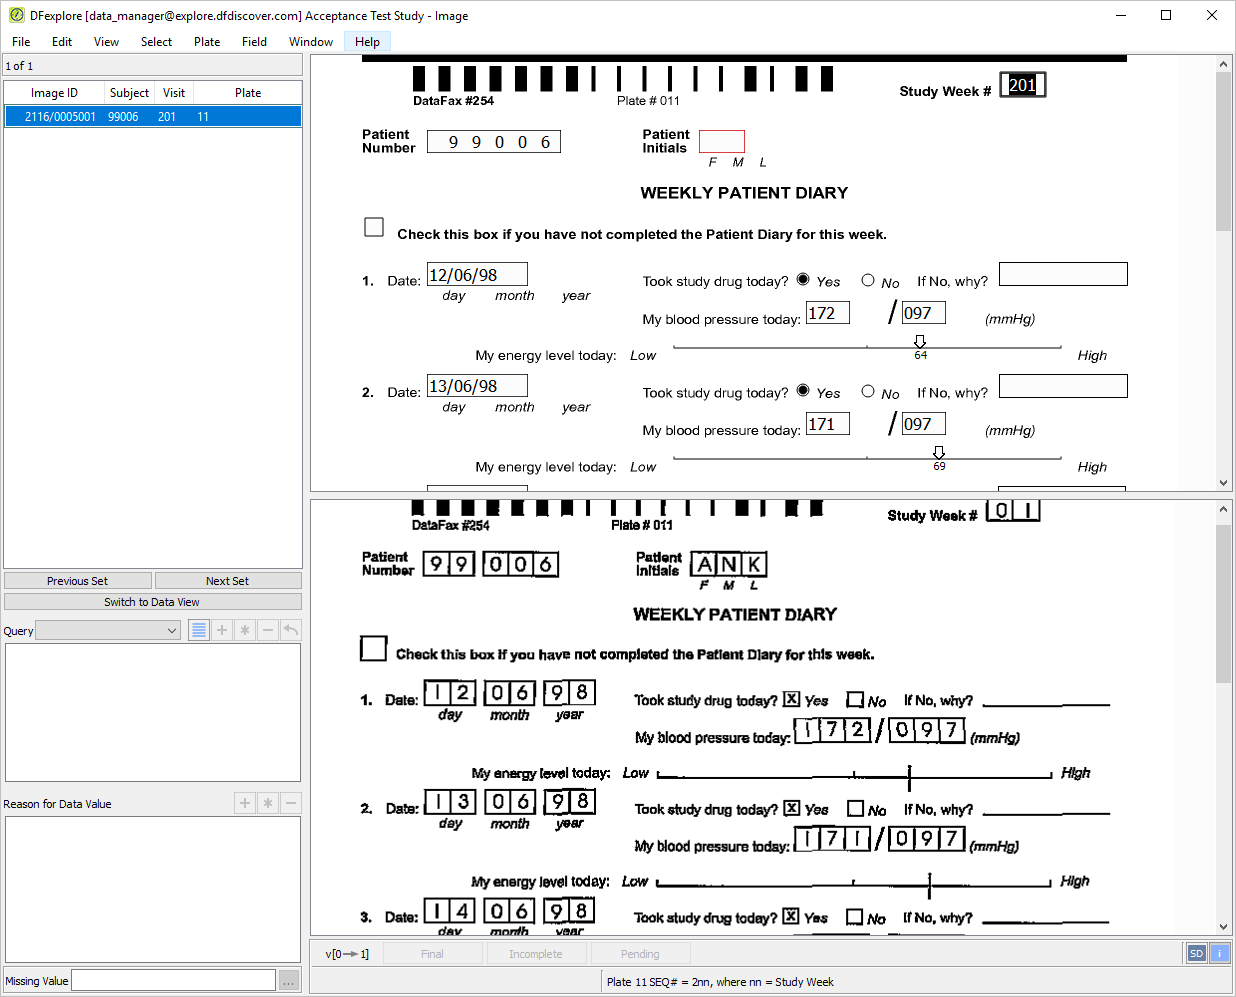
-
Select > to display a listing of properties for all fields on the current page. Locate field numbers 46 to 51 that were created in Section 3.10, “Use copy and paste to create repeating module and field references on a plate.”. Verify the settings and click .
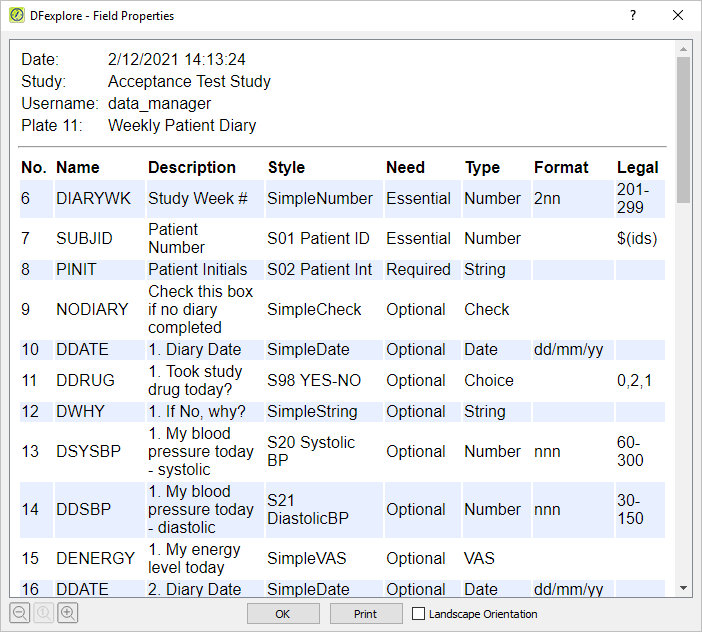
-
Upon retrieval of plate 11-Weekly Patient Diary, the cursor is on the Study Week # field. Enter the Study Week # value as it appears on the CRF image. Note that a prefix of
2is hardcoded in the Study Week # field so that the resulting value will appear as201. Press Tab to advance to the Patient Number field.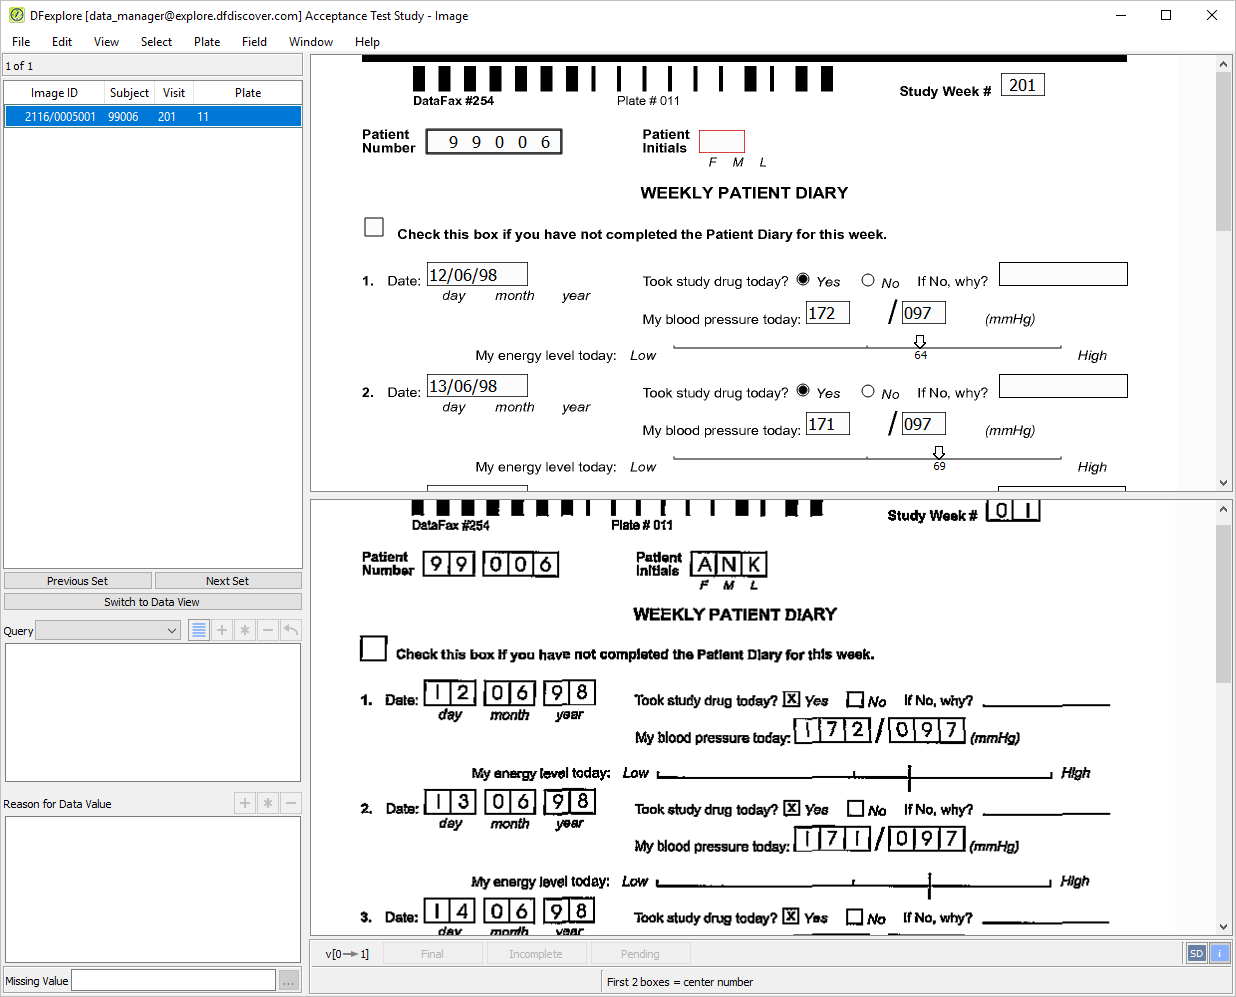
-
Enter the Patient Number as it appears on the CRF image. Press Tab to move to the Patient Initials field. Enter
ANKas per the CRF image and press Tab to advance to the next field.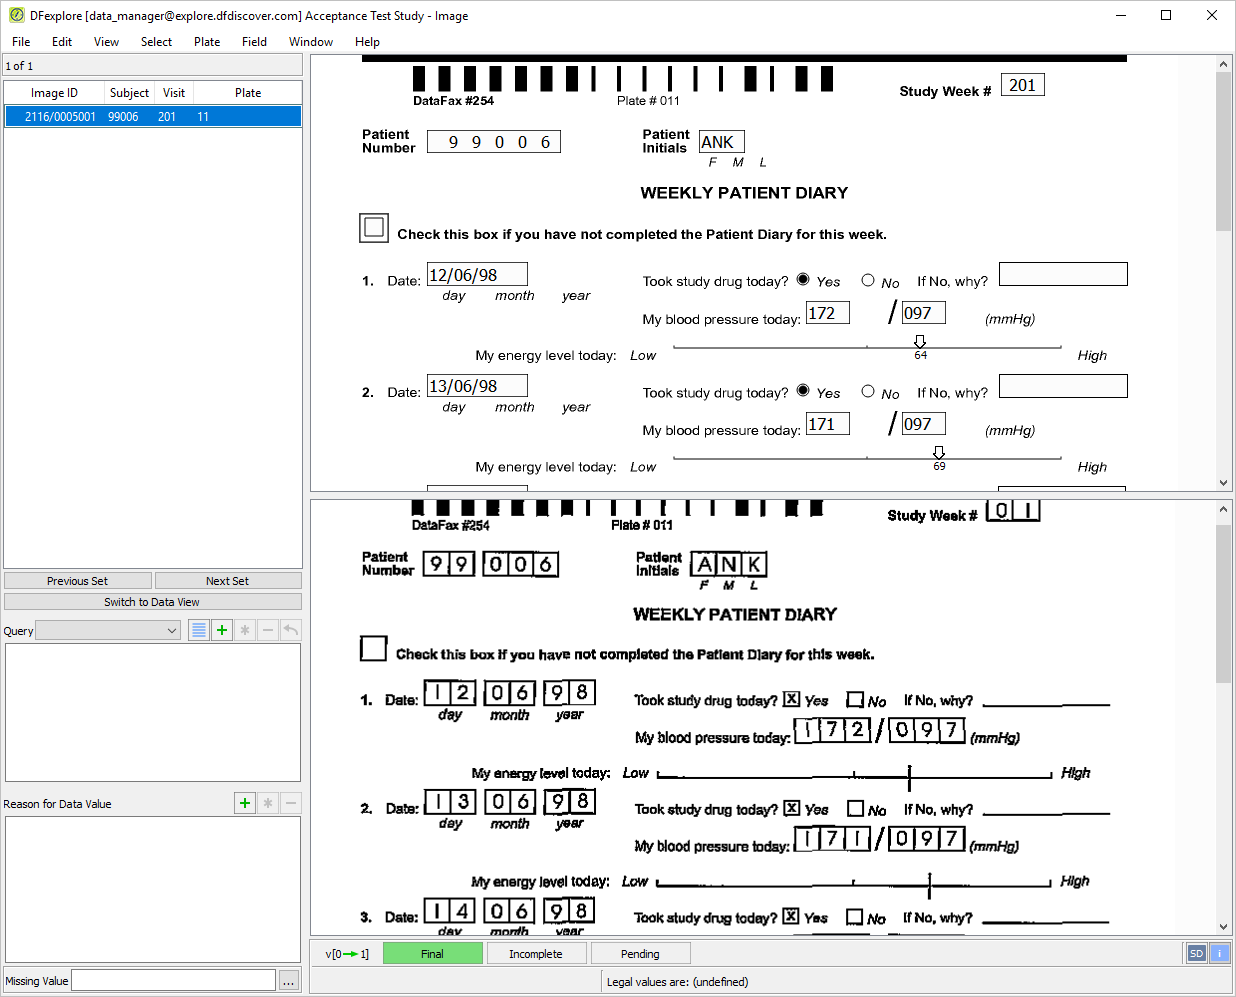
-
Starting with the Check this box... field, enter all data for 11-Weekly Diary Report as it appears on the CRF image in the lower half of the split-screen window. Press Tab to move from field to field until field 6. My blood pressure today is the current field. Leave the field blank as per the CRF image and press Tab. The Add Query dialog is presented.
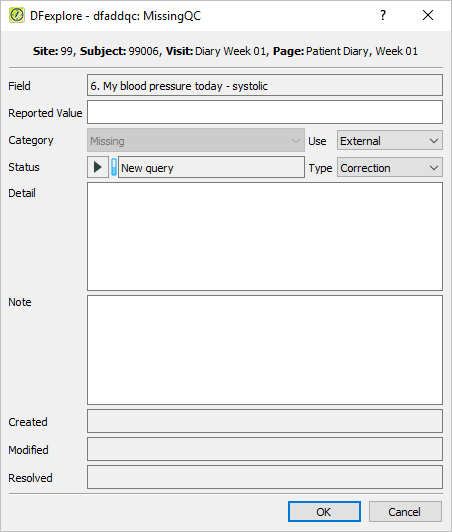
-
Click in the Add Query dialog to close the dialog. The 2nd blood pressure field (diastolic) gets the focus. Leave the field blank as per the CRF image and Tab off the field. Again, click in the resulting Add Query dialog.
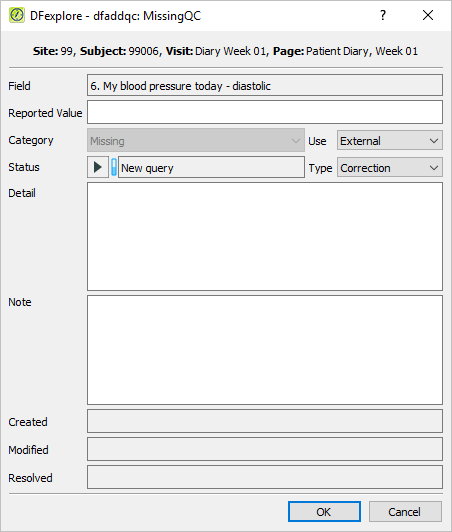
-
Enter the remaining fields on Plate 11-Weekly Patient Diary as per the CRF image. Once a value has been entered in the last VAS field (7. My energy level today), press Tab. This makes the save buttons active at the bottom of the data record.
Note During document submission, the ICR may fail on one or more of the fields on the Plate 11-Weekly Patient Diary page. You will need to enter values into those fields that have been missed or misread by the ICR. To correct VAS scales, make the desired VAS scale the current field on the data record. Locate the corresponding VAS scale on the CRF image. Using the mouse button, select the leftmost end of the scale, followed by the intersection point, and then the rightmost end of the scale on the CRF image.
-
With the focus on the save buttons, click to save the record to the database with the status Final.

Select > to close DFexplore.
Start DFATK as described in Module 1 (Installation & Initialization).
-
Click to confirm successful completion of Module 3. Study Setup.
Table of Contents
Estimate of Time Required: 20 Minutes
This module utilizes Electronic case report forms (eCRFs) which you will create using DFsetup without a PostScript® or PDF file. eCRFs do not contain barcodes and are therefore only suitable for entry via EDC.
-
Start DFATK as described in Module 1 (Installation & Initialization).
-
Click followed by to begin this module.
-
This module requires user
data_managerto have exclusive access to the 254 Acceptance Test Study database. The Control Panel must be closed. Click .
-
Start DFsetup, login as user
data_managerand choose 254 Acceptance Test Study as described in Section 1.8, “How to start DFsetup”. Choose Exclusive Access and click . Exclusive Access allows you to create and modify plates, styles and fields, and to define all setup configuration files.

Note The main DFsetup window displays the last plate to be active in the user's previous DFsetup session. For this reason, you may see a different plate from what is displayed in the above illustration.
-
Select > . In the Add eCRF Plate dialog enter a New Plate Number of 21. Click .

In the Plate Properties set:
Label =
Lab ResultseCRF = Yes
Sequence is = predefined
Triggers Early Termination = No
Layout = Portrait
Eligible for Signing When = Final
Click .

Within Plates-Modules-Fields Module options Click . Check Keys, LB, LB1, LB2, LB3 modules, click .

-
Double-click the Keys [1] module to expand the list of fields. Using your mouse, click and drag the SUBJID and PINIT fields onto the 21: Lab Results eCRF.

-
Click LB [1] Module, drag the module onto the eCRF, select LBORRES_n, LBNRIND and LBCLSIG_c fields by holding Shift and clicking on the fields. Select > .

-
Click LB1 [1] Module, drag the module onto the eCRF. Select > .

-
Click LB2 [1] Module, drag the module onto the eCRF. Select > .

-
Click LB3 [1] Module, drag the module onto the eCRF. Select > .

-
Select > .
-
Select > to close DFsetup.
-
Start DFexplore, login as user
site_monitorand choose 254 Acceptance Test Study as described in Section 1.7, “How to start DFexplore”. -
Click Site 99 - Hospital #99 > Subject 99008 > 1: Baseline > 21: Lab Results to make it the active page.
Note DFexplore stores previously defined user preferences. If
site_monitorpreviously used DFexplore and modified user preferences, you may see a different background than what is illustrated below.
-
Select > , click Background Options to expand the preferences. Click Color then to apply the changes.

-
Select > > Data Window, within eCRF background color, click
 to open the Select Color window.
-
Enter HTML:
#07458e.
-
Click to close the Select Color window, click to apply your color preferences.
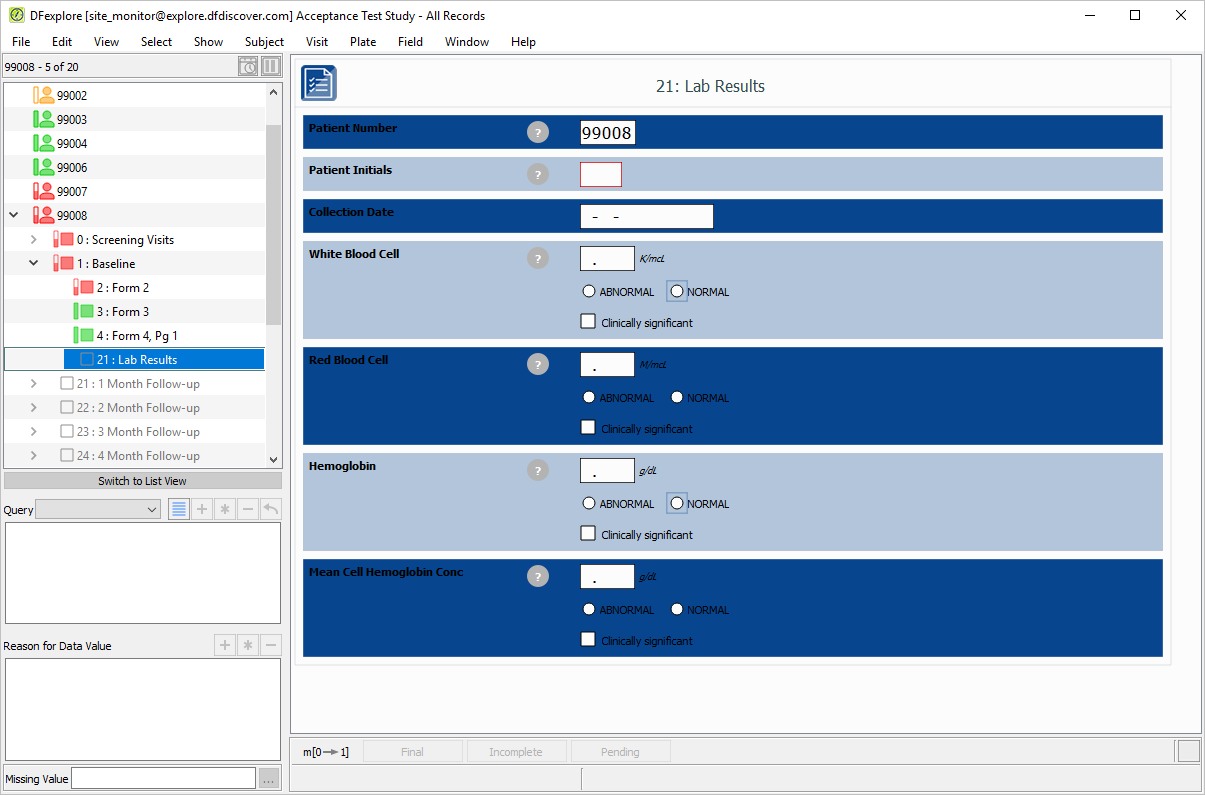
-
Click
 within the Patient Initials field to display the field level help. Click
  to close the help dialog.
-
With subject 99008 21: Lab Results as the current eCRF, click Patient Initials. The initials are pre-filled as a result of the edit check
SetInitdescribed in Module 8. Image Data Entry. Set:Collection Date =
27-SEP-2018White Blood Cell =
18.8, Check (enable) Abnormal.Red Blood Cell =
4.7, Check (enable) NormalHemoglobin =
18.5, Check (enable) NormalMean Cell Hemoglobin Conc =
40.2, Check (enable) Normal
Click to save the data record.

-
Select > to close DFexplore.
Start DFATK as described in Module 1 (Installation & Initialization).
-
Click to confirm successful completion of Module 4. eCRF Creation.
Table of Contents
- 5.1. Tests & Requirements
- 5.2. Begin Module 5. Custom Properties.
- 5.3. Defining Custom Properties in DFsetup.
- 5.4. Adding Global Custom Property values.
- 5.5. Adding Plate, Module and Variable level Custom Property values
- 5.6. Exporting Custom Properties in DFsetup.
- 5.7. Edit checks execution of Custom Properties.
- 5.8. Creating subject data lists and exporting data views.
- 5.9. DFexplore Database Definition Report exporting.
- 5.10. End Module 5. Custom Properties.
Defining Custom Properties in DFsetup.
Adding Global Custom Property values.
Adding Plate, Module and Variable level Custom Property values
Exporting Custom Properties in DFsetup.
Edit checks execution of Custom Properties.
Creating subject data lists and exporting data views.
DFexplore Database Definition Report exporting.
Estimate of Time Required: 30 Minutes
-
Start DFATK as described in Module 1 (Installation & Initialization).
-
Click followed by to begin this module.
-
This module requires user
data_managerto have exclusive access to the 254 Acceptance Test Study database, the Control Panel must be closed. Click .
-
Start DFsetup, login as
data_managerand choose 254 Acceptance Test Study as described in Section 1.8, “How to start DFsetup”. Choose Exclusive Access and click . Exclusive Access allows you to create and modify plates, styles and fields, and to define all setup configuration files.
-
Select > .
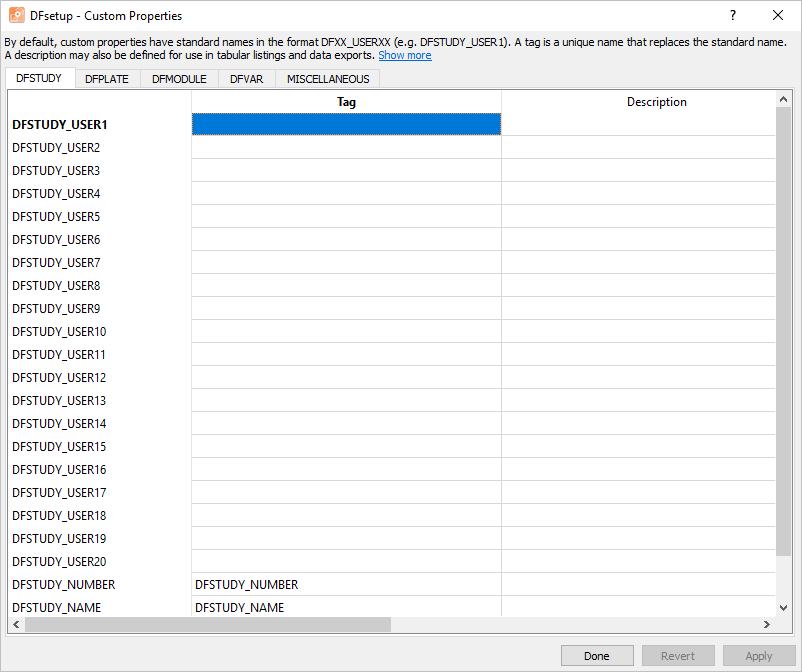
-
Click DFSTUDY tab, followed by the empty Tag cell for DFSTUDY_USER1 to make it the active field.
-
Beginning with DFSTUDY_USER1 cell. Enter the Custom Properties for DFSTUDY as follows:
DFSTUDY_USER1 =
TITLEDFSTUDY_USER2 =
SPONSORDFSTUDY_USER3 =
PLANSUBJECTSDFSTUDY_USER4 =
TRIALPHASEDFSTUDY_USER5 =
TRIALTYPEDFSTUDY_USER6 =
LENGTHDFSTUDY_USER7 =
REGID
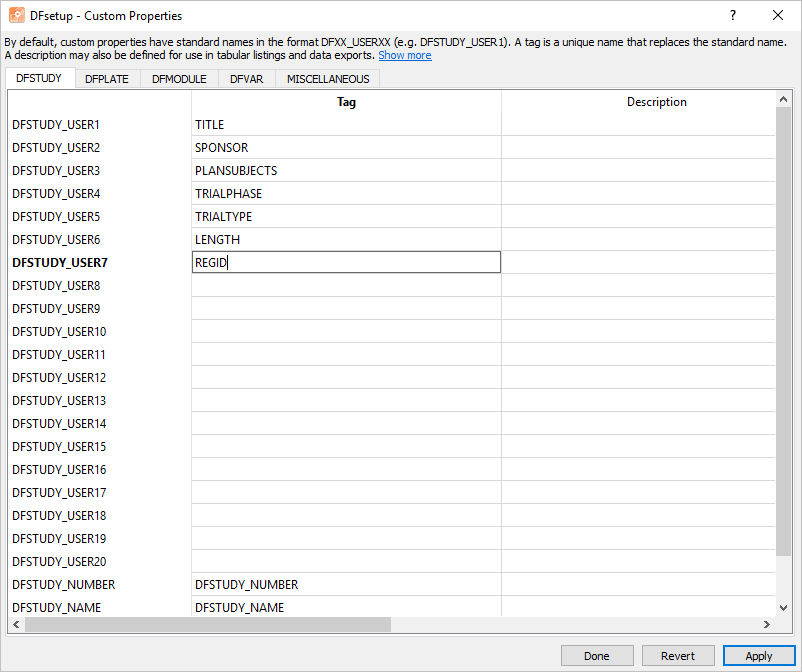
-
Click DFPLATE tab, followed by the empty Tag cell for DFPLATE_USER1. Enter the Custom Properties for DFPLATE as follows:
DFPLATE_USER1 =
V1DFPLATE_USER2 =
V2
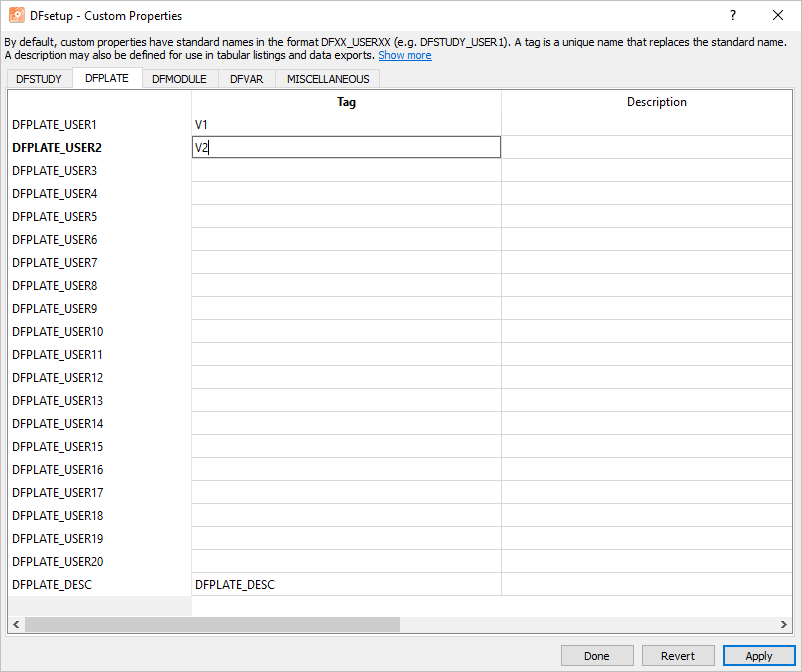
-
Click DFMODULE tab, followed by the empty Tag cell for DFMODULE_USER1. Enter the Custom Properties for DFMODULE as follows:
DFMODULE_USER1 =
XXTESTDFMODULE_USER2 =
XXTERMDFMODULE_USER3 =
XXTRTDFMODULE_USER4 =
XXCATDFMODULE_USER5 =
XXSCATDFMODULE_USER6 =
XXFAST
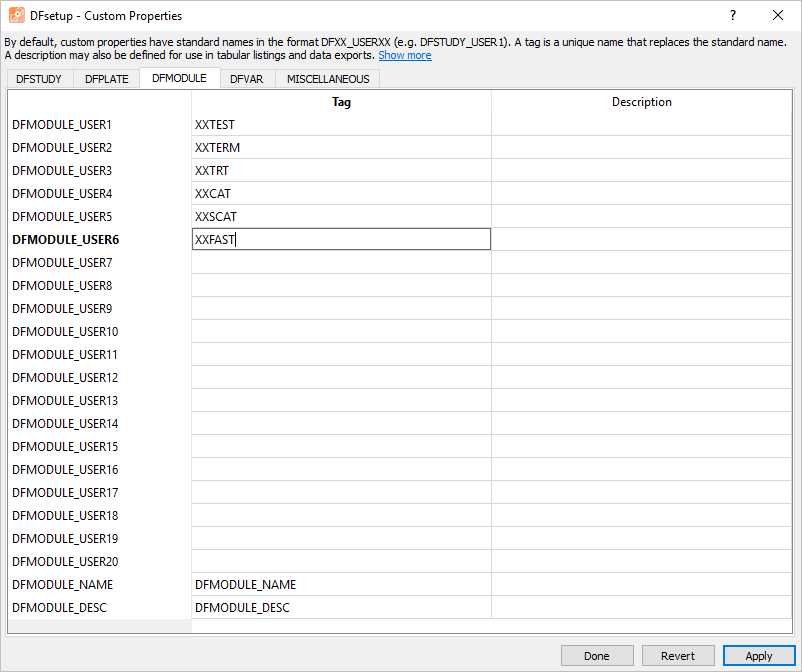
-
Click DFVAR tab, followed by the empty cell for DFVAR_USER1. Enter the Custom Properties for DFVAR as follows:
DFVAR_USER1 =
EC_PLT_ENTERDFVAR_USER2 =
EC_FLD_ENTERDFVAR_USER3 =
EC_PLT_EXITDFVAR_USER4 =
EC_FLD_EXIT
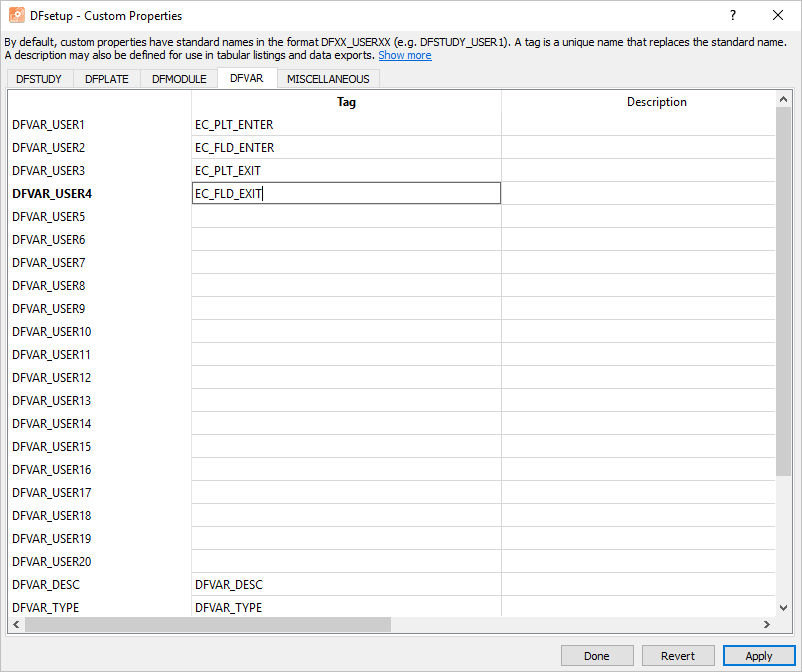
-
Click to apply the newly defined Custom Property values.
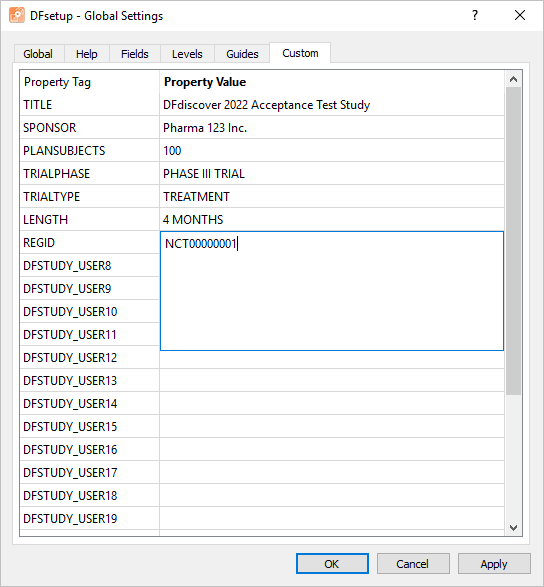
-
Click 1 - Blood Pressure Screening Visits to make it the active page. Within the Plate Properties window click Custom tab.
-
Enter the Property Value tags as follows:
V1 =
1 October 2014V2 =
11 November 2014 - Corrected error in Eligibility Criteria item 6.
Click .
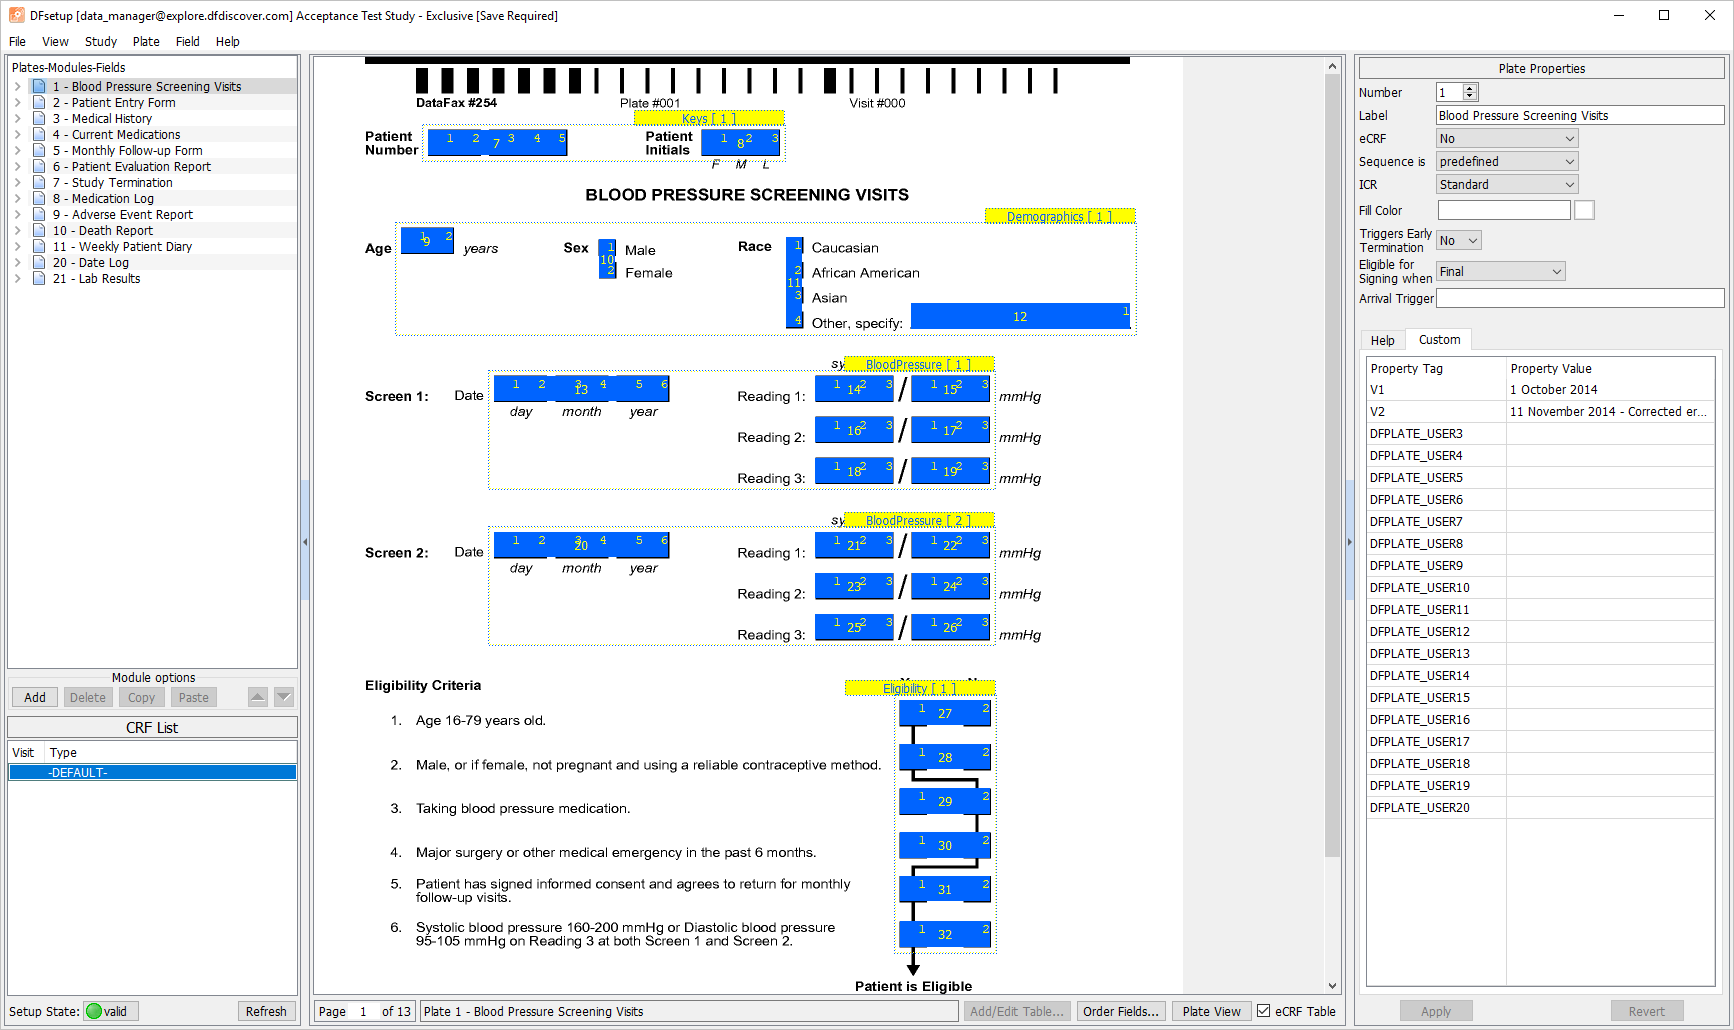
-
Select > .
-
Within row 2 Patient Entry Form navigate to the V1 Property Value cell. Enter
1 October 2014. In the V2 cell enter11 November 2014 - Updated randomization instructions.. Click , .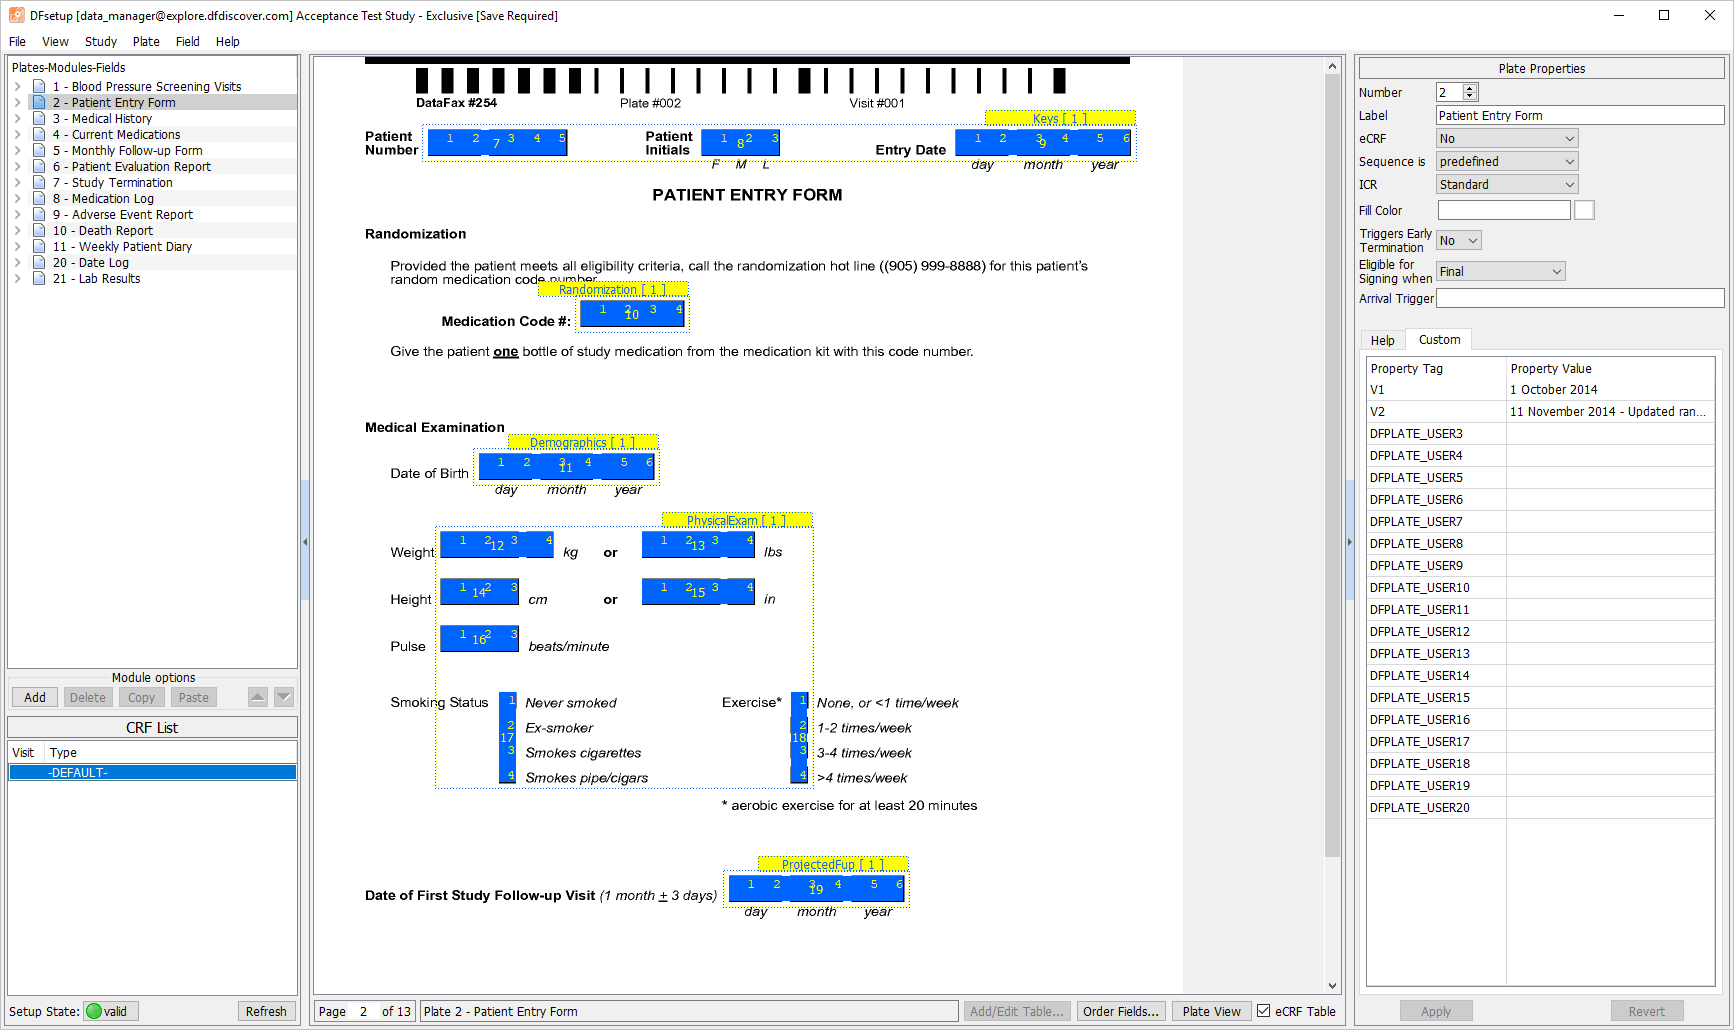
-
From the Plates-Modules-Fields window double-click 2 - Patient Entry Form. Click Keys [1] to make the module active.
-
In the Module Properties window specify
PTKEYSfor the XXTEST Property Value. Click .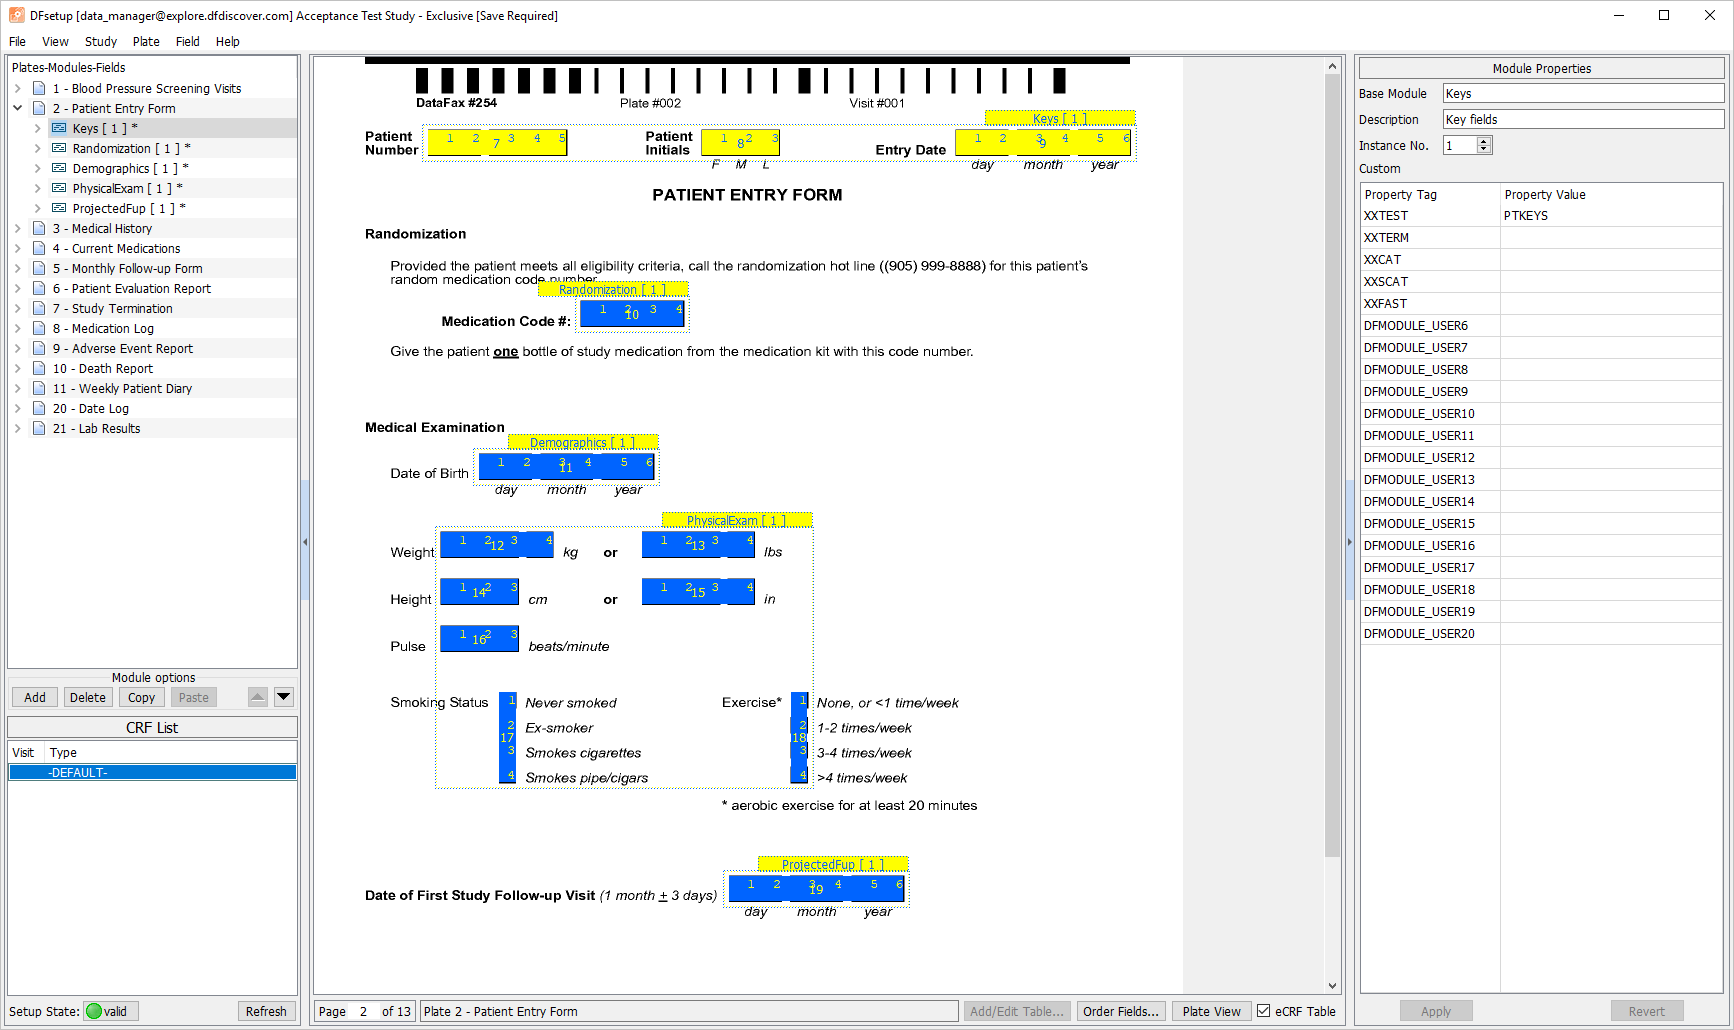
-
Double-click Randomization [1]. In the Module Properties window specify
RANDCODEfor the XXTEST Property Value. Click .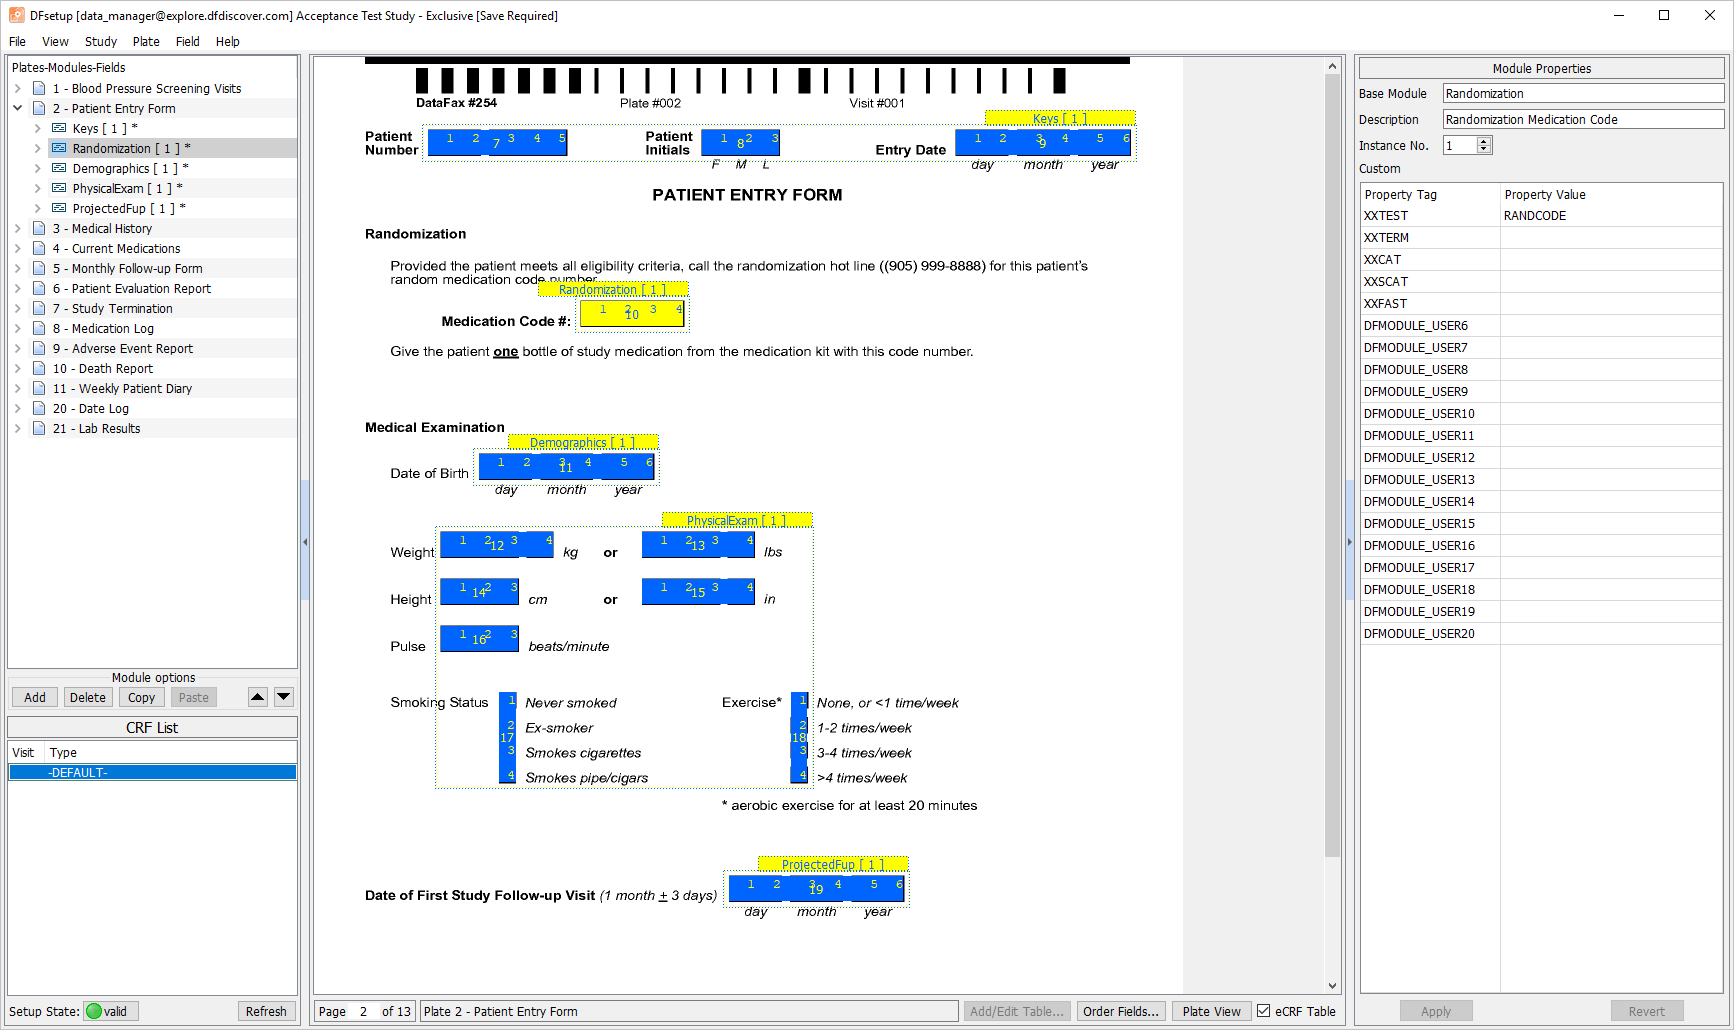
-
Select Medication Code # field. Click Custom from the Field Properties window.
-
Enter
[MissingQC] Response is required.in the EC_FLD_EXIT Property Value.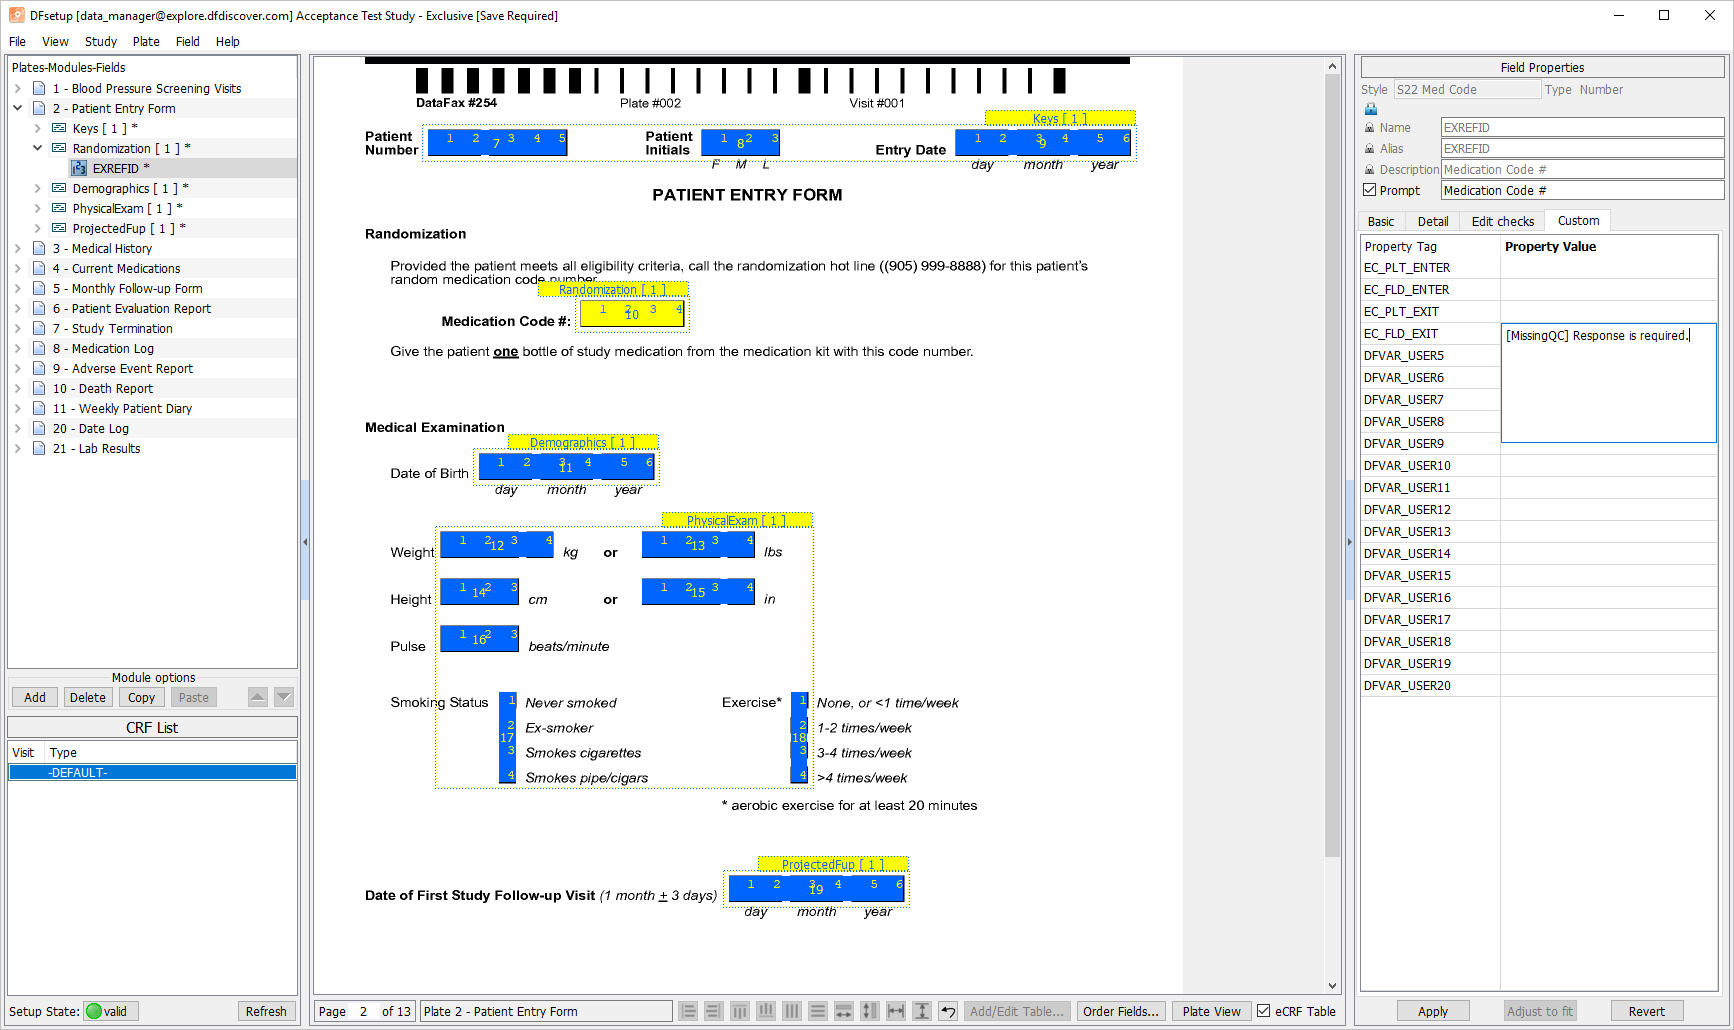
-
Click Edit checks tab within the Field Properties window.
-
Enter
MissingQC, sdvnext to Field Exit, click .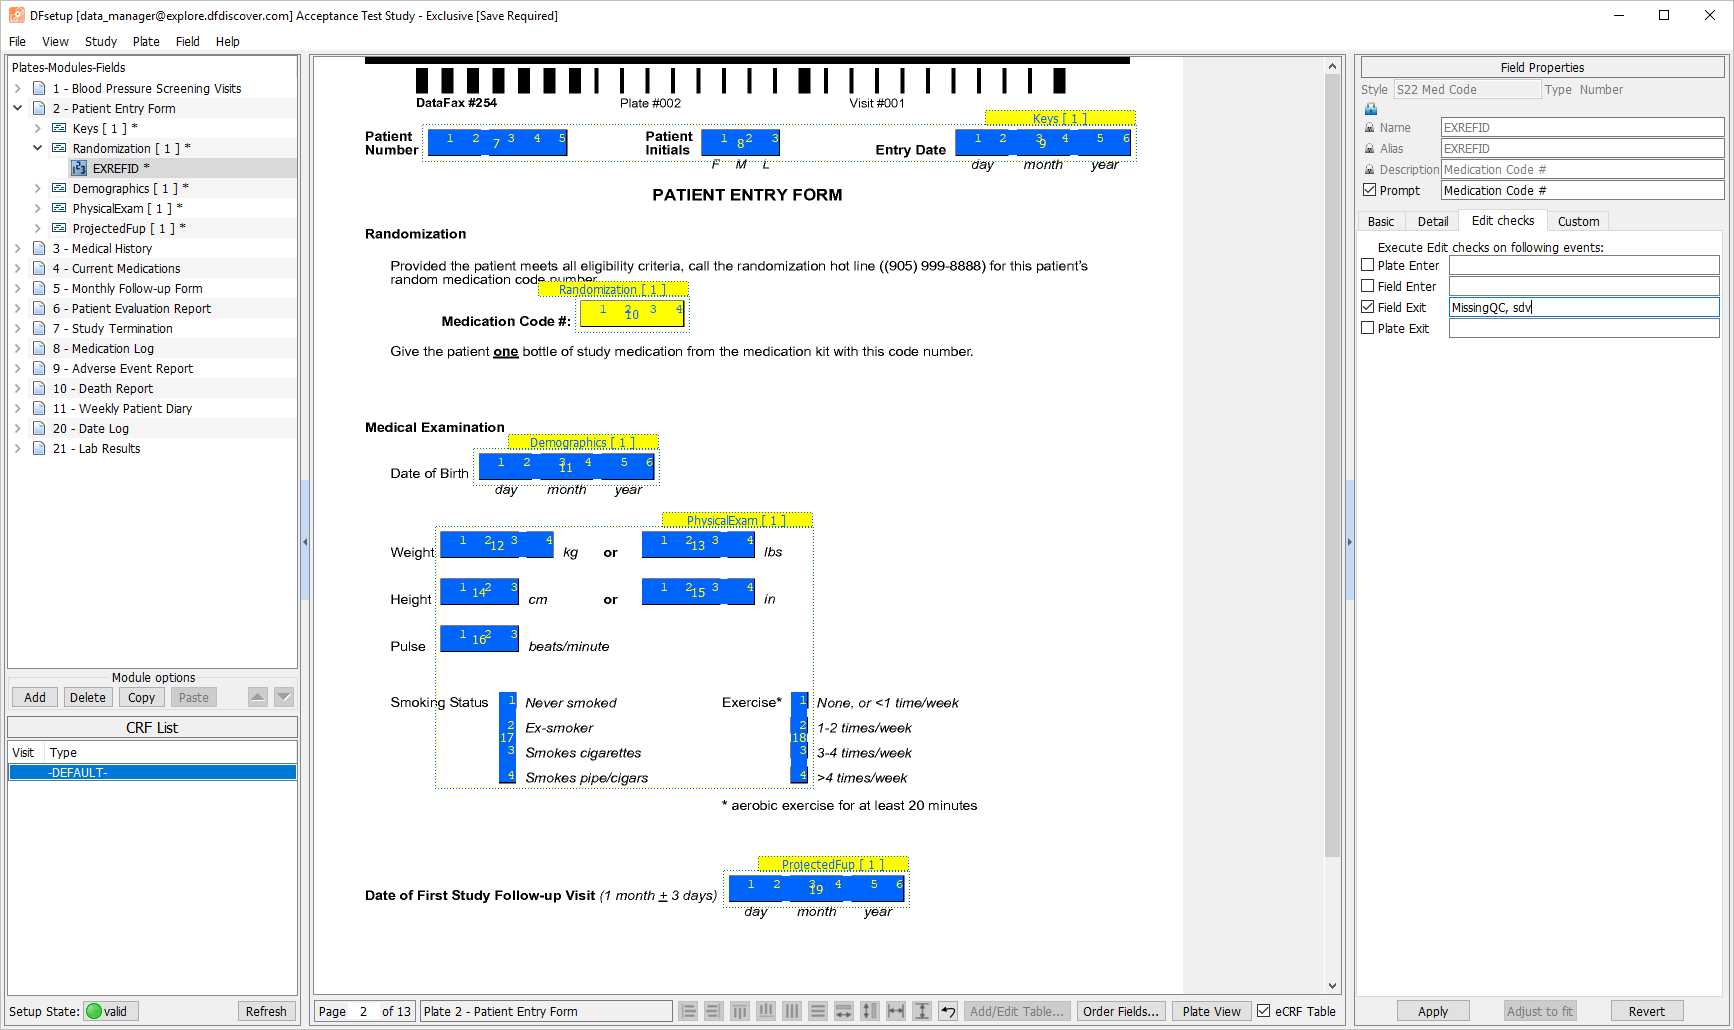
-
Click Weight (lbs) field, then Custom. Enter
[WeightEquiv] Weight conversion.in the EC_FLD_EXIT Property Value. Click .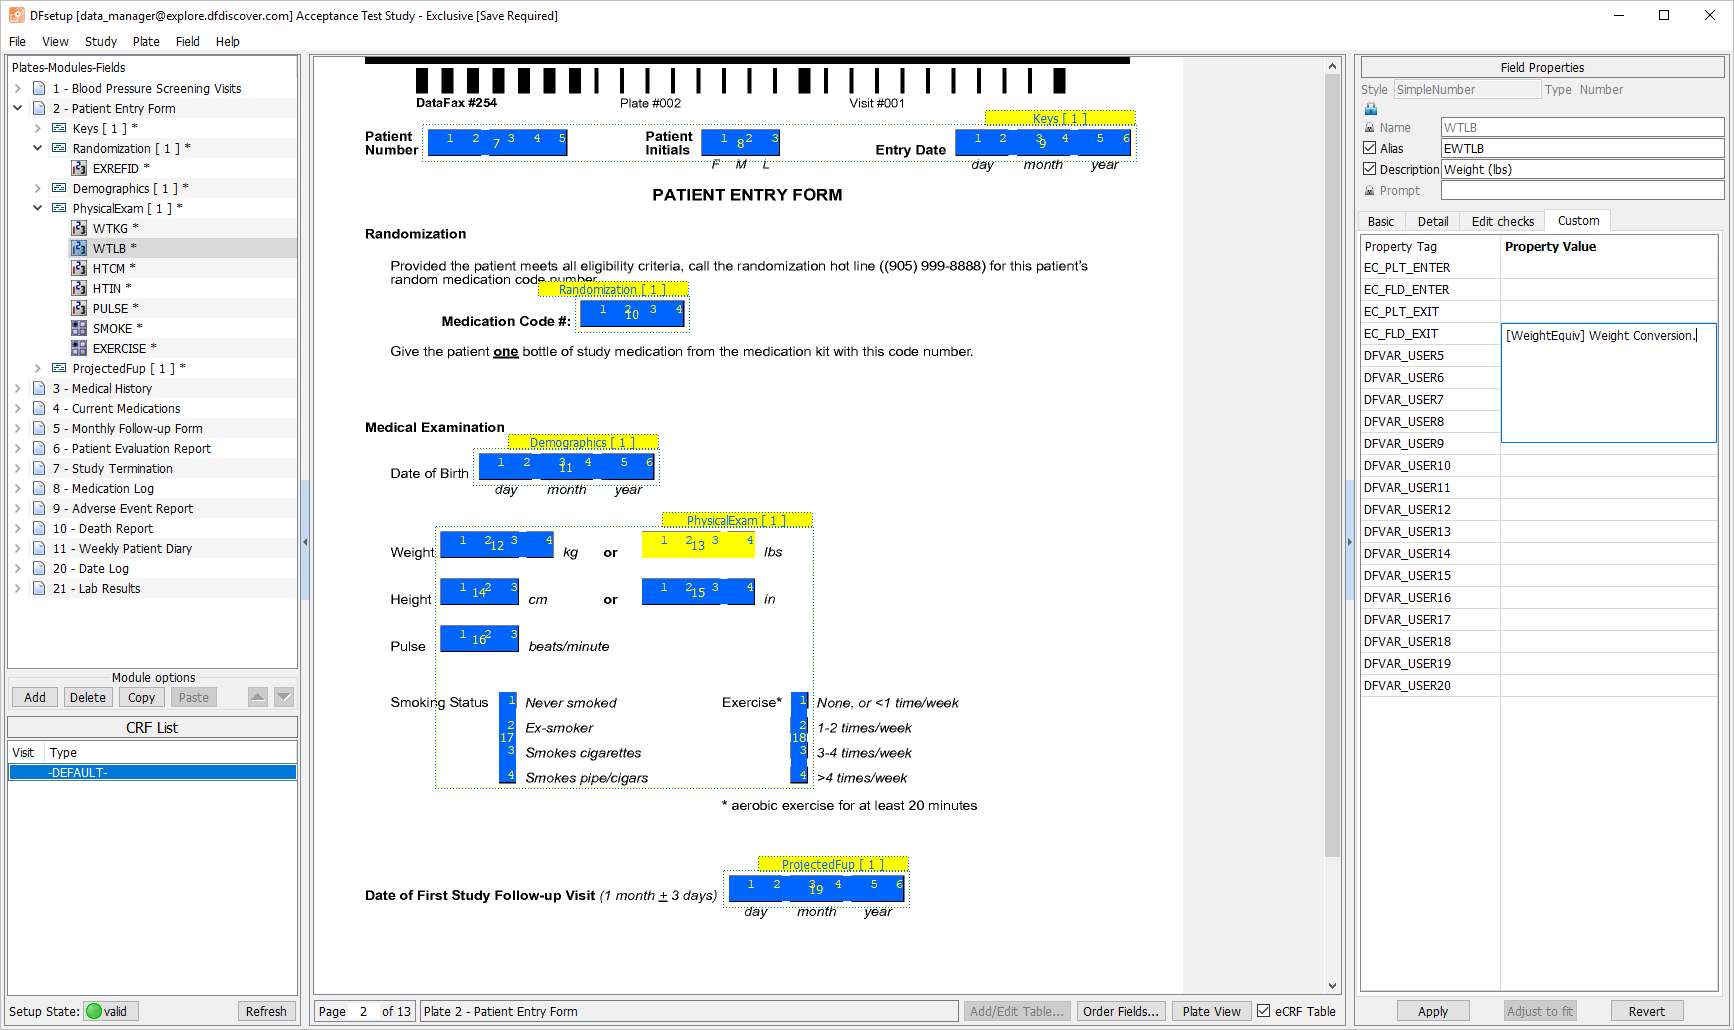
-
Select > .
-
Select > >.
-
Click Field Properties .
-
In the resulting dialog, click .
-
Select Name, Alias, Description, EC_PLT_ENTER, EC_FLD_ENTER, EC_PLT_EXIT and EC_FLD_EXIT. Click .
-
Specify
module5_setup.xlsxas the Output File name, enable (check) Open output file after export.. Click .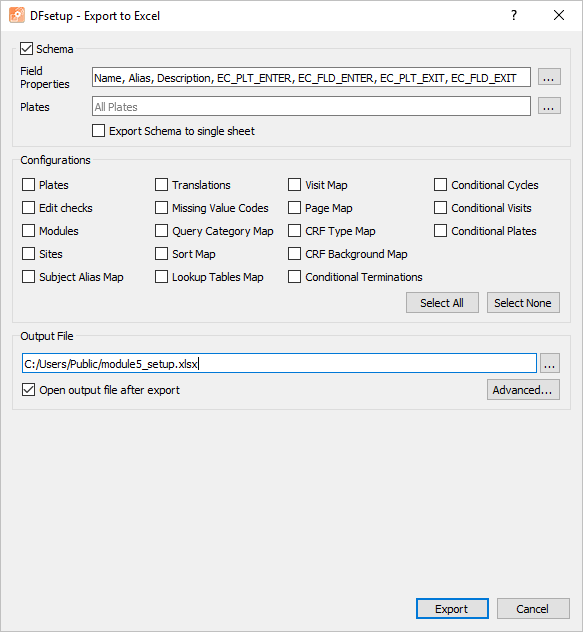
-
In the exported Excel file open the Global Settings tab to view the newly defined Global Property tags.
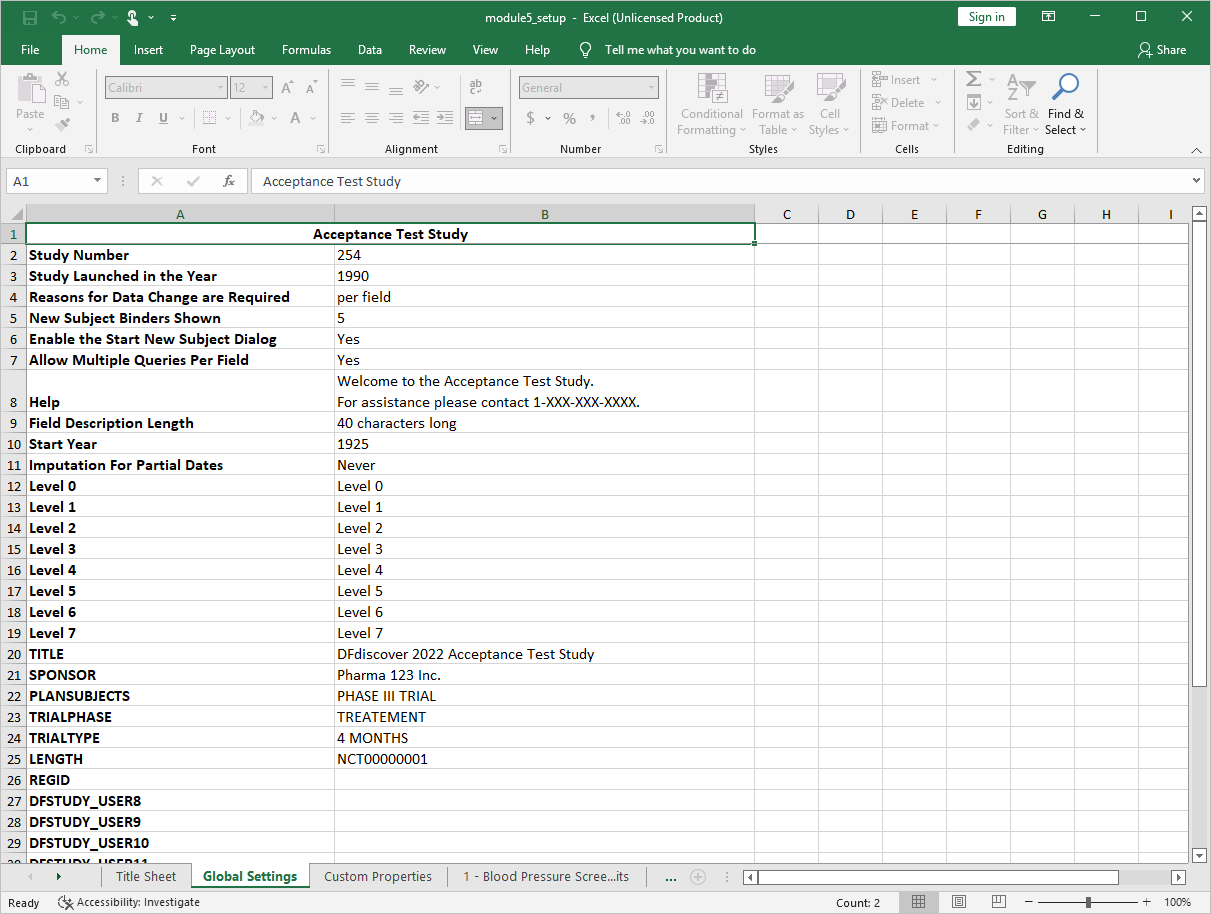
-
Click 2 - Patient Entry Form to view the newly defined Plate Custom Property tags. Return to DFsetup.
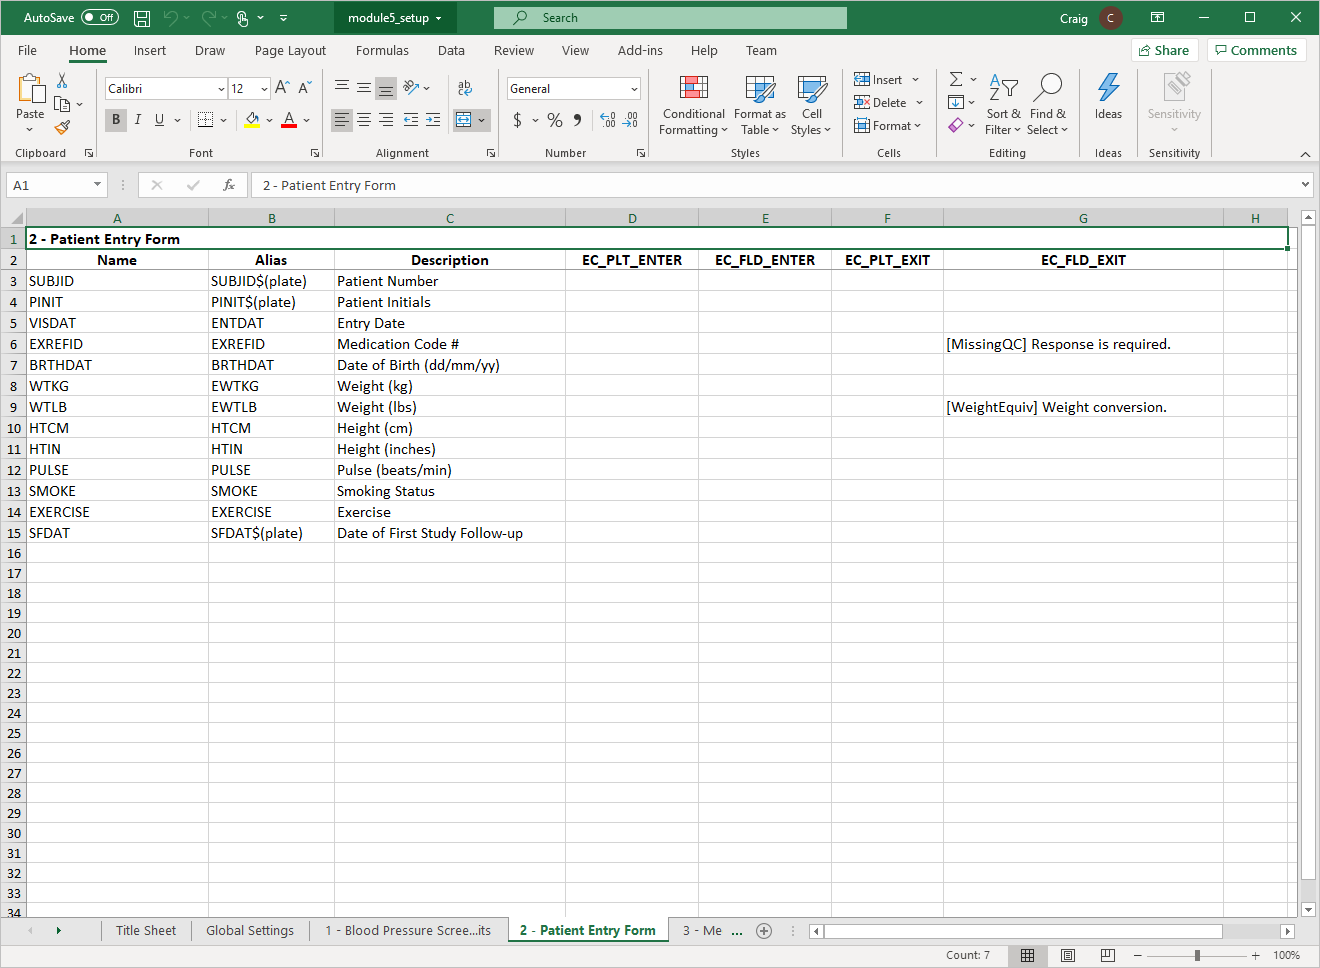
-
Select > to close DFsetup.
-
Start DFexplore, login as
data_coordinatorand choose 254 Acceptance Test Study as described in Section 1.7, “How to start DFexplore”. Upon logging in adfmessageedit check dialog is displayed containing the DFsetup-Global Settings Custom property tags defined in Section 5.3, “Defining Custom Properties in DFsetup.”. Click to close the dialog.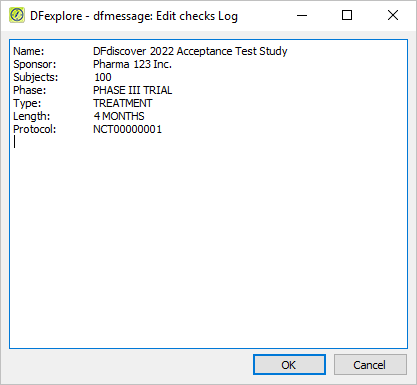
-
Select > , click Background Options to expand the preferences. Click Color then to apply the changes.
-
Select > . Set:
Mode = Validate
Save level = 3 - Level 3
Check (enable) Enable edit checks.
Click .
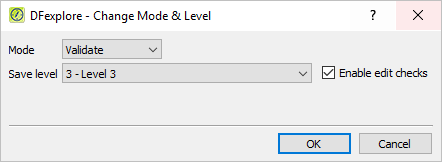
-
Double-click Site 99 - Hospital #99 > 99010 > 1 : Baseline > 2 : Form 2.
-
Click anywhere on the page background to make the fields active. Press Tab to advance to the Medication Code # field.
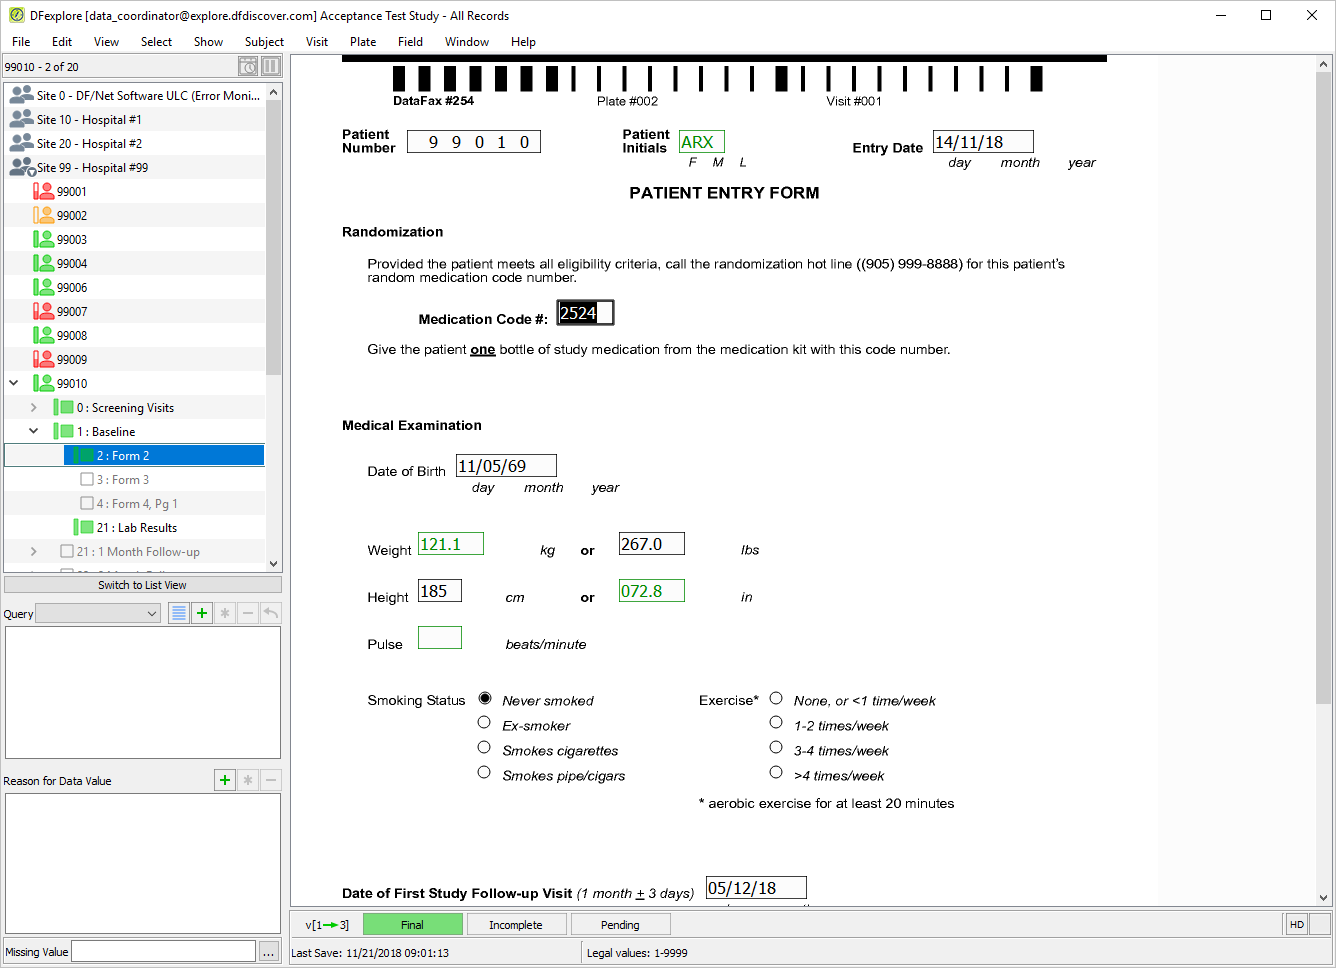
-
Press Tab to exit the field and execute the
sdvedit check.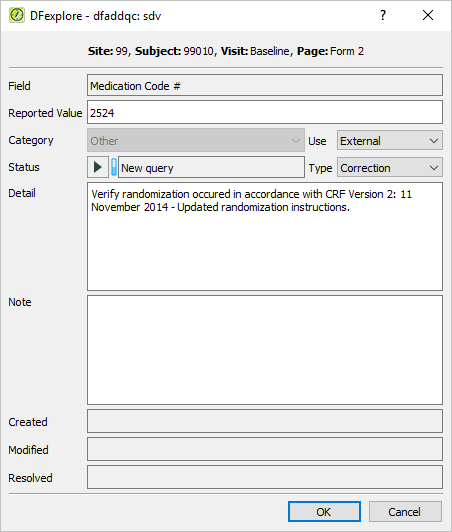
-
Click to add the edit check containing the Custom Property Value's added in Section 5.3, “Defining Custom Properties in DFsetup.”.
-
Press Tab to advance through the remainder of the fields on the Patient Entry Form page. Verify that the Save information bar at the bottom of the screen indicates that the saved page will be assigned a record level of 3. Click .
-
Select > .
-
Click 002 - Patient Entry Form.
-
Select > to show the listing of all data fields and their metadata properties defined for the plate. In the Data Fields window, click
 next to fields 7:SUBJID
, 10:EXREFID
, 12:WTKG
, 13:WTLB.
next to fields 7:SUBJID
, 10:EXREFID
, 12:WTKG
, 13:WTLB.
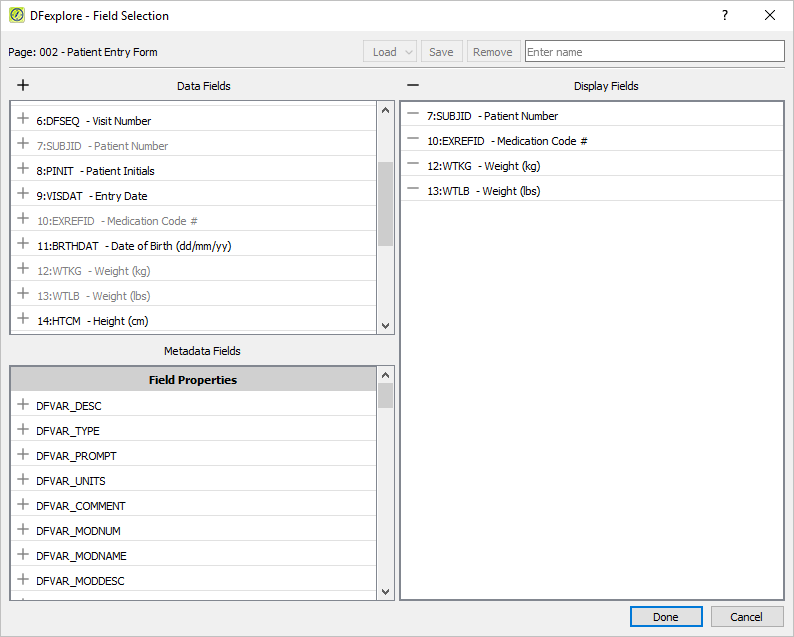
Note Alternatively fields can also be added by dragging-and-dropping the desired fields from the Data Fields or Metadata Fields windows to the Display Fields window.
-
In the Metadata Fields window, click
next to field EC_FLD_EXIT to add the field to the Display Fields window.
From the drop-down select 10:EXREFID, click and drag the field to be below the 10:EXREFID - Medication Code # field.
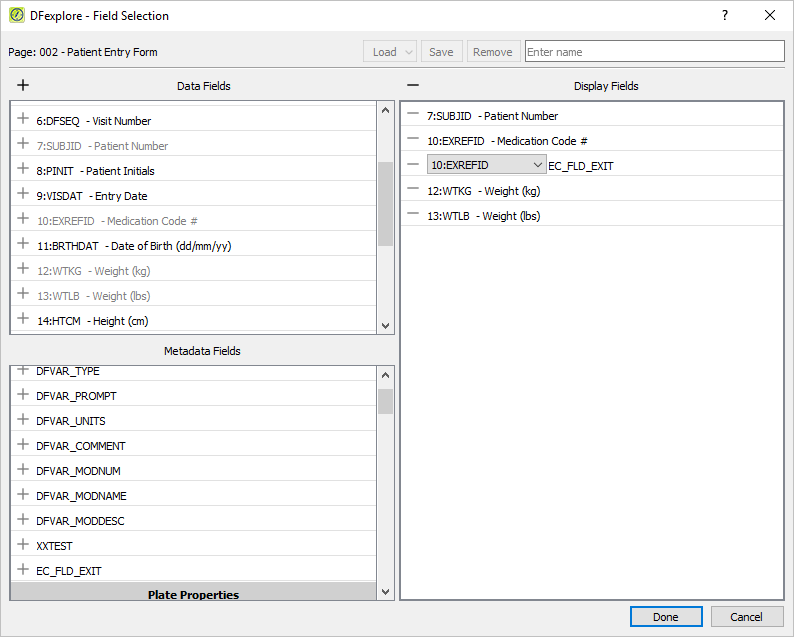
-
Return to the Metadata Fields window, click
next to field EC_FLD_EXIT to add the field to the Display Fields window. From the drop-down select 13:WTLB.
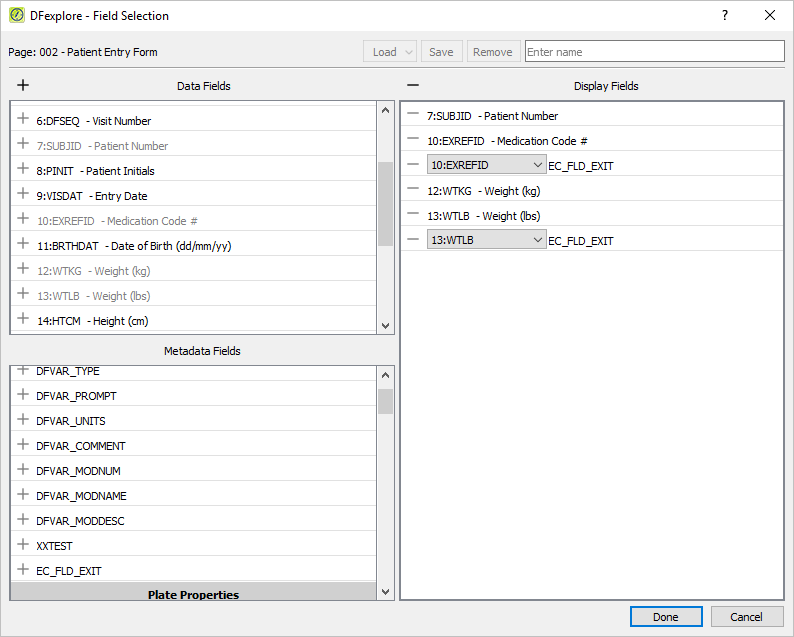
-
Click to apply the field selection criteria and close the dialog.
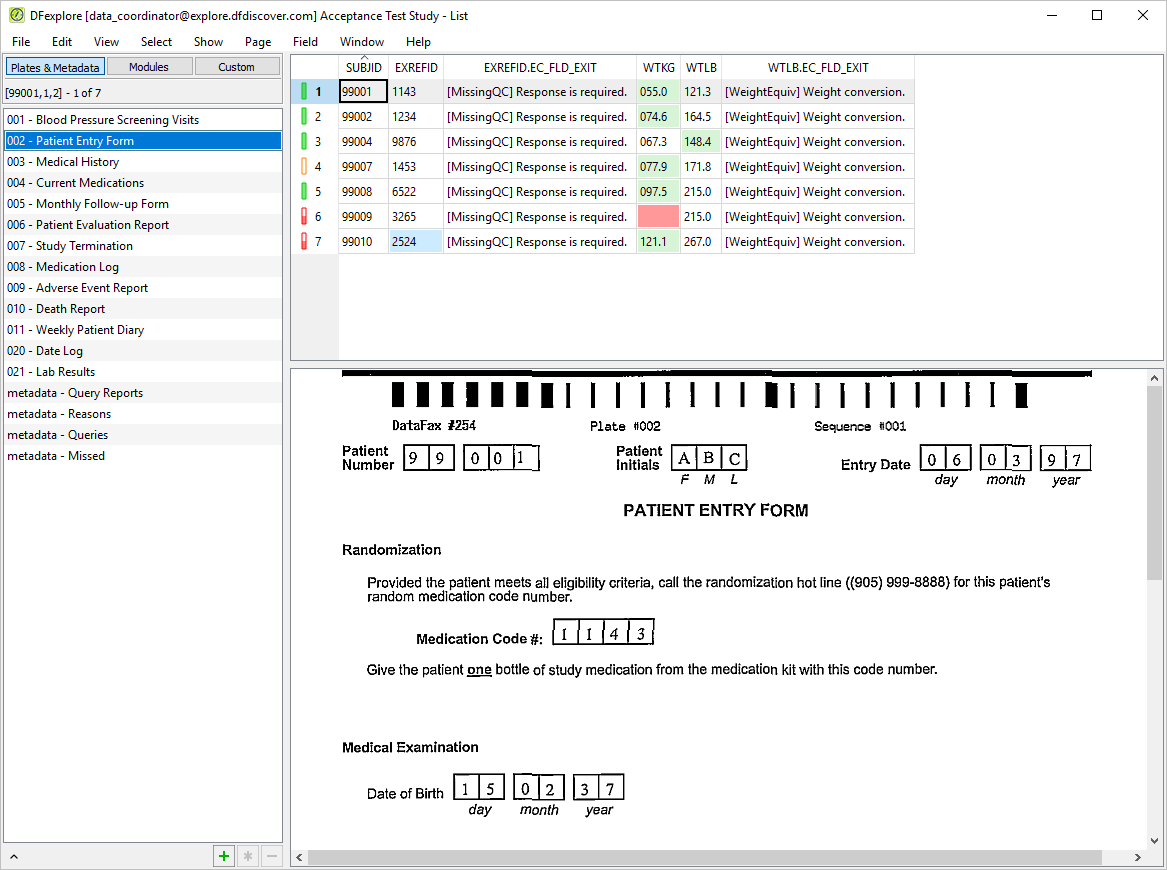
-
Select > to save the data to a local file. In the dialog, set:
Format = Excel
Check (enable) Include header as the first record in output file.
-
Click next to Output File. Choose a directory in the file selection dialog, enter
module5_data.xlsxas the filename, and click . Click to create/write the file and close the dialog.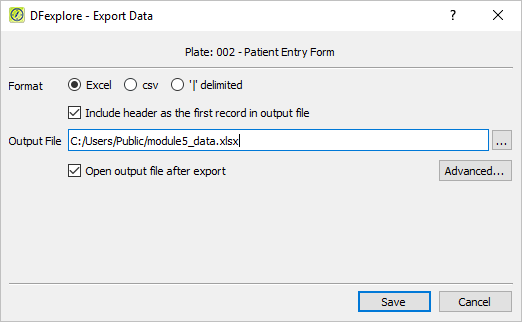
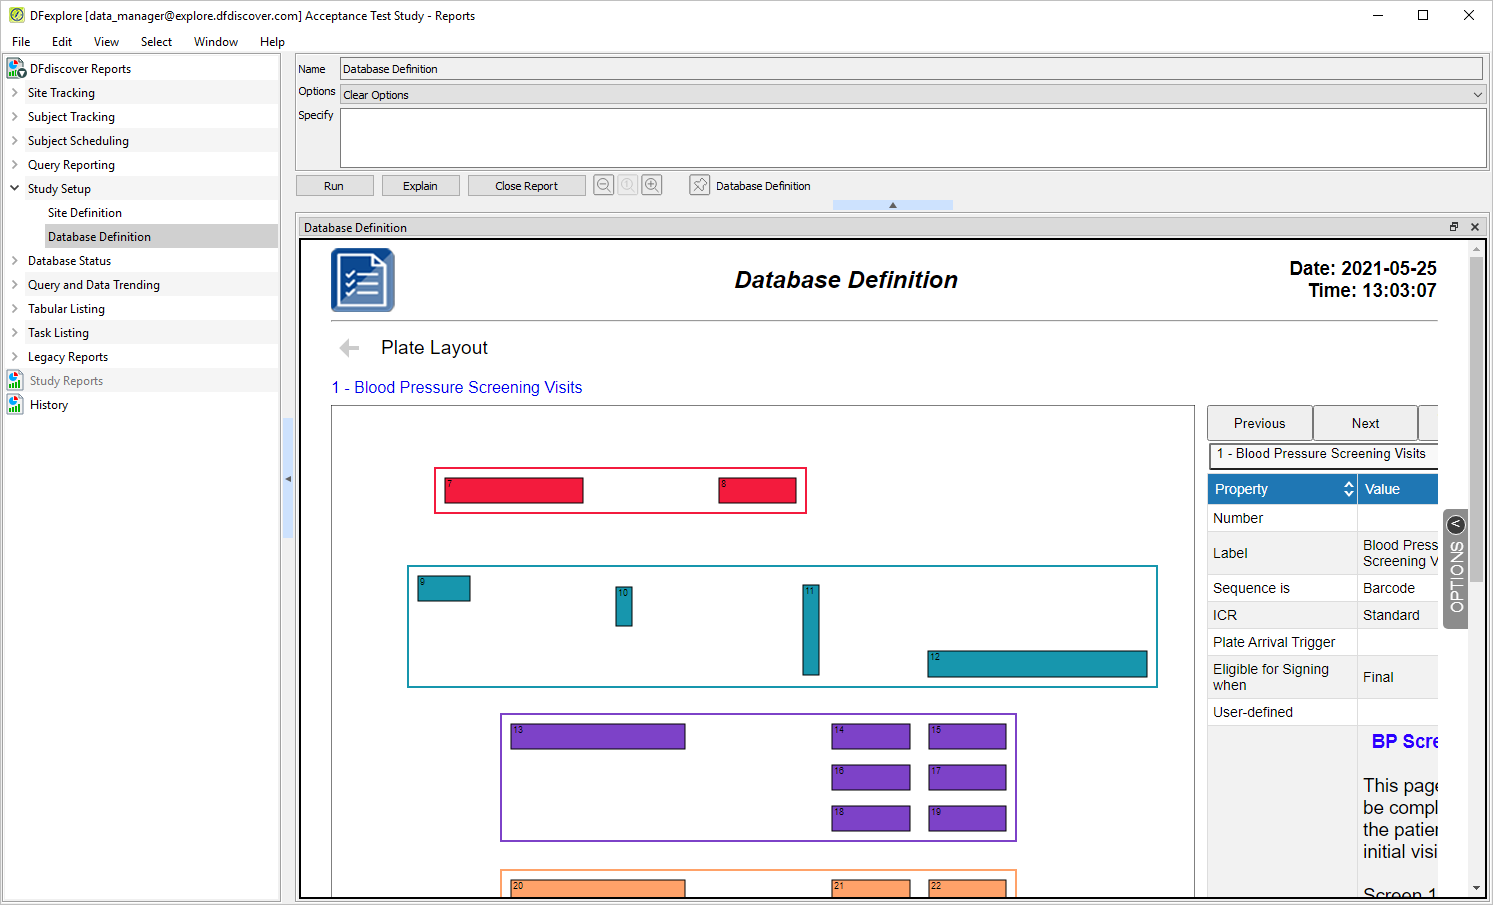
Start DFATK as described in Module 1 (Installation & Initialization).
-
Click to confirm successful completion of Module 5. Custom Properties.
Table of Contents
Importing and Modifying Subject Alias Map using DFsetup.
Subject Alias Tracking (Reports).
Exporting Subject Alias data.
Estimate of Time Required: 20 Minutes
-
Start DFATK as described in Module 1 (Installation & Initialization).
-
Click followed by to begin this module.
-
Click to email a copy of subject_alias_map.csv to
data_manager. Clicking more than once will result in multiple files arriving to your email inbox.Note Save the subject_alias_map.csv file received via email to your local computer. This file is required to complete the remainder of this module. Refer to Section 1.8, “Creating user accounts and assigning study permissions.” as a valid email address is required for
data_managerto receive the module specific files. -
This module requires user
data_managerto have exclusive access to the 254 Acceptance Test Study database, the Control Panel must be closed. Click .
-
Start DFsetup, login as user
data_managerand choose 254 Acceptance Test Study as described in Section 1.8, “How to start DFsetup”. Choose Exclusive Access and click . Exclusive Access allows you to edit the Subject Alias Map.
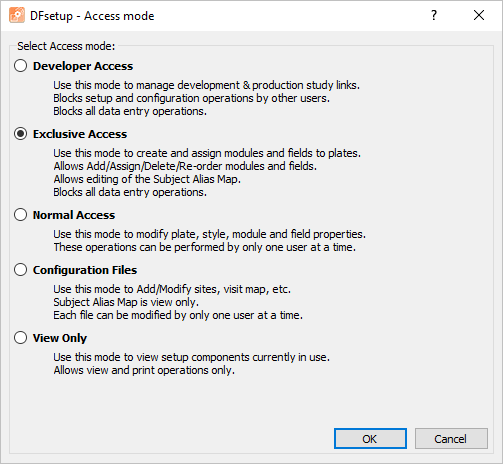
-
Select > .
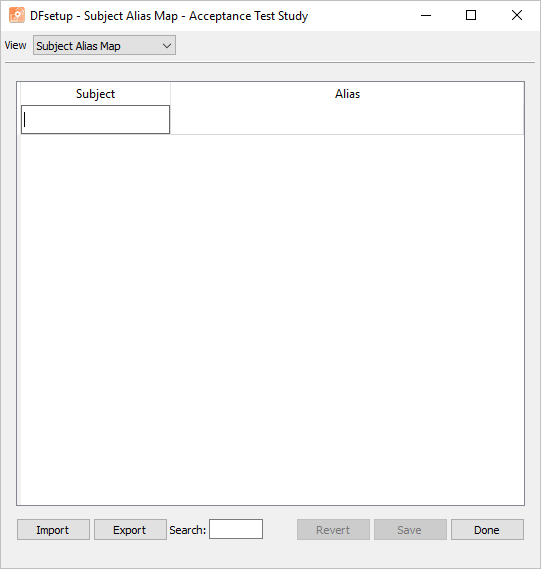
-
Click . From the file selection dialog, locate the previously saved
subject_alias_map.csvfile.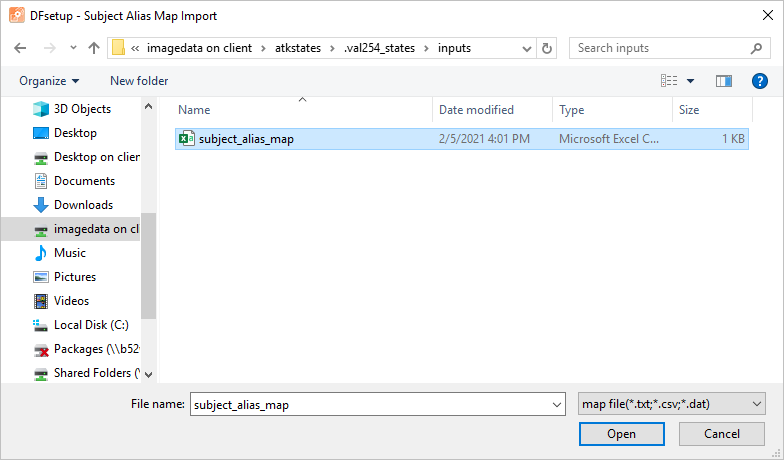
-
Select the file, click , then .
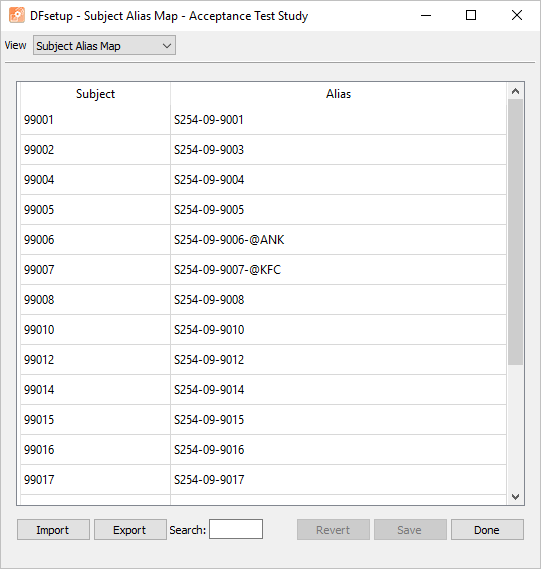
Note Clicking triggers the initial import of the Subject Alias Map to be logged in
DFsubjectaliasmap.logwhich leads to the output produced in Section 6.5, “Subject Alias Tracking (Reports).”. -
Modify the following Alias definitions:
99002fromS254-09-9003toS254-09-900299006fromS254-09-9006-@ANKtoS254-09-900699007fromS254-09-9007-@KFCtoS254-09-9007
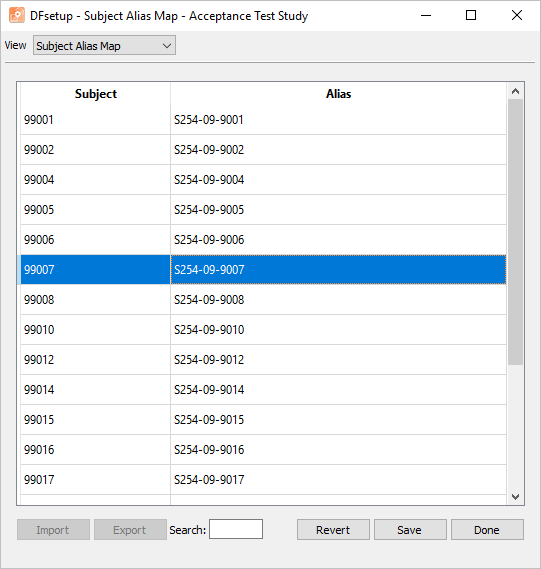
-
Click then to apply the modifications to the Subject Alias Map.
-
Select > to close DFsetup.
-
Start DFexplore , login as user
data_managerand choose 254 Acceptance Test Study as described in Section 1.7, “How to start DFexplore”. -
Double-click Site 99 - Hospital #99 to open the list of available subjects.
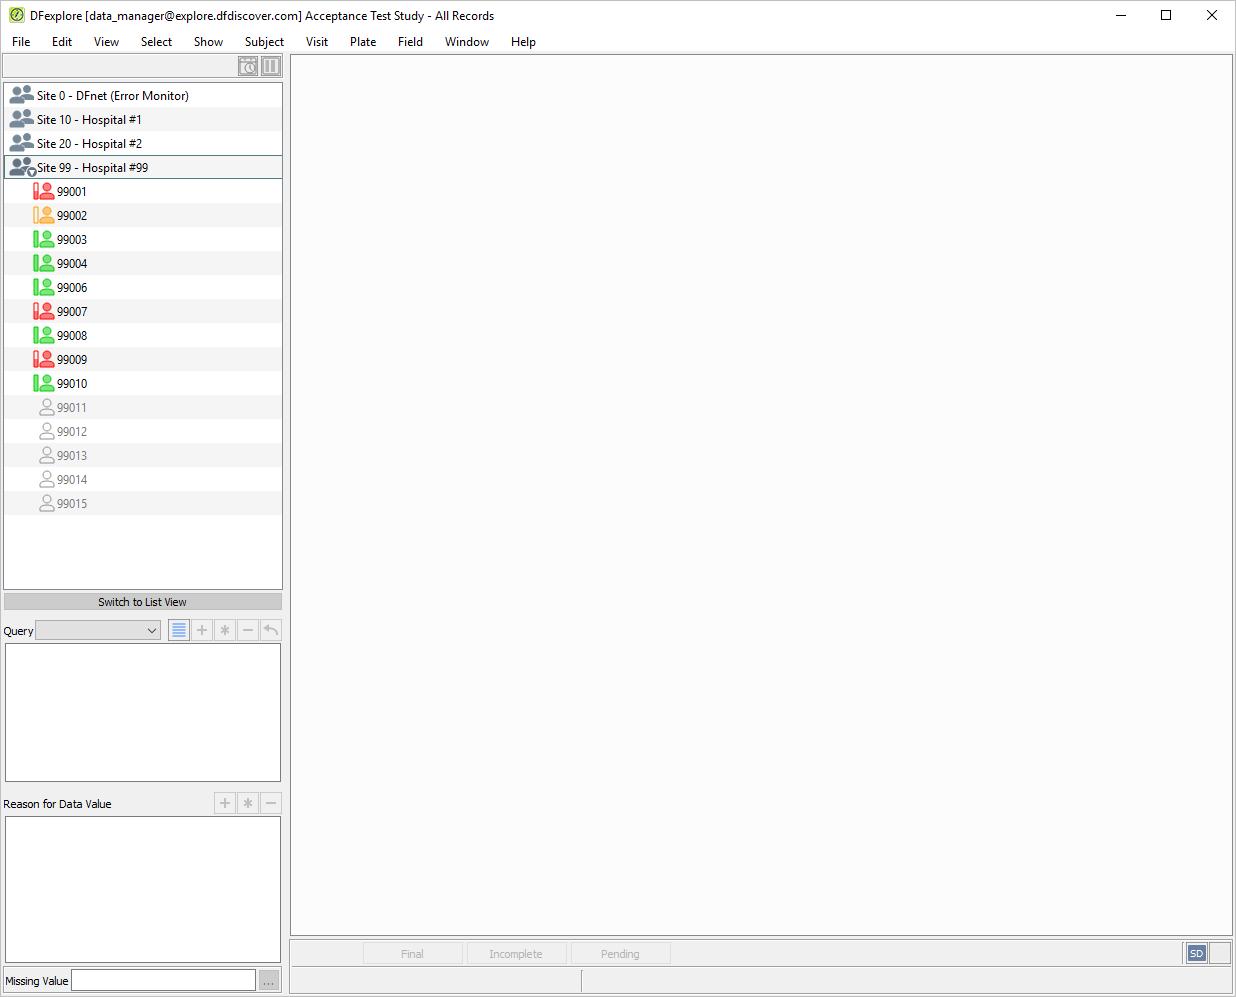
-
Select > . Check (enable) Use subject alias. Click . The Subject ID list now displays the Subject Alias Mapping as defined in DFsetup.
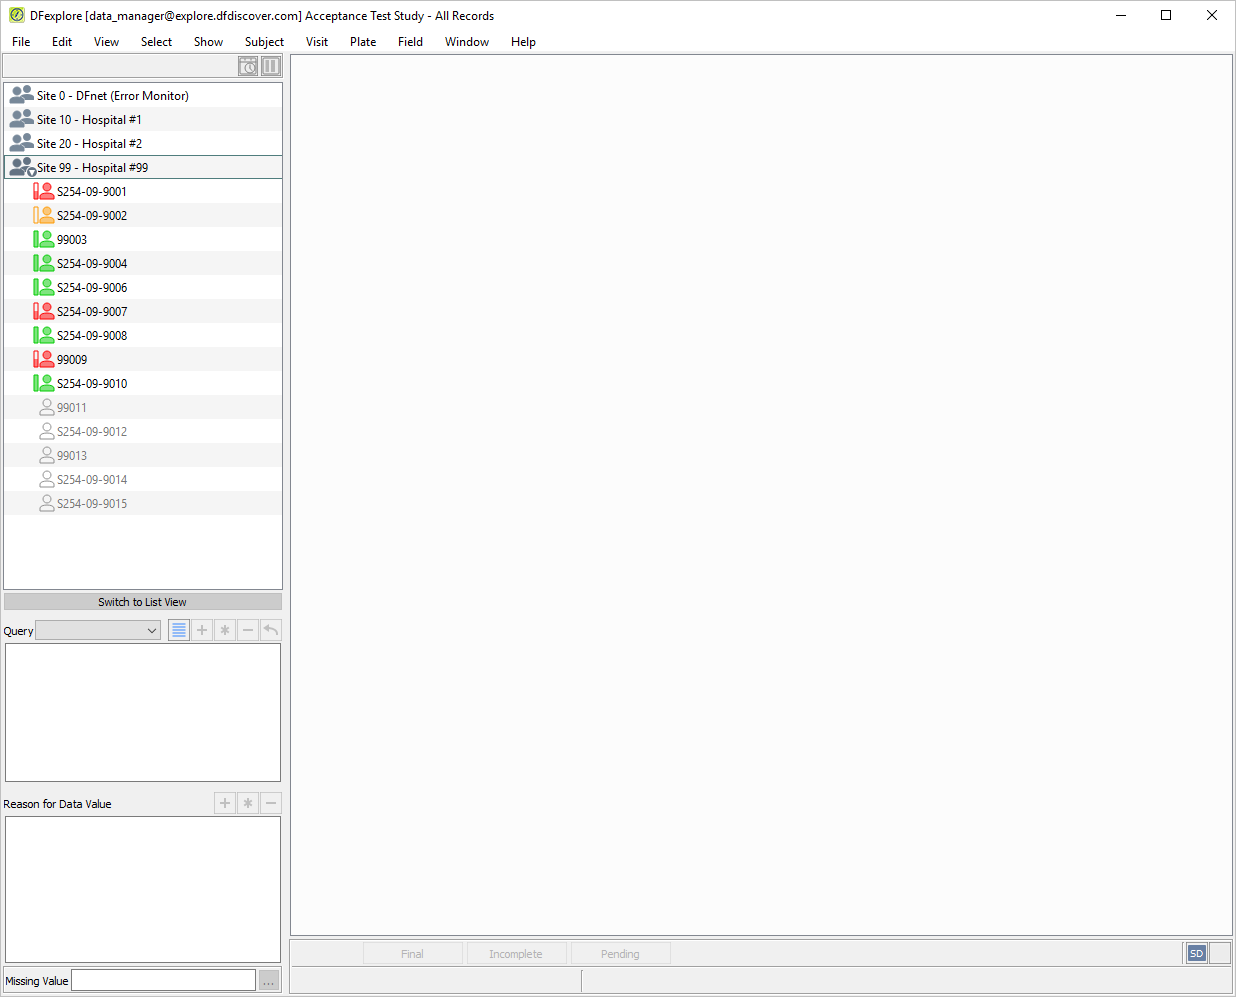
-
Click Site 99 - Hospital #99 > S254-09-9008 > 1: Baseline > 21: Lab Results to make it the active page.
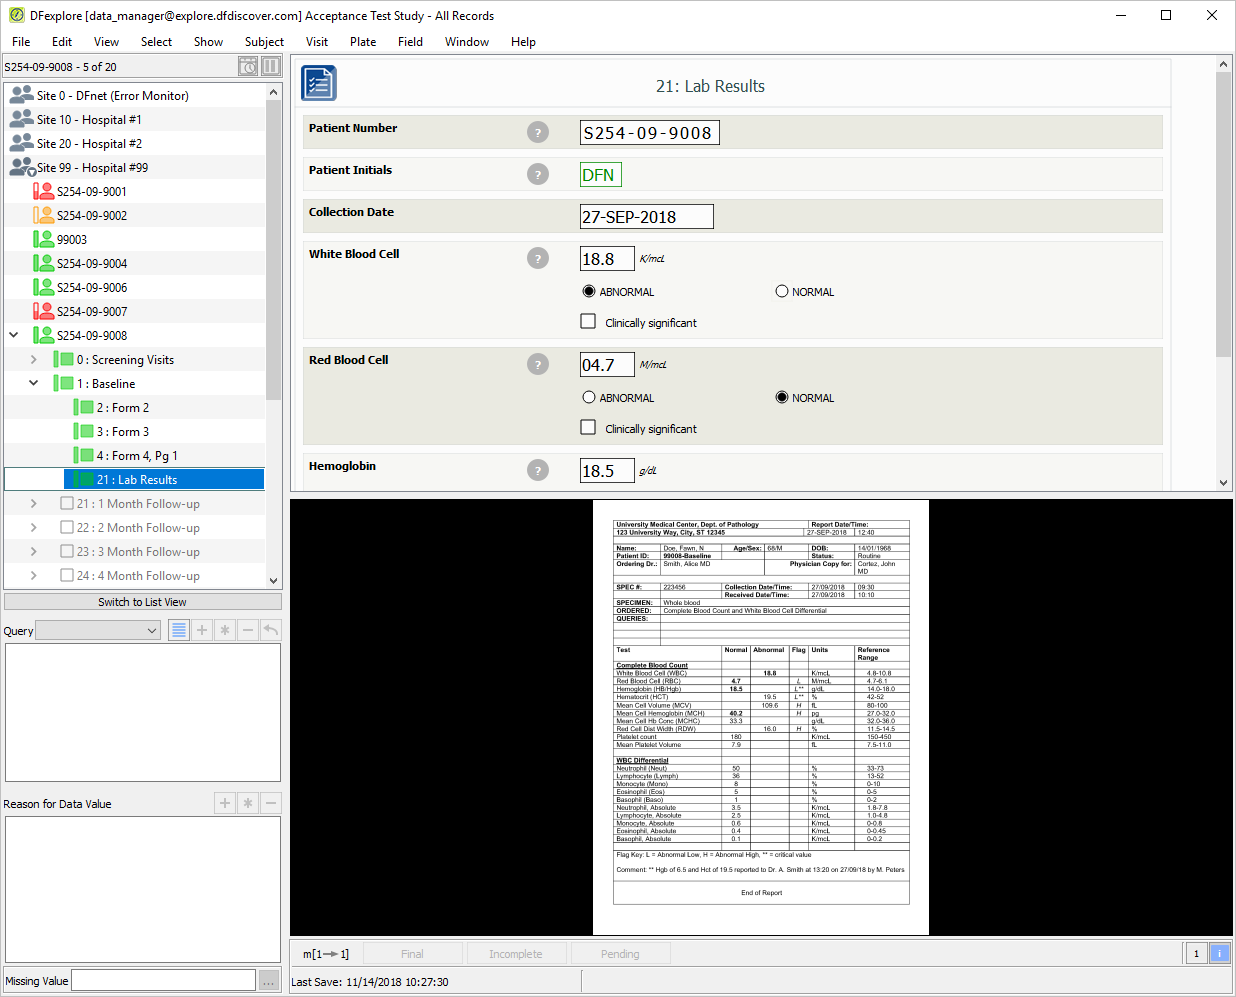
-
Select > . Set:
Subject Alias =
S254-09-9011Confirm Alias =
S254-09-9011
Click .
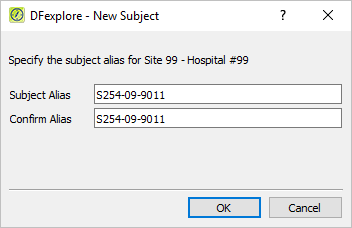
-
The message This subject alias does not exist is displayed. Click to dismiss the New Subject dialog.
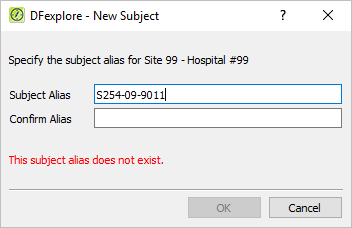
Note All Subject Alias definitions are required to be defined within DFsetup. Users are unable to add new Subject Alias definitions within DFexplore.
-
Double-click S254-09-9012 then entry for 0 : Screening Visits to display the list of pages belonging to the visit. Page 1 : Form 1 becomes the active page. The data window redraws with the plate background and related data entry fields.
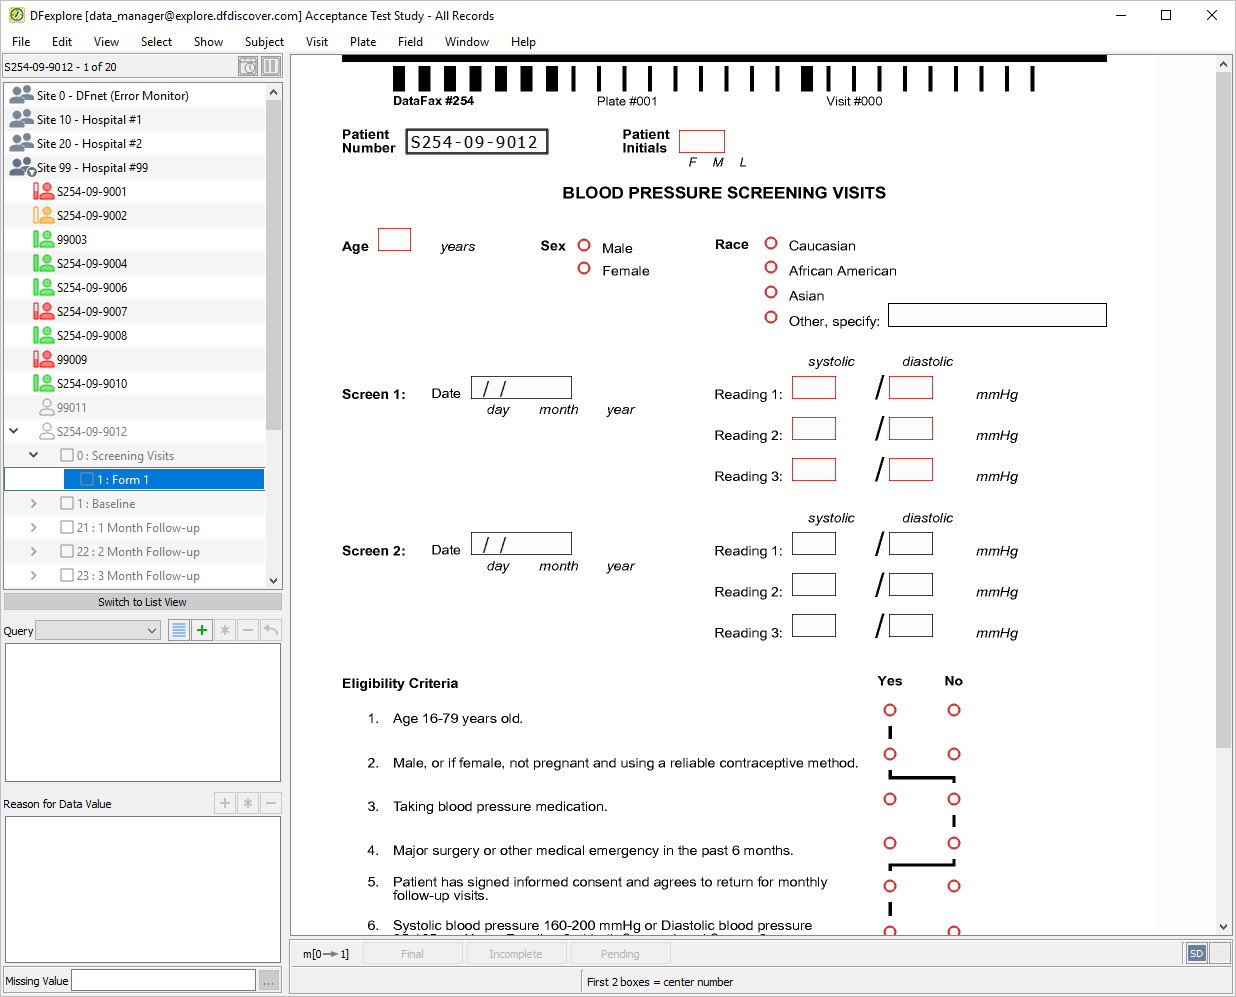
-
Click anywhere on the plate background - this moves the mouse and keyboard focus to the data window.
-
Beginning at the Patient Number field, press Tab to advance to the Patient Initials. Enter the initials
TVMPress Tab to advance to the Age field. -
Beginning with the Age field set the following values:
Age =
44Sex = Female
Race = African American
Screen 1 =
26/04/20
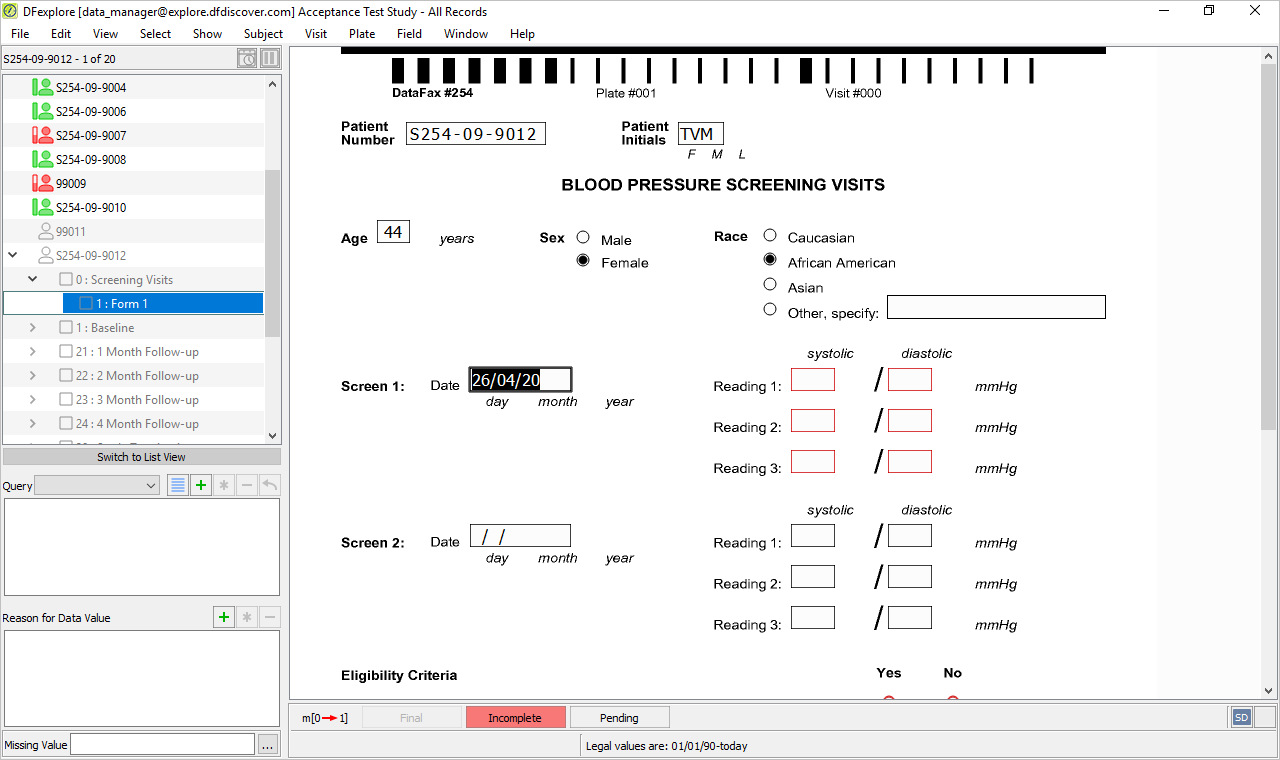
-
As outstanding required data fields exist on the page it must be saved to the database with a status of Incomplete. Click .
-
Select > . Select 001 - Blood Pressure Screening Visits.
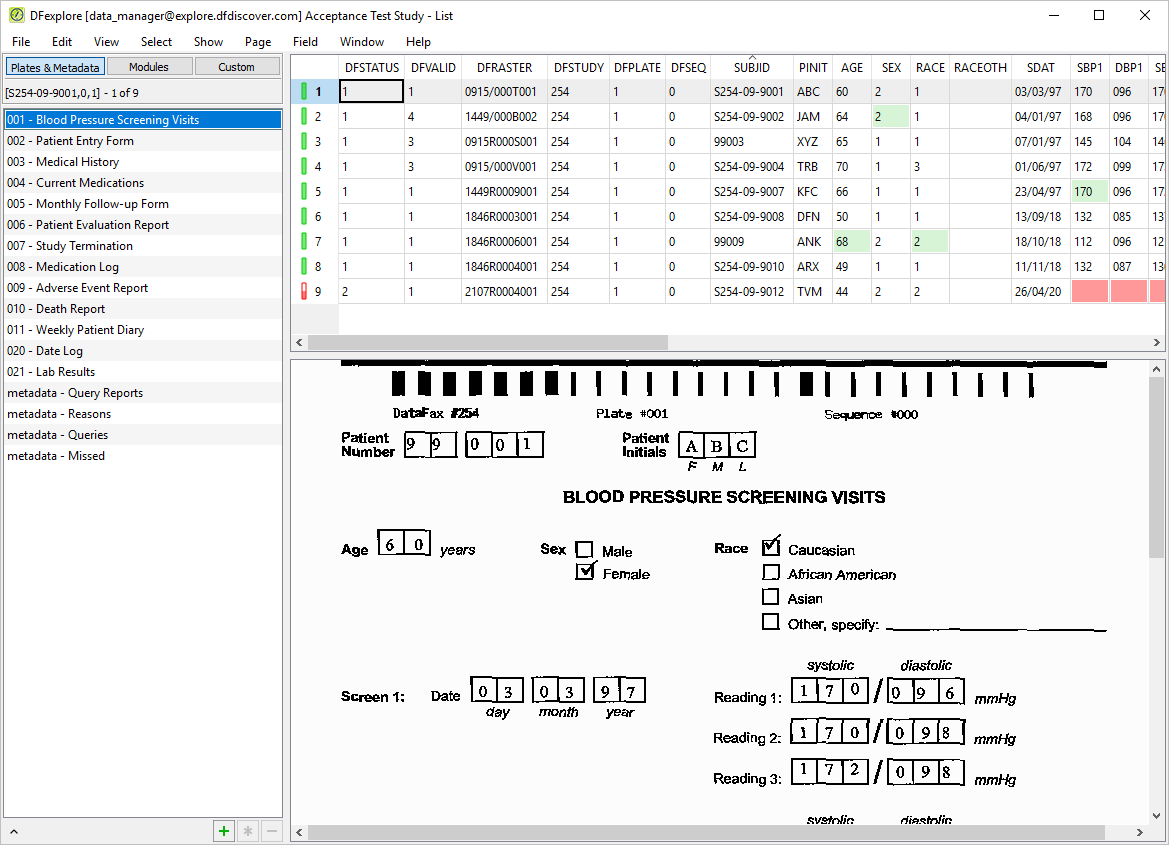
-
Confirm an entry exists for S254-09-9012.
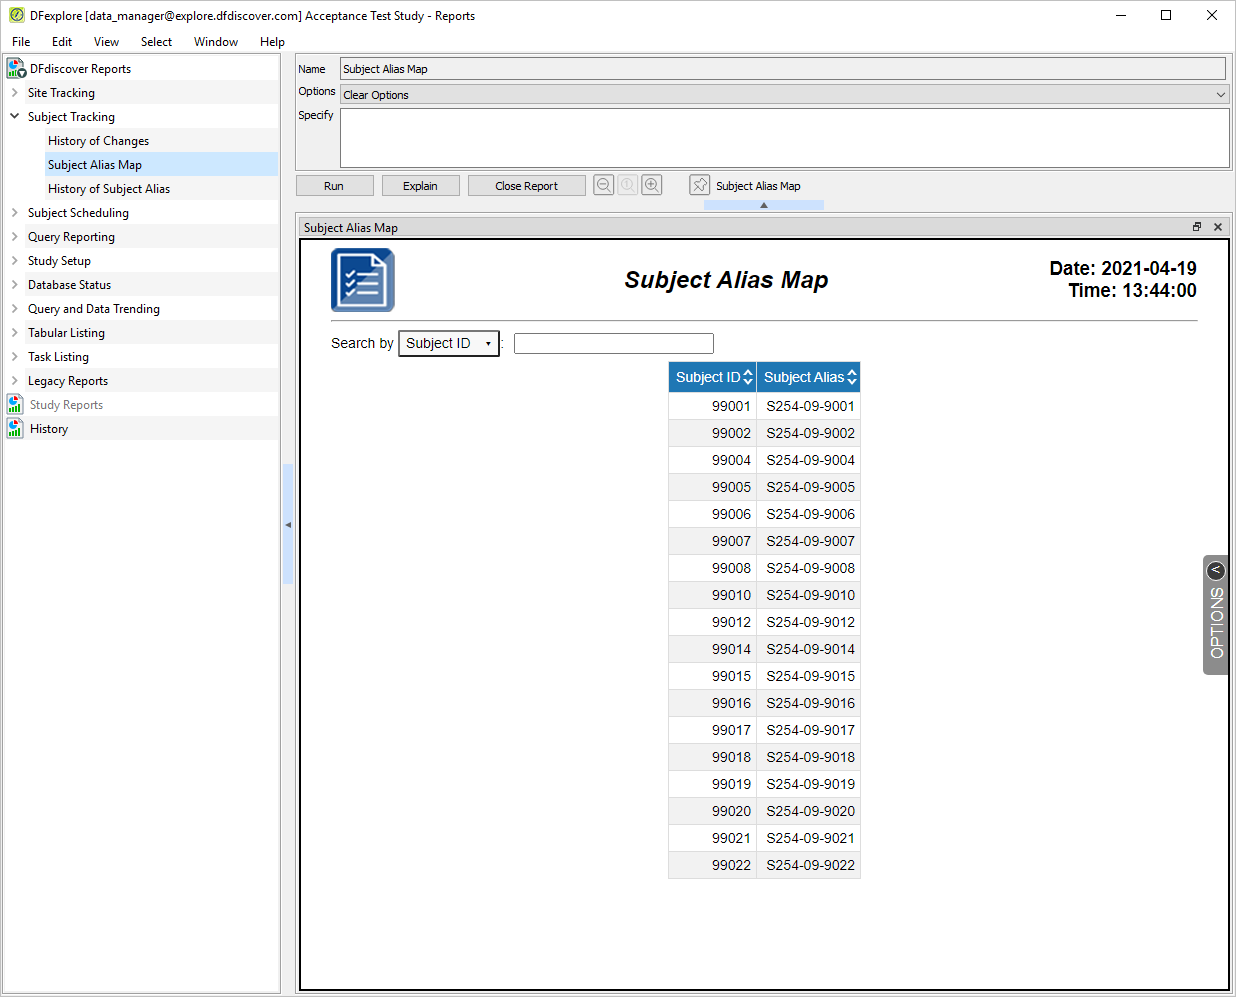
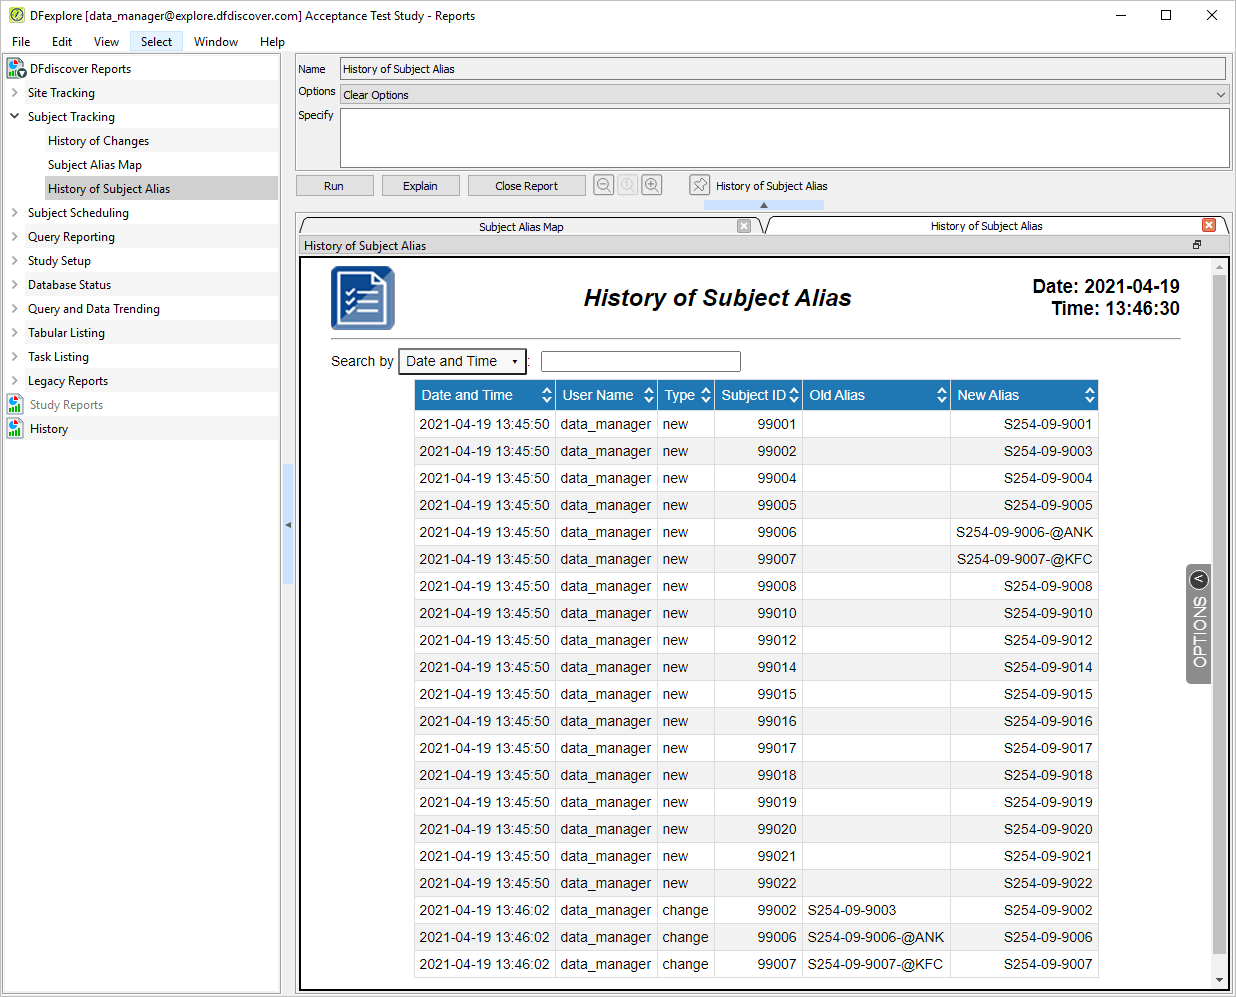
Select > .
Confirm that 001 - Blood Pressure Screening Visits is still the active plate.
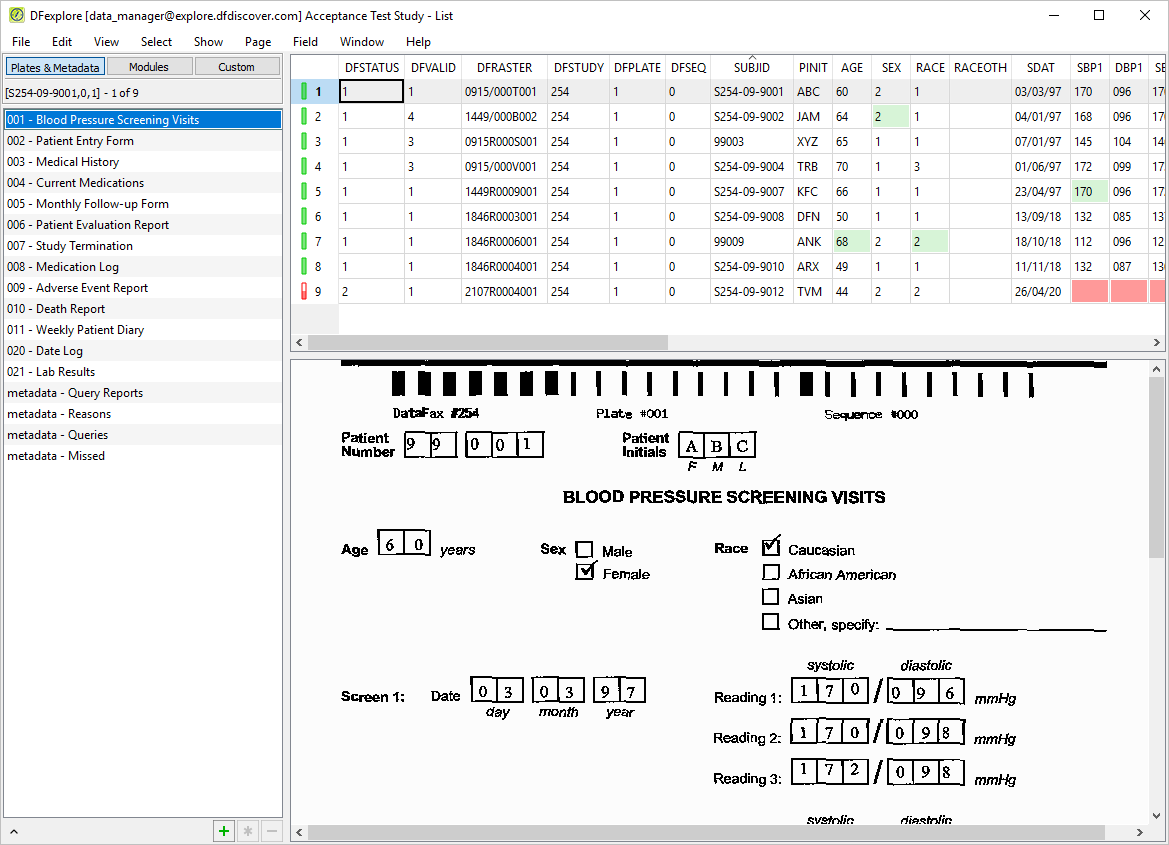
Select > .
In Export Data dialog set:
Format = Excel
Check (Enable) Include header as the first record in the output file.
Check (enable) Open output file after export
-
Click Output File . In the file selection dialog, choose a directory in which to save the Excel file. Once a directory has been chosen, append the file name
module6_dataexport.xlsxto the directory name. Click .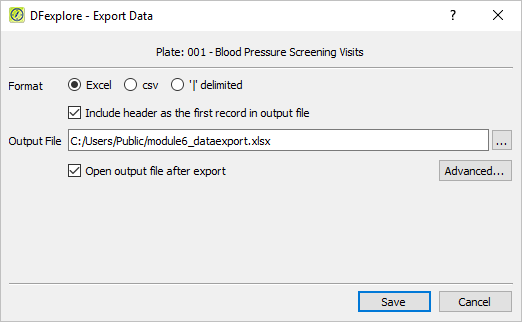
After saving, the file
module6_dataexport.xlsxopens. The SUBJID displays the Subject Aliases.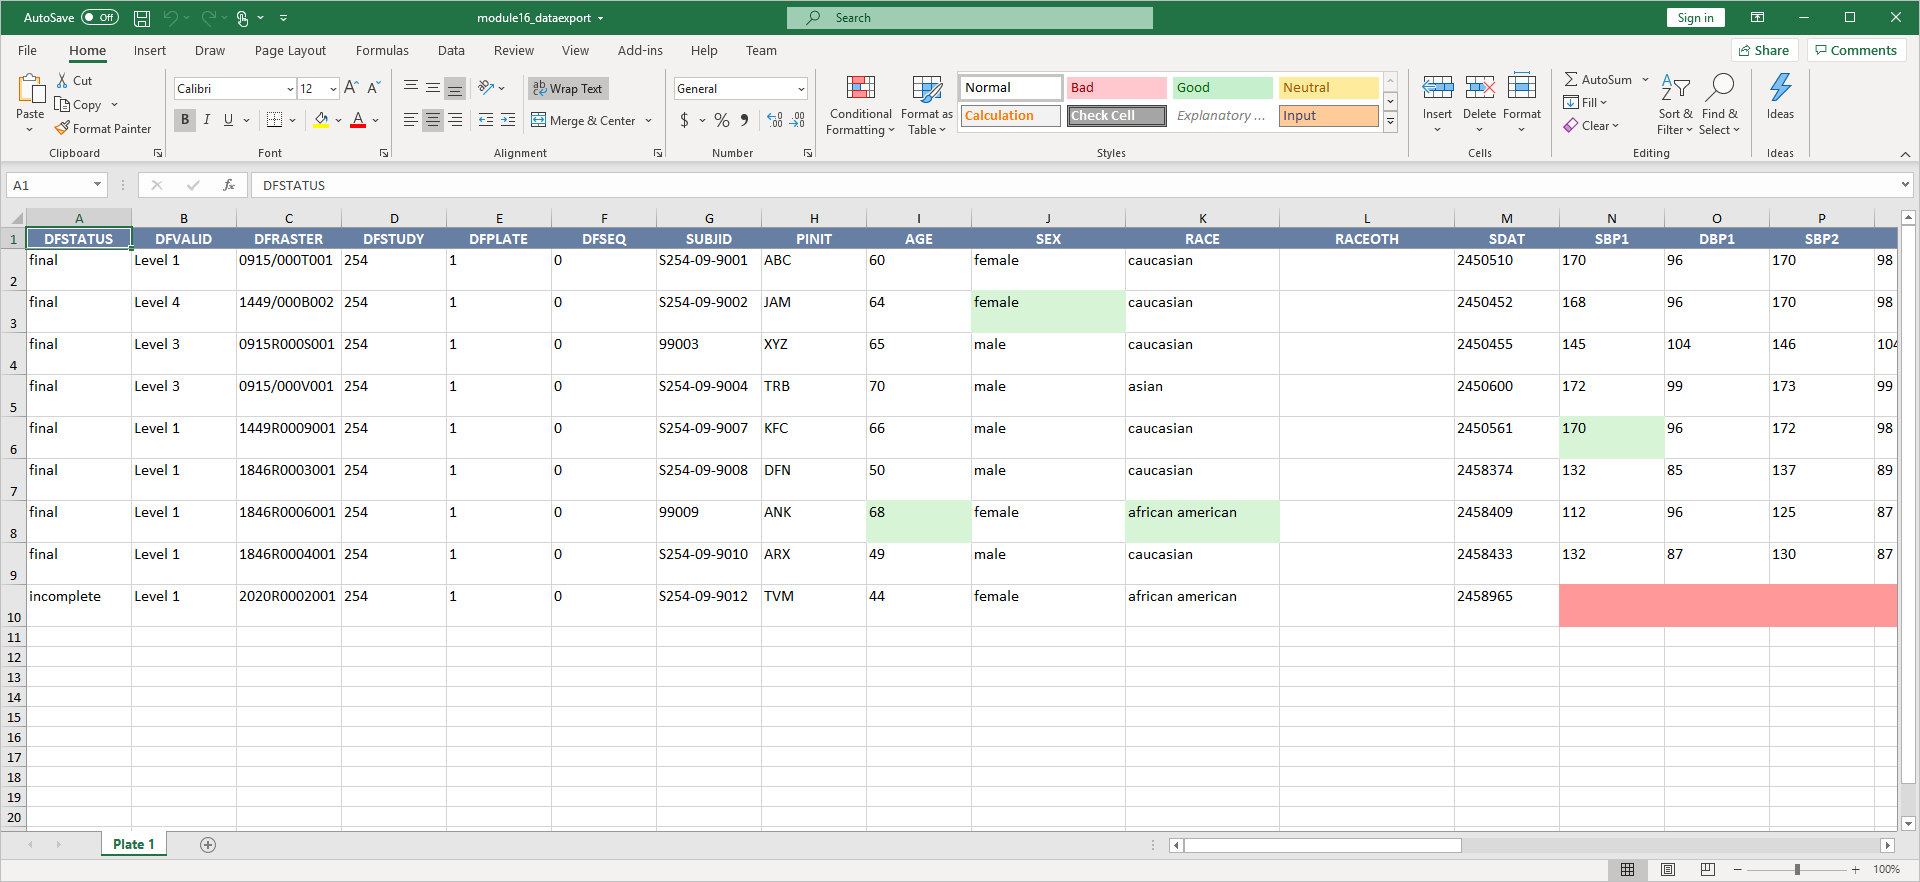
Return to DFexplore. Select > .
Create a task record set by selecting > . Set:
Mode = View
Plate = 21
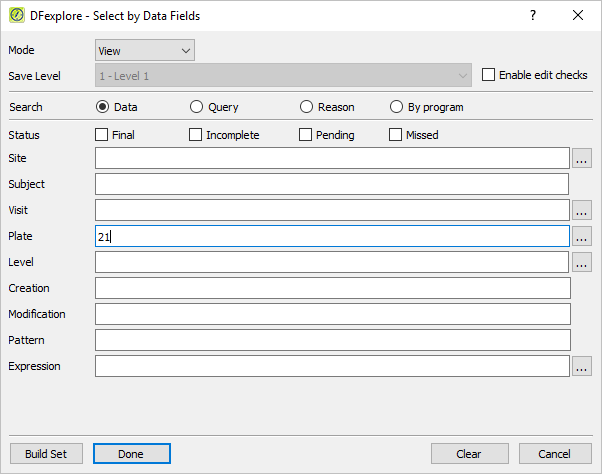
Click then .
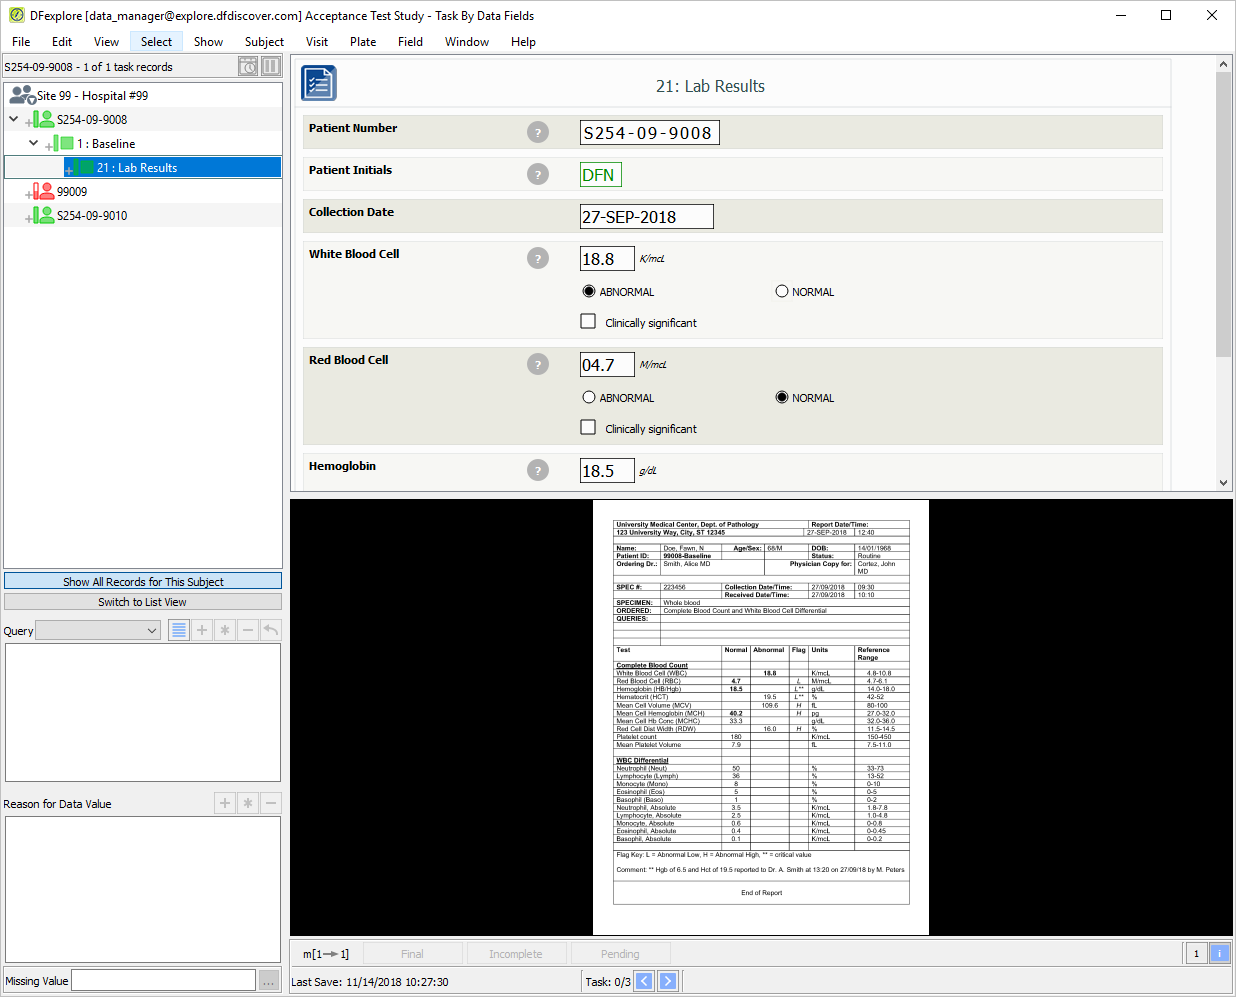
-
Select > .
-
In the Selection Criteria panel,
Select (enable) Data and images followed by current task set
In the Save Options panel,
Check (enable) Data records and expand text fields for plates
Check (enable) Apply field color for completed plates
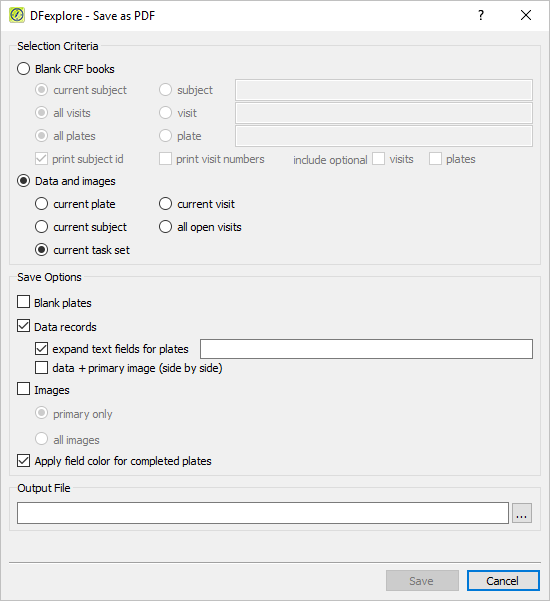
Click Output File . In the file selection dialog, choose a directory in which to save the PDF.
Once a directory has been chosen, append the file name
subjectalias.pdfto the directory name. Click .-
Complete the specification by clicking . There will be a busy pause while the PDF of completed data pages and their primary images is created.
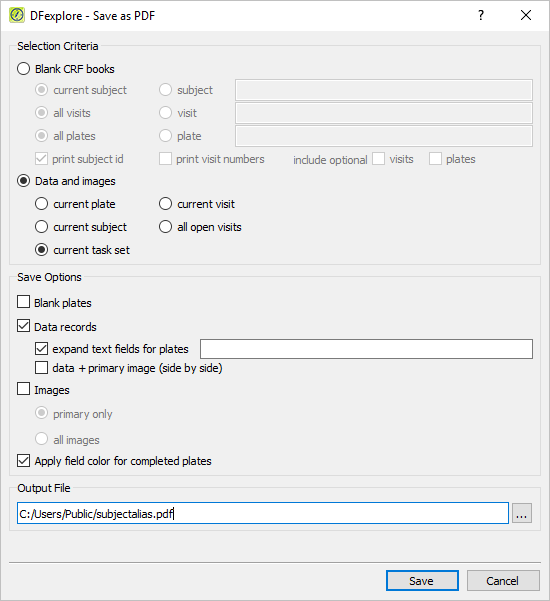
Locate and open the previously saved
subjectalias.pdffile. Confirm the Patient Number fields within the PDF are identical to that shown in DFexplore Data View.Select > . Uncheck (disable) Use subject alias. Click .
Select > to close DFexplore.
Start DFATK as described in Module 1 (Installation & Initialization).
-
Click to confirm successful completion of Module 6. Subject Alias.
Table of Contents
- 7.1. Tests & Requirements
- 7.2. Begin Module 7. EDC Data Entry.
- 7.3. Login to DFexplore and inspect the list of sites, subjects and visits in the record list window.
- 7.4. Enter and save new data using EDC data entry for Subject 99007.
- 7.5. Add reasons to explain entered data values.
- 7.6. Enter and save Plate 3, Subject 99007 as a pending record.
- 7.7. Mark and save unavailable data as missed. Unmark available data as missed.
- 7.8. Retrieve and modify existing data using a predefined task and save modifications to the database.
- 7.9. Confirm audit trail information for entered and modified data.
- 7.10. End Module 7. EDC Data Entry.
Login to DFexplore and the Acceptance Test Study and confirm the list of sites, subjects and assessments in the record list window.
Enter and save new data using EDC data entry for Subject 99007.
Add reasons to explain entered data values.
Enter and save Plate 3, Subject 99007 as a pending record.
Mark and save unavailable data as missed. Unmark available data as missed.
Retrieve and modify existing data using a predefined task and save modifications to the database.
Confirm audit trail information for entered and modified data.
Estimate of Time Required: 20 minutes
Every module uses DFATK and must be run as datafax.
-
Start DFATK as described in Module 1 (Installation & Initialization).
-
Click followed by to begin this module.
-
Click to email a copy of ID99007_module7.pdf to
site_monitor. Clicking more than once will result in multiple pages arriving to your email inbox.Note Refer to Section 1.8, “Creating user accounts and assigning study permissions.” as a valid email address is required for
site_monitorto receive the module specific PDF files.Wait 2-3 minutes prior to proceeding to DFexplore.
-
Start DFexplore, login as
site_monitorand choose 254 Acceptance Test Study as described in Section 1.7, “How to start DFexplore”. -
Confirm that only Site 99 - Hospital #99 is available.
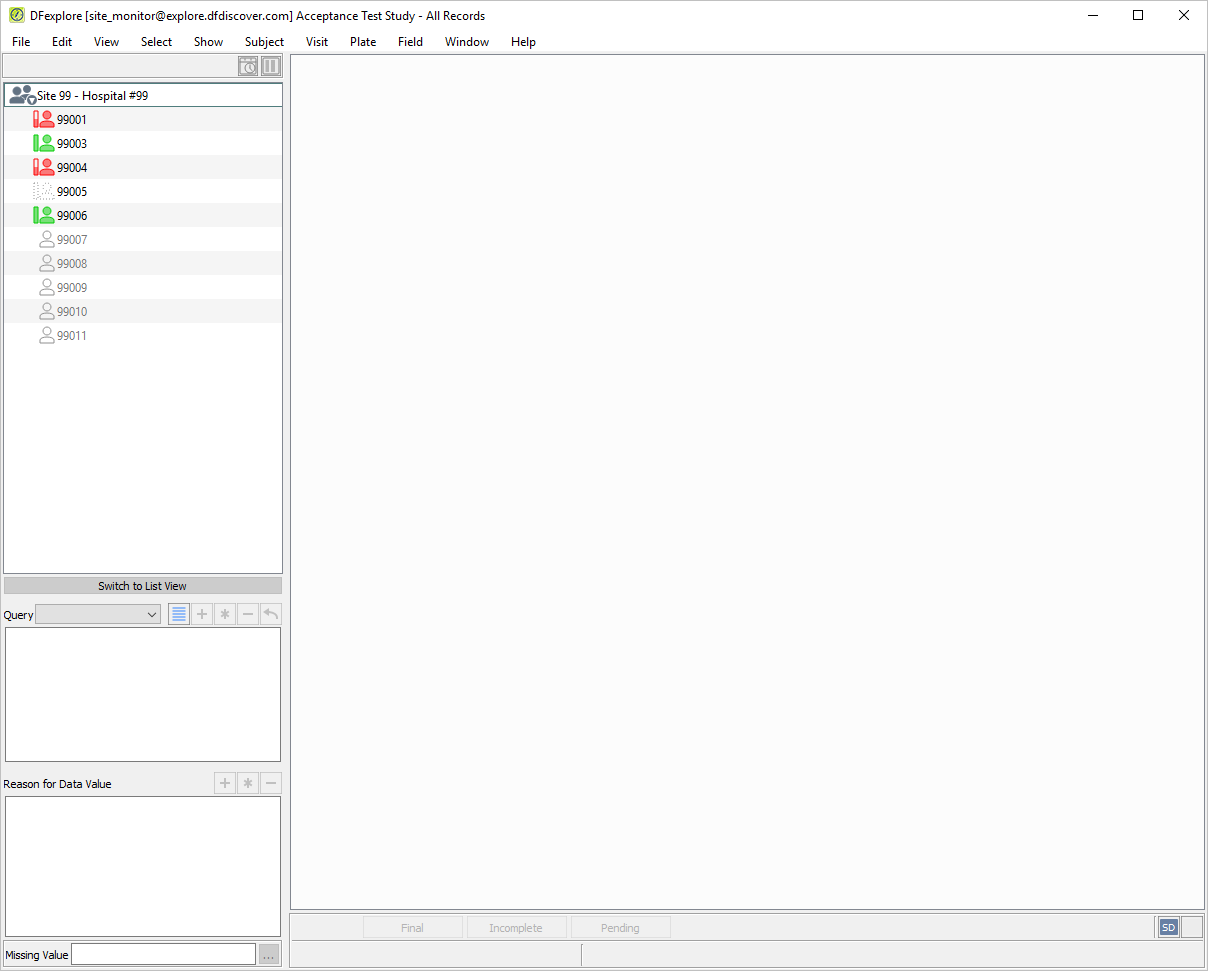
-
Double-click entry for Subject 99001 to select and open the subject binder. A list of available visits is displayed.
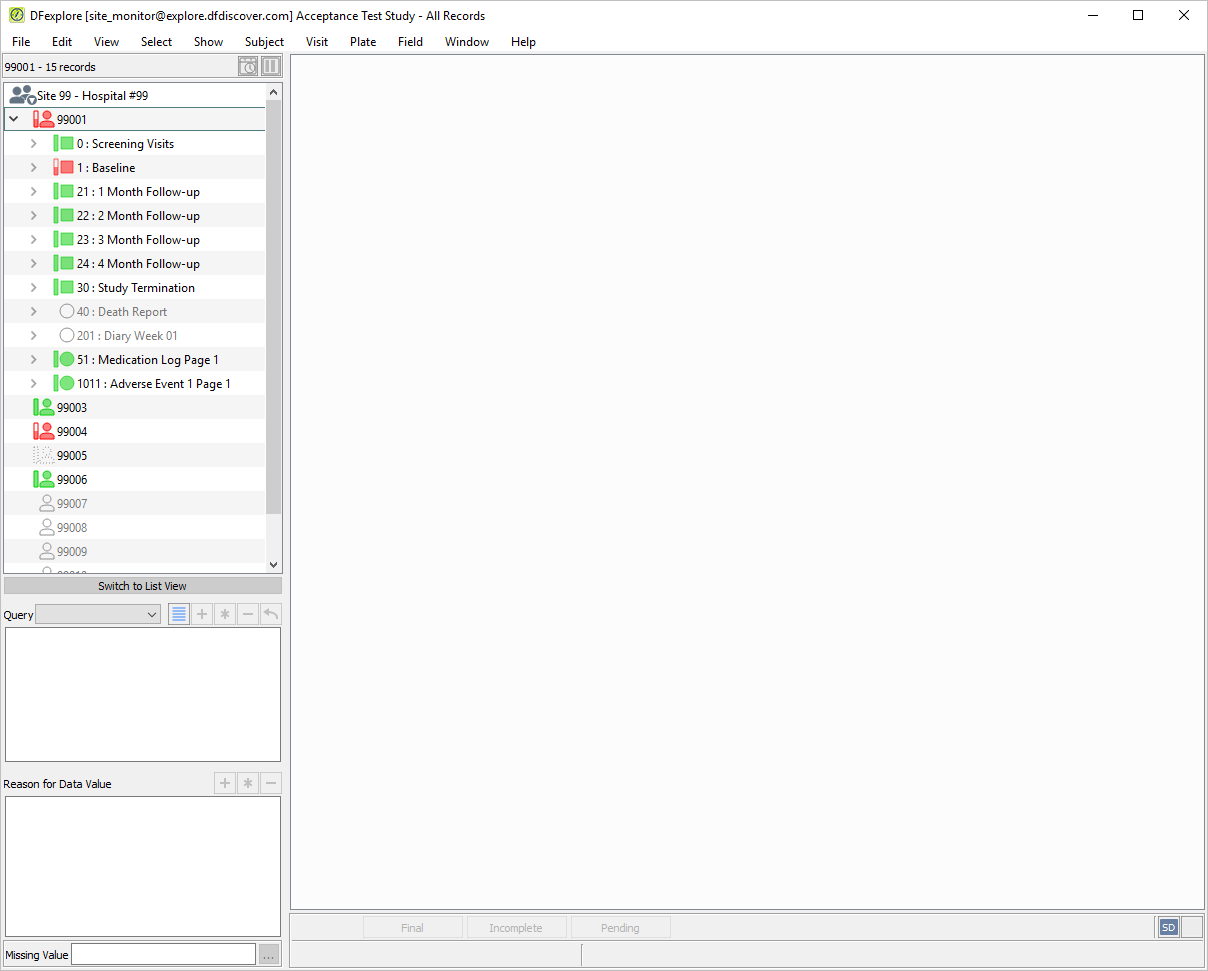
-
Double-click entry for the highlighted 1 : Baseline visit to display the list of pages belonging to the visit.
-
Close the subject binder for Subject 99001 by double-clicking Site 99 - Hospital #99 in the record list panel.
-
Using the paper CRFs that were printed or emailed at the beginning of this module (Step 2). Select > to set the working mode and data entry level. In the dialog, set:
Mode = Validate
Save level = 1 - Level 1
Check Enable edit checks
Click .
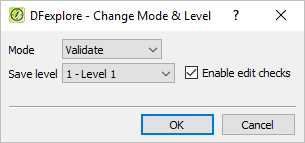
-
Double-click Site 99 - Hospital #99 entry in the record list panel. Double-click Subject 99007.
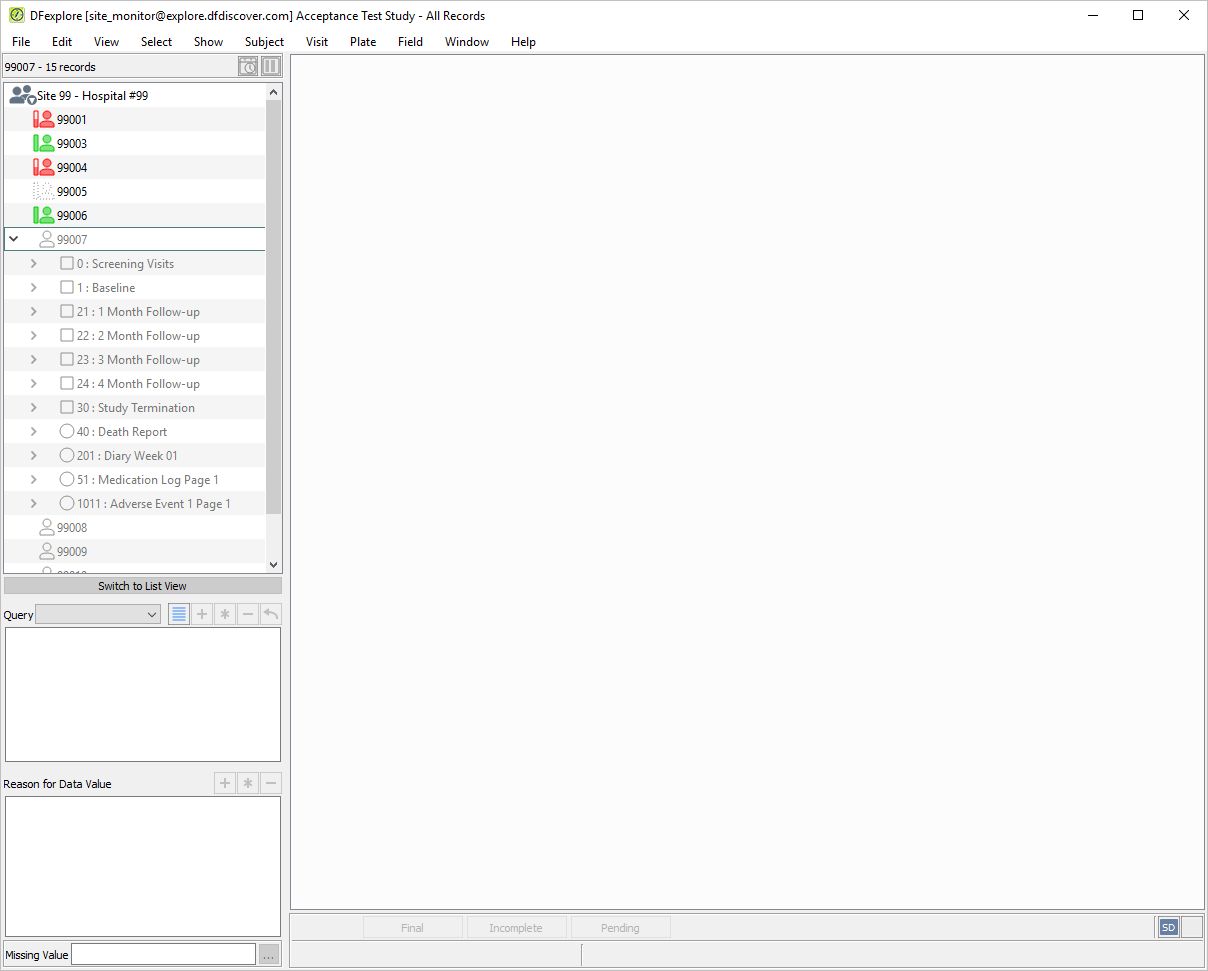
-
Double-click the 0 : Screening Visits entry to display all pages belonging to the visit.
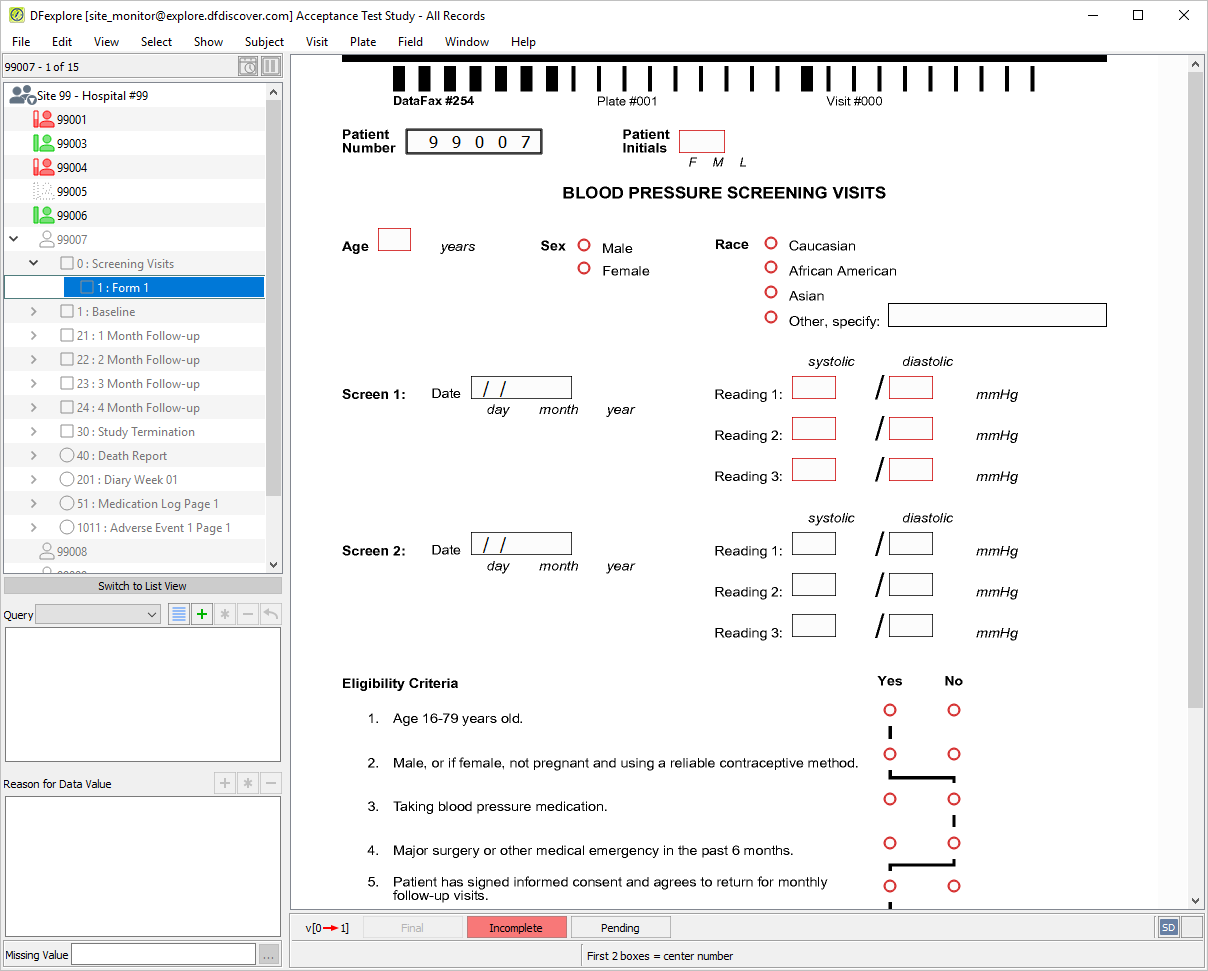
-
1 : Form 1 becomes the active page. The data window redraws with the plate background and related data entry fields.
-
Click anywhere on the plate background - this moves the mouse and keyboard focus to the data window.
-
Beginning at the Patient Number field, press Tab to advance to the Patient Initials. Enter the initials as they appear on the printed CRF. Press Tab to advance to the next field.
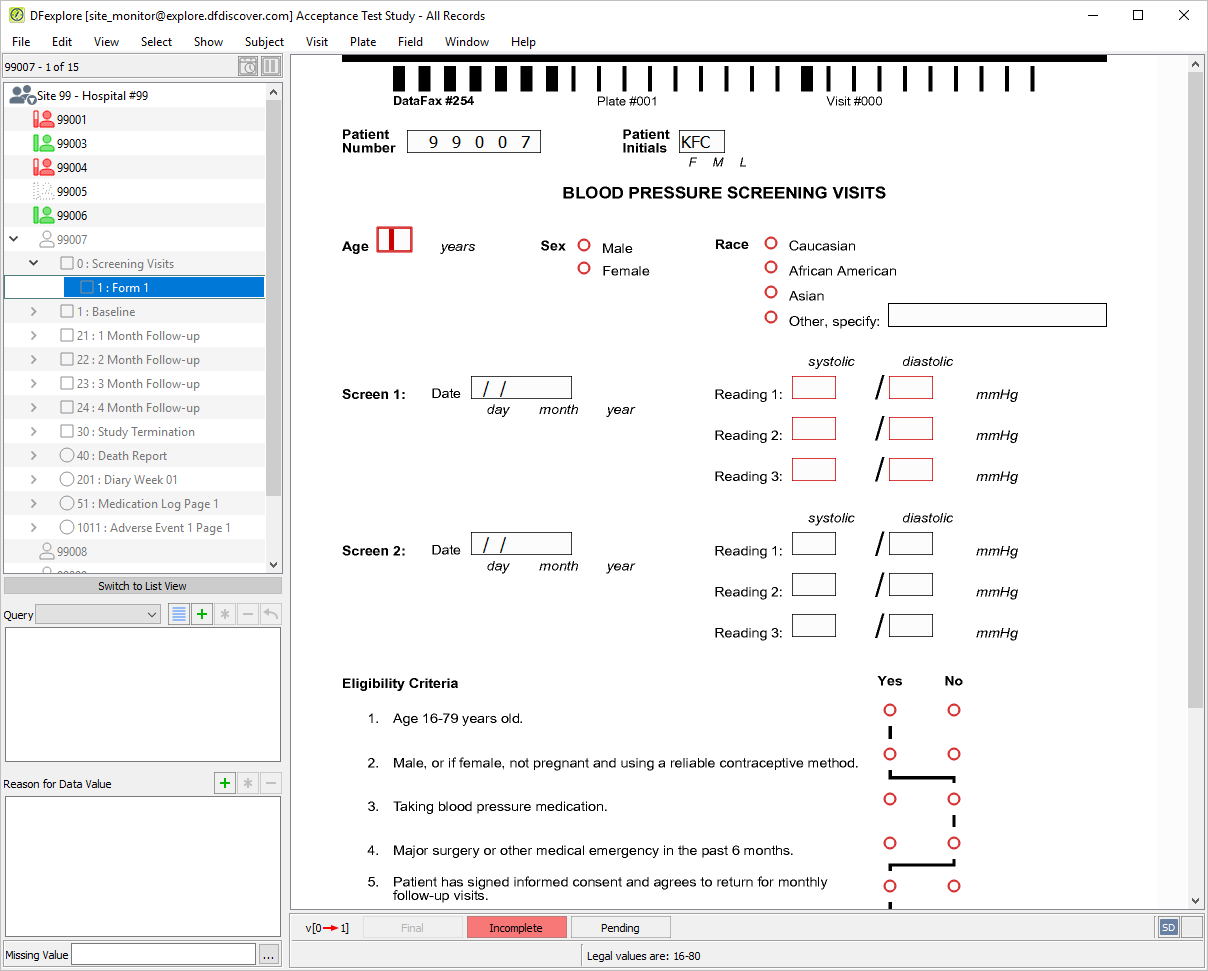
-
Continuing from the Age field, press Tab to advance through the fields individually. Enter all remaining data as it appears on the printed CRF. Although leading zeros may not always appear on the paper CRF, be sure to enter leading zeros where necessary. After entering the Eligibility Criteria #6, press Tab to make the save buttons active.
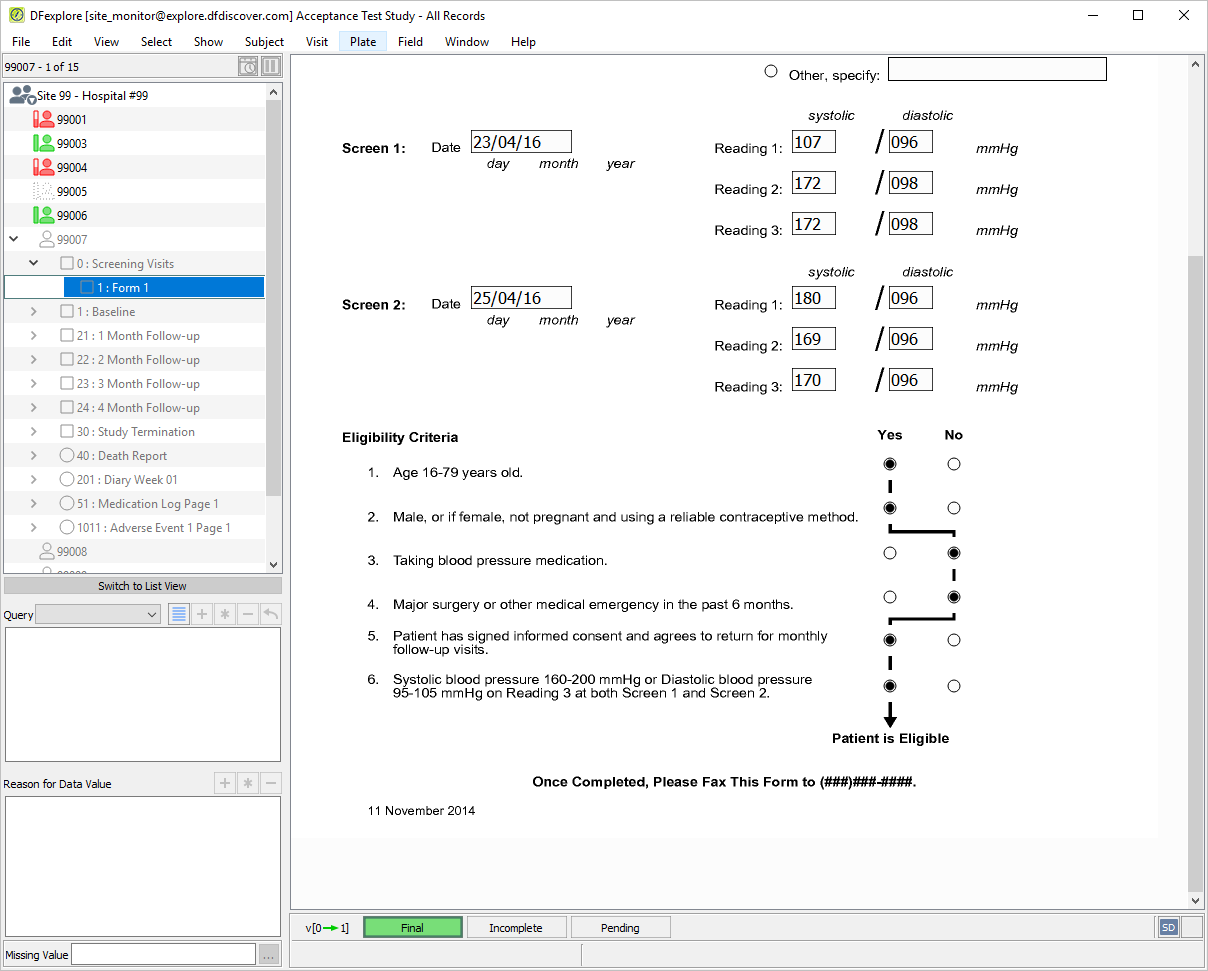
-
As no data problems exist on the entered page, the page can be saved to the database with a Final status. Click .
-
To open a new visit for Subject 99007, double-click the entry labeled 1 : Baseline in the record list panel.
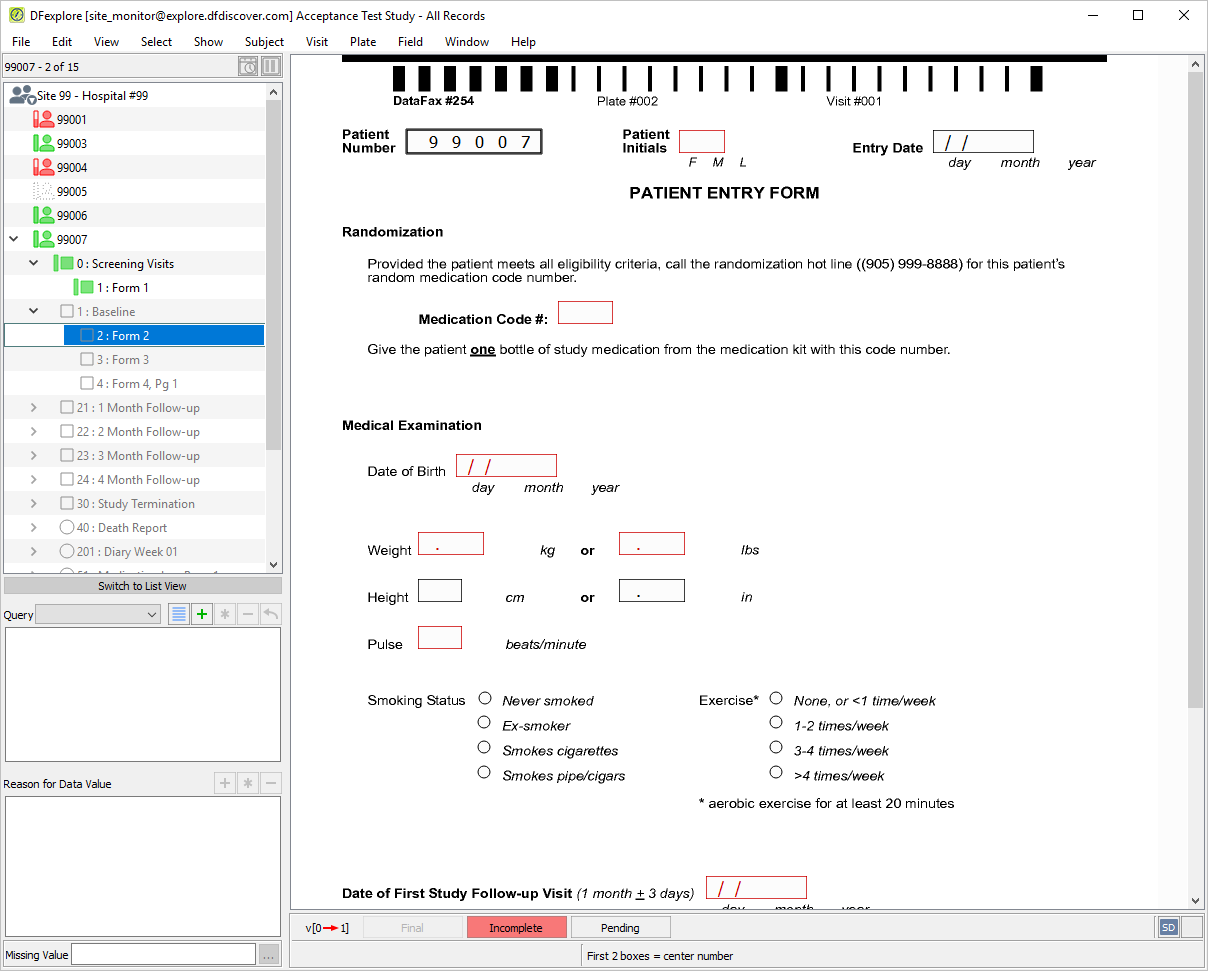
-
Click anywhere on the plate background - this moves the mouse and keyboard focus to the data window.
-
With Patient Number as the active field, attempt to edit the pre-filled value, note that this is not possible. Press Tab to advance to Patient Initials. The
SetInitedit check executes upon entry to the field. If the initials are available on the 1 : Form 1 (previously entered), they are brought forward and populate the Patient Initials field.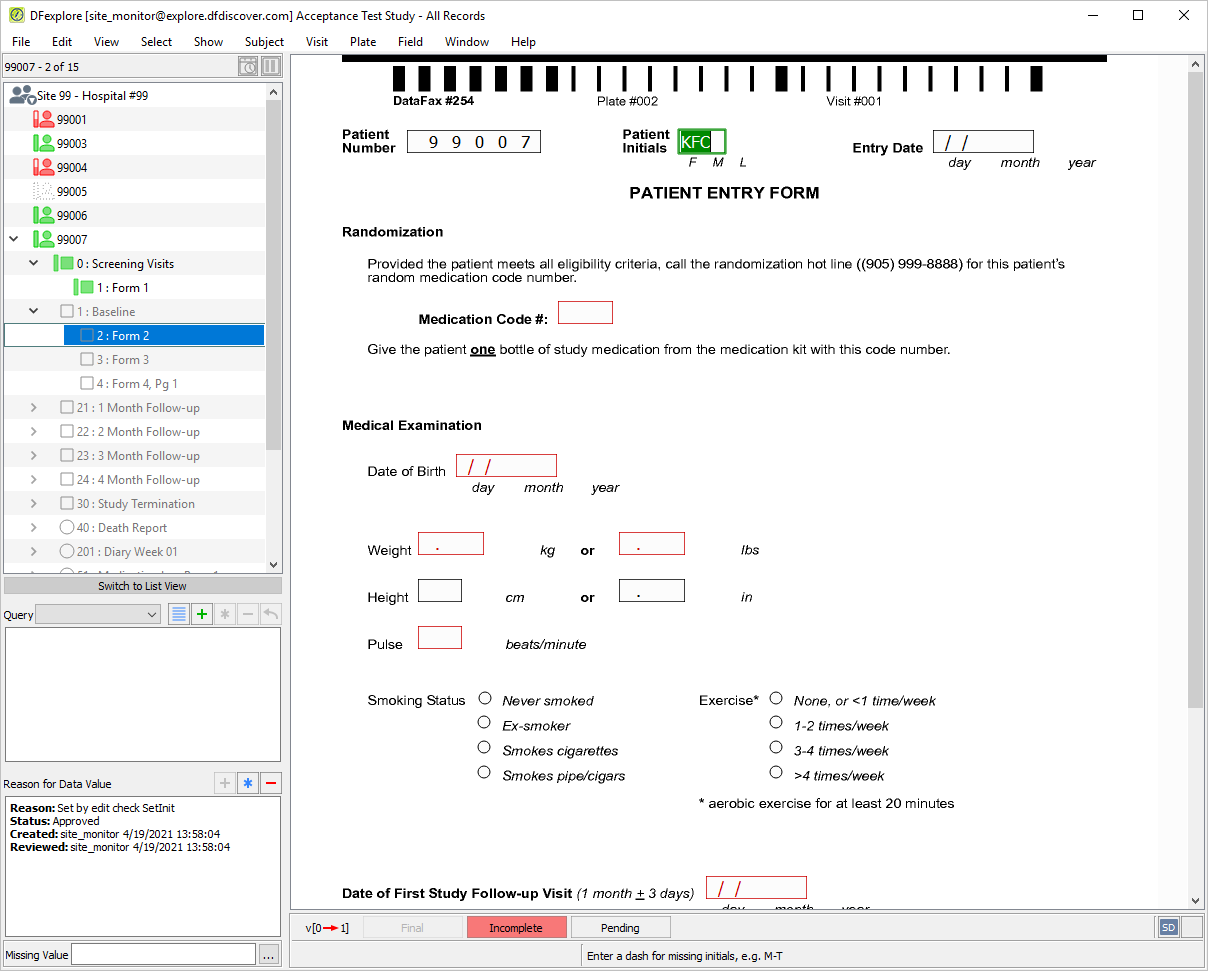
-
Press Tab to advance through each field and enter the data as it appears on the printed CRF, up to and including Weight (lbs). Press Tab to exit the Weight (lbs) field and execute the
WeightEquivedit check. TheWeightEquivedit check calculates and enters the equivalent value in the blank Weight (kg) field.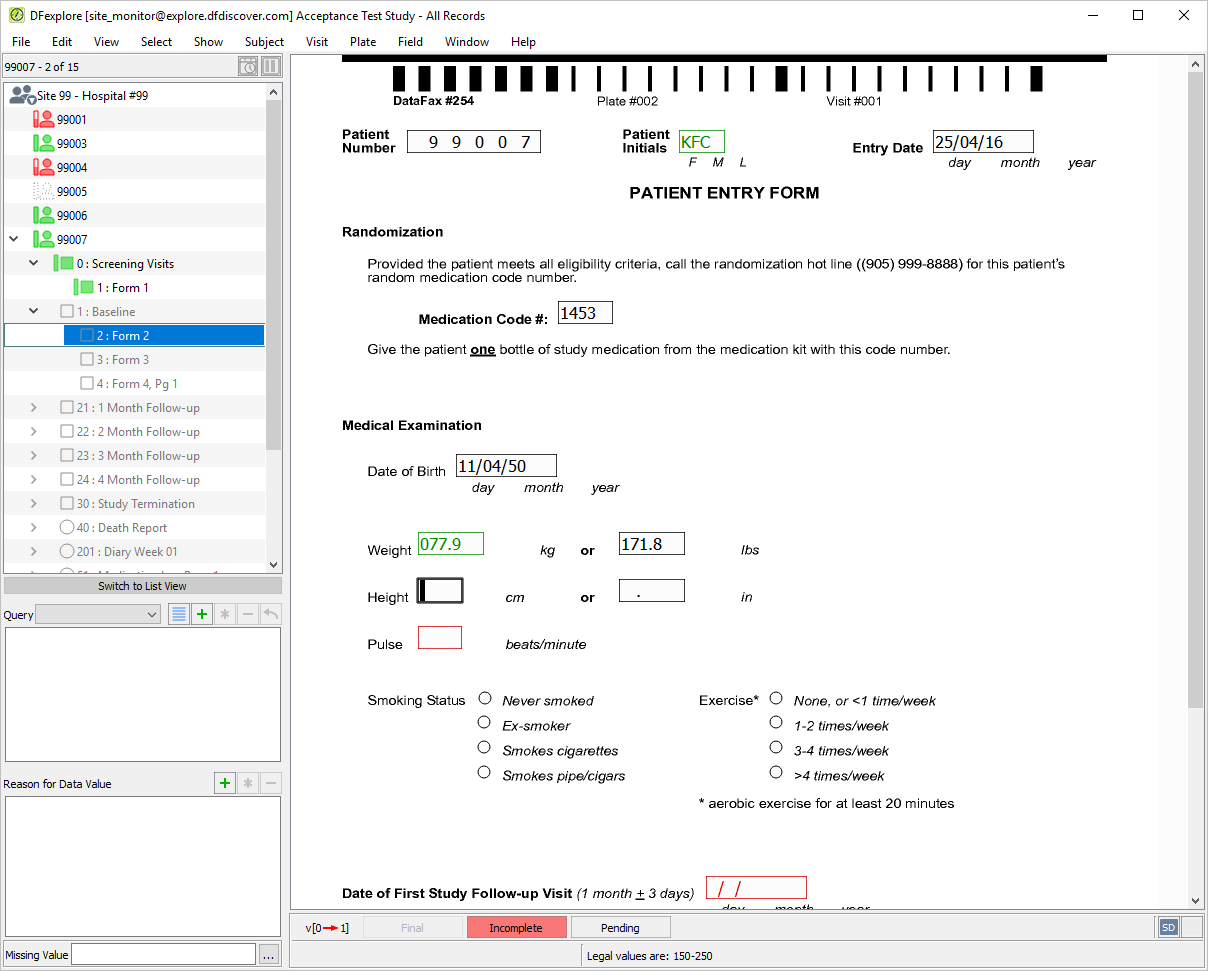
-
The
HeightEquivedit check is similar to theWeightEquivedit check. If only one of the two height values are entered, the edit check calculates and enters the equivalent value for the blank field. Press Tab to exit the Height (in) field and enter the value as it appears on the printed CRF (including leading zeros). Press Tab to exit the field.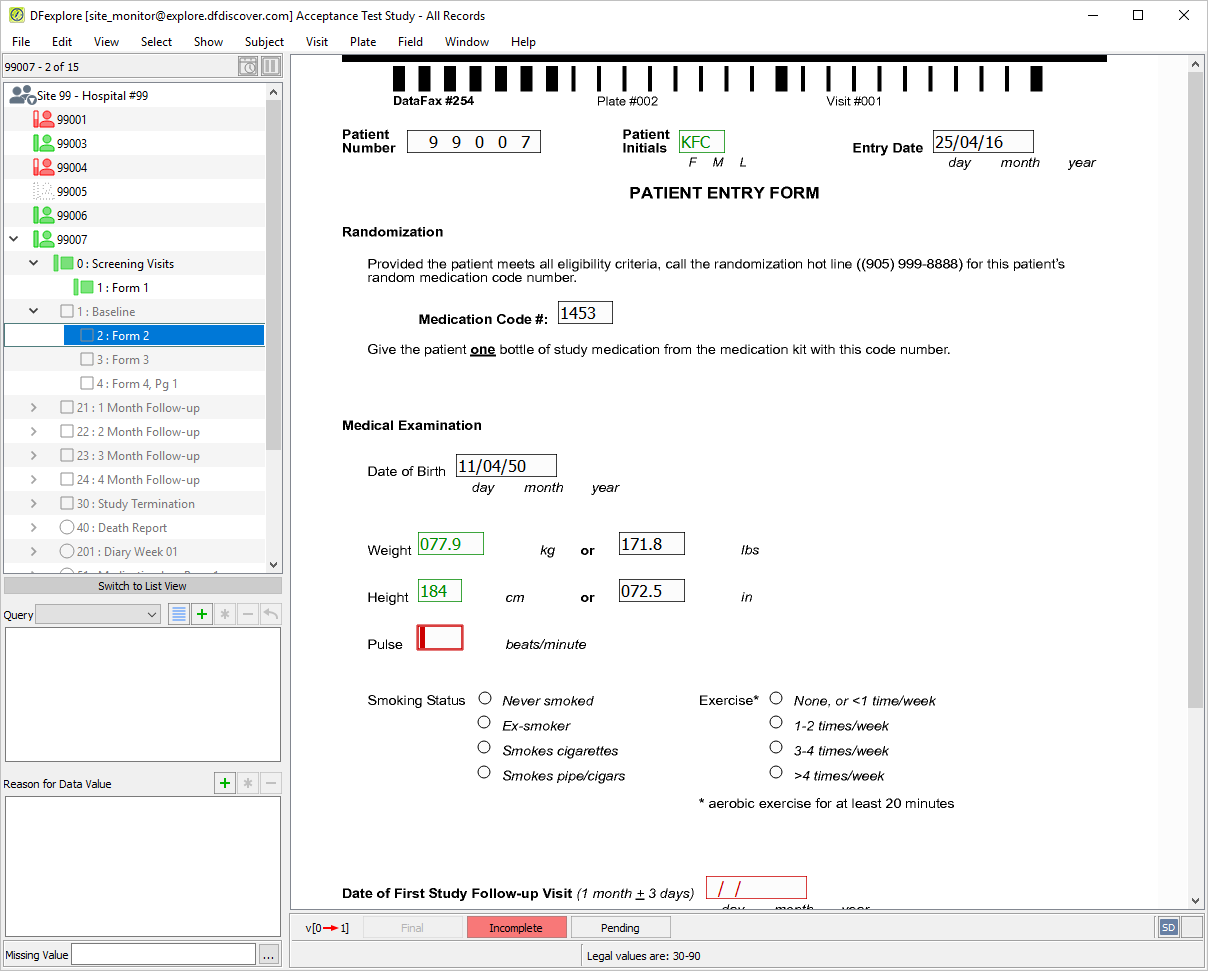
-
Enter the value of the Pulse field as it appears on the printed CRF. Press Tab to advance to the Smoking Status field.
-
Select > or click
 in the Reason for Data Value window.
In the resulting dialog, choose Approved from the pull-down list.
in the Reason for Data Value window.
In the resulting dialog, choose Approved from the pull-down list.
-
Enter the text
Smoking Status data will be provided once contact has been made with the patient.for the Reason property. Click , press Tab to advance to the Exercise field.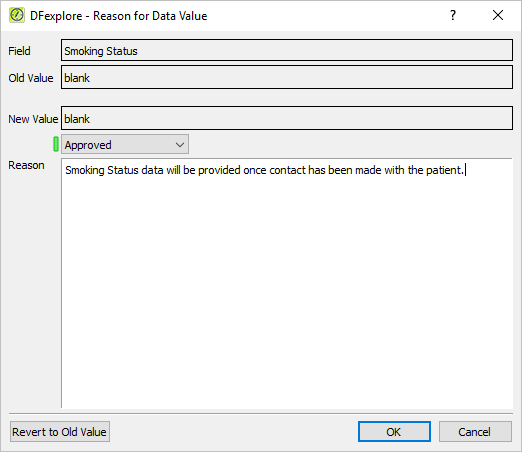
-
Select > or click
in the Reason for Data Value window. Choose Pending from the pull-down list.
-
Enter the text
Exercise data will be
        provided once contact has been made with patient.
for the Reason property. Click , press Tab to advance to the Date of First Study Follow-up Visit field.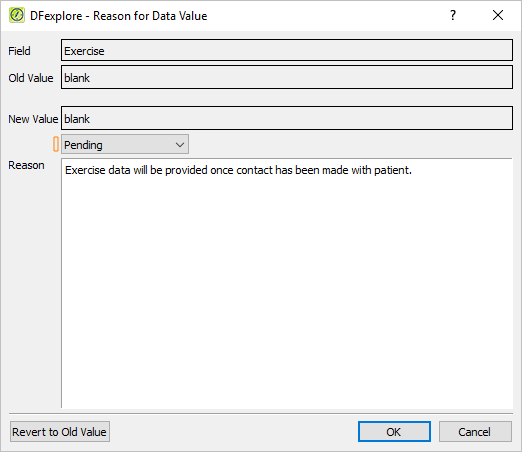
-
Enter the Date of First Study Follow-up Visit and press Tab to advance to the save field. Verify that is highlighted. Do not save the page with this status as the Smoking Status and Exercise fields have yet to be completed. Click .
-
Subject 99007 3 : Form 3 becomes the current record. Click anywhere on the page background to make the fields active for entry.
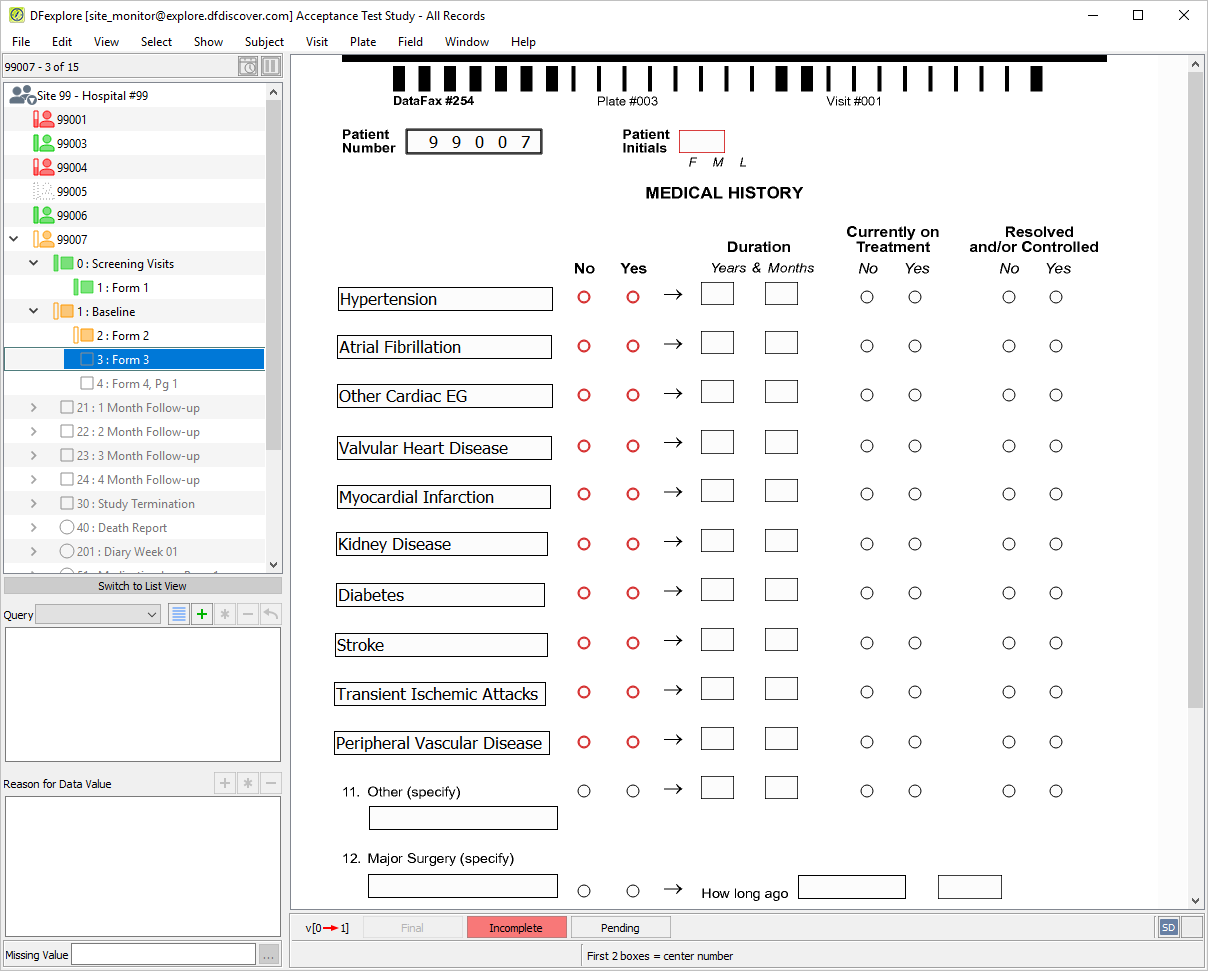
-
Starting at the Patient Number field, press Tab to advance to the Patient Initials field. The
SetInitedit check executes upon entry to the field.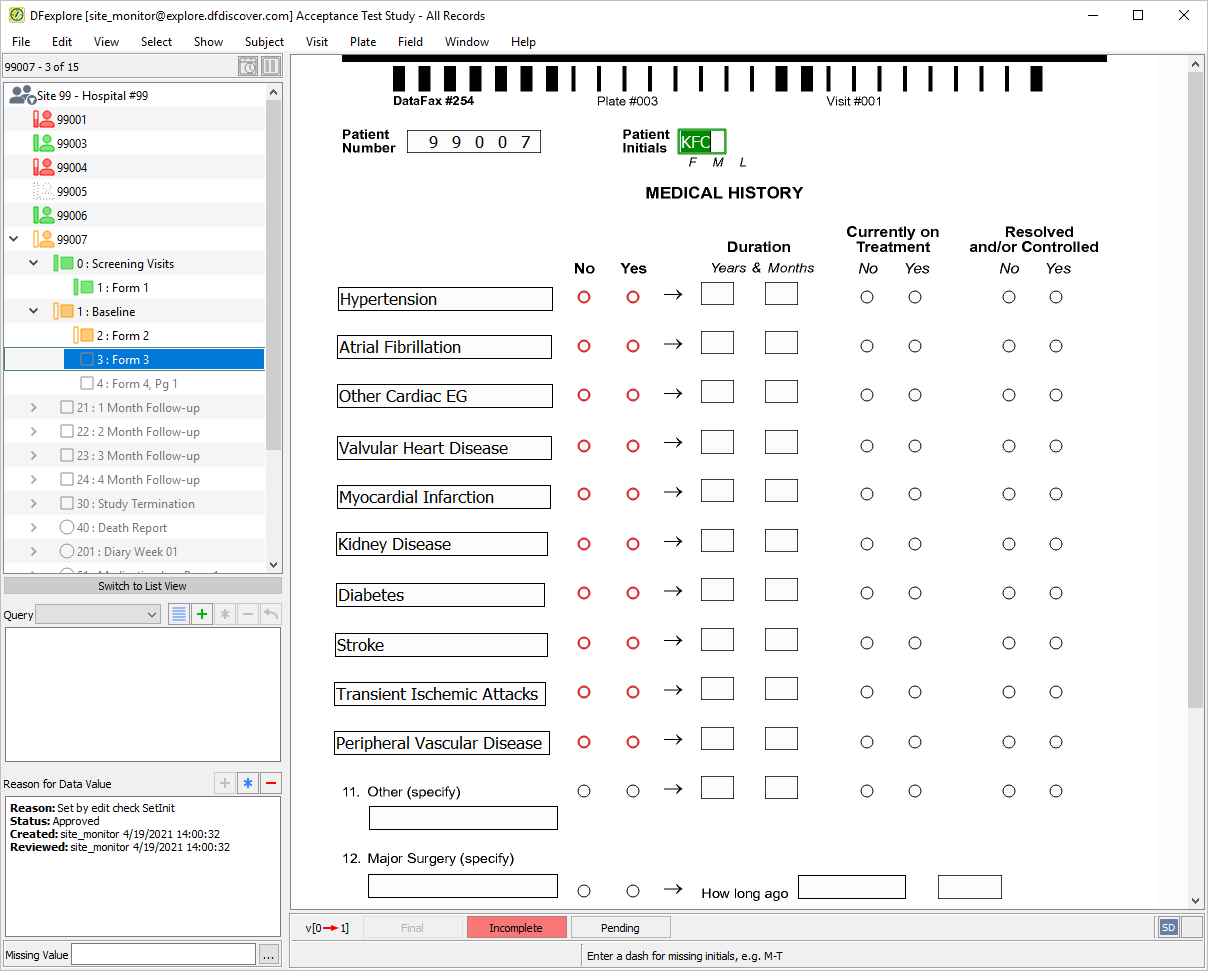
-
Continuing at Patient Initials, press Tab to advance through each field and enter the data as it appears on the printed CRF. The medical conditions that appear pre-printed on the CRF page have been defined as constant values in the study setup. As a result, these fields cannot be edited. Press Tab to advance to the save buttons. As data for Major Surgery is not yet complete, click to save the page with status Pending.
-
Baseline 4 : Form 4, Pg 1 is now the active page. As no data is available for this page, select > .
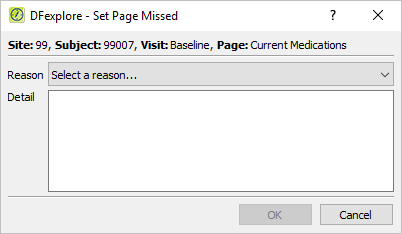
-
In the dialog, choose Data not available value from the Reason pull-down list. Enter
Medication information is missing
        from patient's chart.
as the Detail. -
Click to register the page as missed.
-
Double-click Subject 99005 in the record list. From the now open list of visits for that subject, double-click the 1 : Baseline visit.
-
All pages for that visit are displayed.
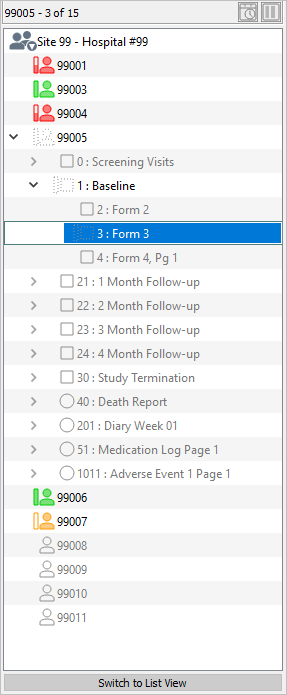
-
Choose 3 : Form 3. Select > .
-
Enter the text
Patient's chart has been located and Medical History is available.in the Reason field. Click to unset 3: Form 3 as missed.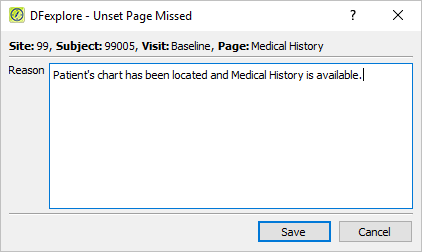
-
Double-click Site 99 - Hospital #99 entry in the record list. This closes all open subject binders for Site 99 - Hospital #99.
-
Select > to view the list of predefined data entry and data management tasks.
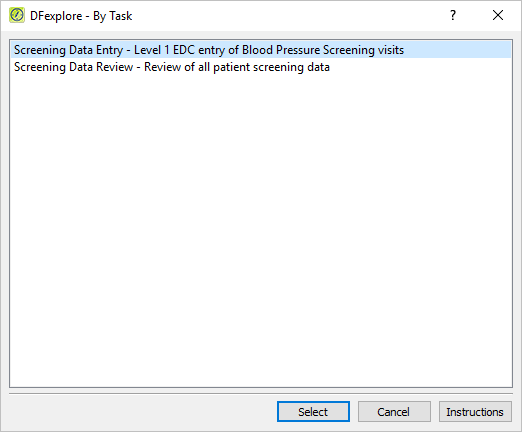
-
Click Screening Data Review from the list, then to load the task and its selection criteria. This task is used to review all screening plate 1s that exist at level 1 or 2 and save them to level 3. Examine the lower left of the dialog to determine the number of records that match the task search criteria. Confirm that the number is 4.
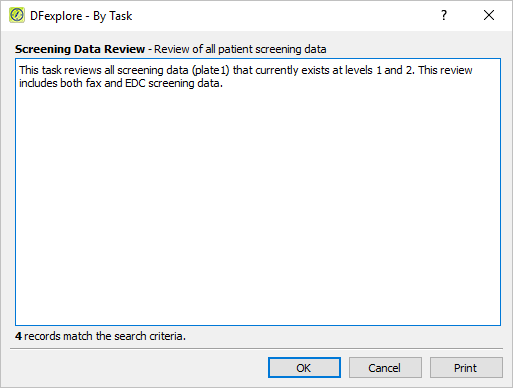
-
Click to bring forward all records that match the task criteria.
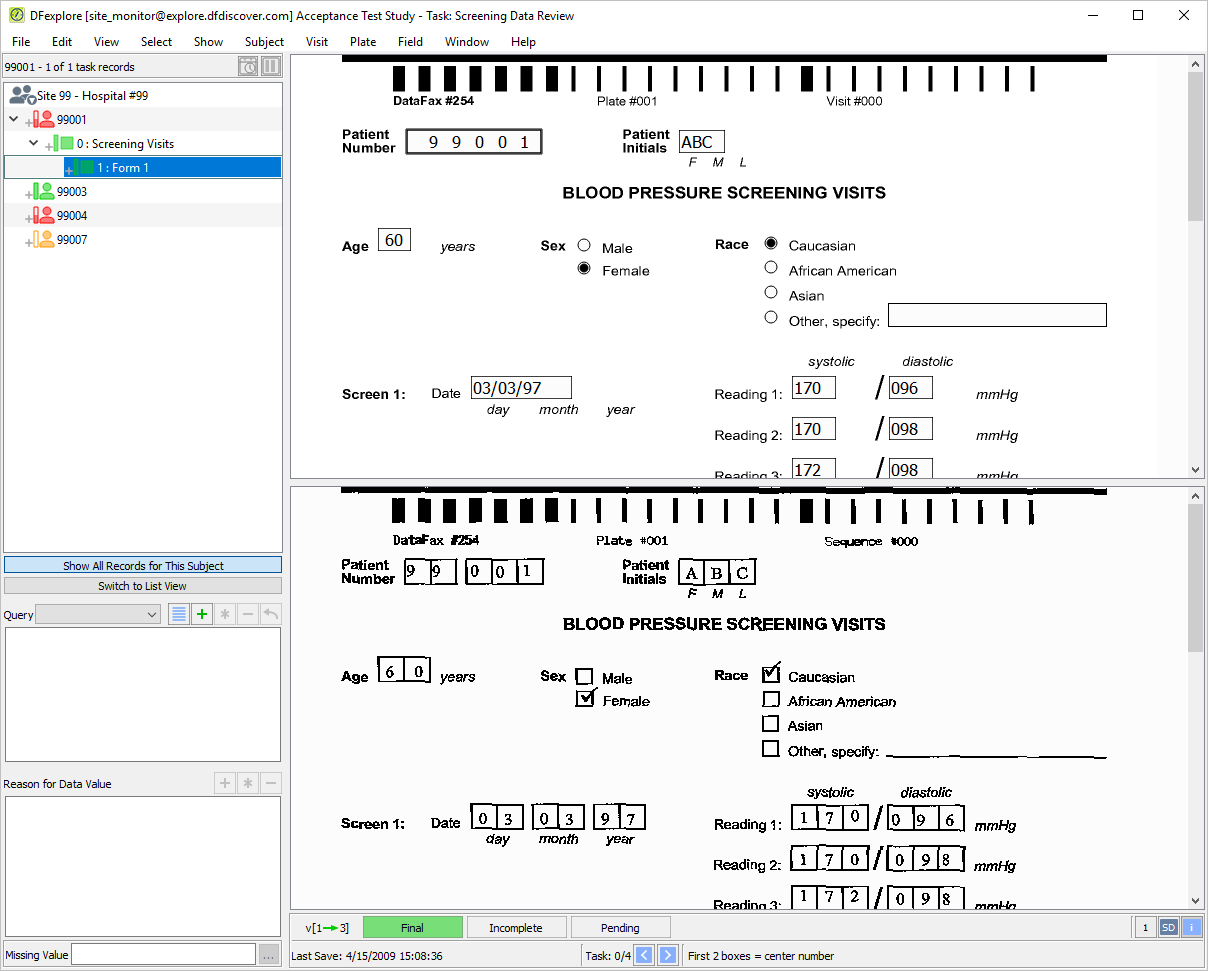
-
Beginning with the first task record for Subject 99001, press Tab to advance through all fields on the page, comparing their values to those on the CRF image in the image window. When Eligibility Criteria #5 is the current field, select > or click
in the Query window.
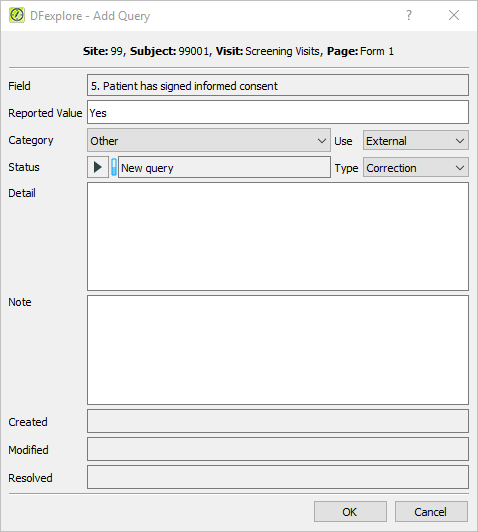
-
Category = Other
Use = External
Status = New query
Type = Clarification
Detail enter
We have not received this patient's informed consent form. Please send it by fax or email without delay.
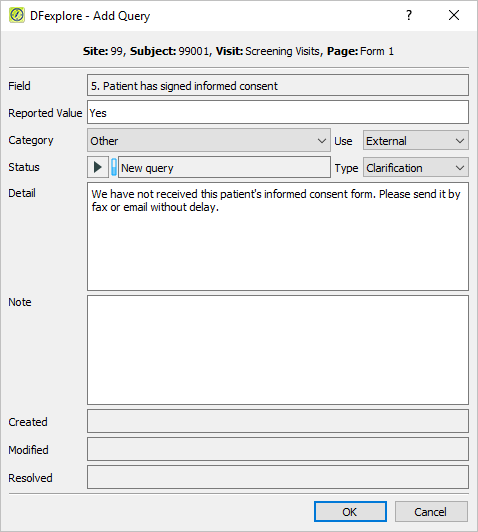
-
Click to apply the query.
-
Press Tab to advance through the remaining fields on the page. Once all fields have been traversed, press Tab to make the save buttons active.
-
Click to save the current task record to the database at level 3.
-
Batch validate the remaining records in the task list to raise their level to level 3. Select > . In the dialog, set:
Move record level to = 3 - Level 3
Choose All currently selected task records
Click .
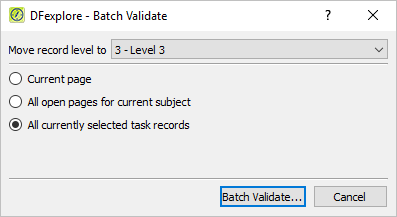
-
Enter Username of
site_monitor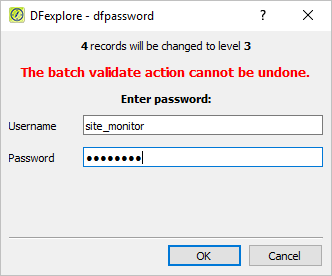
-
Review the details in the summary dialog. Click to close the summary dialog and complete the batch validation operation.
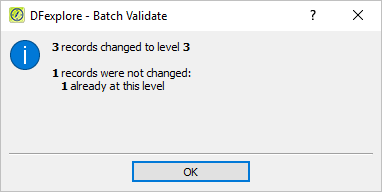
-
Return to Subject 99001 > 0 : Screening Visits > 1 : Form 1.
-
Select > to display the current record's history. The default page history dialog is displayed.
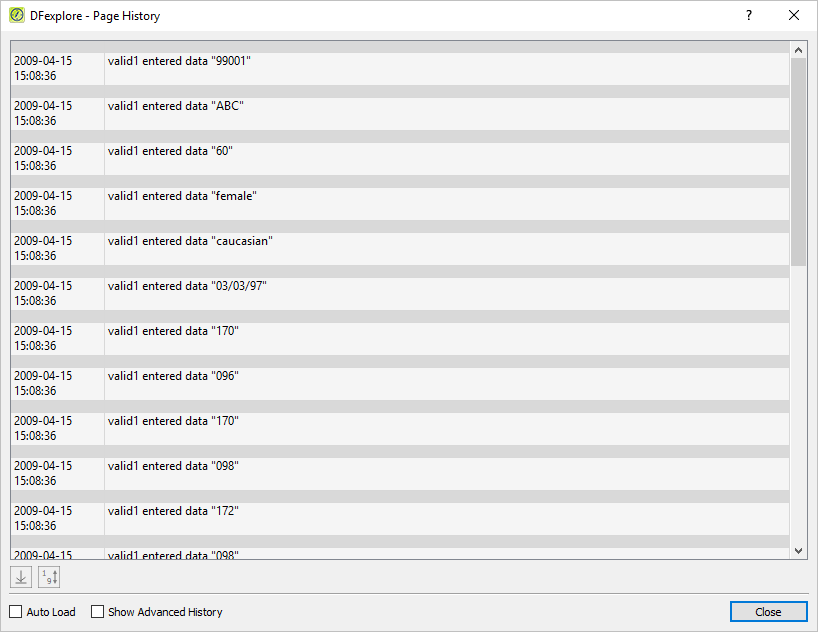
-
Check (Enable) Auto Load and Show Advanced History to enable advanced plate history.
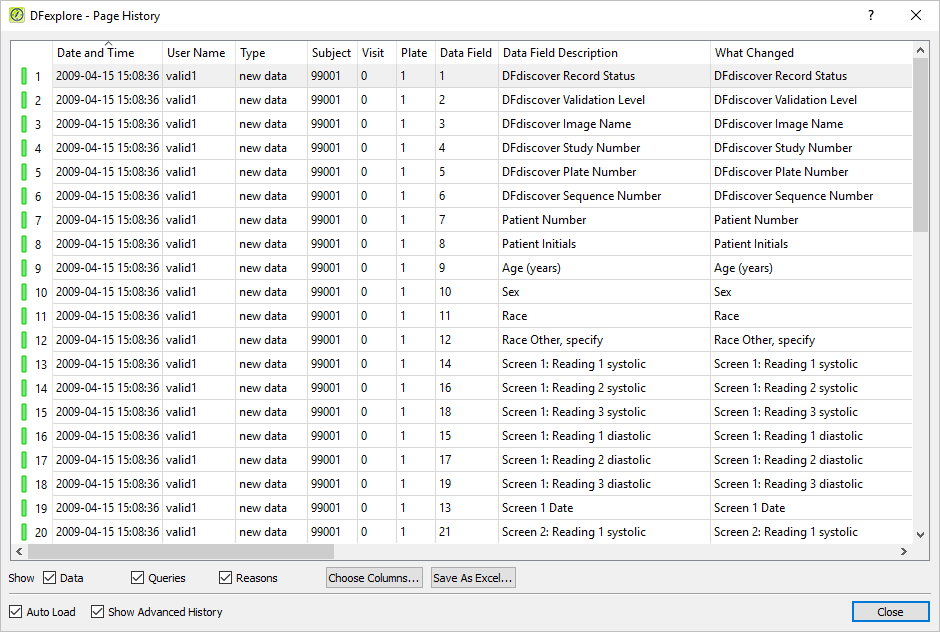
-
Click to close the Page History dialog.
-
Select > menu to close and exit DFexplore.
Table of Contents
- 8.1. Tests & Requirements
- 8.2. Begin Module 8. Image Data Entry
- 8.3. Send PDF images to DFexplore.
- 8.4. Login to DFexplore and confirm the receipt of new pages in the Status View.
- 8.5. Login to the Image Router and route a misidentified page to the Acceptance Test Study new record queue.
- 8.6. Login to DFexplore and confirm receipt of the routed page in the Status View.
- 8.7. Retrieve new images in DFexplore Image View.
- 8.8. Enter Plate 1 (Form 1) for Subject 99002.
- 8.9. Enter Plate 2 (Form 2) for Subject 99002.
- 8.10. Enter Plate 3 (Form 3) for Subject 99002.
- 8.11. Enter Plate 4 (Form 4) for Subject 99002.
- 8.12. Compare the resolutions between Standard Definition (SD) and High Definition (HD).
- 8.13. Edit an existing query.
- 8.14. Delete an existing query.
- 8.15. Change data and record a reason for data change.
- 8.16. Batch validate all opened pages for Subject 99002 to level 2.
- 8.17. Confirm the status of entered pages in Status View.
- 8.18. End Module 8. Image Data Entry.
Submit PDF images to DFexplore.
Login to DFexplore and confirm the receipt of new pages in the Status View.
Login to the Image Router and route a misidentified page to the Acceptance Test Study new record queue.
Login to DFexplore and confirm receipt of the routed page in the Status View.
Retrieve new images in DFexplore Image View.
Enter Plate 1 (Form 1) for Subject 99002.
Enter Plate 2 (Form 2) for Subject 99002.
Enter Plate 3 (Form 3) for Subject 99002.
Enter Plate 4 (Form 4) for Subject 99002.
Compare the resolutions between Standard Definition (SD) and High Definition (HD).
Edit an existing query.
Delete an existing query.
Change data and record a reason for data change.
Batch validate all opened pages for Subject 99002 to level 2.
Confirm the status of entered pages in Status View.
Estimate of Time Required: 30 Minutes
-
Start DFATK as described in Module 1 (Installation & Initialization).
-
Click followed by to begin this module.
-
Click to email a copy of ID99002.pdf to
site_monitor. Clicking more than once will result in multiple pages arriving to your email inbox.Note Save the ID99002.pdf file received via email to your local computer. This file is required to complete the remainder of this module. Refer to Section 1.8, “Creating user accounts and assigning study permissions.” as a valid email address is required for
site_monitorto receive the module specific PDF files. -
Start DFsend as described in Section 1.9, “How to start DFsend”.
-
Click . From the Select PDF Files file selection dialog. Locate the previously saved ID99002.pdf file. Select the file. Click .
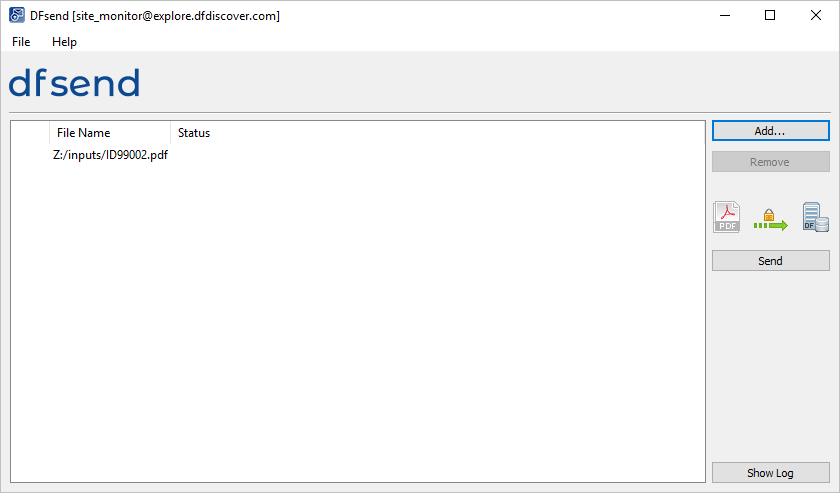
Note Documents can also be added by dragging-and-dropping the desired PDF files from a local file folder directly into the list area.
-
Click . In Verify Password dialog, enter
site_monitorin the Username field and the previously assigned password in the Password field. Click . -
In the resulting Send PDFs to DFdiscover dialog, confirm 1 success and 0 failure are shown. Click .
-
Click to review the DFsend transmission history.
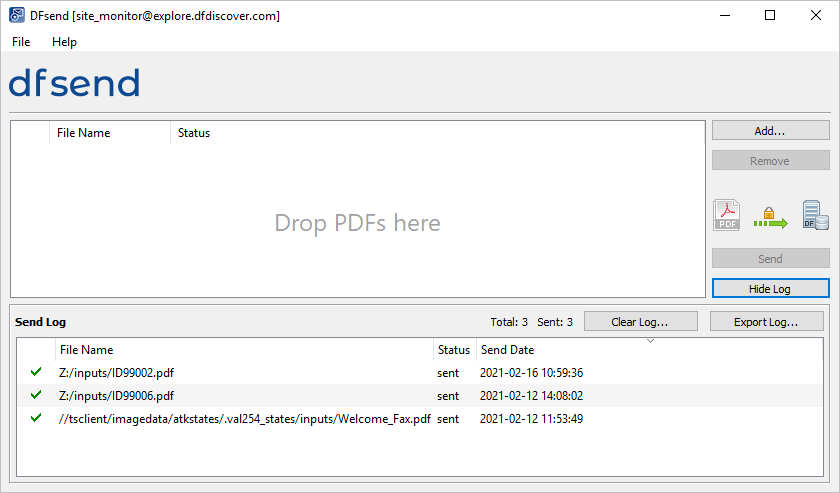
-
Select > .
Note Wait 2-3 minutes prior to proceeding to DFexplore.
-
Start DFexplore and login as
data_coordinatorand choose 254 Acceptance Test Study as described in Section 1.7, “How to start DFexplore”. -
Select > . Examine the count displayed for Images awaiting review in Image Queue.
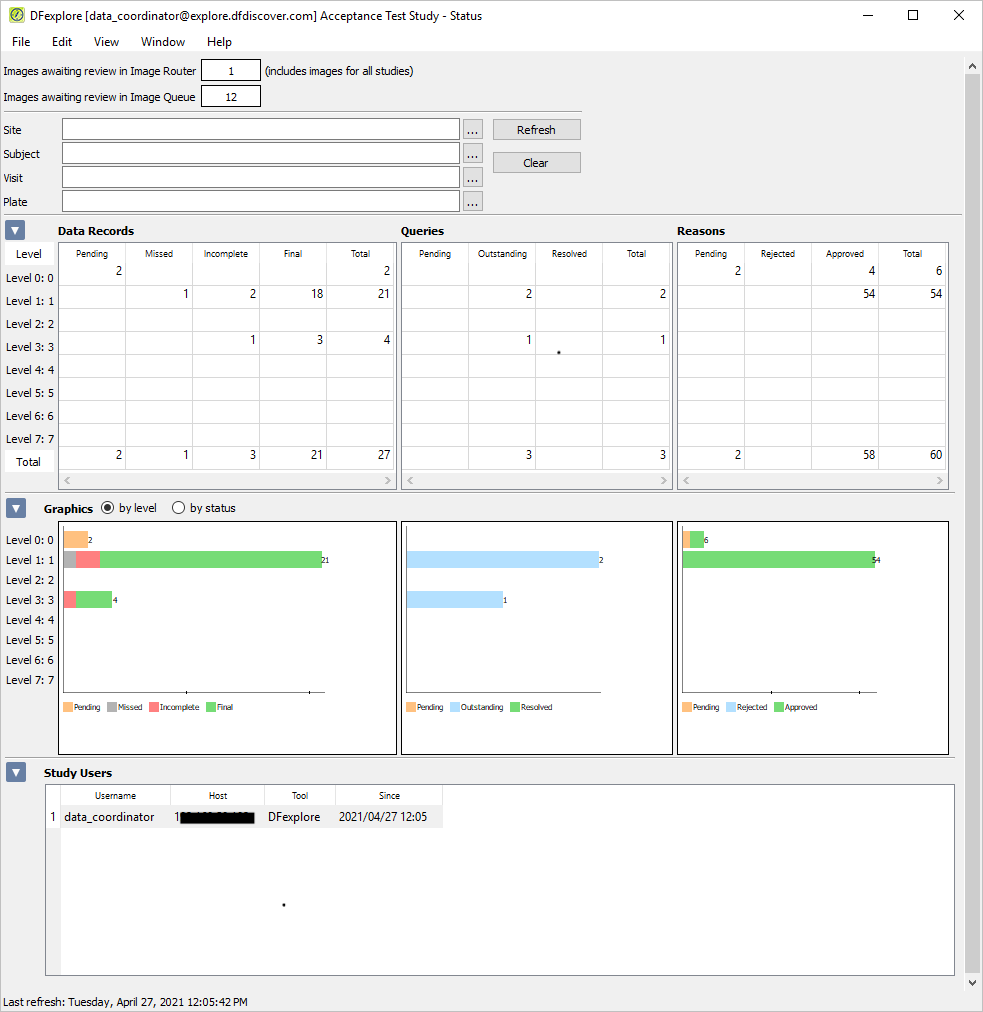
Note Although 13 records were submitted, only 12 will be awaiting validation. The first page in the document has an unreadable barcode. As the barcode could not be identified for the page, it has been routed to the Image Router instead of to 254 Acceptance Test Study.
-
Select > to return to the login dialog and list of available studies.
-
In the DFexplore login dialog, click to open the Image Router.
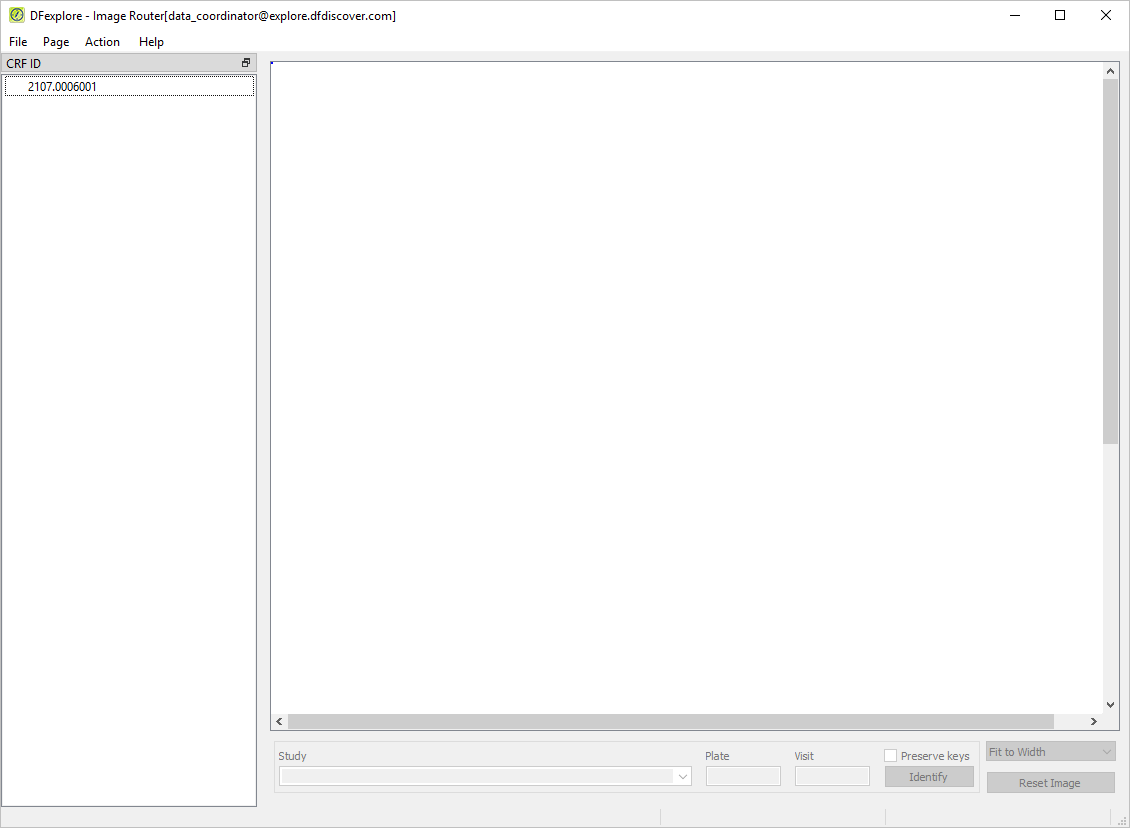
-
Locate the CRF for Subject Number 99002, Plate 1, Sequence 0 (Form 1), and select the page from the list of images in the CRF ID window.
Note Any pages that have been received and which DFdiscover could not identify as CRFs for any of the studies registered at your site, will be found in the Image Router. If there are more pages than those added by execution of the DFATK, you may need to locate the 254 Acceptance Test Study page in the listing of images.
-
Select > to correctly identify the CRF for Subject 99002, Plate 1, Sequence 0.
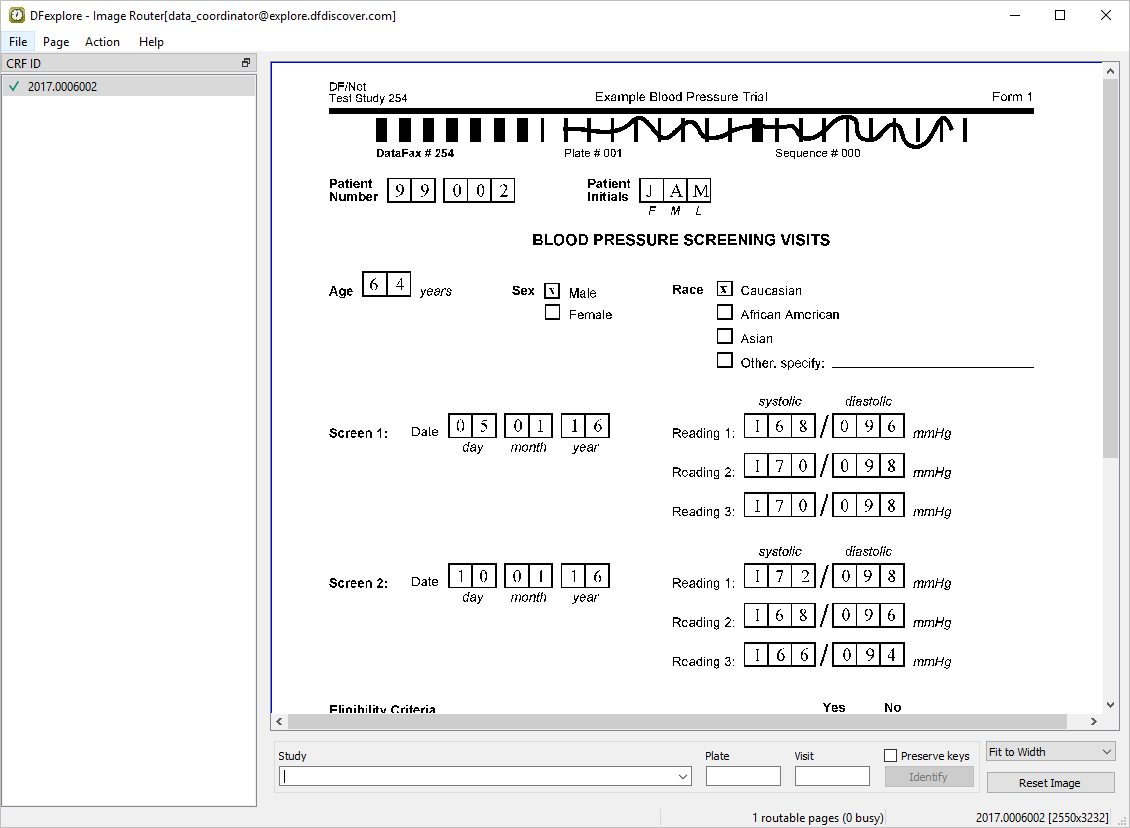
-
Click leftmost end of the horizontal barcode line. Drag the cross-hairs across the solid barcode line then click rightmost end of the line.
-
Select 254 - Acceptance Test Study from the Study drop-down list. Enter Plate and Visit numbers, as illustrated. Click to identify the record.

-
Select > to exit the Image Router and return to the DFexplore login dialog.
-
Choose 254 Acceptance Test Study and click . If the list of studies closes before a selection is made you will need to log back into DFexplore by re-entering the Username and Password for user
data_coordinator. -
Select > to examine the count displayed for Images awaiting review in the Image Queue. This count has increased by 1 as a result of a misidentified page being routed.
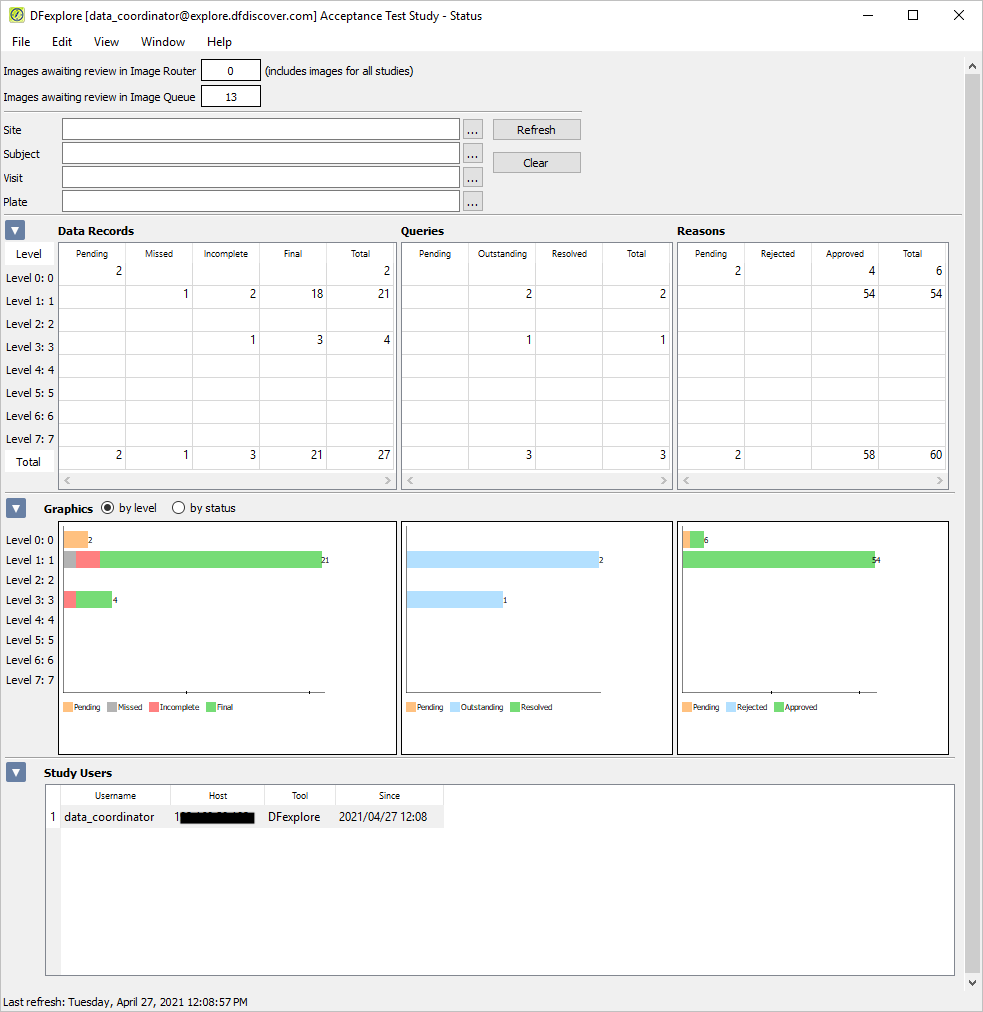
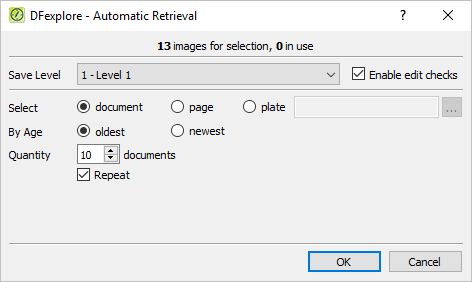
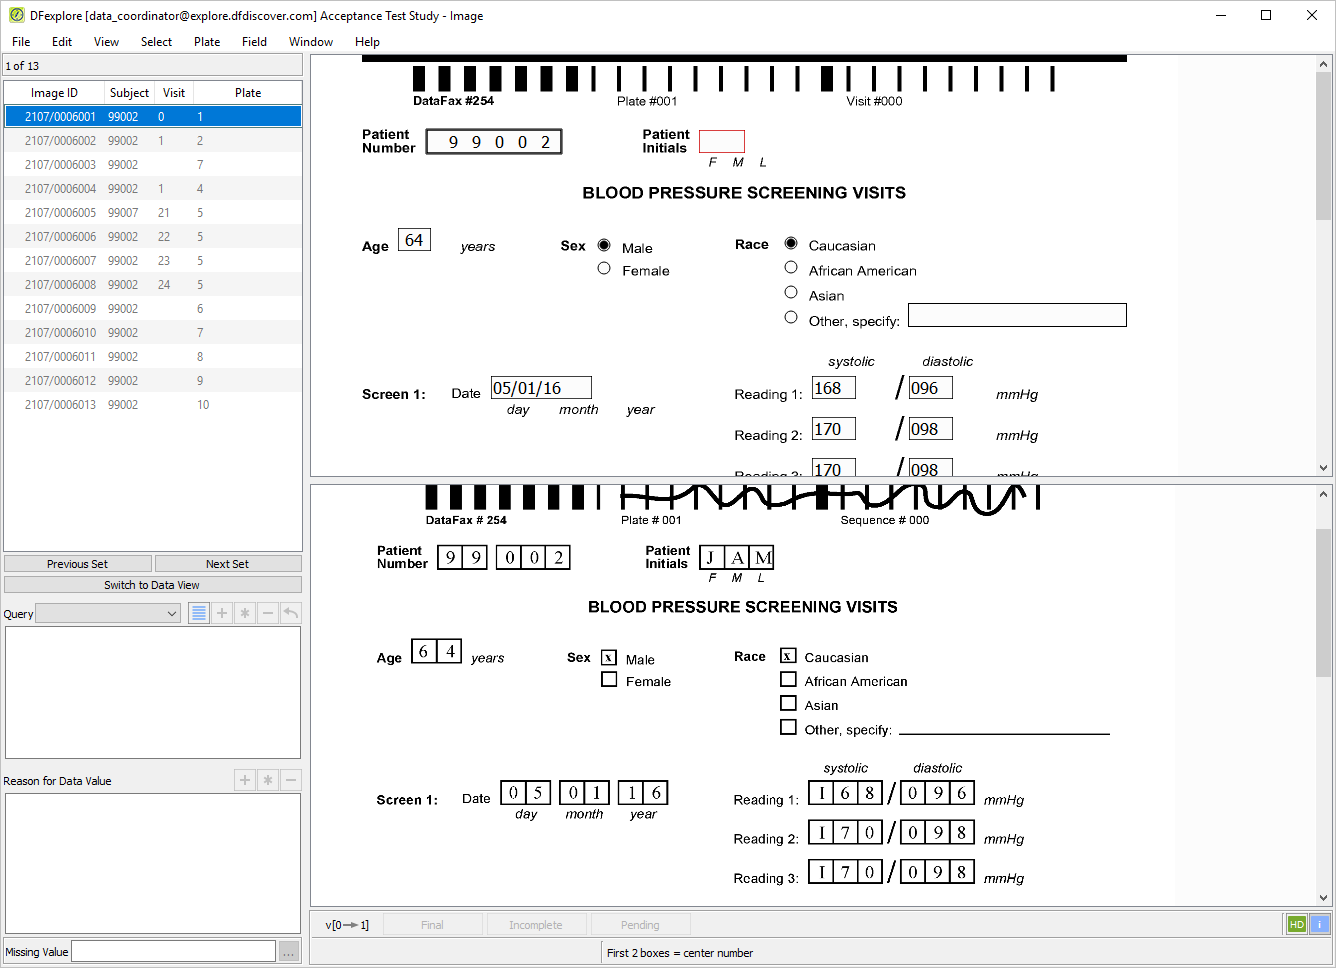
-
With the first page of BLOOD PRESSURE SCREENING VISITS for Subject 99002 displayed, make the page active for data entry by clicking anywhere on the page background using the mouse.
Note In your normal image entry process, you must always pay careful attention to the accuracy of the ICR data. You will need to do the same here. It is possible that the new pages contain ICR errors that you will need to correct during entry. In particular, it is important that you correct any key fields (visit and/or subject numbers) that may have been misread as these are critical to the identification and storage of the data. Note that the ICR data records on your screen may not match exactly those shown in the examples throughout this module.
-
Correctly enter Patient Number and Patient Initials as per the CRF image. Press Tab to advance to the Age field.
-
The
MissingQCedit check is programmed to pop up a Query note if any of the following fields are left blank: Age, Sex, Screen 1 Date and all Screen 1 blood pressure readings. Test this edit check on the Age field by making this field blank. Press Tab to exit the Age field. When the Add Query window pops up, click to ignore and return to complete the field as per the CRF image, before proceeding to the next field.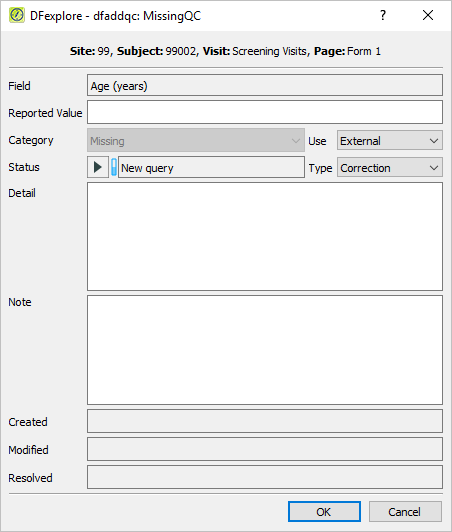
-
Enter the Sex and Race fields as they appear on the CRF image. Press Tab to advance to the Screen 1 date field and enter its value
05/01/16followed by all blood pressure readings for Screen 1 date. -
The
ScreenDatesedit check is executed on exit from the Screen 2 Date field. It checks that the Screen 2 Date follows the Screen 1 Date by at least one day. Enter a Screen 2 Date of04/01/16, which precedes the Screen 1 Date of05/01/16, then press Tab to exit the field. After verifying the message in the confirmation dialog, click .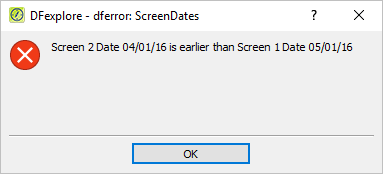
-
Return to the Screen 2 date field and enter the date and all Screen 2 blood pressure values as they appears on the CRF image.
-
Step 1 to Step 6 test the entry of specific data fields. Any field that has not been correctly entered (by you or the DFdiscover ICR) is now completed by entering the values as they appear on the CRF image. After entering the last data field Eligibility Criteria #6, press Tab to exit the field to make the Save buttons at the bottom of the data entry window active.
-
As no data problems exist on the entered page, the page can be saved to the database with a status of Final. Do this by clicking with the mouse or by pressing the space bar.
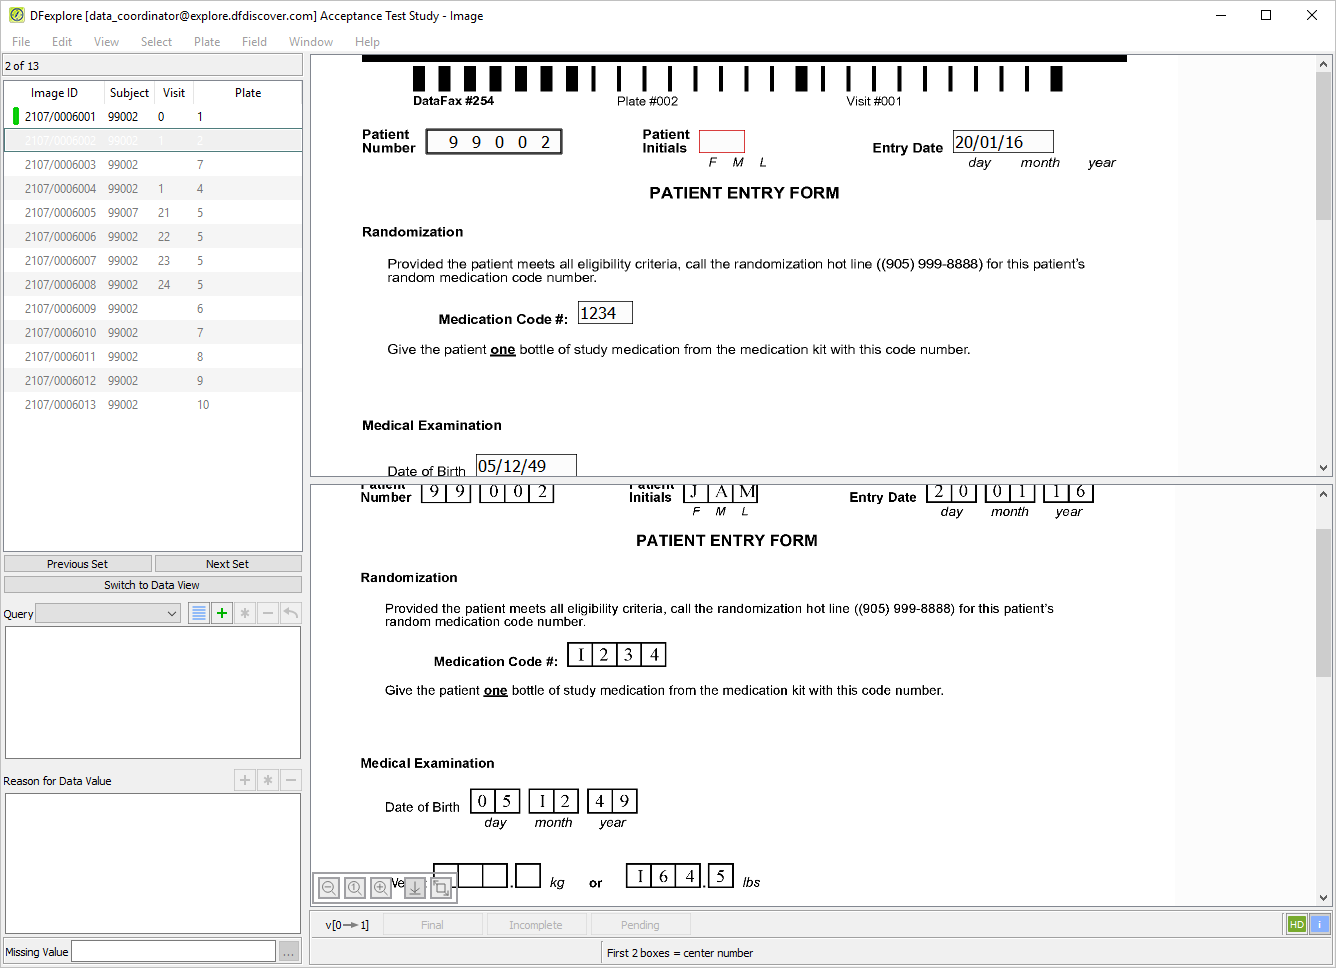
-
Correctly enter Patient Number per the CRF image. Press Tab to advance to the Patient Initials field. The
SetInitedit check automatically completes the Patient Initials field if the initials are available on the Screening Form (Plate 1).Note The Patient Number must be entered correctly on the data record for the
SetInitedit check to execute. When an edit check changes a field's value, the changed field will automatically be assigned a default reason and the field's color will change to green to show that an approved reason exists. -
Correctly enter the Entry Date, Medication Code # and Date of Birth values per the CRF image. The
CheckAgeedit check calculates the Subject's age from the Entry Date and Date of Birth fields, and compares this value with the value entered for Age on Plate 1. If these values disagree, an error message is displayed. Press Tab to exit Date of Birth field to execute theCheckAgeedit check.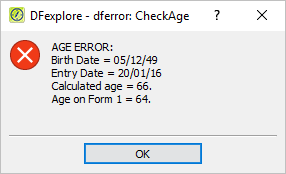
-
Click in the error message window to bring forward the query dialog. Click in the query dialog to attach a query to the Date of Birth field.
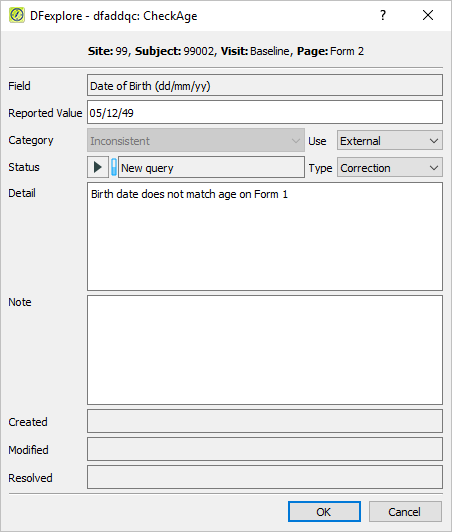
-
Press Tab to advance to the Weight (kg) field. Do not enter a value as the corresponding field on the CRF image is blank. Continue on to the Weight (lbs) field and enter the value that appears on the CRF image. If only one of the 2 weight fields are completed, the
WeightEquivedit check calculates and enters the equivalent value for the blank Weight field. Press Tab to exit the Weight (lbs) field executing theWeightEquivedit check. -
Press Tab to advance to the Height (cm) field. Do not enter a value as the corresponding field on the CRF image is blank. Continue on to the Height (in) field and enter the value that appears on the CRF image. If only one of the 2 height fields is completed, the
HeightEquivedit check calculates and enters the equivalent value for the blank Height field. Press Tab to exit the Height (in) field executing theHeightEquivedit check. -
Step 1 to Step 5 test specific data fields. Any field that has not been entered (by you or the DFdiscover ICR) is now completed by entering the values as they appear on the CRF image. After entering the last data field (Date of First Study Follow-up Visit), press Tab to exit the field to make the save buttons active.
-
As an outstanding query exists on the Date of Birth field, the page must be saved to the database with a status of Incomplete. Click with the mouse or by pressing the space bar.
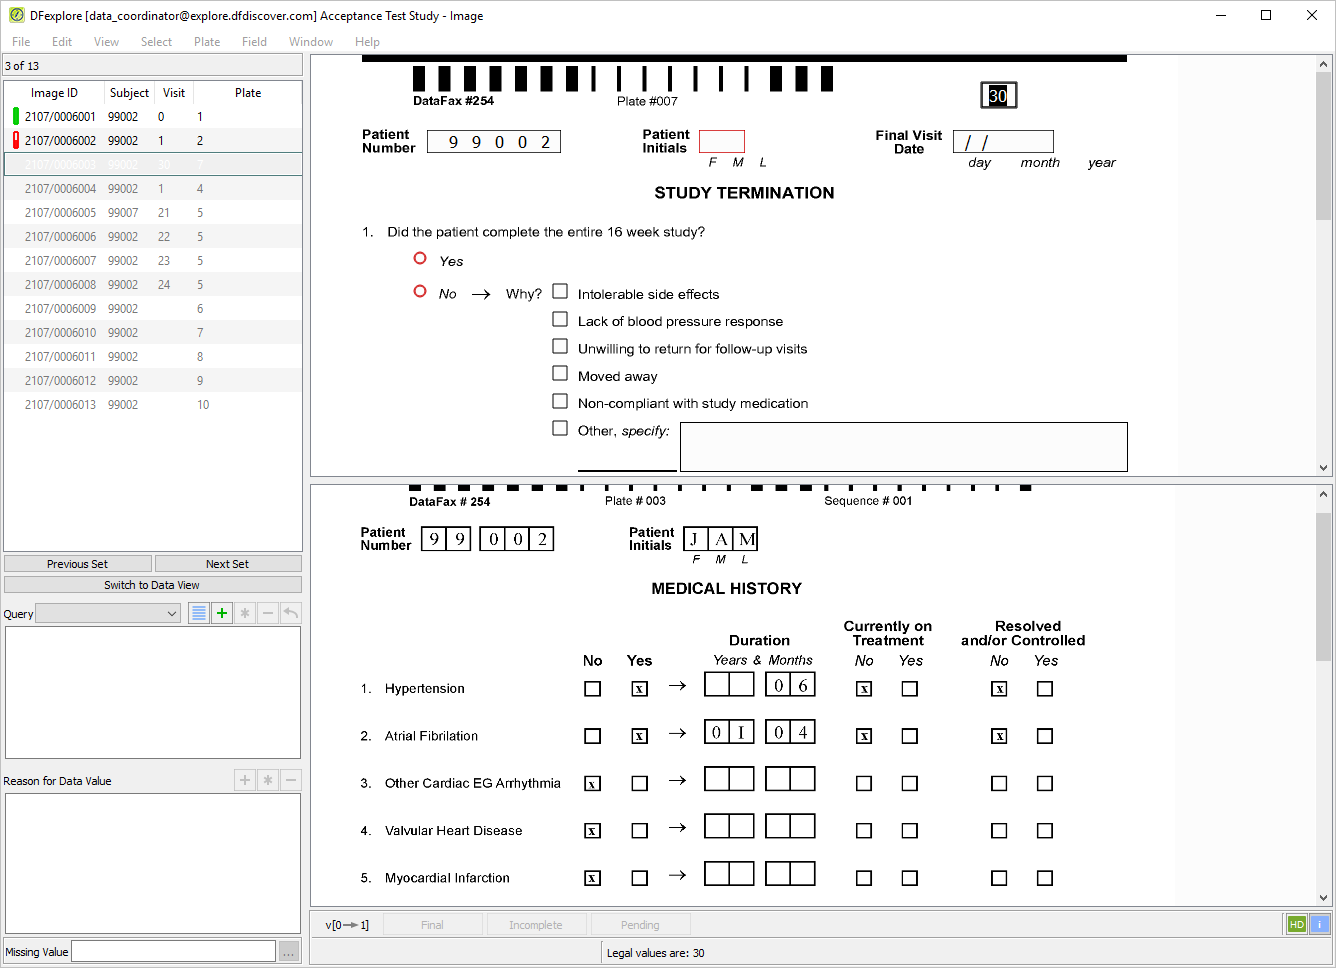
Note If outstanding queries and/or illegal values exist on a data record, DFdiscover will never allow the record to be assigned the status Final.
-
Plate 3 has been incorrectly identified by DFdiscover as Plate 7 (the data record and CRF image do not match). Before data entry can begin, the record must first be correctly identified by correcting the barcode. To do this, select > .
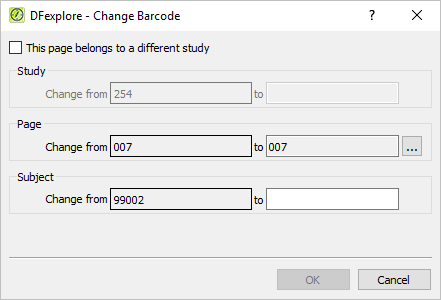
-
In the Change Barcode dialog, set the Page to 003. Do this by clicking to display a listing of all defined study plates, then select the entry 003 - Medical History from the list. Click to close the dialog.
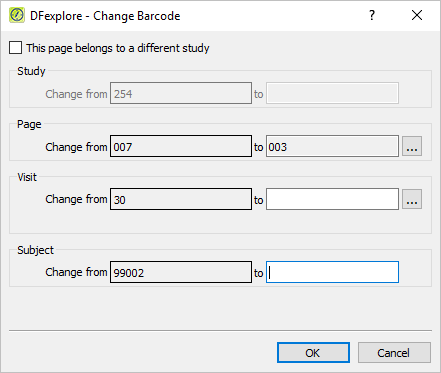
-
Set the Visit by clicking to display a listing of all defined study visits, select 1 - Baseline from the list. Click to close the visit listing dialog. Click .
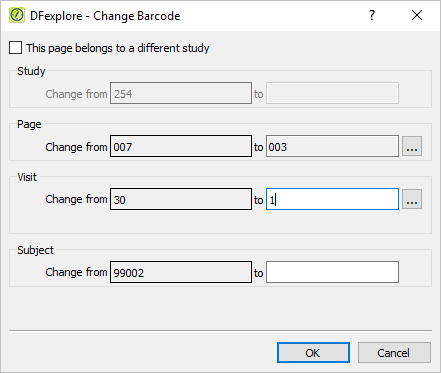
-
Confirm the change to the barcode by clicking in the warning dialog.
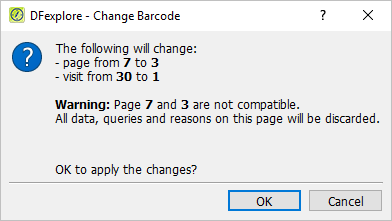
Note When a barcode is changed, all data fields on the data record (top half of the screen), will be blanked of their previous ICR values as these are no longer correct. The correct values must be entered manually.
-
Correctly enter Patient Number as per the CRF image. Press Tab to advance to the Patient Initials executing the
SetInitedit check as in Section 8.9, “Enter Plate 2 (Form 2) for Subject 99002.”. -
Press Tab to advance to the 1. Hypertension No/Yes field and check the response indicated on the CRF image. Press Tab to advance to the Duration, Years field and leave it blank as per the CRF image. Press Tab to advance to the Duration, Months field and enter the number of months
06as they appear on the CRF image. TheMedHxDuredit check completes the Duration fields by entering zeros into the Years field if only Months are given, and zeros into the Months field if only Years are given. Press Tab to exit the Duration, Months field to execute theMedHxDuredit check.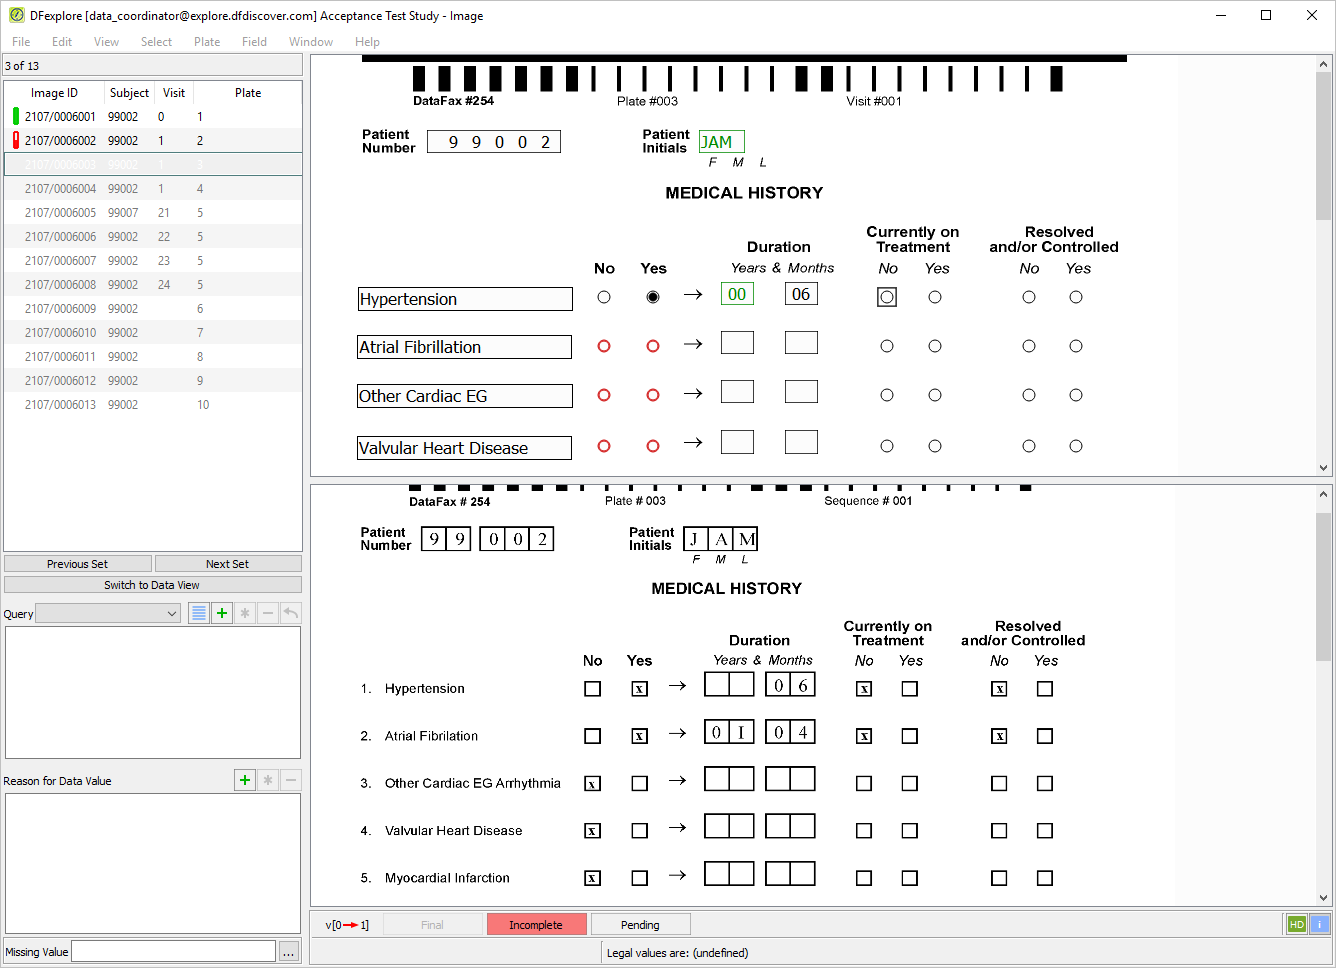
-
Enter the remaining values for 1. Hypertension and enter all fields for 2. Atrial Fibrillation. Press Tab to advance to the first No/Yes field for 3. Other Cardiac EG Arrhythmia.
-
A skip has been set on the No/Yes fields for each medical history item such that if "No" is selected, the remaining fields for that medical history item are skipped and the user is taken to the next item. Enter the correct values for medical history items 3. to 6. to execute the skip.
-
Enter all values for 7. Diabetes up to and including the Currently on Treatment field. Press Tab to advance to the Resolved and/or Controlled field which has been left blank on the CRF image. Select > or click
. In the Add Query dialog, set:Category = Missing
Status = New query
Use = External
Type = Correction
Click .
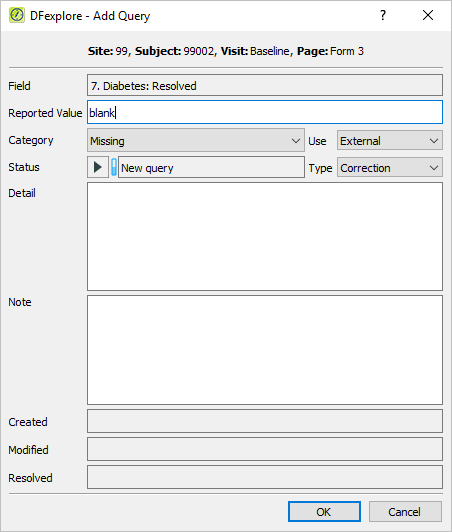
Note DFexplore attempts to infer the Category, Status, Use and Type information when a query is being added. It is important to verify the query settings and correct them if necessary, before applying the query to the data field.
-
For medical history items 8. to 11., enter the appropriate values per the CRF image. Press Tab to advance to the text field for the first 12. Major surgery (specify) to make it the current field.
-
Enter the correct values in all fields for the first Major Surgery. Input
hip replacementup to and including the How long ago response. An edit check,CalcDays, attempts to read the How long ago text field to calculate the number of days prior to study entry that surgery occurred. The calculated value automatically populates the hidden field to the right of these text fields. Pressing Tab off the How long ago field executesCalcDaysedit check.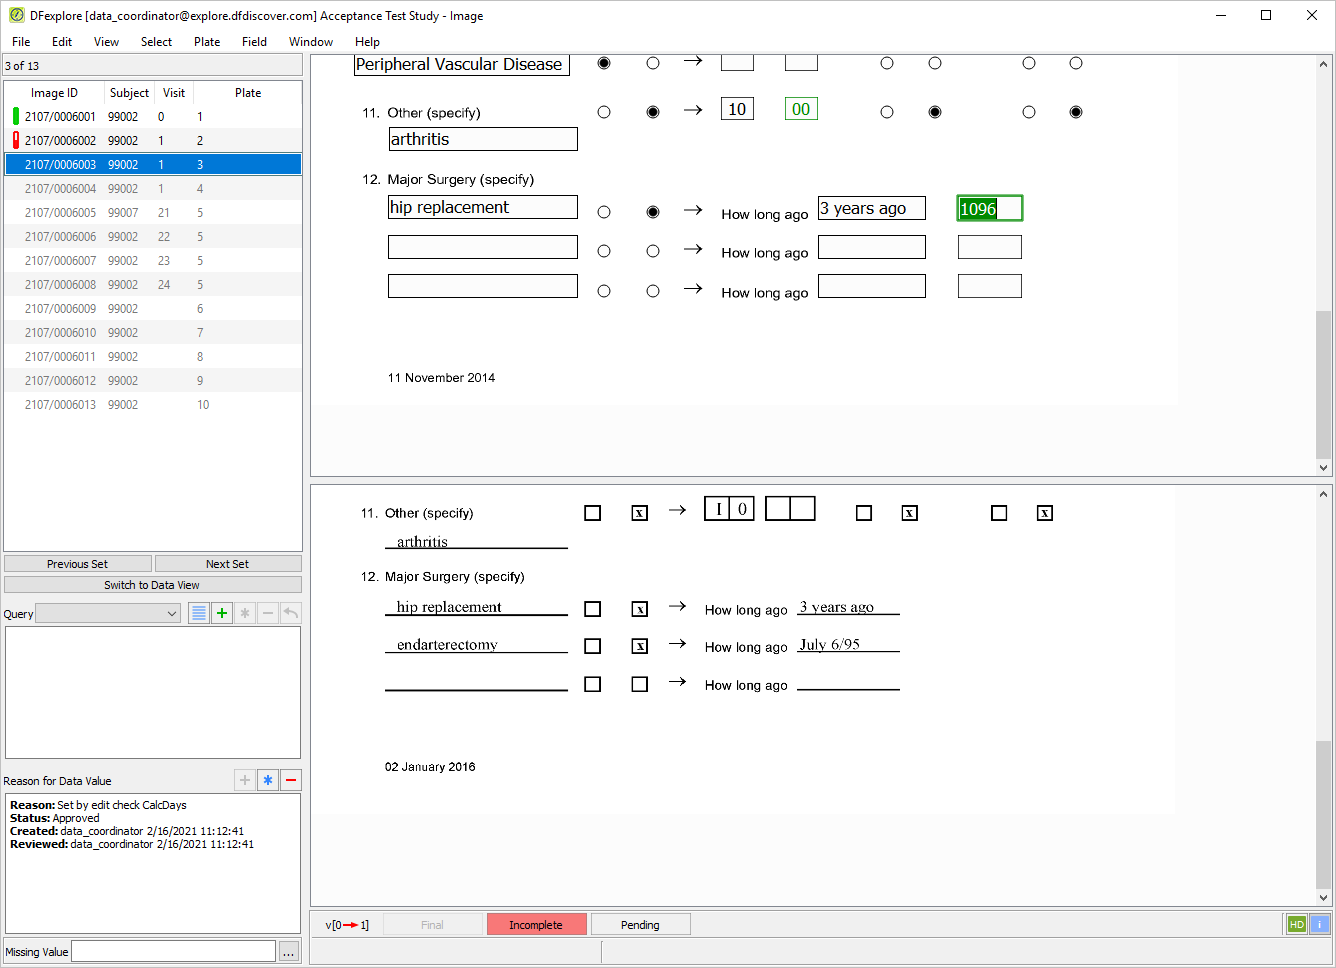
-
Press Tab to advance to the 2nd Major Surgery item. Input
endarterectomyand perform the same steps as in Step 11. Enter the date06/07/95forJuly 6/95in the How long ago field.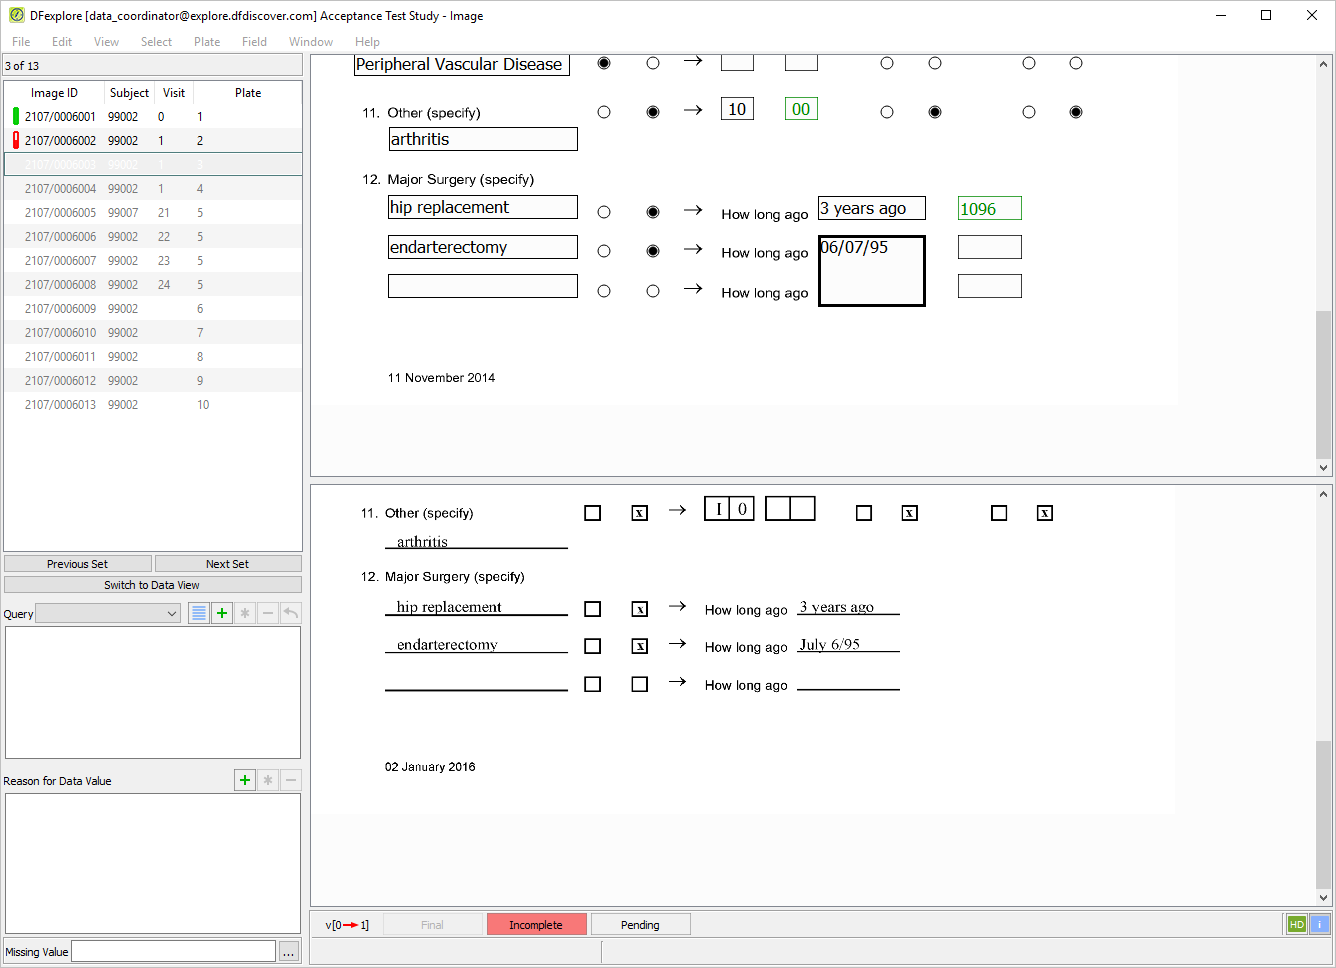
-
Step 5 to Step 12 test specific data fields. Any field that has not been entered (by you or the DFdiscover ICR) is now completed by entering the values as they appear on the CRF image. After entering the last data field, press Tab off the field to make the save buttons at the bottom of the data entry window active.
-
Click with the mouse or by pressing the space bar. As an outstanding query exists on the 7. Diabetes, Resolved and/or Controlled field, the page must be saved to the database with a status of Incomplete.
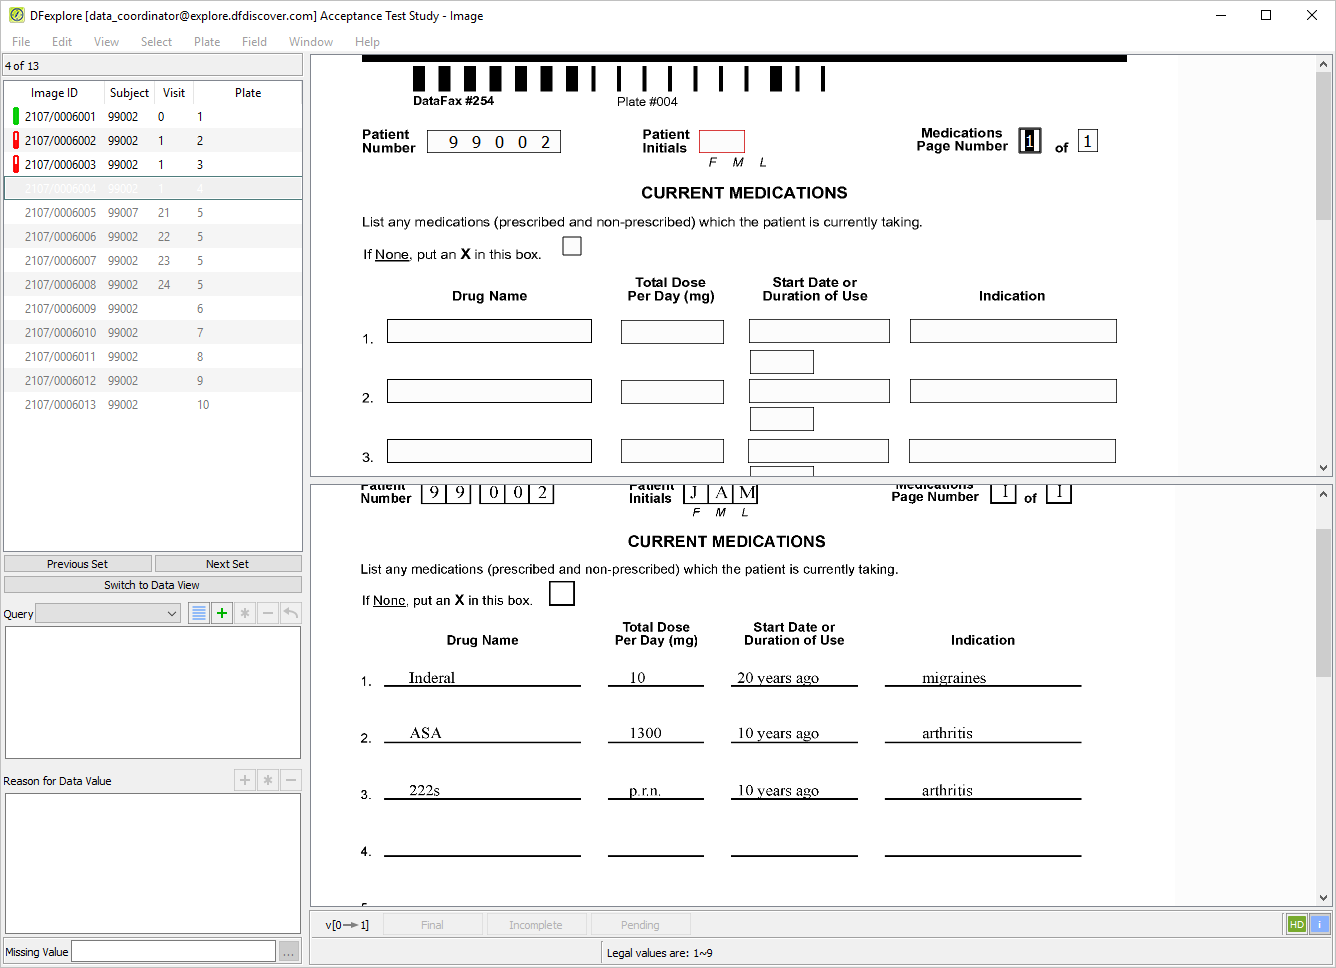
-
Correctly enter Patient Number, Patient Initials and both Medications Page Number fields per the CRF image. As for the previous pages, the
SetInitedit check automatically completes the Patient Initials field. Press Tab to advance to the 1. Drug Name field. -
In 1. Drug Name type the text Inderal as it appears on the CRF image. The Drug Name fields have been mapped to lower case in their setup definitions. Therefore, all entered text will appear as lower case regardless of the case typed.
-
Enter all data for the first 2 drugs (
Inderal and ASA) as it appears on the CRF image. TheCalcDaysedit check that is present on Plate 3 (Medical History) is also present on the Start Date or Duration of Use fields. During data entry, confirm that the hidden fields contain the calculated values as shown below.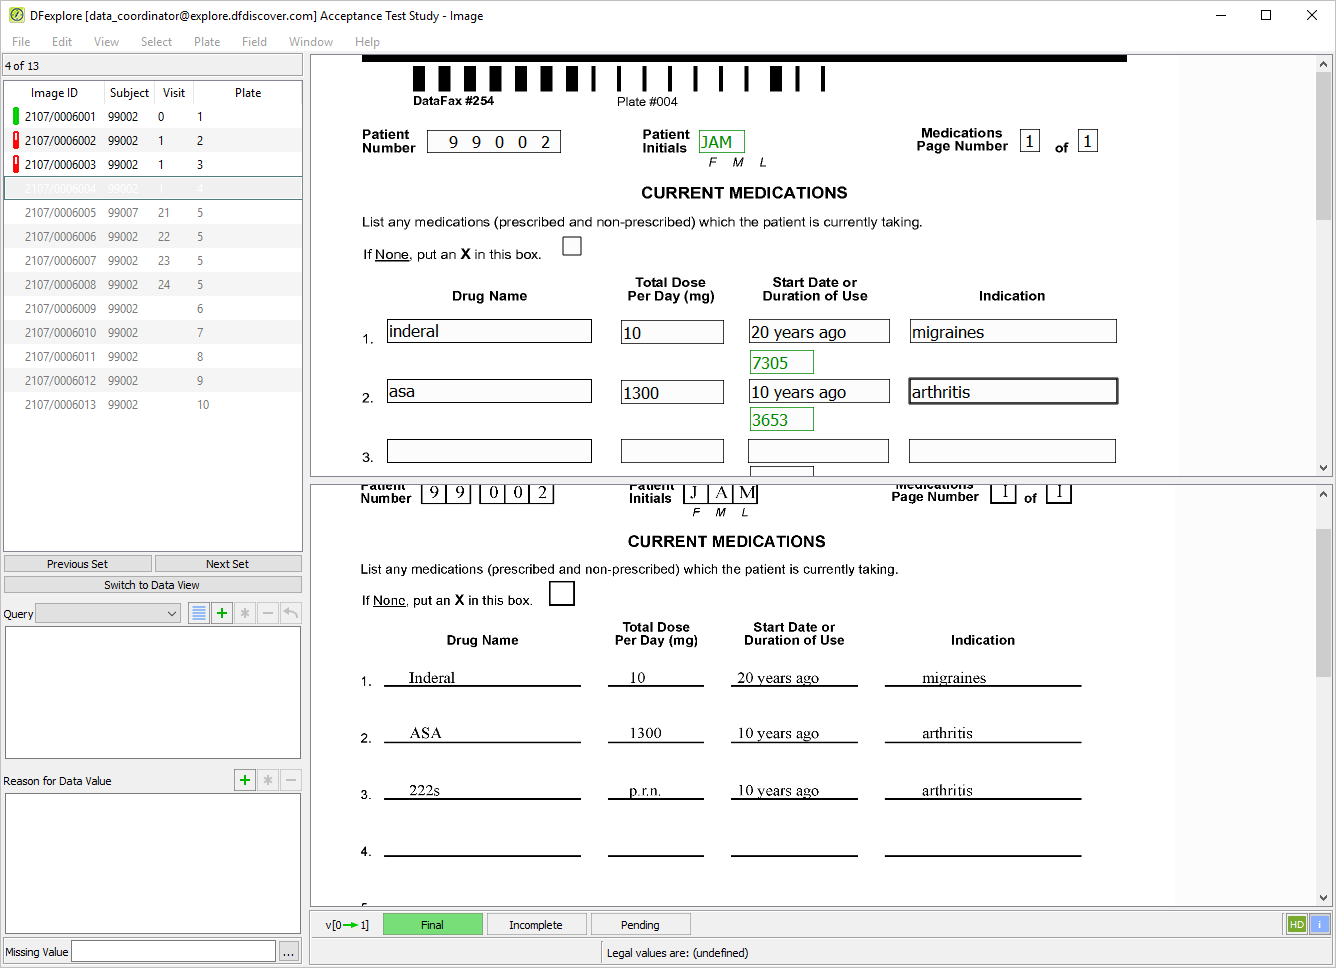
-
Press Tab to advance to the 3. Drug Name field. An edit check,
DrugLookup, has been programmed to match the entered drug text with an entry in a lookup table. Enter the 3rd drug name222sand press Tab to exit the field executingDrugLookupedit check. (If an entry can not be found in the lookup table, a search dialog is displayed.)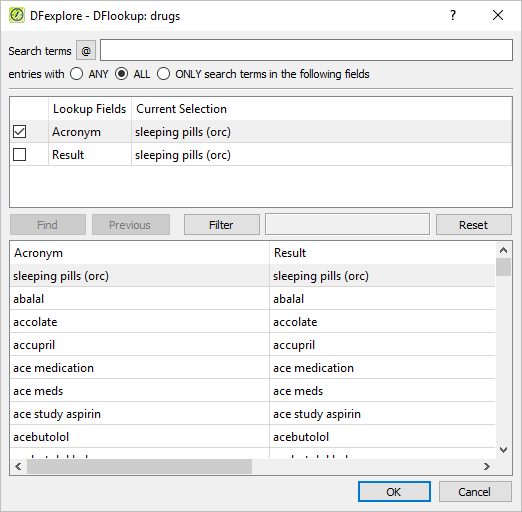
-
In the search dialog,
Check (enable) Acronym
Uncheck (disable) Result
Input (enter)
222in the Search terms
Click . Once the match asa with codeine (222) is found, click .
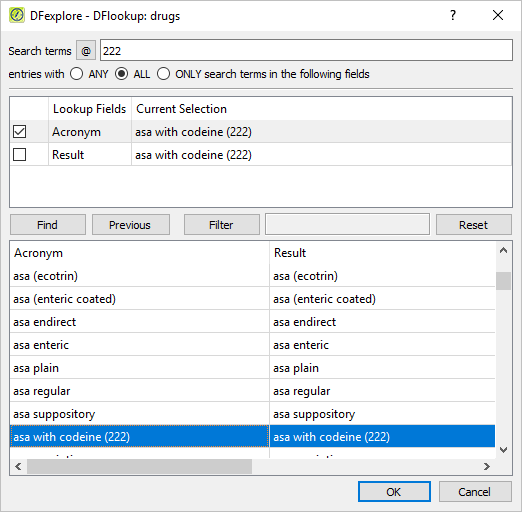
-
Enter the remaining values for the 3rd drug field and press Tab to advance to 4. Drug Name field. A skip has been set on each of the Drug Name fields such that if the field is blank, the remaining fields for that drug are skipped. Press Tab to advance through the remaining Drug name fields, and leave them blank as per the CRF image, to execute the skip.
-
Step 1 to Step 6 test specific data fields. Any field that has not been entered (by you or the DFdiscover ICR) is now completed by entering the values as they appear on the CRF image. After entering the last data field, press Tab to exit the field and make the save buttons at the bottom of the data entry window active.
-
As no data problems exist on the entered page, the page can be saved to the database with a status of Final. Do this by clicking or by pressing the space bar.
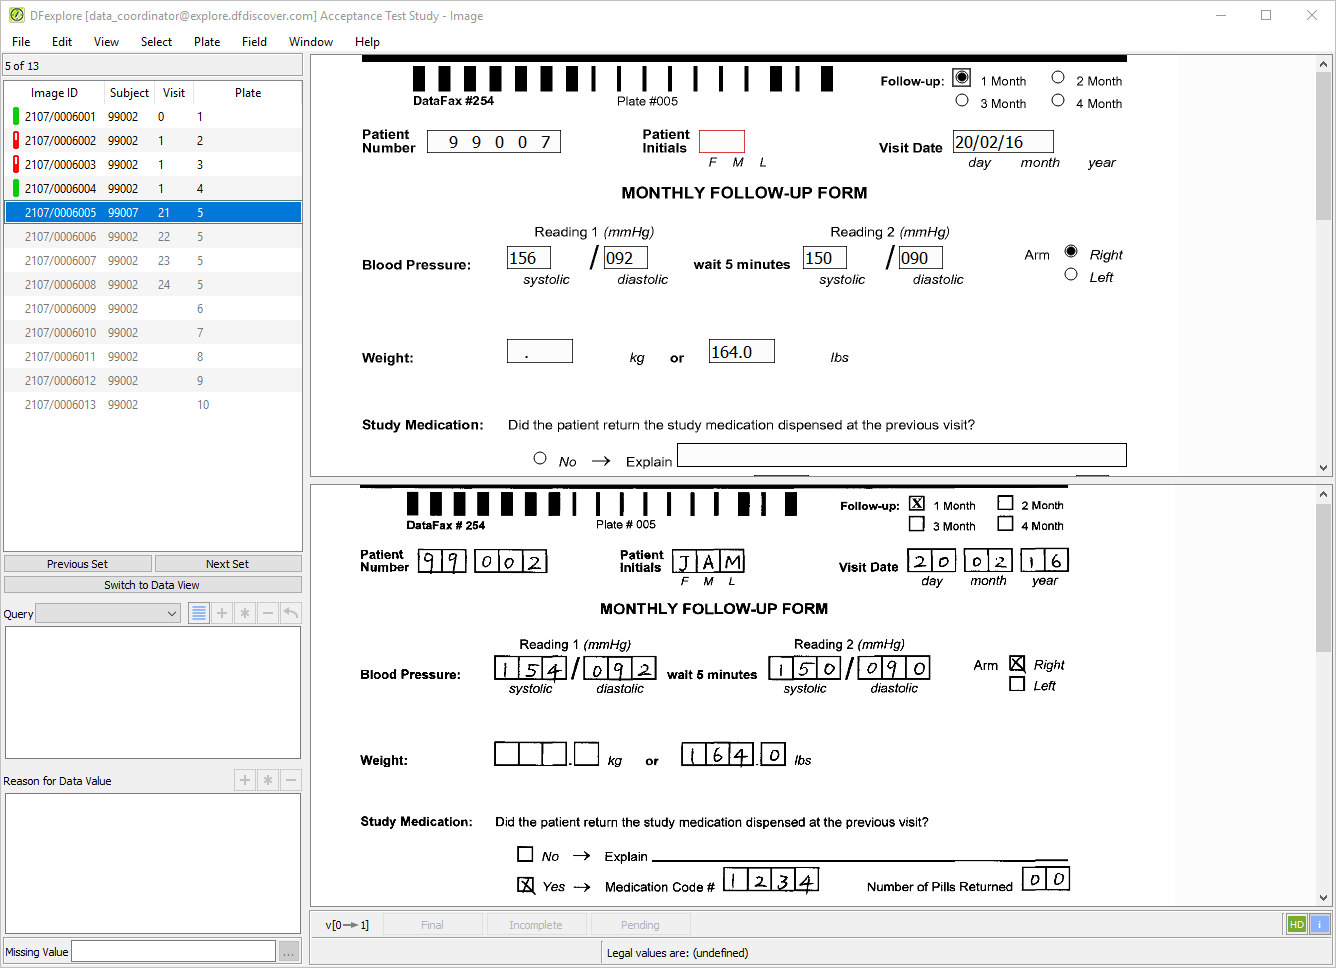
-
With MONTHLY FOLLOW-UP FORM for subject 99002 as the active page, verify that the
 button is shown at the bottom-right corner of the main data entry screen. Examine the quality of the SD image.
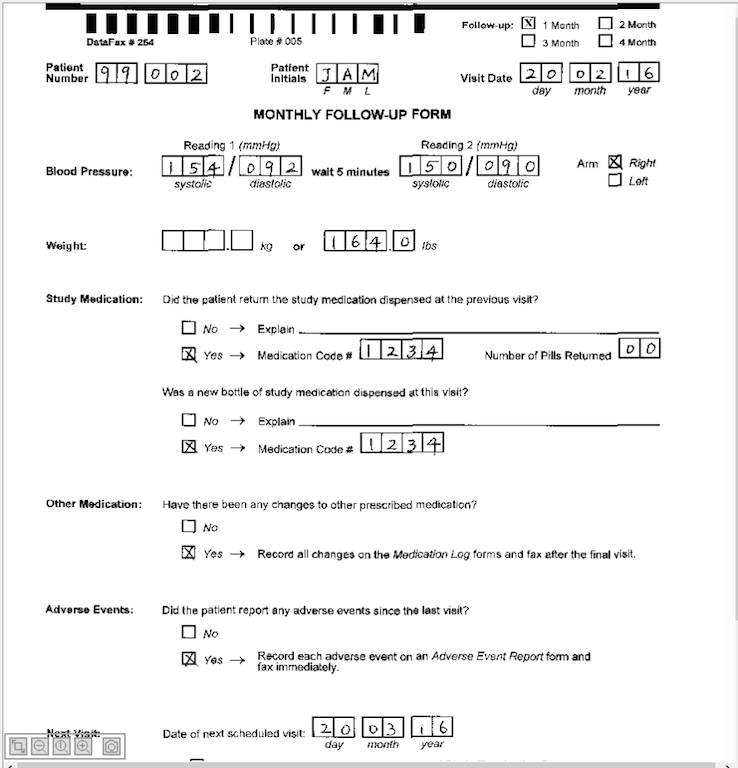
Note DFexplore remembers this setting from the last use. If module 8. Image Data Entry was previously executed, the button will already show
 . In this case, continue with
Section 8.13, “Edit an existing query.”.
. In this case, continue with
Section 8.13, “Edit an existing query.”.
-
Five hidden buttons
 ,
,  ,
,  ,
,  and
and  can be displayed and identified at the bottom-left corner of the main data entry screen. To show these buttons, place the mouse anywhere on the image. To identify each button, hover the mouse over top of it.
 -
Click
until the image reaches its maximum size. Examine the enlarged SD image. 
-
Click
at the bottom-right corner of the data entry screen, switching the label to
. Confirm that the background color of is green as shown.

-
Examine the HD image. Verify that the HD image is clearly visible and there is a noticeable difference between the HD image and the previous SD image.
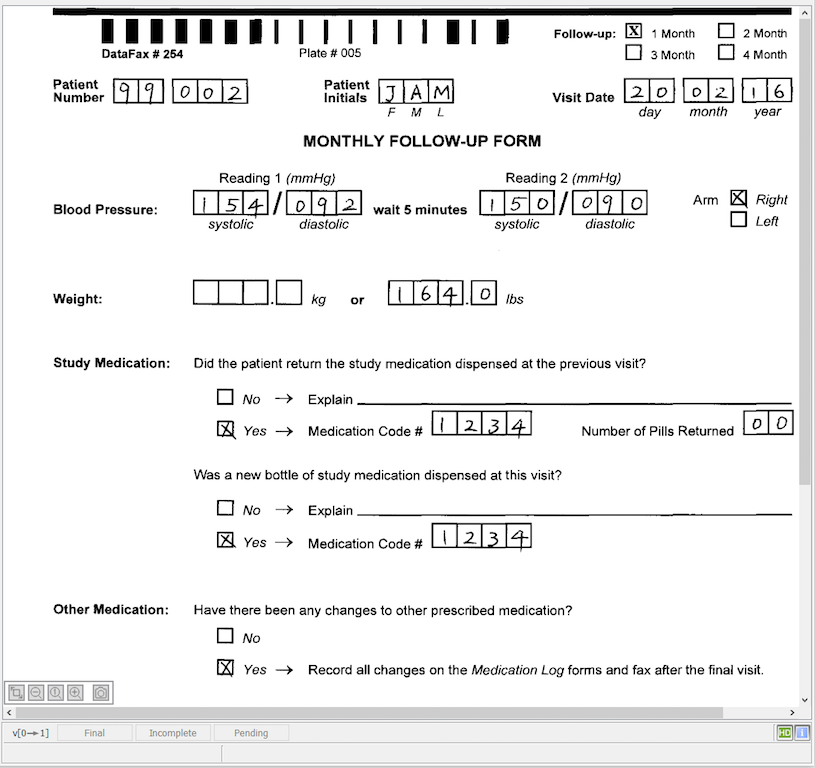
-
Select > to change from Image View to Queries View.
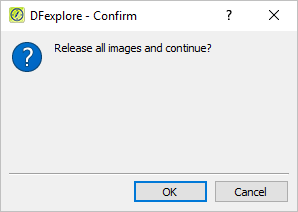
-
Click in the confirmation dialog to release the Image View records and open Queries View.

-
In the Queries View site list, double-click icon Site 99 - Hospital #99 to list the queries for that site. Select > to display all outstanding/unresolved queries for Site 99 - Hospital #99.
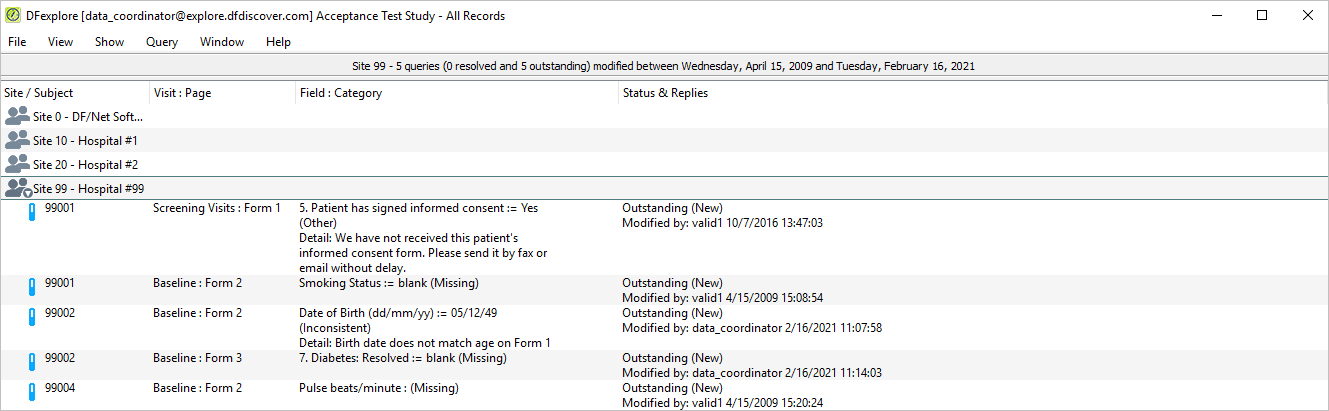
-
Locate the query for Subject 99002, Baseline : Form 3. This is the query that was added to the field 7. Diabetes, Resolved and/or Controlled in Section 8.10, “Enter Plate 3 (Form 3) for Subject 99002.”. Double-click the query to be taken directly to the page and queried field.
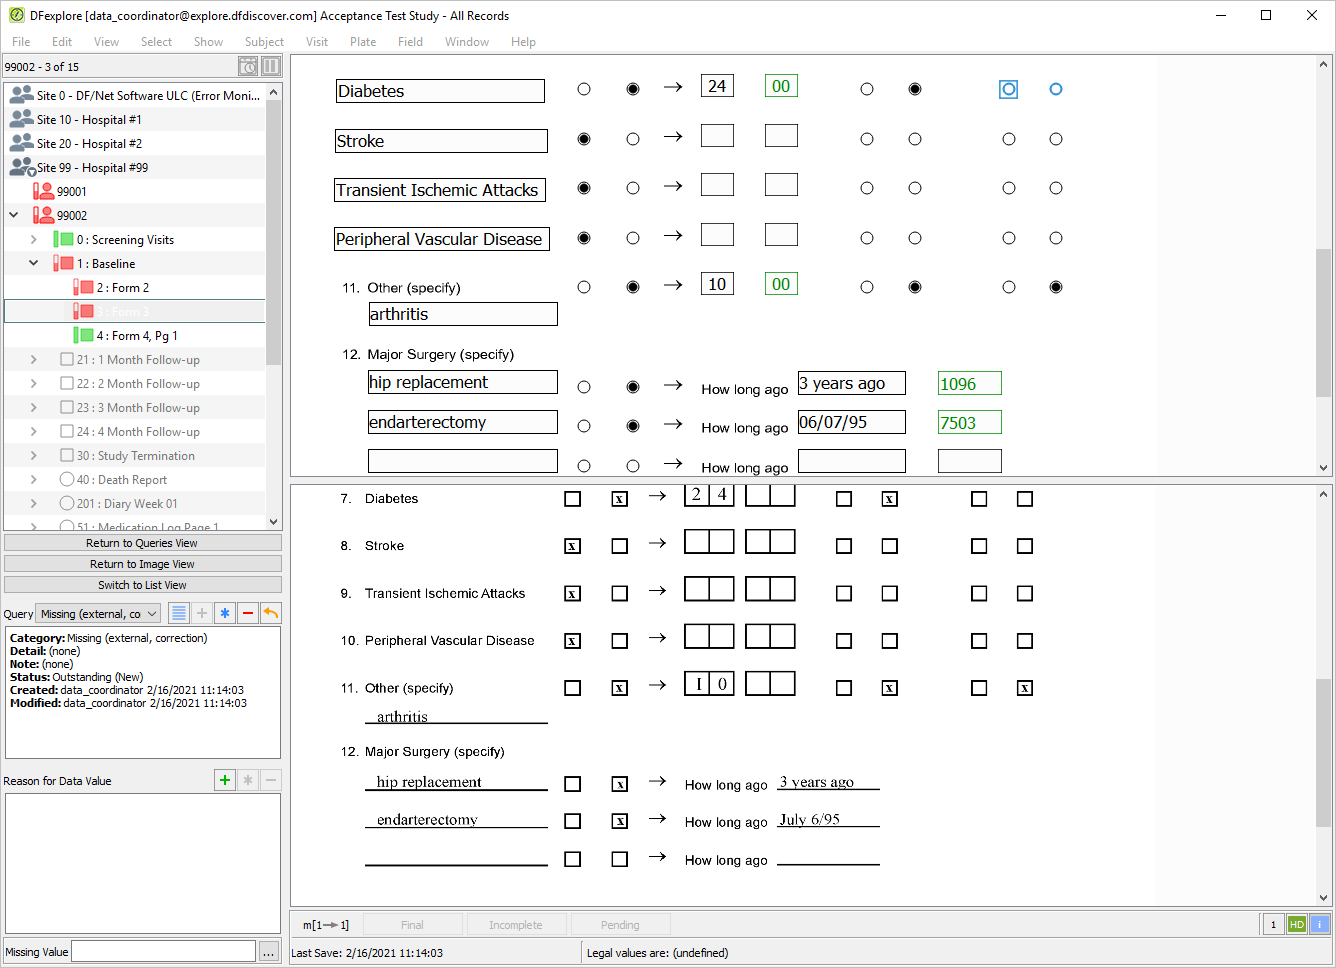
-
Select > . In the dialog, set:
Mode = Validate
Save level = 2 - Level 2
Check (enable) Enable edit checks
Click to apply the changes.
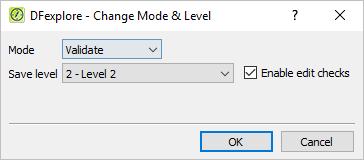
-
Select > or click
 . In the dialog, set:
 Status = Resolved NA from the pull-down list.
Enter
The Subject is currently on treatment.in the Detail field
Click to apply the edits.
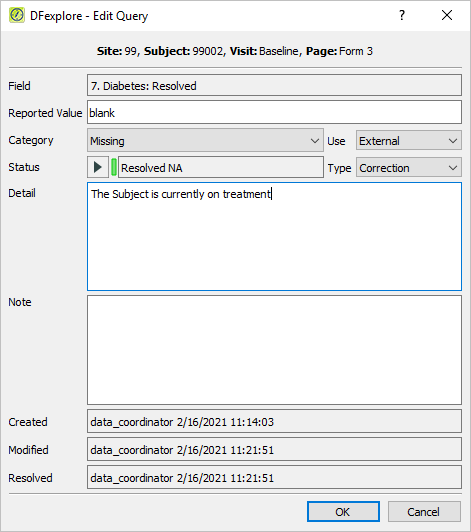
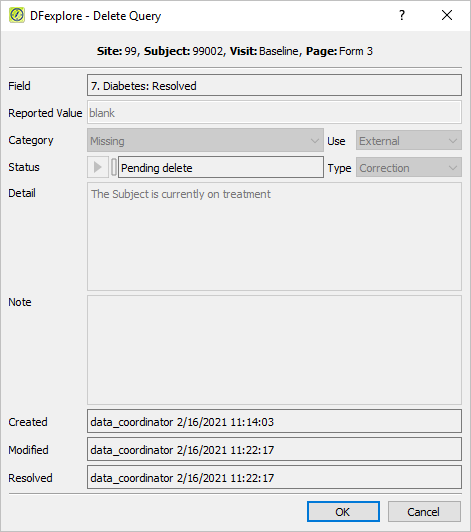
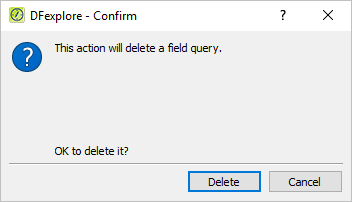
-
With 3:Form 3, Medical History as the current page, press Tab to advance to 11. Other (specify). Change the existing data value of
arthritistoarthritis (knees)and select > or click.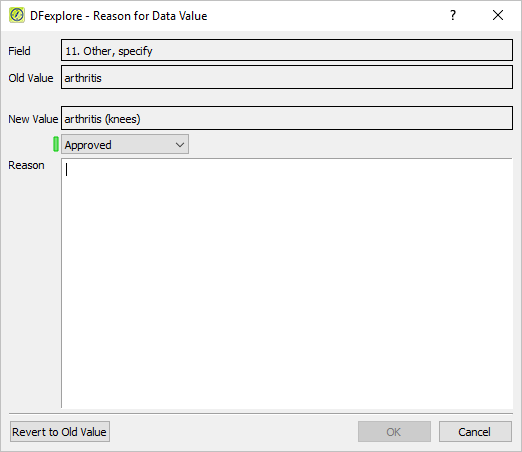
-
In the Reason for Data Value dialog, confirm that the Old Value and New Value fields display the data values shown. Choose Pending from the status list to change the reason's Status to Pending. Enter the text
Location of arthritis (knees) was provided verbally by the site.in the Reason field. Click to close the dialog and save the reason for data change to the database. Press Tab to advance to the next field.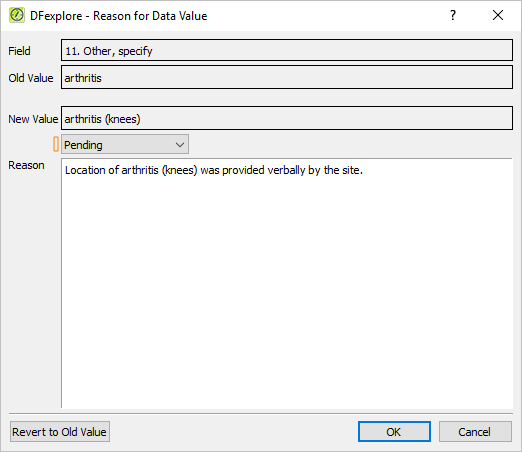
-
Press Tab to advance through the remaining fields on the Medical History page until the save buttons at the bottom of the screen become active. Click to save the modified page to the database at level 2.
-
Still working at Save Level 2 with the pages previously opened for Subject 99002, select > . Confirmed credentials are needed to complete this action.
-
Choose 2-Level 2 from the Move record level to pull-down list. Choose All open pages for current subject. Click . Confirmed credentials are needed to complete this action.
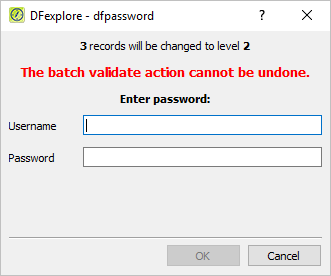
-
Enter
data_coordinatoras the Username and the previously assigned password. Click to batch validate the selected records.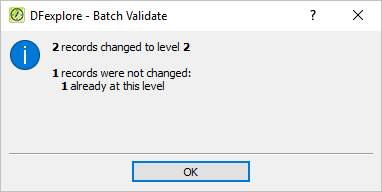
-
Click to close the summary dialog and complete the batch validation operation.
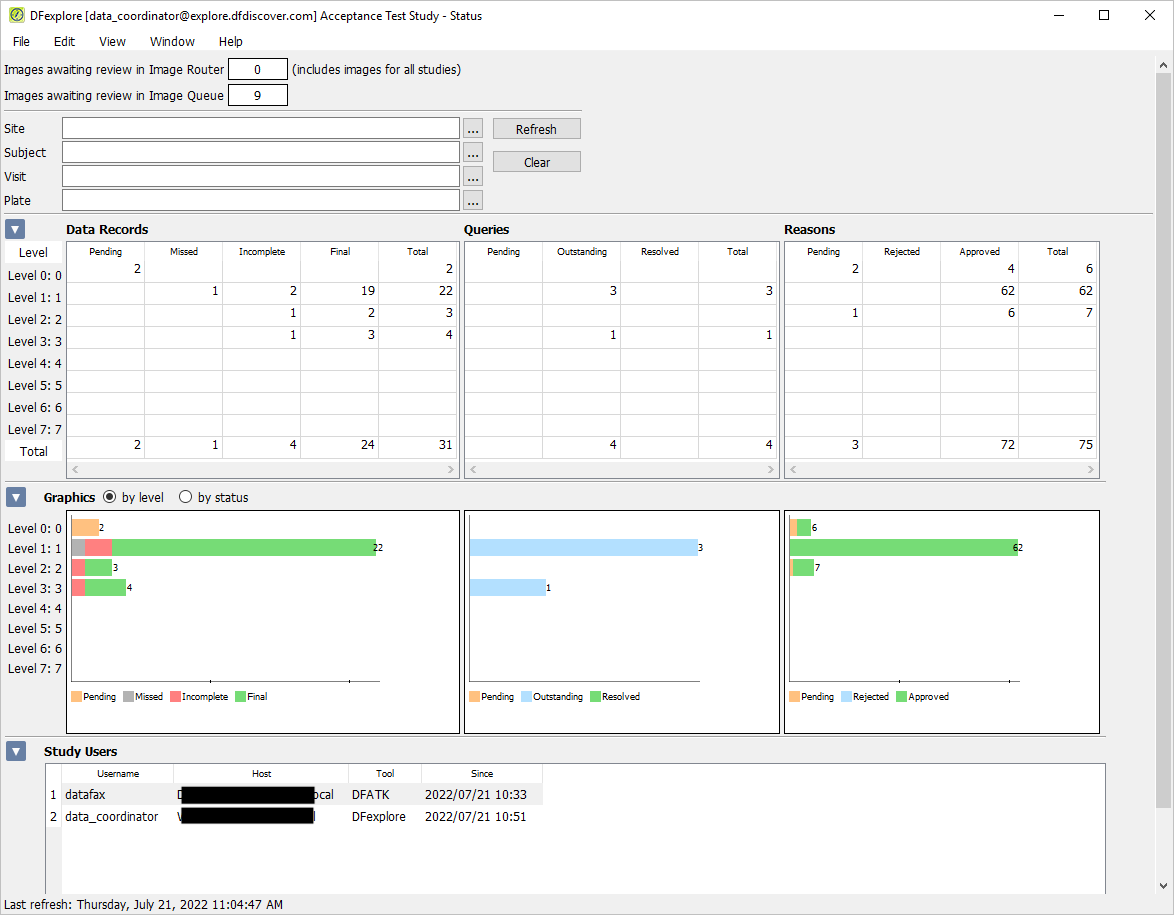
Table of Contents
- 9.1. Tests & Requirements
- 9.2. Begin Module 9. User-defined Query Category Types.
- 9.3. Retrieve an existing data record in DFexplore.
- 9.4. Apply a user-defined Category query.
- 9.5. Add a reason for Data Value to explain entered data.
- 9.6. Edit an existing query.
- 9.7. Delete a user-defined Query Category that is used by an existing query.
- 9.8. Delete a user-defined Category query.
- 9.9. End Module 9. User-defined Query Category Types.
Retrieve an existing data record in DFexplore.
Apply a user-defined Category query.
Add a reason for Data Value to explain entered data.
Edit an existing query.
Delete a user-defined Query Category that is used by an existing query.
Delete a user-defined Category query.
Estimate of Time Required: 30 Minutes
-
Start DFATK as described in Module 1 (Installation & Initialization).
-
Click followed by to begin this module.
-
Start DFexplore, login as
data_coordinatorand choose 254 Acceptance Test Study as described in Section 1.7, “How to start DFexplore”. -
Select > . Within the dialog, set:
Mode = Validate
Save level = 1 - Level 1
Check (enable) Enable edit checks
Click to apply these settings.
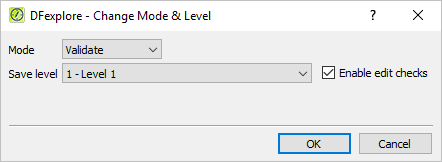
-
Double-click the folder for Site 99 and then double-click subject 99007 to open the subject binder. Locate 0: Screening Visits in the list of visits for subject 99007, and double-click this entry to open task records for this subject. Press Tab to advance through the fields until Screen 2, Reading 1 systolic blood pressure becomes the current field.
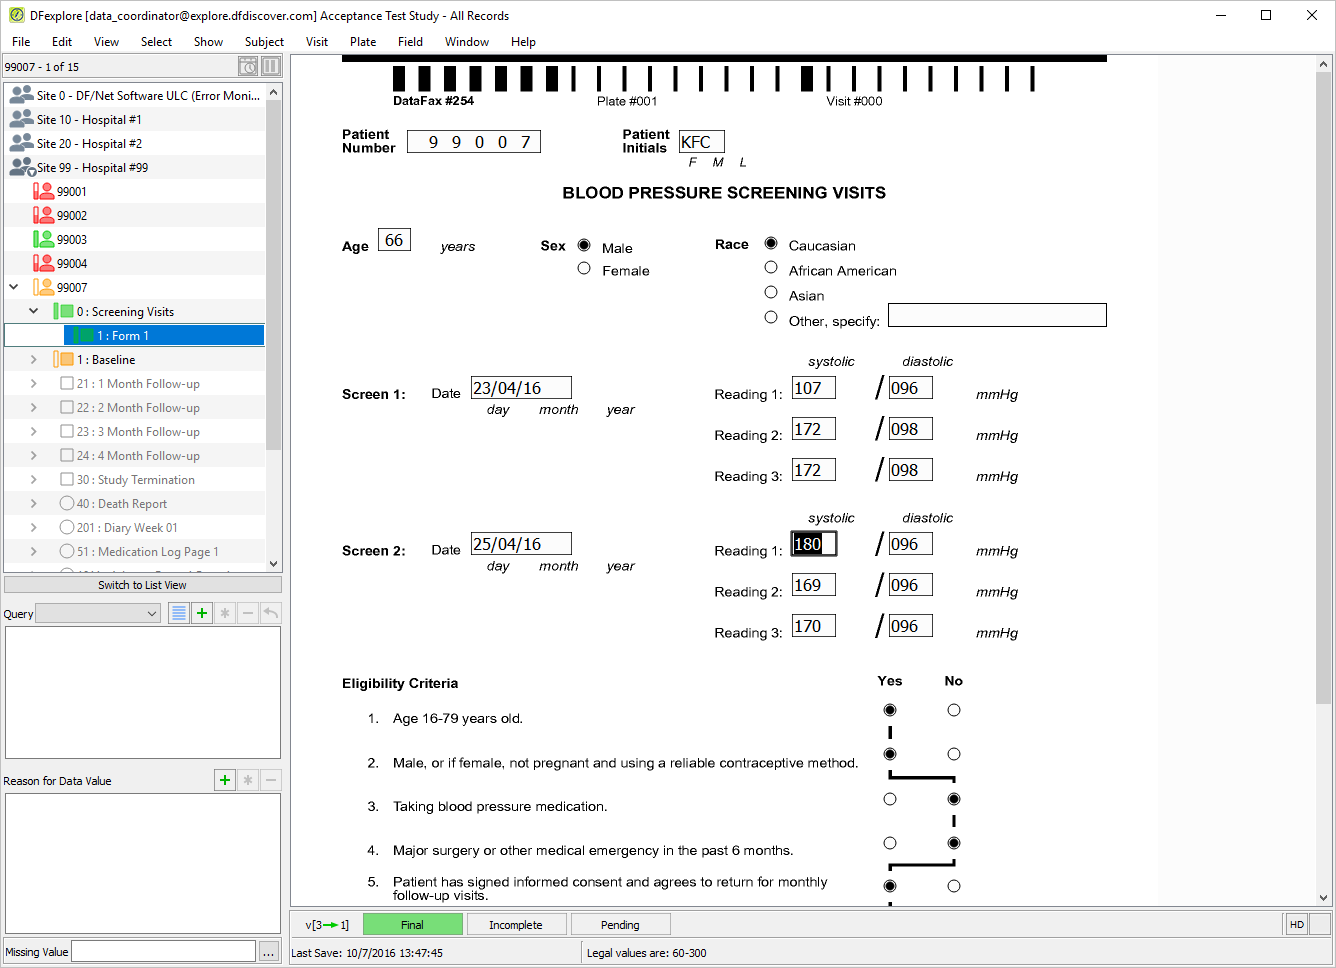
-
With Screen 2, Reading 1 systolic blood pressure as the current field, select > or click
to open the Add Query dialog. In the dialog, confirm that Monitor, Test and Clinical QC are present in the Category pull-down list. Set:Category = Test
Use = External
Type = Clarification
Status = New query
Detail =
This value is out of our reference range. Please review.
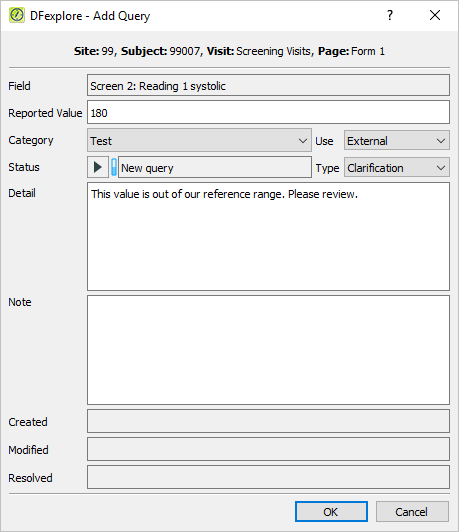
-
Click to apply the query to the Screen 2, Reading 1 systolic blood pressure field. Note that the field becomes blue. Examine the details in the Query window that appears near the bottom left of the screen.
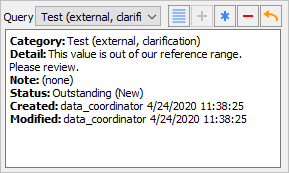
-
Press Tab to advance through the remaining fields on the page without making any changes. Press Tab to advance to the save buttons at the bottom of the data screen. Click to save the page.
-
With BLOOD PRESSURE SCREENING VISITS as the active page, press Tab to advance through the fields until Screen 2, Reading 1 systolic blood pressure becomes the current field. Select > or click
to open Reason for Data Value dialog.
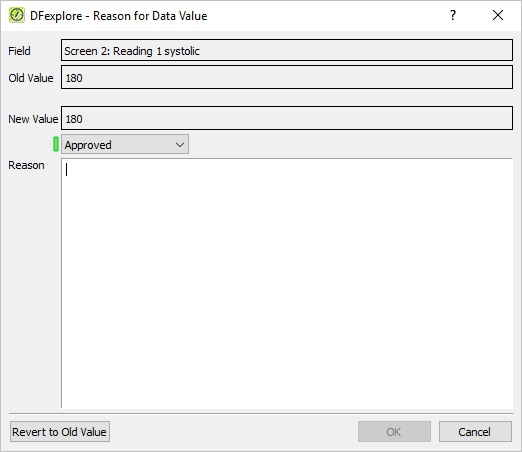
-
In the Reason field, enter
The value 180 mmHg for systolic blood pressure has been confirmed. Clinical significance is being evaluated..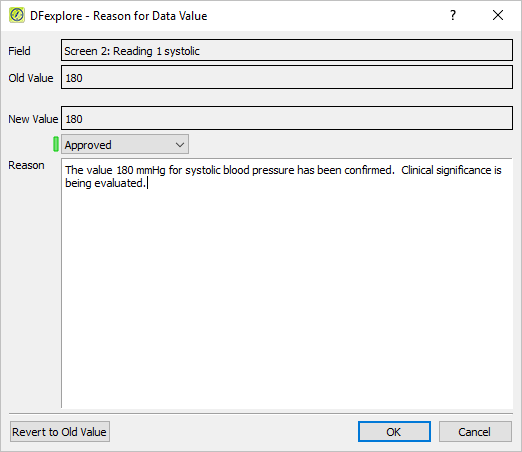
-
Click to apply the reason to the Screen 2, Reading 1 systolic blood pressure field. Note that this field is the current field and the field becomes orange. Examine the details in the Reason window that appears near the bottom left of the screen.
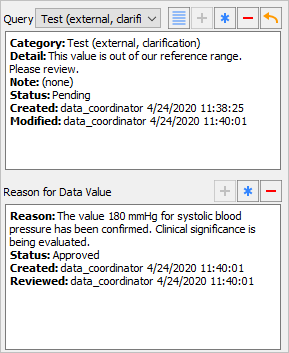
Note If a user-defined Category Code is defined with auto-resolution in DFsetup, adding a reason to a field that has a query with such a category will change the query status from outstanding to pending.
-
From the Screen 2, Reading 1 systolic blood pressure field, press Tab to advance through the remaining fields on the page without making any changes. Press Tab to advance to the Save buttons at the bottom of the data screen to make them active. Click to save the page.
-
Select > . Select > to display all pending queries for Site 99 - Hospital #99.

-
Double-click entry for subject 99007, Screening Visits: Form 1 to be taken directly to the page and the pending field.
-
In Data View, select > . In the dialog, set:
Mode = Validate
Save level = 2 - Level 2
Check Enable edit checks
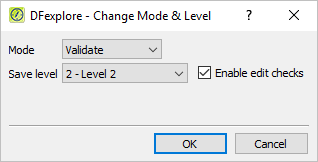
-
Click to apply and close the Change Mode & Level dialog. The current field is Screen 2, Reading 1 systolic blood pressure.
-
Select > or click
. In the dialog, Set Use as Internal
Delete the existing text in the Detail field
Enter
See Reason for Data Value.in the Note field
Click to apply the edits.
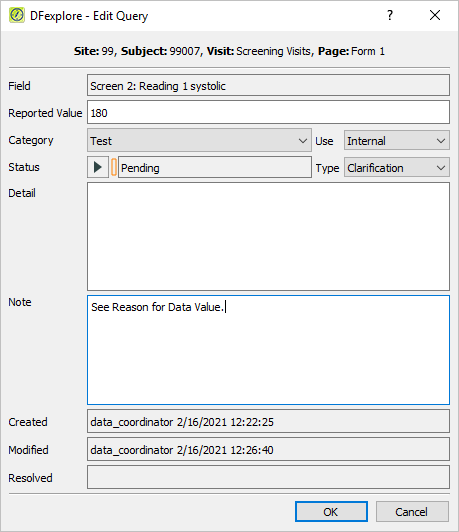
-
From the Screen 2, Reading 1 systolic blood pressure field, press Tab to advance through the remaining fields on the page without making any changes. Press Tab to advance to the save buttons at the bottom of the data screen to make them active. Click .
-
Select > to close and exit DFexplore.
-
Start DFsetup, login as
data_managerand choose 254 Acceptance Test Study as described in Section 1.8, “How to start DFsetup”. -
Choose Normal Access and click .
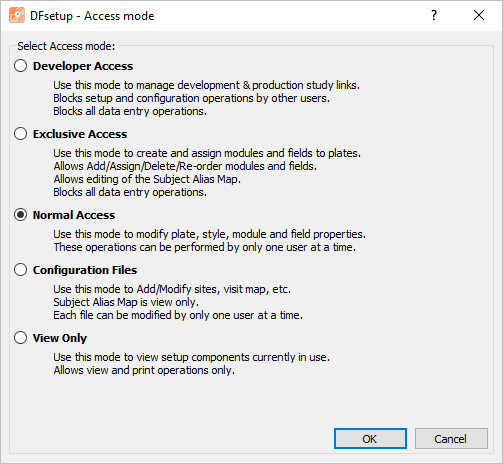
-
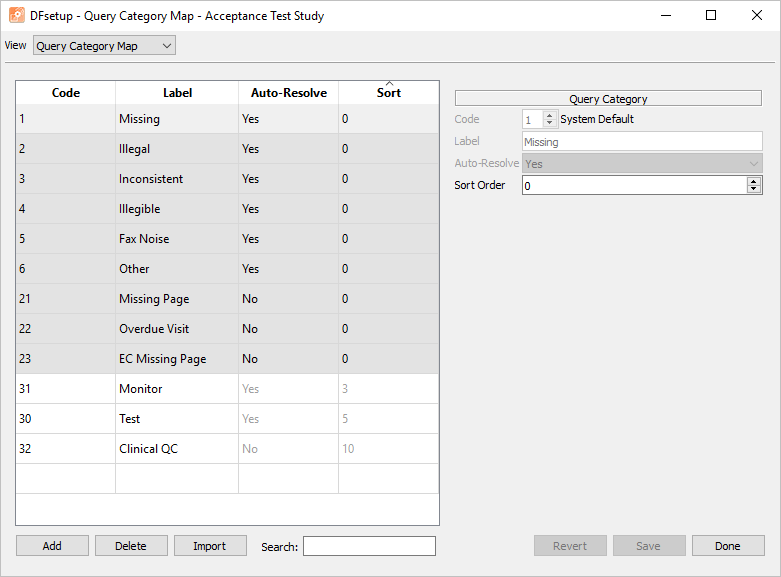
-
In the Query Category Map dialog, locate the entry that has Code 30 and Label
Test. Click the entry to highlight it, then click . Click and .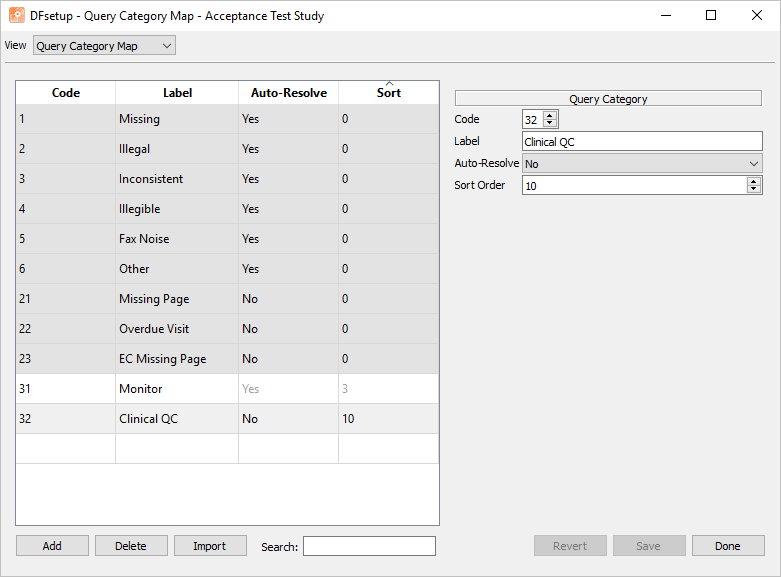
-
Select > to close DFsetup.
-
Start DFexplore, login as
data_coordinatorand choose 254 Acceptance Test Study as described in Section 1.7, “How to start DFexplore”. -
Double-click the folder for Site 99 - Hospital #99 to display a list of available subjects. Double-click subject entry 99007 in the subject list to open the subject binder. Locate the 0: Screening Visits visit for subject 99007 and double-click this entry. Press Tab to advance through the fields until Screen 2, Reading 1 systolic blood pressure becomes the current field. Examine the details in the Query window. If an existing query contains a user-defined category, and that category definition has been removed from DFsetup, the query in DFexplore displays Query Category Code 30.
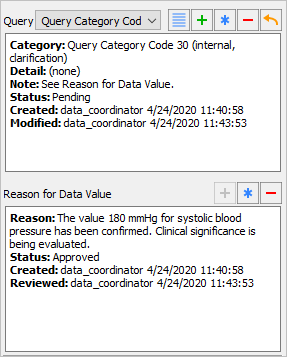
-
Select > or click
 .
.
-
Click to perform the query deletion.
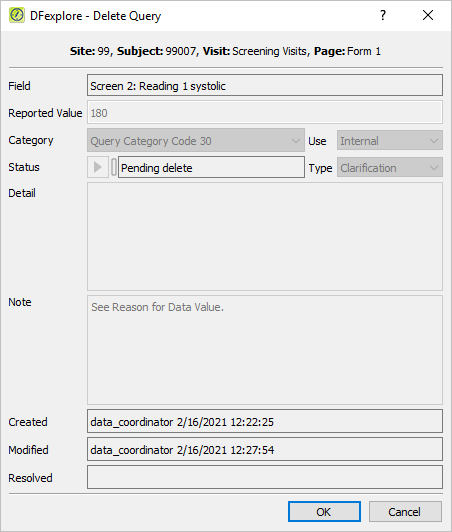
-
Click in the confirmation dialog.
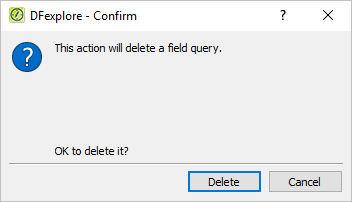
-
Press Tab to advance through the remaining fields on the Blood Pressure Screening Visits page until the save buttons at the bottom of the screen become active. Click .
-
Click > to exit DFexplore.
Table of Contents
- 10.1. Tests & Requirements
- 10.2. Begin Module 10. Multiple Queries Per Field.
- 10.3. Submit PDF images to DFdiscover.
- 10.4. Enable multiple queries per field in DFsetup.
- 10.5. Retrieve submitted CRF in DFexplore Image View.
- 10.6. Enter Plate 9 for Subject 99002.
- 10.7. Apply multiple queries to a field.
- 10.8. Select and edit an existing query in a field that has multiple queries.
- 10.9. Select and reply to an existing query in a field that has multiple queries.
- 10.10. Select and delete an existing query in a field that has multiple queries.
- 10.11. End Module 10. Multiple Queries Per Field
Submit PDF images to DFdiscover.
Enable multiple queries per field in DFsetup.
Retrieve submitted CRF in DFexplore Image View.
Enter Plate 9 for Subject 99002.
Apply multiple queries to a field.
Select and edit an existing query in a field that has multiple queries.
Select and reply to an existing query in a field that has multiple queries.
Select and delete an existing query in a field that has multiple queries.
Estimate of Time Required: 30 Minutes
-
Start DFATK as described in Module 1 (Installation & Initialization).
-
Click followed by to begin this module.
-
Click to email a copy of ID99002-module10.pdf to
site_monitor. Clicking more than once will result in multiple files arriving to your email inbox.Note Save the ID99002-module10.pdf file received via email to your local computer. This file is required to complete the remainder of this module. Refer to Section 1.8, “Creating user accounts and assigning study permissions.” as a valid email address is required for
site_monitorto receive the module specific PDF files. -
The following steps require exclusive access to the 254 Acceptance Test Study database. To facilitate exclusive access, close DFATK by clicking .
-
Start DFsend, login as user
site_monitoras described in Section 1.9, “How to start DFsend”. -
Click . From the Select PDF Files file selection dialog, locate the previously saved ID99002-module10.pdf file. Select the file, click .
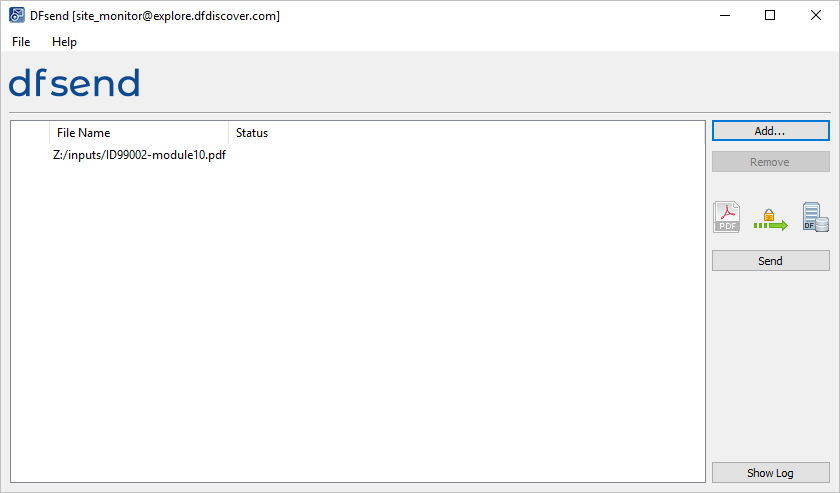
-
Click , enter
site_monitorin the Username field and the previously assigned password in the Password field. Click . -
In the resulting Send PDFs to DFdiscover dialog, confirm 1 success and 0 failure are shown. Click .
-
Click to confirm successfull transmission of the ID99002-module10.pdf file to DFdiscover.
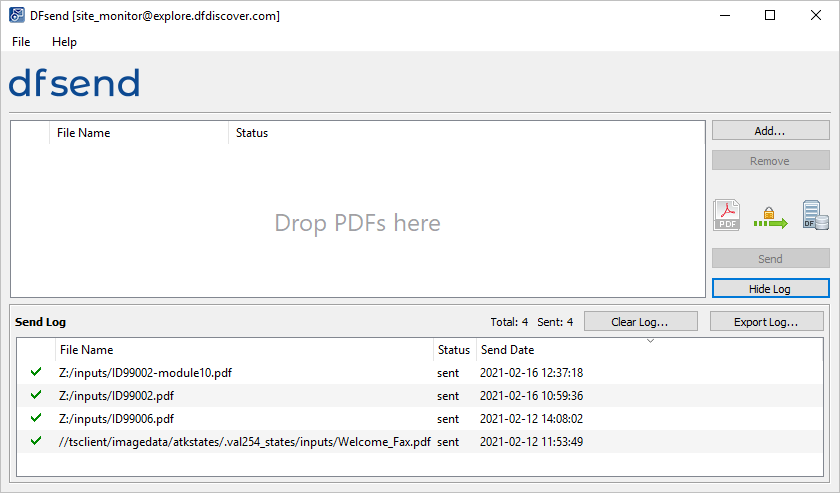
-
Select > .
-
Start DFsetup, login as user
data_managerand choose 254 Acceptance Test Study as described in Section 1.8, “How to start DFsetup”. -
Choose Developer Access in the Access mode dialog, click .
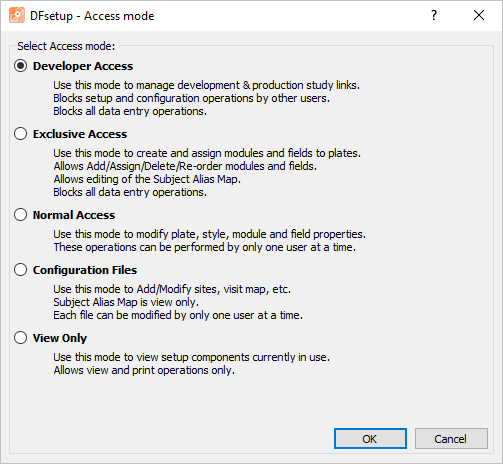
-
The main window for DFsetup is displayed. Select > .
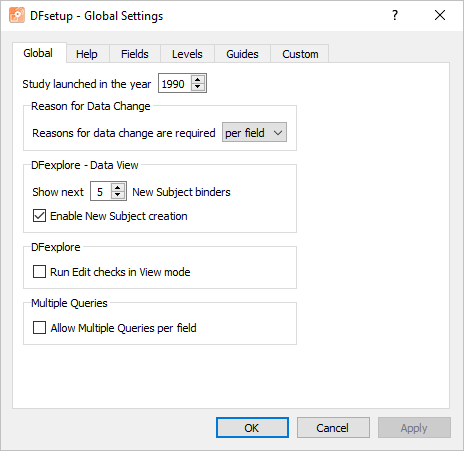
-
Click Global tab in the dialog.
Check (enable), if not already checked, Allow Multiple Queries per field.
The warning message: This CANNOT be undone once the Study Setup is saved is displayed.
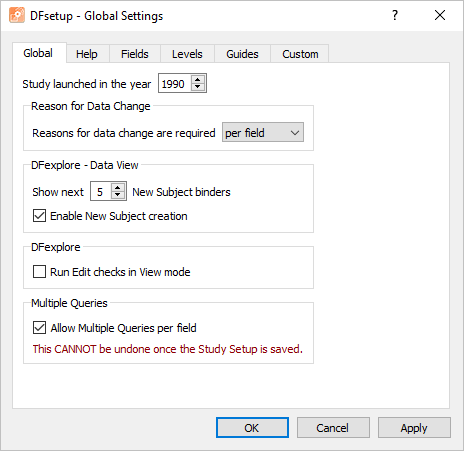
-
Click to close the Global Settings dialog.
-
Select > , followed by > .
-
Start DFexplore, login as user
data_coordinatorand choose 254 Acceptance Test Study as described in Section 1.7, “How to start DFexplore”. -
In the Automatic Retrieval dialog, set:
-
Save level = 1 - Level 1
-
Check (enable) Enable Edit Checks
Select = document
By Age = Oldest
Quantity __ documents = 10
Check (enable) Repeat
Confirm the settings.
Click .
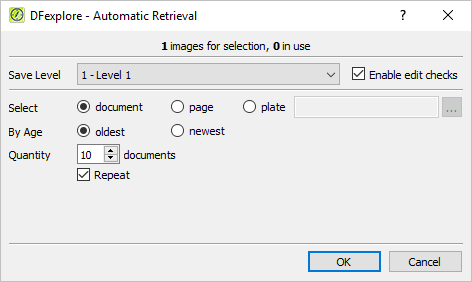
-
-
The first image retrieved is the Adverse Event Report CRF.
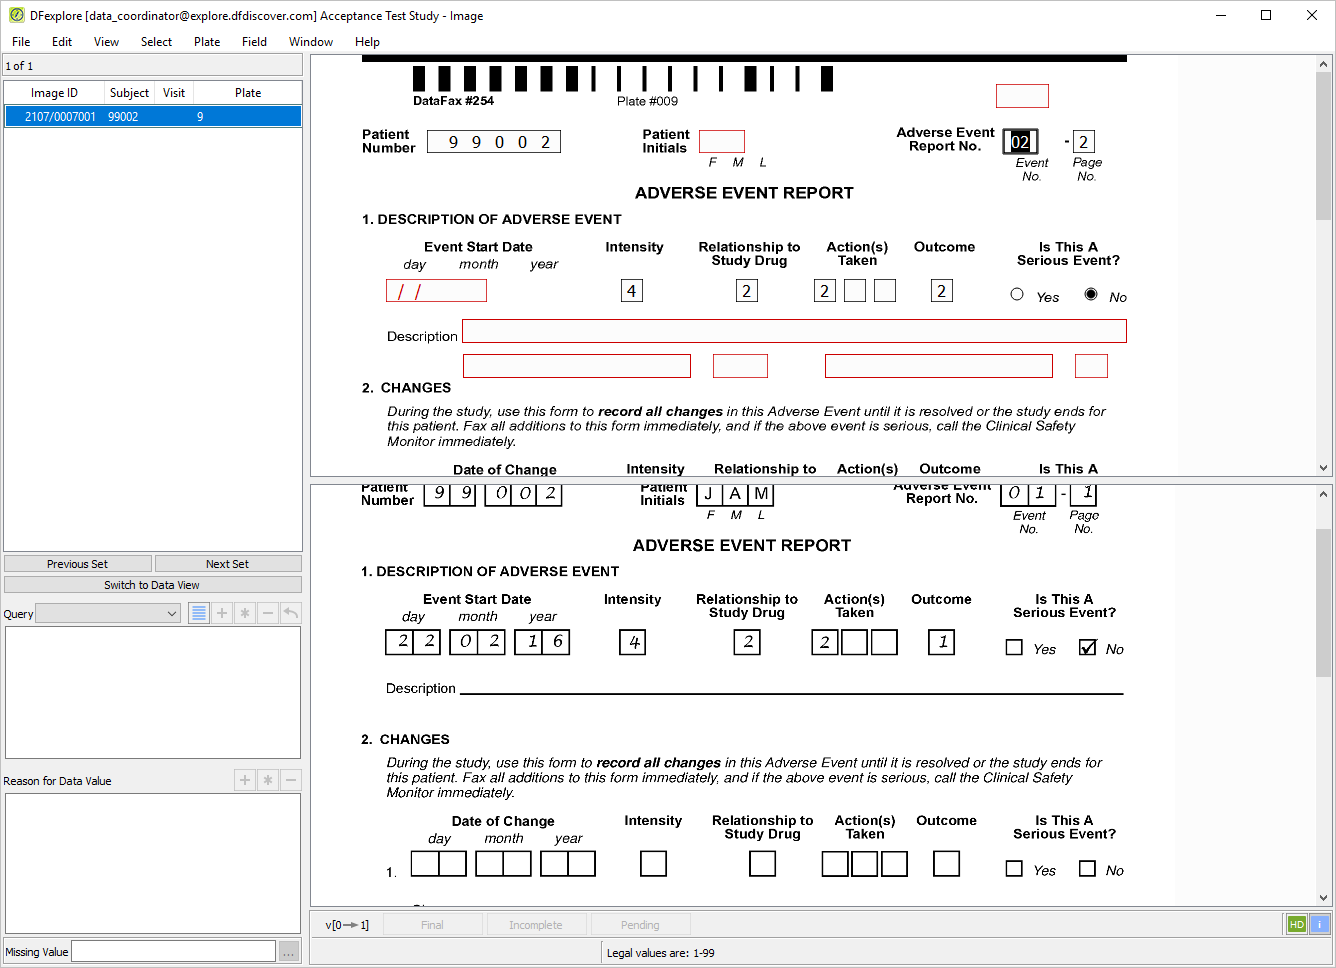
-
The Adverse Event Report No. field is highlighted as the current field. Enter the value from the CRF image if it is not already correctly auto-filled. Press Tab to advance to the AE Identifier field. The
AESEQNUM2edit check executes upon entry to the AE Identifier field. The data value in the field is updated.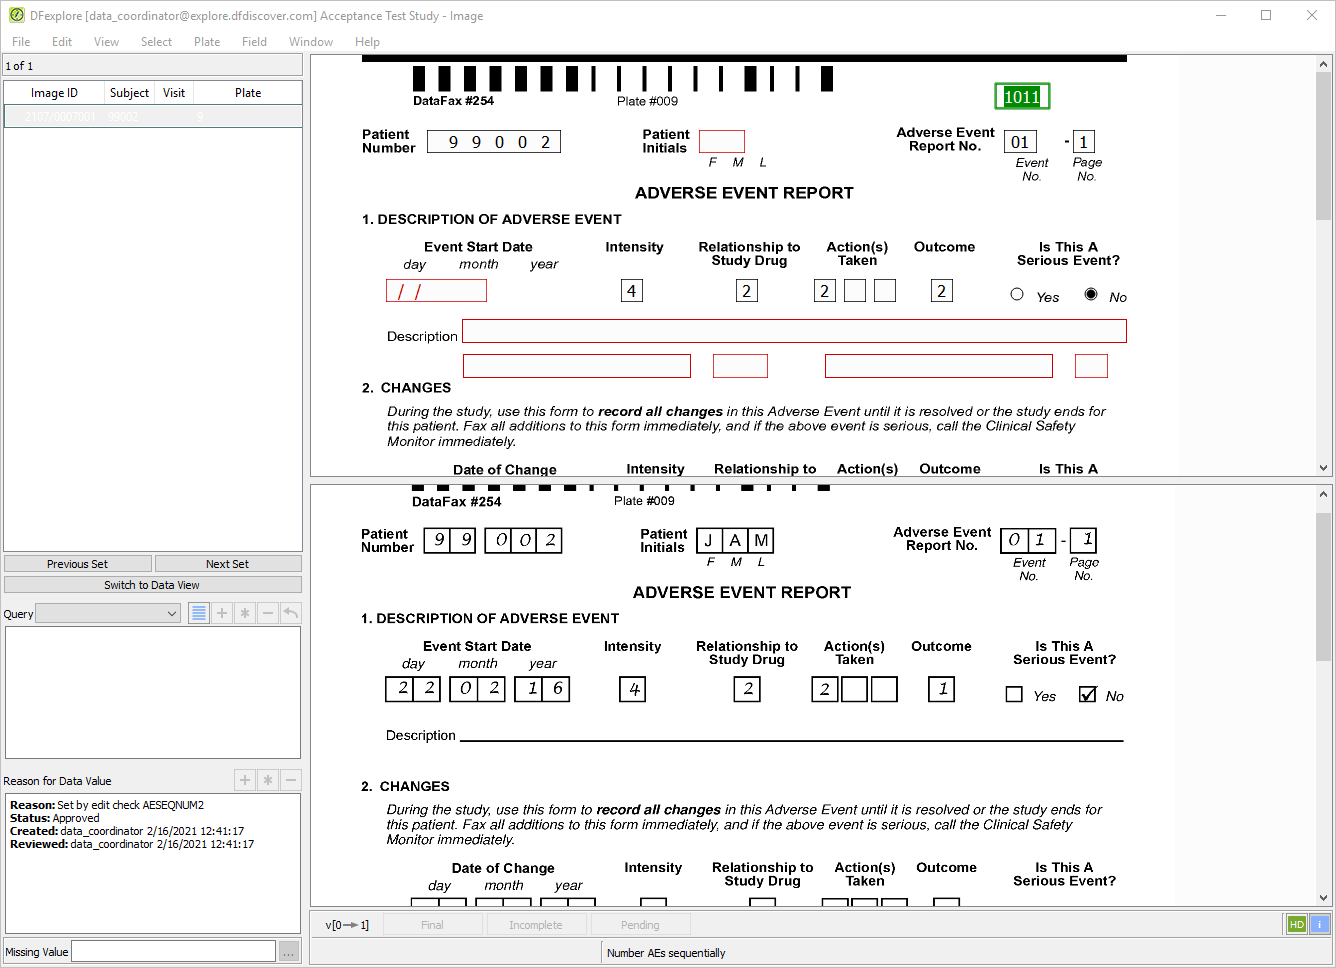
-
Press Tab to advance to the Patient Number field.
-
Beginning at the Patient Number field, correctly enter the data per the CRF image, up to and including the Intensity field. Tabbing from the Intensity field, a user-defined edit check executes and the dfaddqc: Severity dialog is displayed.
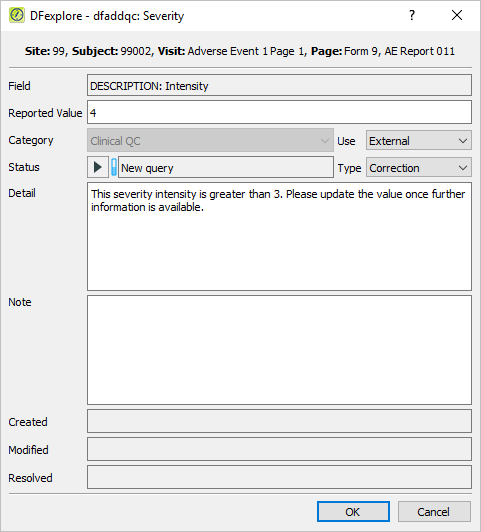
-
Click to apply the edit check. The field becomes blue, and the next field Relationship to Study Drug becomes the current field.
-
Correctly enter each data field on the page per the CRF image, up to and including the Description field.
Do not enter any text in the Description field as the corresponding field on the CRF image is blank. Upon tabbing off this field, the dfaddqc: MissingQC dialog appears.
Confirm that Missing is displayed in the Category field.
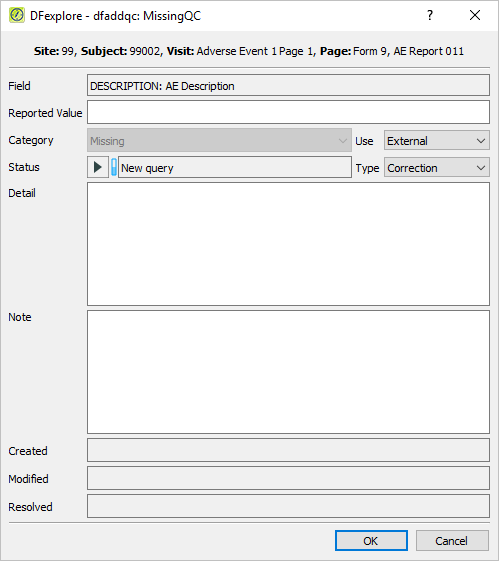
-
Click . This applies the edit check to the Description field. The field becomes blue, and the AECOTERM becomes the current field.
-
From the AECOTERM field, press Tab through all remaining fields until the Investigator's Signature field becomes the current field.
Tabbing from the Investigator's Signature field, the DFlookup: investigators dialog appears. Highlight
Dr. John Snowand click .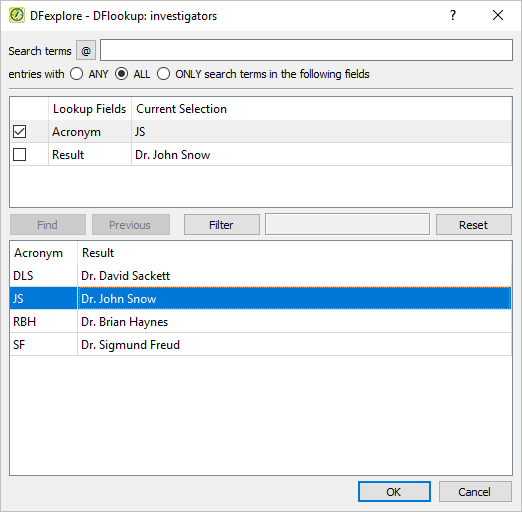
-
Enter the Date field value. Press Tab to advance to the save status bar to make it active. Click to save the changes.
-
With the Adverse Event Report displayed as the current page, make the page active by clicking anywhere on the page background using the mouse. Press Tab to advance through the fields until Description becomes the current field. Note that the Description field is blank and has an unresolved query with the category Missing (external, correction). Enter the text
Nausea, ??? and fever.
-
Select > or click
. In the dialog, confirm Category type Missing is disabled. Set:Category = Other
Use = External
Type = Correction
Status = New query
Detail =
Please clarify the word after nausea. The description provided through email is 'Nausea, vamit and fever'. Do you mean Vomit instead?
Note Multiple queries can be added to a single field, but each query must have a unique Query Category type. Therefore, a Category will be disabled if it has been previously used on the same field where a new query is to be added.
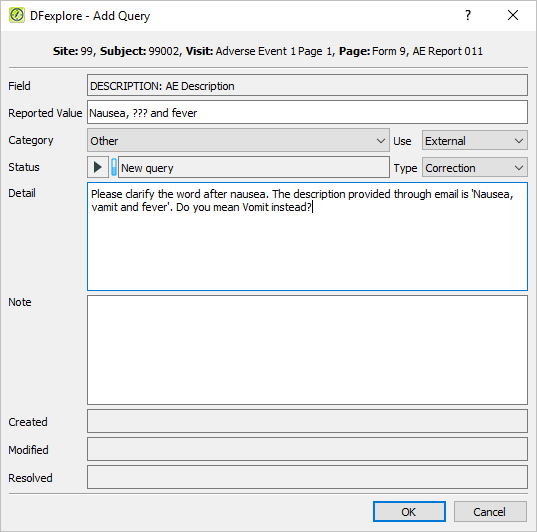
-
Click to apply the query. Confirm that the Description field is the current field with the query count '2' displaying on the top left corner of the field widget, and the field becomes blue.

-
With the focus still on the Description field, examine the details in the Query window that appears at the bottom left corner of the main data entry screen.
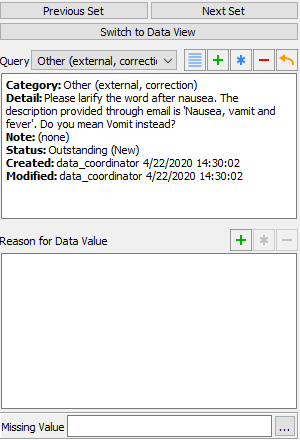
-
Select > or click
to add the third query to the Description field. In the dialog, set:Category = Monitor
Use = External
Type = Correction
Status = New query
Detail =
Nausea and fever are two separate adverse events and should be reported in different CRFs. Please review.
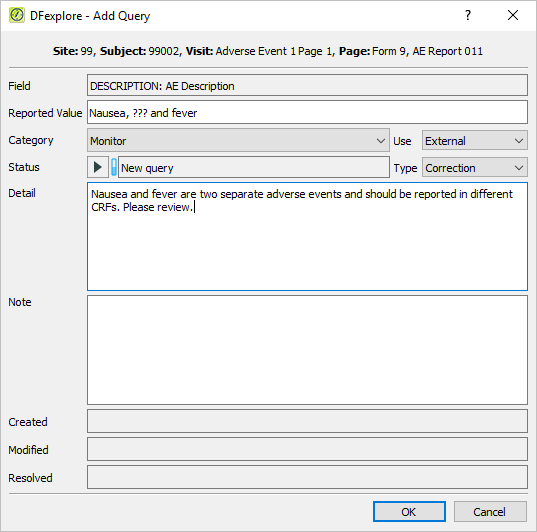
-
Click to apply the query. Confirm that the Description field is the current field with the query count 3 displaying on the top left corner of the field widget, and the field becomes blue.

-
With the focus still on the Description field, examine the details in the Query window that appears at the bottom left corner of the main data entry screen.
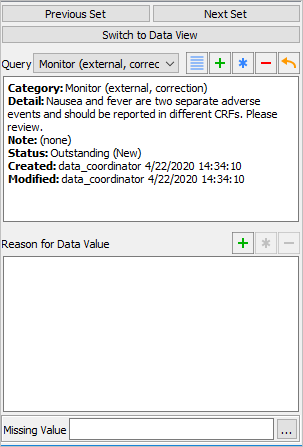
Note The query list reflects the query sort order that has been defined by the user in DFsetup Query Category Map.
-
Press Tab to exit the Description field, and a
DFlookup: aecodeswindow appears. Click in the window to close the dialog. The next field AECOTERM becomes the current field.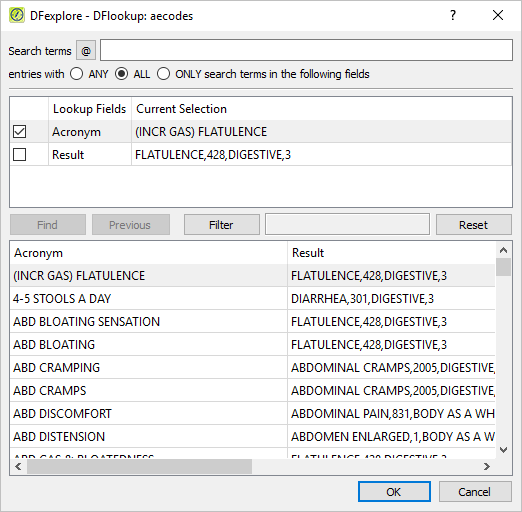
-
Press Tab to advance through the remaining fields on the page without making any changes. Press Tab to advance to the save buttons at the bottom of the data screen to make them active. Click .
-
With the Adverse Event Report page still active, select > to open the Queries View window. In the resulting confirmation dialog, click to release all Image records. Select > . Double-click Site 99 - Hospital #99. Locate and confirm that the Queries window displays the three queries that have been applied to the AE Description field for Subject 99002.
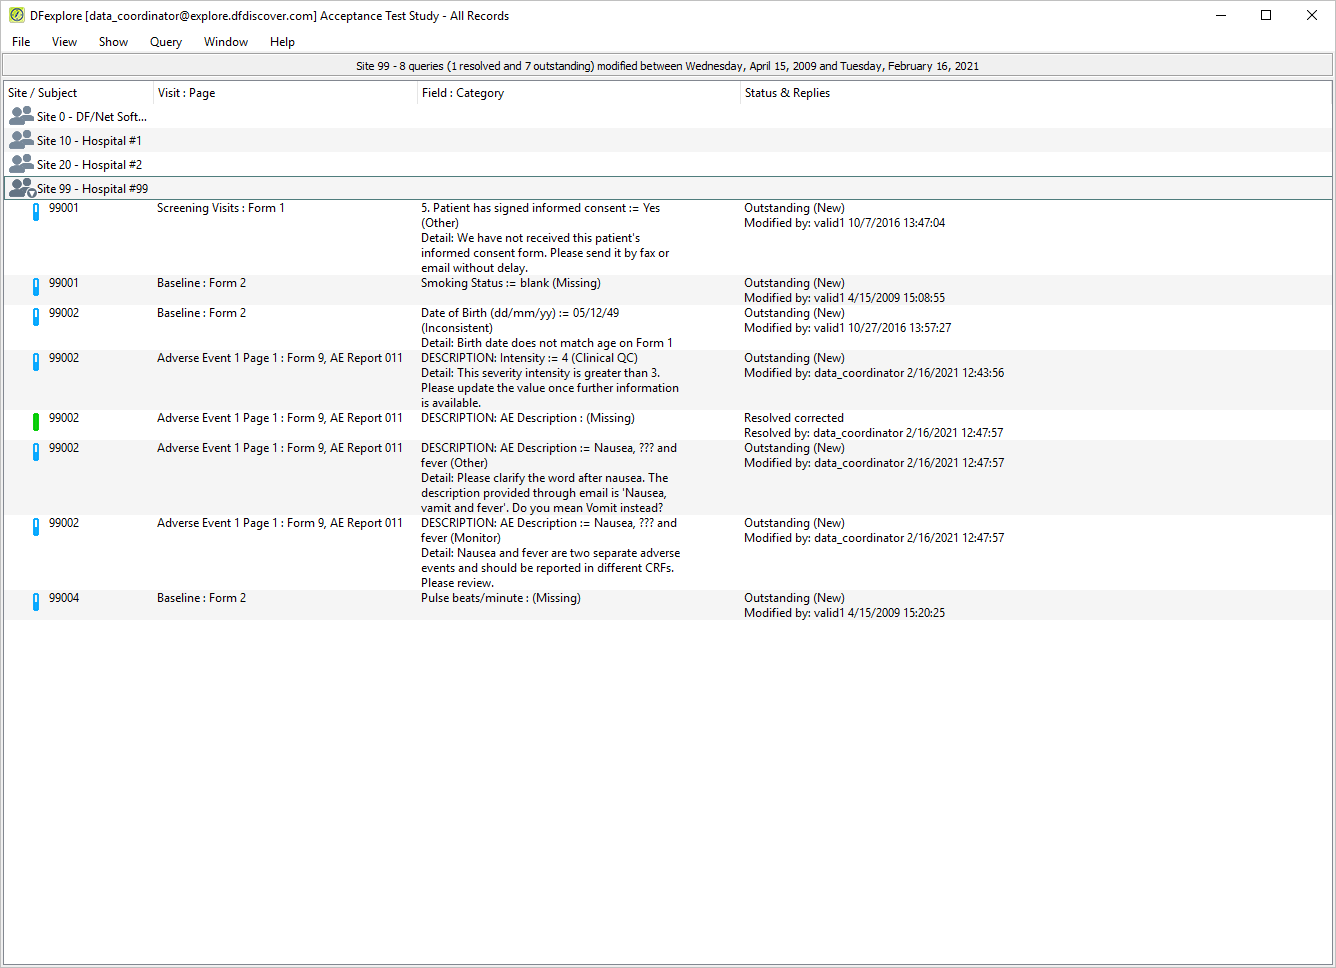
-
Select > . Locate and confirm that two unresolved queries with categories Other and Monitor on the AE Description field of Subject 99002 are displayed.
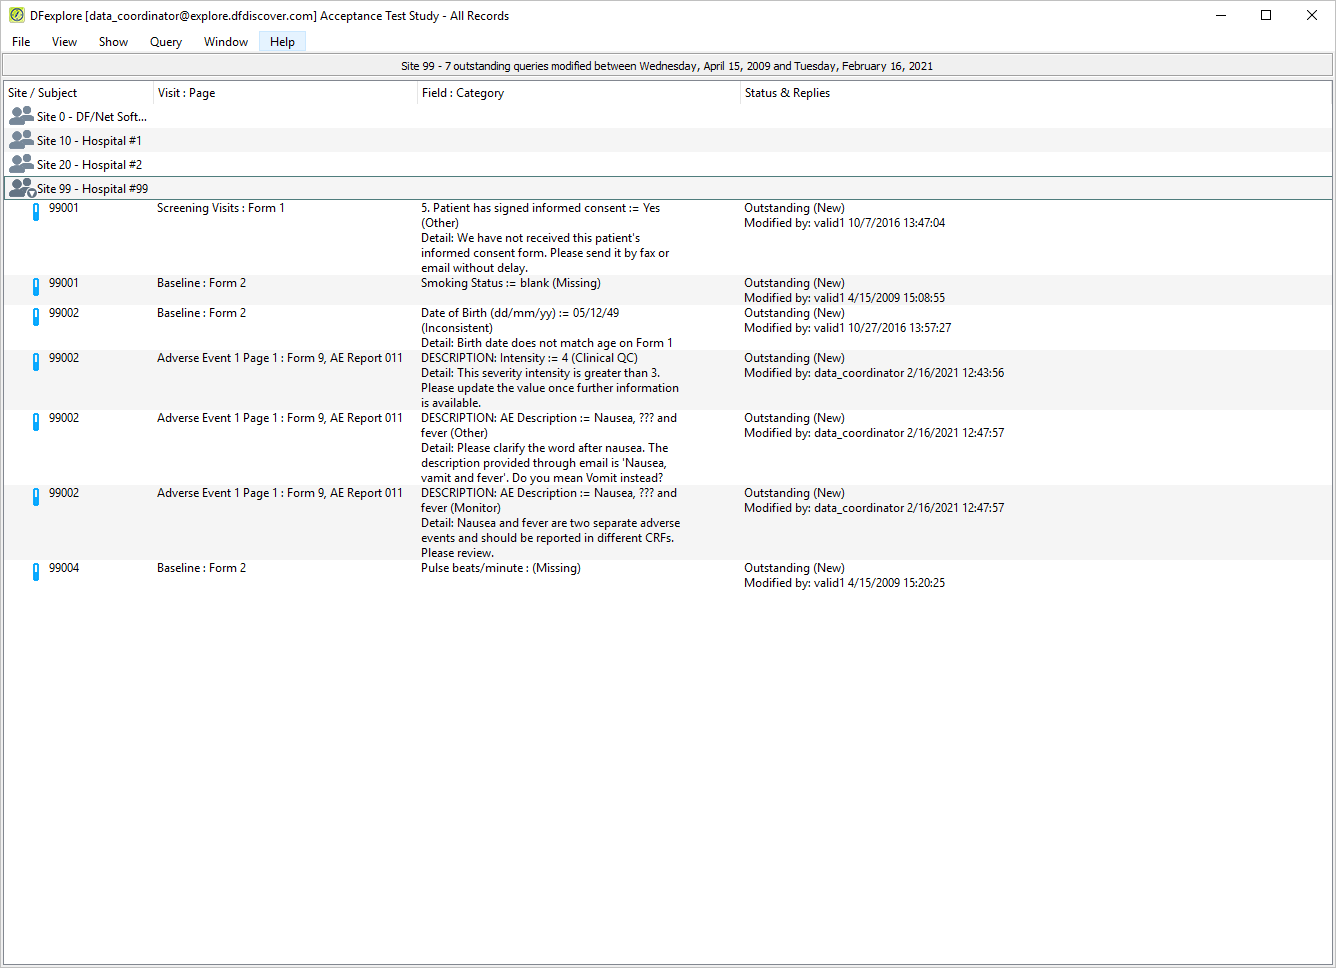
-
Double-click entry containing the query category Other in the Description field of Subject 99002, Adverse Event 1 Page 1: Form 9, AE Report 011.
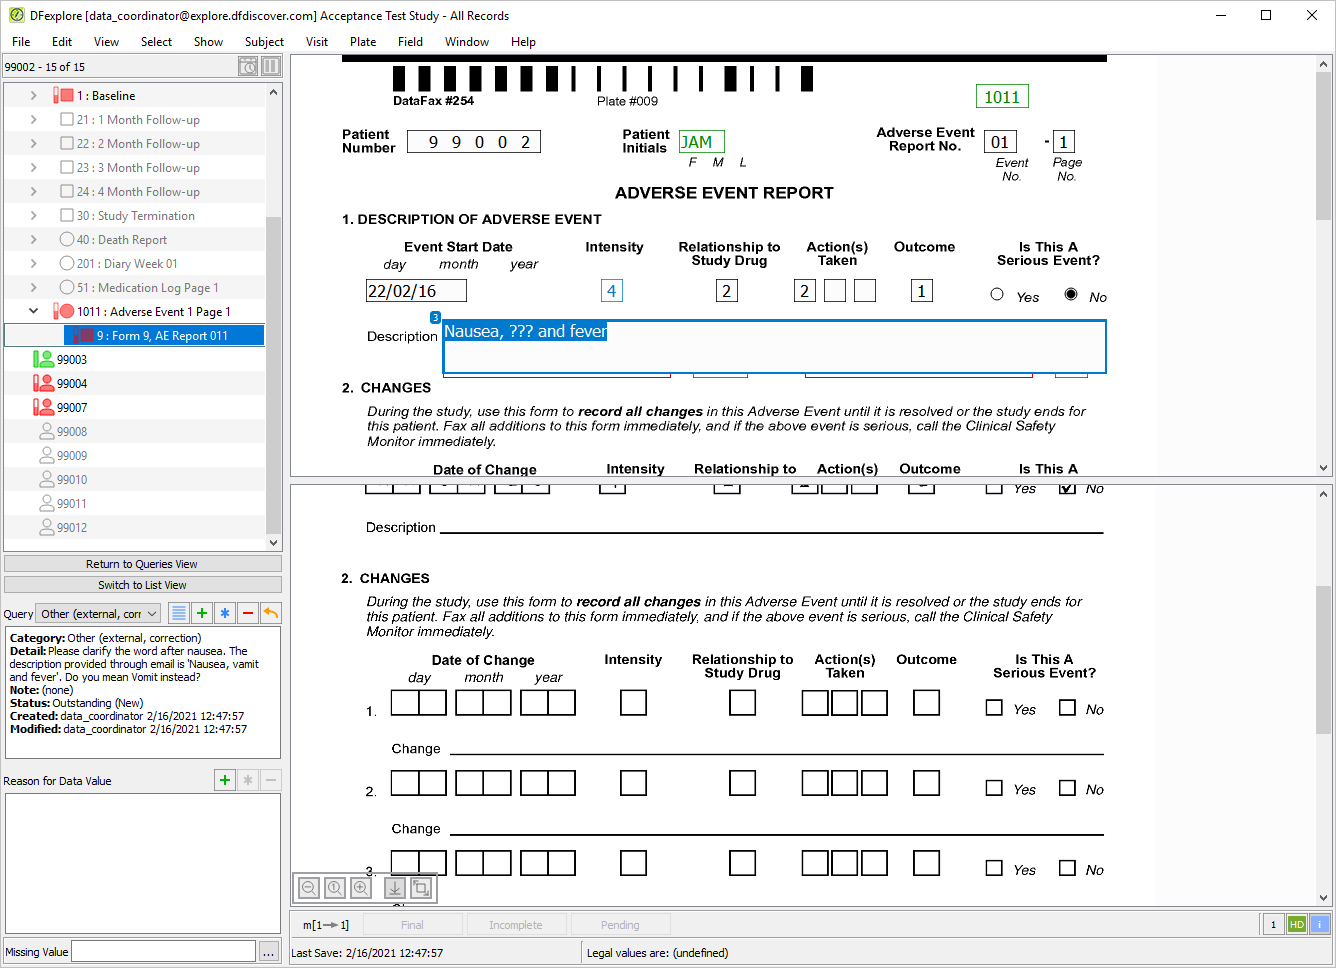
-
Select > . In the dialog, set:
Mode = Validate
Save level = 2 - Level 2
Check (enable) Enable edit checks
Click to apply the changes.
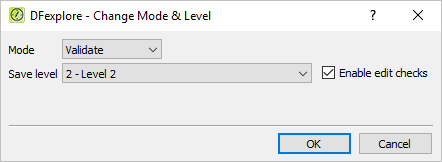
-
Delete the text
???in the description field and entervomitinginstead. Examine the query window. From the Query drop-down choose Other (external, correction) query in the query list.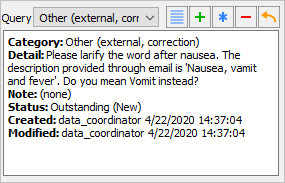
-
With the focus on the Other (external, correction) query Description field, select > , or click the
 to open the dialog. set:
-
Select Pending from the Status pull-down.
Enter
The correction was provided via email.in the Note field.
Click to apply the edits.
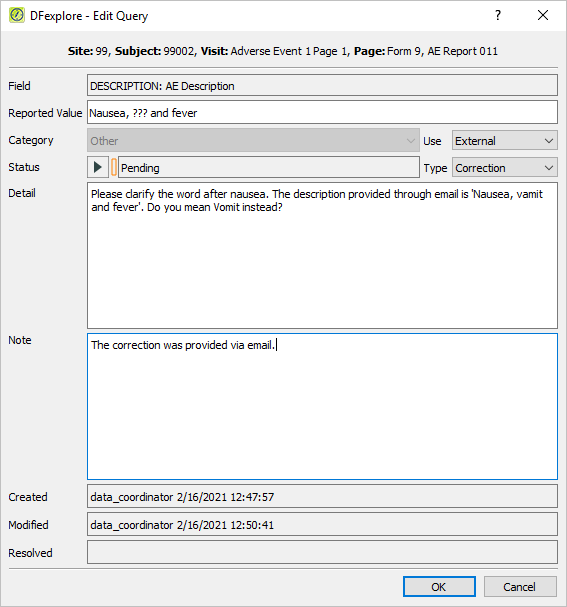
-
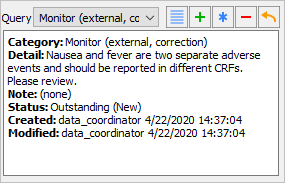
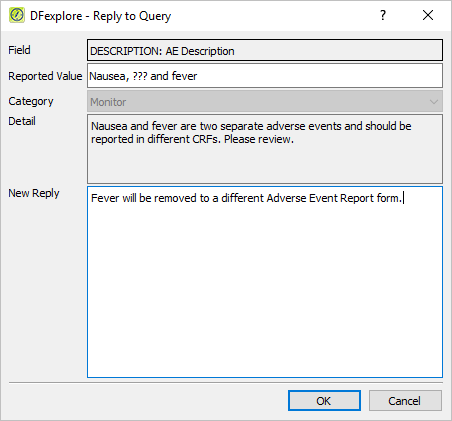
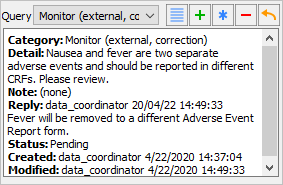
-
Choose Missing (external, correction) from the Query pull-down list. The query list in the query window displays the Missing (external, correction) query. Confirm that the first query is defined with Category: Missing (external, correction) and a Status: Resolved corrected.
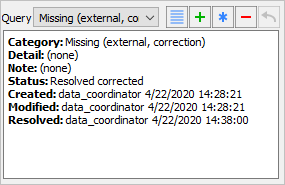
-
Select > or click
to open the Delete Query dialog. 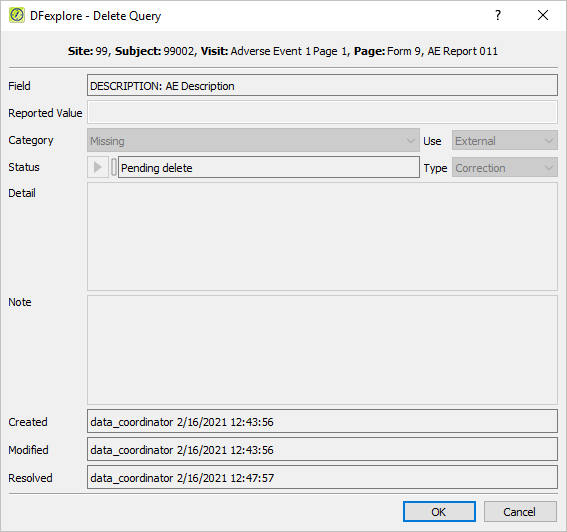
-
Click to perform the query deletion.
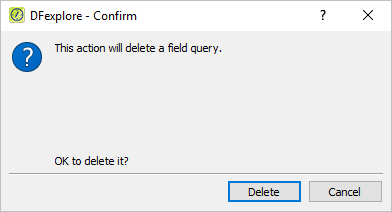
-
Click in the Delete Query confirmation dialog. Confirm that the Description field remains as the active field and has the query count 2 displaying on the top left corner of the field widget.

-
Press Tab to exit the Description field, and a
DFlookup: aecodeswindow appears. Click in the window to close the dialog. The next field AECOTERM becomes the current field.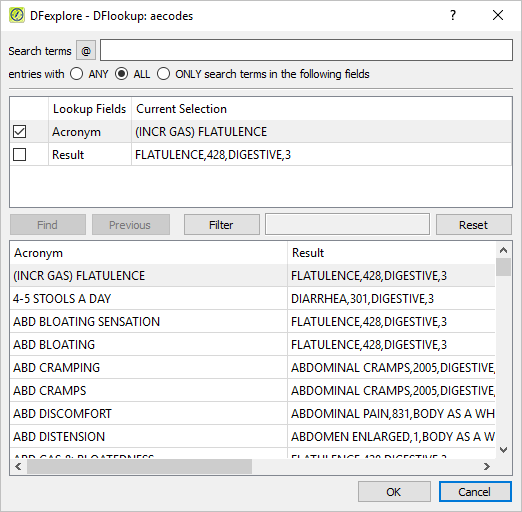
-
Press Tab to advance through the remaining fields on the Adverse Event Report page until the at the bottom of the screen becomes active. Click to save the modified page.
-
Select > to close and exit DFexplore.
-
Start DFATK as described in Module 1 (Installation & Initialization).
-
Click to confirm successful completion of Module 10. Multiple Queries Per Field.
Table of Contents
- 11.1. Tests & Requirements
- 11.2. Begin Module 11. Data Review.
- 11.3. Retrieve all data for Site 99 that exists at level 3.
- 11.4. Review and approve a pending reason for data value, and approve a selected query in a field that has multiple queries.
- 11.5. Review and move approved reasons for data values to a higher workflow level, and review queries in a field that has multiple queries.
- 11.6. Data review and add a query to inconsistent data.
- 11.7. Review and complete pending data for Subject 99007.
- 11.8. Confirm audit trail information for reviewed and modified data.
- 11.9. Run batch edit checks to verify data integrity.
- 11.10. Use a data expression to retrieve specific subject information.
- 11.11. Use cross-plate data criteria to retrieve specific subject information.
- 11.12. End Module 11. Data Review.
Retrieve all data for Site 99 that exists at level 3.
Review and approve a pending reason for data value, and approve a selected query in a field that has multiple queries.
Review and move approved reasons for data values to a higher workflow level, and review queries in a field that has multiple queries.
Data review and add a query to inconsistent data.
Review and complete pending data for Subject 99007.
Confirm audit trail information for reviewed and modified data.
Run batch edit checks to verify data integrity.
Use a data expression to retrieve specific subject information.
Use cross-plate data criteria to retrieve specific subject information.
Estimate of Time Required: 20 Minutes
-
Start DFATK as described in Module 1 (Installation & Initialization).
-
Click followed by to begin this module.
-
Click to email a copy of ID99007_module11.pdf to
site_monitor. Clicking more than once will result in multiple pages arriving to your email inbox.Note Refer to Section 1.8, “Creating user accounts and assigning study permissions.” as a valid email address is required for
site_monitorto receive the module specific PDF files.
-
Start DFexplore, login as user
data_managerand choose 254 Acceptance Test Study as described in Section 1.7, “How to start DFexplore”. -
Select > from the menubar to open the Select By Data Fields retrieval dialog. In the dialog, set:
Mode = Validate
Save level = 4 - Level 4
Search = Data
Level = 3
Check (enable) Enable edit checks
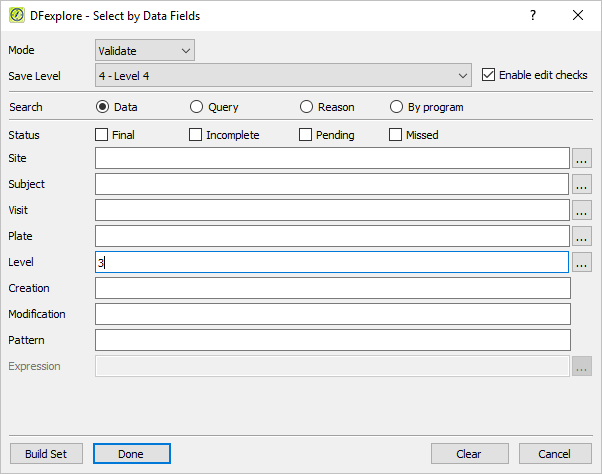
-
Click . In the confirmation dialog, click to retrieve data records that match the criteria.
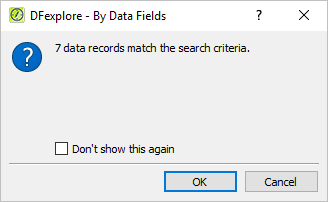
-
Double-click entry for Subject 99002 to open the subject binder.
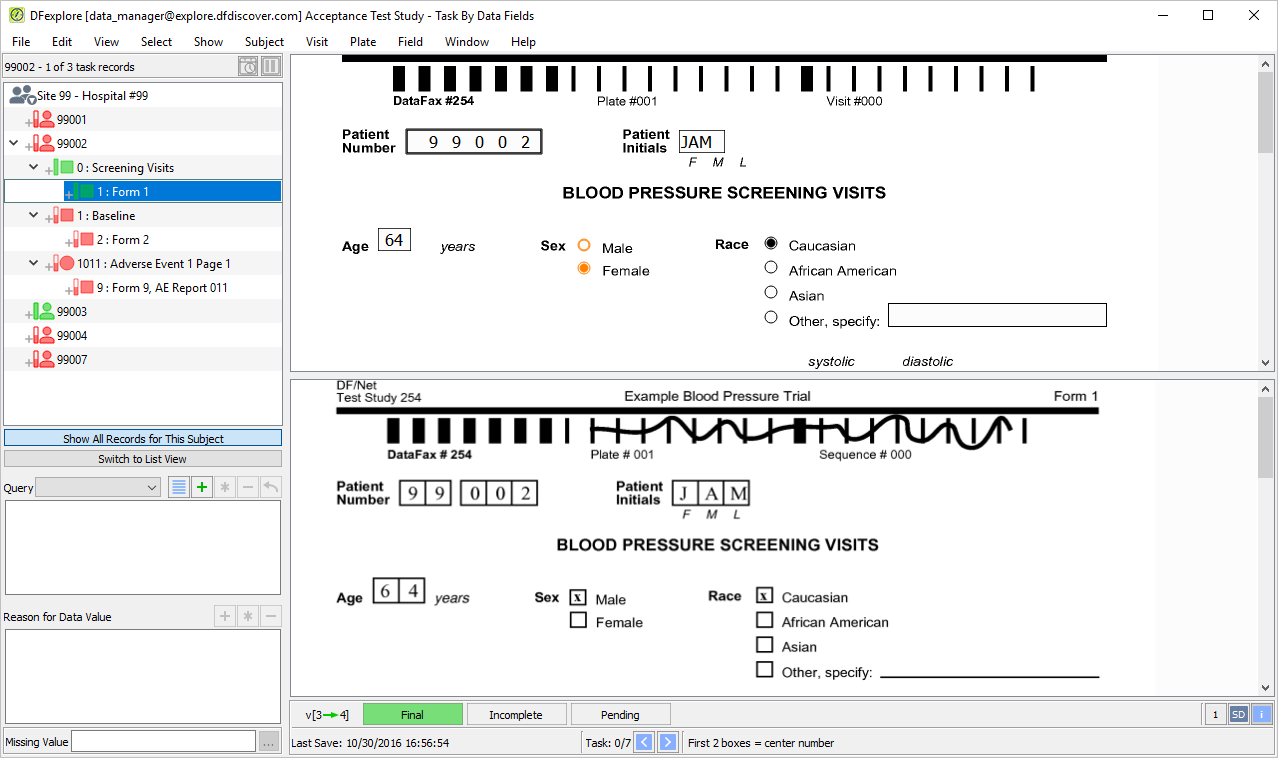
-
1: Form 1 (BLOOD PRESSURE SCREENING VISITS) for Subject 99002 is the active page. Press Tab to advance to the Sex field. Examine the information in the Reason for Data Value window.
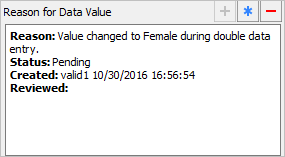
-
Select > . Examine the information in the dialog.
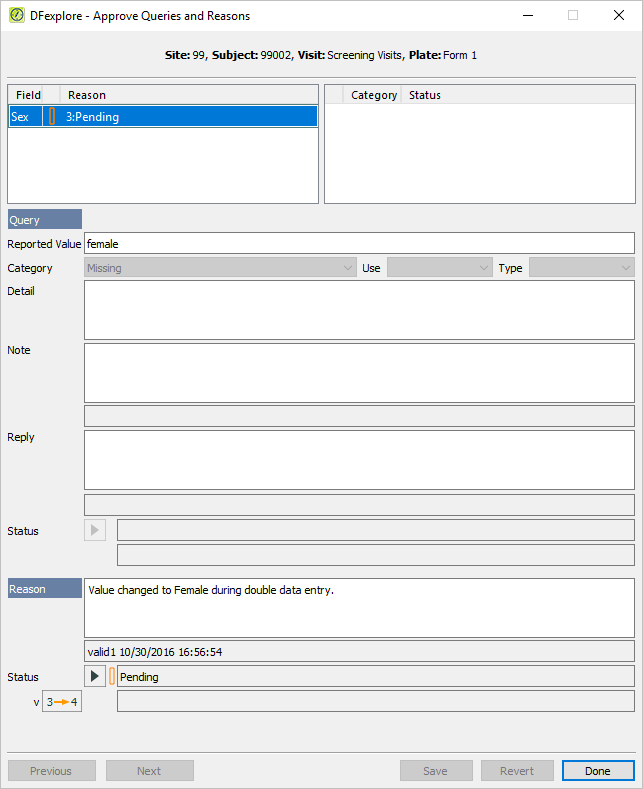
-
Select Approved from the Status pull-down. Confirm that the approved reason shows
 .
.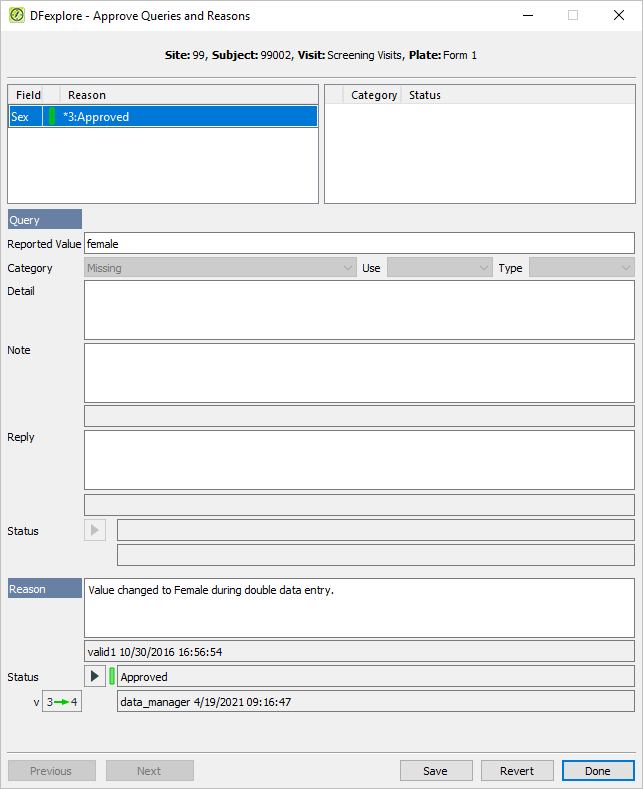
-
Click and to close the dialog.
-
Do not make any other changes to the data on the current page and press Tab to advance to the save buttons. Click to save the page and its reason at level 4.
-
Click 9: Form 9, AE Report 011.
-
Click anywhere on the page background to make the fields active. Press Tab to advance to the Description field. Examine the information displayed in this field and the information in the corresponding Query window.
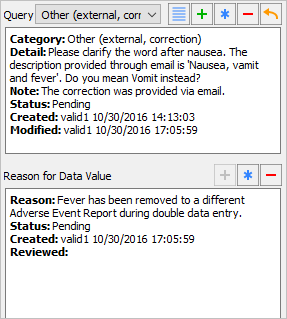
-
Select > . Select the Monitor query. Examine the information in the dialog.
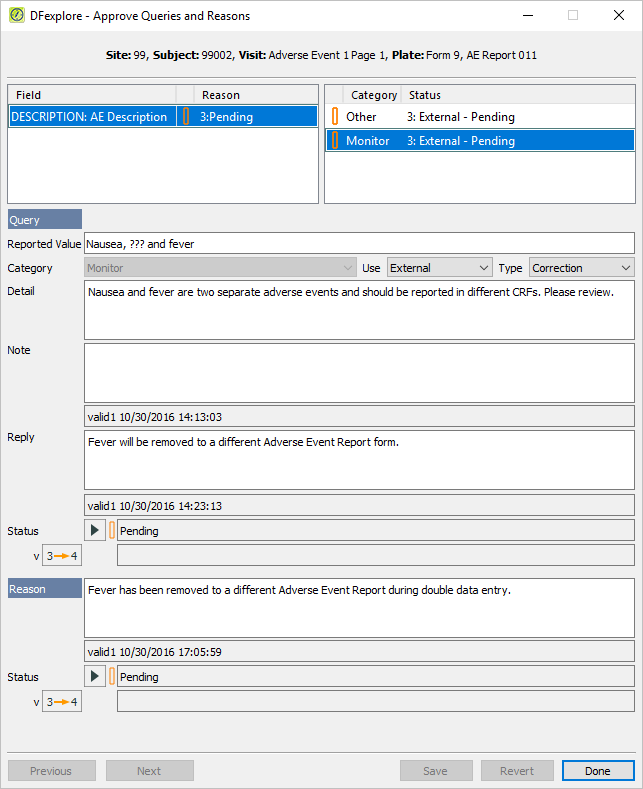
-
Select Resolved corrected from the Status in the Query section. Confirm that the CRF will be moved from level
, and Status from Pending to Resolved corrected. 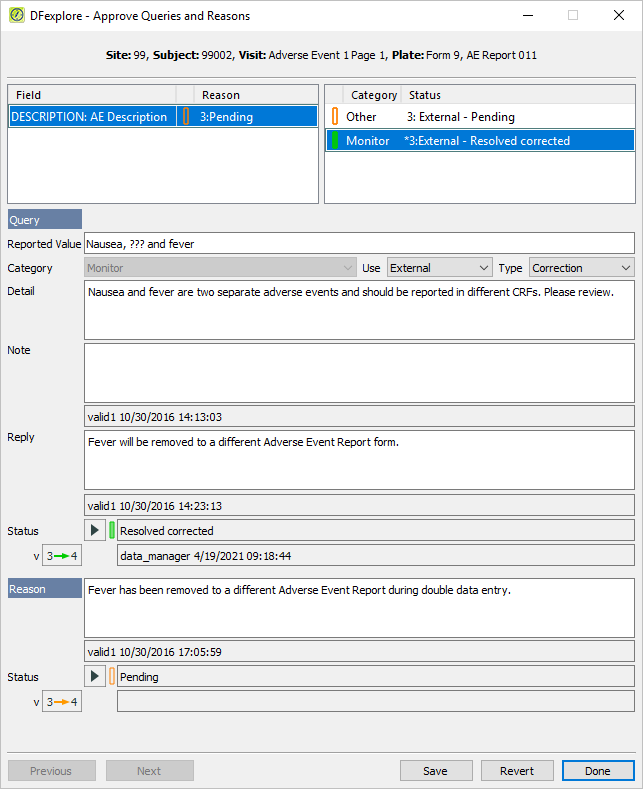
-
Click . The Approve Queries and Reasons dialog changes from displaying the query with category Monitor to displaying the query with catgeory Other as shown. Click .
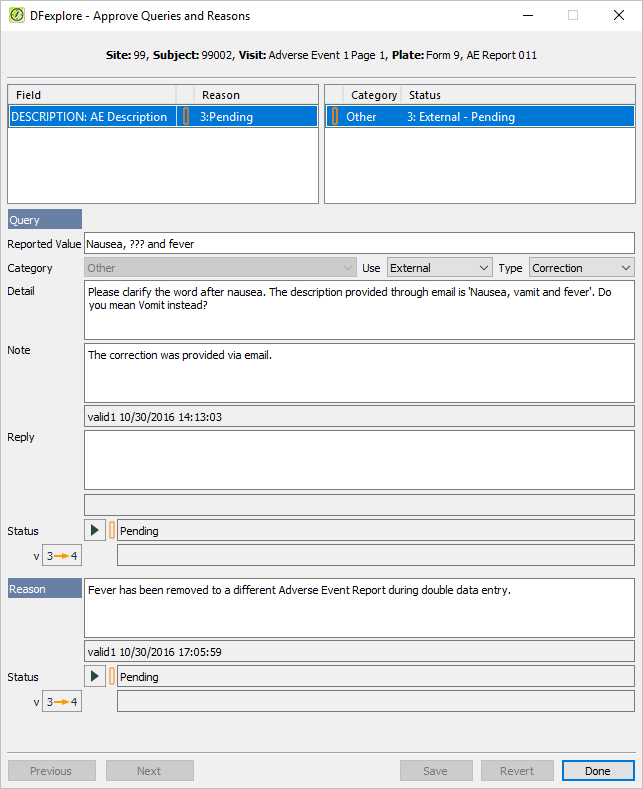
-
Press Tab to exit the Description field. Upon leaving the field, the
DrugLookupedit check is executed and DFlookup:aecodes dialog appears. Click .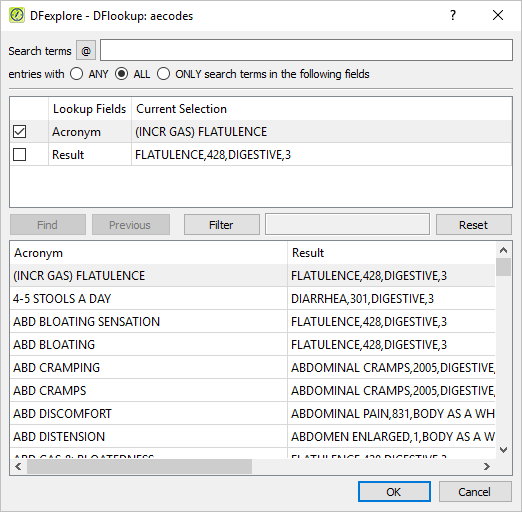
-
Do not make any other changes to the data and press Tab to advance to the save buttons. Click to save the page at level 4.
-
Double-click Subject 99002. Select entry for 2 : Form 2. Select > to review all queries and reasons that are present on the page.
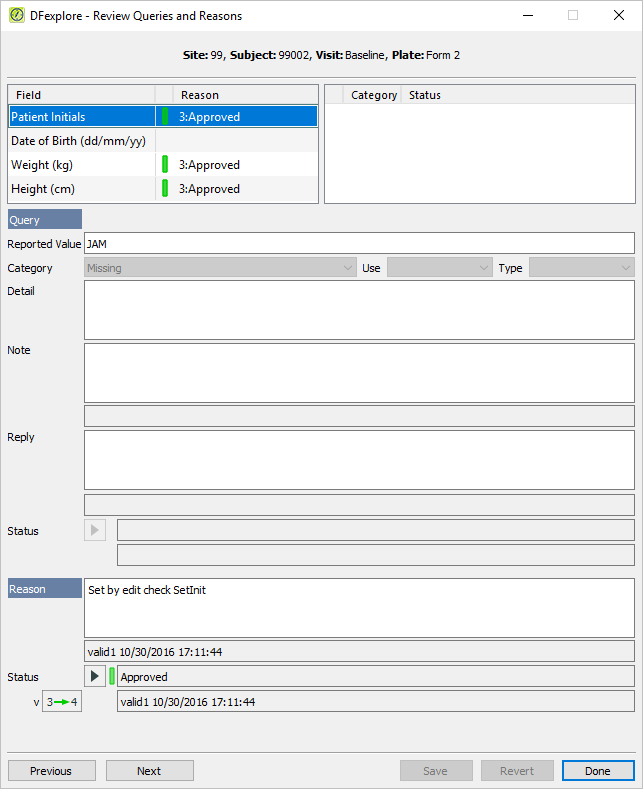
-
Working with the highlighted entry for Patient Initials, confirm that the Status is set to Approved and the level button displays
. Click to move the approved reason from level 3 to level 4 without making any other modifications.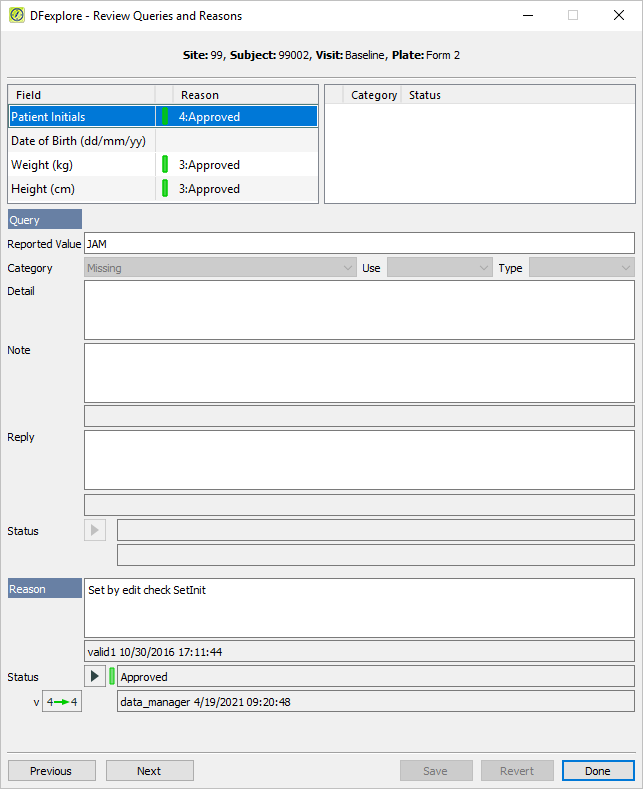
-
Select the 3rd Reason entry Weight (kg). Confirm that the Status is set to Approved and
is displayed. Click to move the approved reason from level 3 to level 4 without making any other modifications.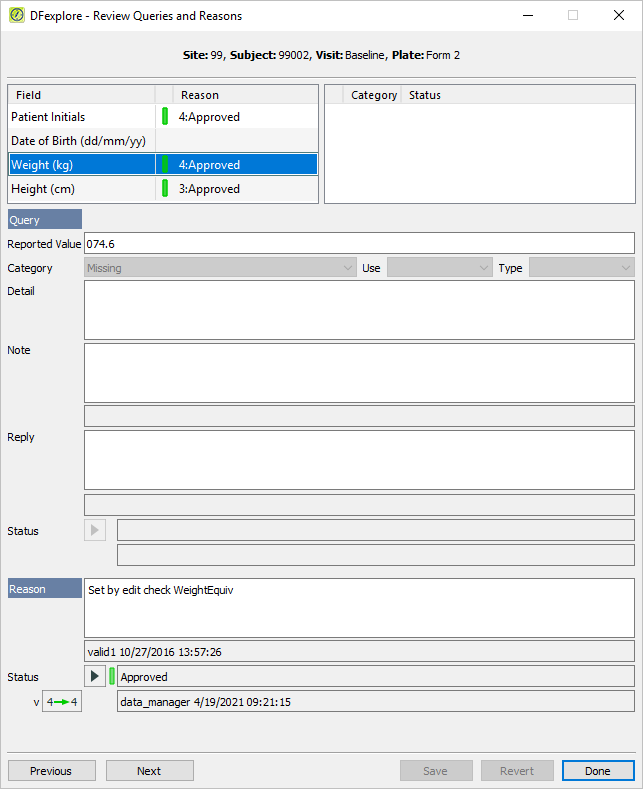
-
Select the 4th Reason entry Height (cm). Confirm that the Status is set to Approved and
is displayed. Click to move the approved reason from level 3 to level 4 without making any other modifications.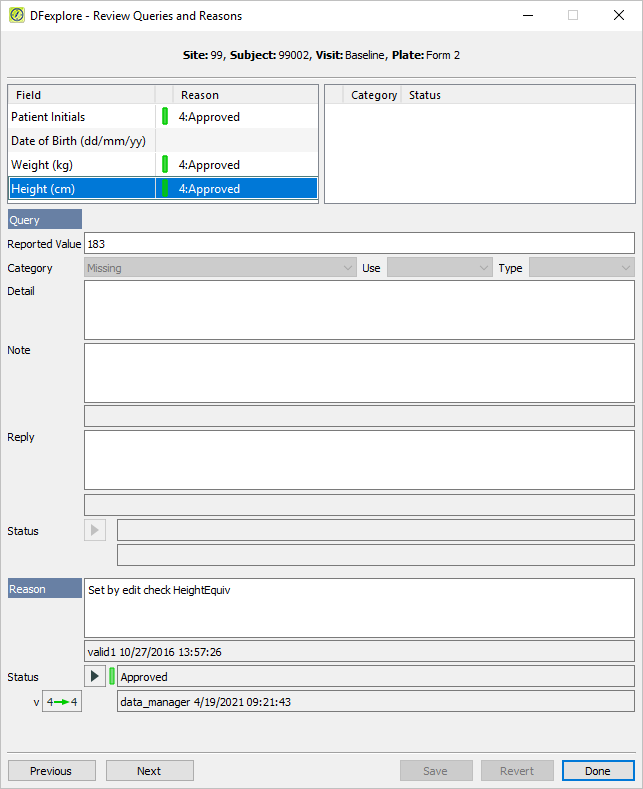
-
Once each of the 3 approved reasons have been reviewed, click .
-
As an outstanding query remains on the Date of Birth field, click to save.
-
Continuing with the ADVERSE EVENT REPORT as the current page, click anywhere in the data entry screen to make the page active. Press Tab to advance though the fields until the Description field becomes the current field. Select > . Examine the information in the dialog.
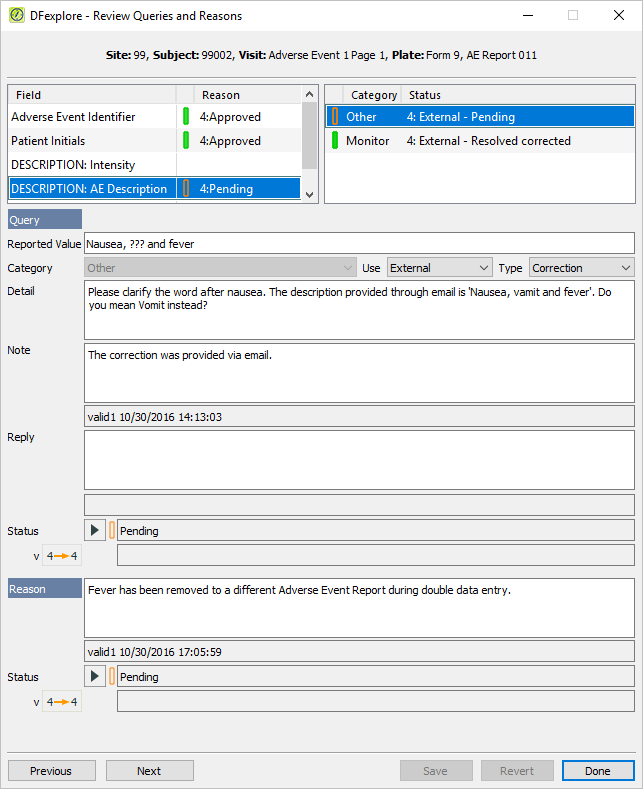
-
Click the second query with the Category type Monitor and a status of 4: External - Resolved corrected. Click to close the dialog.
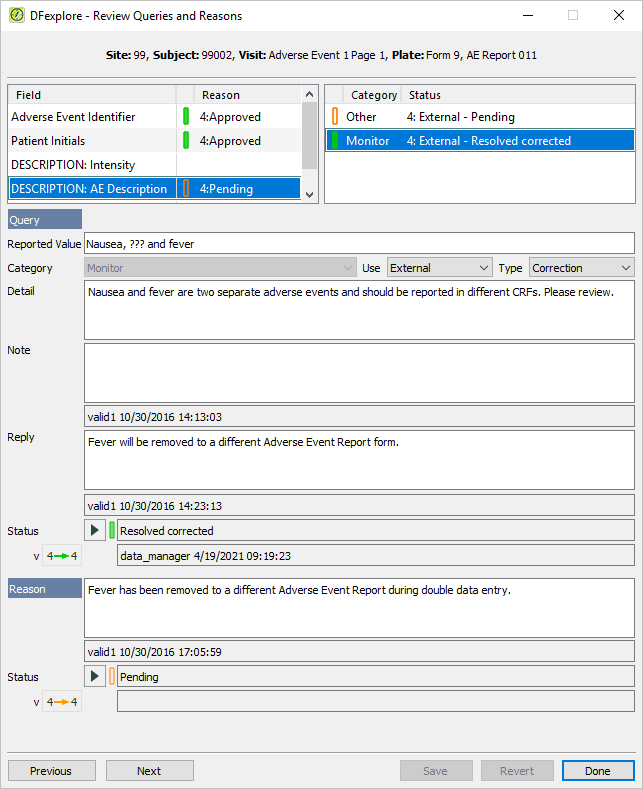
-
Press Tab to exit the Description field. Upon leaving the Description field, the
DrugLookupedit check is executed and DFlookup:aecodes dialog appears. Click .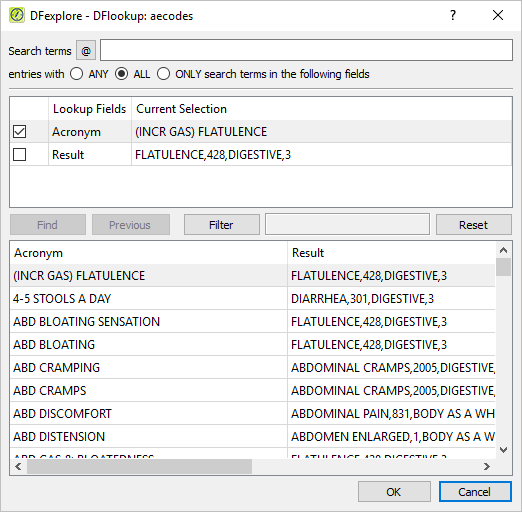
-
Do not make any other changes to the data on the current page and press Tab to advance to the save buttons. Click .
-
Double-click Subject 99007 entry in the record list to open task records for this subject. Press Tab to advance through the fields until Screen 1, Reading 1 systolic blood pressure becomes the current field.
-
Select > or click
to open the Add Query dialog. In the dialog, set:Category = Inconsistent
Use = External
Type = Clarification
Status = New query
Enter
This value is inconsistent with all other BP readings. Please explain.in the Detail field.
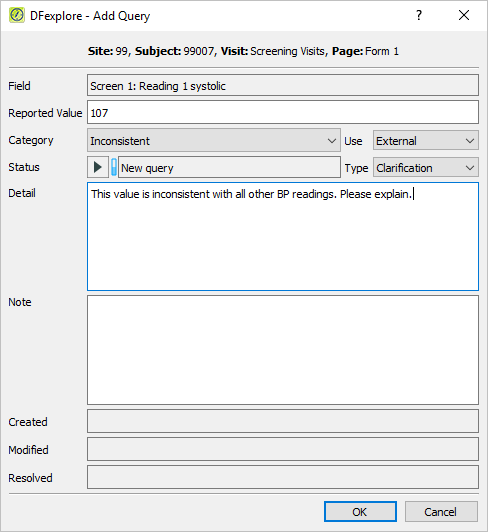
-
Click to apply the query.
-
Press Tab to advance through the remaining fields on the page until the save buttons become active. Click to save the page.
-
Release the current task set and retrieve all pages in the database that have been saved with status Pending. Do this by selecting > . In the dialog set:
Mode = Validate
Save level = 4 - Level 4
Search = Data
Status = Pending
Leave the retrieval Level field blank.
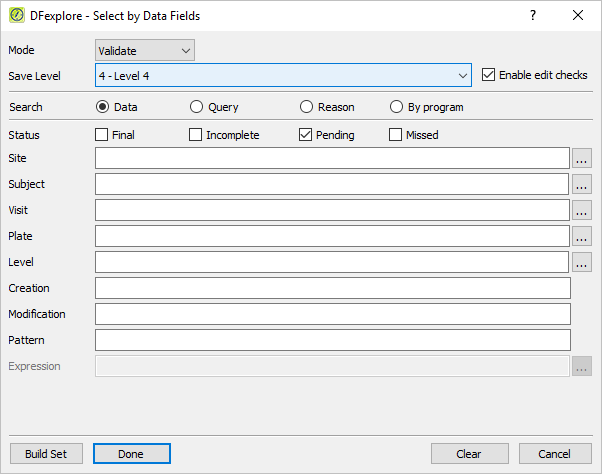
-
Click . In the confirmation dialog, click to retrieve data records that match the search criteria.
-
Select Subject 99007 > 1 : Baseline > 3: Form 3 from the record list and click anywhere on the page background to make it the active page. Beginning with the Patient Number field, press Tab to advance through the fields until the first Major Surgery text field is the current field. Enter all Major Surgery information as it appears in the following image. Press Tab to exit the last data field to make the save buttons active.
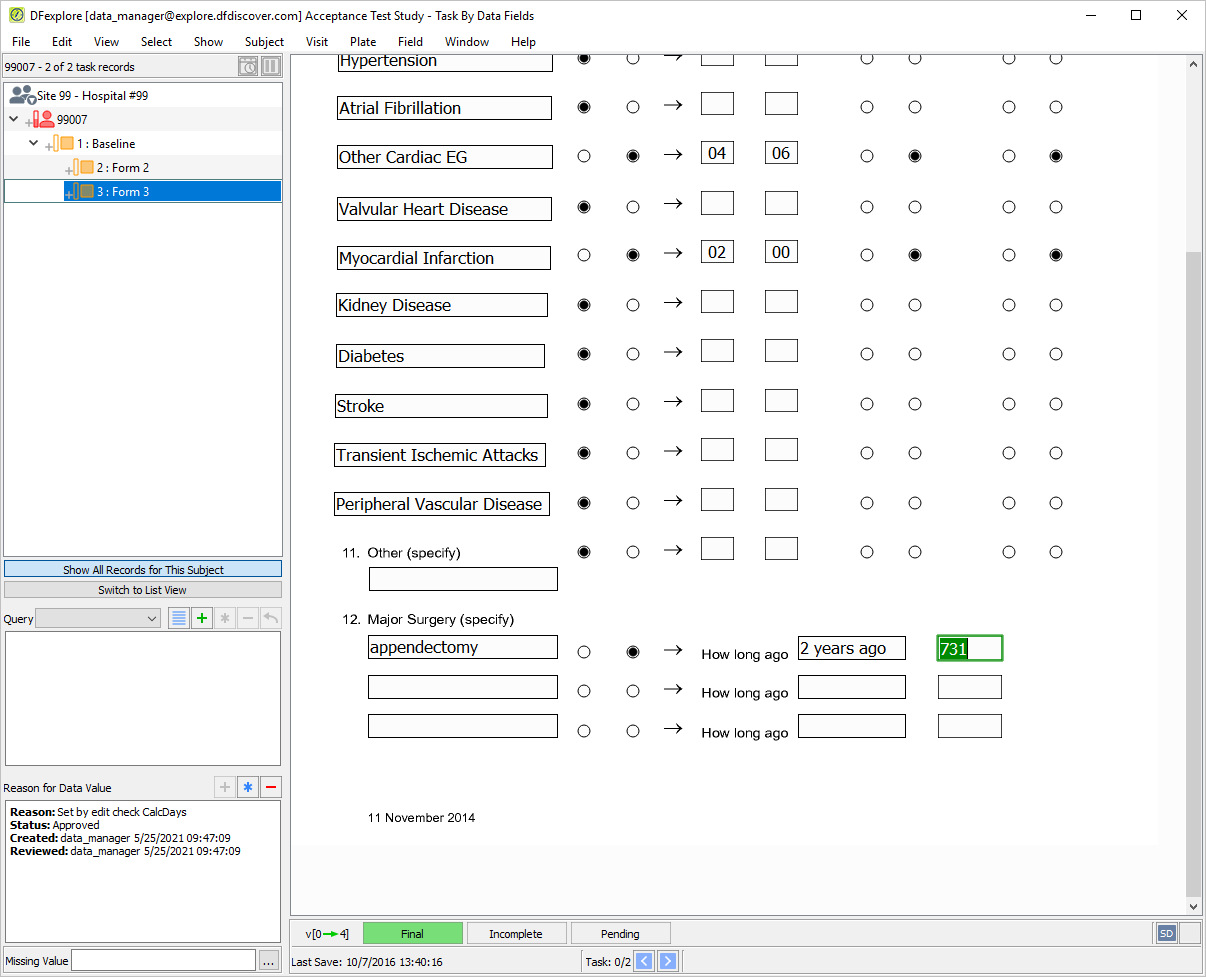
-
As there are no outstanding problems on the page and the data is now complete, click to change the page status from Pending to Final at level 4.
-
Select > to release all task records from the current set. Click in the dialog to clear the main Data View window.
-
Select > , Reports View becomes the current view.
-
Click the Subject Tracking section and choose report History of Changes from the list of reports. To review all data modifications made to Subject 99002 and 99007. Enter
-date today -subjects 99002,99007in the Specify field.
-
Click to execute the DF_ATmods report. Examine the output.
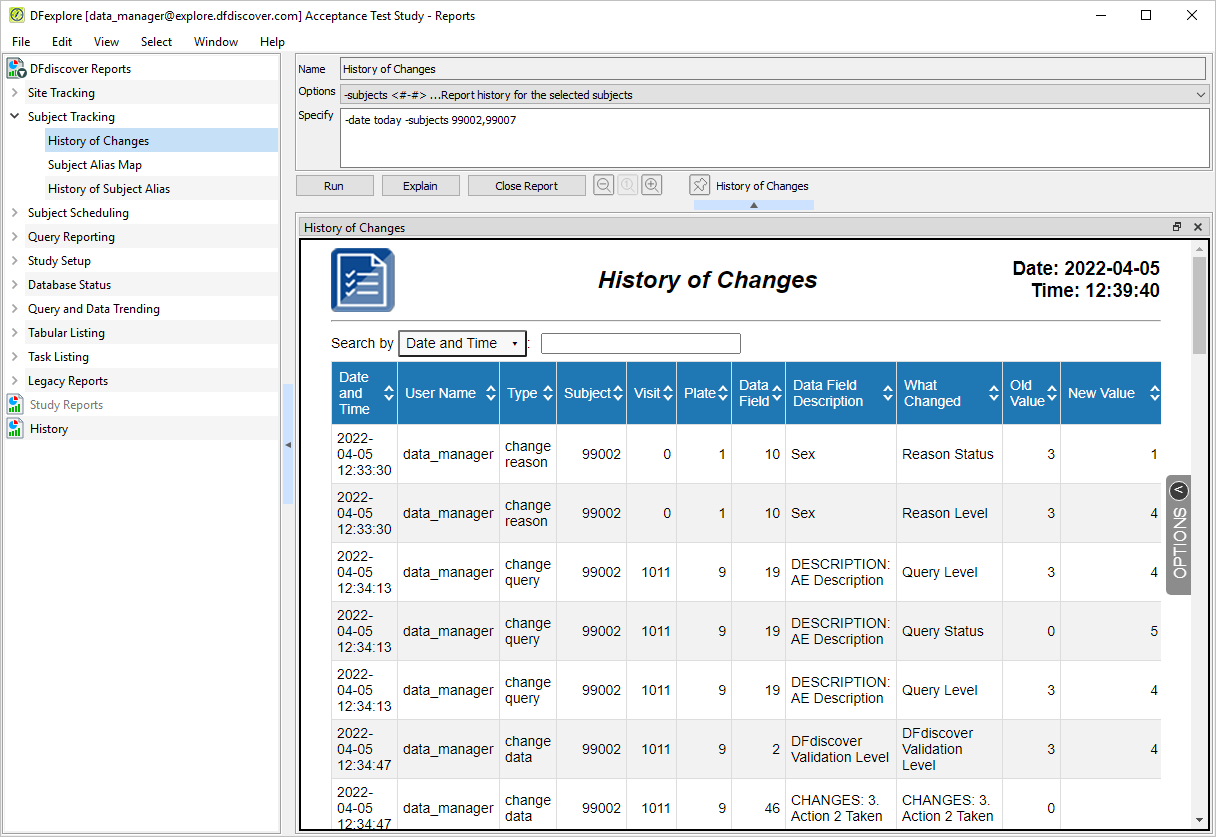
-
Select > . Batch Edits becomes the current view.
-
With the Controls tab as the current view. Click > from the drop-down list.
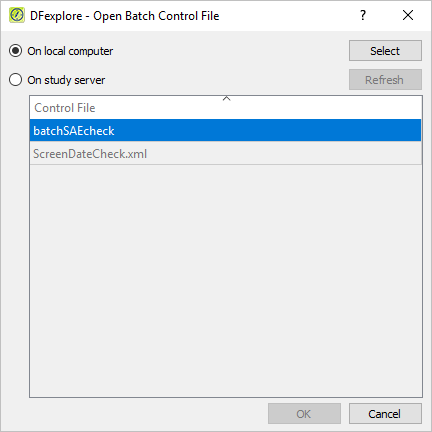
-
In the Open Batch Control File dialog, select (enable) the On study server option to display a list of available control files that are located on the study server for the 254 Acceptance Test Study. Choose
ScreenDateCheck.xmlfrom the list and click to load the control file.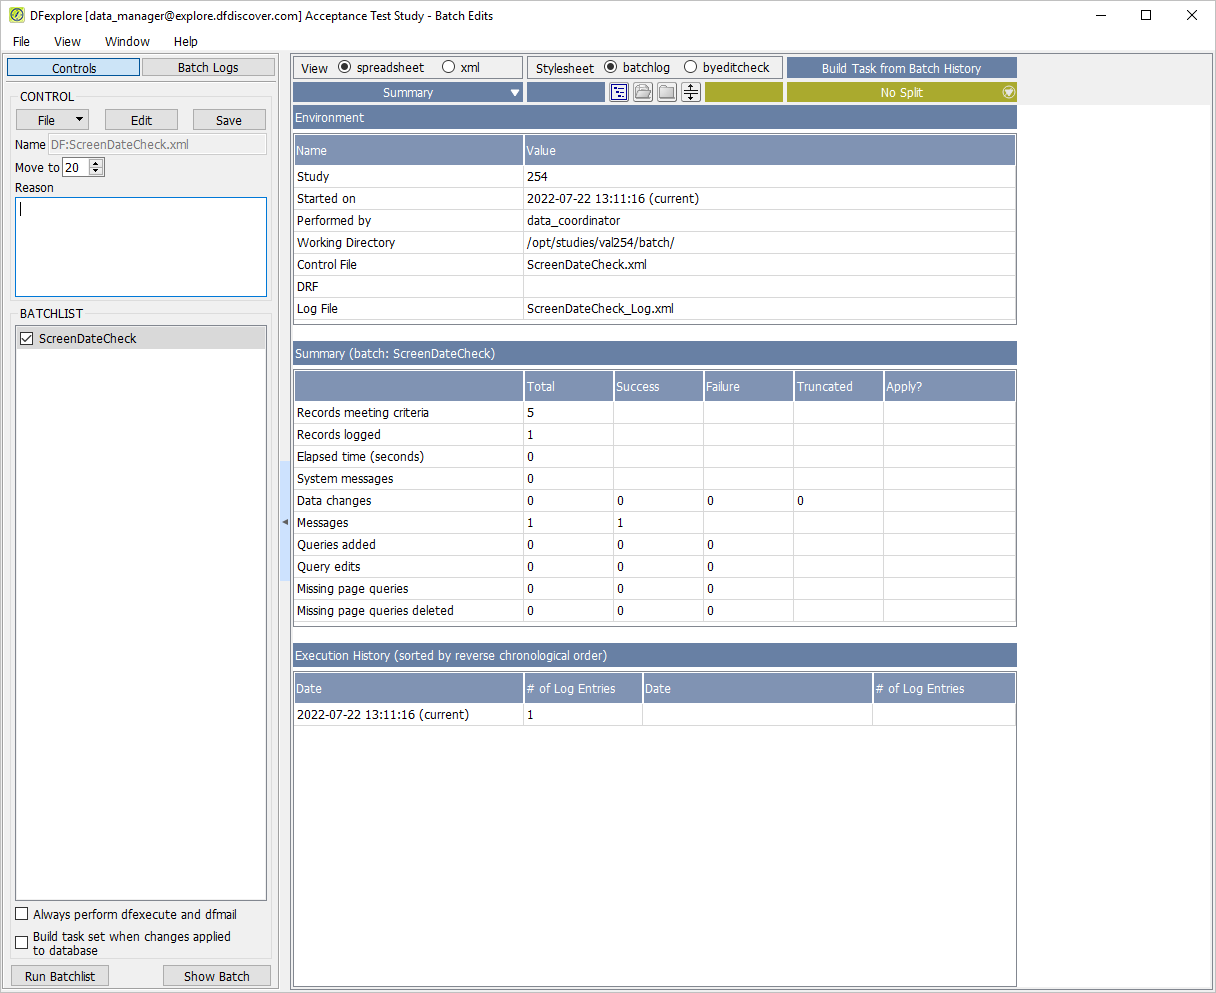
-
Click to ensure the settings are as shown below. Click to hide the settings.
Note The ScreenDateCheck.xml control file executes the edit check
ScreenDateswhich verifies that the Screen 1 and Screen 2 dates on all plate 1s (Blood Pressure Screening Form) are in sequential order with the Screen 1 date coming before the Screen 2 date.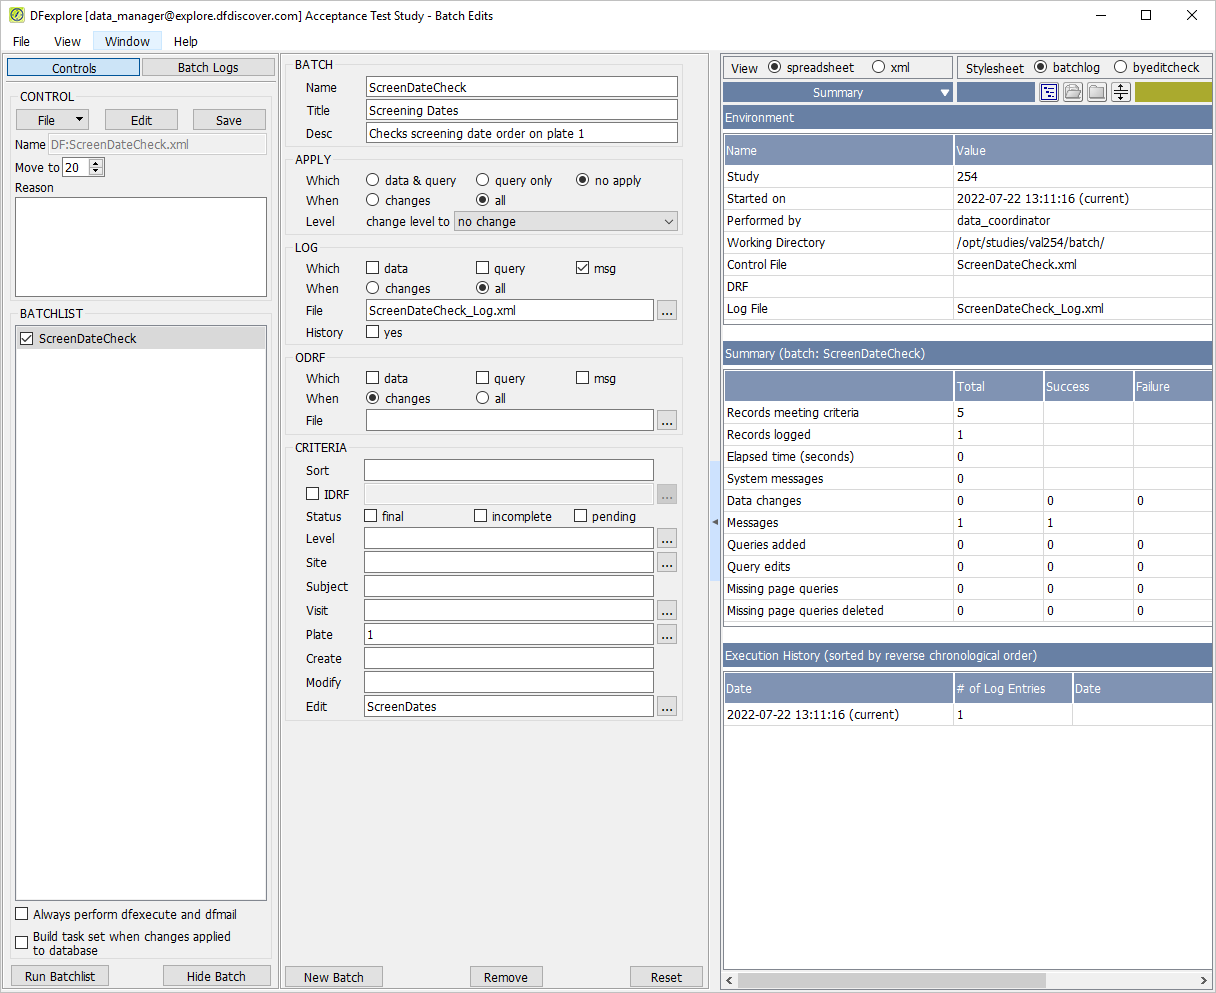
-
Click to run the current batch program. Click in the confirmation dialog.
-
From the Summary drop-down list, choose the item identified as '(current)'.
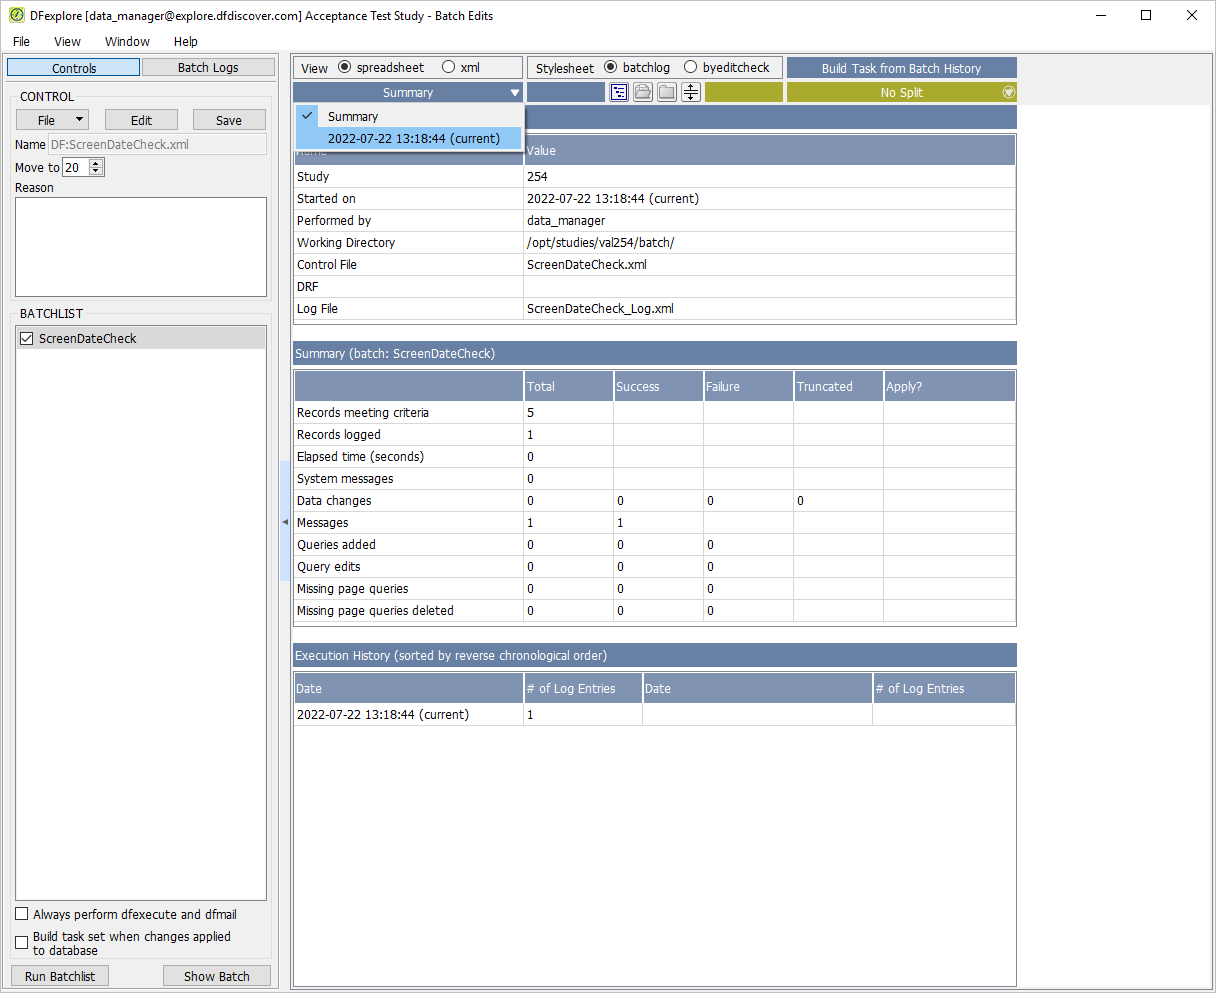
-
The edit check
ScreenDateschecks the Screen 1 and Screen 2 dates on Form 1 (plate 1) and determines if they are out of sequence. Examine the log entry message.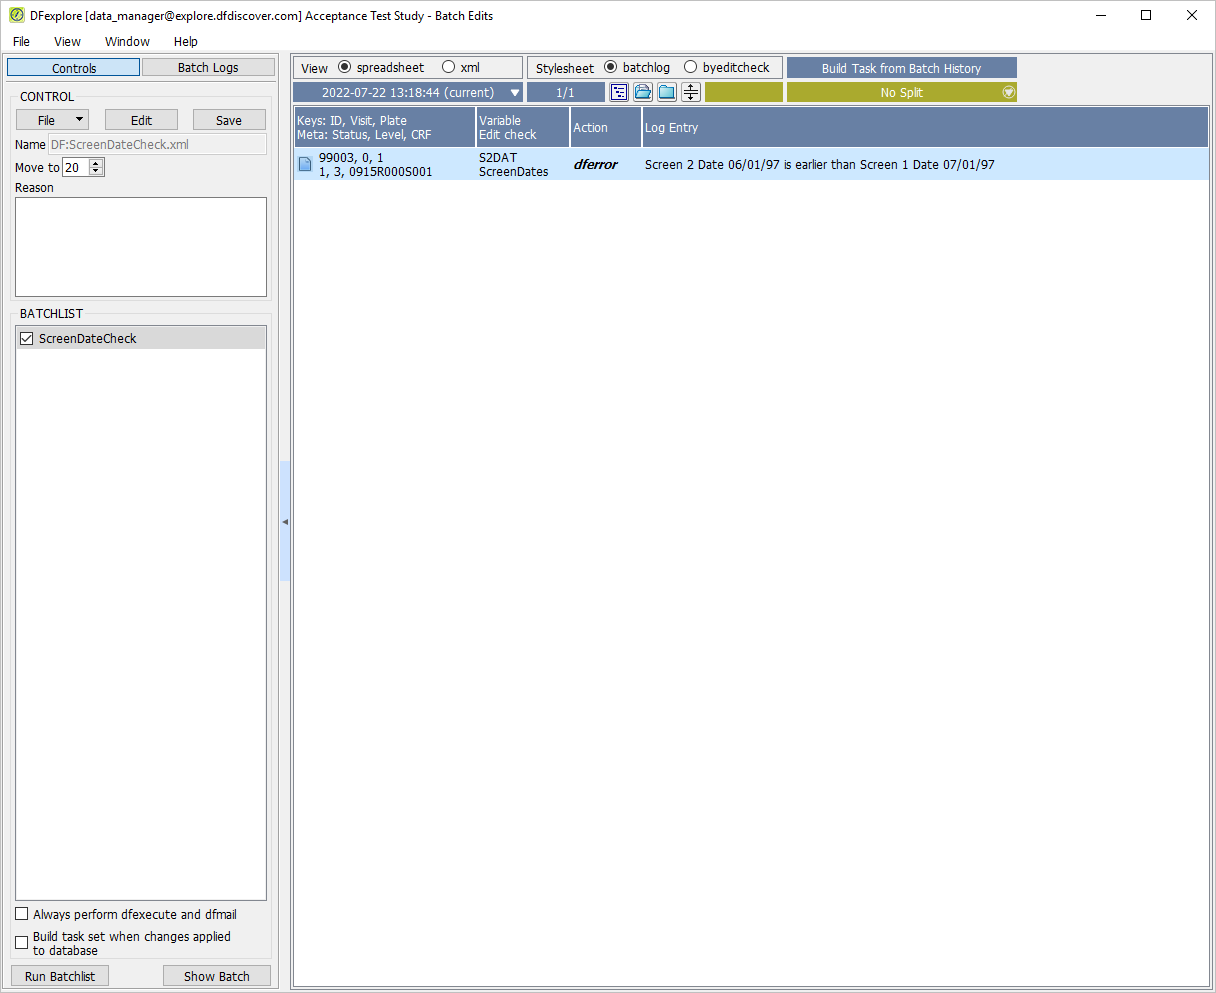
-
Double click the entry to be taken to Data View. Examine the values in the Screen 1 and Screen 2 date fields.
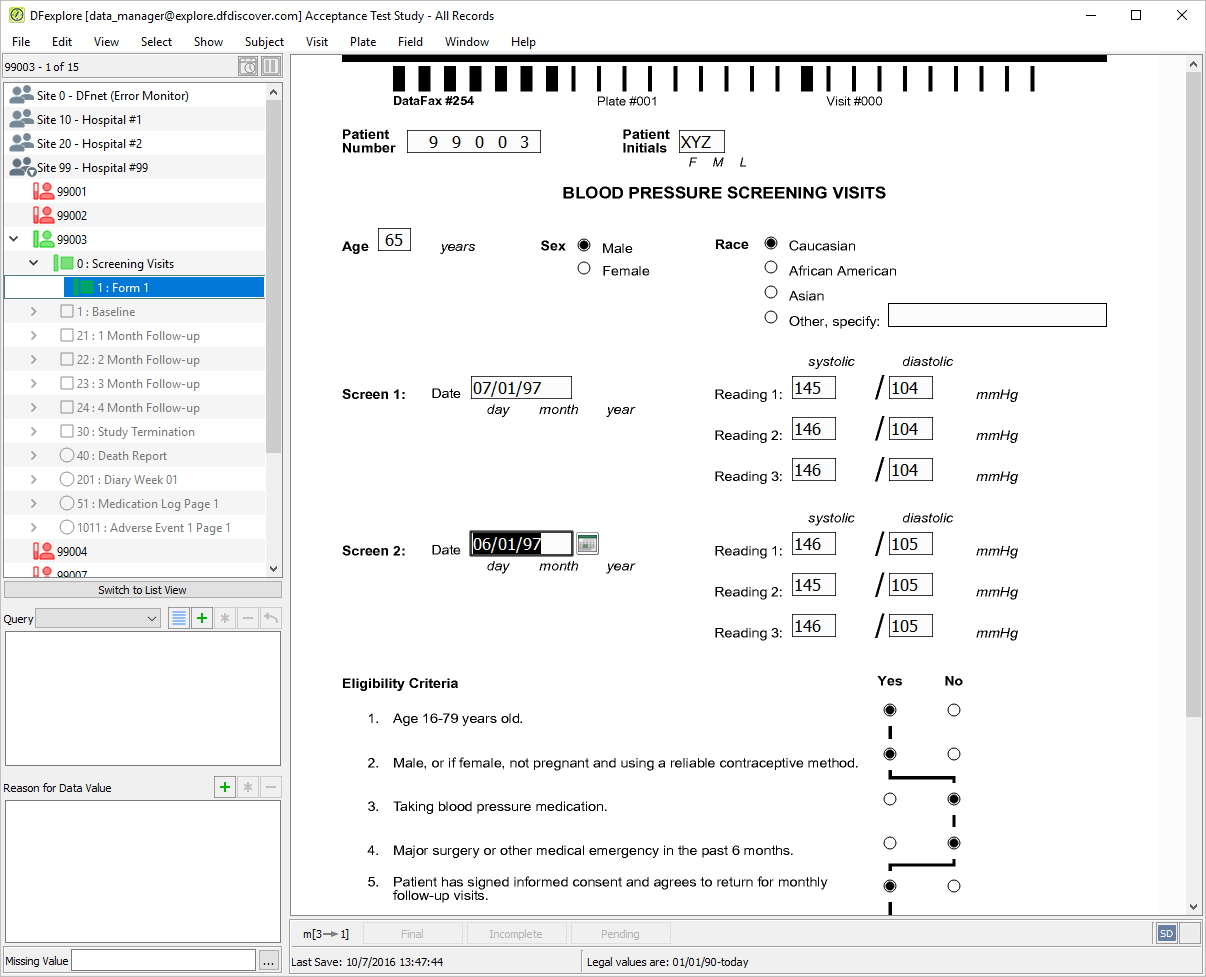
-
Select > . With the Controls tab as the current view, click > from the drop-down list.
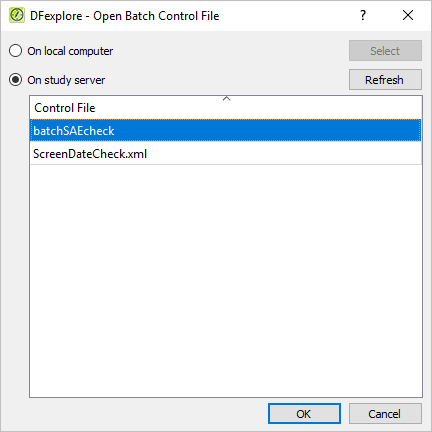
-
In the Open Batch Control File dialog, select (enable) the On study server option to display a list of available control files that are located on the study server for the 254 Acceptance Test Study. Choose batchSAEcheck from the list and click to load the control file.
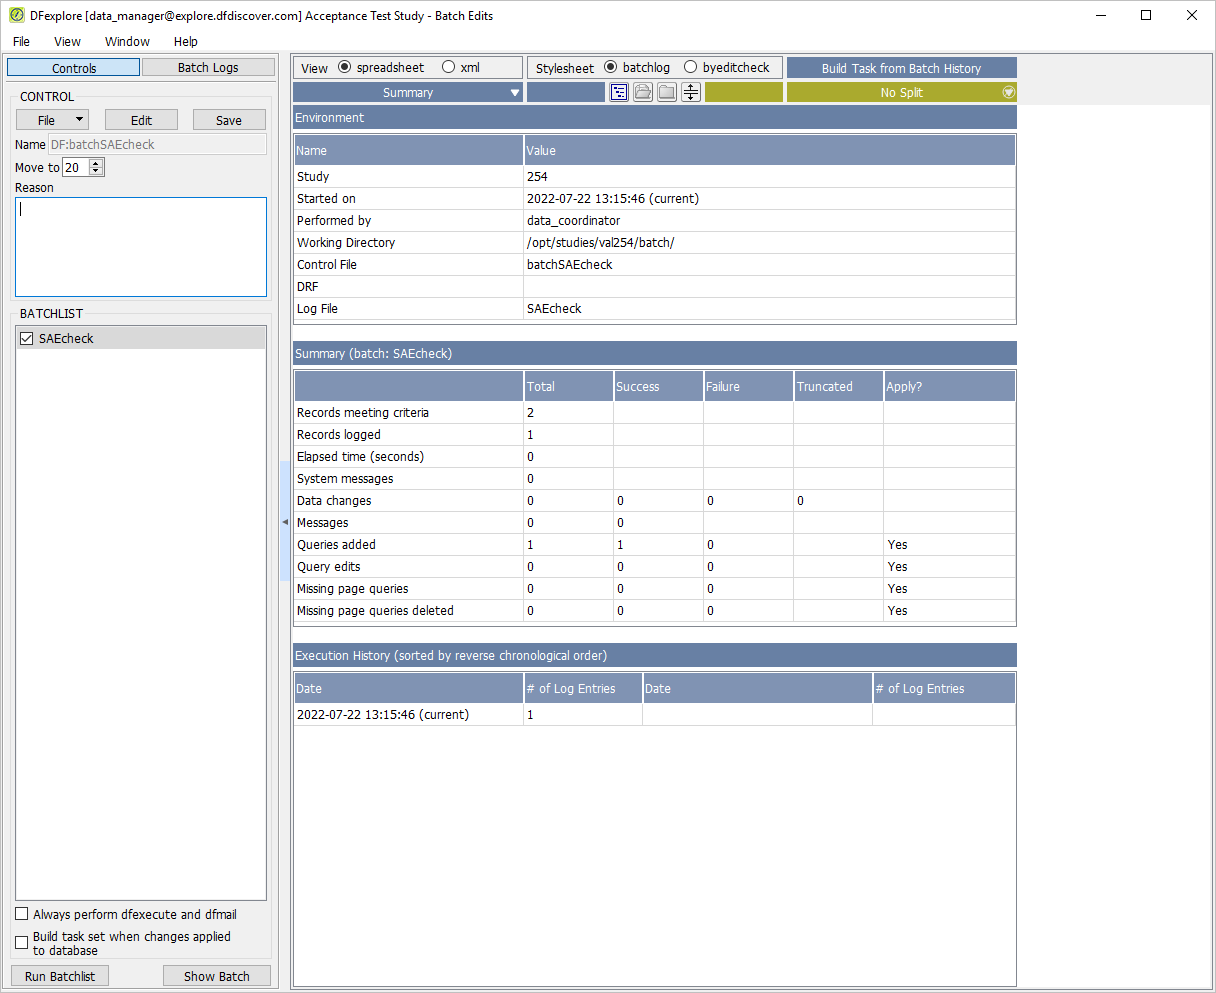
-
Click to ensure the settings are as shown below. Click to hide the settings.
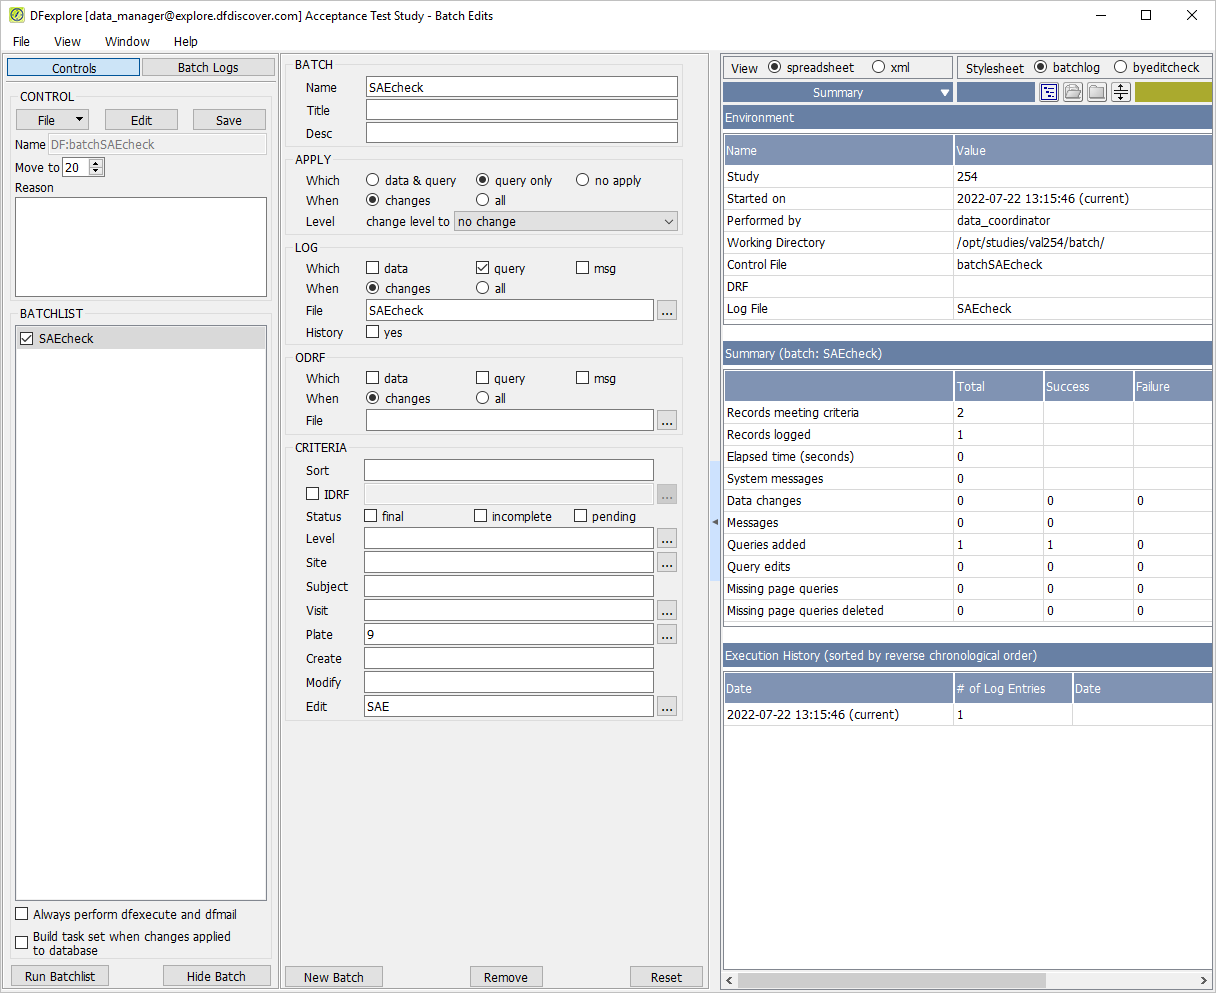
Note The
batchSAEcheck.xmlcontrol file applies a query to Is This A Serious Event field on plate 009 when the response to this field is inconsistent with the value in the Intensity field of the same plate. -
Click to run the current batch program. Enter the Username and Password of the current user, click .
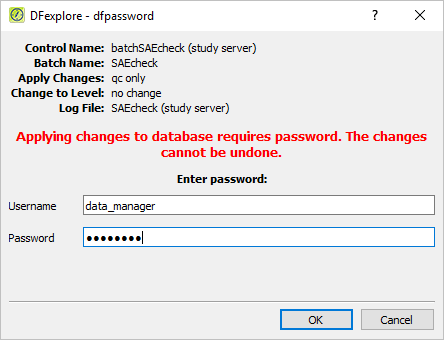
-
From the Summary drop-down list, choose the item identified as '(current)'.
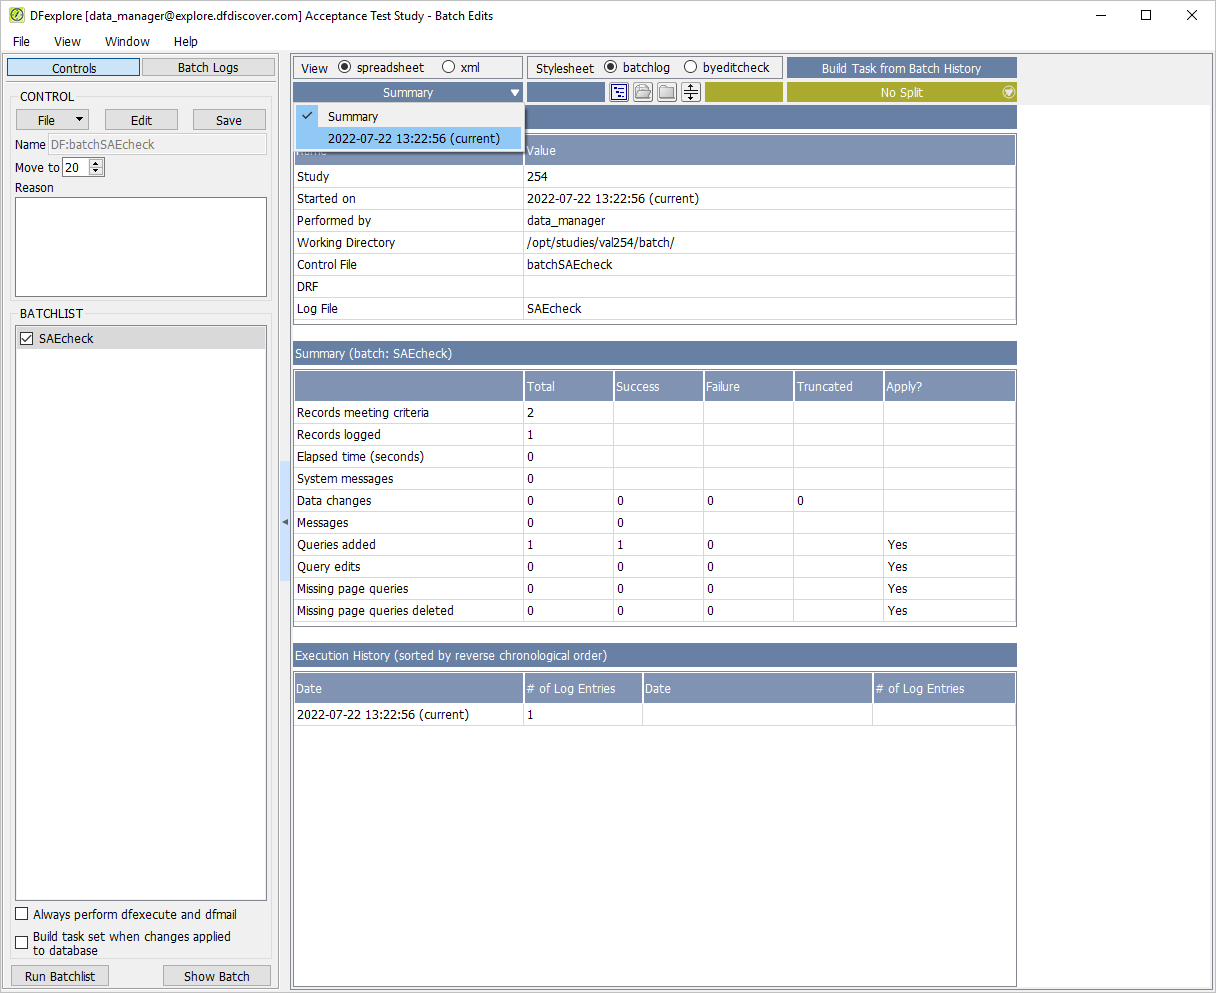
-
Double-click the entry to be taken to Data View.
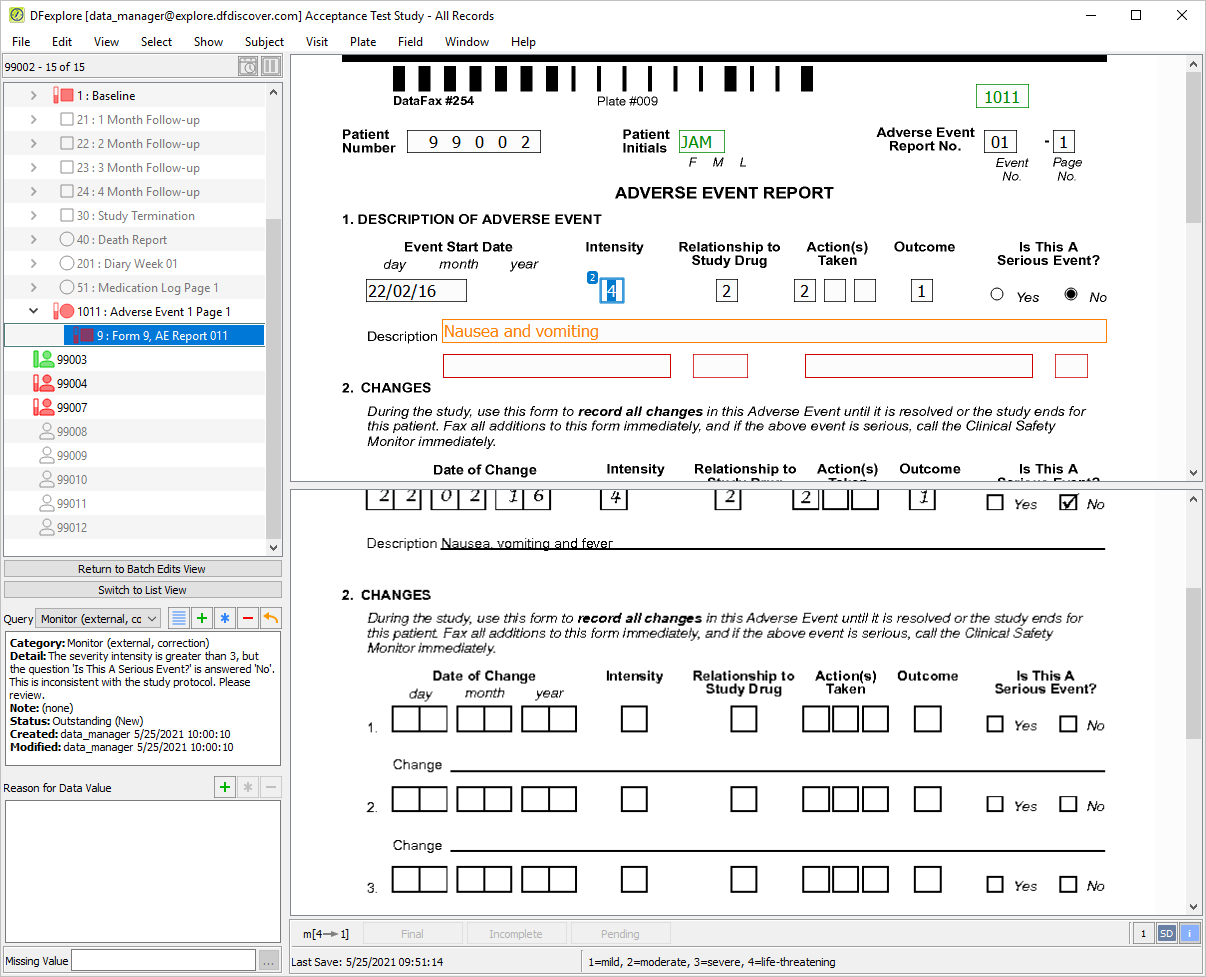
-
The Intensity field becomes the current field. Verify that Intensity has a value of
4with the query count '2' displaying on the field widget and the field is blue. Continue tabbing through the fields until the field Is This A Serious Event? has the focus. Confirm that the 'No' box is marked for this field. -
Return back to the Intensity field by using Shift + Tab keys. With the focus on Intensity, examine the details in the Query window, and confirm that the batch edit check with the category Monitor has been added to this field.
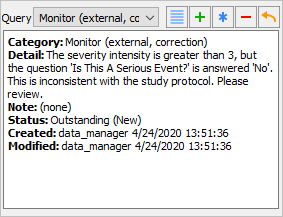
Note The query list is presented in accordance with the query sort order defined in Step 1.
-
Double-click Site 99 - Hospital #99 entry to close all subject binders.
-
Still in Data View, determine which subjects have had adverse events. Do this by selecting > to open the Select by Data Fields window. In the dialog, set:
Mode = View
Plate = 5
Level = 1-4
Do not select any Status check box.
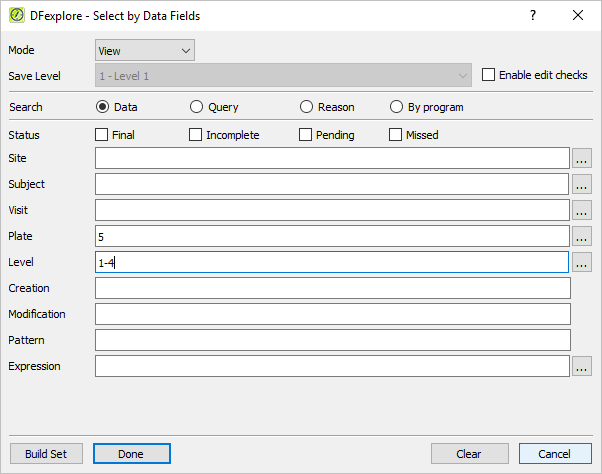
-
Click Expression to open the Expression Editor dialog.
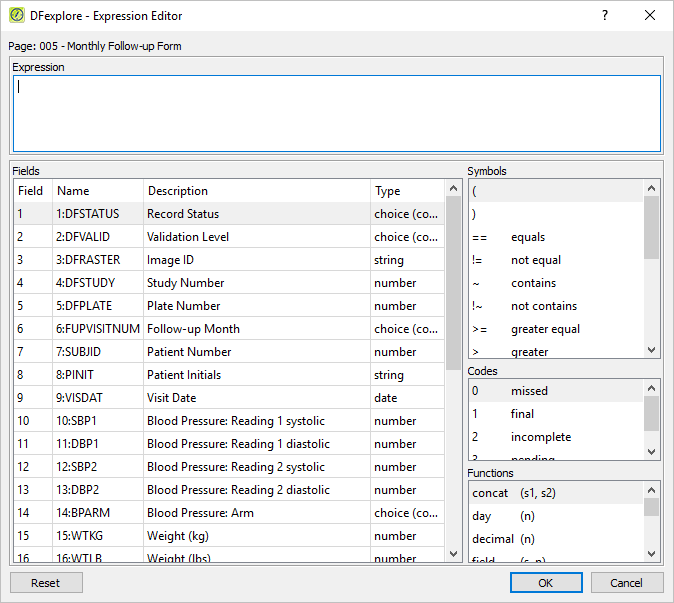
-
Do the following to build an expression that searches for the occurrence of adverse events: In the Expression Editor, select 25:AEYN from Fields. From the Symbols list choose == equals. From the Codes list choose 2 Yes. Click to add the expression to the Expression field in the Select by Data Fields retrieval dialog.
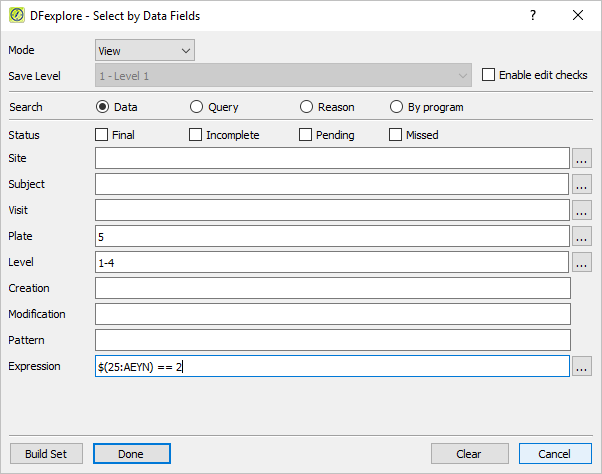
-
Click to apply the settings. Click in the confirmation dialog to retrieve the 1 data record that matches the expression and retrieval criteria.
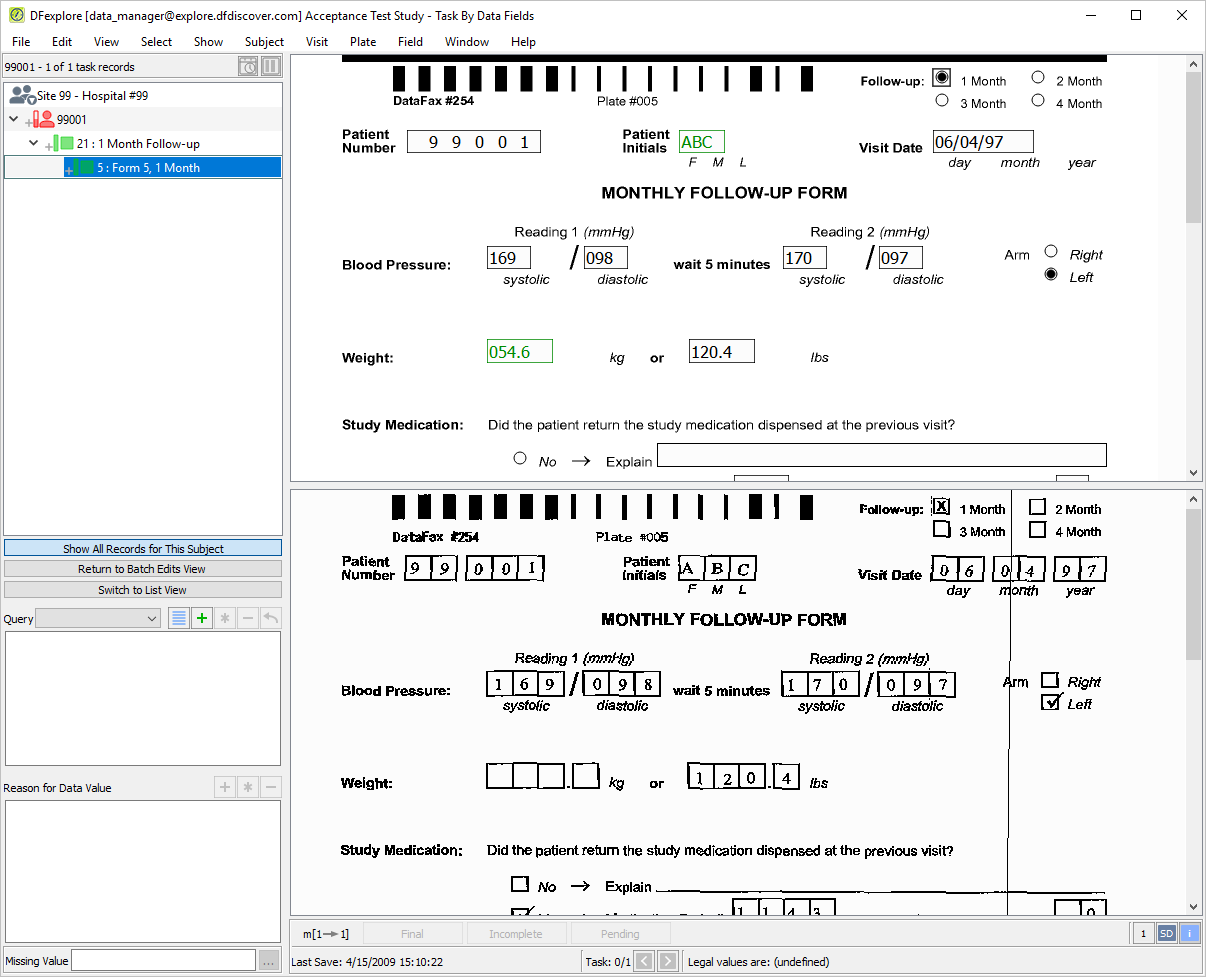
-
Scroll down the current page for Subject 99001 to locate the adverse event question. Confirm that the Yes choice has been entered in response to the question Did the patient report any adverse events since the last visit?.
-
Confirm that a corresponding adverse event report has been submitted for Subject 99001. Do this by clicking located below the subject binder list. Scroll through the list of assessments until the 1011 : Adverse Event 1 Page 1 entry. Select the list entry for 9: Form 9, AE Report 011.
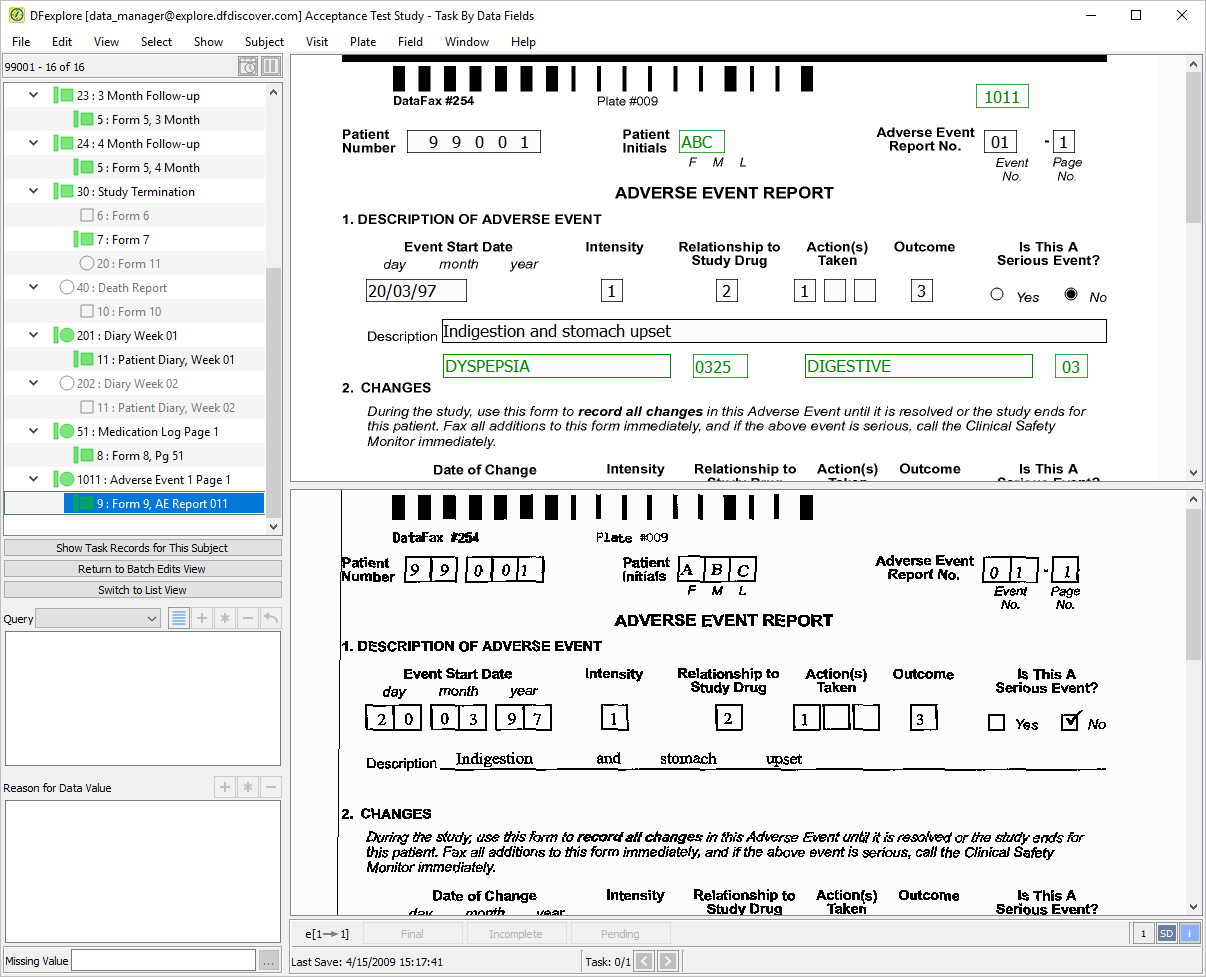
-
Select > to release all task records from the previous test. Click in the resulting confirmation dialog. Select > to open the Select by Data Fields dialog, click to clear the previous retrieval specifications and reset the dialog.
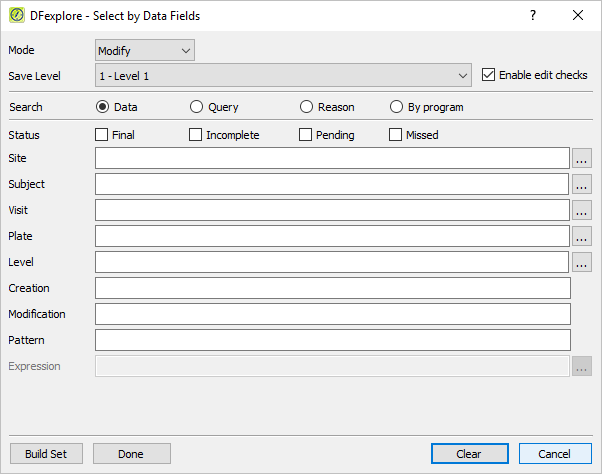
-
The steps that follow search for and retrieve all patients in the database that are >=50 years old, male and have a history of diabetes. Within the Select by Data Fields dialog, click next to the Subject field to open the Subjects dialog and then choose ALL as the value for Select subjects that match.
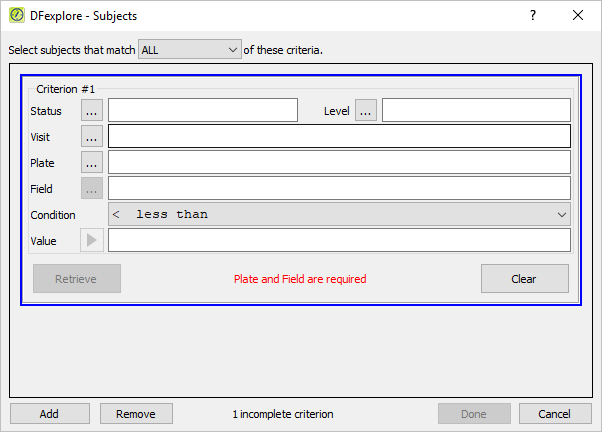
-
Begin by building an expression for the first subject criterion of Age. Working in the Criterion #1 block, specify Visit =
0. Click next to Plate to open a list of study plates. In the list double-click entry 001 - Blood Pressure Screening Visits to populate the Plate field (plate 1 contains the Age data field). Click next to Field to get a listing of all fields defined on the selected plate 1. Double-click AGE to populate the Field specification. Using the Condition drop-down menu, choose >= greater than or equal to assign a retrieval Condition. Finally, specify50in Value.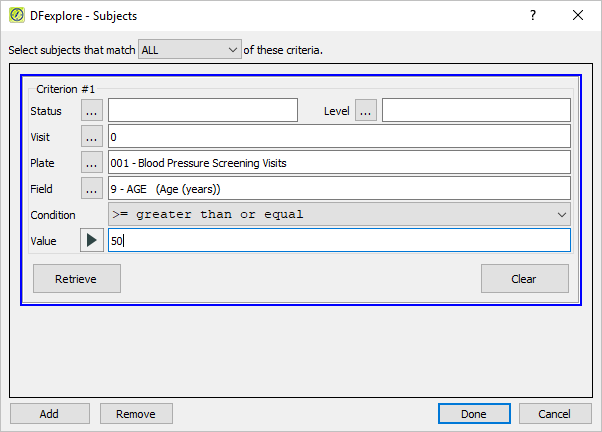
-
Click to retrieve the number of subjects that match the specified Age criterion. Click to add a new criterion block in preparation for the specification of the 2nd retrieval criterion (Male).
-
Build an expression for the second subject criterion of Male. Working in the Criterion #2 block, specify Visit =
0. Click next to Plate to open a list of study plates. In the list double-click entry 001 - Blood Pressure Screening Visits to populate the Plate field (plate 1 contains the Sex data field). Click next to Field to get a listing of all fields defined on plate 1. Double-click entry SEX to populate the Field specification. Using the Condition drop-down menu, choose == equal to assign a retrieval Condition. Select 1 Male from the Value pull-down.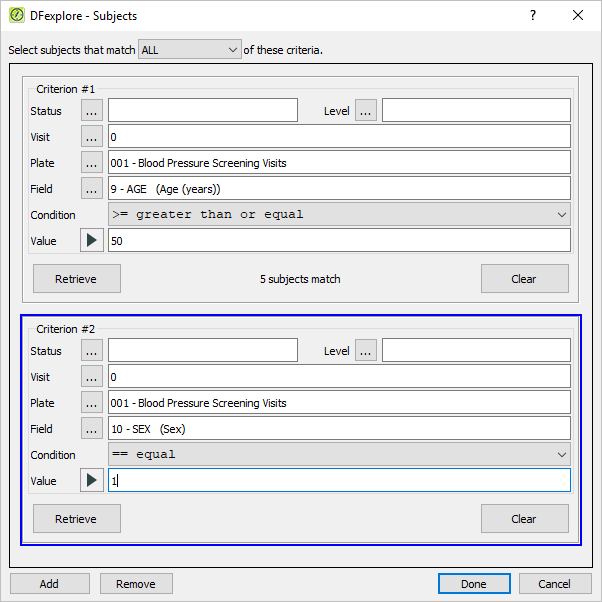
-
Click to retrieve the number of subjects that match the specified Sex criteria. Click to add a new criteria block in preparation for the specification of the 3rd retrieval criteria (history of diabetes).
-
Build an expression for the third subject criterion of diabetes history. Working in the Criterion #3 block, specify Visit =
1. Click next to the Plate label to open a list of study plates. In the list double-click entry 003 - Medical History to populate Plate (plate 3 contains the Diabetes data field). Click next to Field to get a listing of all fields defined on the selected plate 3. Double-click entry MHOCCUR (7. Diabetes: N/Y) to populate the Field specification. Using the Condition drop-down menu, choose == equal to assign a retrieval Condition. Select 2 Yes from the Value pull-down.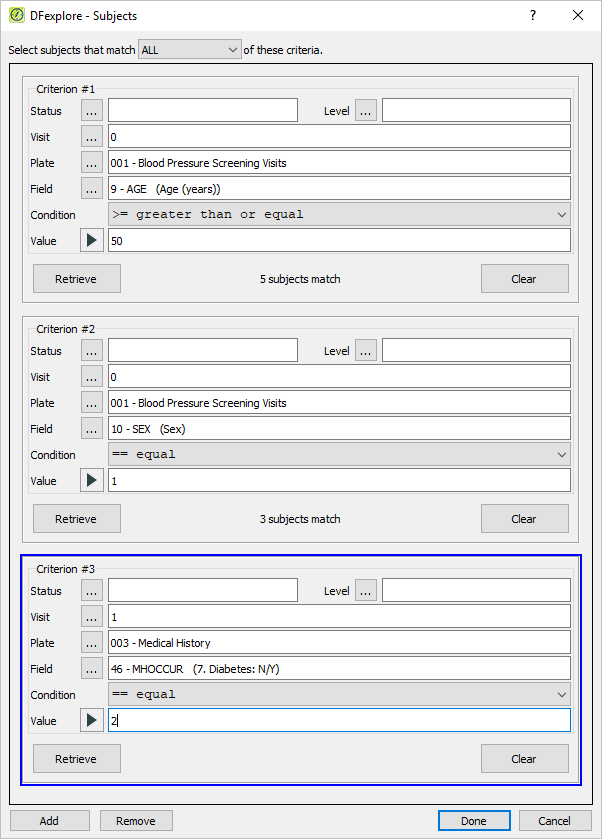
-
Click to retrieve the number of subjects that match the specified Diabetes history criteria. Click to find the subjects that match ALL three of the criteria specifications and close the Subject Criteria dialog.
-
In the Select by Data Fields dialog, set:
Mode = View
Plate = 1,3
Level = 1-7
to retrieve only those plates having the Age, Sex and Diabetes history information for the matching subjects.
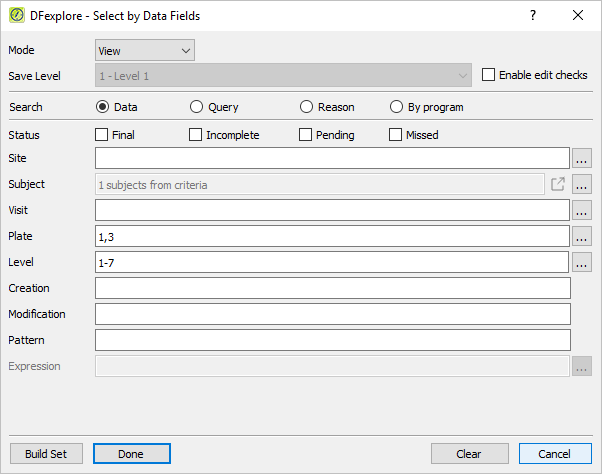
-
Click in the dialog to apply the settings. Click in the confirmation dialog to retrieve the 2 data records that match the subject, plate and level specifications.
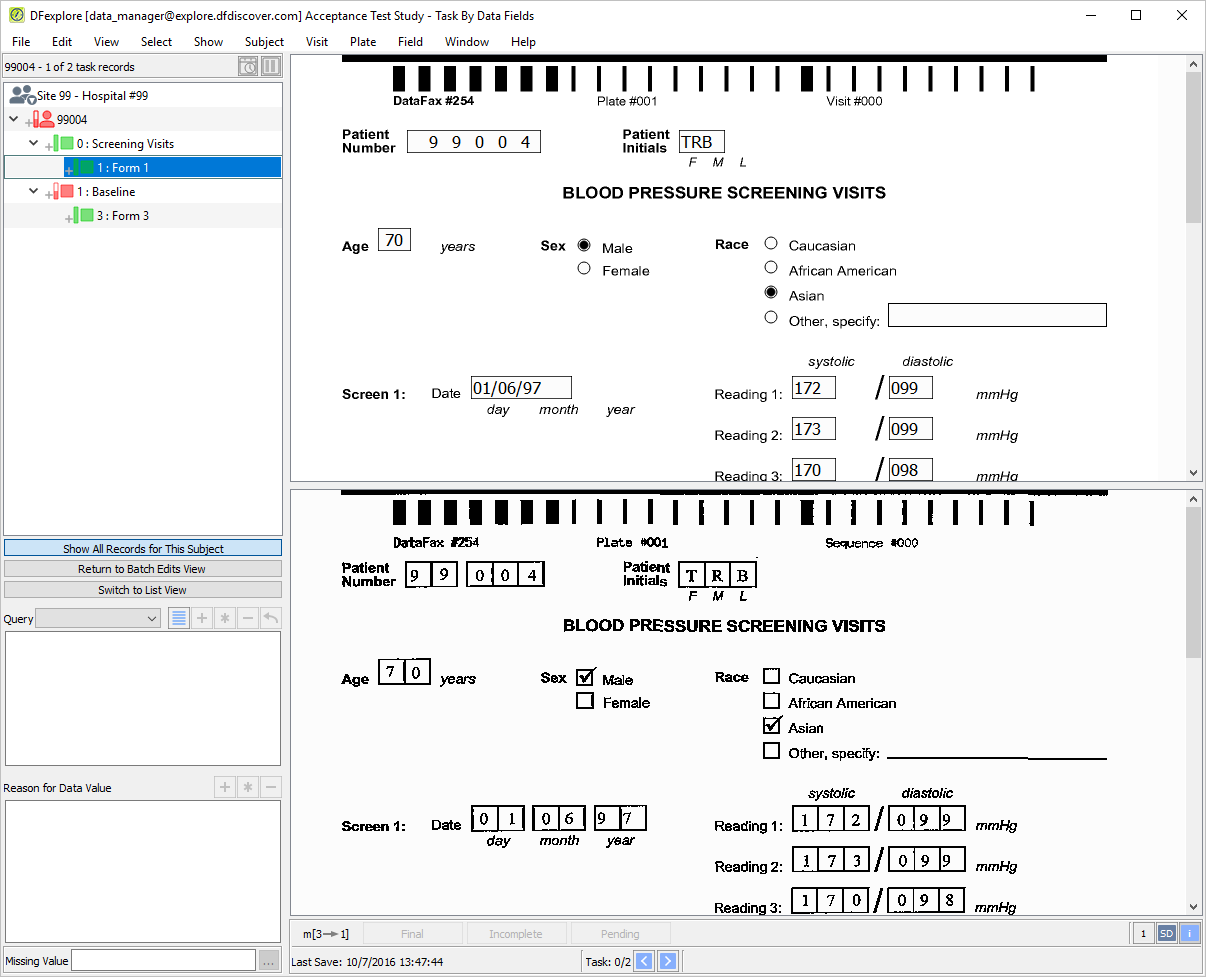
-
With 0 : Screening Visits, 1 : Form 1 for Subject 99004 as the active page, locate the Age and Sex fields. Confirm that the subject's Age >= 50 and Sex=male.
-
Select 1: Baseline, 3: Form 3 for Subject 99004 to open the Medical History page. Scroll down the page to locate the 7. Diabetes field. Confirm that this field is checked 'Yes'.
-
Select > to close Data View and exit DFexplore.
Table of Contents
- 12.1. Tests & Requirements
- 12.2. Begin Module 12. External Query Reports.
- 12.3. Obtain database query metrics and details using Status and List Views to review all outstanding queries prior to query report creation.
- 12.4. Run database integrity check report DF_XXkeys to export all key fields and visit dates from required plates in the database.
- 12.5. Use Data View to check, and if necessary correct, illegal visit dates by retrieving the problems keys identified by DF_XXkeys.
- 12.6. Execute DF_QCupdate to update the query database and lock all records for query report generation.
- 12.7. Execute DF_QCreports to create a standard, 3-part external query report for a study site.
- 12.8. Confirm the status of external queries following query report creation.
- 12.9. Execute DF_QCstatus to verify that a new query report was created by listing all reports in the QC/NEW directory.
- 12.10. Execute DF_QCview to display the newly created query report.
- 12.11. Execute DF_QCprint to print the query report from the QC/NEW directory.
- 12.12. Comparing several examples from the printed query report against their corresponding queries in the study database.
- 12.13. Execute DF_QCfax to email the query report to a valid email account.
- 12.14. Verify the status of the queries in the sent report.
- 12.15. End Module 12. External Query Reports.
Obtain database query metrics and details using Status and List Views to review all outstanding queries prior to query report creation.
Run database integrity check report DF_XXkeys to export all key fields and visit dates from required plates in the database.
Use Data View to check, and if necessary correct, illegal visit dates by retrieving the problems keys identified by DF_XXkeys.
Execute DF_QCupdate to update the query database and lock all records for query report generation.
Execute DF_QCreports to create a standard, 3-part external query report for a study site.
Confirm the status of external queries following query report creation.
Execute DF_QCstatus to verify that a new query report was created by listing all reports in the QC/NEW directory.
Execute DF_QCview to display the newly created query report.
Execute DF_QCprint to print the query report from the QC/NEW directory.
Comparing several examples from the printed query report against their corresponding queries in the study database.
Execute DF_QCfax to email the query report to a valid email account.
Verify the status of the queries in the sent report.
Estimate of Time Required: 40 Minutes
-
Start DFATK as described in Module 1 (Installation & Initialization).
-
Click followed by to begin this module.
-
Start DFexplore, login as user
data_coordinatorand choose 254 Acceptance Test Study as described in Section 1.7, “How to start DFexplore”. -
Select > . Examine the Queries table to view the status and count of all queries in the database.
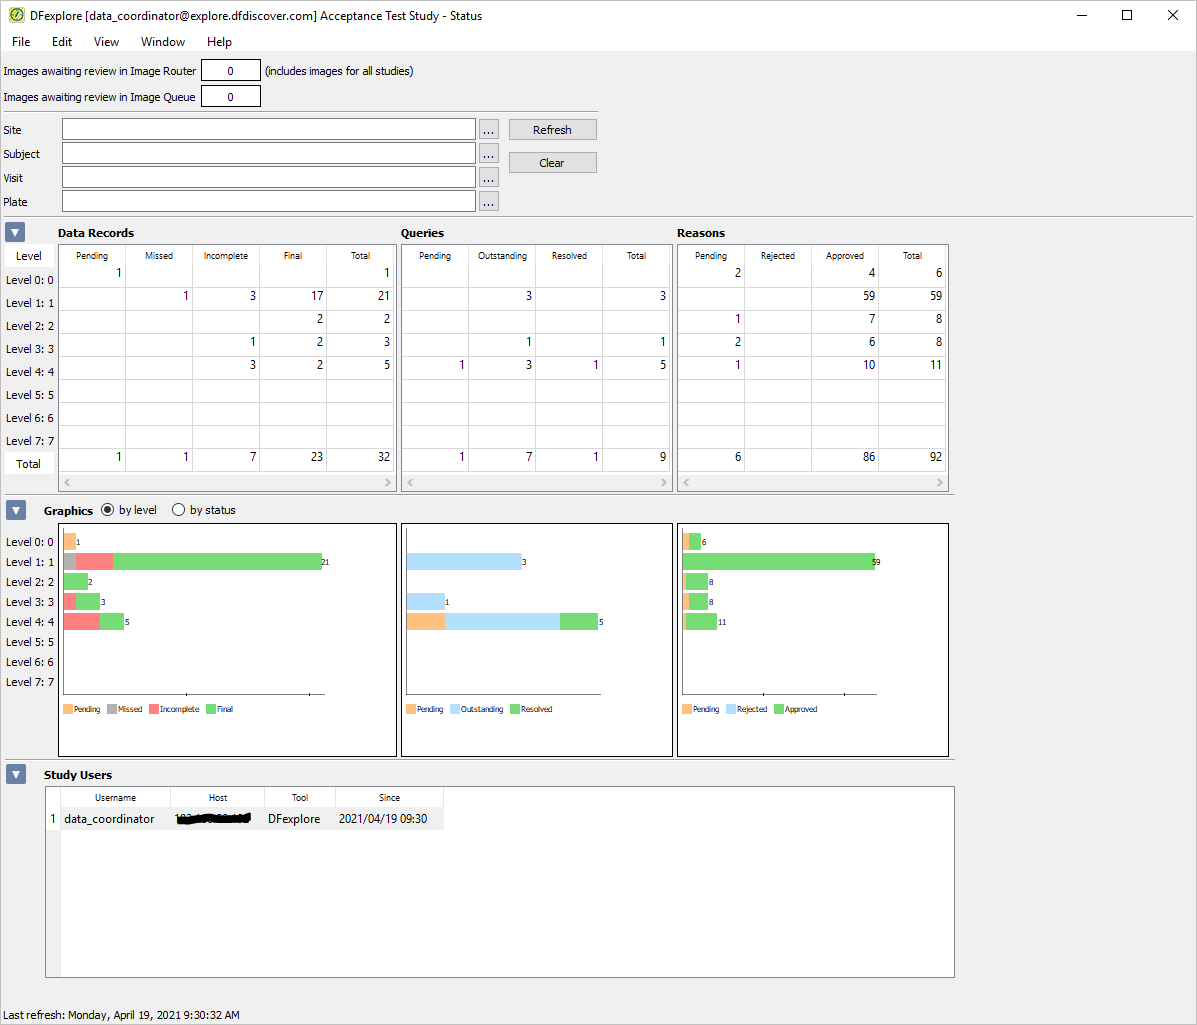
-
Open the Graphics section and select the toggle button for by status. Confirm the count of Pending and Outstanding queries.
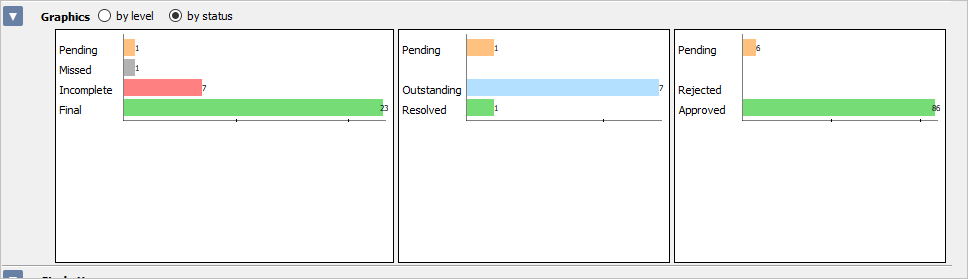
-
Select > . Select the Plates & Metadata tab.
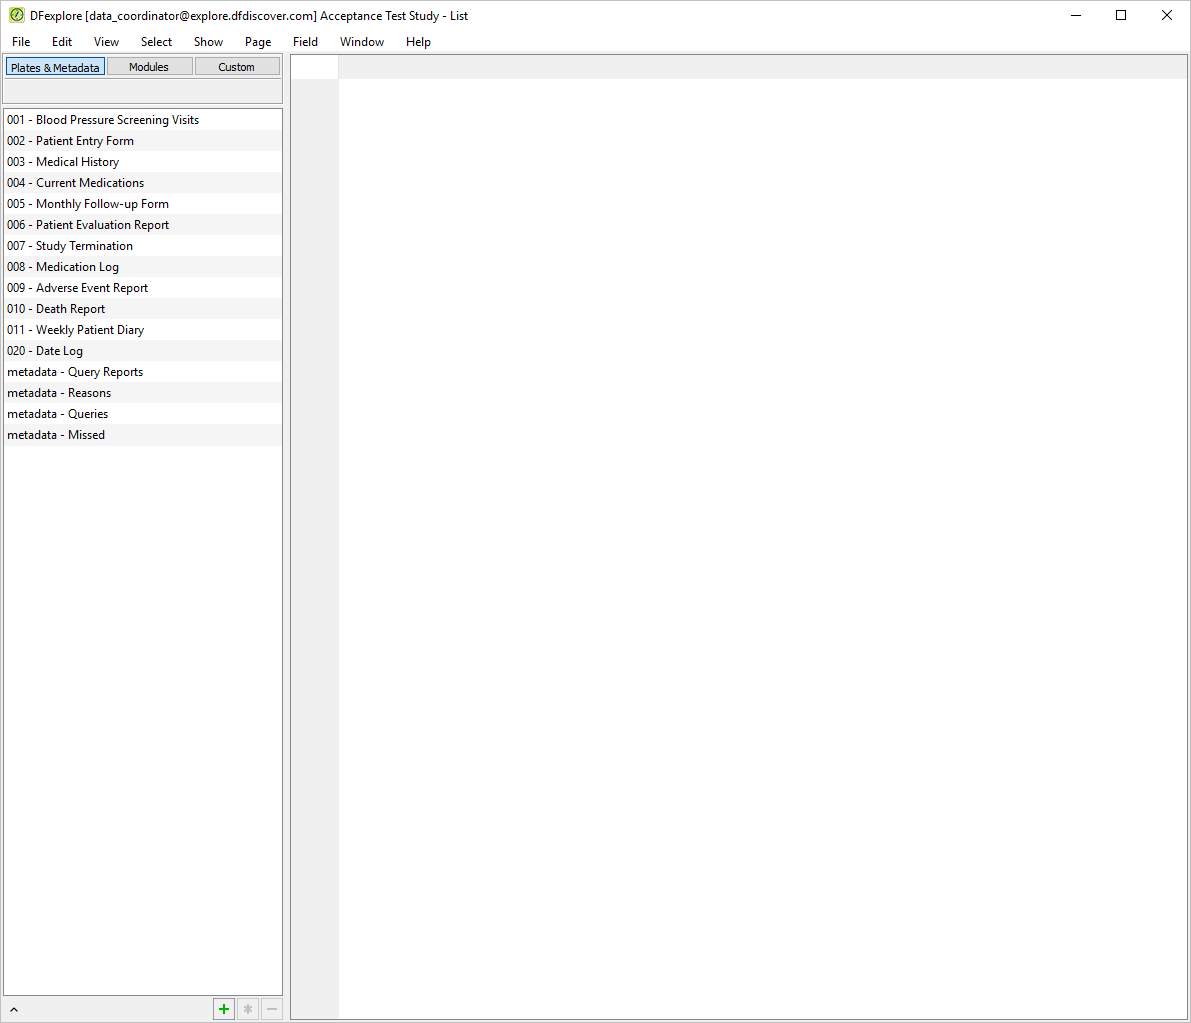
-
Click metadata - Queries to display information about database queries.
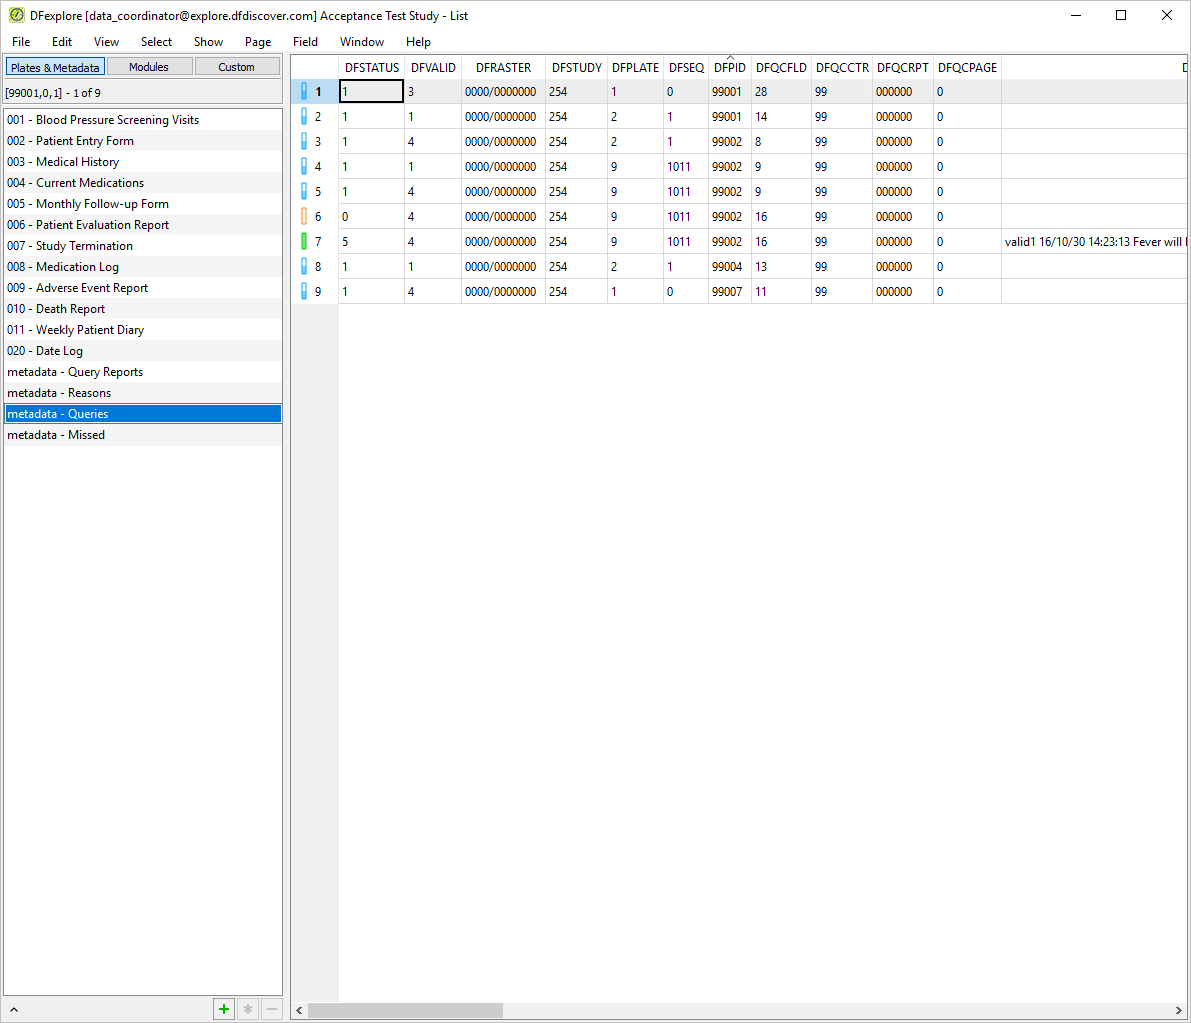
-
Select > to specify query search criteria. In the search dialog, check (enable) the Usage = external, click to update the dialog with details and a count of external queries.
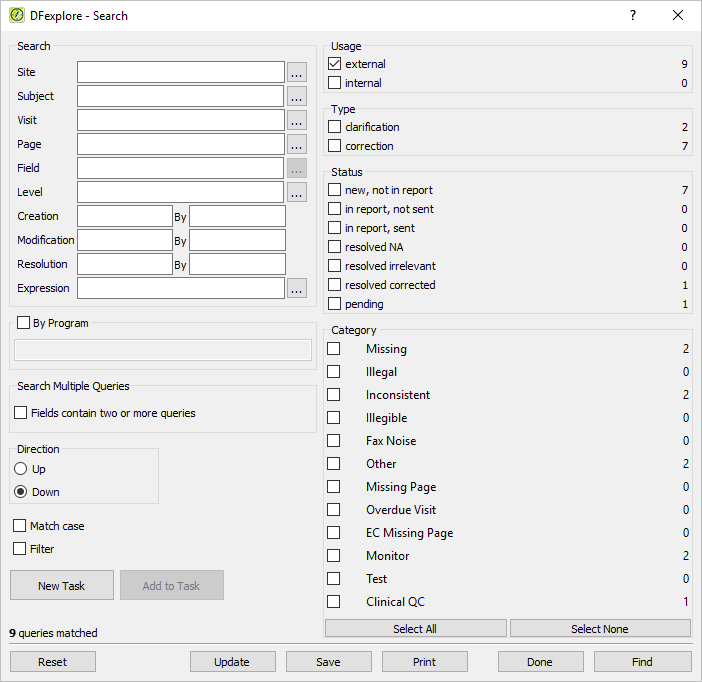
-
Click to close the Search dialog.
-
Double-click
DFdiscover ReportsthenLegacy Reportslist by clicking. Select the report DF_XXkeysfrom the list. Click to view a detailed description of the report. As options do not exist for this report, click to executeDF_XXkeys.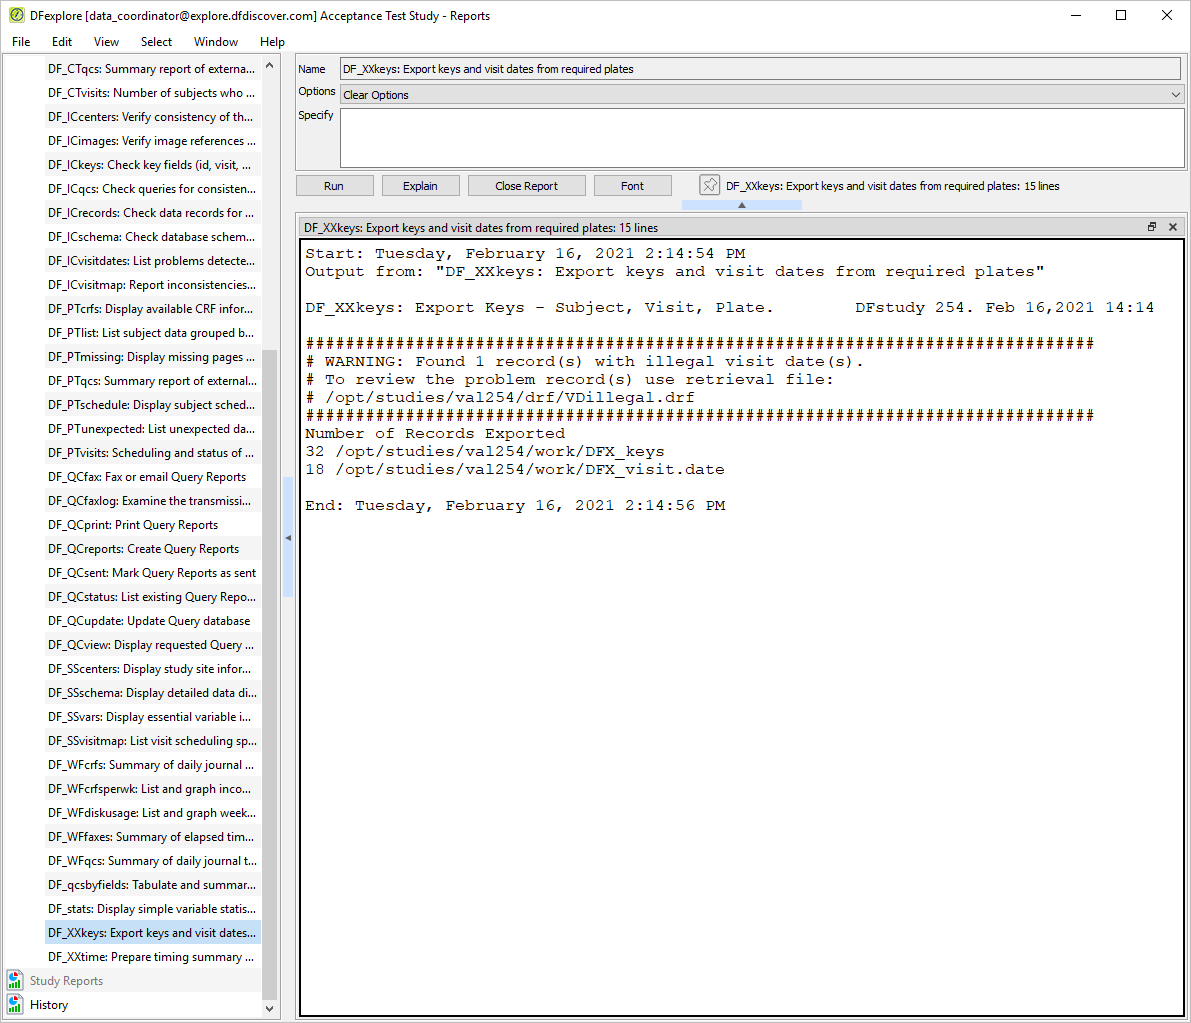
-
In Step 2,
DF_XXkeysdetected an illegal visit date. As indicated by the message in the reports window, a data retrieval file calledVDillegal.drfwas created. This file contains the plate(s) on which the illegal visit date was detected, and can be reviewed and edited in Data View. Click to close the report output window. Select > to change to Data View.
-
To review the data retrieval file created in Step 2, select > . In the retrieval file dialog, set:
Mode = Validate
Save level = 1 - Level 1
Check (enable) Enable edit checks
Select file from = study server
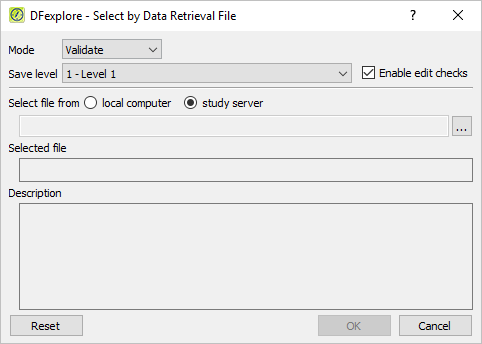
-
To locate the data retrieval file
VDillegal.drf, click next to Select file from. In the file selection dialog, choose the fileVDillegal.drf, then click .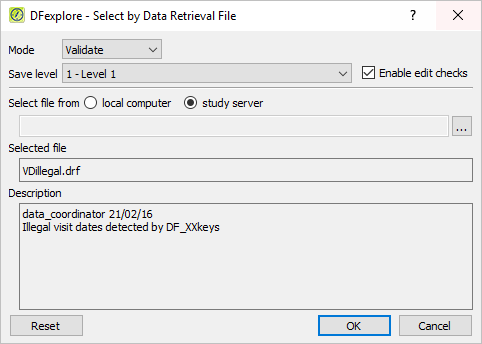
-
Click in the dialog. Click in the resulting confirmation dialog to retrieve all data records having illegal visit dates.
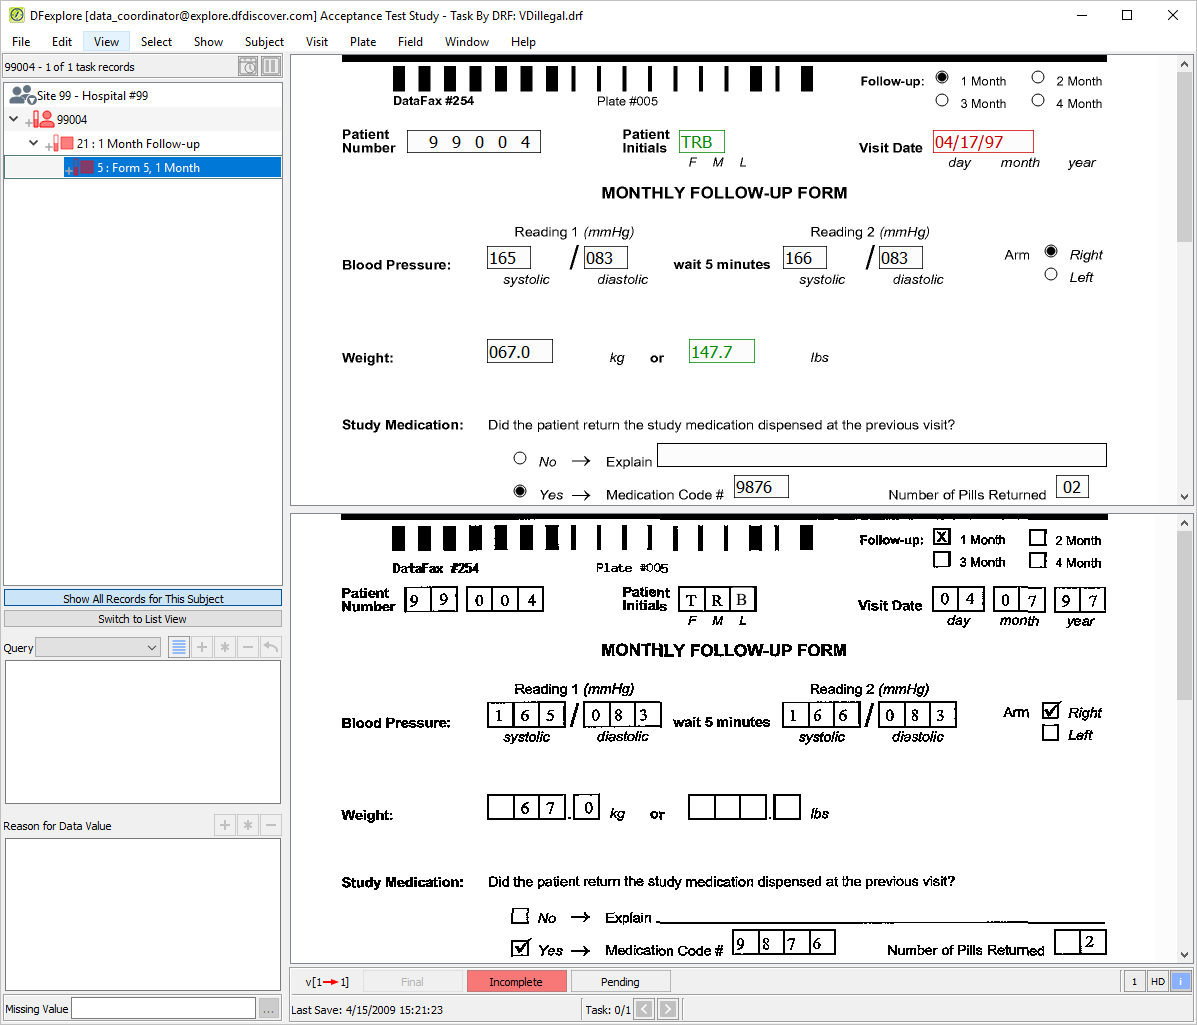
-
Click anywhere in the page to make it active for data entry. Starting with the Follow-up choice field, press Tab to advance to the Visit Date. The Visit Date value has been entered as
04/17/97(an illegal date), rather than04/07/97as shown on the CRF image. Enter the correct date and press Tab to exit the field. -
As problems no longer exist on the corrected page, the page can be saved with a status of Final. Click to save the page.
-
Select > , click . Select > to return to Reports View. Again choose the report name
DF_XXkeysfrom the list and click . Confirm that the output no longer reports illegal visit dates.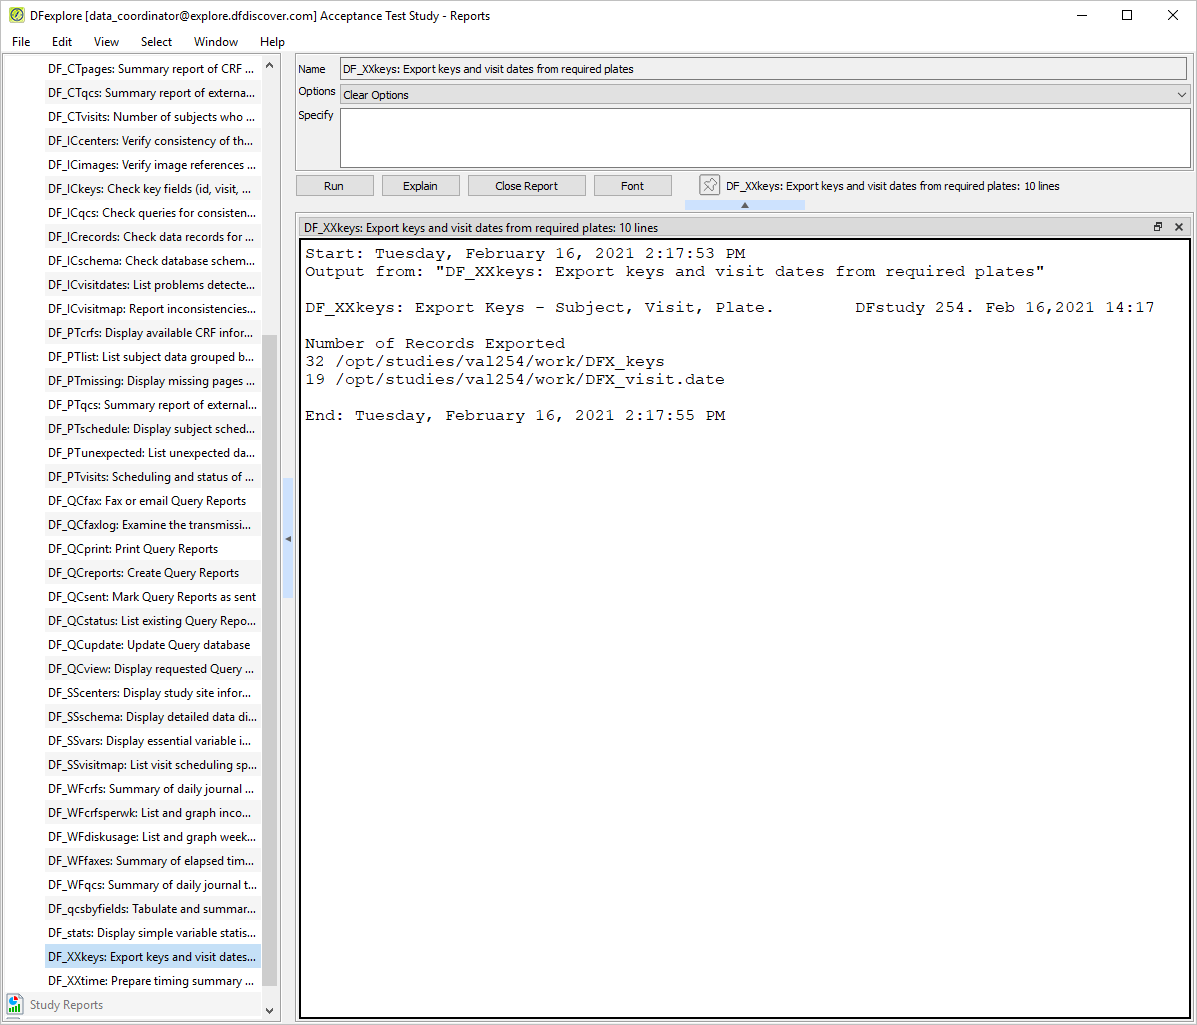
-
Choose
DF_QCupdatefrom the list of Legacy Reports and click to view a report description. Do not enter any options in the Specify field and click to update the Query database.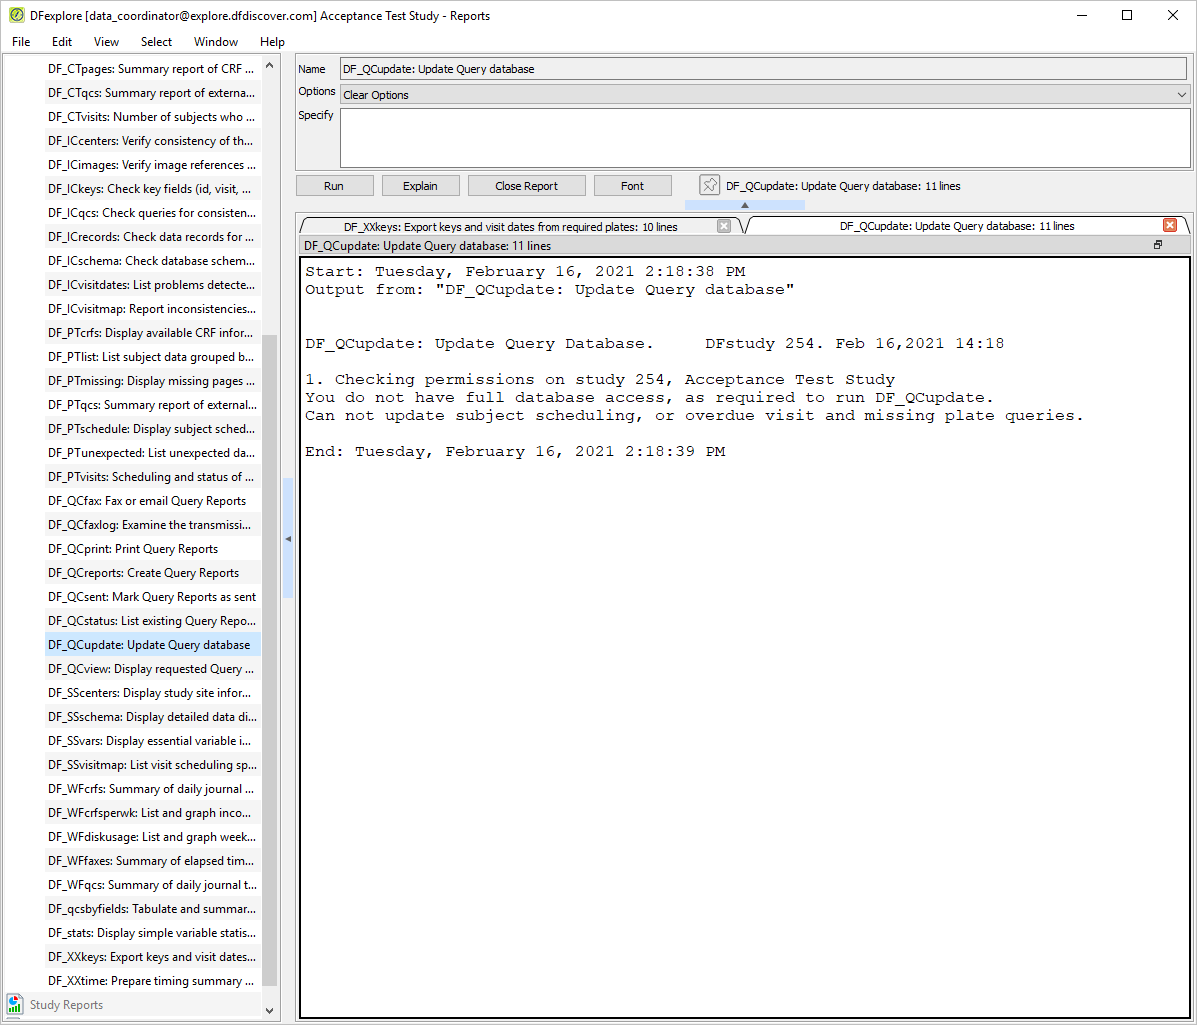
-
A user requires unrestricted permissions to execute DF_QCupdate. As user
data_coordinatoris restricted to database Modify and Write levels of 0-4 (as set in Chapter 1, Module 1. Installation and Initialization), it is not possible to execute DF_QCupdate successfully. Click > to close DFexplore. -
Start DFexplore, login as user
data_manageras described in Section 12.3, “Obtain database query metrics and details using Status and List Views to review all outstanding queries prior to query report creation.”. -
Select > .
-
Double-click DFdiscover Reports, expand Legacy Reports by clicking
. Choose DF_QCupdate from the list of reports. Click to execute DF_QCupdate with the correct permissions.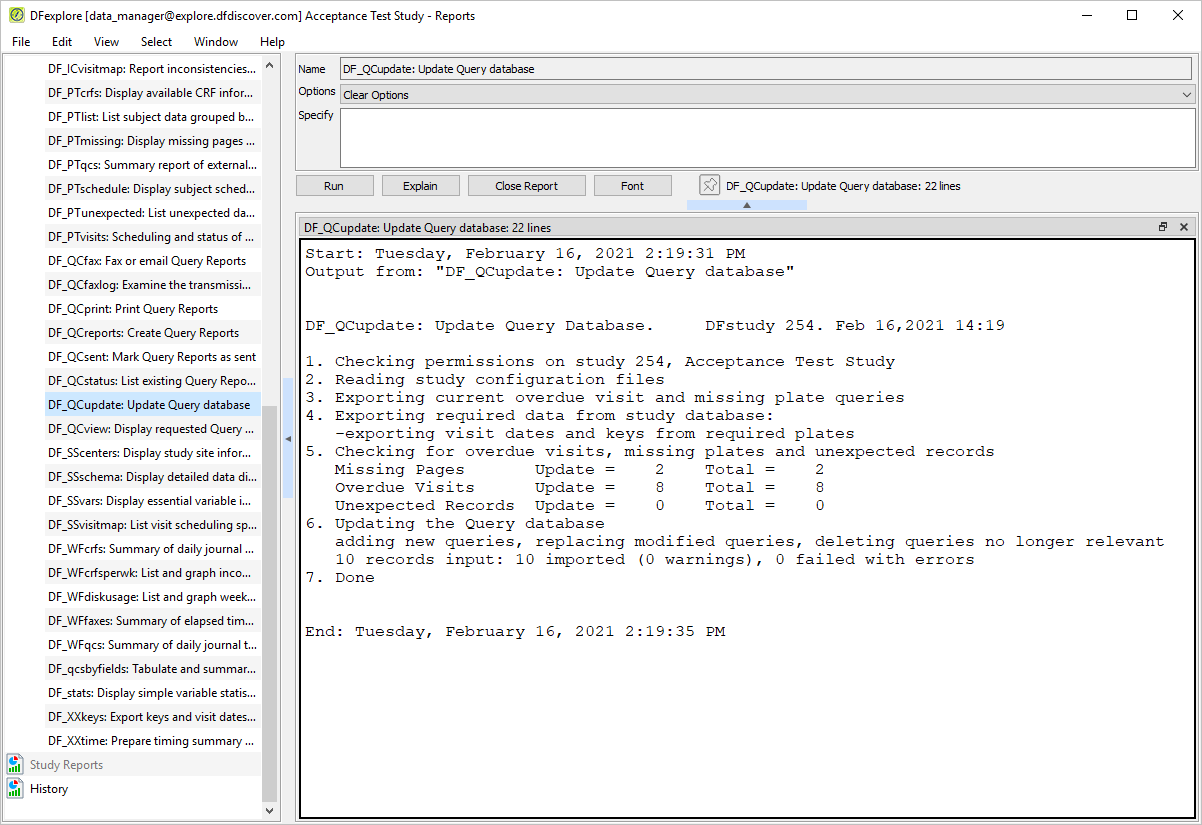
-
Choose DF_QCreports from the list of Legacy Reports and click to view a report description.
-
Do not enter any options in the Specify field so that a complete query report is generated. Click to execute DF_QCreports.
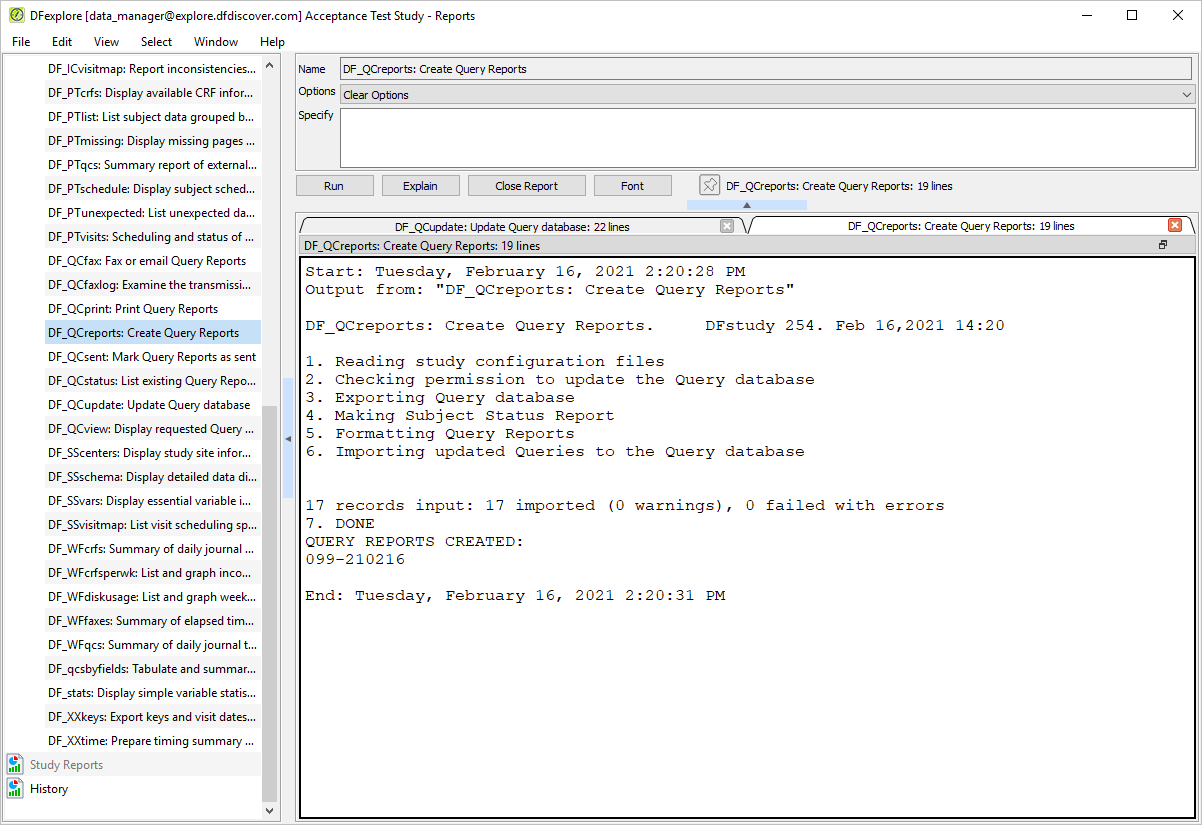
Note DFdiscover report numbers are comprised of a site number followed by the date of report creation (as yy/mm/dd). The two are separated by a hyphen. Your Query report has been created for Site 99 and the date of creation is the date on which DF_QCreports was executed (i.e.today).
-
To print the output, select > . In the Print dialog, the Printer Name field contains the name of your printer. Click . Keep this printout to reference the query report number in Section 12.12, “Comparing several examples from the printed query report against their corresponding queries in the study database.”. Click to close the report output window.
-
Select > . Click to update the database counts. Examine the Queries table to view the status and count of all queries in the database.
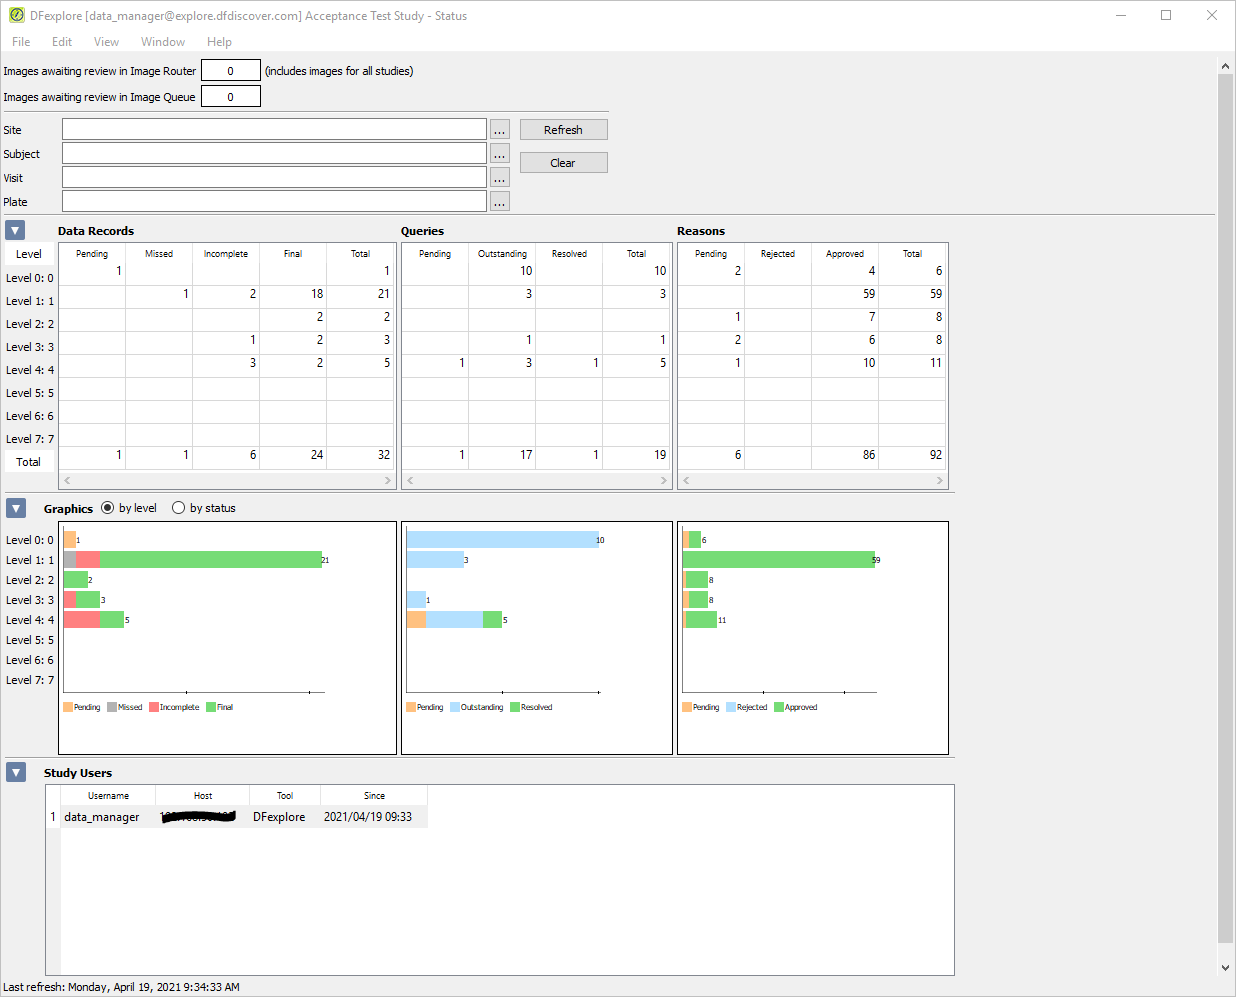
Note The counts in the Queries table have changed because the query database has been updated by the running of the report DF_QCupdate in Section 12.6, “Execute DF_QCupdate to update the query database and lock all records for query report generation.”. If applicable, DF_QCupdate will create new queries for missing pages and overdue visits based on the study scheduling information present in the study visit map files.
-
Click metadata - Queries to display information about database queries.
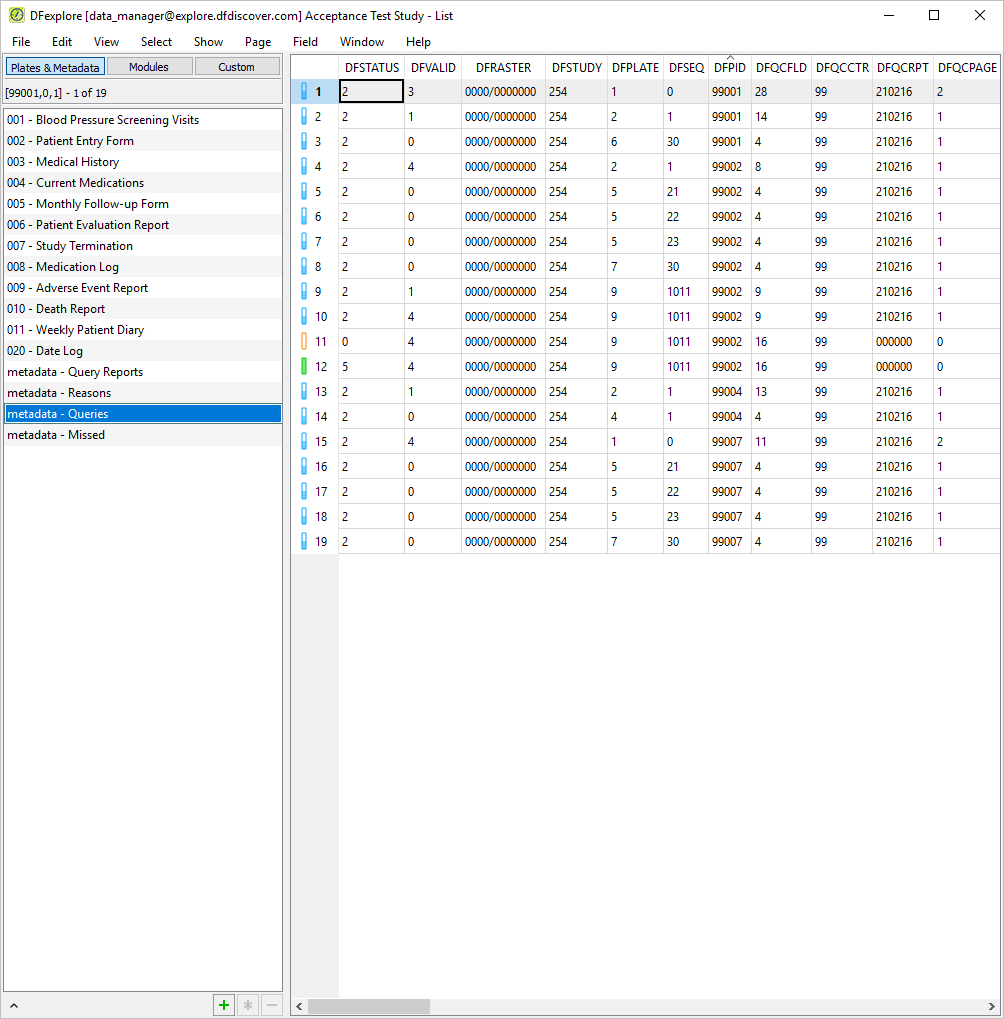
-
Select > to specify a set of query search criteria. In the resulting search dialog, select (enable) Usage = External and click to update the dialog with details and a count of external queries.
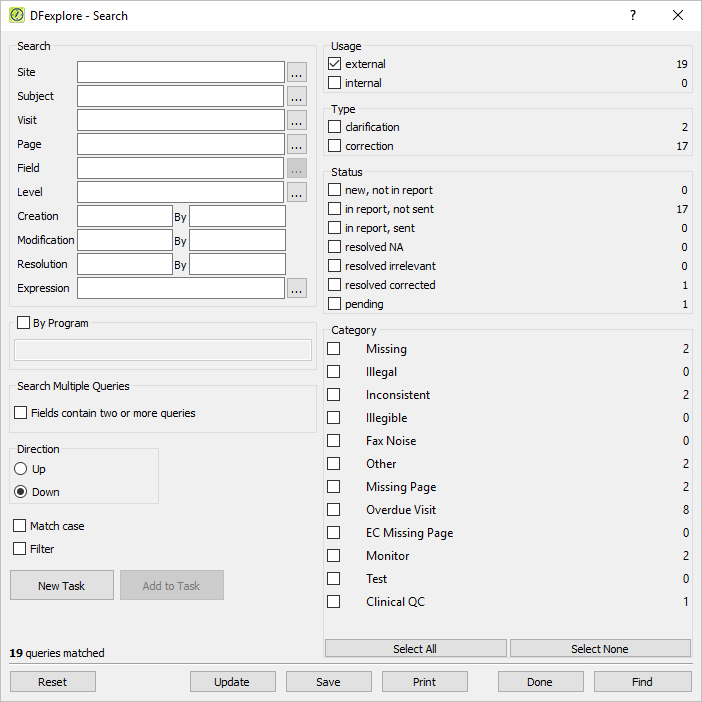
-
Click to close the dialog.
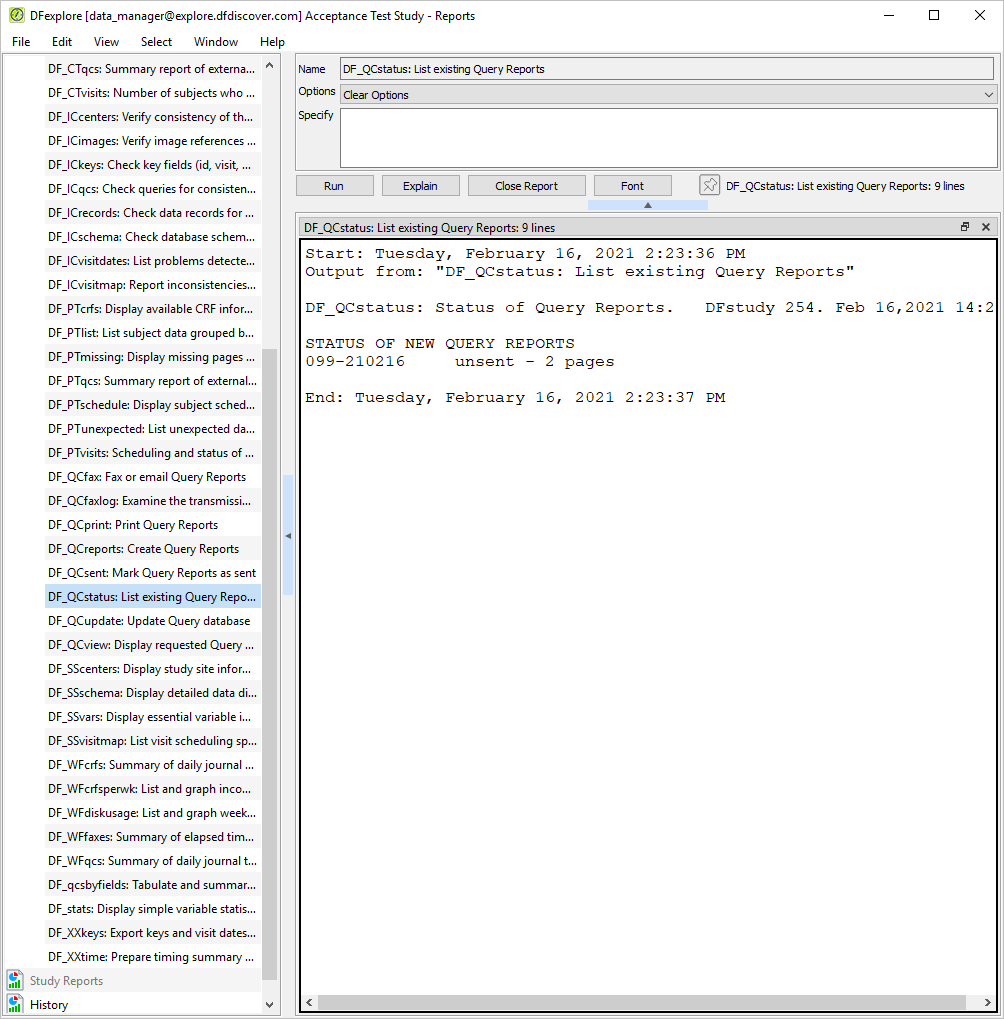
-
To display the query report created for Site 099 - Hospital #99, choose DF_QCview. Click to view a description of the report. As the report for Site 099 - Hospital #99 still resides in the QC/NEW directory (it has not yet been sent to the site), click to execute DF_QCview.
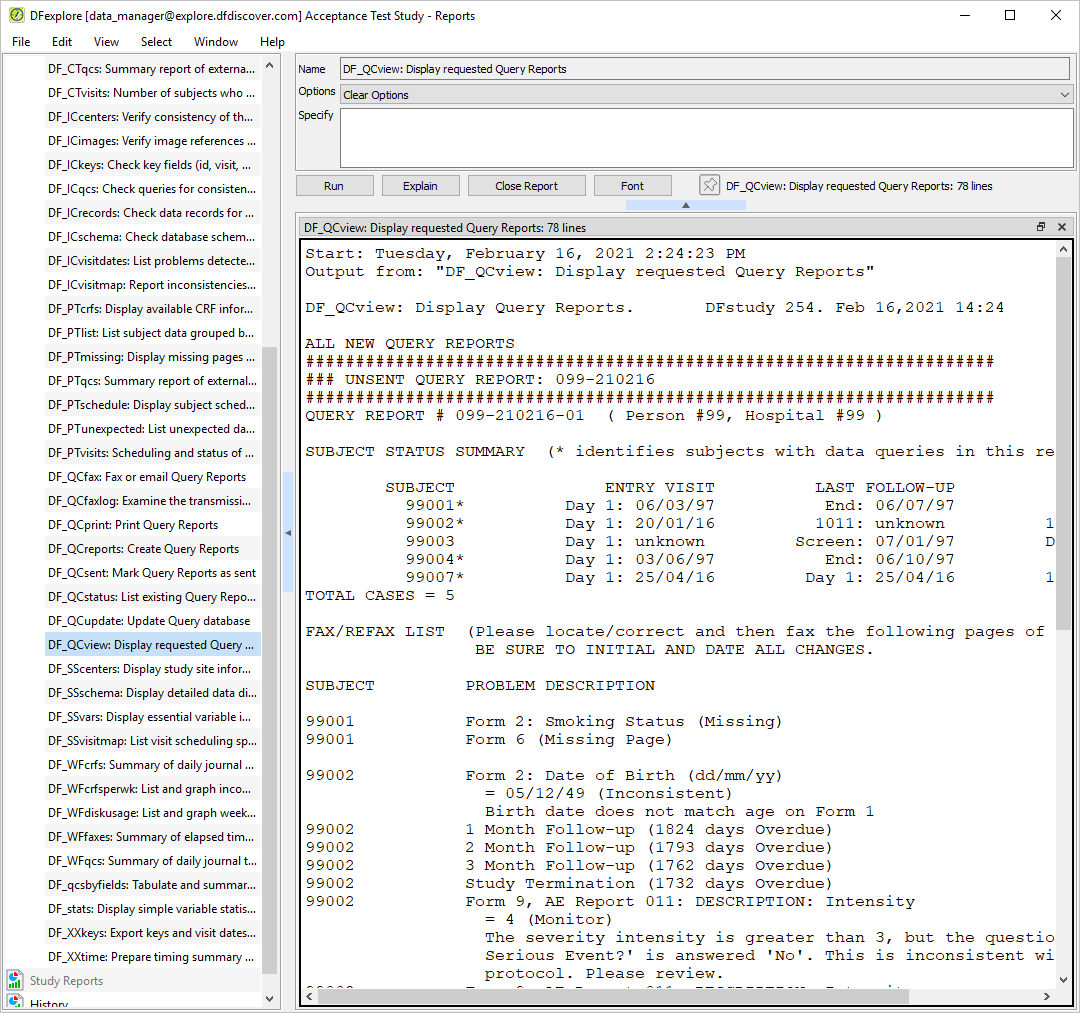
-
Click to close the report output window.
-
Print a copy of the query report for Site 099 - Hospital #99 by choosing DF_QCprint. Click to view a description of the report. Enter
-uin the Specify field. Click to execute DF_QCprint.number of your query reportNote If you do not have a printer connected to the DFdiscover server or if you are a hosted client, the query report will not be printed. Instead you can choose to print the query report displayed in the DF_QCview output window from the previous Step 1.
-
Click to close the report output window.
| Note |
|---|---|
For this test you will need to reference the query report printed in Section 12.11, “Execute DF_QCprint to print the query report from the QC/NEW directory.” to verify the information contained in the report against the study database. Three examples of queries will be verified in this test. You may choose to check the remainder of the queries yourself. |
-
In the printed query report, find the entries for patients 99002 and 99004 in the FAX/REFAX section of the report. For patient 99002, locate the entry for Form 9, AE Report 011 having multiple queries in the Intensity field. For patient 99004, locate the entry for Form Number 4, Pg 1 having the category “Missing Page”. Form 4 corresponds to Plate 4 in the database. Now locate the entry for Form Number 2, having the category “Pulse beats/minute (Missing)”. Form 2 corresponds to Plate 2 in the database.
-
Select > . In the dialog, set:
Mode = View.
Subject =
99002,99004Plate =
2,4,9Level =
1-7
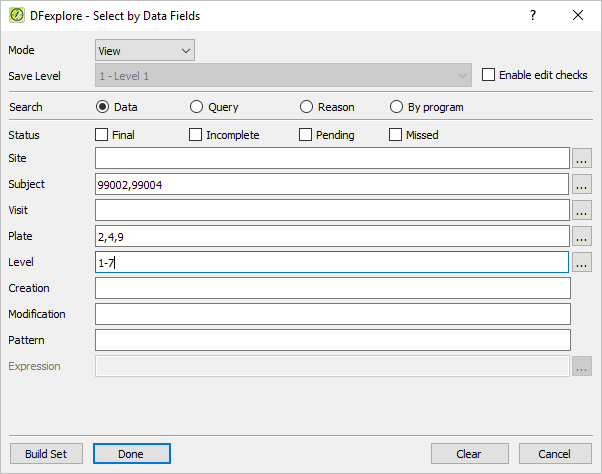
-
Click then to apply the record selection criteria and retrieve the applicable pages.
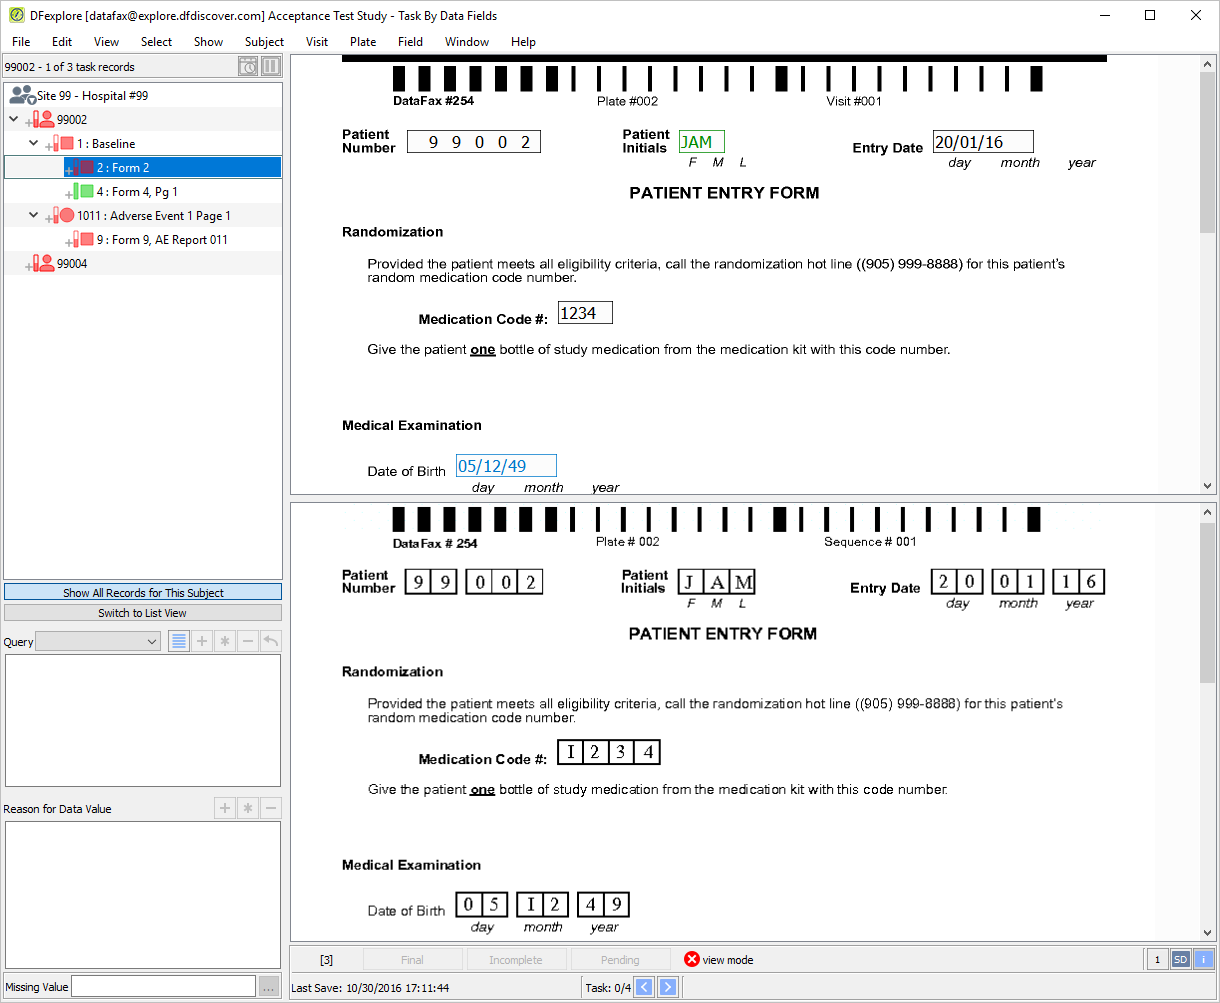
-
Highlight the 9: Form 9, AE Report 011 page in the record list. Press Tab to advance through the fields until Intensity becomes the current field. Confirm that this field is blue and the query count “2” is displayed on the field widget. Examine the Query window to view the details of the queries. Verify that the information in the Query window is consistent with the corresponding printed Query report.
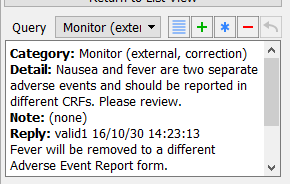
-
In the record list, double-click entry for subject 99004.
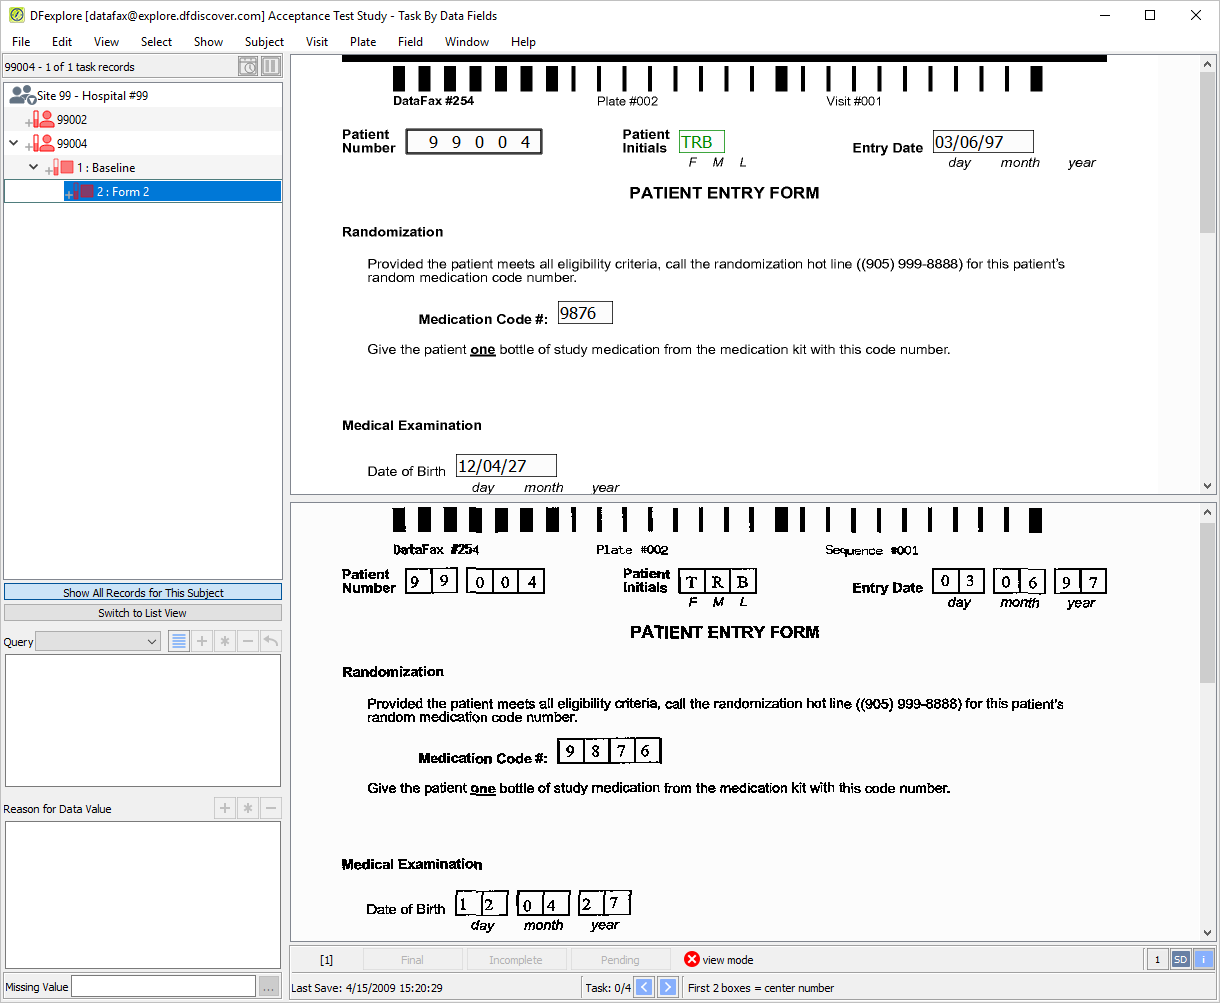
-
Press Tab to advance to the Pulse field to make it the current field. Verify that the field is blue (indicating that an outstanding query exists). Examine the Query to view the details of the query.
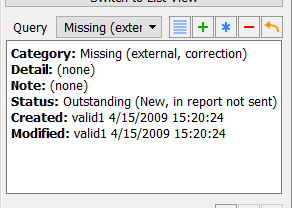
-
Examine the record list for the entry for Form 4 for Subject 99004 (identified as a Missing Page on the query report).
-
Select > . Confirm the settings:
Mode = Modify
Save level= 1 - Level 1
Enable (check) edit checks
Click to release the task set and display all records in the database.
-
Choose DF_QCfax and click to view a description of the report. Send the query report generated in Section 12.7, “Execute DF_QCreports to create a standard, 3-part external query report for a study site.” to a valid email address. Enter
-f mailto:user@localhostin the Specify field, substituting “user@localhost” with your email address as defined on your mail system. Click to execute DF_QCfax.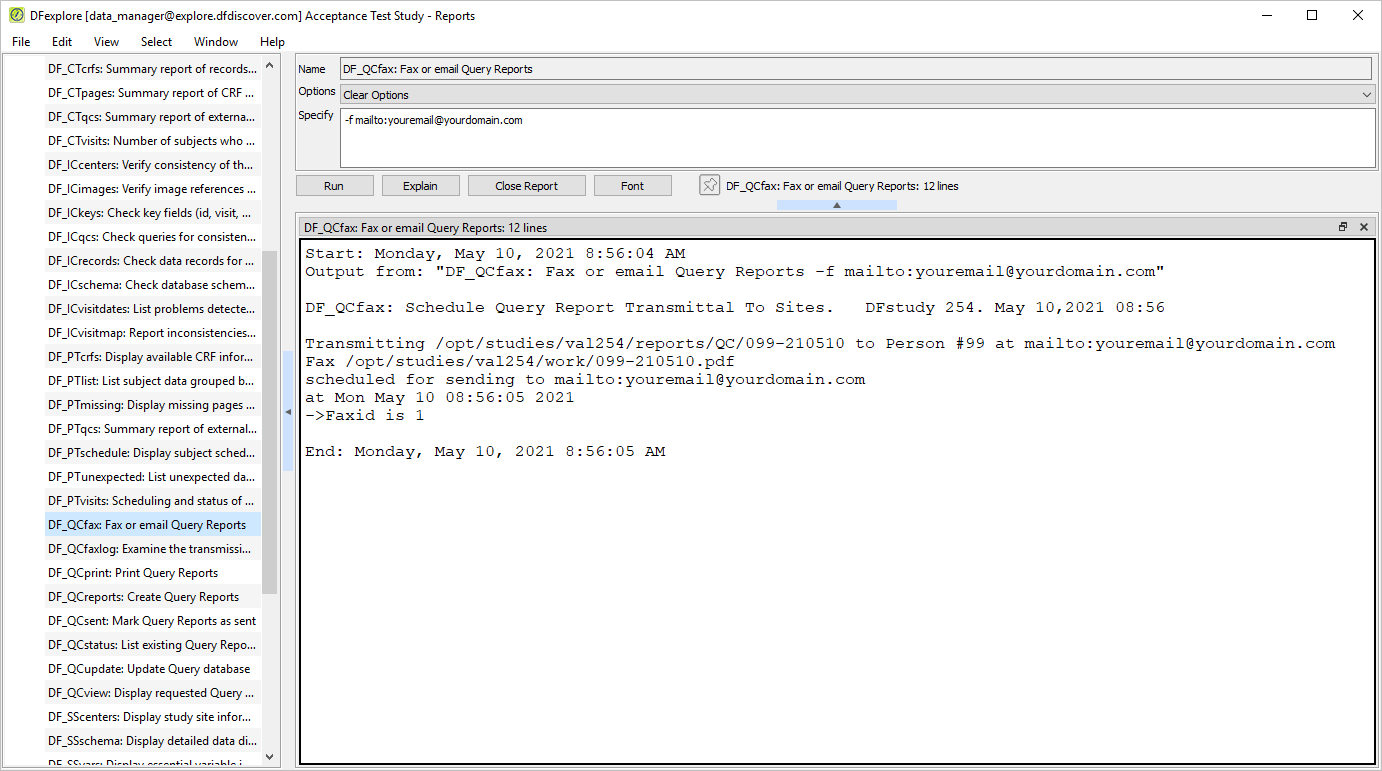
-
Wait for several minutes, then check the recipient's email account for the arrival of the query report emailed in Step 2. Once the report has arrived, click to close the report output window.
-
Select > . Click to update the database counts. Examine the Queries table to view the status and count of all queries in the database.
Note The counts in the Queries table are the same as those in Step 1 because queries have been sent to the site but not resolved.
-
Select > , and click Plates & Metadata.
-
Select > . Click List View to expand that sub-panel and enable Label for Display coded field as. Click . To display information about database queries, click metadata - Queries.
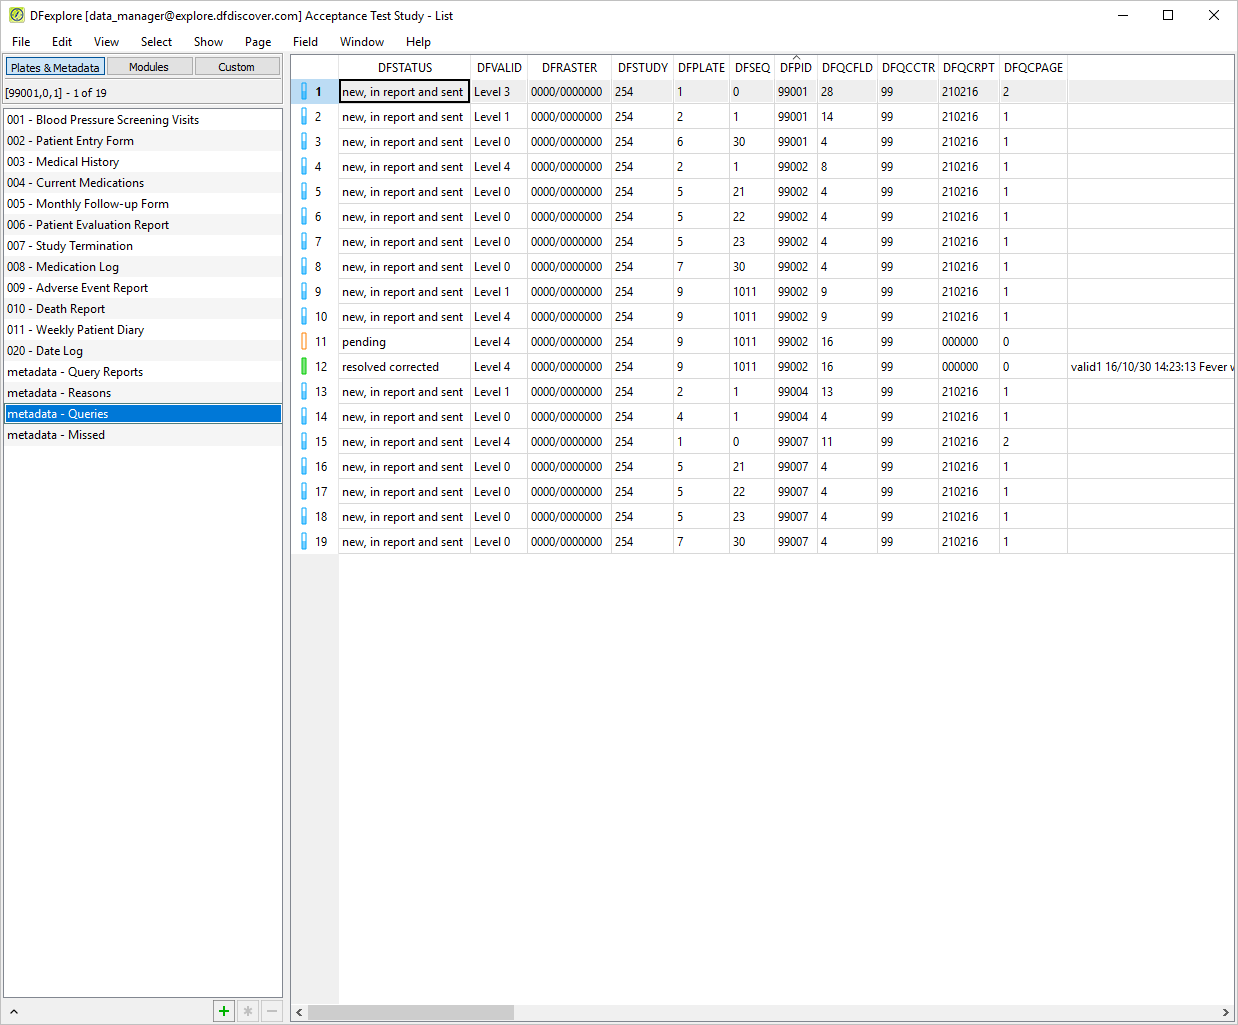
-
Select > to specify a set of query search criteria. In the resulting search dialog, select (enable) Usage = external. Click to update the dialog with details and a count of external queries.
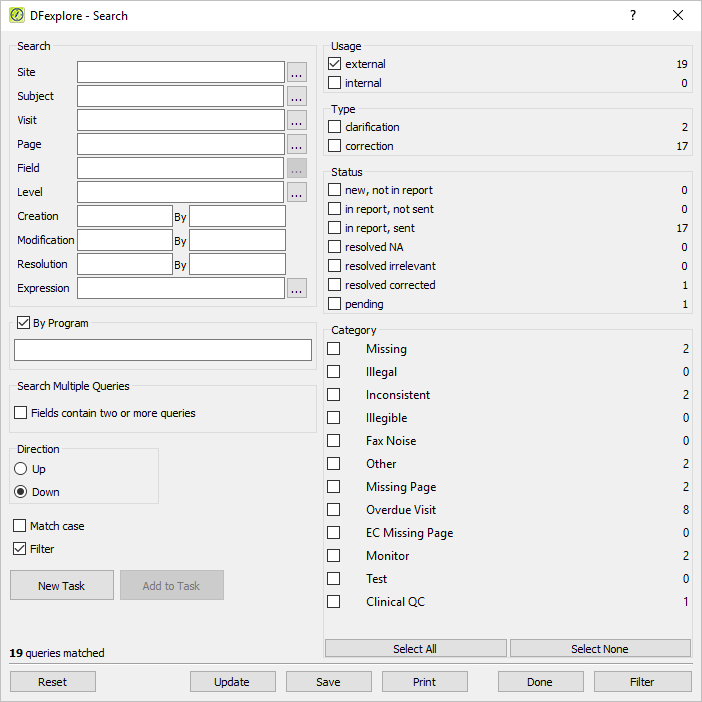
-
Click to close the Search dialog.
-
Select > to close and exit DFexplore.
Table of Contents
- 13.1. Tests & Requirements
- 13.2. Begin Module 13. Replying to EDC Queries, eSignatures.
- 13.3. Determine a count of outstanding/outstanding queries in Status View.
- 13.4. Review outstanding queries in Queries View.
- 13.5. Using EDC, locate and reply to outstanding clarification queries.
- 13.6. Add an Electronic Signature (eSign) to a set of completed subject records.
- 13.7. Verify removal and Re-applicaton of eSignatures.
- 13.8. End Module 13. Replying to EDC Queries, eSignatures.
-
Determine a count of outstanding/outstanding queries in Status View.
-
Review outstanding queries in Queries View.
-
Using EDC, locate and reply to outstanding clarification queries.
-
Add an Electronic Signature (eSign) to a set of completed subject records.
-
Verify removal and Re-applicaton of eSignatures.
Estimate of Time Required: 30 Minutes
-
Start DFATK as described in Module 1 (Installation & Initialization) .
-
Click followed by to begin this module.
-
Start DFexplore, login as
site_monitorand choose 254 Acceptance Test Study as described in Section 1.7, “How to start DFexplore” . -
Select > . Examine the Queries table to view the status and count of all queries.
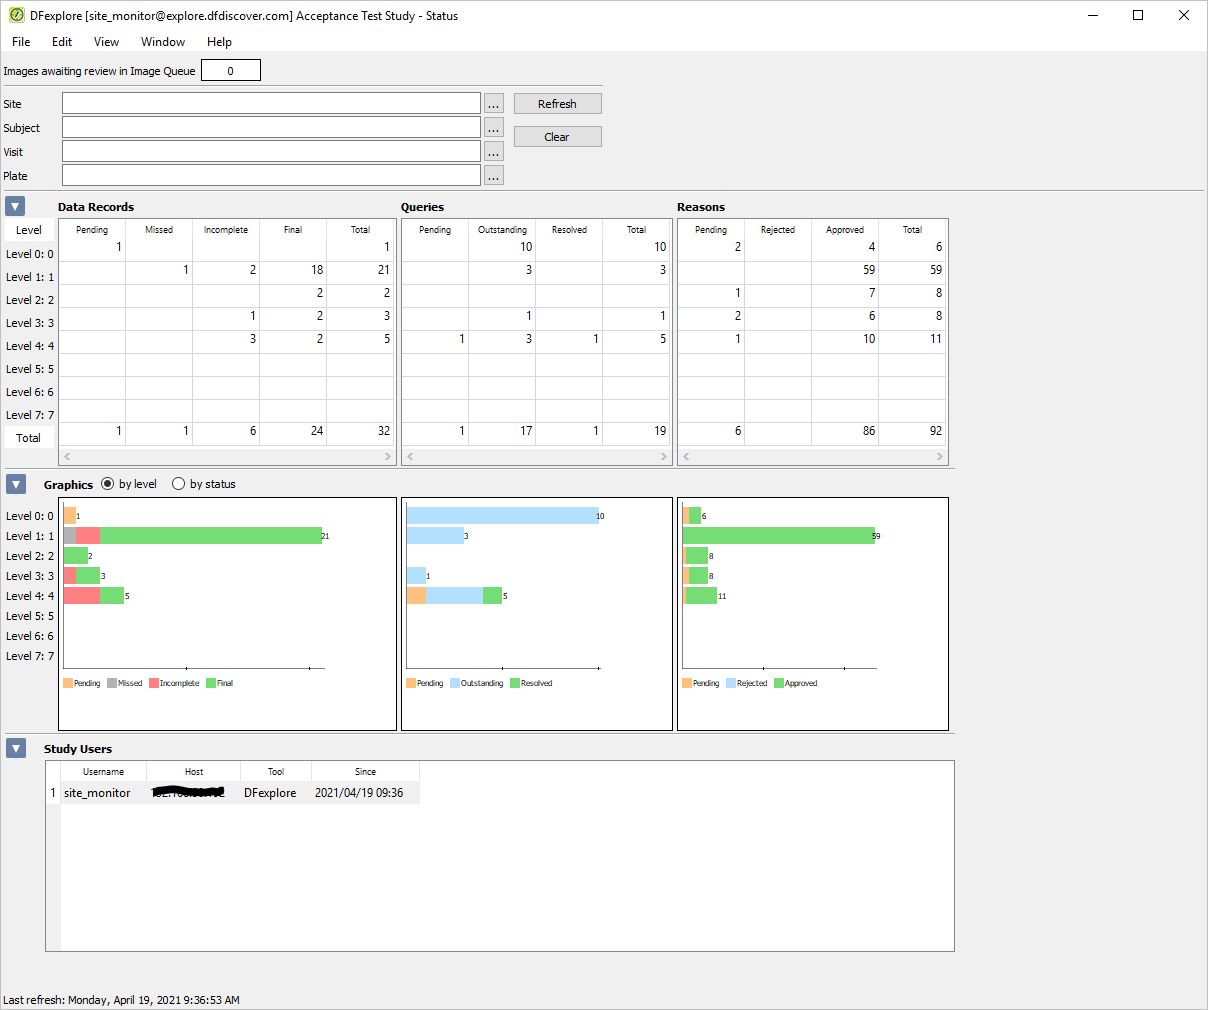
-
Locate the Outstanding column that displays a count of 17 in the Total row. Double-click 17 to retrieve the records containing the 17 outstanding queries.
-
In the Database Status task Specification dialog set:
-
Mode = Validate
-
Save level = 1 - Level 1
-
Check (enable) Enable Edit checks
-
Search queries and open check (enable) Queries View?
Click to display a dialog confirming the retrieval. In the confirmation dialog, click to open Queries View .
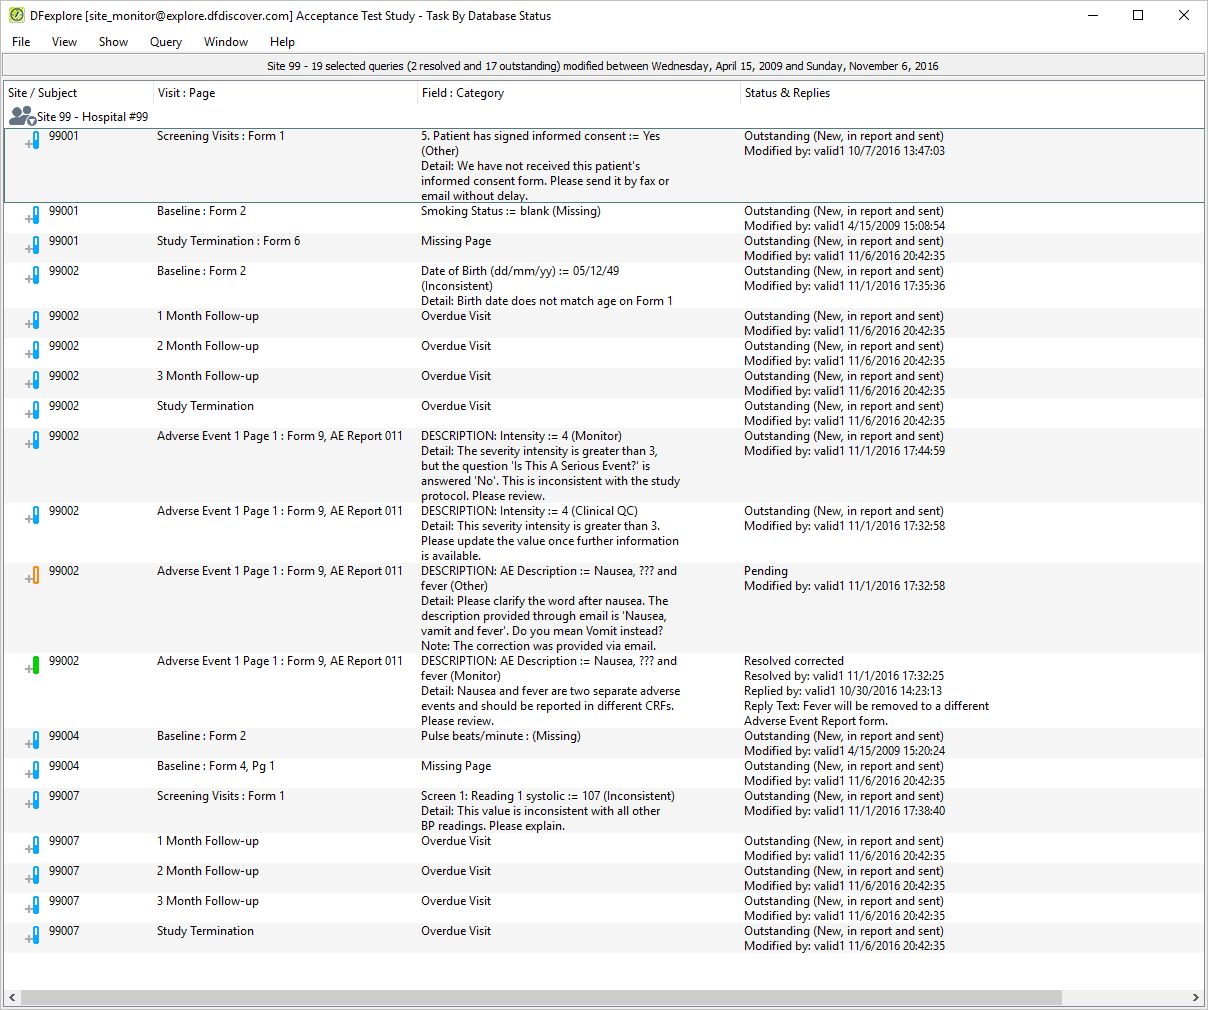
-
-
Select > to verify that you are seeing only outstanding queries for subjects in Site 99 - Hospital #99 .
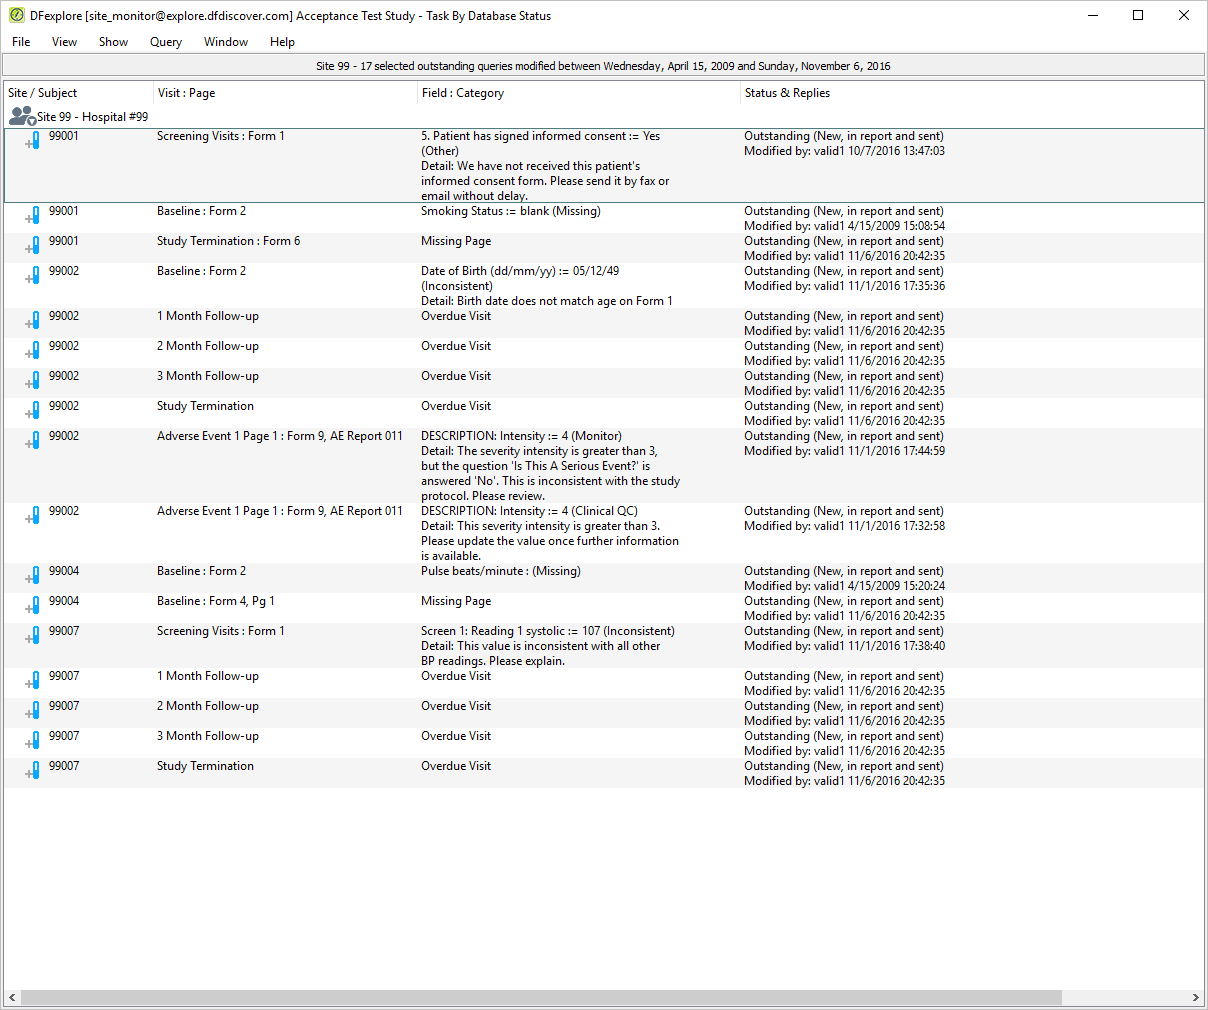
-
Examine Queries View to confirm:
-
The Status & Replies column displays Outstanding (New, in report and sent) for all queries.
-
An entry exists for Subject 99001 , Screening Visits Form 1, 5. Patient has signed informed consent.
-
An entry exists for Subject 99007 , Screening Visits Form 1, Screen 1 Reading 1 systolic.
-
-
Locate the entry for Subject 99001, Screening Visits Form 1, 5. Patient has signed informed consent . Double-click the query to switch to Data View and make the queried page and field active. Examine the information present in the Query window.
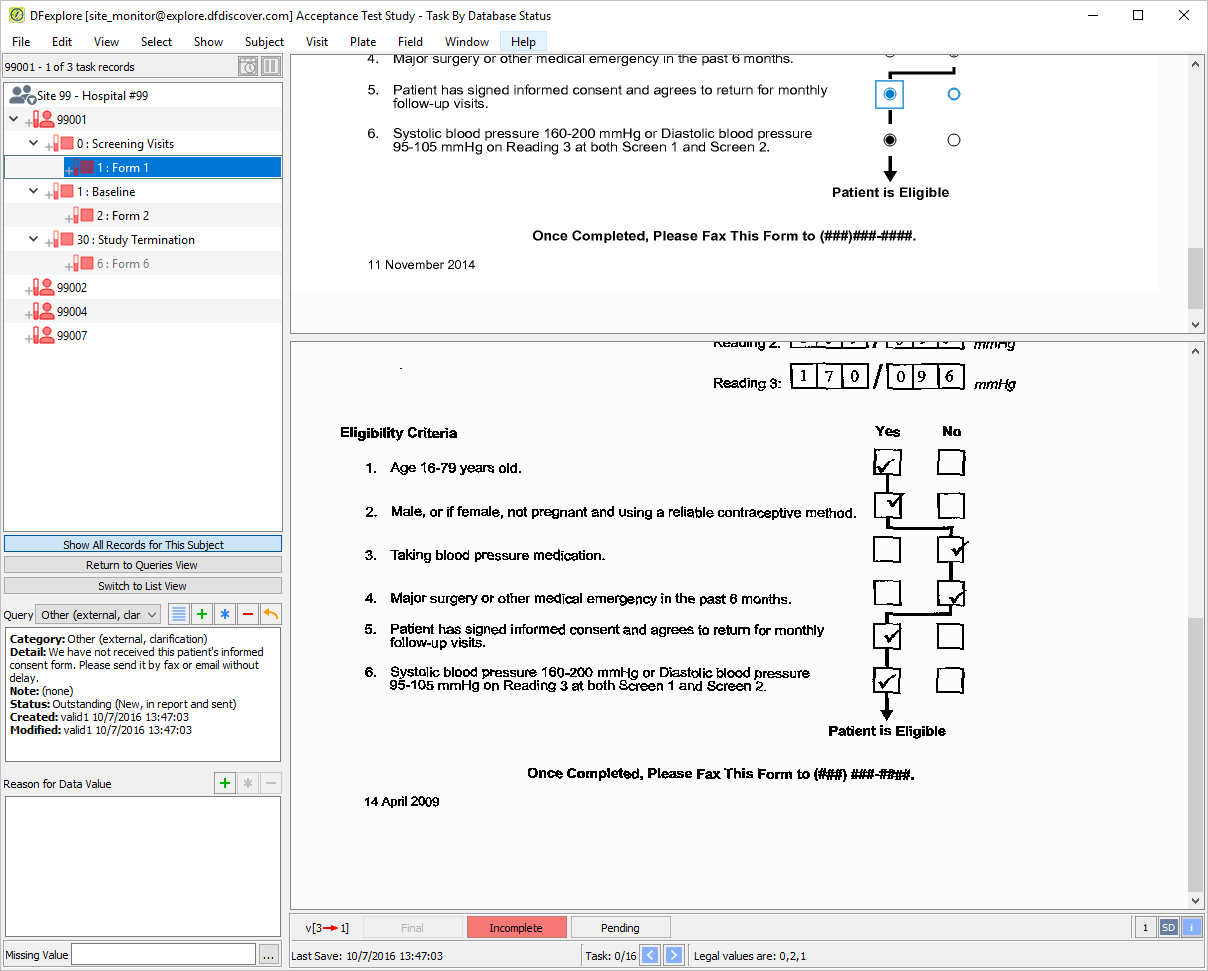
-
Select > or click
 . In the dialog, enter
Informed consent was sent to study coordinator by email on March 20.in the New Reply field.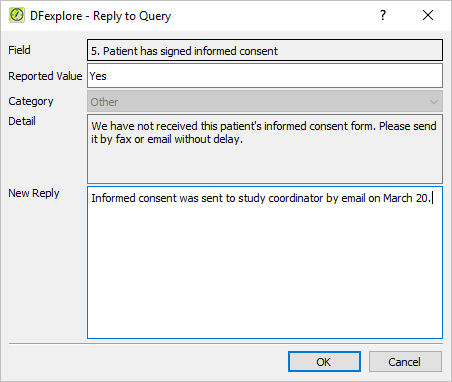
-
Click to apply the reply to the queried field. Examine the information present in the Query window.
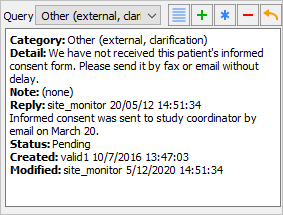
-
Do not enter or change data in any of the remaining fields on the current page. Click to save the current page and the query reply to the database.
-
From the record list window, click . Examine the list of queries.
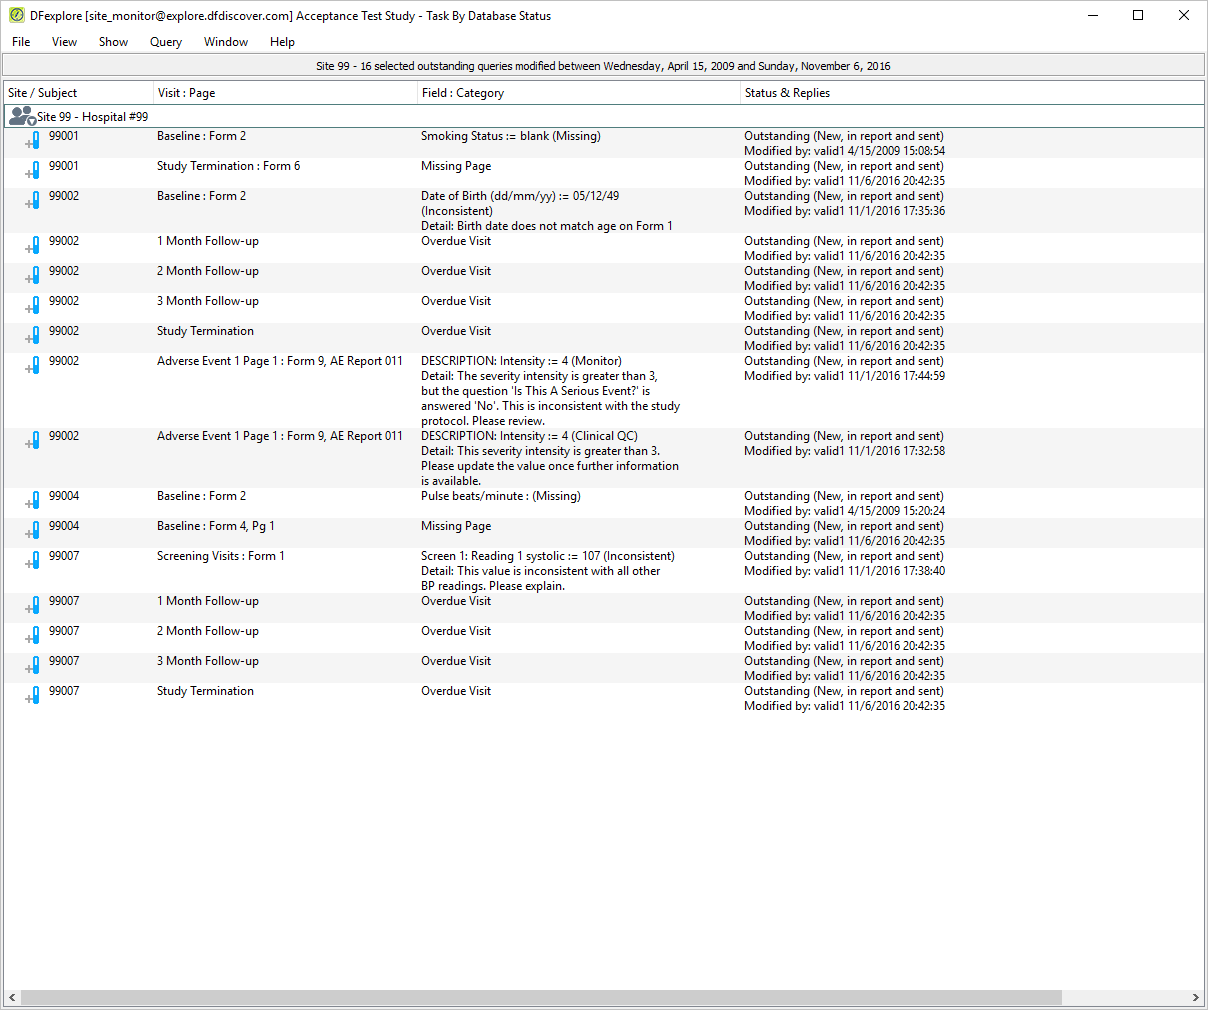
-
Locate the entry for Subject 99007, Screening Visits: Form 1, Screen 1: Reading 1 systolic. Double-click the systolic blood pressure query to switch to Data View and make the queried page and field active. Examine the information present in the Query window.
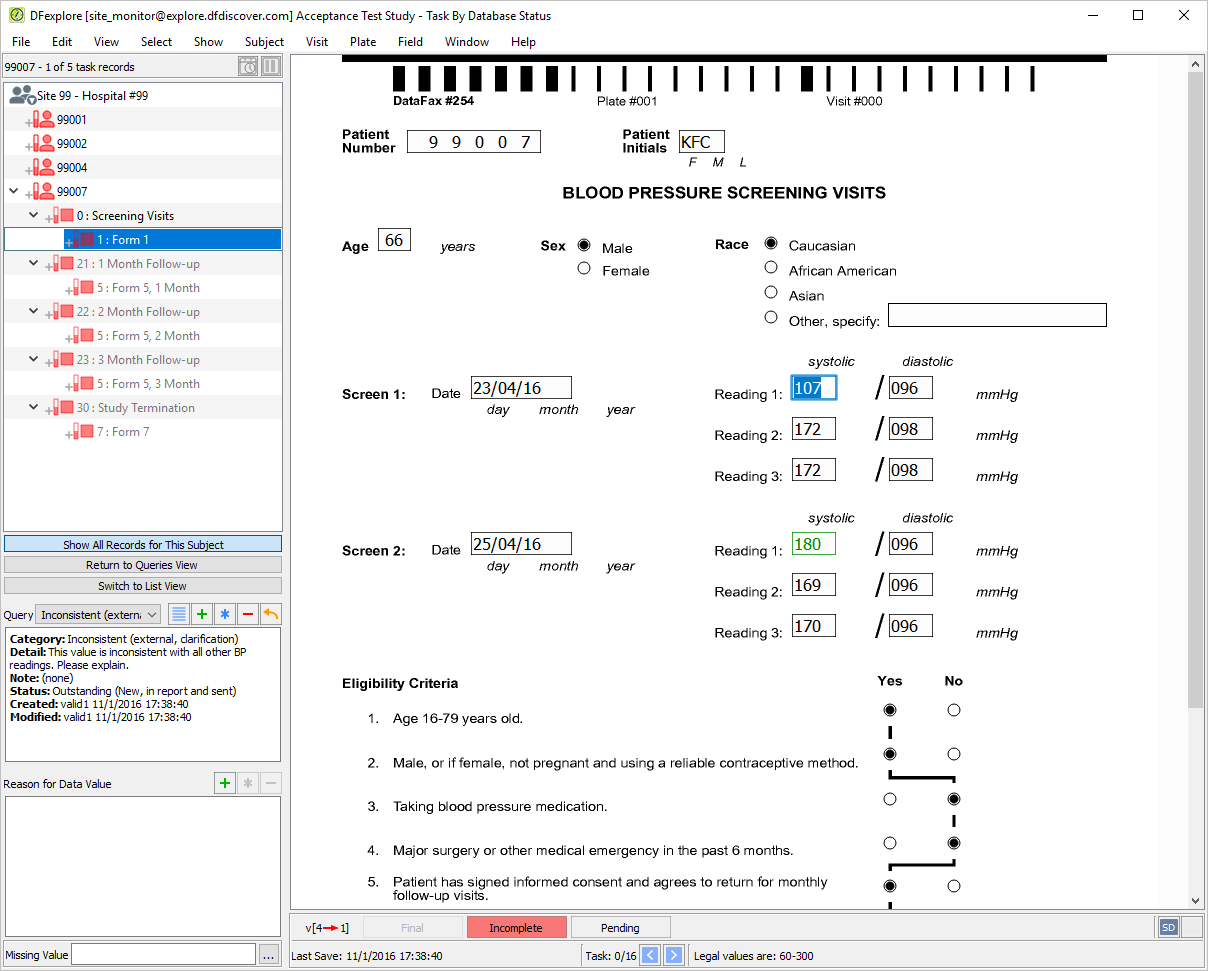
-
Select > or click
in the dialog, enter
Systolic reading was entered incorrectly. It should be 170.in the New Reply field.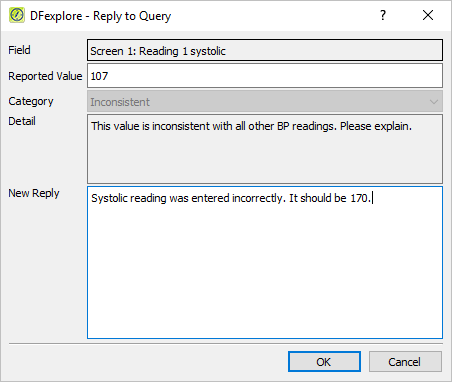
-
Click in the Reply to Query dialog to apply the reply to the queried field. Examine the information present in the Query window.
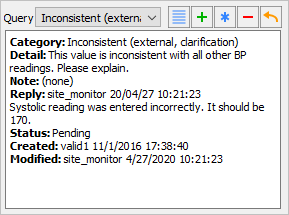
-
Click to save the current page and the query reply to the database.
-
Select > to close and exit DFexplore.
| Note |
|---|---|
|
eSignatures require password permission to be set in the user role at the DFadmin level. The Password permission must be granted for the specific eSignature plate. |
-
Start DFexplore, login as user
site_investand open the 254 Acceptance Test Study as described in ( Section 1.7, “How to start DFexplore” ). -
As user
site_investhas 2FA enabled, enter security code received by email as previously defined.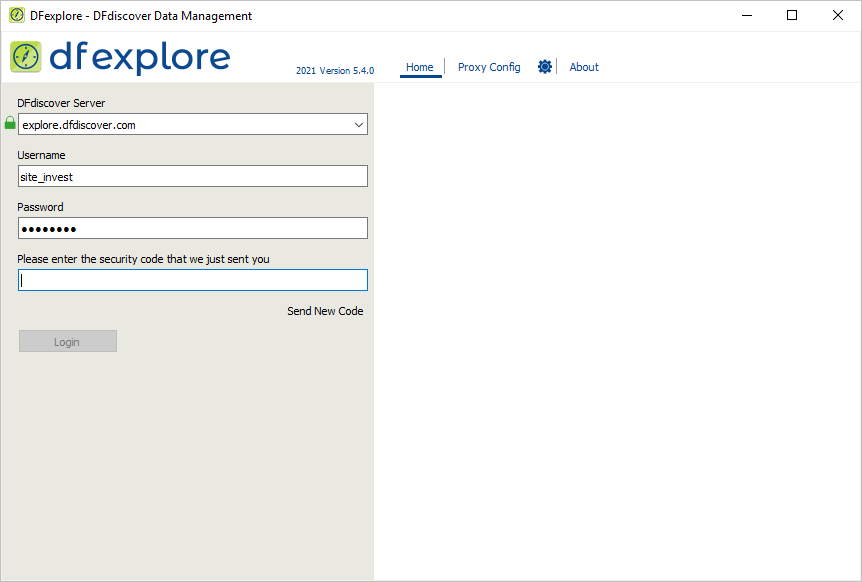
Note Refer to Section 1.8, “Creating user accounts and assigning study permissions.” as a valid email address is required for
site_investto receive 2FA codes. -
Select > , click Background Options to expand the preferences. Click Color > to apply the changes.
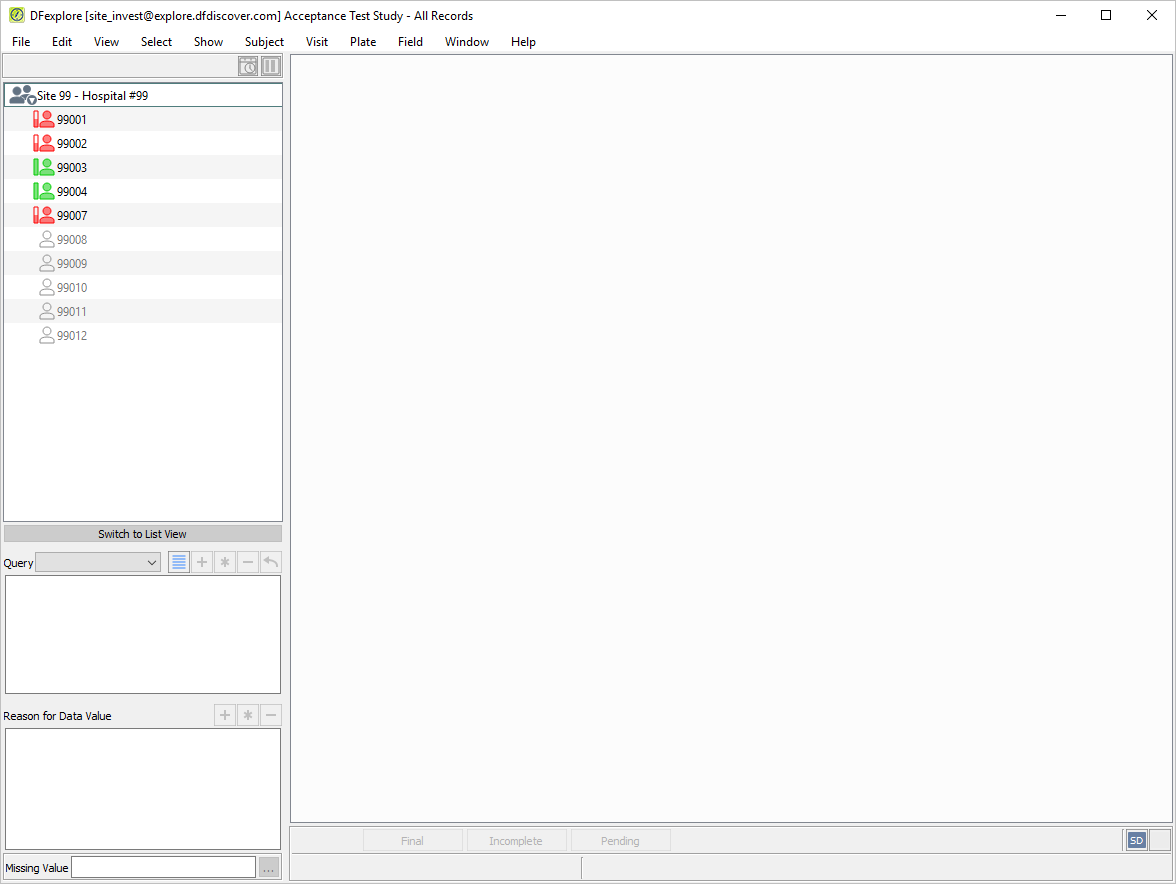
-
Locate subject 99003 , double-click its entry to expand a list of visits for Subject 99003 .
-
Double-click 30 : Study Termination . Select 7: Form 7 to open a new STUDY TERMINATION form.
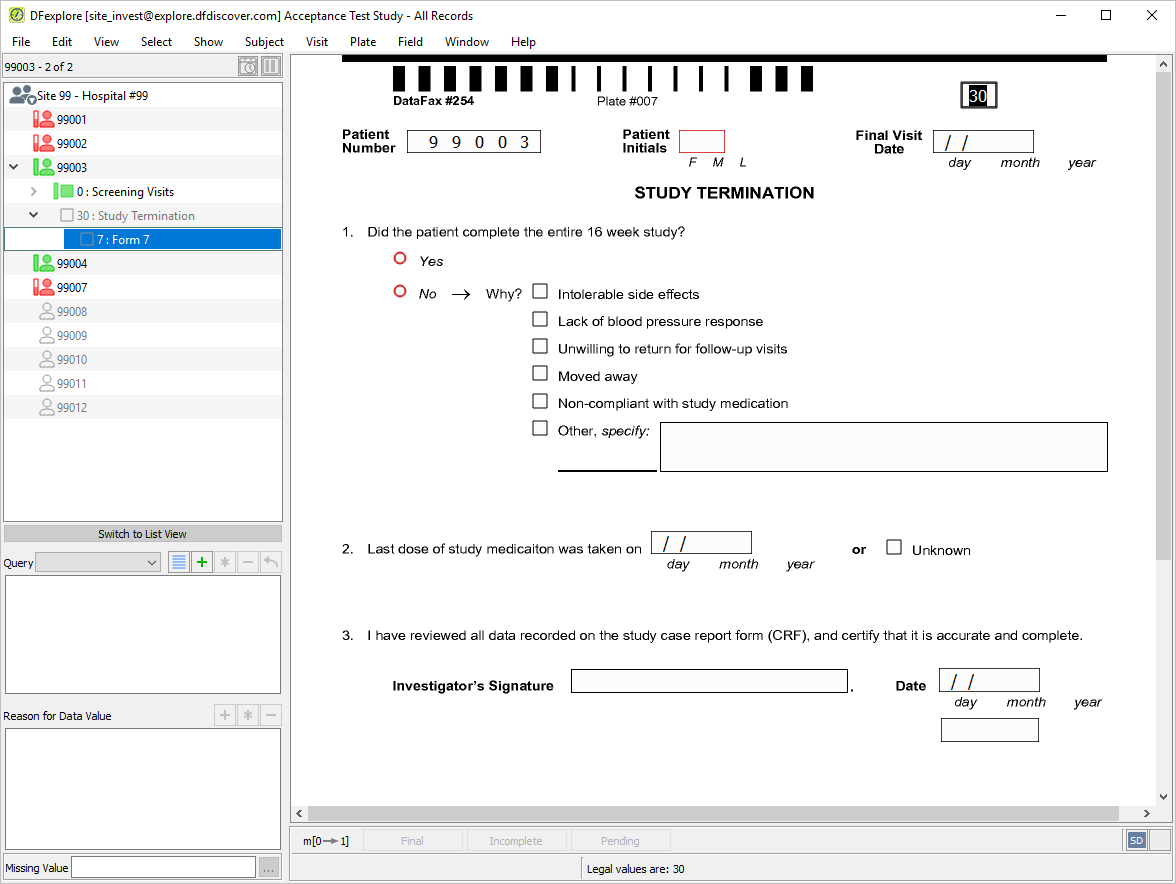
-
Click anywhere in the screen background to begin data entry. Enter the form data as shown below:
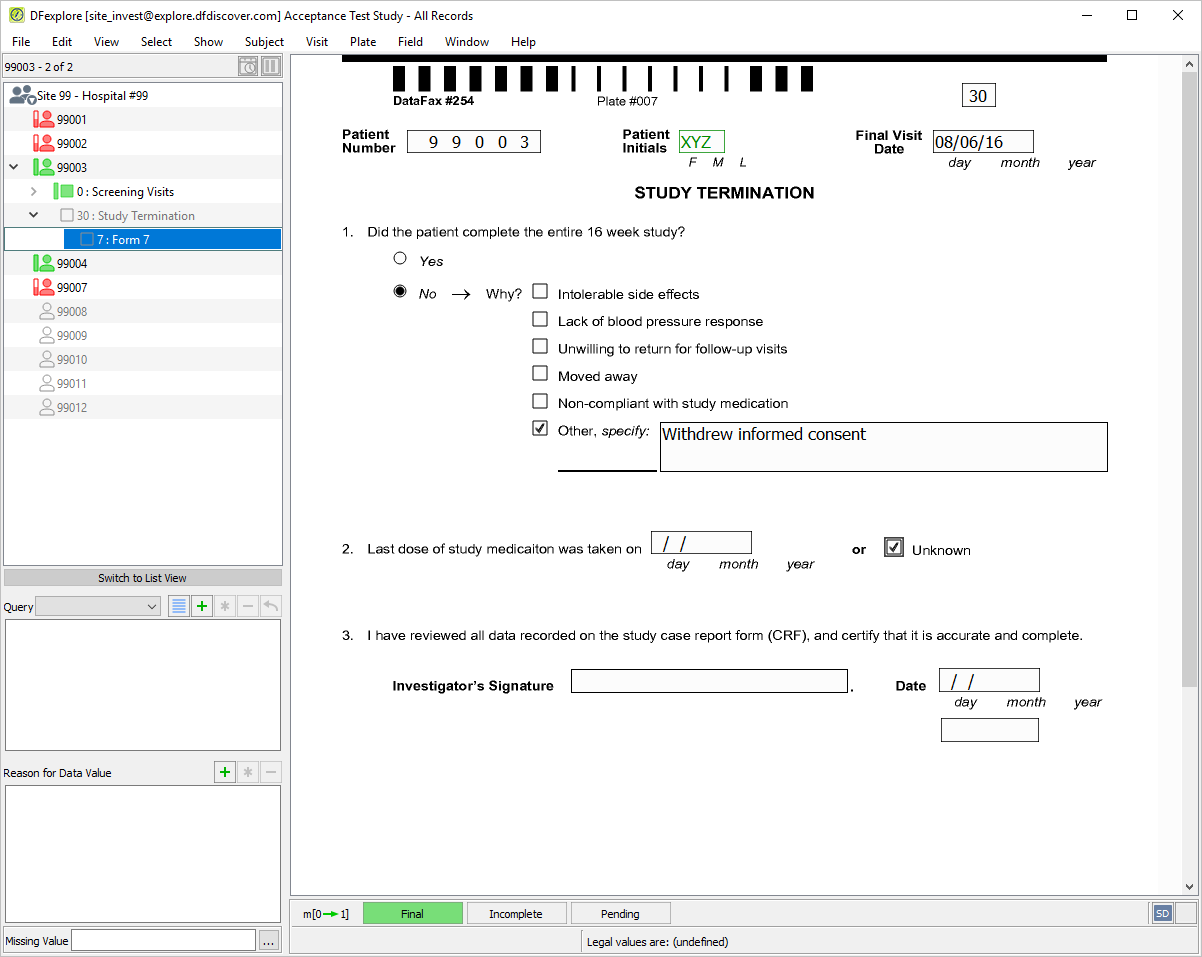
-
Press Tab to advance to the Investigator's Signature field. This field and the remaining fields on the page are used to capture eSignature name, date and time, respectively. Attempt to enter any name in the Investigator's Signature field.
-
Press Tab to advance to the remaining 2 eSignature fields. Again attempt to manually enter data into each of these fields. Press Tab to exit the last field on the page ( eSignature time ) to make the save buttons active.
-
Click to save and eSign the STUDY TERMINATION form.
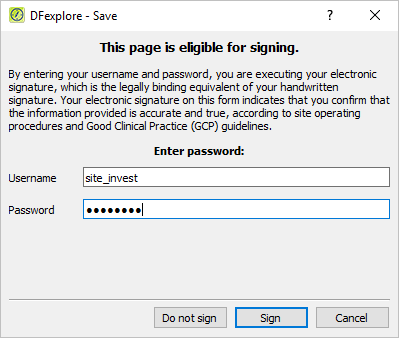
-
In the dfpassword confirmation dialog enter the user name
site_investand the corresponding password used for login in Section 13.6, “Add an Electronic Signature (eSign) to a set of completed subject records.” . Click to apply the electronic signature to the current STUDY TERMINATION page.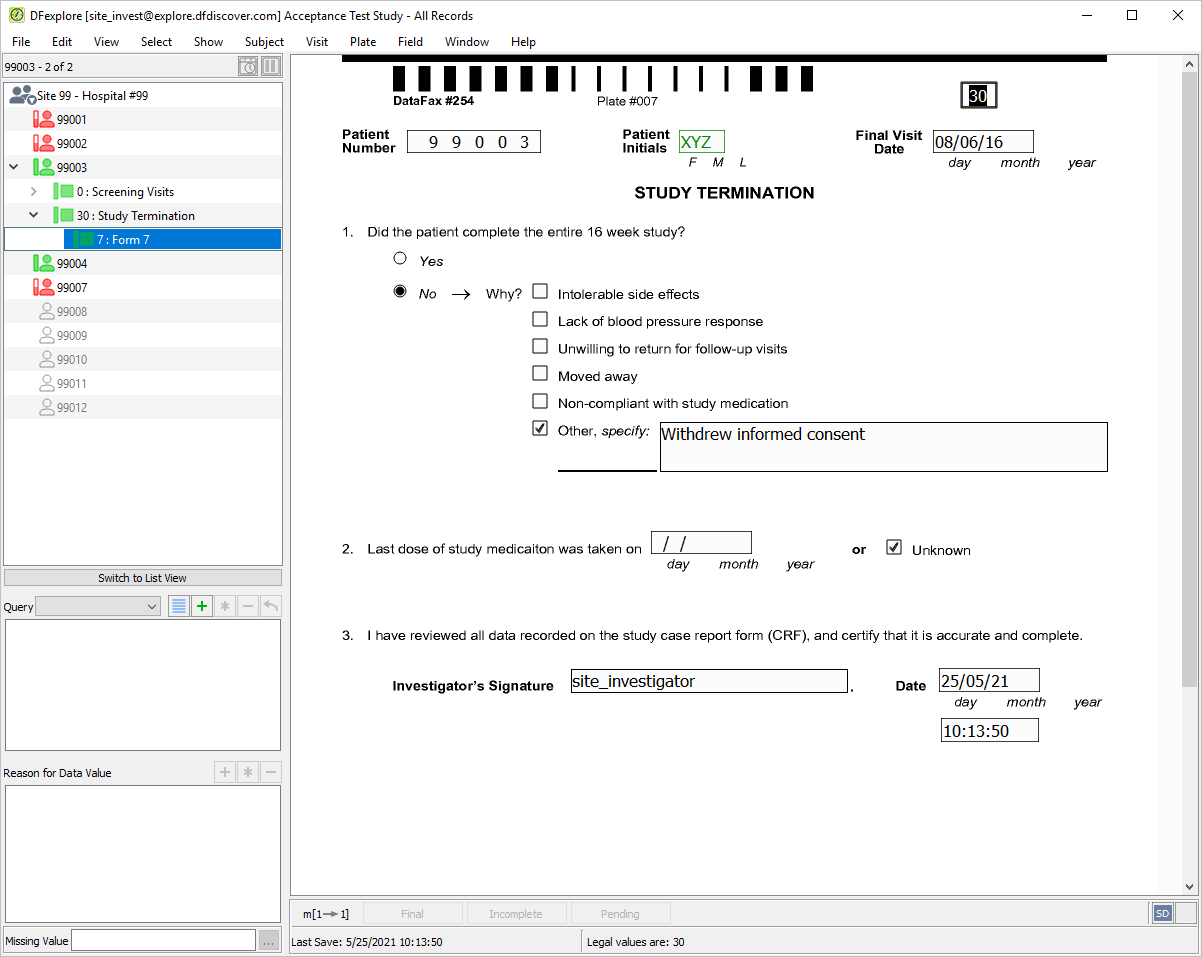
-
Examine the 3 eSignature fields at the bottom of the page.
-
Select > to close and exit DFexplore.
-
Start DFexplore, login as user
site_monitorand open the 254 Acceptance Test Study as described in ( Section 1.7, “How to start DFexplore” ). -
Locate subject 99003 , double-click its entry to expand a list of visits for Subject 99003 .
-
Double-click 30 : Study Termination . Select 7: Form 7 to open the STUDY TERMINATION form.
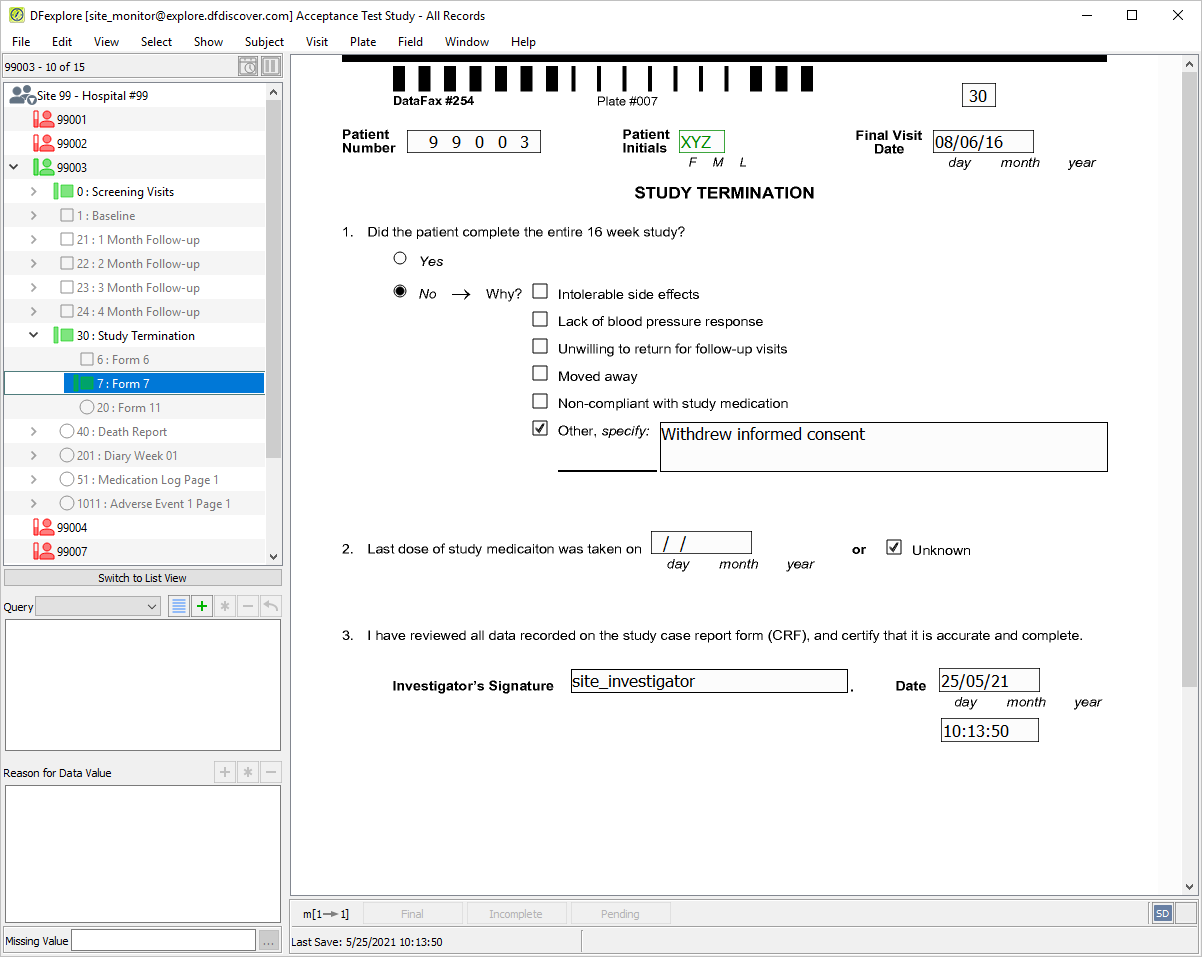
-
Click 2. Last dose of study medication was taken on field. Select > or click
to open the
Add Query
dialog. In the dialog, set:
-
Category = Missing
-
Use = External
-
Type = Clarification
-
Status = New query
-
Enter
Investigator to confirm last dose taken with subject during clinic visit.in the Note field.
-
-
Click to apply the query.
-
Press Tab to advance to the Unknown field. Un-check (disable) the checkbox.
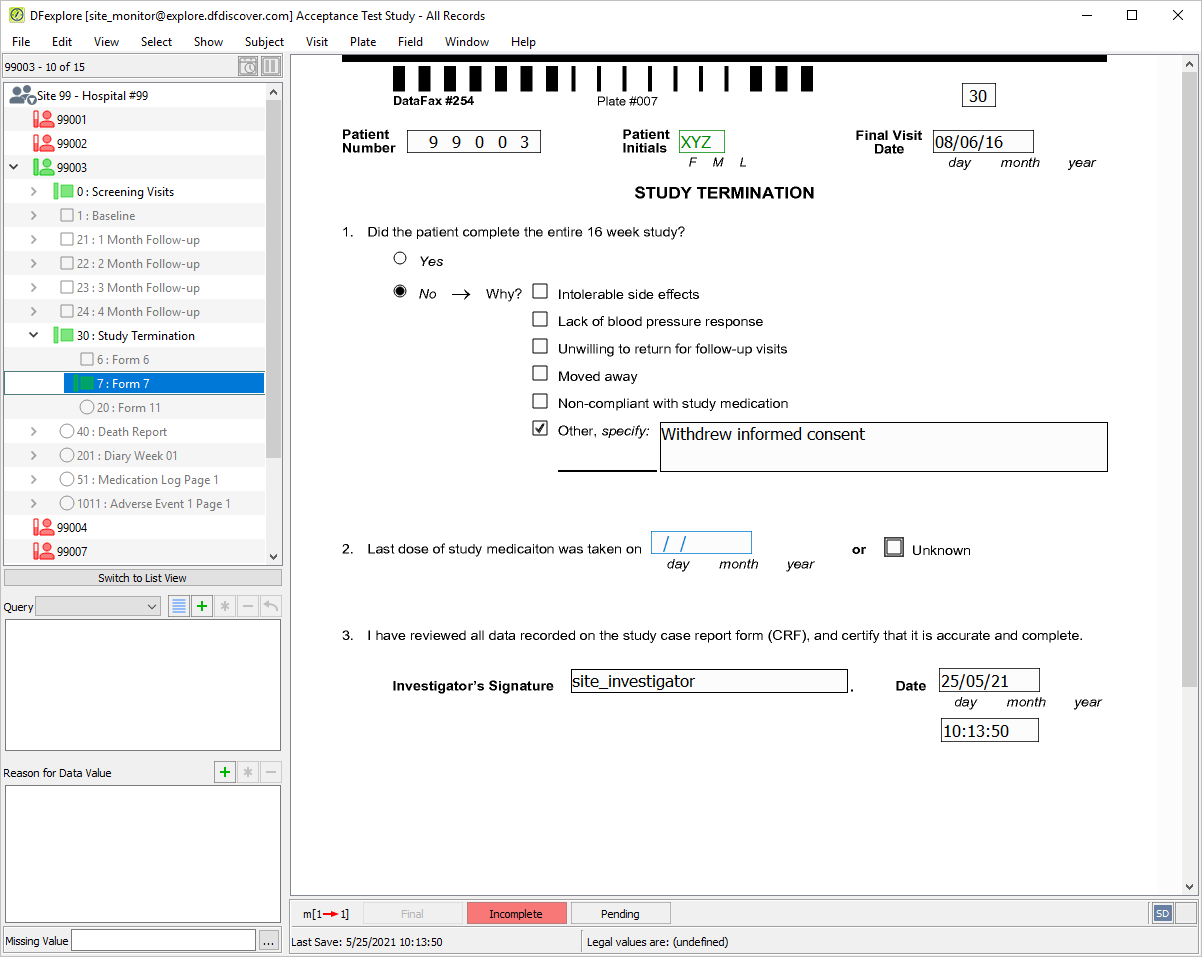
-
Press Tab to advance through the remaining fields on the page until the save buttons become active. Click to save the page.
-
Select > to close and exit DFexplore.
-
Start DFexplore, login as user
site_investand open the 254 Acceptance Test Study as described in ( Section 1.7, “How to start DFexplore” ). -
Locate subject 99003 , double-click its entry to expand a list of visits for Subject 99003 .
-
Double-click 30 : Study Termination . Select 7: Form 7 to open the STUDY TERMINATION form.
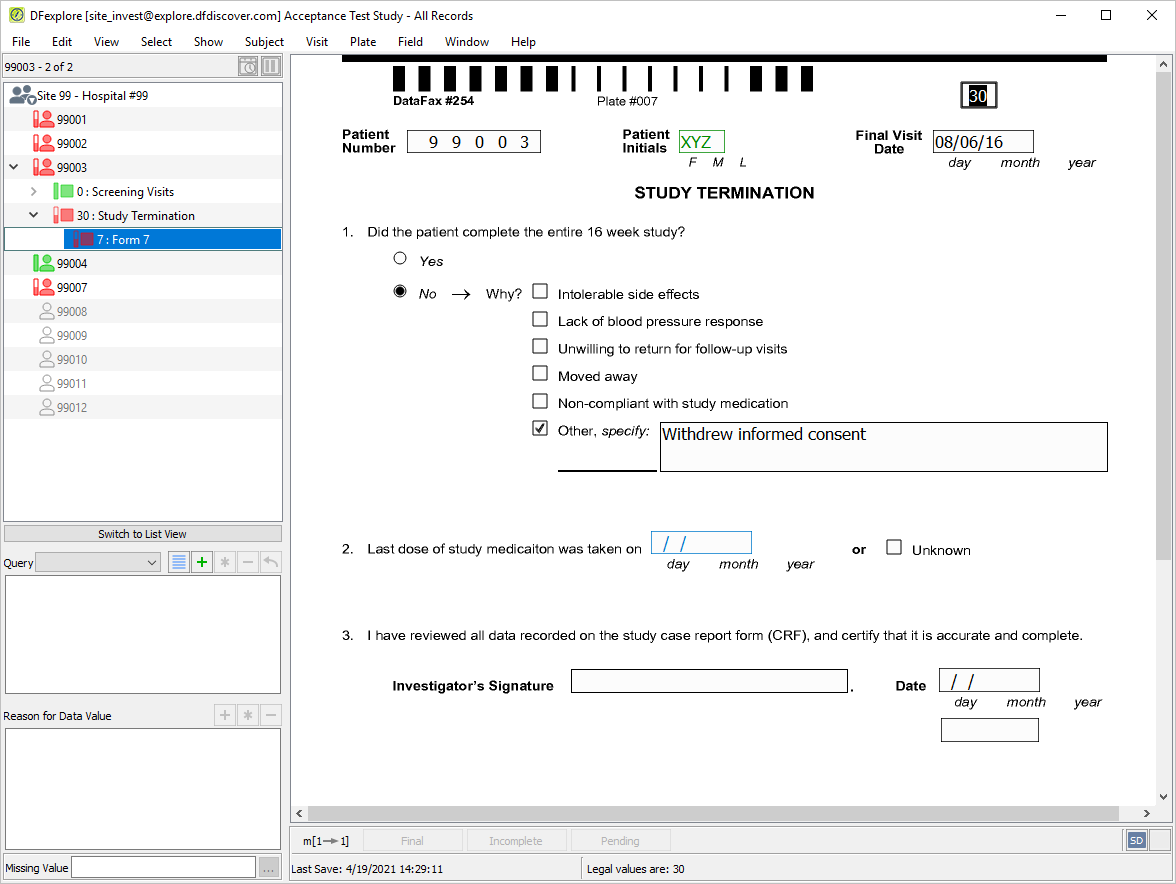
-
Press Tab to advance to 2. Last dose of study medication was taken on field. Select > or click
to open the
Edit Query
dialog. Select
Resolved Corrected
.
Enter
Confirmed date of last medication dose verbally with subject during clinic visit.in the Note field.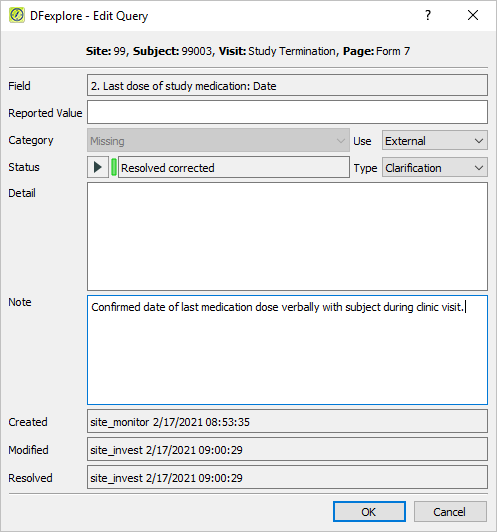
-
Click to close the dialog.
-
Enter the 2. Last dose of study medication was taken on date as
02/06/16. -
Press Tab to advance to the Investigator's Signature field. This field and the remaining fields on the page are used to capture eSignature name, date and time, respectively. Attempt to enter any name in the Investigator's Signature field.
-
Press Tab to advance to the remaining 2 eSignature fields. Again attempt to manually enter data into each of these fields. Press Tab to exit the last field on the page ( eSignature time ) to make the save buttons active.
-
Click to save and eSign the STUDY TERMINATION form.
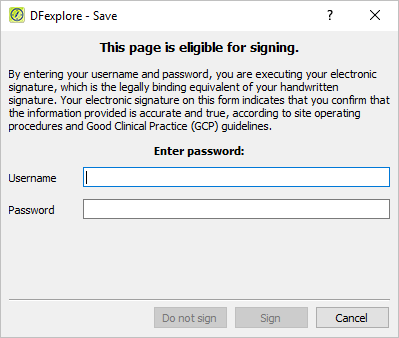
-
In the dfpassword confirmation dialog enter the user name
site_investand the corresponding password used for login in Section 13.6, “Add an Electronic Signature (eSign) to a set of completed subject records.” . Click to apply the electronic signature to the current STUDY TERMINATION page.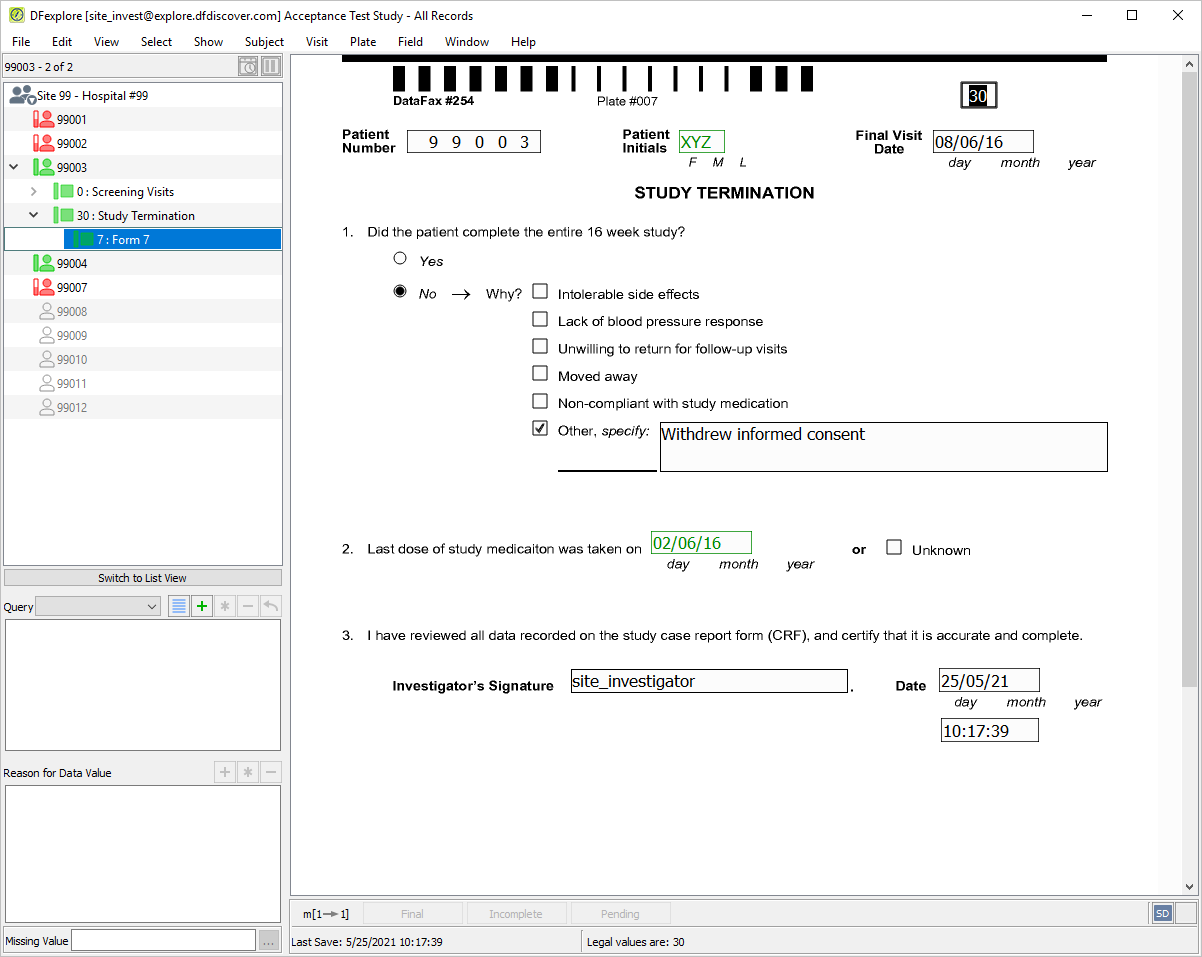
-
Examine the 3 eSignature fields at the bottom of the page.
-
Select > to close and exit DFexplore.
Table of Contents
- 14.1. Tests & Requirements
- 14.2. Begin Module 14. Re-submitting Query Corrections.
- 14.3. Submit PDF images to DFdiscover.
- 14.4. Verify that all CRFs have arrived successfully in Image view.
- 14.5. Retrieve submitted CRFs using DFexplore Image View.
- 14.6. Enter Form 2, Subject 99001, resolve outstanding queries, and save the corrected CRF to the database.
- 14.7. Enter Form 2, Subject 99002, resolve outstanding queries, and save the corrected CRF to the database.
- 14.8. Enter Form 4, Subject 99004.
- 14.9. Enter Form 2, Subject 99004, resolve outstanding queries, and save the corrected CRF to the database.
- 14.10. Select and resolve a query in a field that has multiple queries.
- 14.11. Review and approve a pending query reply for Form 1 for Subject 99002.
- 14.12. Review, correct and approve a pending query reply for Form 1, Subject 99007.
- 14.13. Confirm query resolution by examining the database status.
- 14.14. End Module 14. Re-submitting Query Corrections.
Submit PDF images to DFdiscover.
Verify that all CRFs have arrived successfully in Image view.
Retrieve submitted CRFs using DFexplore Image View.
Enter Form 2, Subject 99001, resolve outstanding queries, and save the corrected CRF to the database.
Enter Form 2, Subject 99002, resolve outstanding queries, and save the corrected CRF to the database.
Enter Form 4, Subject 99004.
Enter Form 2, Subject 99004, resolve outstanding queries, and save the corrected CRF to the database.
Select and resolve a query in a field that has multiple queries.
Review and approve a pending query reply for Form 1 for Subject 99002.
Review, correct and approve a pending query reply for Form 1, Subject 99007.
Confirm query resolution by examining the database status.
Estimate of Time Required: 30 Minutes
-
Start DFATK as described in Module 1 (Installation & Initialization).
-
Click followed by to begin this module.
-
Click to email a copy of QC_corrections.pdf to
site_monitor. Clicking more than once will result in multiple pages arriving to your email inbox.Note Save the QC_corrections.pdf file received via email to your local computer. This file is required to complete the remainder of this module. Refer to Section 1.8, “Creating user accounts and assigning study permissions.” as a valid email address is required for
site_monitorto receive the module specific PDF files. -
Start DFsend, login as user
site_monitoras described in Section 1.9, “How to start DFsend”. -
Click . From the Select PDF Files file selection dialog, locate the previously saved QC_corrections.pdf file. Select the file, Click .
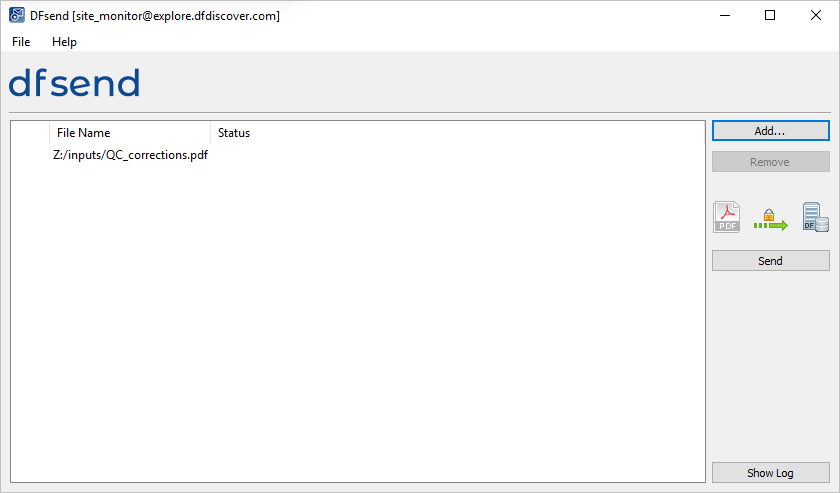
Note Documents can also be added by dragging-and-dropping the desired PDF files from a local file folder directly into the list area.
-
Click , enter
site_monitorin the Username field and the previously assigned password in the Password field. Click . -
In the resulting Send PDFs to DFdiscover dialog, confirm 1 success and 0 failure are shown. Click .
-
Click to confirm successfull transmission of the QC_corrections.pdf file to DFdiscover.
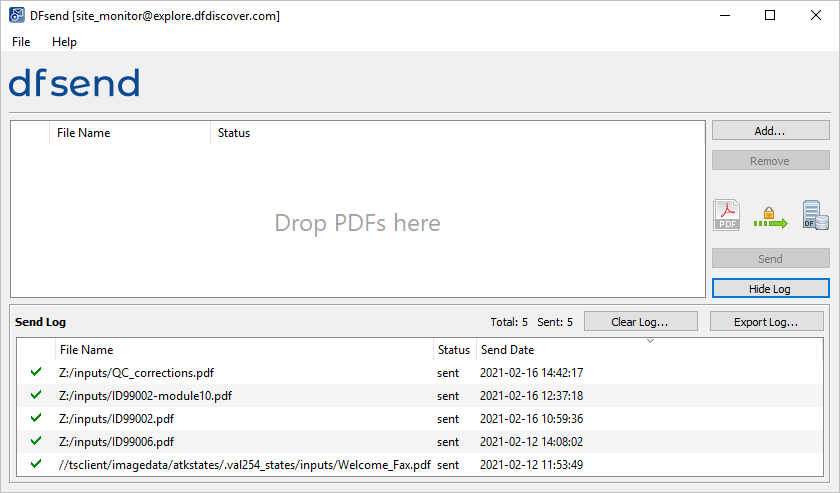
-
Select > .
Note Wait 2-3 minutes prior to proceeding to DFexplore.
-
Start DFexplore, login as user
data_coordinatorand choose 254 Acceptance Test Study as described in Section 1.7, “How to start DFexplore”. -
Select > . In the Preferences dialog, click
 from Image View section. Select (enable) When the revised record is saved. Click to save and close the Preferences dialog.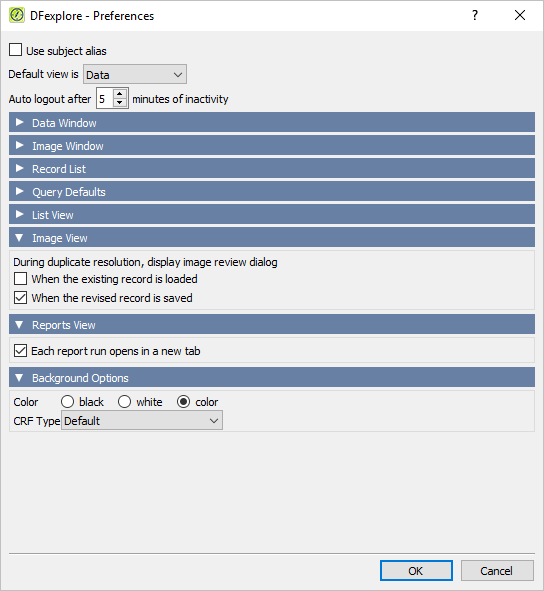
-
Select > . Examine the information displayed for the Images awaiting review in Image Queue, Data Records and Queries tables.
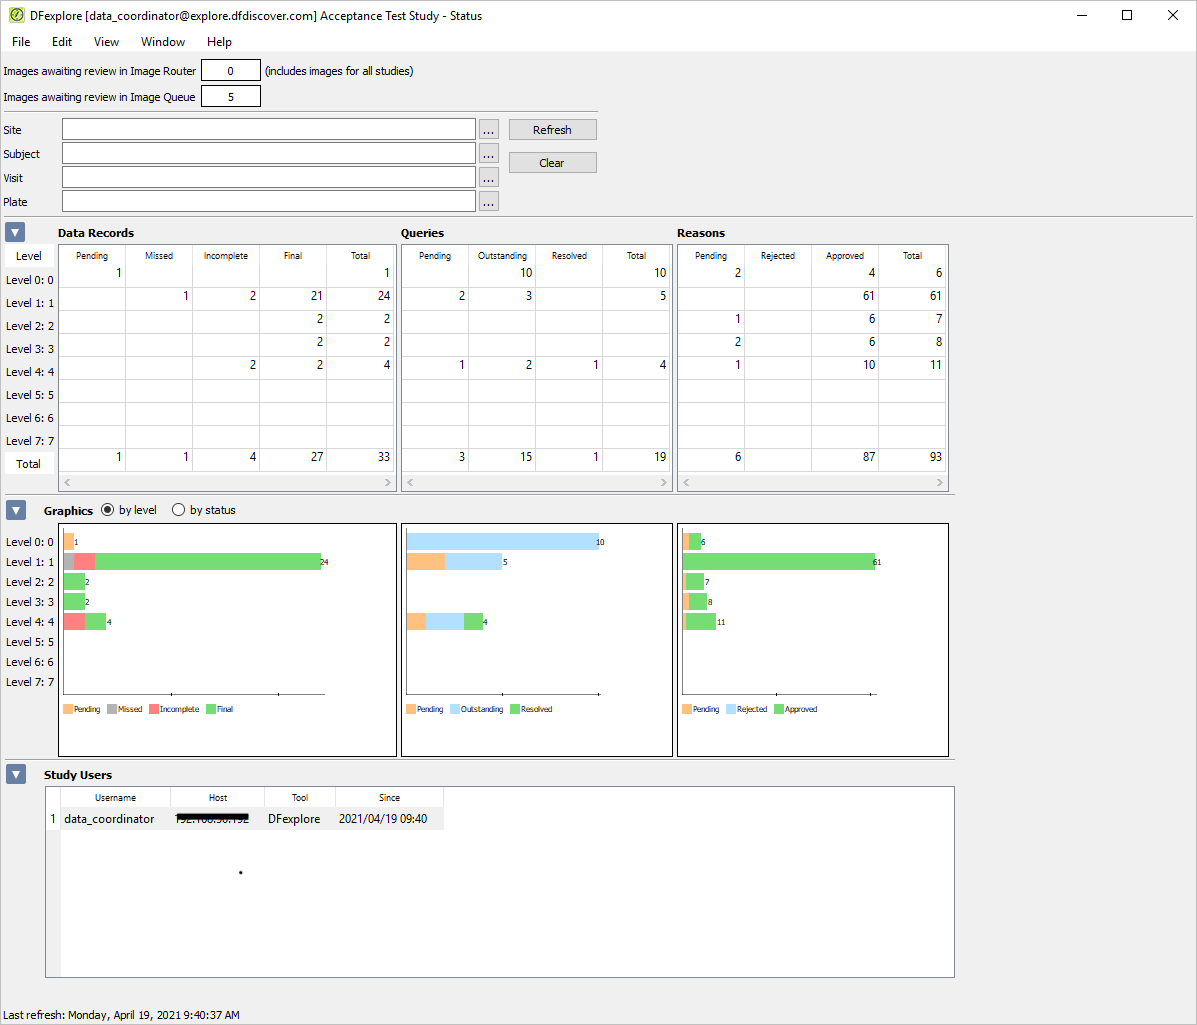
Note The number of pages awaiting review in the Image Router may be different from that shown here as this number includes pages for all studies on the DFdiscover server, not only those that belong to the 254 Acceptance Test Study.
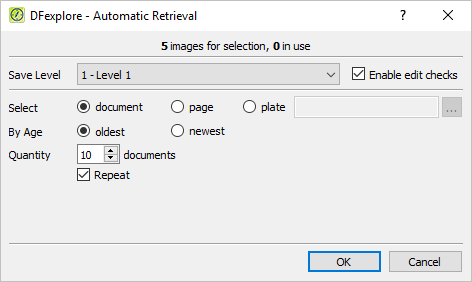
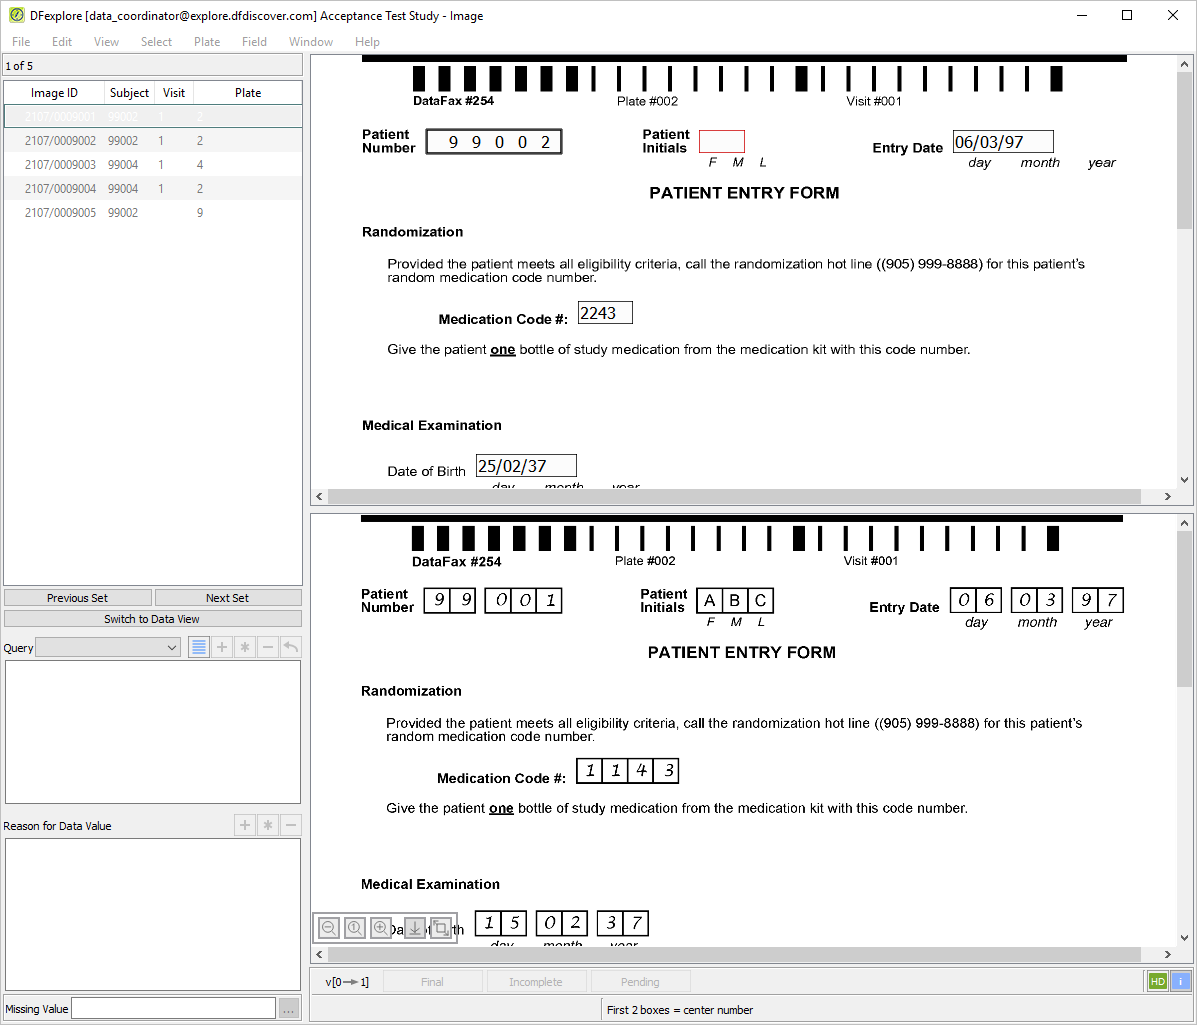
-
With PATIENT ENTRY FORM for Subject 99001 as the current page, click anywhere on the page background to make the page active for data entry. Beginning with the Patient Number field, verify that the correct Subject 99001 is displayed. If the Patient Number is incorrect, correct it by selecting > , specify a Subject of
99001. Click . Press Tab to exit the field.
Note In your normal image entry process, you must always pay careful attention to the accuracy of the ICR data. You will need to do the same here. It is possible that the new pages contain ICR errors that you will need to correct during entry. In particular, it is important that you correct any key fields (visit and/or subject numbers) that may have been misread as these are critical to the identification and storage of the data. Note that the ICR data records on your screen may not match exactly those shown in the examples throughout this module.
-
Click to load the data from the existing subject 99001, PATIENT ENTRY FORM.
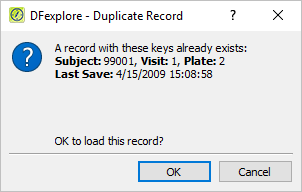
-
Press Tab to advance from field to field, and verify that data is the same as that found on the CRF image. Note that some fields may contain values that have been assigned by edit checks. Stop when the Smoking Status field becomes the current field. Examine the details in the Query window. Enter the data as it appears on the image.
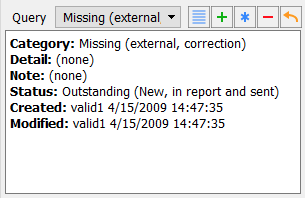
Note When data is entered into a field that contains an outstanding missing value query of type Correction, the query is automatically resolved by DFdiscover as the missing data has now been provided. The color green indicates that the query has been resolved.
-
Continue tabbing through the remaining fields on the page to verify that the data in the fields is the same as the CRF image. Once the save buttons become active at the bottom of the record, click to save the corrected page.
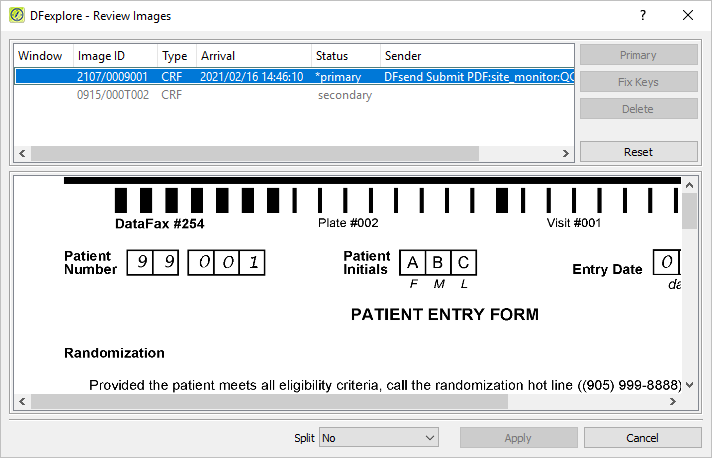
-
Using the scroll bars, examine the primary image and locate the corrected Smoking Status field to verify that this is the same image that was saved with the corrected data record in Section 14.6, “Enter Form 2, Subject 99001, resolve outstanding queries, and save the corrected CRF to the database.”. Click to exit the Review Images dialog.
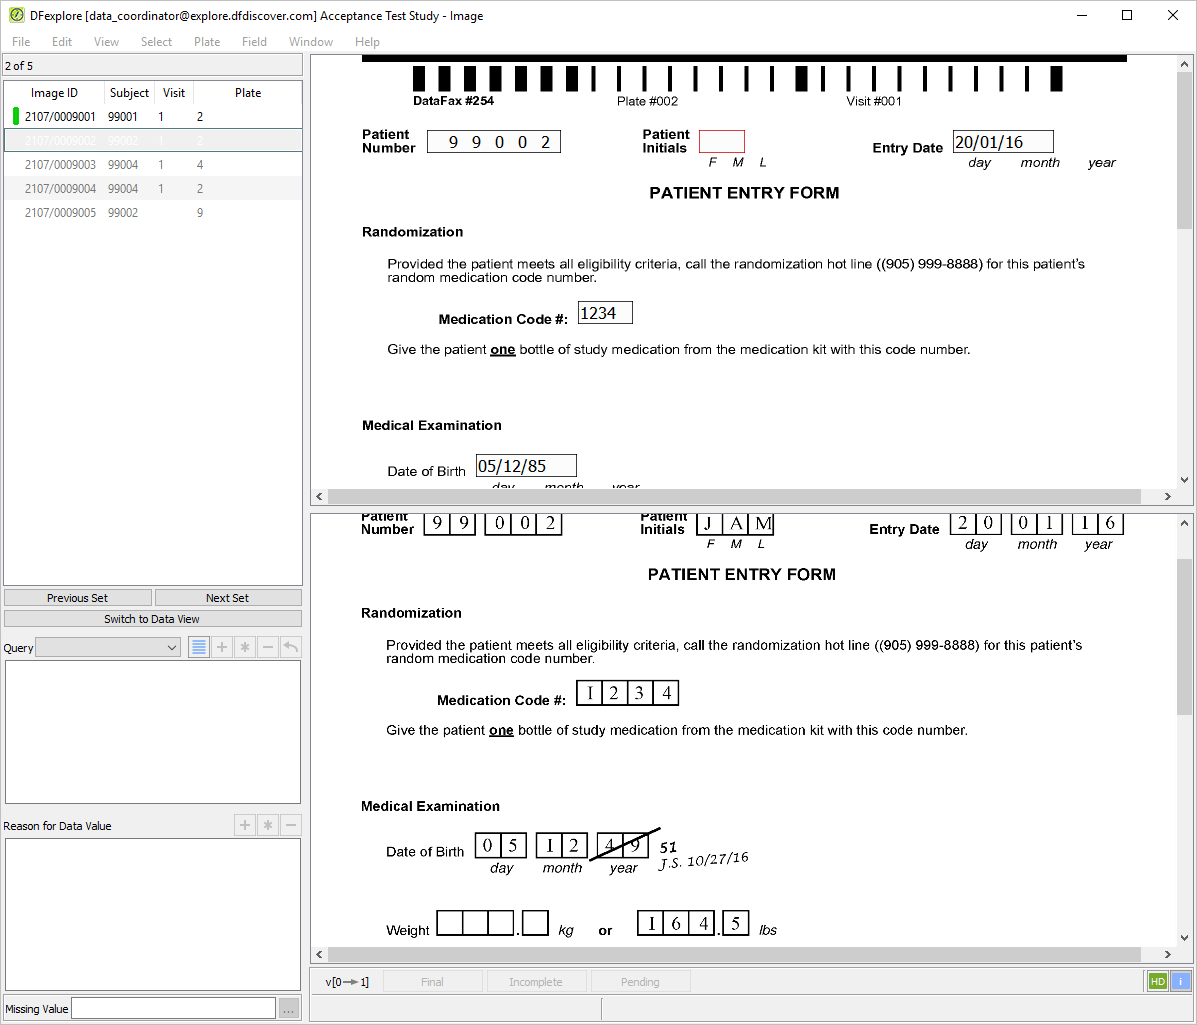
-
Return to the saved page for Subject 99001 by selecting it from the Image Queue list. Examine the bottom right corner of the main data entry screen.

-
From the new Image Queue, click the 2nd entry in the list (Subject 99002) to make it the current page. Click anywhere on the page background to make the page active for data entry. Beginning with the Patient Number field, enter the correct subject
99002and press Tab to exit the field.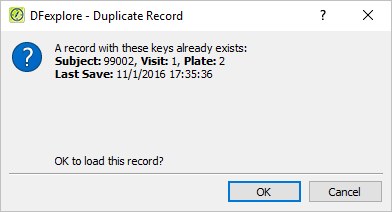
-
Click to load the data from the existing Subject 99002, PATIENT ENTRY FORM.
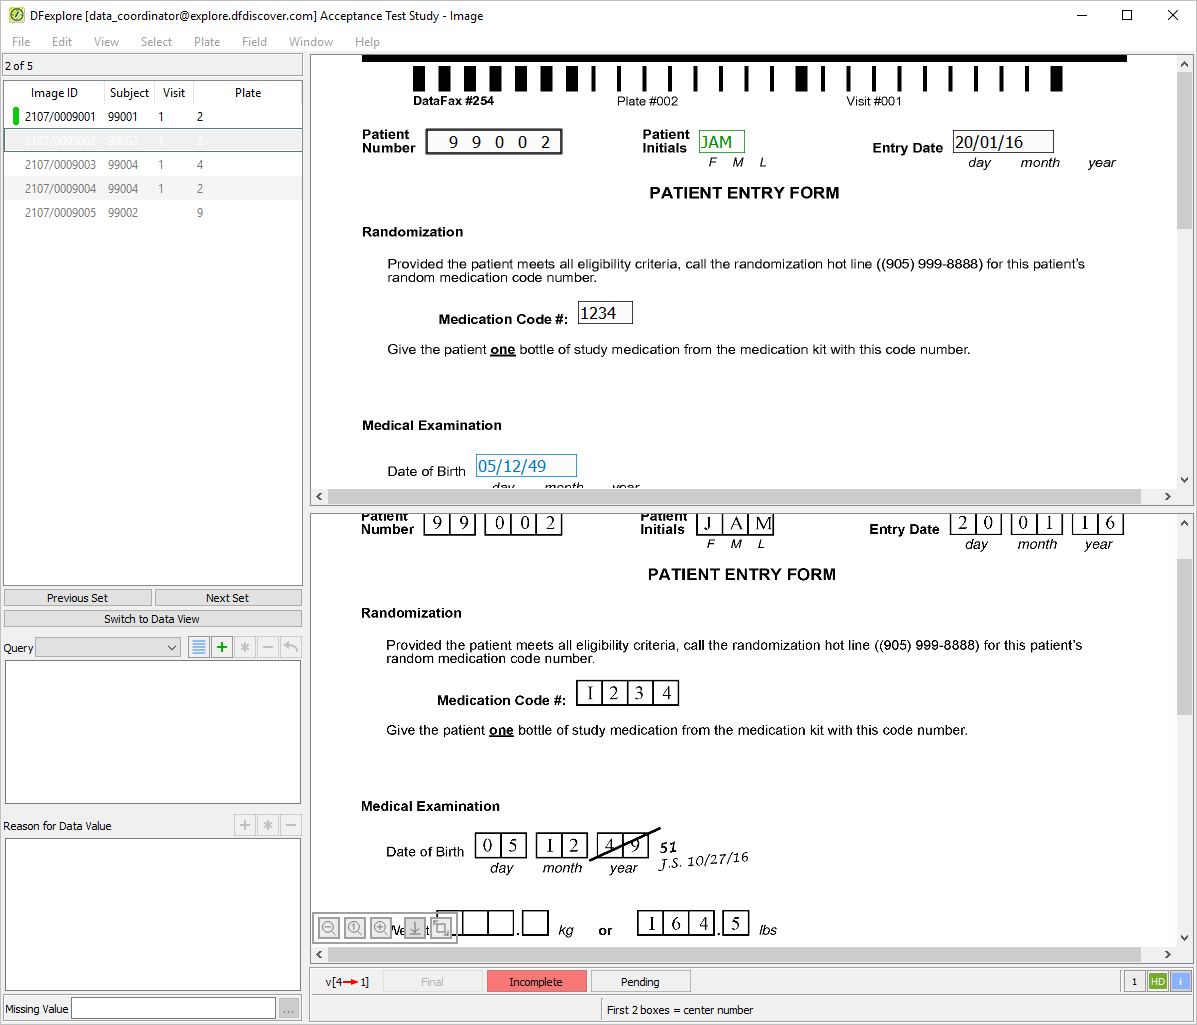
-
Press Tab to advance from field to field, and verify that data is the same as that found on the CRF image. Stop when the Date of Birth field becomes the current field. Examine the details in the Query window.
-
Enter the corrected date value
05/12/51, as it appears on the image of the CRF. With Date of Birth as the current field, select > or click.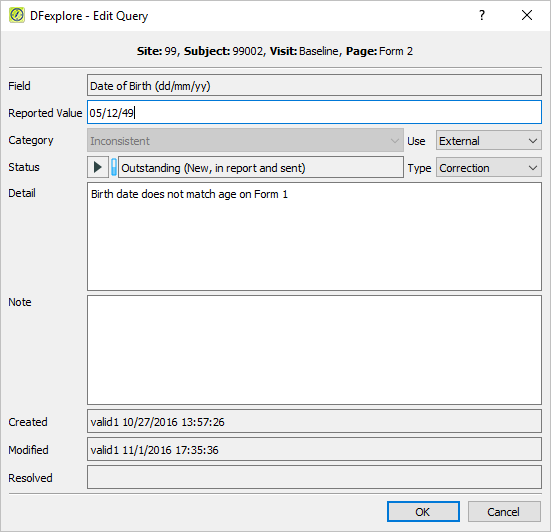
-
Select Resolved corrected from the Status pull-down. Click to apply the change to the query status. Examine the Query window.
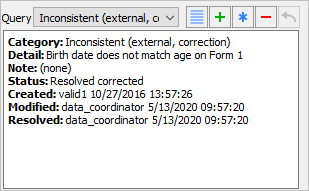
-
Continue tabbing through the remaining fields on the page to verify that the data in the fields is the same as the CRF image. Note that some fields may contain values assigned by edit checks. Once the save buttons at bottom of the record become active click to save the corrected page.
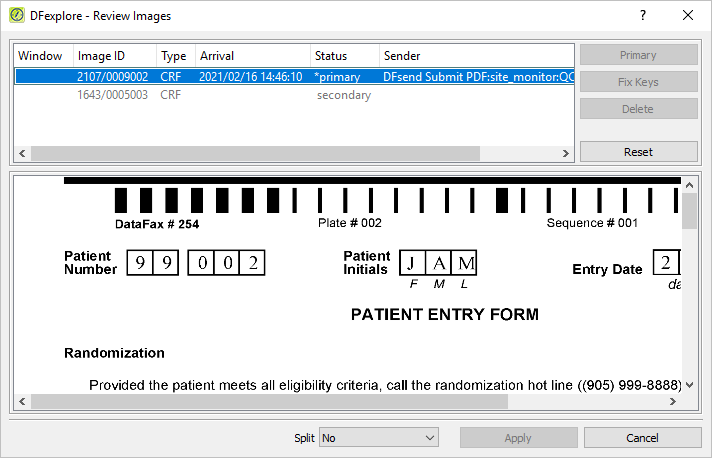
-
Using the scroll bars, examine the primary image and locate the corrected Date of Birth field to verify that this is the same image as was saved with the corrected data record in Section 14.7, “Enter Form 2, Subject 99002, resolve outstanding queries, and save the corrected CRF to the database.”. Click to close the Review Images dialog.
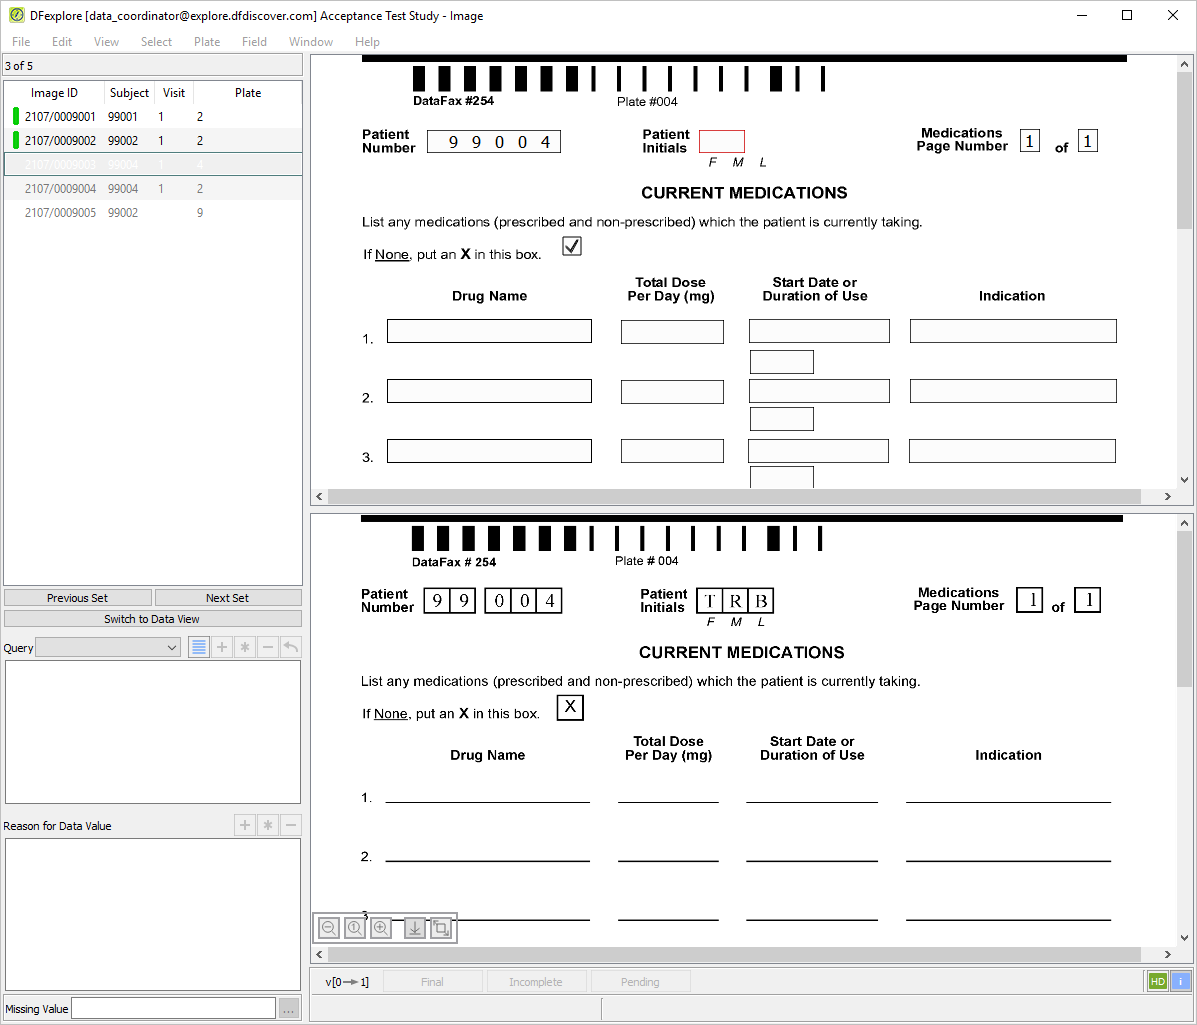
-
Click anywhere on the page background to make the page active for data entry. Beginning with the Medications Page Number field, enter
1as shown on the CRF image. Press Tab to exit the field and move to the Patient Number. Enter the number shown on the CRF image and leave the field.Note The CURRENT MEDICATIONS form for Subject 99004 has been flagged as Missing in the Query report of Module 12. As a result, arrival of this plate will not trigger the Duplicate Record warning because the page does not currently exist in the study database.
-
Enter all fields on the data record as they appear on the CRF image. Once the save buttons at bottom of the record become active, click to save the entered page.
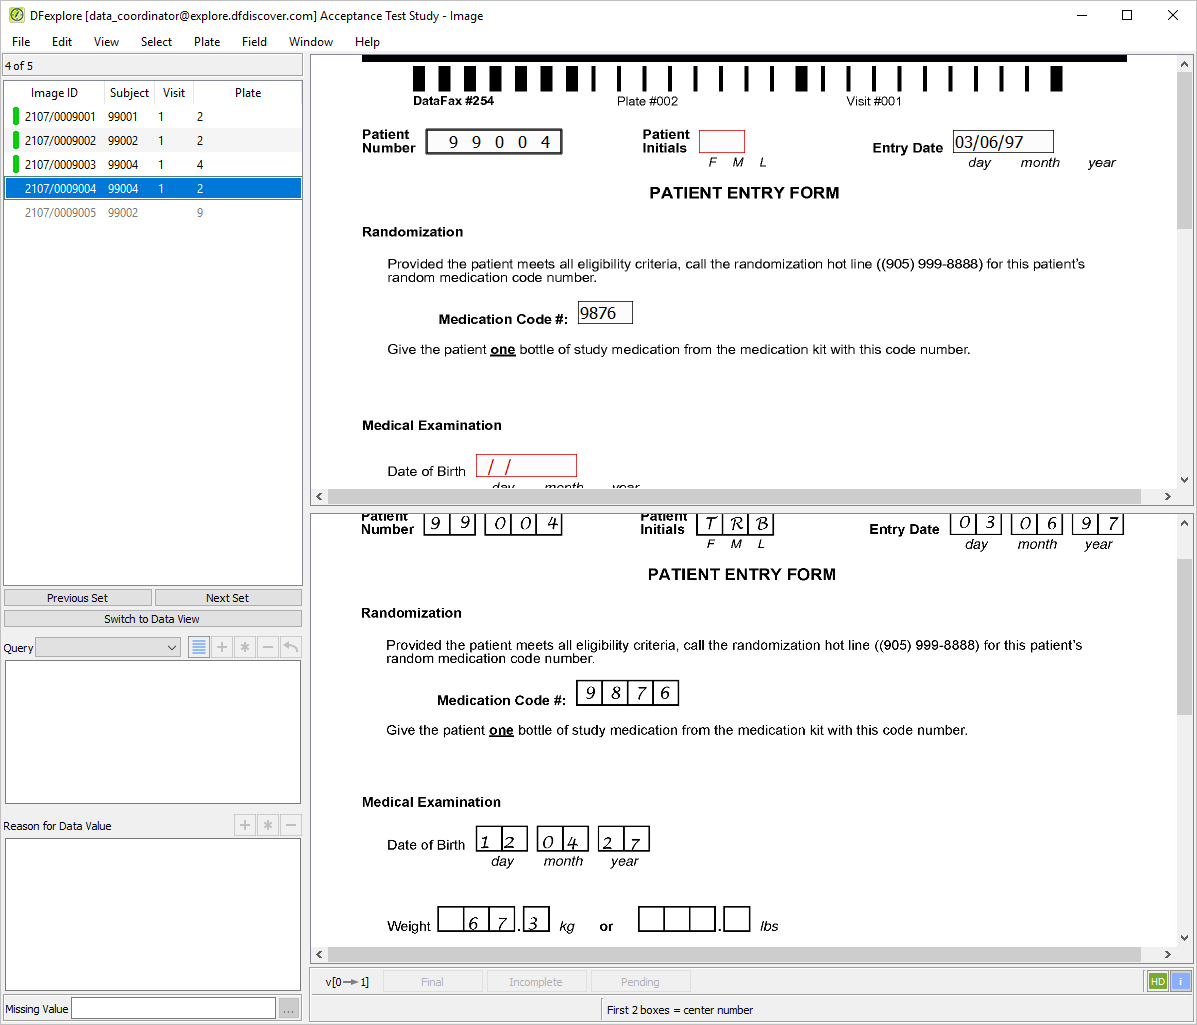
Note The Review Images window does not appear upon saving Form 4, Subject 99004 because a duplicate page does not exist for this set of keys.
-
Click anywhere on the page background to make the page active for data entry. Beginning with the Patient Number, enter
99004as shown on the CRF image. Press Tab to exit the field.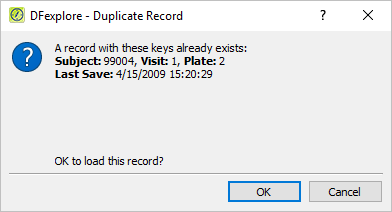
-
Click to load the data from the existing Subject 99004, PATIENT ENTRY FORM.
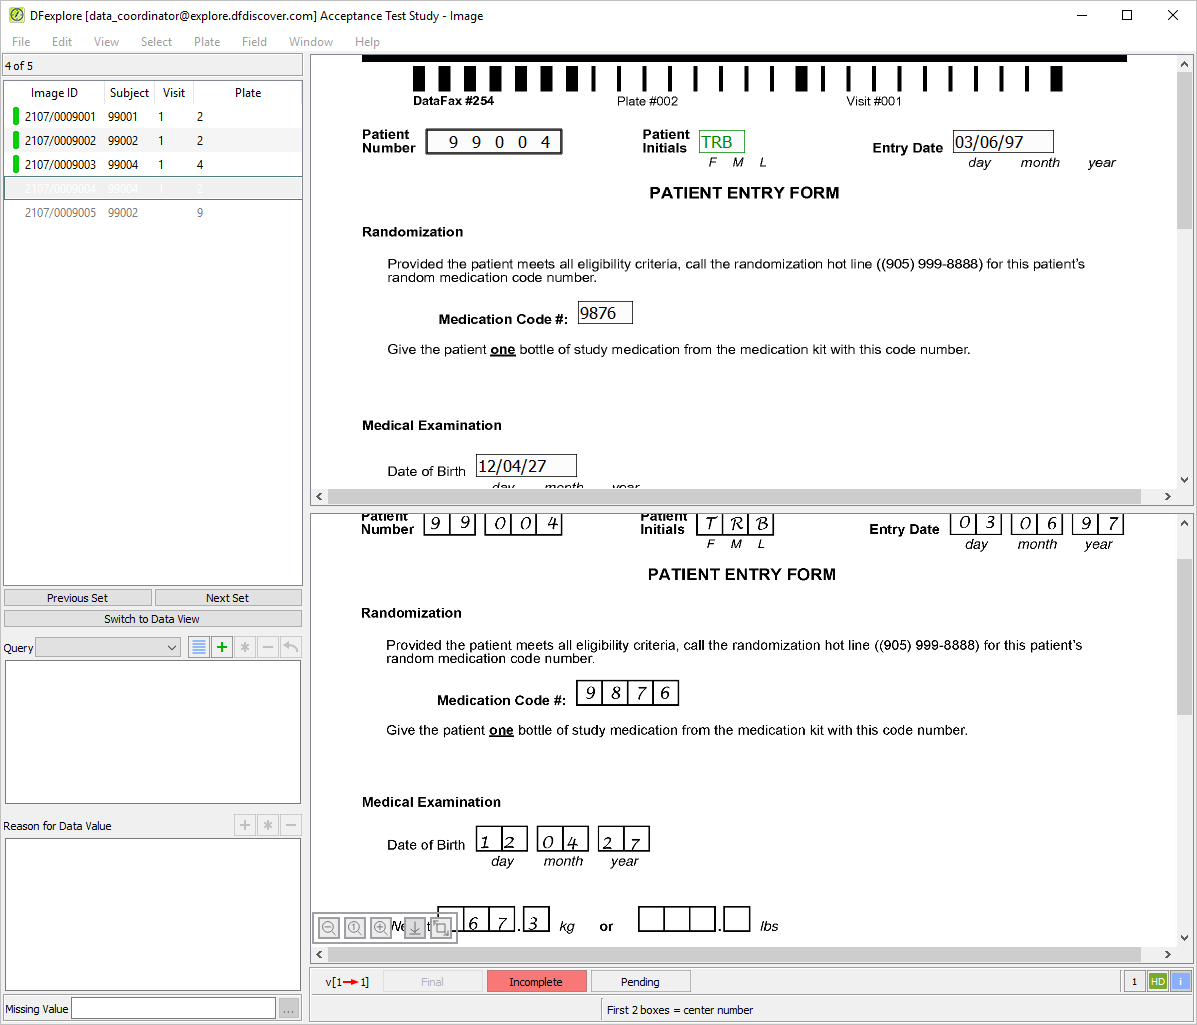
-
Press Tab to advance from field to field, and verify that data is the same as that found on the CRF image. Note that some fields may contain values assigned by edit checks. Stop when the queried Pulse field becomes the current field. Examine the details in the Query window.
-
Enter the correct response as it appears on the image of the corrected CRF. Examine the details in the Query window and press Tab to exit the corrected Pulse field.
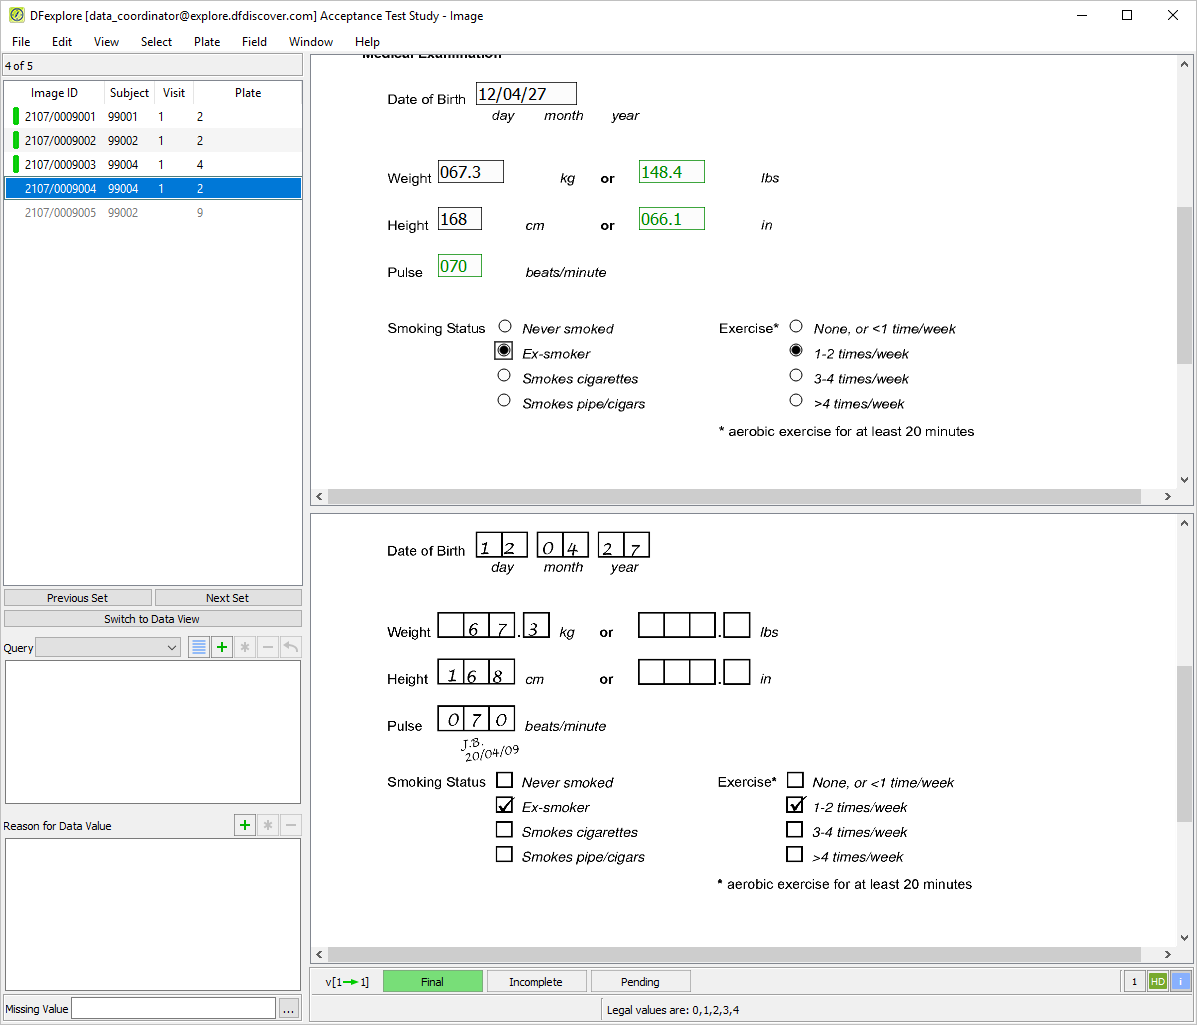
-
Continue tabbing through the remaining fields on the page to verify that the data in the fields is the same as the CRF image. Once the save buttons at the bottom become active, click to save the corrected page to the database.
Using the scroll bars, examine the primary image and locate the corrected Pulse field to verify that this is the same image as was saved with the corrected data record in Step 3. Click to close the Review Images window.
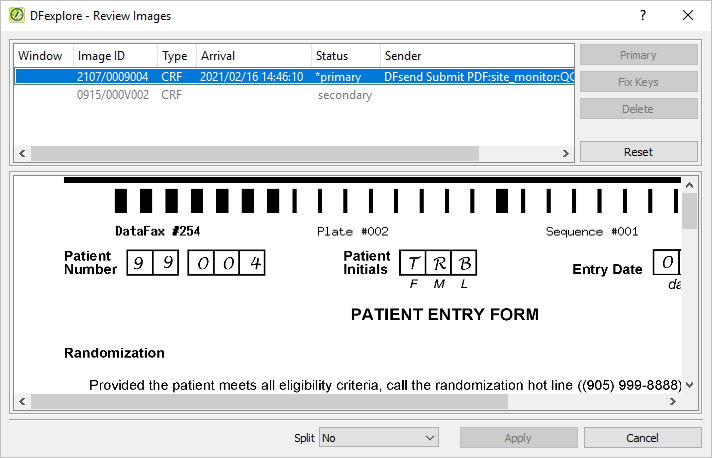
-
With the ADVERSE EVENT REPORT Form for Patient Number 99002 as the current plate, click anywhere on the page background to make the page active. Beginning with the Adverse Event Report No. field, enter the value as shown on the CRF image. Press Tab to exit this field and advance to the AE Identifier field. Upon entering the AE Identifier field, the edit check
AESEQNUM2automatically complete this field. Press Tab to exit the AE Identifier field to advance to the Patient Number field. Verify that the correct Subject 99002 is displayed for the Patient Number field. If the number is incorrect, correct it and press Tab to exit the field.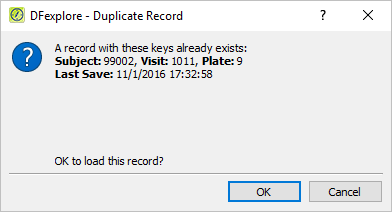
-
Click to load the data from the existing Subject 99002, ADVERSE EVENT REPORT FORM.
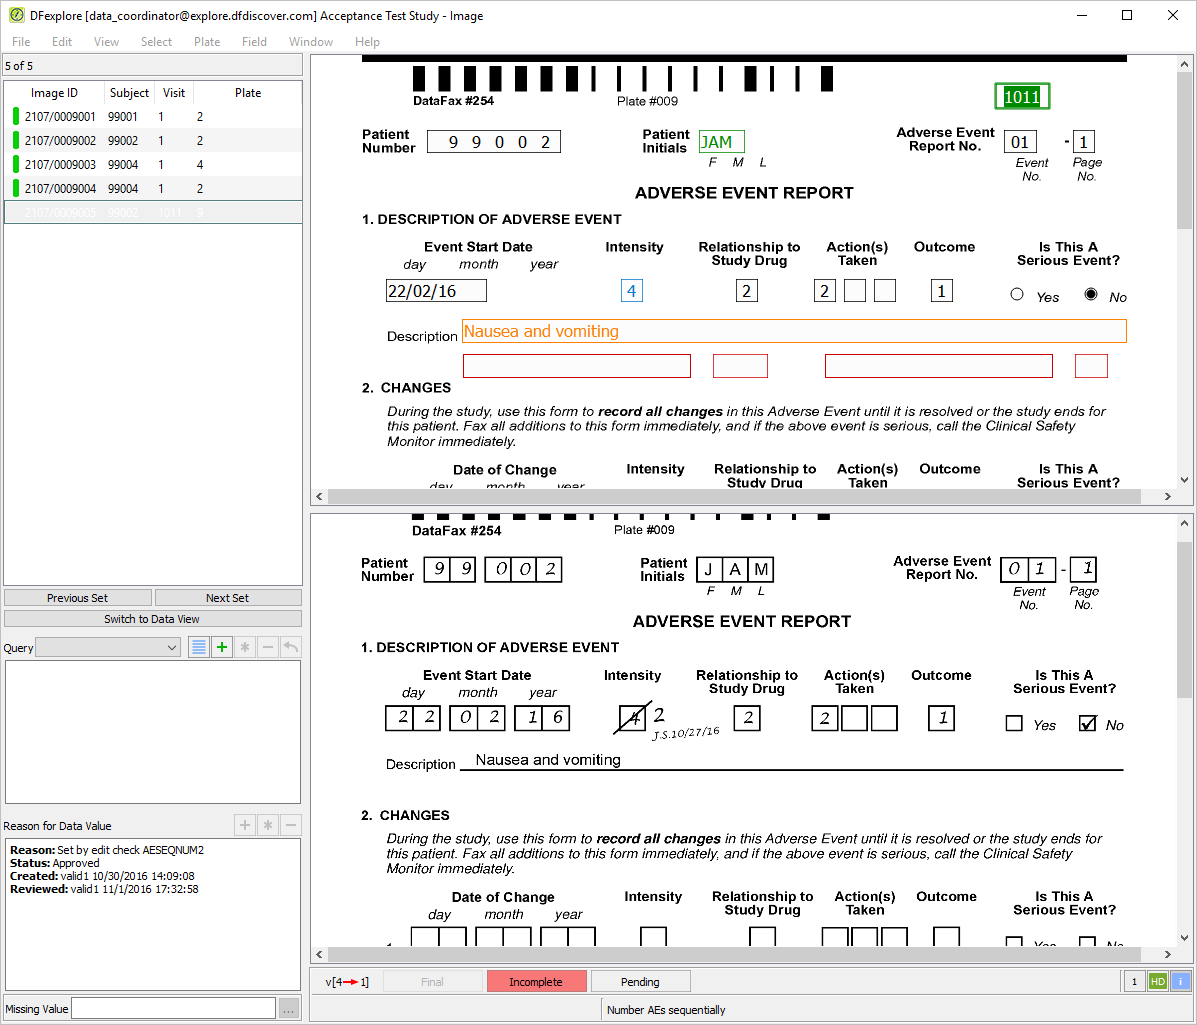
-
Correctly enter each data field on the page per the CRF image, up to the Intensity field. Confirm that the Intensity field has a value of 4, and contains 2 unresolved queries.
-
Enter the correct value
2for Intensity field per the CRF image. Examine the details in the Query window.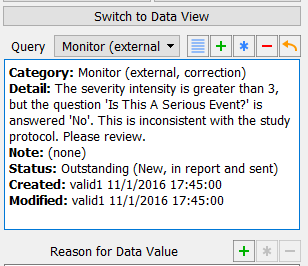
-
Select > or click
. Choose Resolved corrected from the Status pull-down. Click to apply the edits.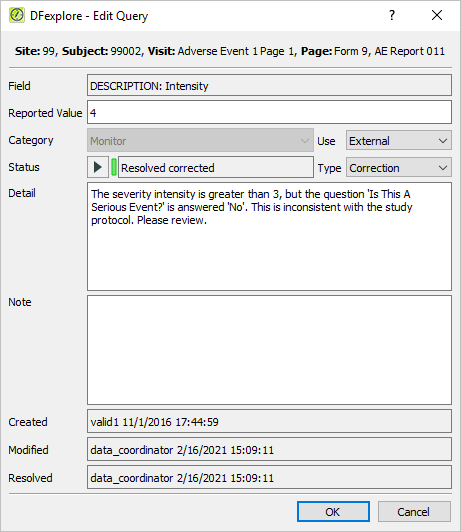
-
With the focus still on the Intensity field, examine the details in the Query window. Select the Clinical QC query from the Query drop-down, and examine its details.
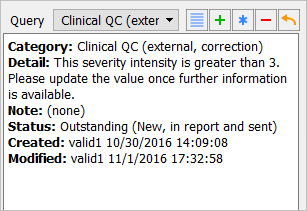
-
Select > or click
in the dialog, choose Resolved corrected from the Status pull-down. Click to apply the edits.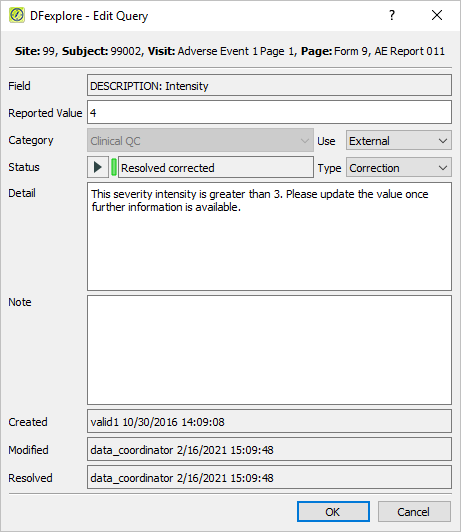
-
Press Tab to advance through the fields, and verify that the data is the same as that found on the CRF image. Note that upon leaving the Description field, an edit check is executed and DFlookup:aecodes dialog appears. Click to close the DFlookup:aecodes dialog.
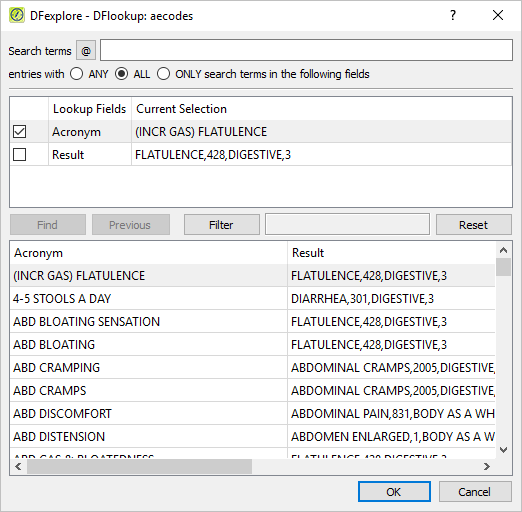
-
Continue tabbing through the remaining fields on the page and verify that the data in the fields is the same as the CRF image. Once the save buttons become active at the bottom of the record, click to save the corrected page to the database. Upon clicking , the Review Images dialog appears. Click to close the Review Images window.
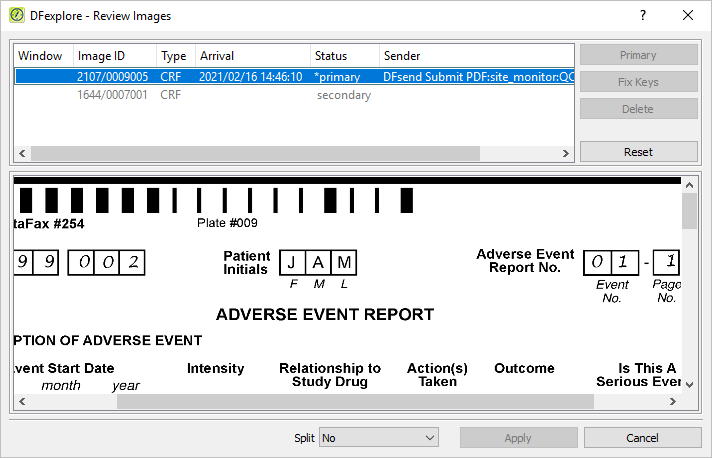
-
-
Click in the confirmation dialog to release the Image View records and open Queries View.
-
Select > to display only queries for which a resolution is pending. Double-click Site 99 - Hospital #99 entry to display all pending queries.
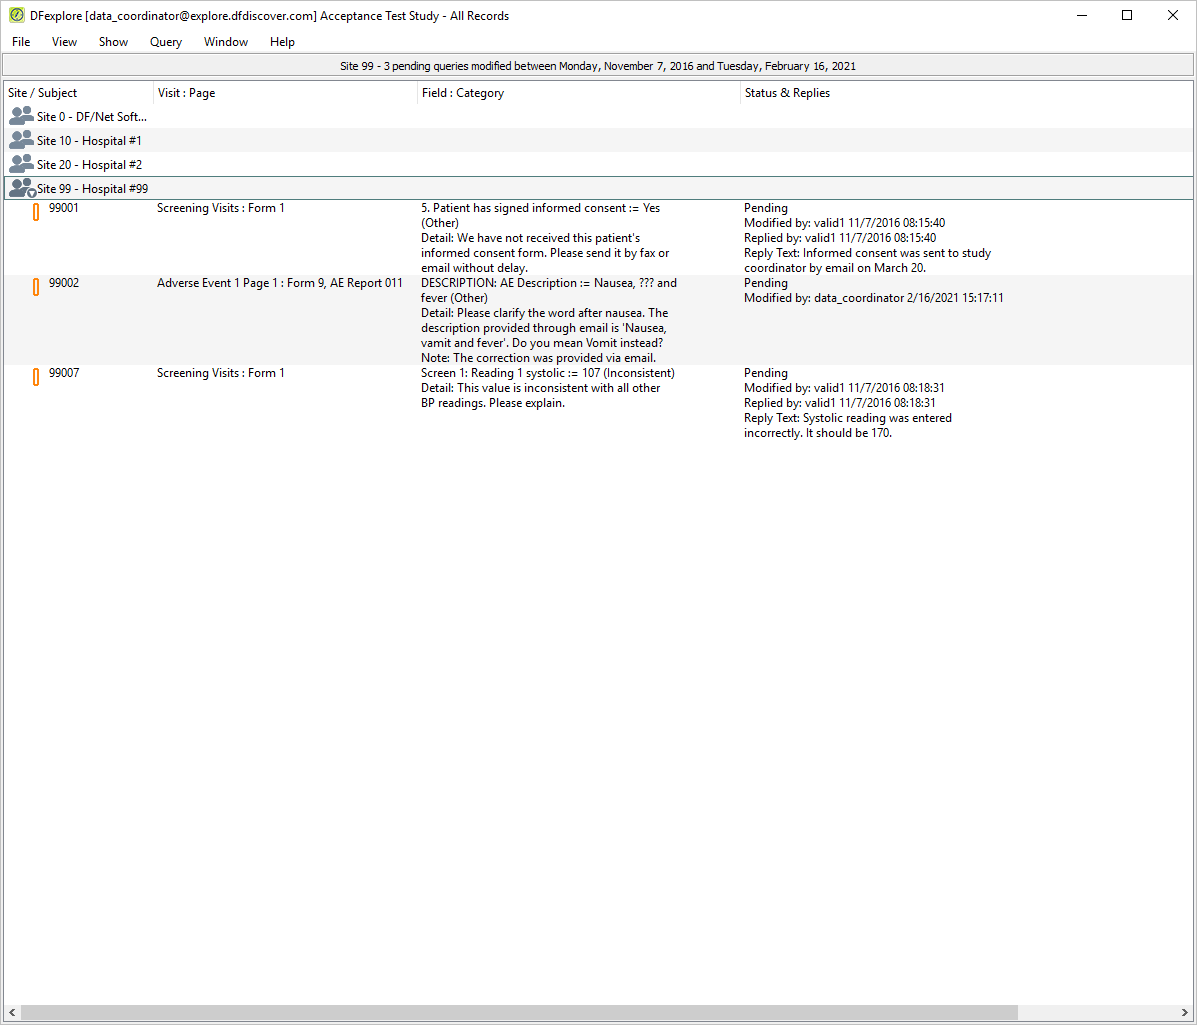
-
Locate the pending query for Subject 99001, 5. Patient has signed informed consent. Double-click the query to make the queried field and page the current page. Examine the information in the Query window.
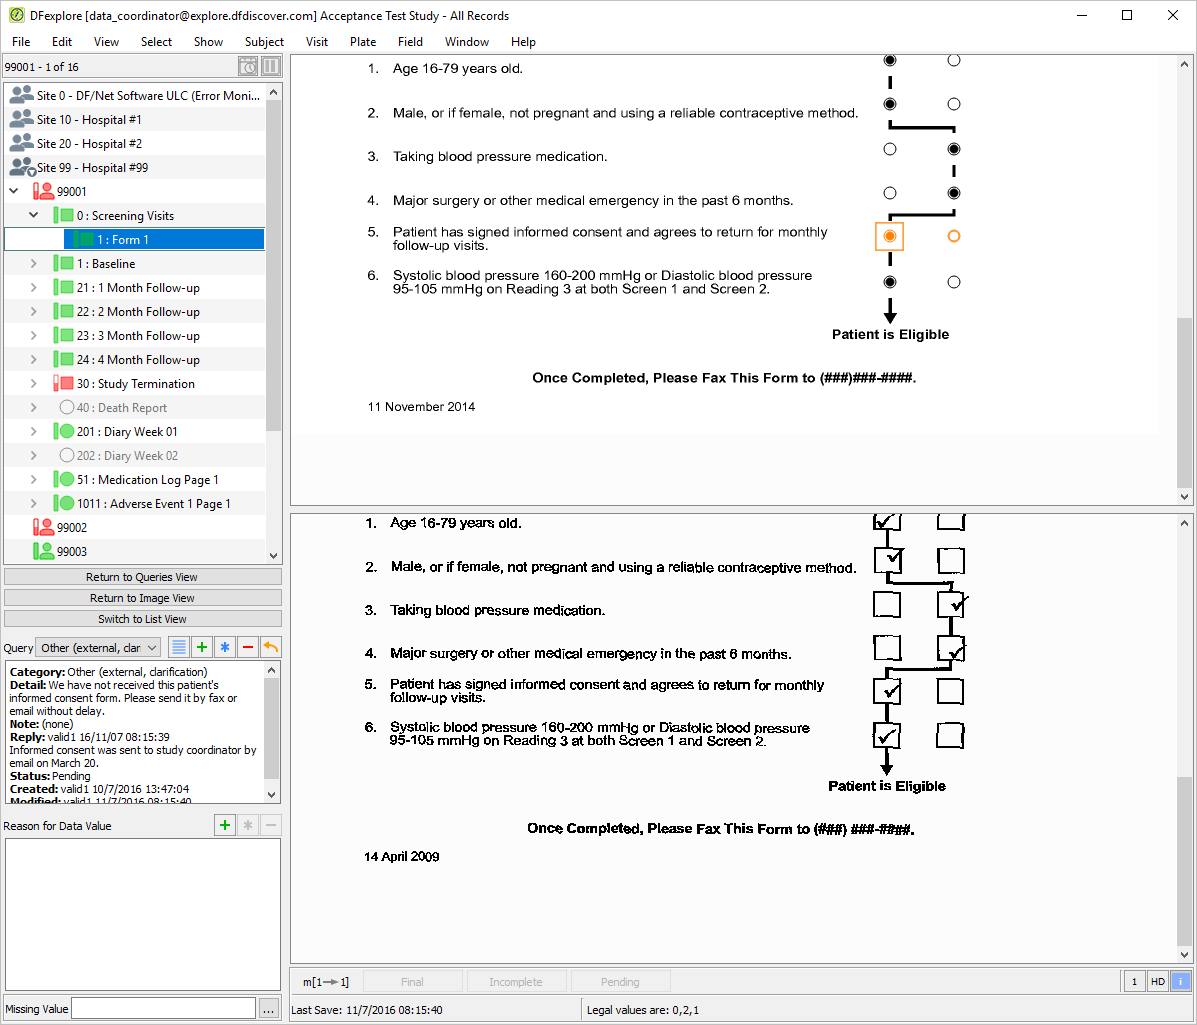
-
Select > to review all queries and reasons that are present on the current page.
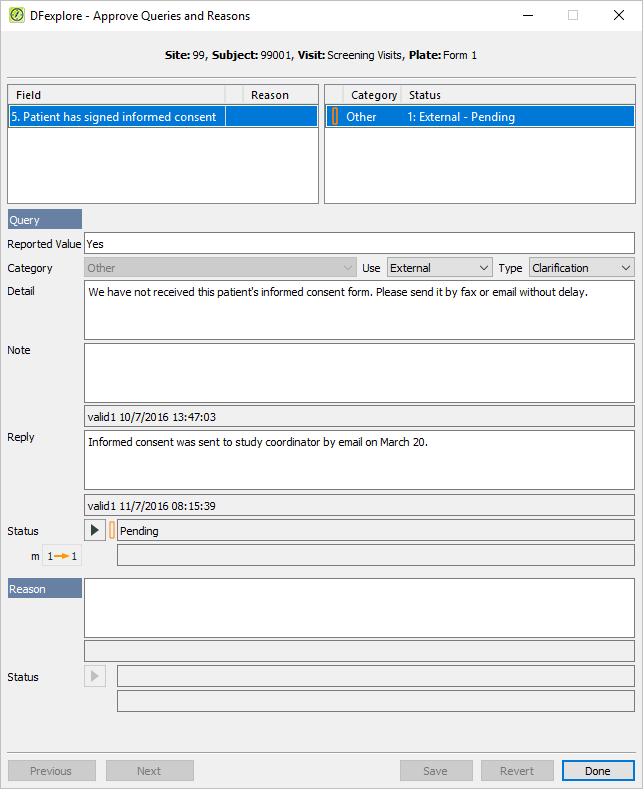
-
Choose Resolved corrected from the Status pull-down. Enter
Signed informed consent was received March 20, 2009.in the Note field.
-
Click to apply the Resolved corrected status to the query. Click to close the Approve Queries and Reasons dialog.
-
Do not change any other data or metadata on the 0 : Screening Visits page for Subject 99001. Make the save buttons at the bottom of the screen active and click to save the data record and query to the database.
In the record list window, click to return to Queries View to process the pending query for Subject 99007.
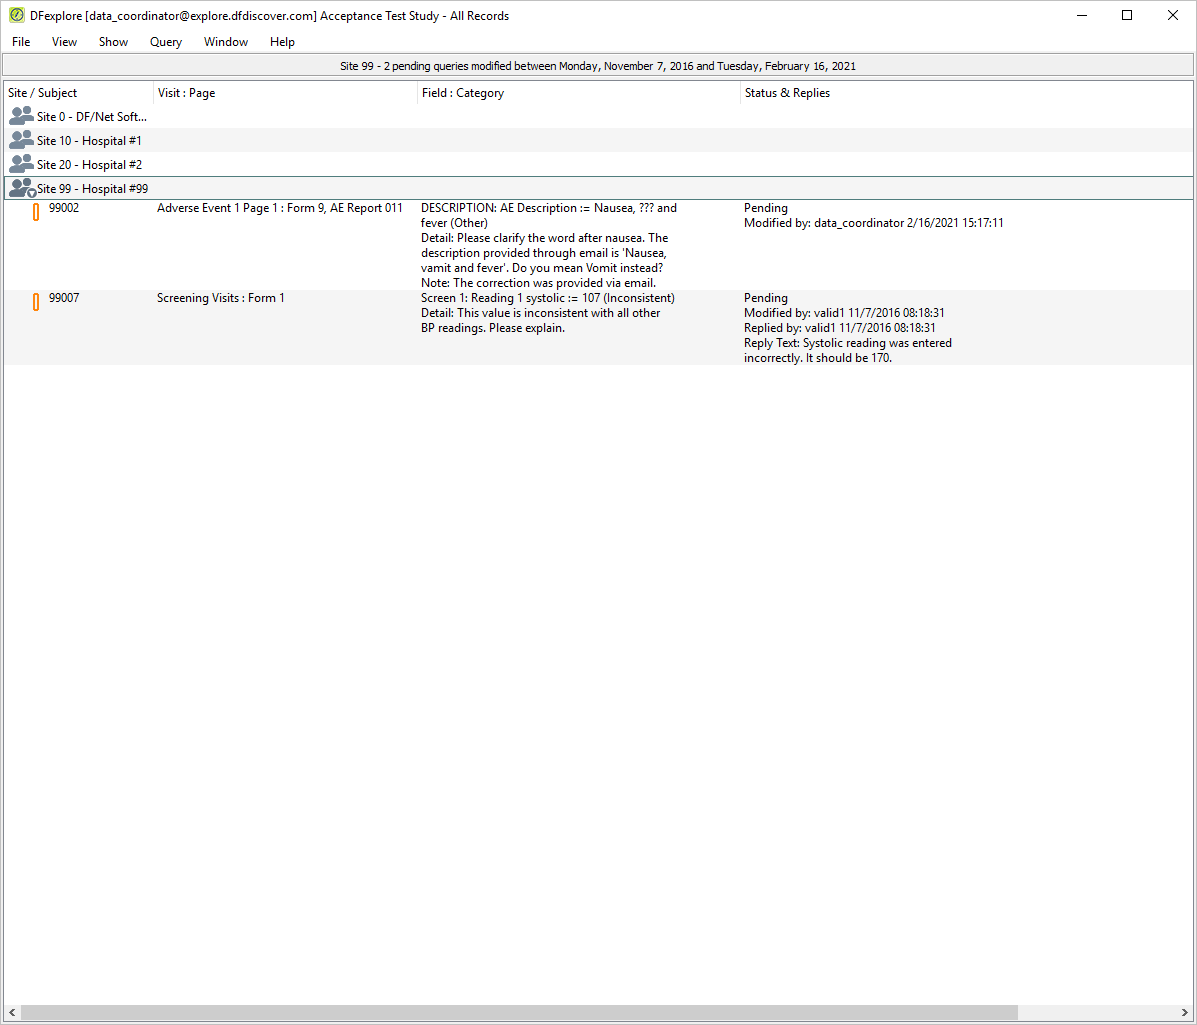
-
Locate the pending query for Subject 99007, Screen 1: Reading 1 systolic. Double-click the query to make the queried field and page current. Examine the information in the Query window.
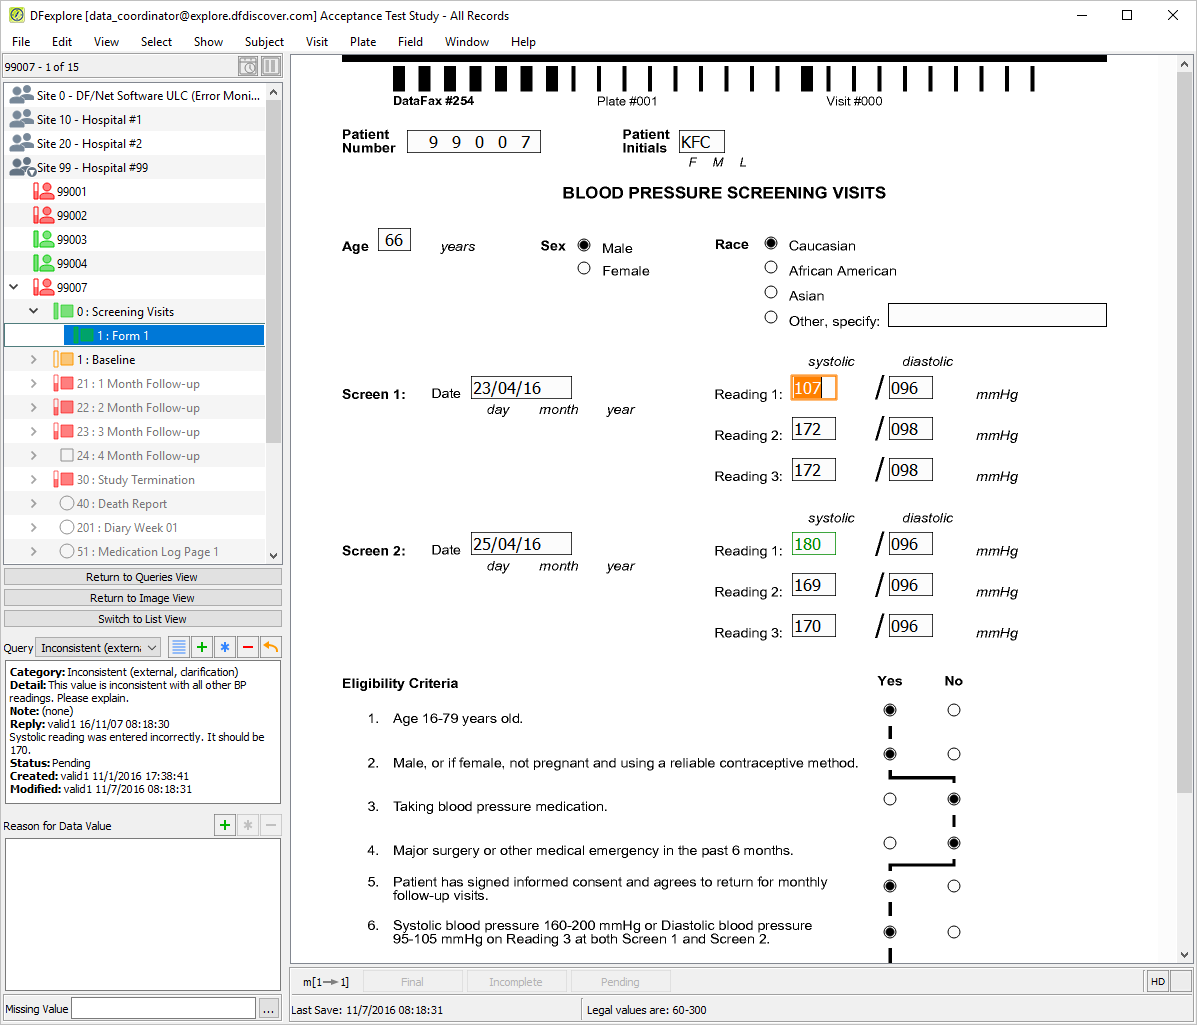
-
Select > to review all queries and reasons that are present on the current page.
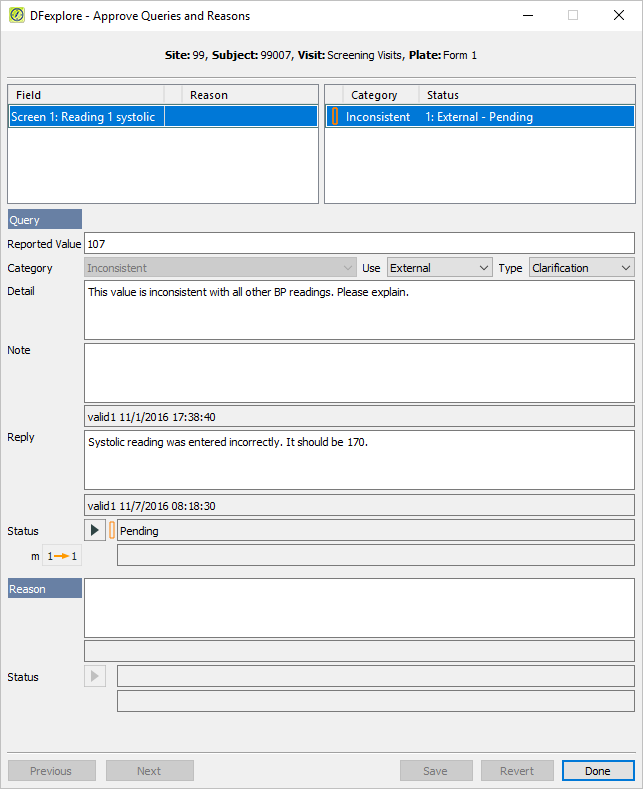
-
Choose Resolved corrected from the Status pull-down.
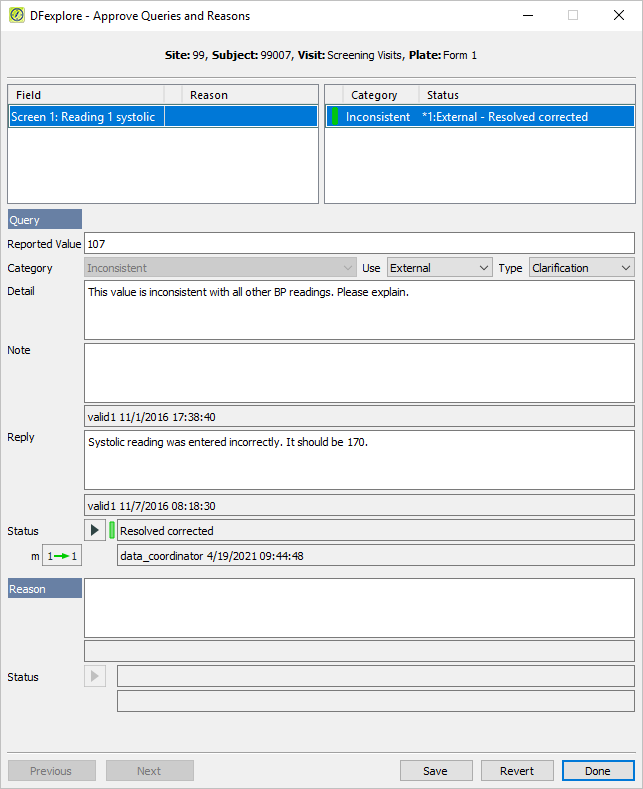
-
Click to apply the Resolved corrected status to the query. Click to close the Approve Queries and Reasons dialog.
-
The query reply indicates that the Screen 1: Reading 1 systolic value should be
170. With the focus still on the Screen 1: Reading 1 systolic field on the page, change the value to170. -
Click to save the data record and query to the database.
-
In the record list window, click to return to Queries View.
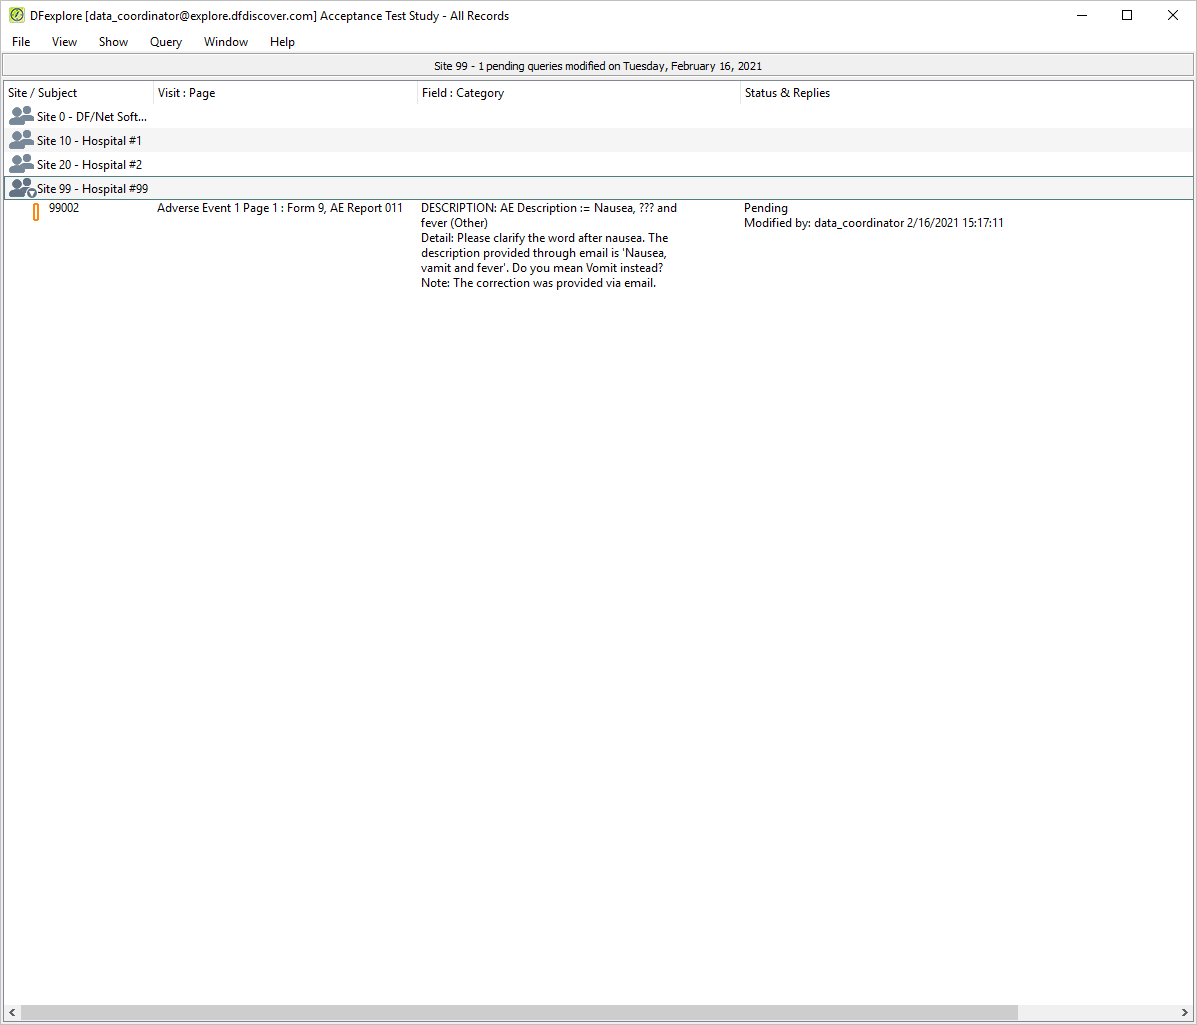
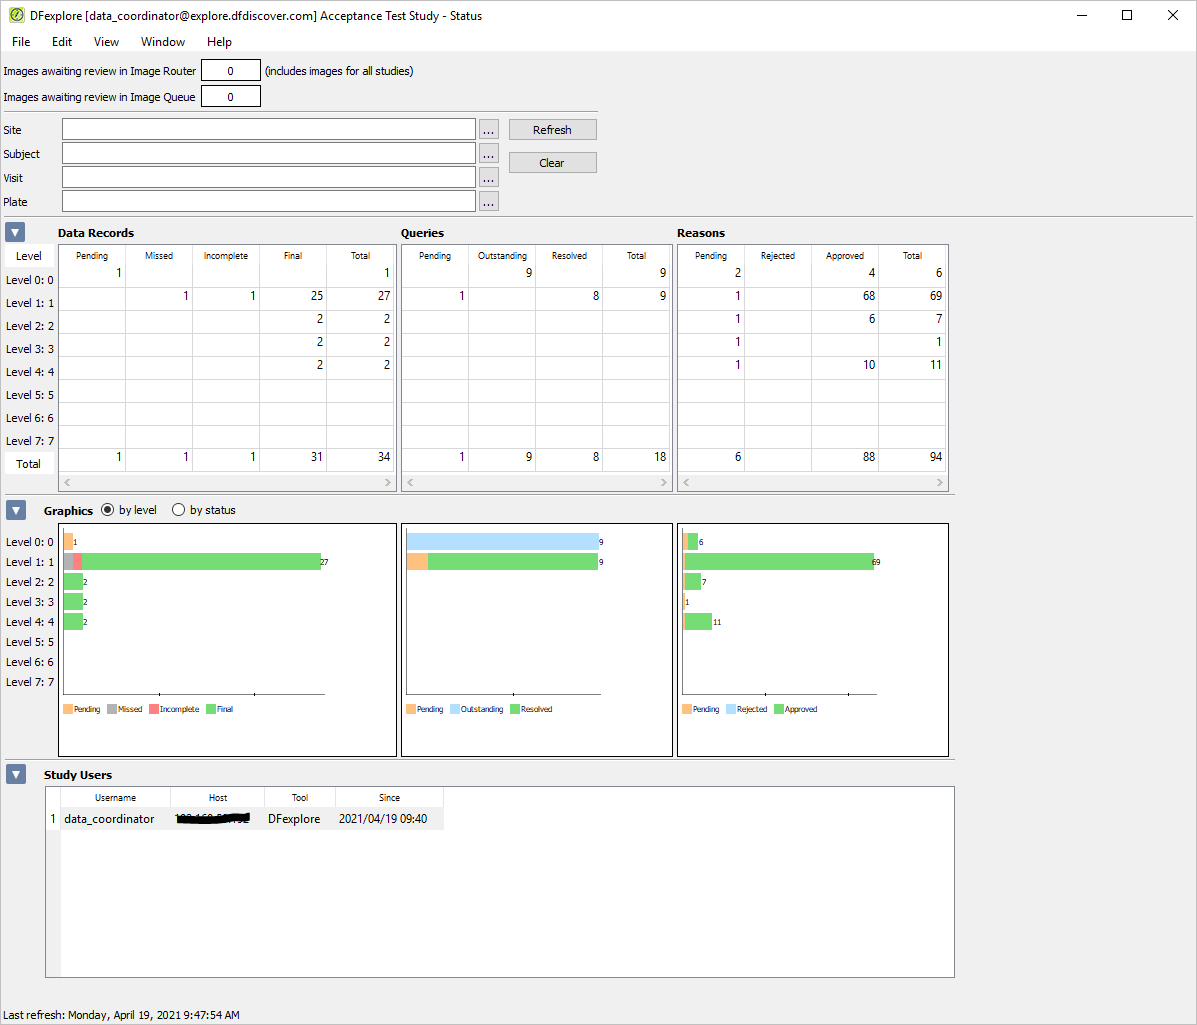
Table of Contents
- 15.1. Tests & Requirements
- 15.2. Begin Module 15. Data Export and DFsas.
- 15.3. Export date values in calender format and save the exported data to a file on the local computer.
- 15.4. Export date values from the database and save the exported data to a file on the local computer.
- 15.5. Examining data values according to user-specified criteria.
- 15.6. Query the database for specific data values.
- 15.7. Create a DFsas job file according to user-specified criteria.
- 15.8. Create a SAS job file and data files using the DFsas job file criteria.
- 15.9. Compare the contents of SAS data files with the actual data in the database.
- 15.10. End Module 15. Data Export and DFsas.
Export date values in calender format and save the exported data to a file on the local computer.
Export date values from the database and save the exported data to a file on the local computer.
Examining data values according to user-specified criteria.
Query the database for specific data values.
Create a DFsas job file according to user-specified criteria.
Create a SAS job file and data files using the DFsas job file criteria.
Compare the contents of SAS data files with the actual data in the database.
Estimate of Time Required: 30 Minutes
-
Start DFATK as described in Module 1 (Installation & Initialization).
-
Click followed by to begin this module.
-
Click to email a copy of ID99006_diary.pdf to
data_manager. Clicking more than once will result in multiple pages arriving to your email inbox.Note Refer to Section 1.8, “Creating user accounts and assigning study permissions.” as a valid email address is required for
data_managerto receive the module specific PDF files.Wait 2-3 minutes prior to proceeding to DFexplore.
All data exported in the following tests will be output to the DFexplore List View screen rather than saved to a file. List View does have 3 save options: Export Data, Save Data Retrieval File and Save As PDF.
-
Start DFexplore, login as user
data_managerand choose 254 Acceptance Test Study as described in Section 1.7, “How to start DFexplore”. -
Select > .
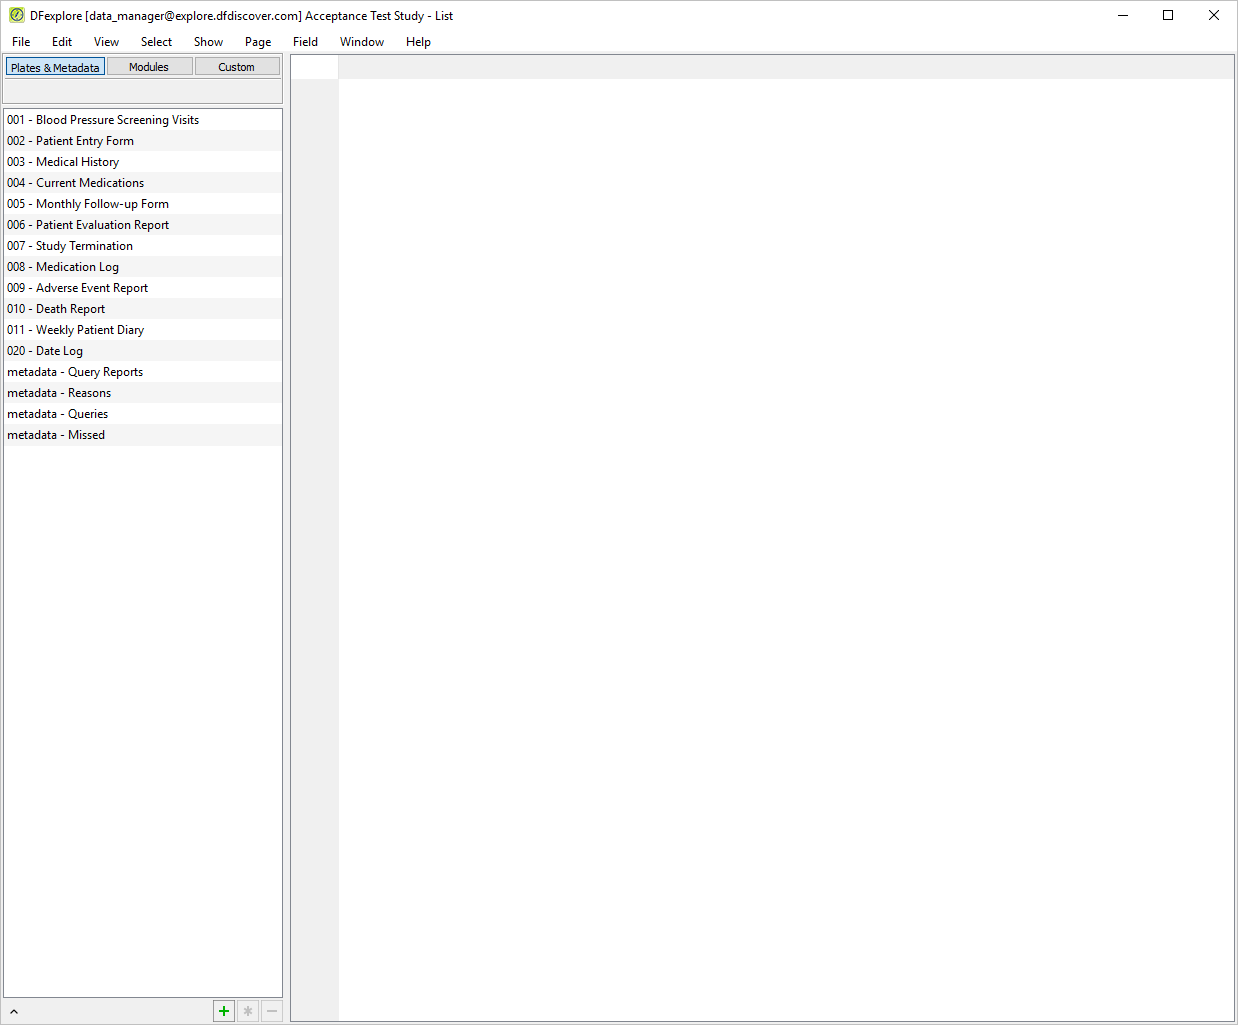
-
Select > . In the dialog, locate the List View panel. Click
and enter the List View settings as follows:
Display field name as = alias
Display coded field as = label
Display date field as = calendar
Check (enable) apply imputation rule
Display missed code as = default
Check (enable) Fill cell with field color
Uncheck (disable) Expand text fields
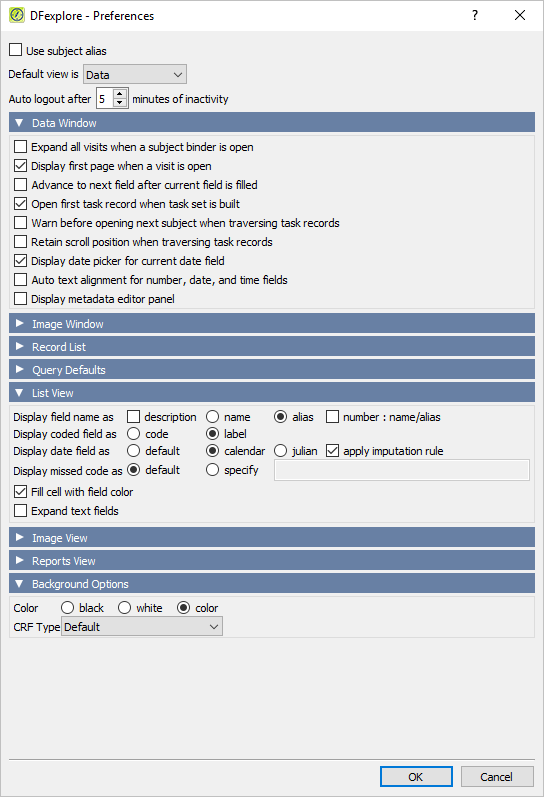
-
Click to close the dialog.
-
In the main List View window, Plates & Metadata panel, click 011 - Weekly Patient Diary.
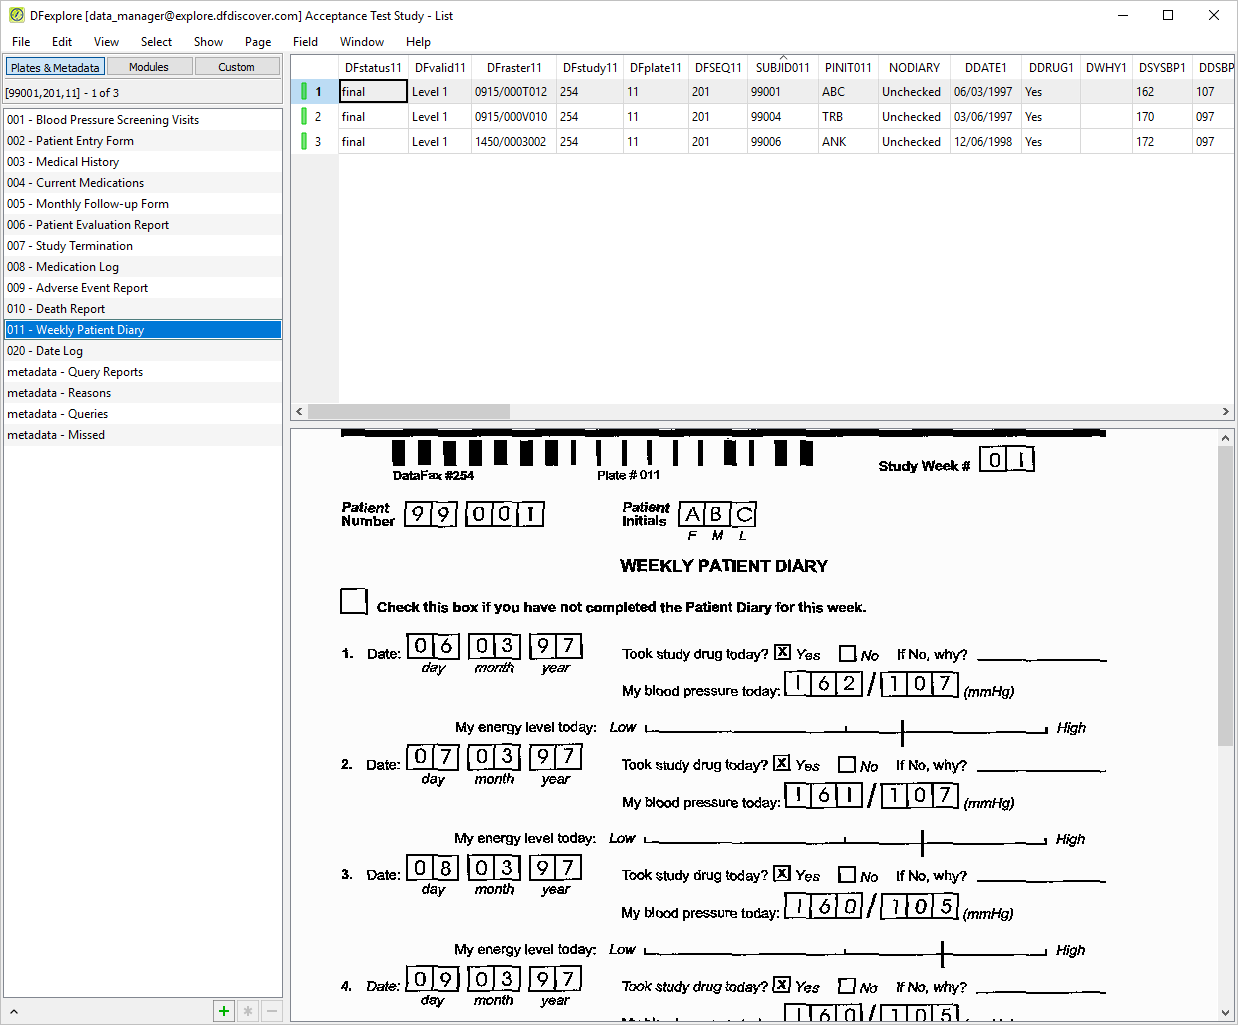
-
Select > to show the listing of all data fields and their metadata properties defined for the plate. In the Data Fields window, click
next to fields 7:SUBJID011,10:DDATE1,16:DDATE2,22:DDATE3,28:DDATE4,34:DDATE5,40:DDATE6
and 46:DDATE7. The fields are added to the Display Fields window.
Note Alternatively fields can also be added by dragging-and-dropping the desired fields from the Data Fields or Metadata Fields windows to the Display Fields window.
-
Click to apply the field selection criteria and close the dialog.
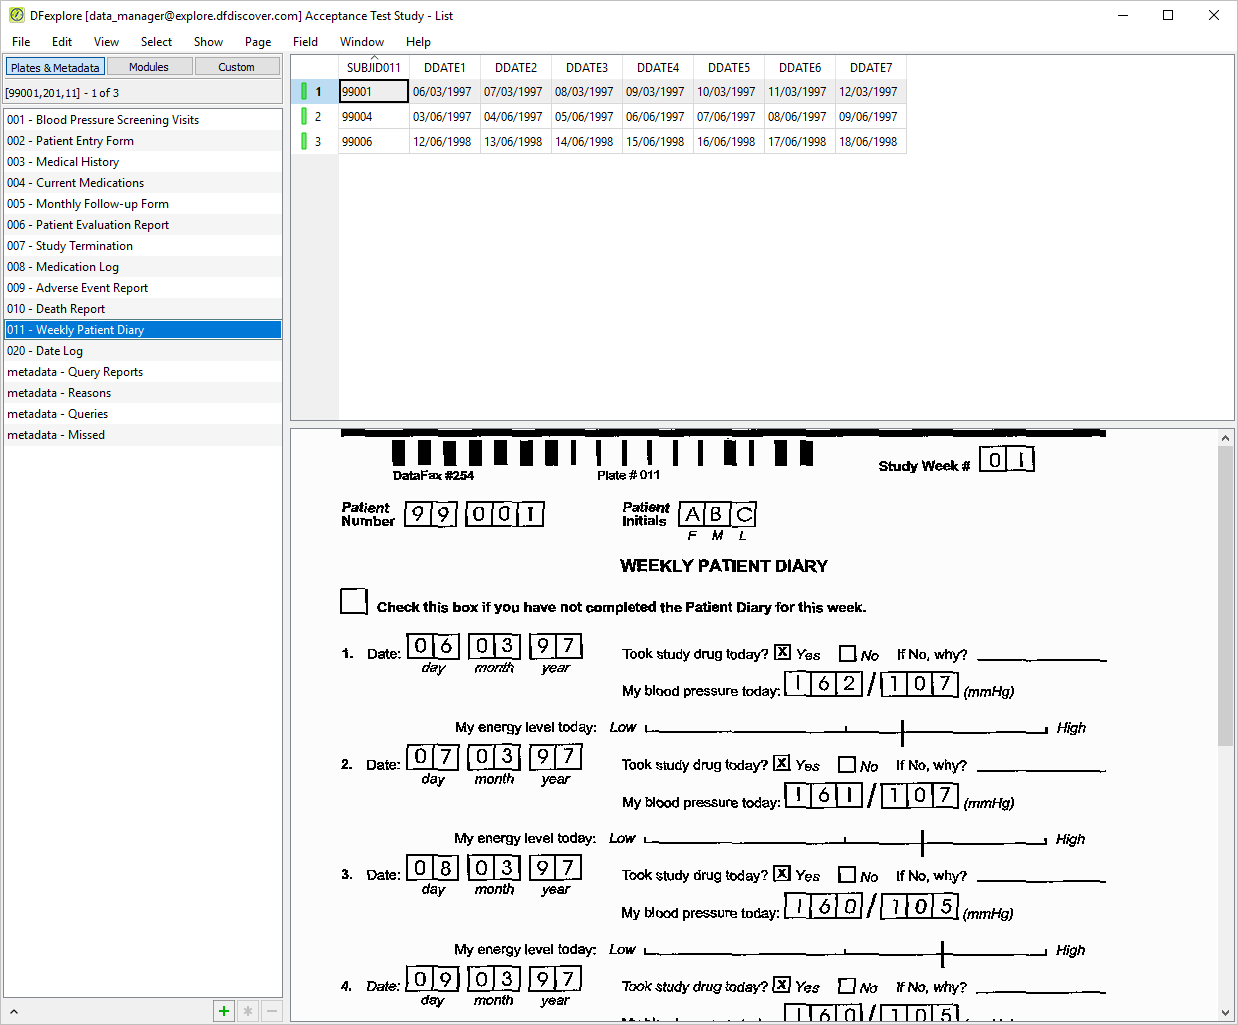
-
Examine each of the exported date fields. Locate the field column for DDATE1 in the table. This is field 10, 1. Date on the WEEKLY PATIENT DIARY page. In Section 3.12, “Submit a copy of the newly defined Plate 11 into the study database and retrieve the page in DFexplore Image View.” this field was defined with the format
dd/mm/yy(a 2-digit year). Verify that field 10 has been correctly exported in calendar (4-digit year) format. -
Double-click DDATE1 cell for ID 99006 in the table. This takes you to the corresponding date field in the WEEKLY PATIENT DIARY page in Data View. Confirm that the date values are the same as those on the printed WEEKLY PATIENT DIARY for Subject 99006.
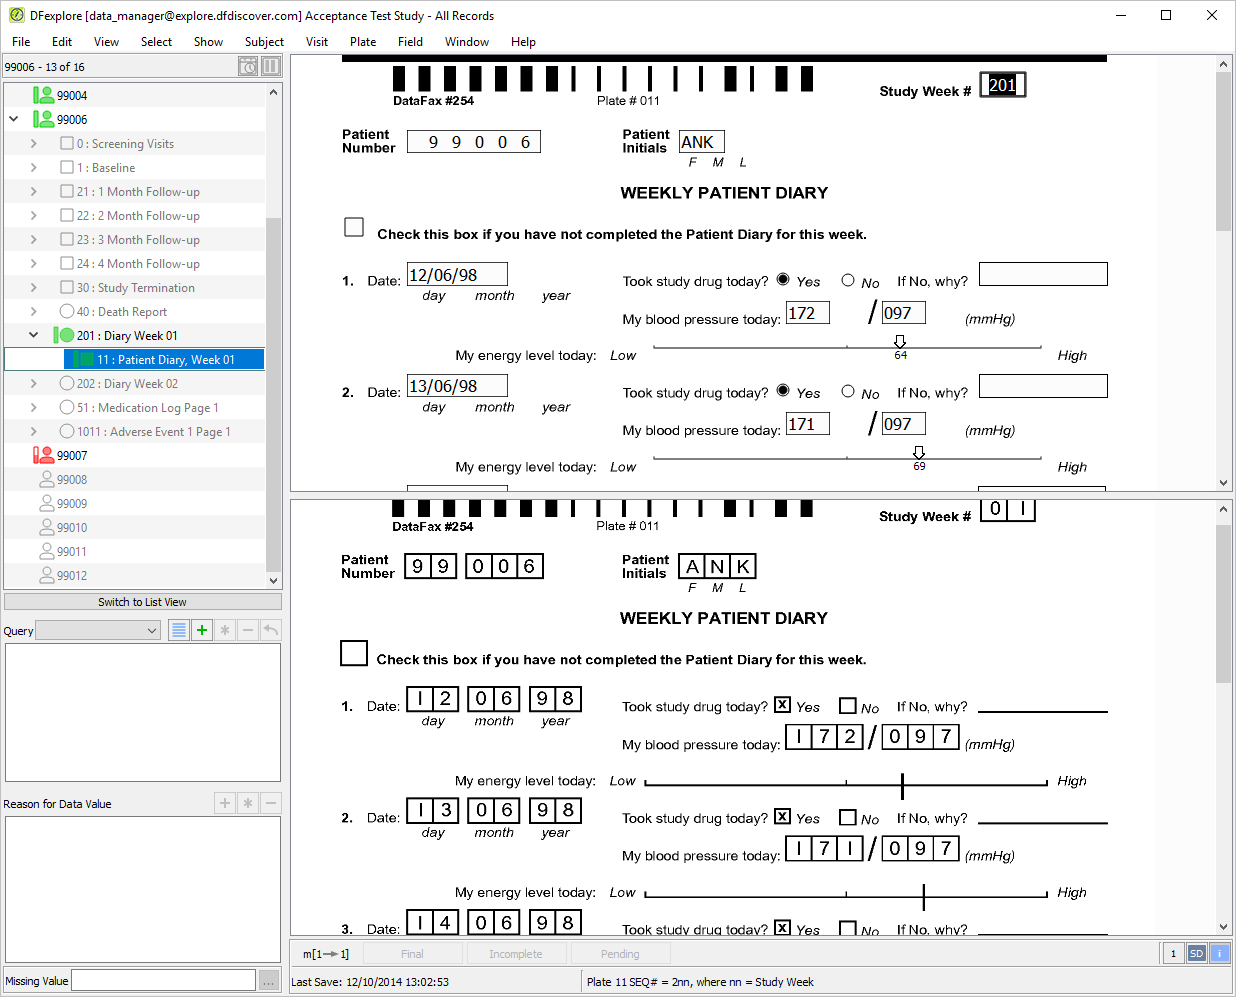
-
In the record list, click to be taken back to the date fields in List View. Confirm that the date values displayed are the same as those on the printed WEEKLY PATIENT DIARY, except now in calendar (4-digit year) format.
-
Select > . In the List View panel, choose julian as the value of Display date field as. Click to apply the settings and close the dialog. Confirm that the exported date values are now in julian format.
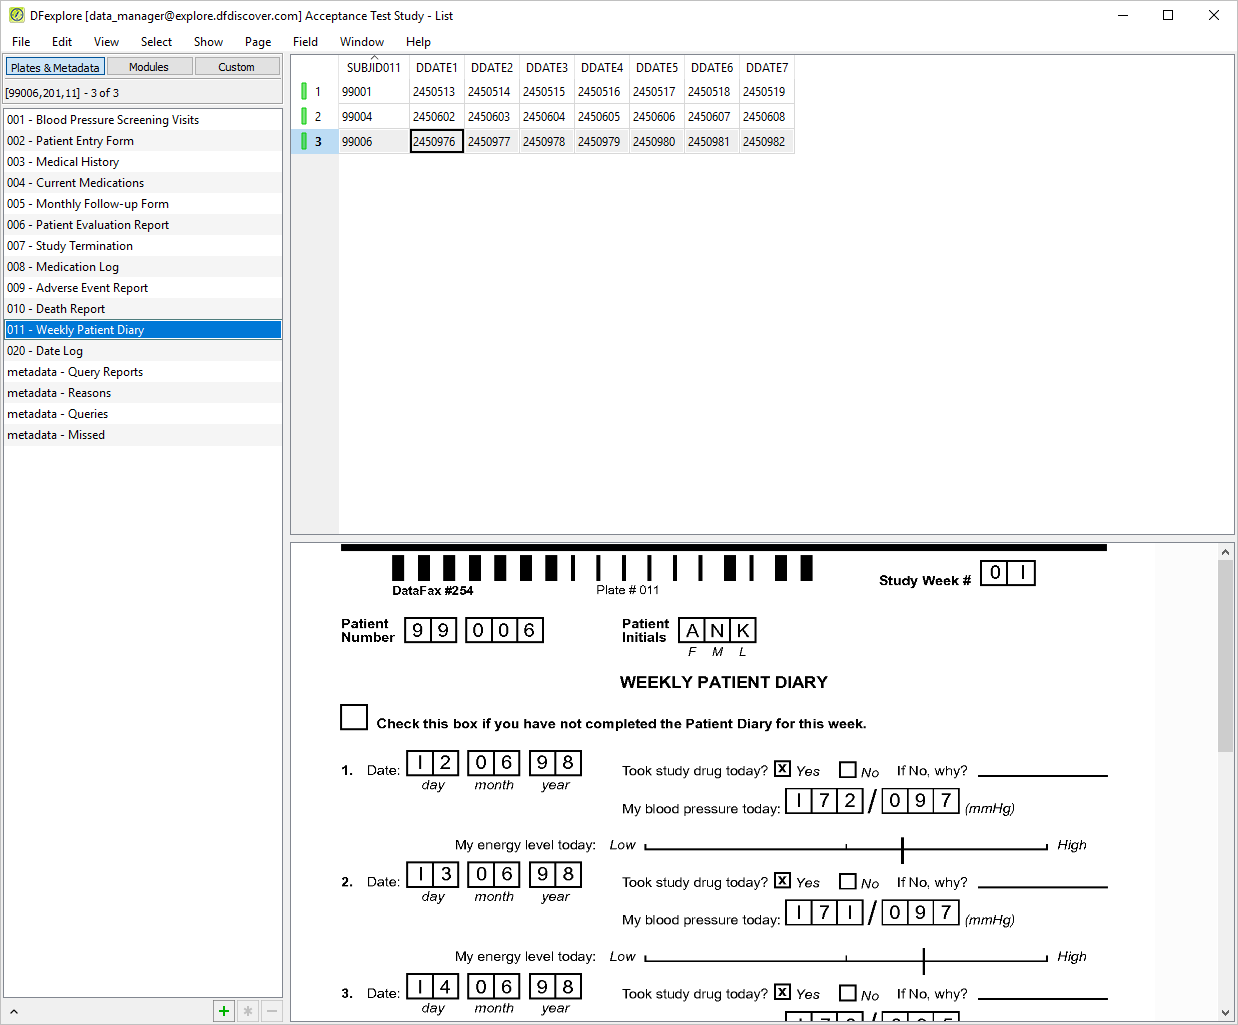
-
Select > to save the dates to a local file. In the dialog, set:
Format = Excel
Check (enable) Include header as the first record in output file
Check (enable) Open output file after export
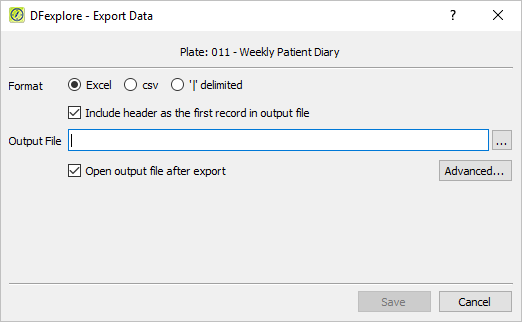
-
Click next to Output File. Choose a directory in the file selection dialog, enter
module15_dates.xlsxas the filename, and click . Click to create/write the file and close the dialog.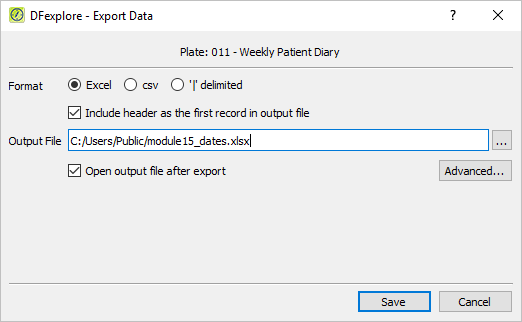
-
The file
module15_dates.xlsxopens. Confirm the contents and then close the file.
-
From the list of plates, select plate 001 - Blood Pressure Screening Visits to make it current.
Select > . In the Data Fields window, click
next to fields
7:SUBJID001,8:PINIT001,9:AGE,10:SEX. The fields are added to the Display Fields window. Note Fields can also be added by dragging-and-dropping the desired fields from the Data Fields or Metadata Fields windows to the Display Fields window.
-
Click to apply the field selection criteria and close the dialog. Examine each of the data fields.
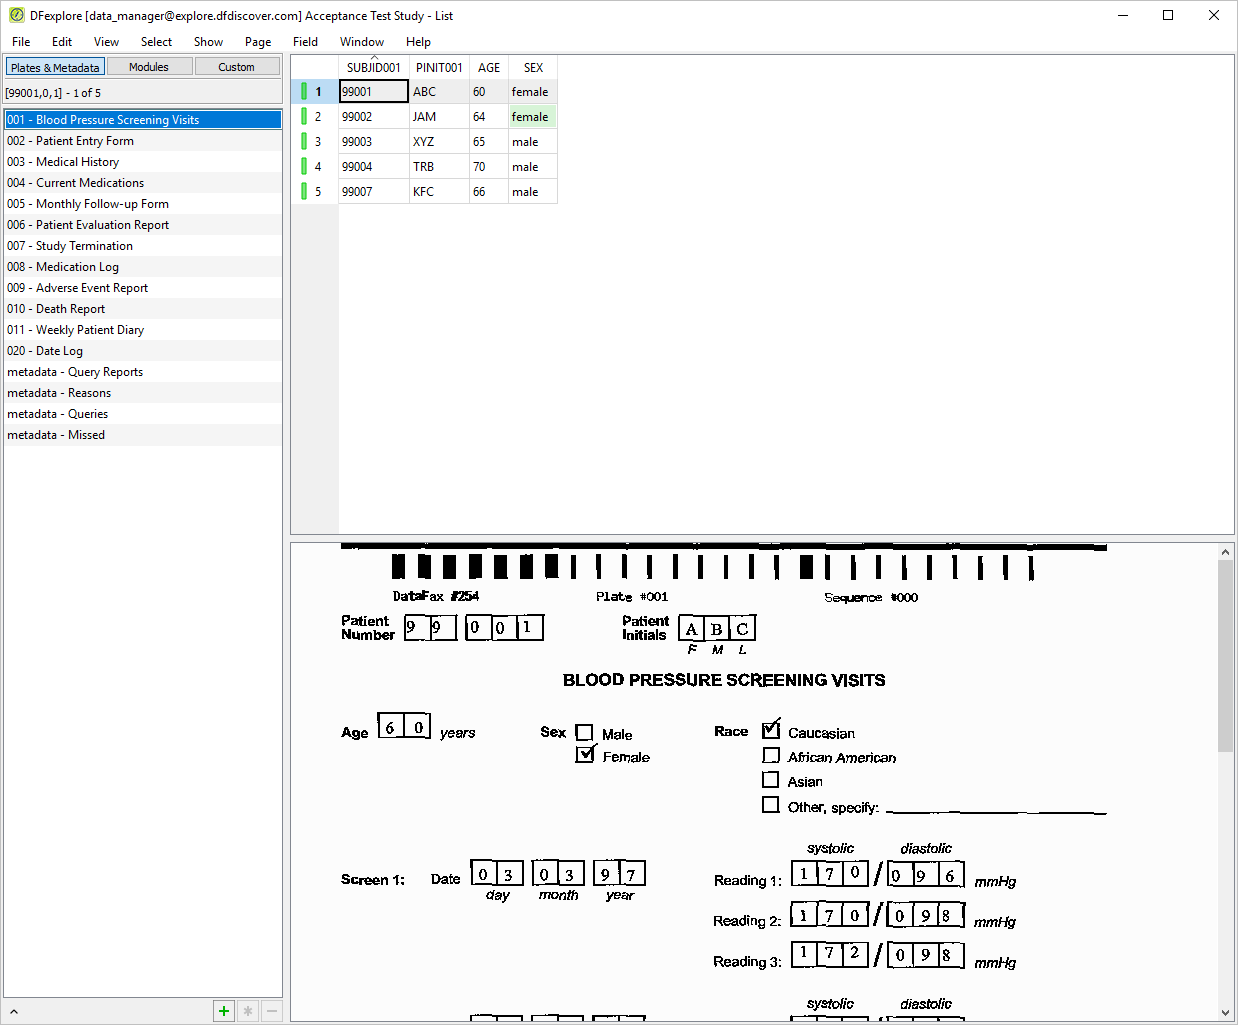
-
To search for specific subject data, select > . Enter
99003in the Subject field.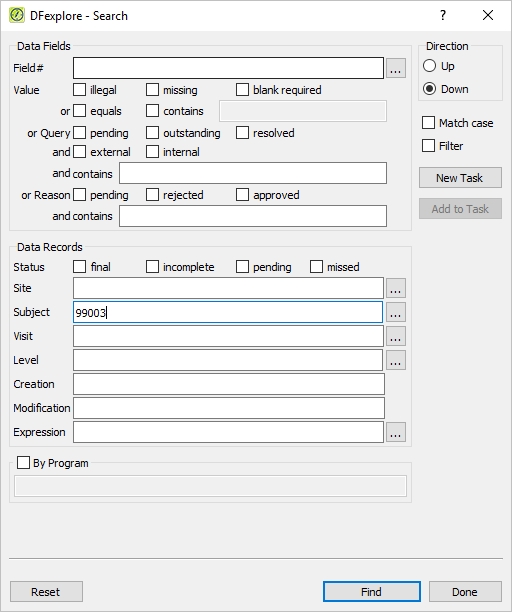
-
Click to start the search. Examine the message in the bottom-left corner of the dialog as well as the highlighted entry in the List View table.
-
Click to locate a 2nd match (if one exists) in the List View table.
-
Click to create a task set of records that match the search criteria. In the resulting dialog, change the Mode to View.
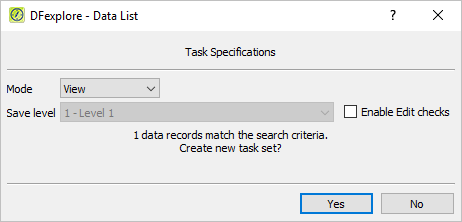
-
Click in the Data List dialog to create the task set. Examine the message in the bottom-left corner of the Search dialog, then click to close the dialog.
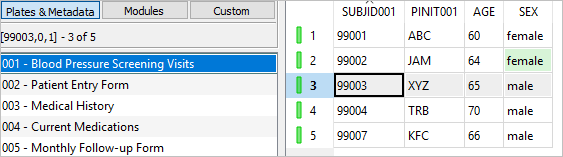
-
Click to open Data View and review the List View task record. Examine the Data View record list and confirm that only the task record for Subject 99003 is displayed. Click .
-
Select > . In the dialog, locate the List View panel. Choose default for Display date field as. Click to save the setting and close the dialog.
-
Click 007 - Study Termination to make it the current page. Select > to open the Search dialog.
-
Click and in the resulting dialogs to clear all previously specified search criteria.
-
Click next to the Expression field. The Expression Editor opens.
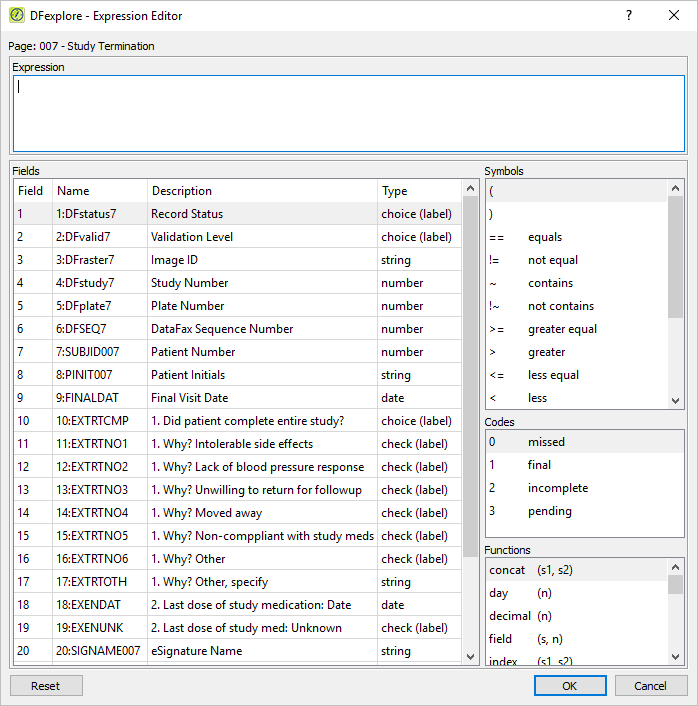
-
For the first part of the query, select 9:FINALDAT from the Fields table. Next, click in the Symbols list. Choose julian from the Functions list. In the Expression field, enter the date
"1997/01/01"(including the quotes). Close the parentheses. To build the second part of the query, click From the Symbols list, followed by field 9:FINALDAT from the Fields table. Next, click in the Symbols list. Choose julian from the Functions list. In the Expression field, enter the date"1997/06/30"(including the quotes). Close the parentheses. Click .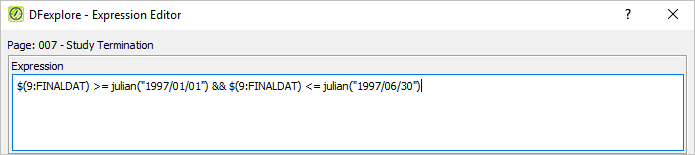
-
Click to locate all subjects that have study termination dates that match the specified search expression.
-
Click to locate the next match.
-
Do not continue the search and click to close the Search dialog.
-
Select > . The DFsas dialog opens.
Note If you have previously executed this module as
data_manager, the DFsas Jobs panel may display jobfile1 and possibly other files. If jobfile1 is already in the list, highlight jobfile1 and click before continuing with this module. -
Click to create a new DFsas job.
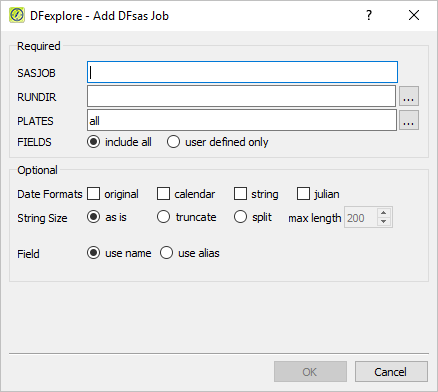
-
Enter SASJOB =
jobfile1. Click RUNDIR to display the file selection dialog. Choose a directory to save "jobfile1" and click .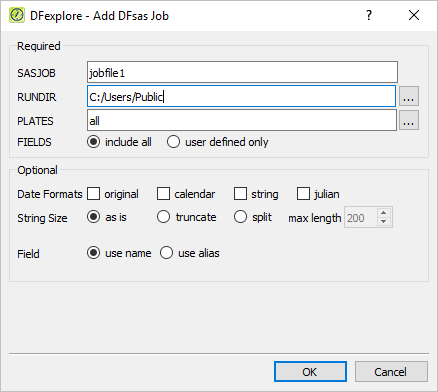
Note The RUNDIR directory was specified as
C:\Users\Public\in this example. Given the directory structure on your local computer, you may have chosen a different value for RUNDIR. -
Click PLATES to view all defined study plates. From the list, hold Control key (Command on macOS) and click the entries for 002 - Patient Entry Form and 009 - Adverse Event Report to highlight them. Click . Choose FIELDS = include all.
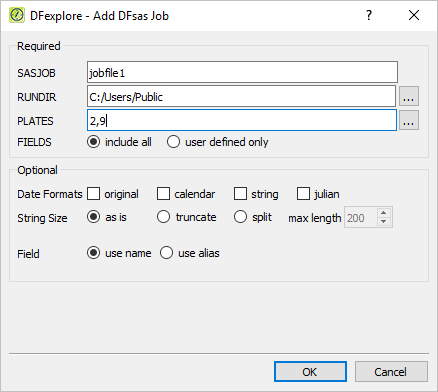
-
In the Optional panel set:
Check (enable) only calendar for Date Formats
String Size = as is
Field = use alias
Click to create and add
jobfile1.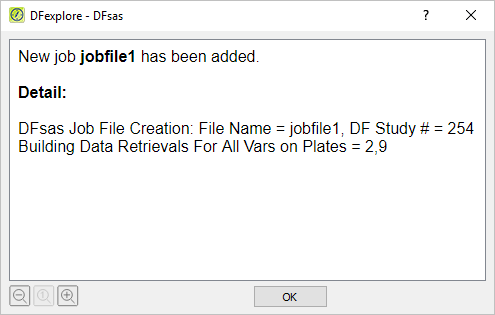
-
Click in the summary confirmation dialog.
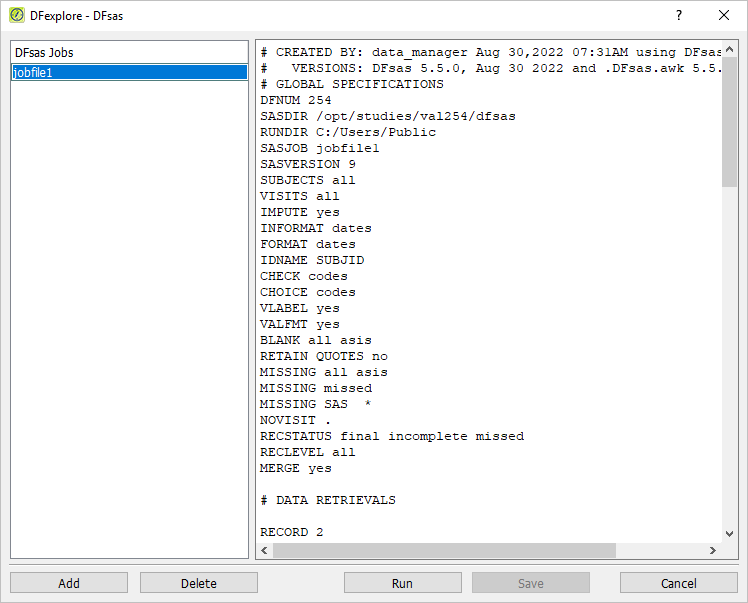
-
Edit the SUBJECTS global specification in the new
jobfile1by selecting it from DFsas Jobs panel. In the main window, change the textSUBJECTS alltoSUBJECTS 99001,99002. This will limit the created SAS data files to subjects 99001 and 99002 only.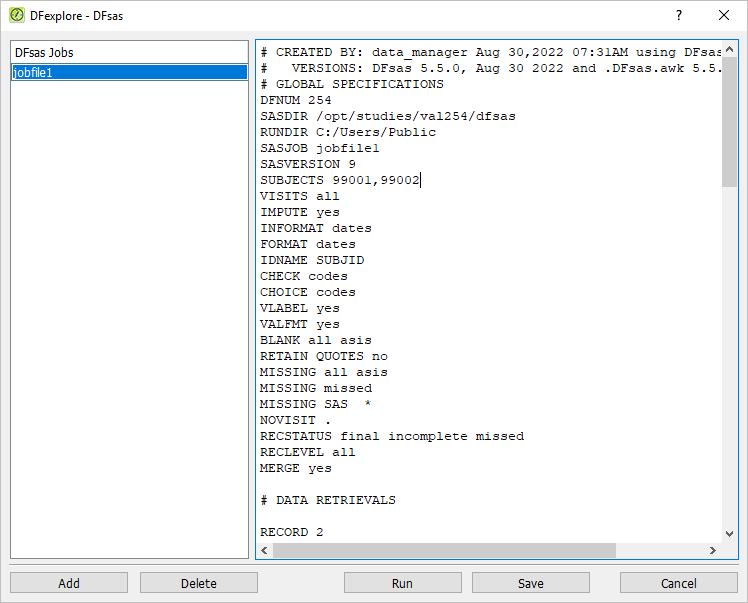
-
Locate the global specifications for CHECK and CHOICE. Change
CHECK codestoCHECK labelsandCHOICE codestoCHOICE labels.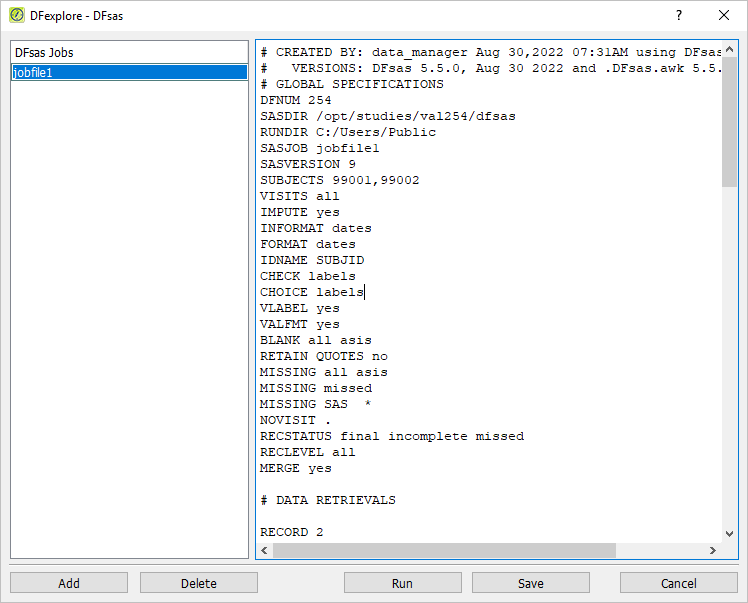
-
Click to save the changes. In the resulting confirmation dialog, choose replace existing job and click .
-
In the DFsas window, highlight
jobfile1. Click to create SAS job and data files.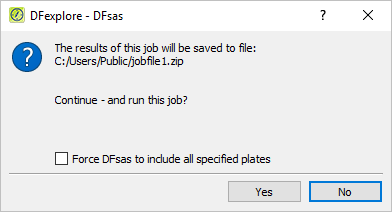
-
In the confirmation dialog, do not check Force DFsas to include all specified plates. The SAS job and data files will not include empty plates. Click to continue and run the DFsas job. After a pause while the job runs, the results dialog appears. Click to close the dialog.
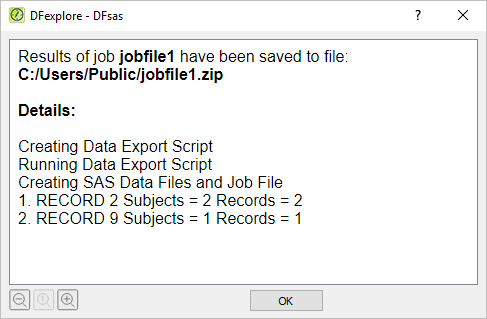
-
Using the file explorer, locate the directory previously specified as the value of RUNDIR. Confirm that
jobfile1.zipis present. Double-clickjobfile1.zipto unzip the file. Open thejobfile1folder and confirm that the filesjobfile1,jobfile1.sas,jobfile1.d01andjobfile1.d02are present. -
With a text editor, open the data file
jobfile1.d01. Examine the contents and confirm that it contains 2 data records - one for each of subjects 99001 and 99002. Print the file (you will need to reference this printed output in Section 15.9, “Compare the contents of SAS data files with the actual data in the database.”) and then close the text editor application. -
With the same text editor, open the data file
jobfile1.d02. Examine the contents and confirm that it contains 1 data record. Print the file (you will need to reference this printed output in Section 15.9, “Compare the contents of SAS data files with the actual data in the database.”) and then close the text editor application.
-
Click to dismiss the DFsas dialog. Select > . Without changing any settings, click .
-
Select > to change from List View to Data View. In the record list, double-click icon for the open Subject 99003 to close the subject binder. The list now displays all subjects for Site 99 - Hospital #99.
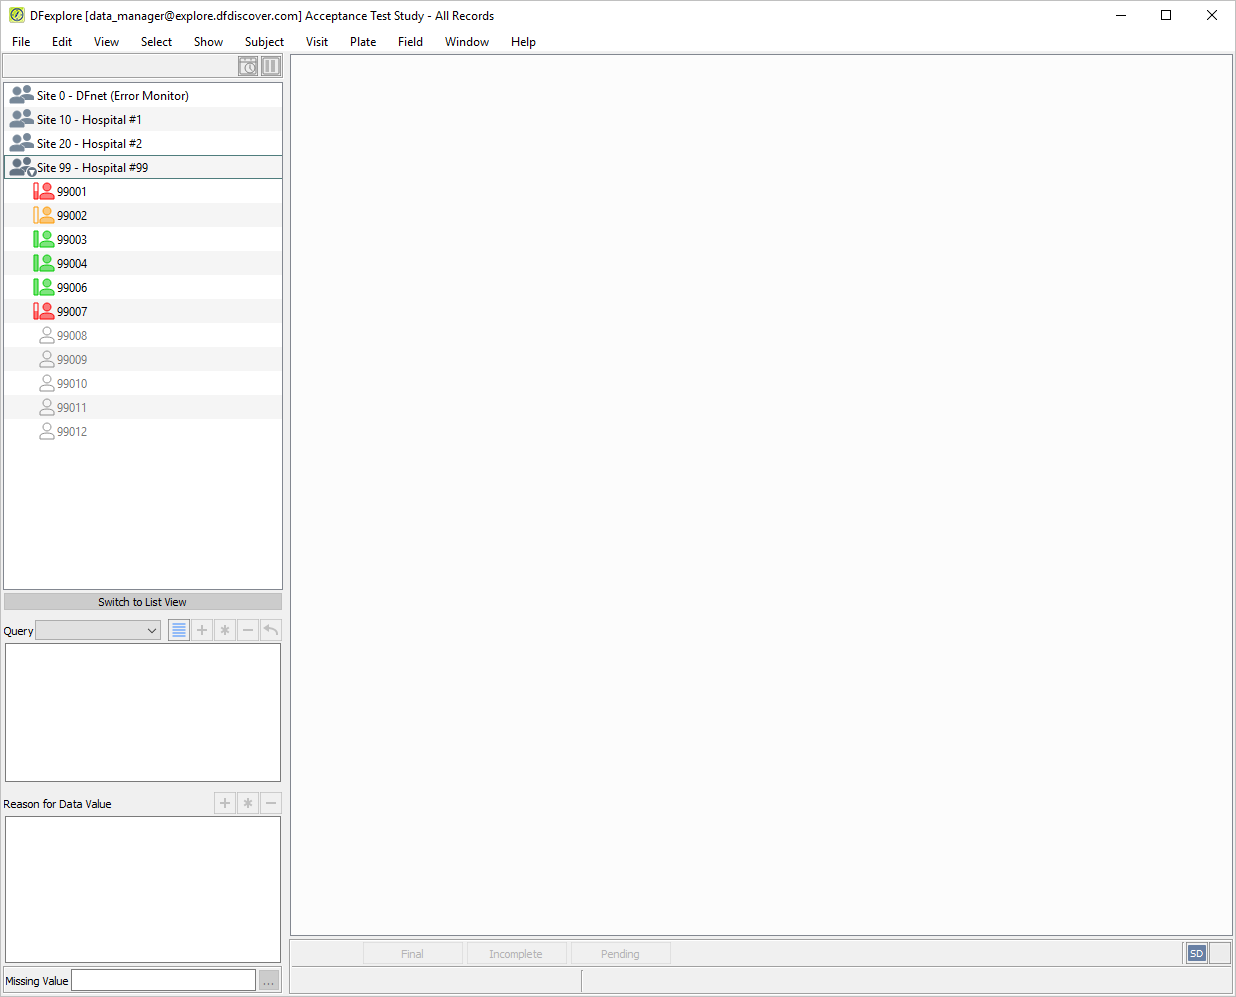
-
Double-click Subject 99001. Select > . Locate the entry for 2: Form 2 within the 1 : Baseline visit and select it from the list to open the data record.
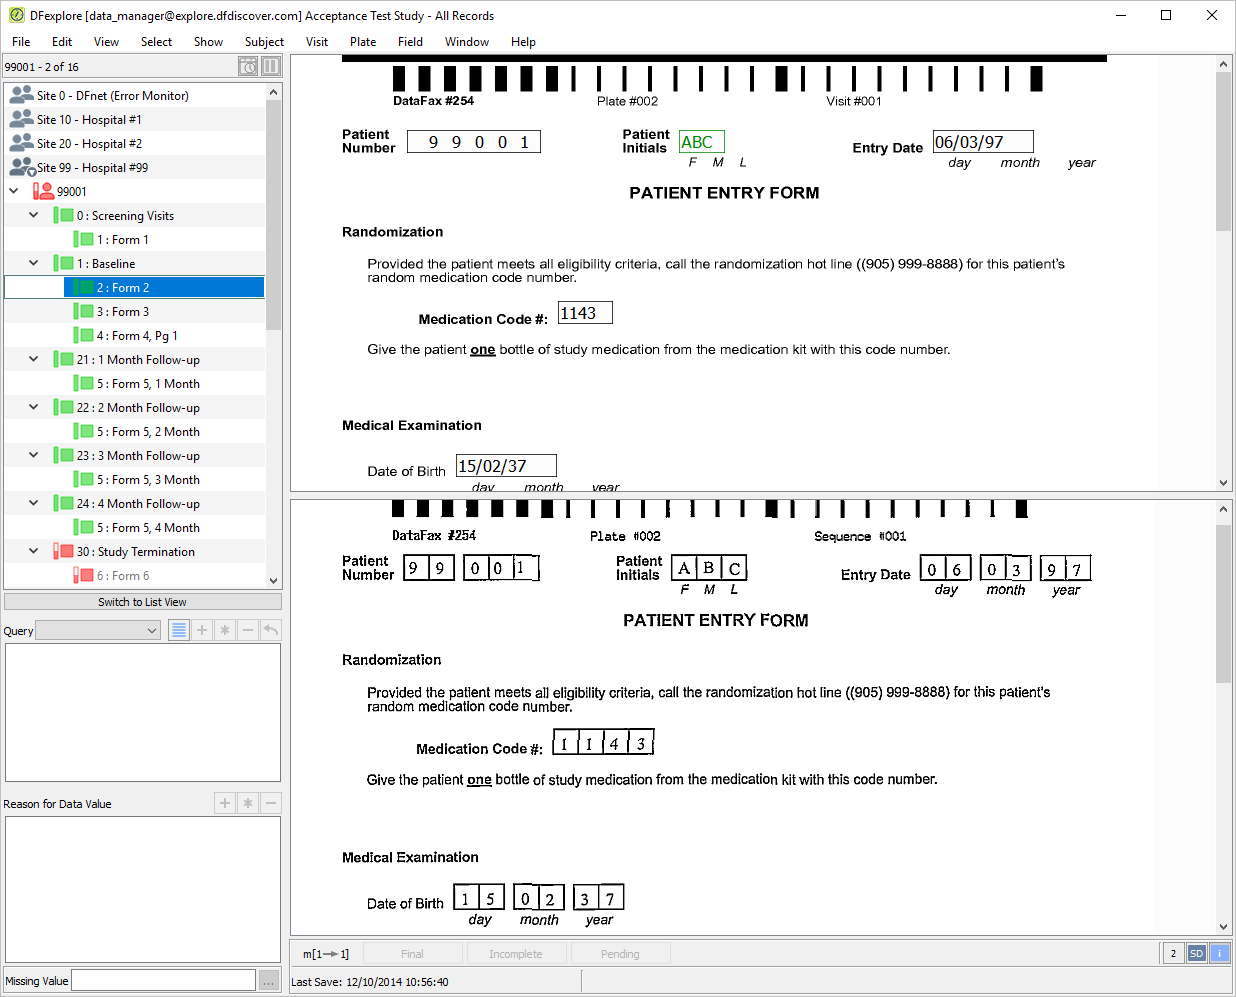
-
Compare the values in each field of the data record with those values in the printout of the data file
jobfile1.d01. -
Double-click Subject 99002 from the record list. Select > . Locate the entry for 2: Form 2 within the 1 : Baseline visit and select it from the list to open the data record.
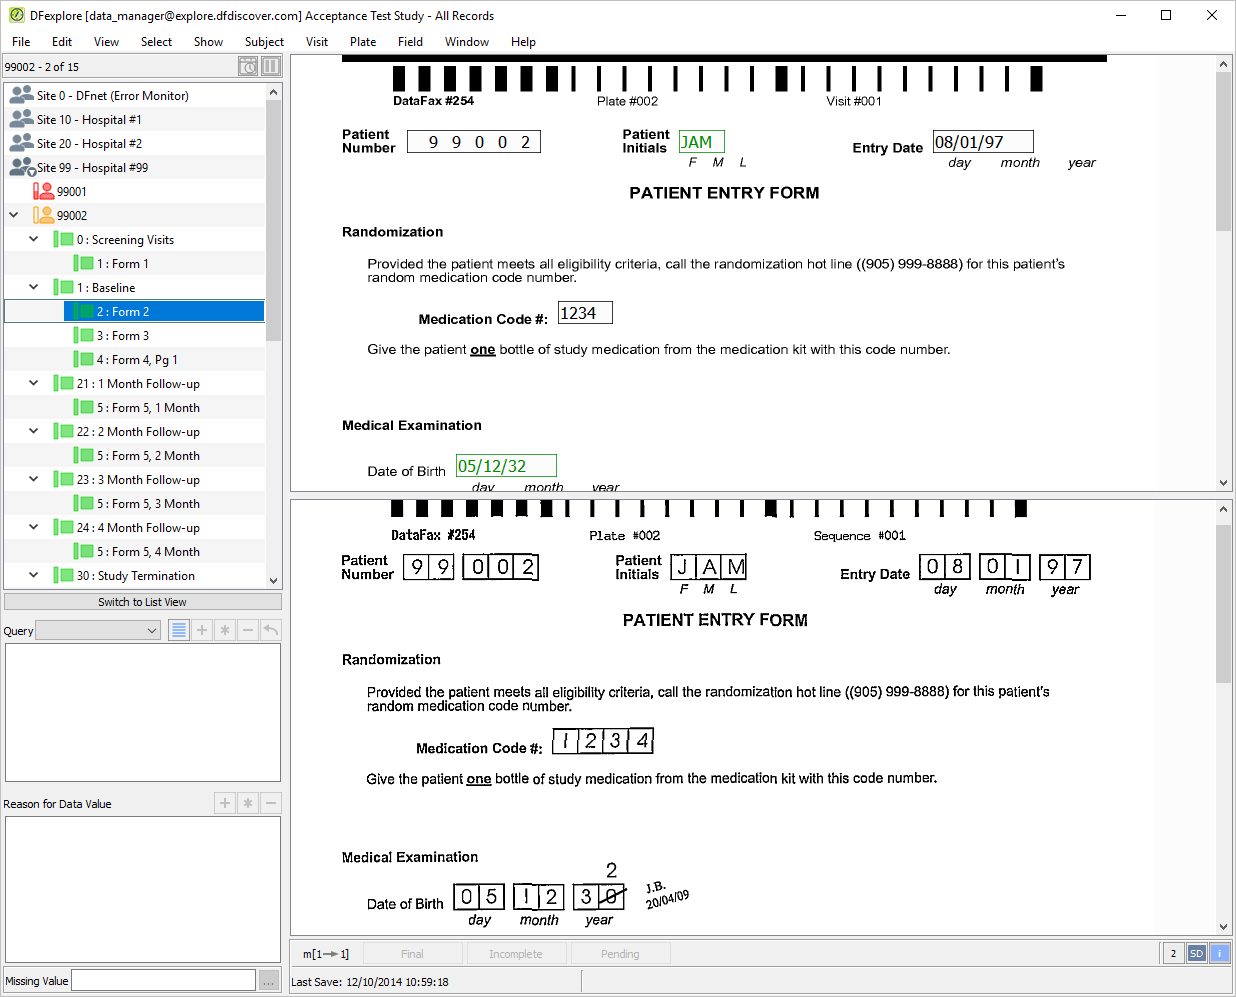
-
Beginning with Subject 99002, Baseline, Form 2, compare the values in each field of the data record with those values in the printout of the data file
jobfile1.d01. -
Double-click Subject 99001 to re-open the subject binder. Select > . Locate the entry for 9: form 9, AE Report 011 within the 1011: Adverse Event 1 Page 1 visit and select it from the list to open the data record.
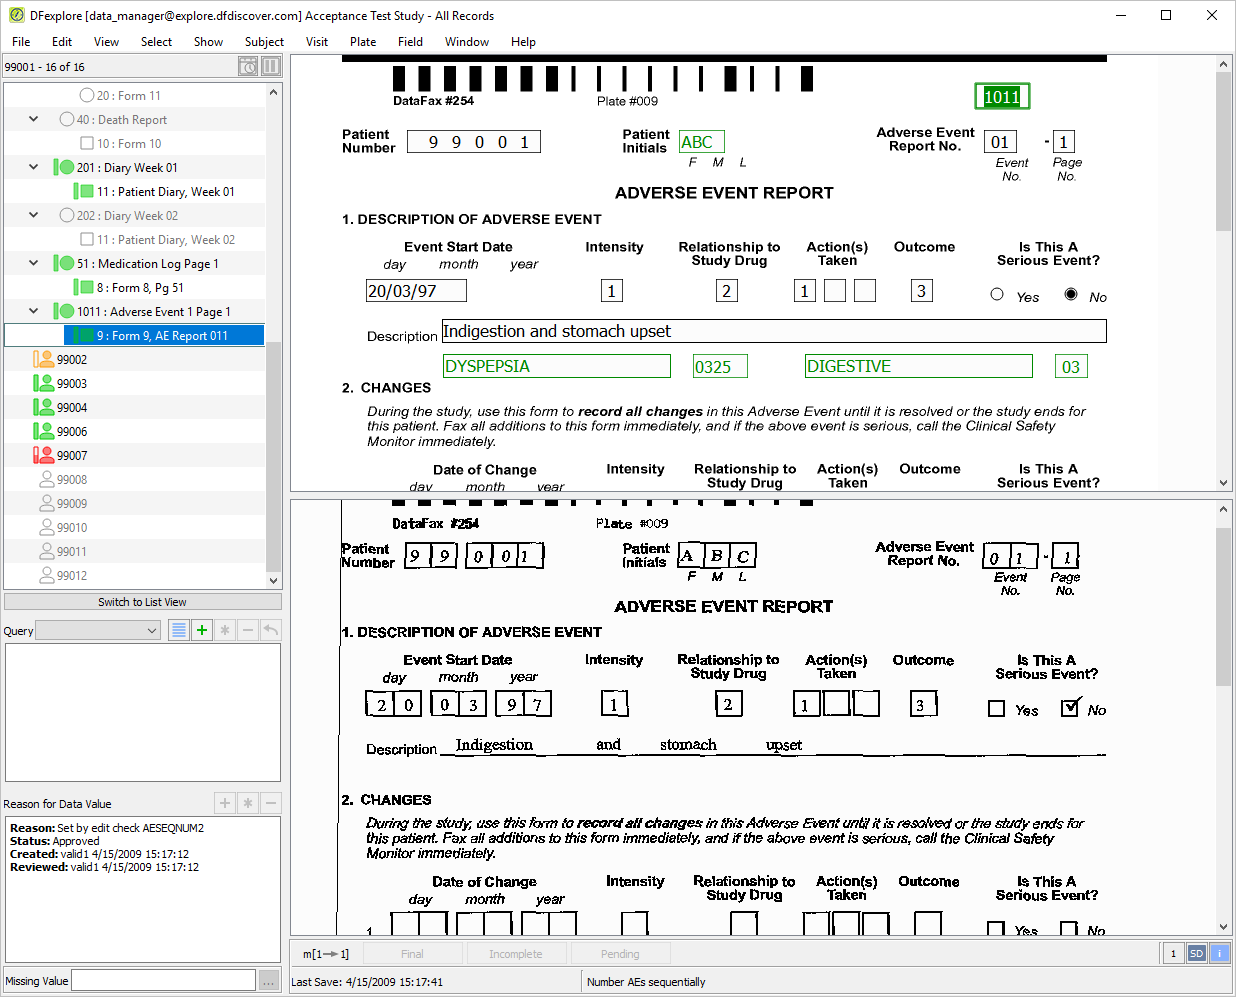
-
Compare the values in each field of the data record in DFexplore with those values in the printout of the data file
jobfile1.d02. -
Select > to close DFexplore.
Table of Contents
- 16.1. Tests & Requirements
- 16.2. Begin Module 16. PDF File Creation.
- 16.3. Retrieve existing data according to user-specified criteria.
- 16.4. Saving DFexplore data to a standard PDF document.
- 16.5. Saving DFexplore blank CRF books to a standard PDF document.
- 16.6. Viewing a standard PDF data file using a PDF viewer application.
- 16.7. Saving DFexplore data to an encrypted bookmarked PDF file.
- 16.8. Open and view an encrypted bookmarked PDF file using a PDF viewer application.
- 16.9. Create a complete subject package PDF file that includes data records, CRF images and audit trail.
- 16.10. Open and view a PDF subject package using a PDF viewer application.
- 16.11. End Module 16. PDF File Creation.
Retrieve existing data according to user-specified criteria.
Saving DFexplore data to a standard PDF document.
Saving DFexplore blank CRF books to a standard PDF document.
Viewing a standard PDF data file using a PDF viewer application.
Saving DFexplore data to an encrypted bookmarked PDF file.
Open and view an encrypted bookmarked PDF file using a PDF viewer application.
Create a complete subject package PDF file that includes data records, CRF images and audit trail.
Open and view a PDF subject package using a PDF viewer application.
Estimate of Time Required: 30 Minutes
-
Start DFATK as described in Module 1 (Installation & Initialization).
-
Click followed by to begin this module.
-
Start DFexplore, login as user
data_managerand choose 254 Acceptance Test Study as described in Section 1.7, “How to start DFexplore”. -
Select > . Set retrieval criteria as follows:
Mode = Validate
Save level = 1 - Level 1
Search = Data
Subject =
99001,99002Level =
1-4
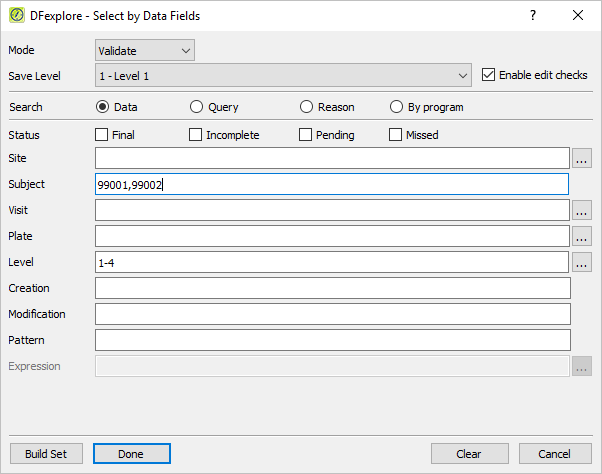
-
Click to retrieve all data records that match the specified criteria. Click in the confirmation dialog, and finally click to create a task set of the retrieved data.
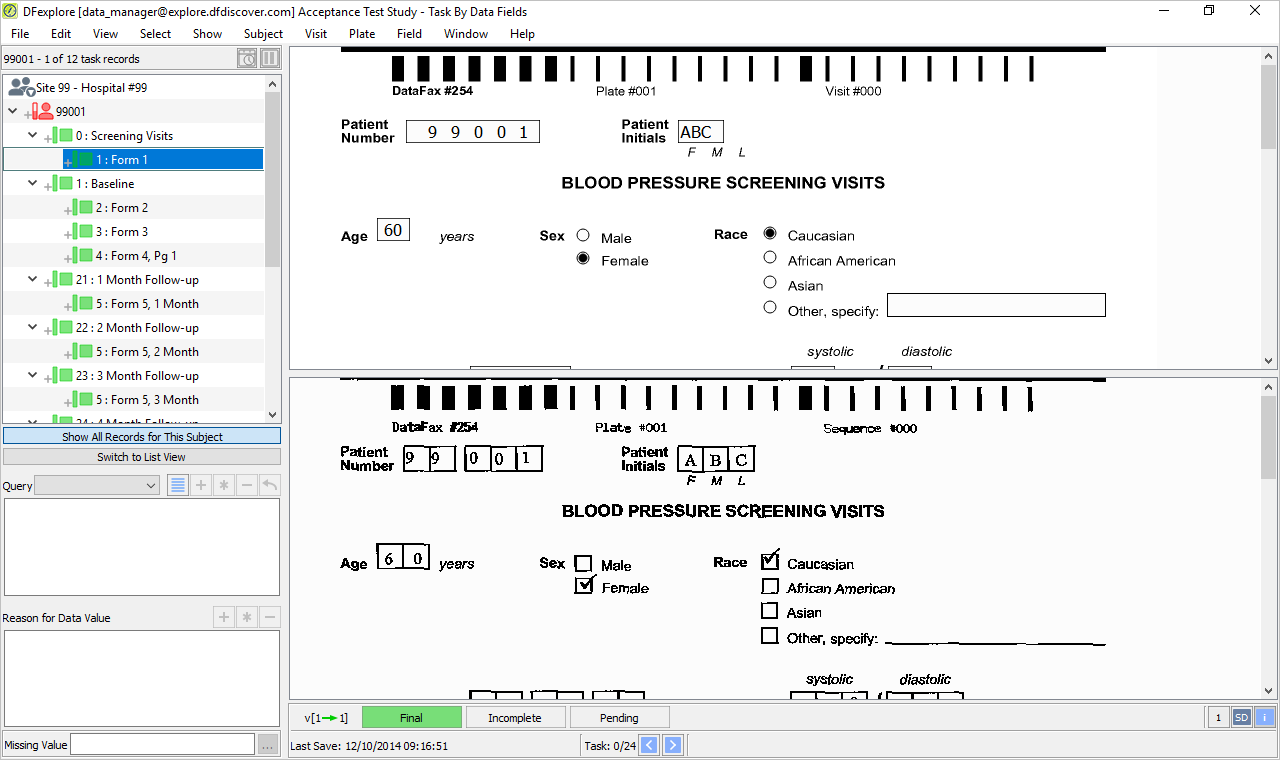
-
Scroll the record list panel to confirm that 2 subjects, 99001 and 99002, have been retrieved. Double-click the entry for Subject 99002 to open and lock all records for the subject.
-
Select > .
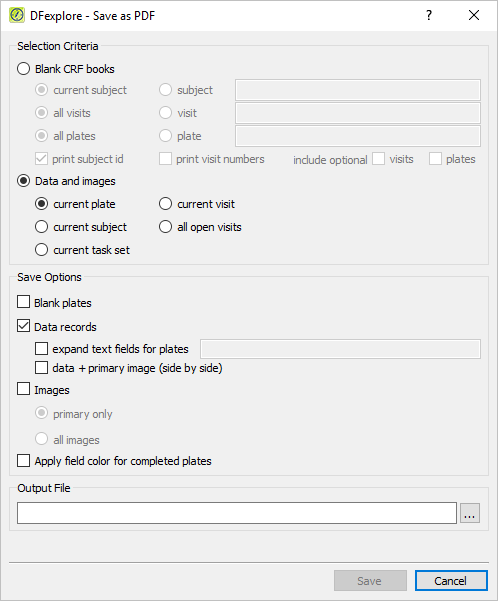
-
In the Selection Criteria panel,
Select (enable) Data and images followed by current task set
In the Save Options panel,
Check (enable) Data records and data + primary image (side by side)
Check (enable) Apply field color for completed plates
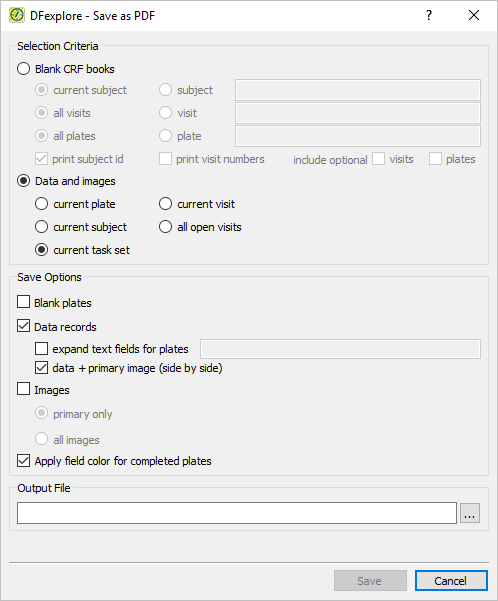
Click Output File . In the file selection dialog, choose a directory in which to save the PDF file.
Once a directory has been chosen, append the file name
subjects.pdfto the directory name. Click .-
Complete the specification by clicking . There will be a busy pause while the PDF file of completed data pages and their primary images is created.
Note The save directory in this test was chosen to be
C:\Users\Public. Your save directory may be different.
-
Select > .
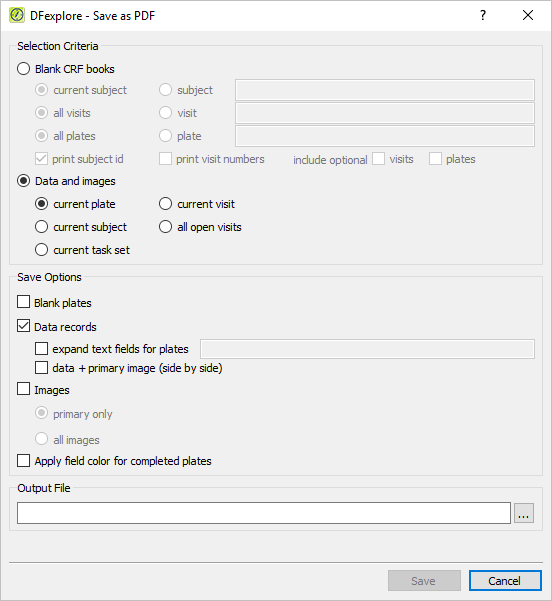
-
In the Selection Criteria panel,
Select (enable) Blank CRF books, followed by all visits, all plates.
Un-check (disable) print subject id
Check (enable) print visit numbers
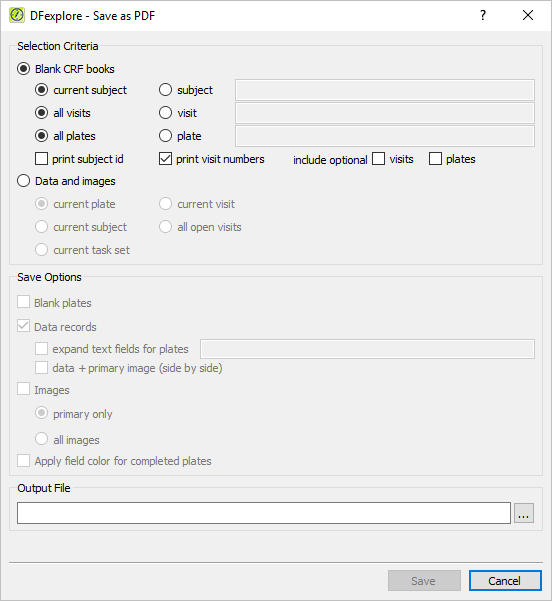
Click Output File . In the file selection dialog, choose a directory in which to save the PDF file.
Once a directory has been chosen, append the file name
blanksubject.pdfto the directory name. Click .-
Complete the specification by clicking followed by in the resulting dialog. There will be a busy pause while the PDF file is created.
Note The save directory in this test was chosen to be
C:\Users\Public. Your save directory may be different.
-
A PDF viewer application, such as Acrobat Reader, is required for this step. Start the PDF viewer application. Locate the directory in which the PDF file
subjects.pdfwas saved in Section 16.4, “Saving DFexplore data to a standard PDF document.”. Opensubjects.pdf.Note All PDF files opened in this test and in the remainder of this module are illustrated using Acrobat Reader. If you are using a different PDF viewer application, the appearance of your document may differ from that shown here. It may also be necessary to rotate the PDF image so that it is displayed in landscape format.
-
Examine the PDF document.
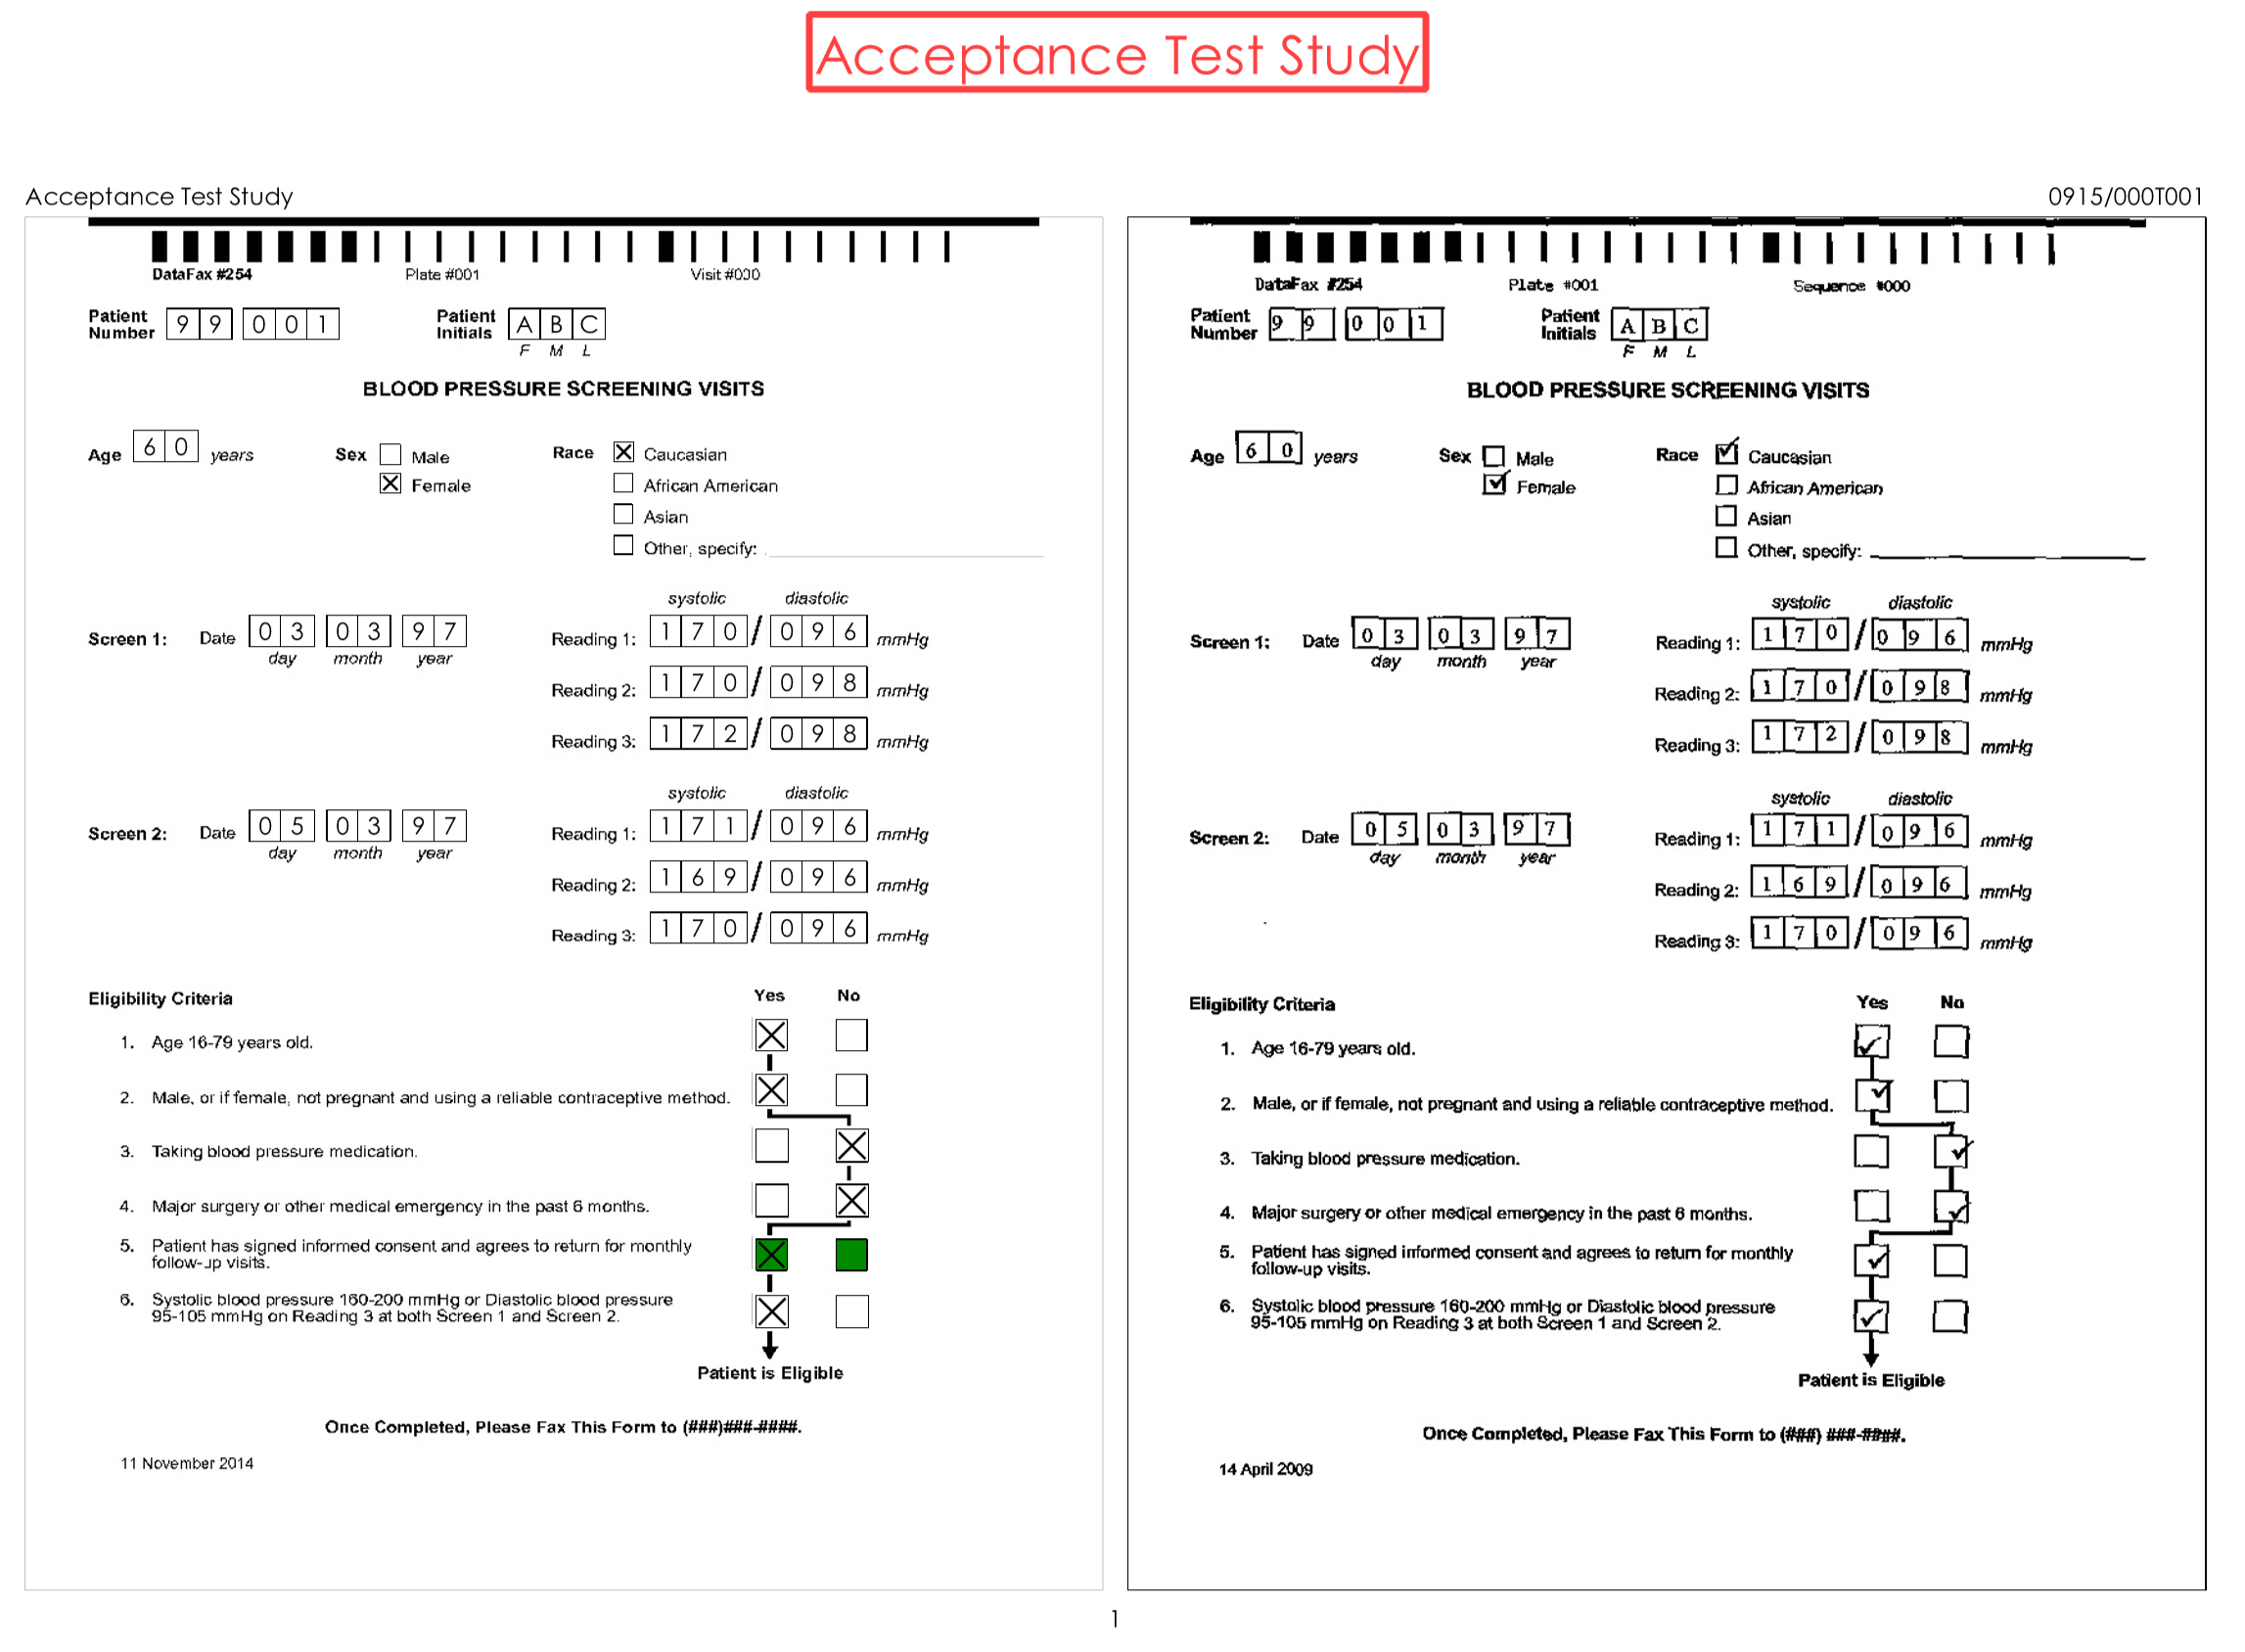
-
Locate the directory in which the PDF file
blanksubject.pdfwas saved in Section 16.5, “Saving DFexplore blank CRF books to a standard PDF document.”. Openblanksubject.pdf. Examine the PDF document. Confirm the PDF document was printed without the presence of Subject ID numbers.
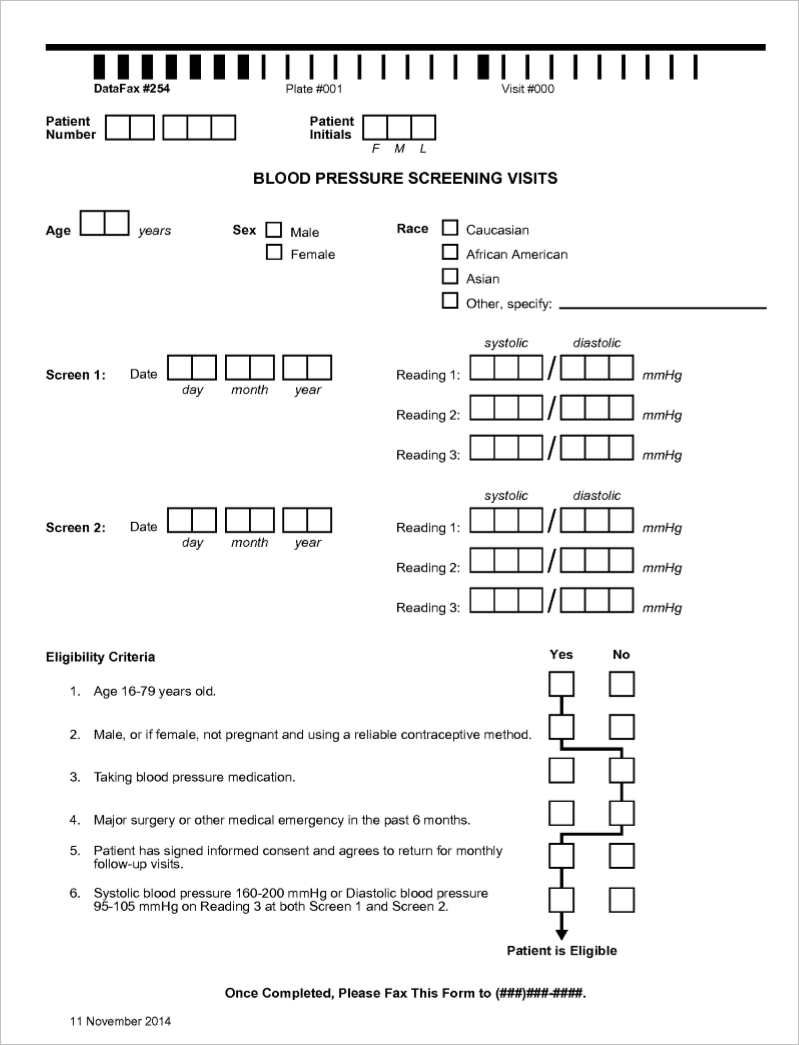
-
Exit the PDF viewer application.
-
With the task set of records from Section 16.3, “Retrieve existing data according to user-specified criteria.” (Subjects 99001 and 99002) still the current set, click the record for Subject 99002, Form 1 to set it as the current page. Select > to open the dialog.
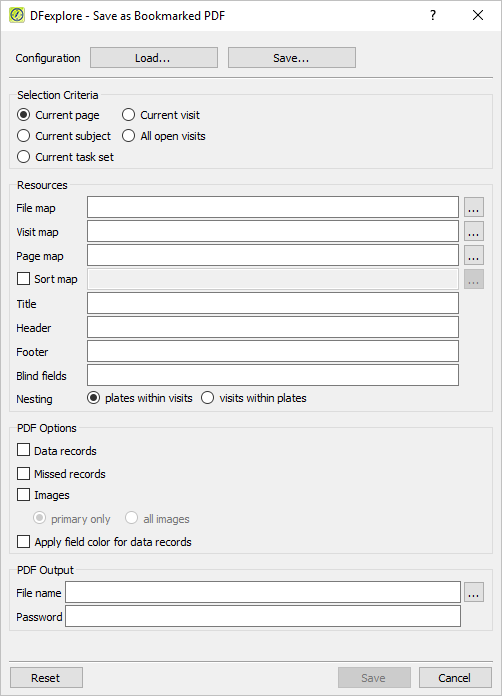
-
In the Selection Criteria panel,
-
Select (enable) Current subject
In the Resources panel,
-
Enter a Title of
Bookmarked Subject 99002 -
Use the default Nesting plates within visits
In the PDF Options panel,
Check (enable) Data records
Check (enable) Missed records
Check (enable) Images and select (enable) primary only
Check (enable) Apply field color for data records
In the PDF Output panel,
Select an Output File directory using the file selection dialog and set the file name to
subject99002.pdf.
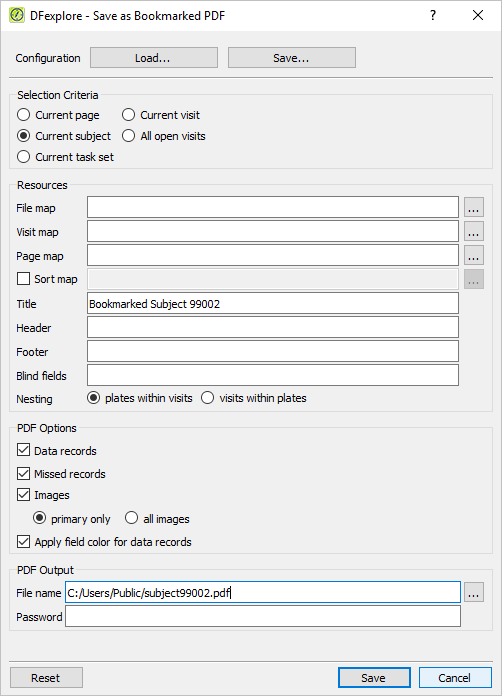
-
-
Enter
module16as the value for Password.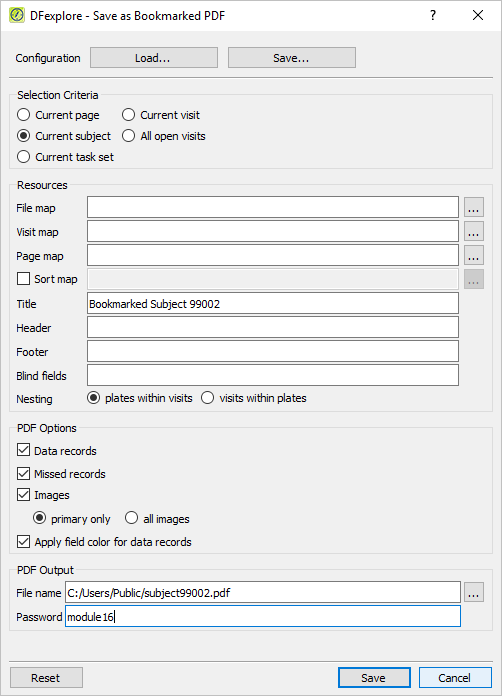
-
Click to create a password encrypted PDF file of completed data pages and primary images for Subject 99002.
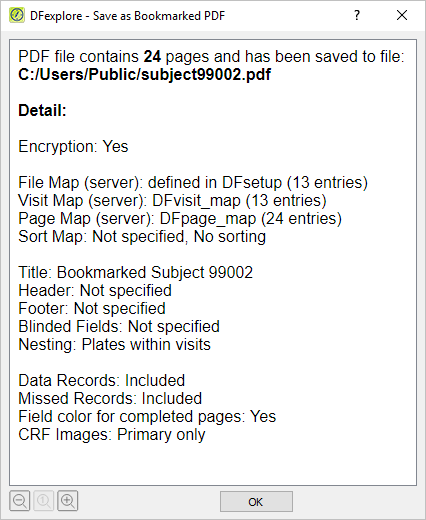
-
Click to close the dialog.
-
A PDF viewer application is required for this test. Start the PDF viewer application. Locate the directory created in Section 16.7, “Saving DFexplore data to an encrypted bookmarked PDF file.”. Locate and open
subject99002.pdf.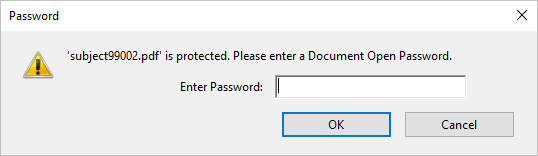
-
In the Password dialog enter
module16as the password. This matches the password that was specified at file creation in Section 16.7, “Saving DFexplore data to an encrypted bookmarked PDF file.”. Once the password has been entered, the PDF file opens.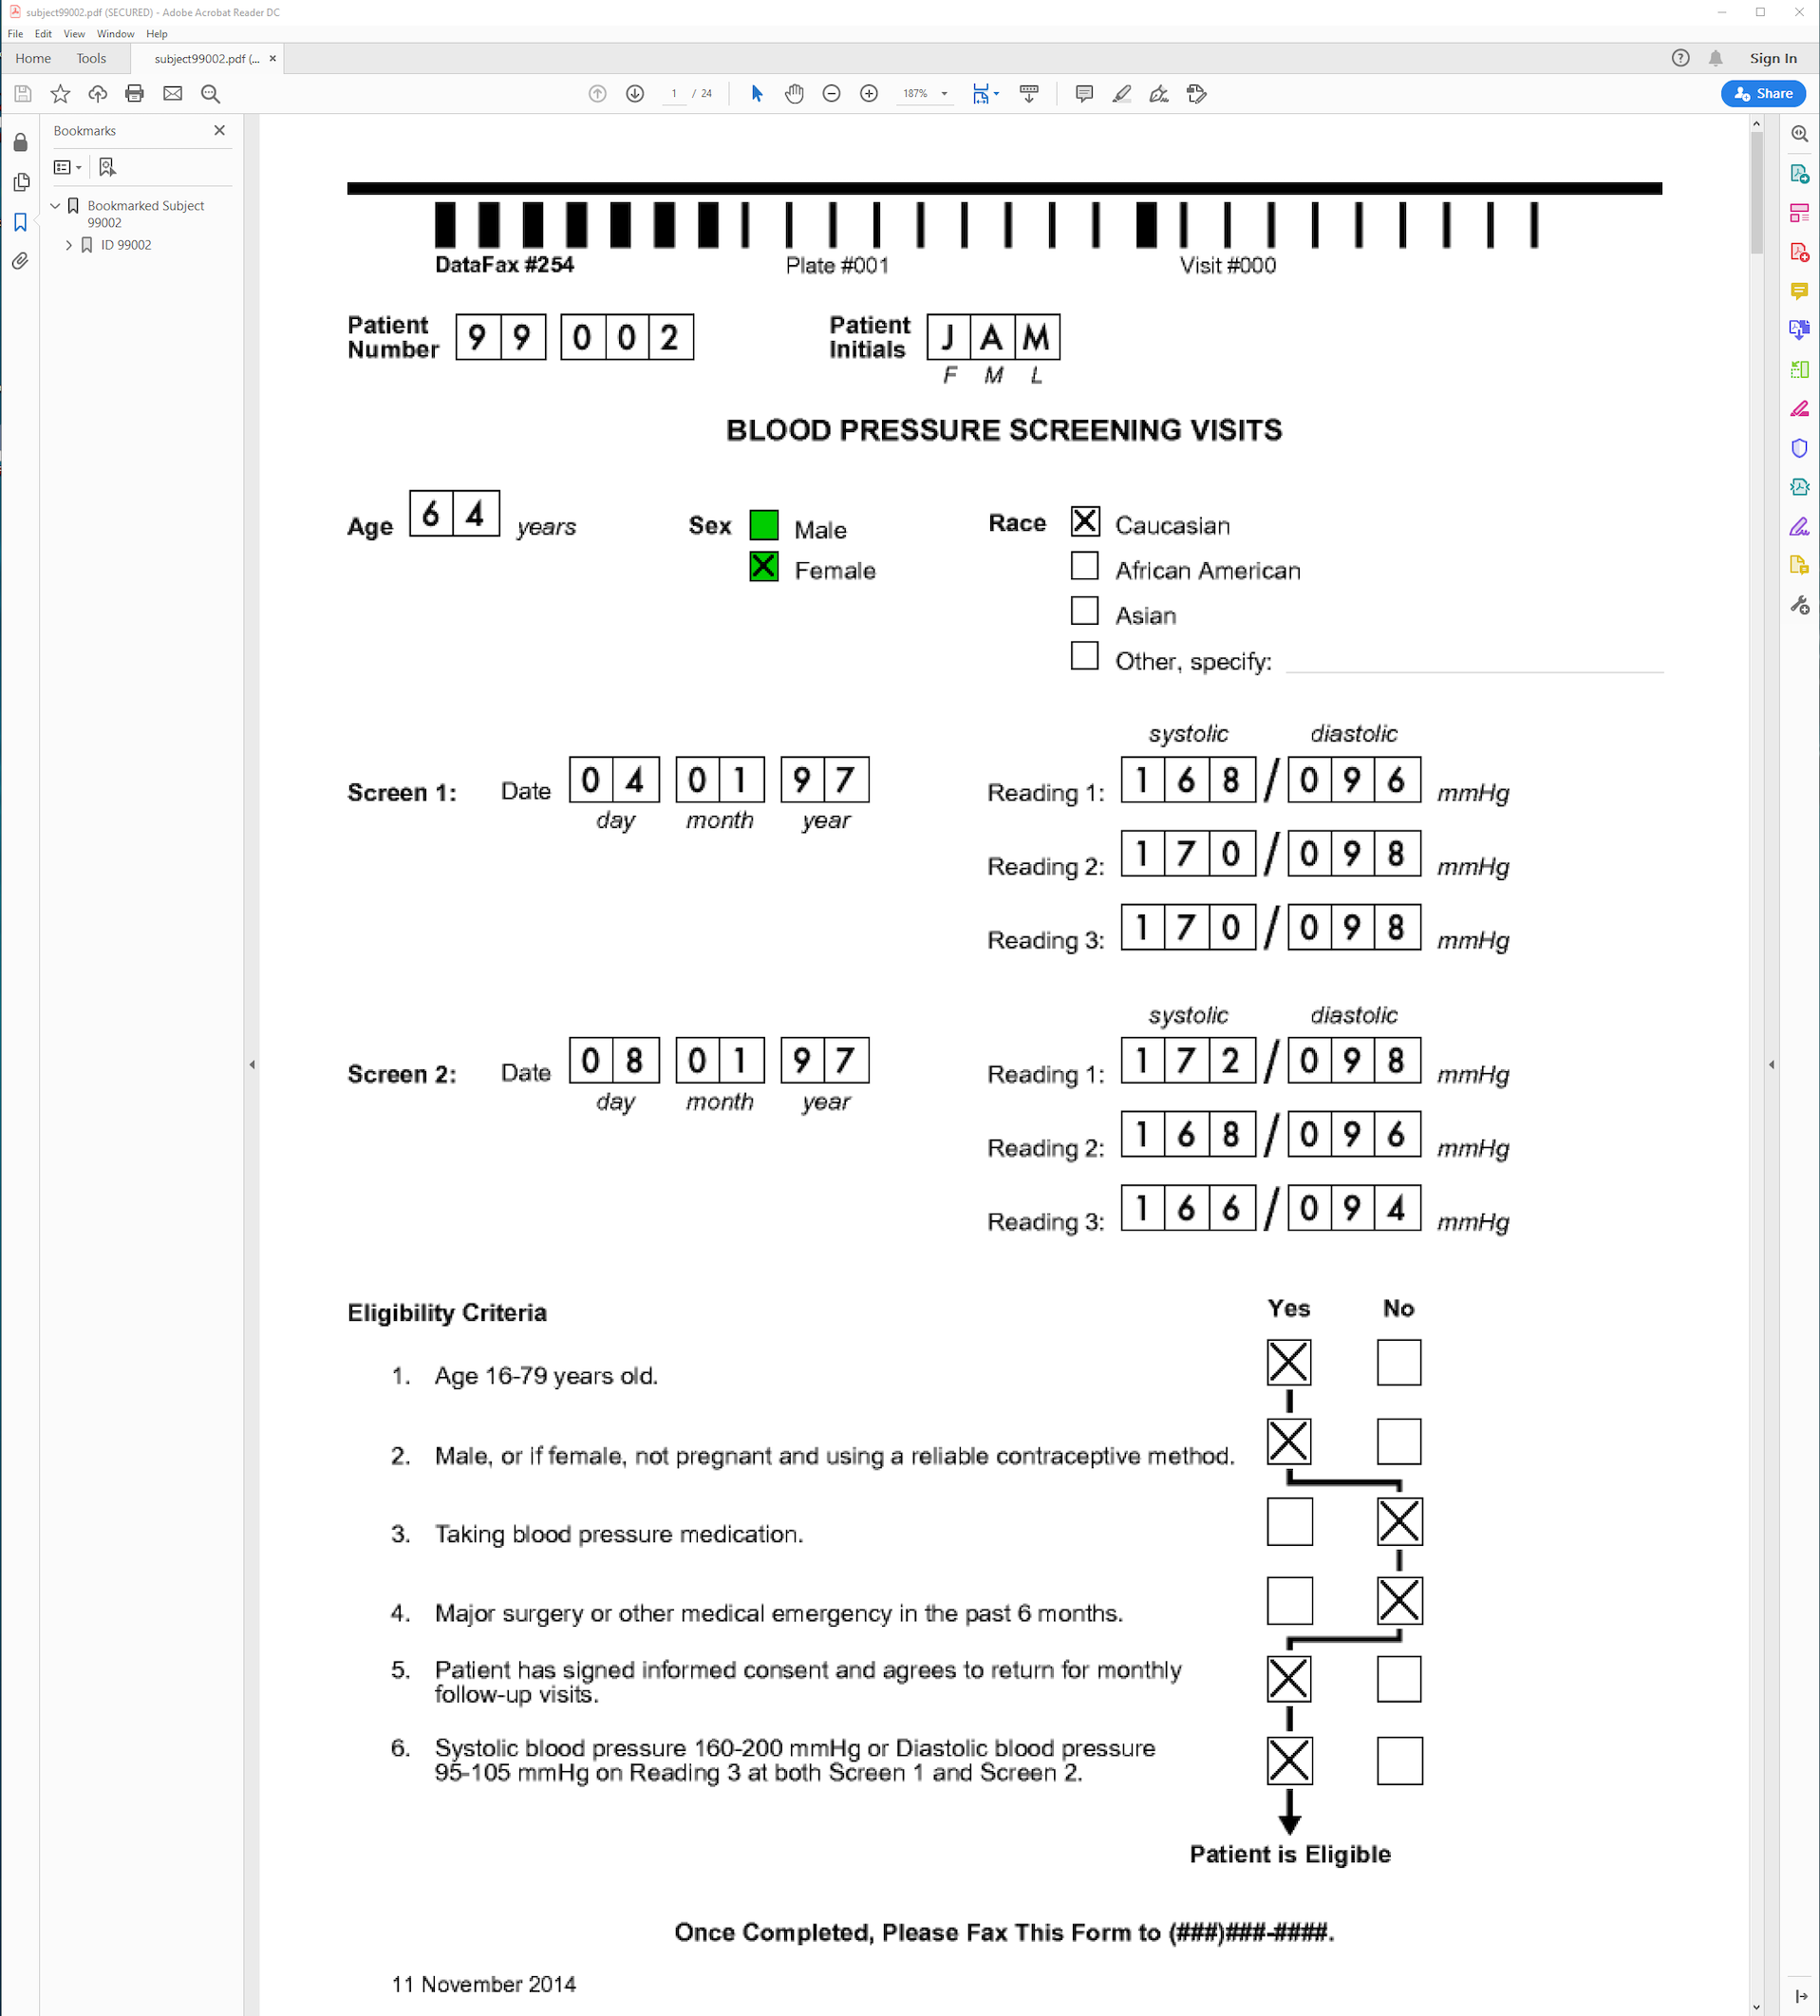
-
Open all bookmarks for Subject 99002.
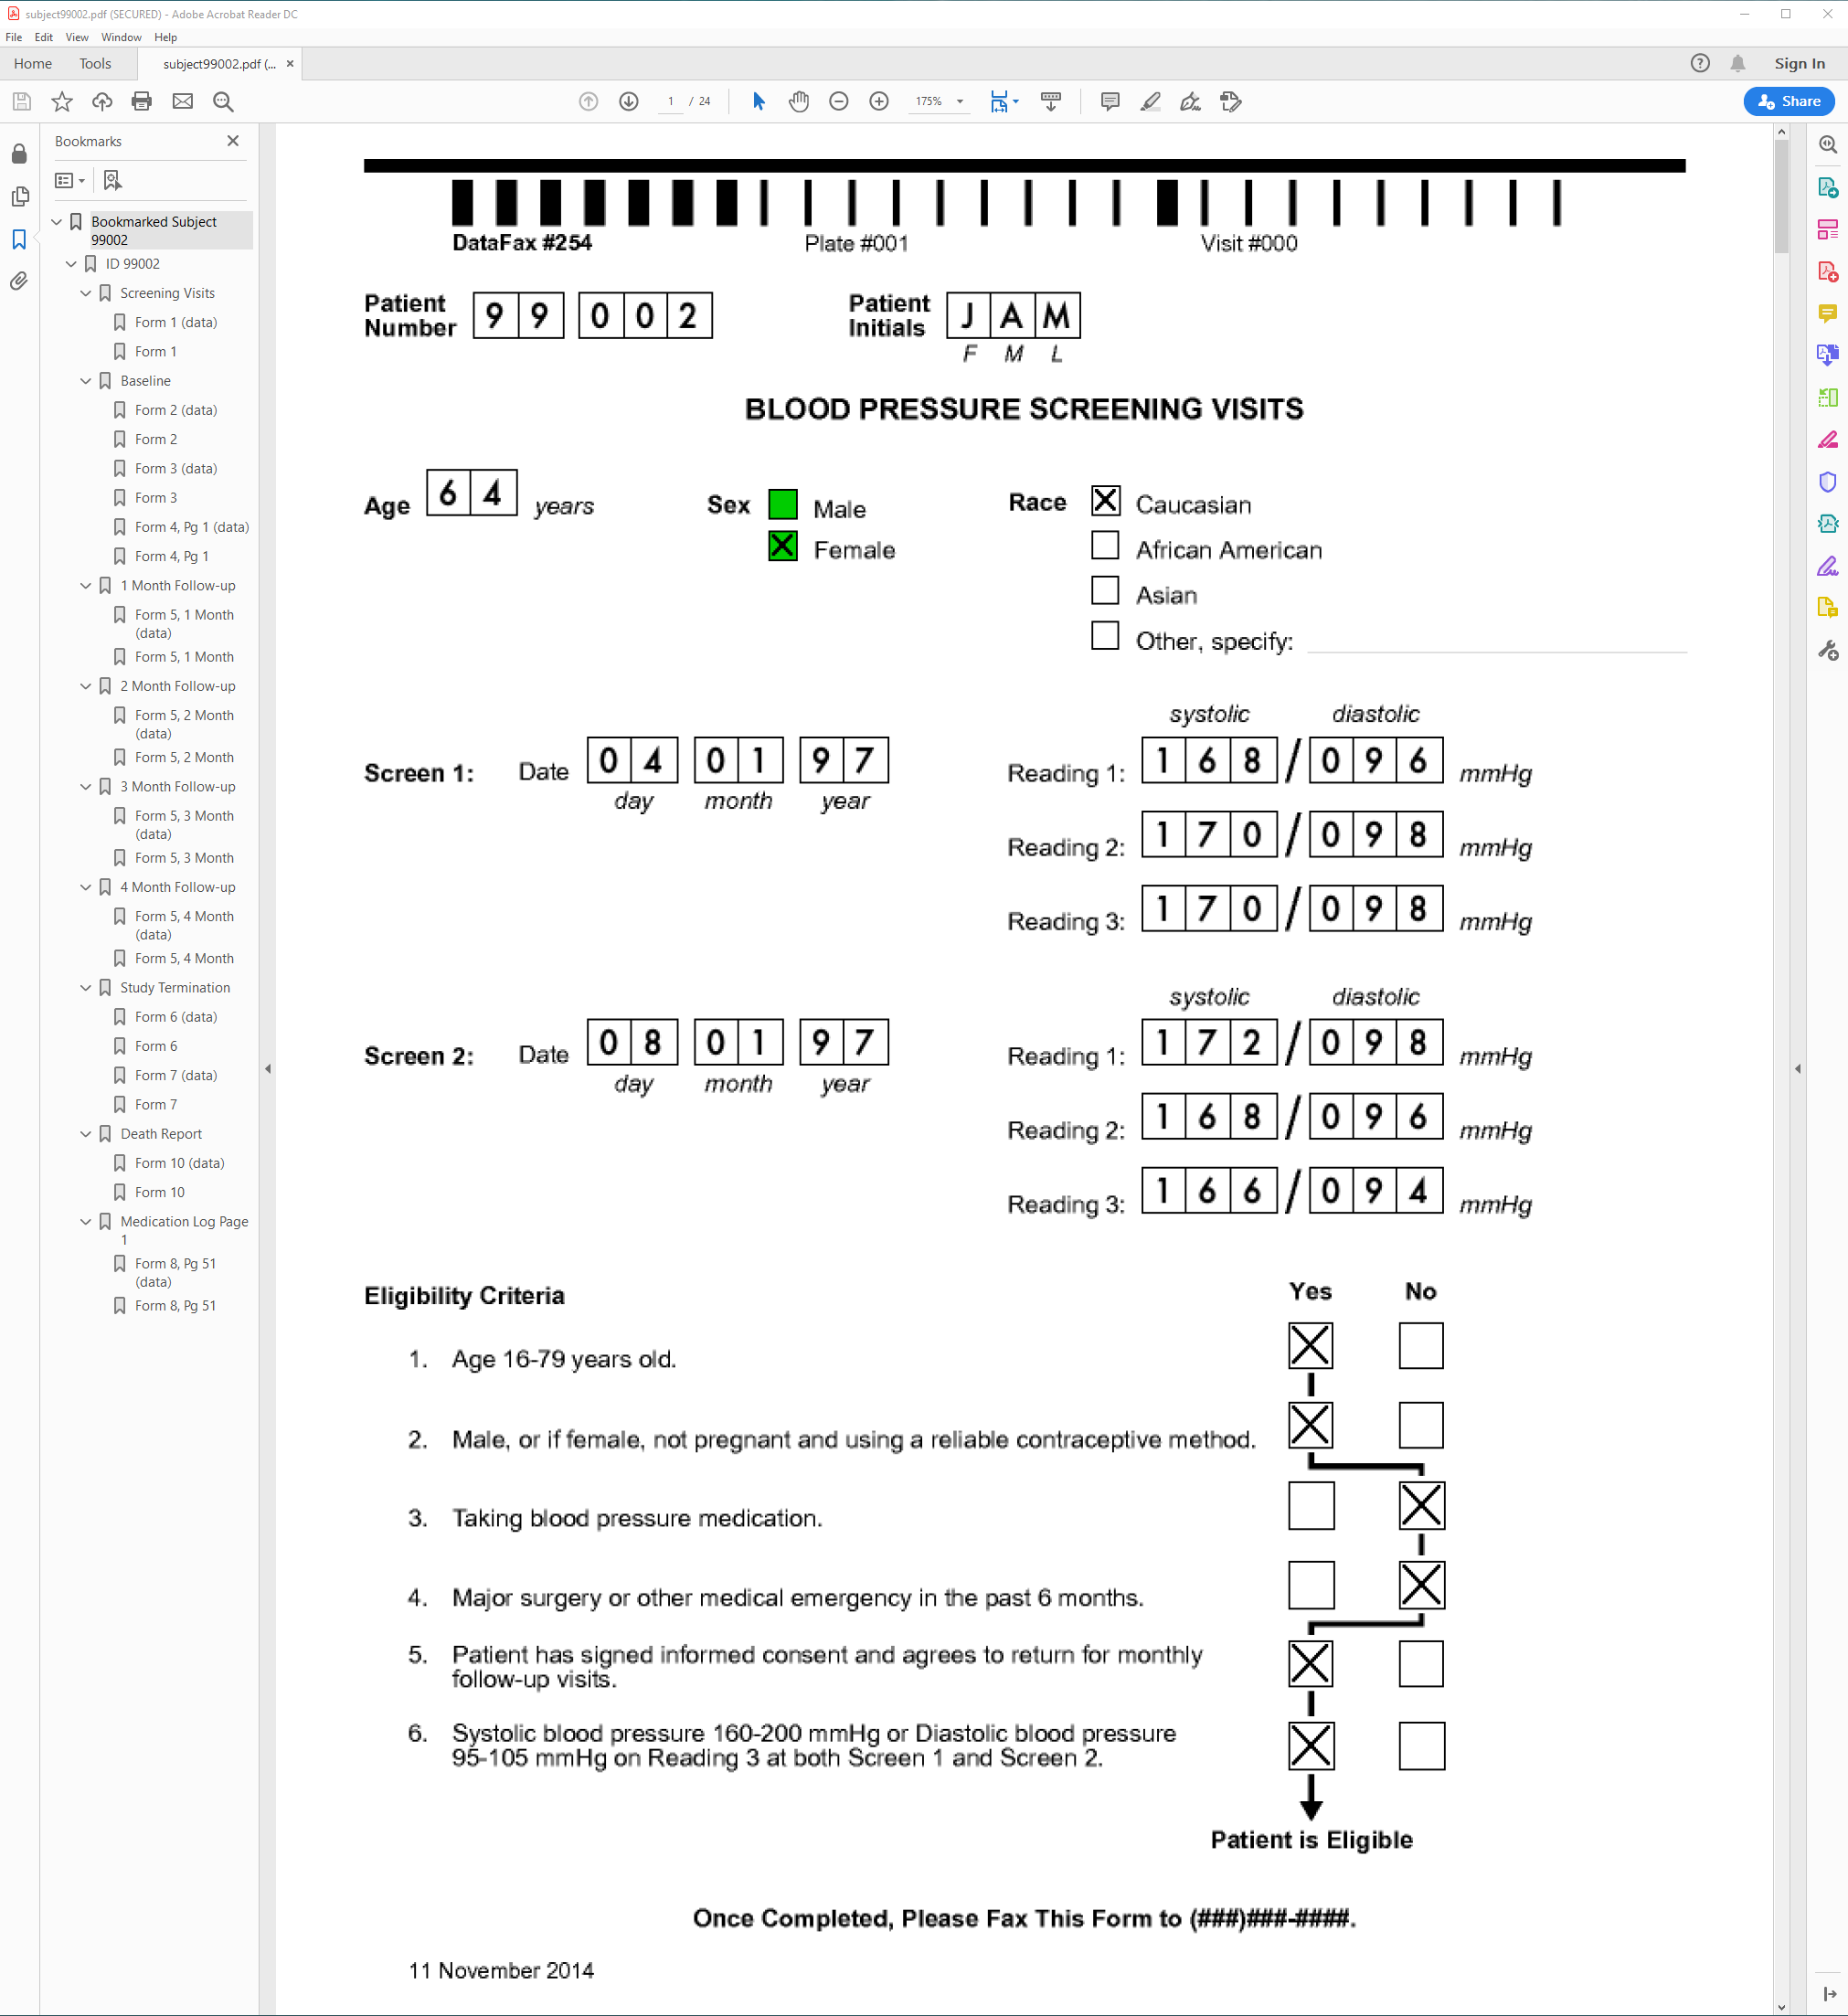
-
In the bookmark panel, each data record is represented by the suffix (data) to distinguish it from the primary CRF image. Click entry Form 2 (data) to make the Form 2 data record the active page. Click entry Form 2 to make the Form 2 primary CRF image the active page.
-
Exit the PDF viewer application. In DFexplore, select > . Then, select > . This will release the task set of records for Subjects 99001 and 99002. Click in the resulting dialog to retain the default settings.
-
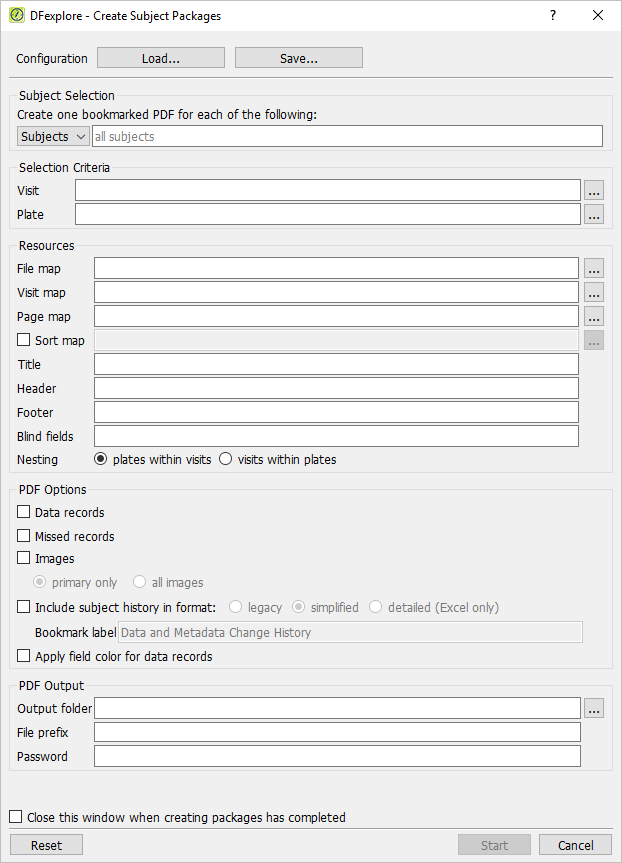
-
In the Subject Selection section, choose Subjects from the drop-down and enter
99001,99002,99003to create complete subject packages for Subjects 99001, 99002 and 99003.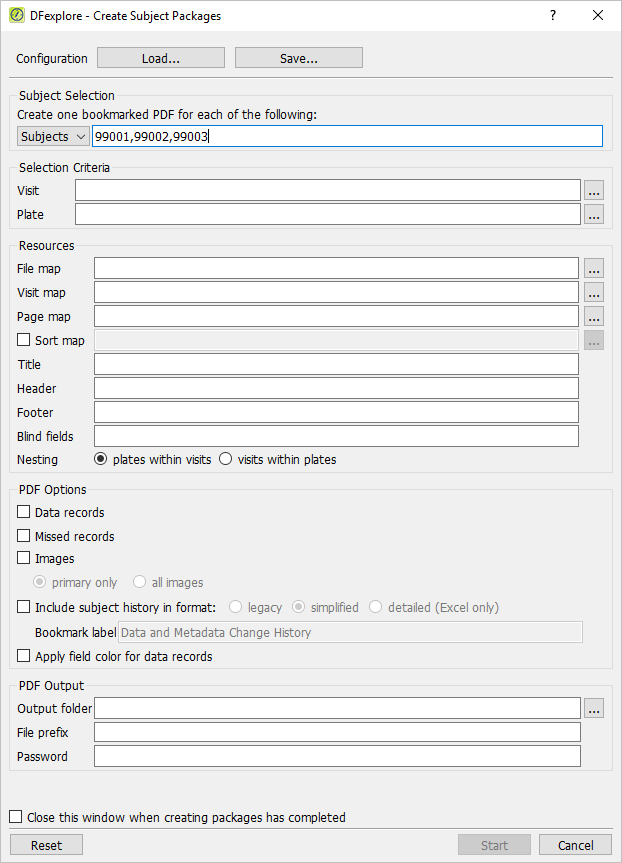
-
In the remainder of the dialog specify the following settings:
Title =
Site 99 Subject PackagesCheck (enable) Data records
Check (enable) Missed records
Check (enable) Images
Check (enable) primary only
Check (enable) Include subject history in format and simplified
Check (enable) Apply field color for data records
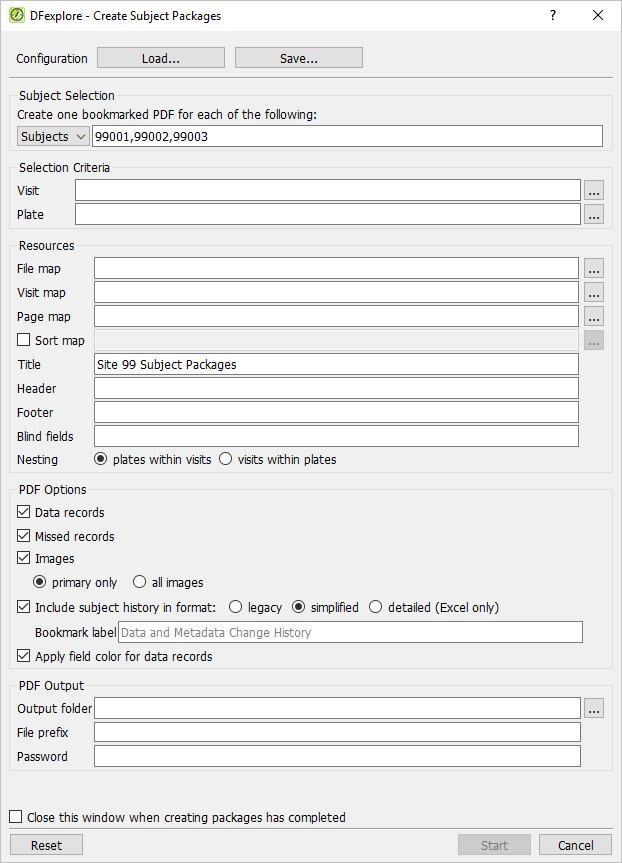
-
Specify a PDF output folder by first clicking Output folder to view the directory structure for the local computer. Select a directory in which to save the subject package PDF files.
-
Specify a file prefix to be prepended to each subject package created. Enter
Site99_in the File prefix field.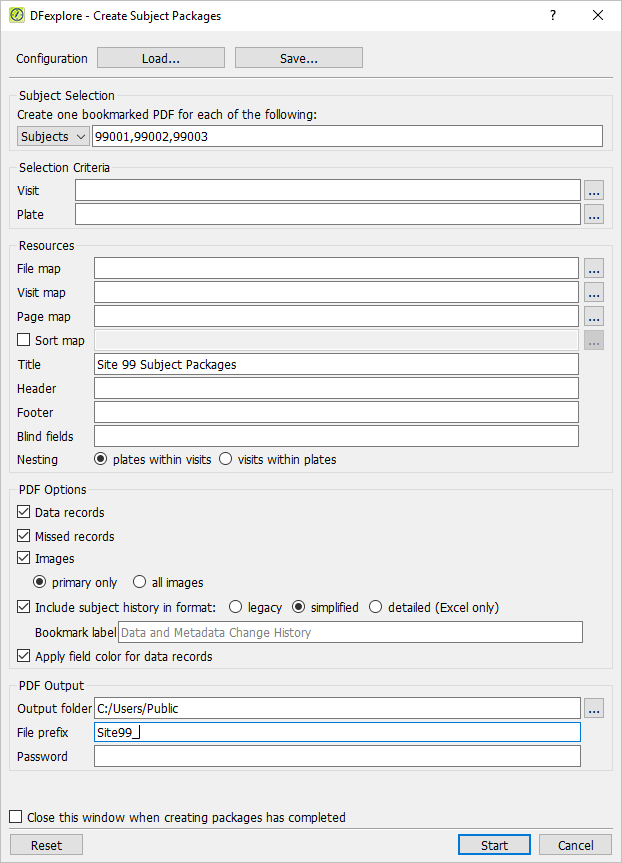
-
Do not encrypt the subject packages to be generated by leaving the Password field empty. Click to begin generating a complete subject package for each of the specified subjects 99001, 99002 and 99003.
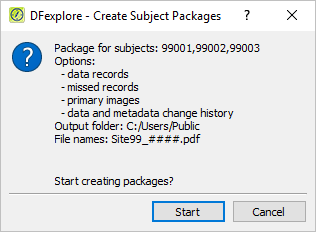
-
Verify that the output in the confirmation dialog specifies packages for subjects 99001, 99002 and 99003. Click to start package creation.
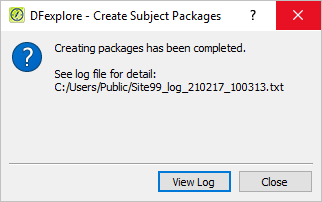
-
In the confirmation dialog, click . Review the output. Click to close the log.
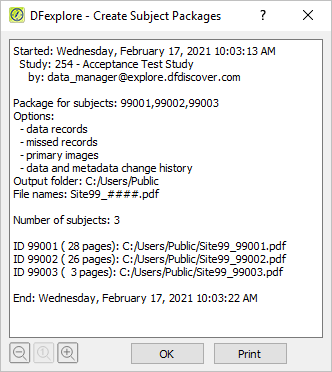
-
The main Create Subject Packages dialog is displayed. Click to close this dialog.
-
A PDF viewer application is required for this test. Start the PDF viewer program. Locate and open the directory in which the PDF subject packages were saved in Step 7. Locate files
Site99_99001.pdf,Site99_99002.pdfandSite99_99003.pdf. -
Open the subject package for
Site99_99001.pdf. -
Open all bookmarks for Subject 99001.
-
In the record list, each data record is represented by the term (data) to distinguish it from its primary CRF image. Click entry Form 2 (data) to make the Form 2 data record the active page. Click entry Form 2 to make the Form 2 primary CRF image the active page.
-
In the bookmark list click the entry for Data and Metadata Change History to display the complete audit trail report for Subject 99001.
-
Exit the PDF viewer application to close both the file
Site99_99001.pdfand PDF viewer. -
Select > to close and exit DFexplore.
Table of Contents
- 17.1. Introduction
- 17.2. Tests & Requirements
- 17.3. Begin Module 17. DFweb Data Entry.
- 17.4. Verify DFweb version information, logging into DFweb and DFweb site certificate verification.
- 17.5. Copying URL and changing user passwords.
- 17.6. Creating a new subject, entering subject data.
- 17.7. Adding, modifying and resolving queries.
- 17.8. Adding, reviewing and downloading subject documents.
- 17.9. Add an Electronic Signature (eSign) to a set of completed subject records.
- 17.10. Verify removal and Re-applicaton of eSignatures.
- 17.11. Verify DFweb saves eSignature task data to the specified save level.
- 17.12. End Module 17. DFweb.
![[Warning]](../../imagedata/warning.png) | Warning |
|---|---|
Optional Module. The DFweb Data Entry module requires the DFWS feature (web services API). If your DFdiscover server is not licensed for this feature, do not complete this module. DFweb is compatible with all web browsers that support the HTML5 standard, including the following web browsers:
|
Verify DFweb version information, logging into DFweb and DFweb site certificate verification.
Copying URL and changing user passwords.
Creating a new subject, entering subject data.
Adding, modifying and resolving queries.
Adding, reviewing and downloading subject documents.
Add an Electronic Signature (eSign) to a set of completed subject records.
Verify removal and Re-applicaton of eSignatures.
Verify DFweb saves eSignature task data to the specified save level.
Estimate of Time Required: 25 Minutes
-
Start DFATK as described in Module 1 (Installation & Initialization).
-
Click followed by to begin this module. Click .
| Note |
|---|---|
Save the |
| Note |
|---|---|
All remaining tests performed in this module have been completed using Google Chrome. Results and/or test steps may vary with other browsers. |
-
Open a web browser and navigate to https://dfweb.dfdiscover.com/login, verify the version information: DFweb Version 5.5.X is displayed.

-
In the DFweb login dialog, enter the DFdiscover Server name that has been provided by your administrator. Enter
site_monitorin the Username field and the previously assigned password in the Password field. Click to login.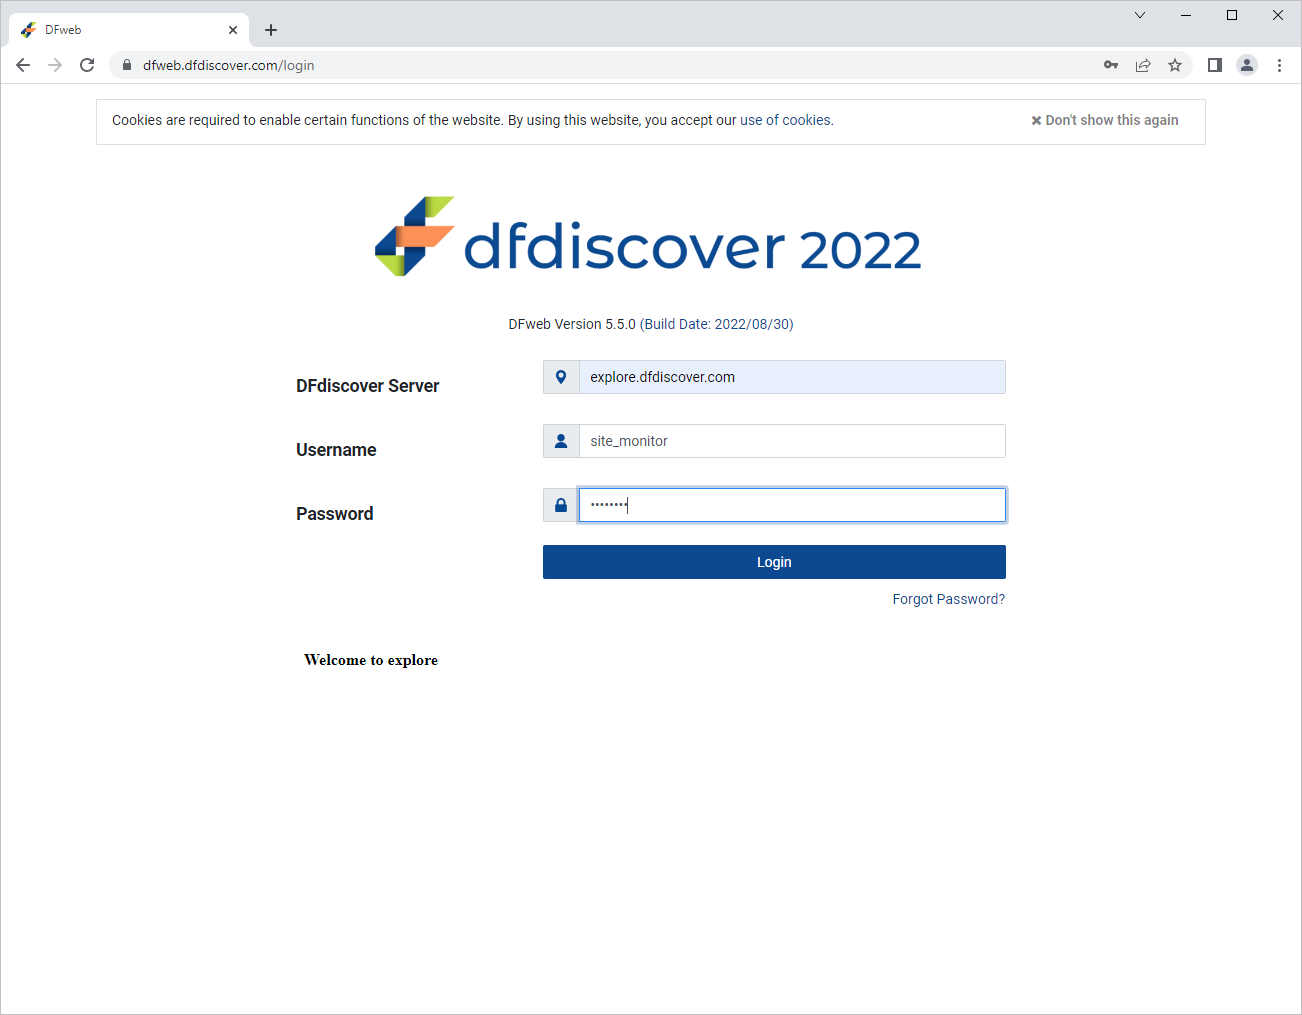
-
A list of subjects for Site 99 is displayed.
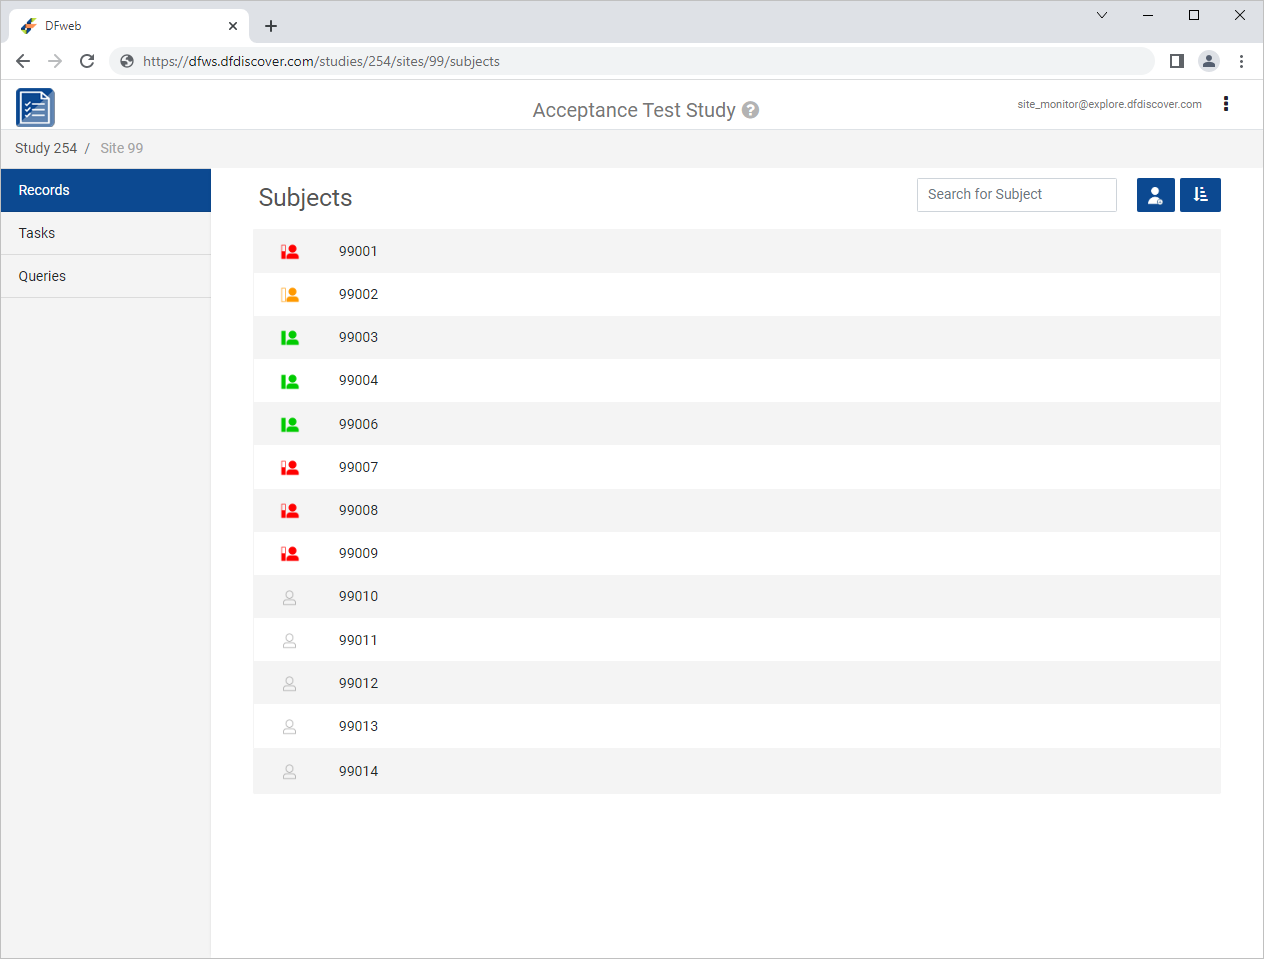
-
Click
 from the web browser address bar. Select . The website trust certificate is displayed for the current DFweb address, click to close the window.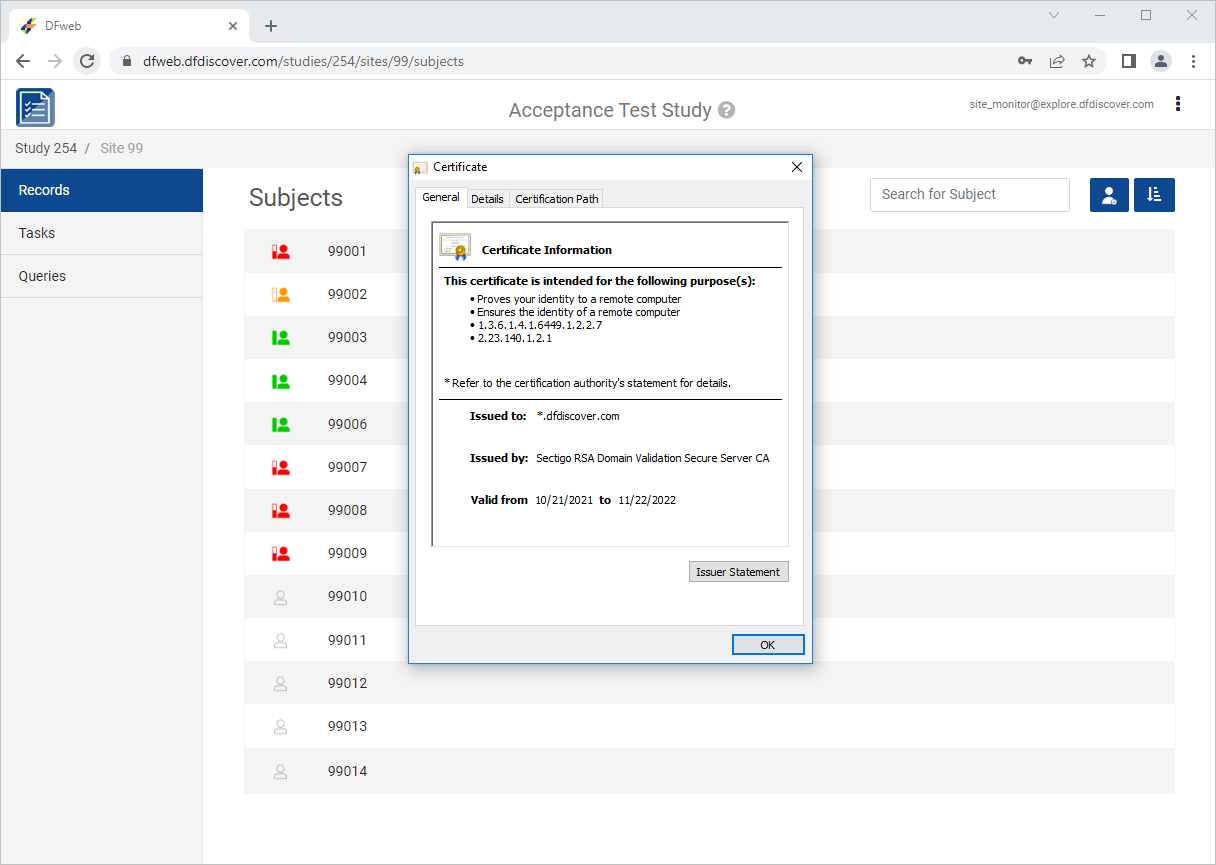
-
From the Subjects list, click Subject 99002 to open the 0: Screening Visits 1:Form 1 page.
-
Copy the DFweb URL by clicking
 > .
> . -
Open a new browser tab, paste the copied URL into the new browser tab, click Enter. The pasted URL in the new tab re-directs you to the DFweb login page. Login again using
site_monitorcredentials, upon logging in you are taken to the same subject data record as the previous web browser tab. Close the web browser tab.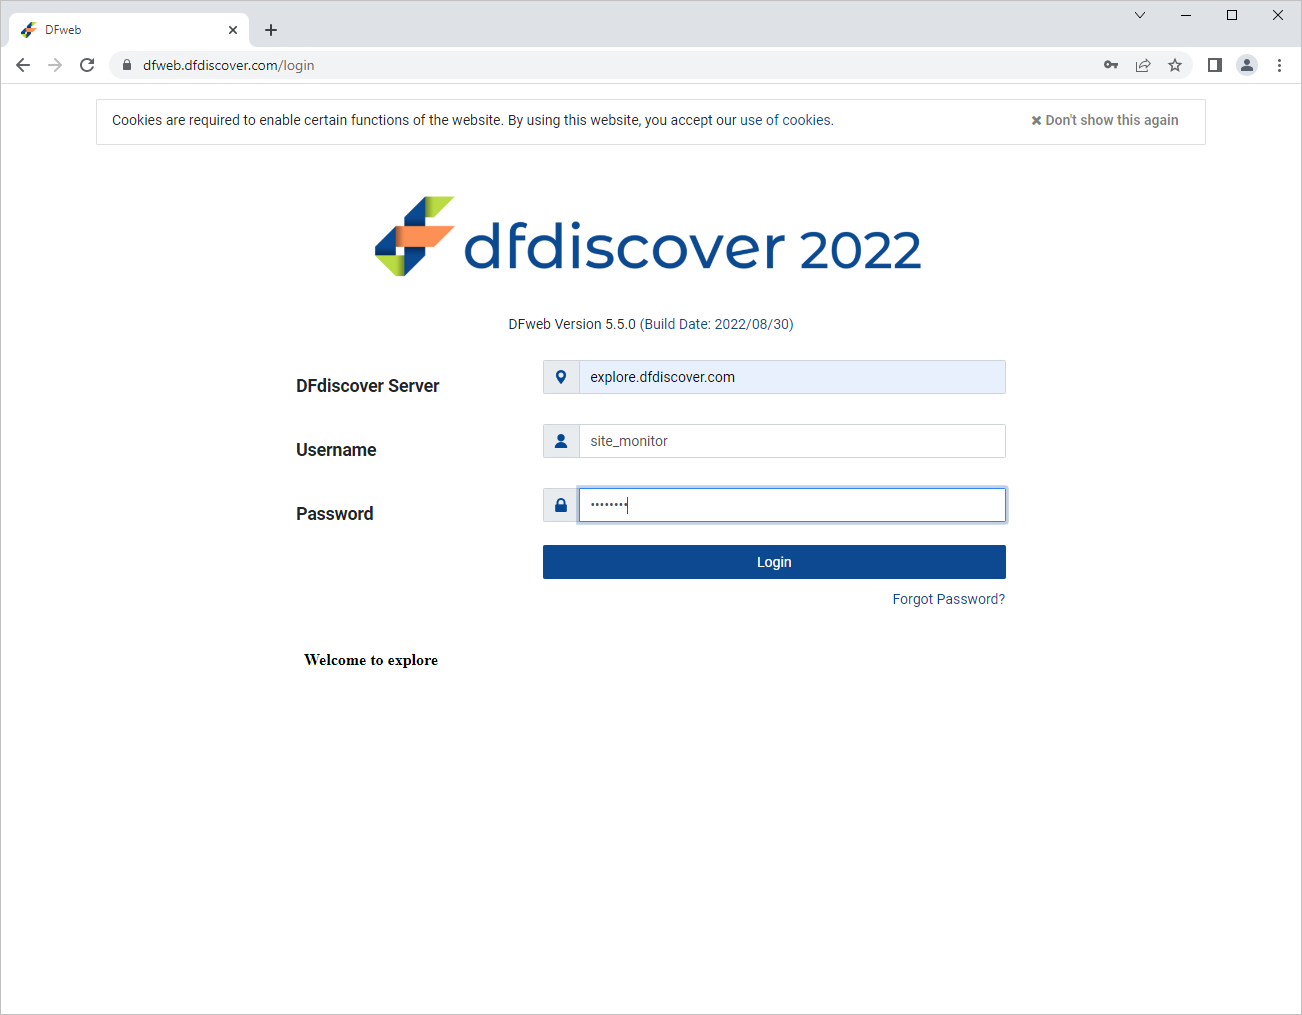
-
From the breadcrumb bar, click Site 99. Click
> to view the Change Password window. Click .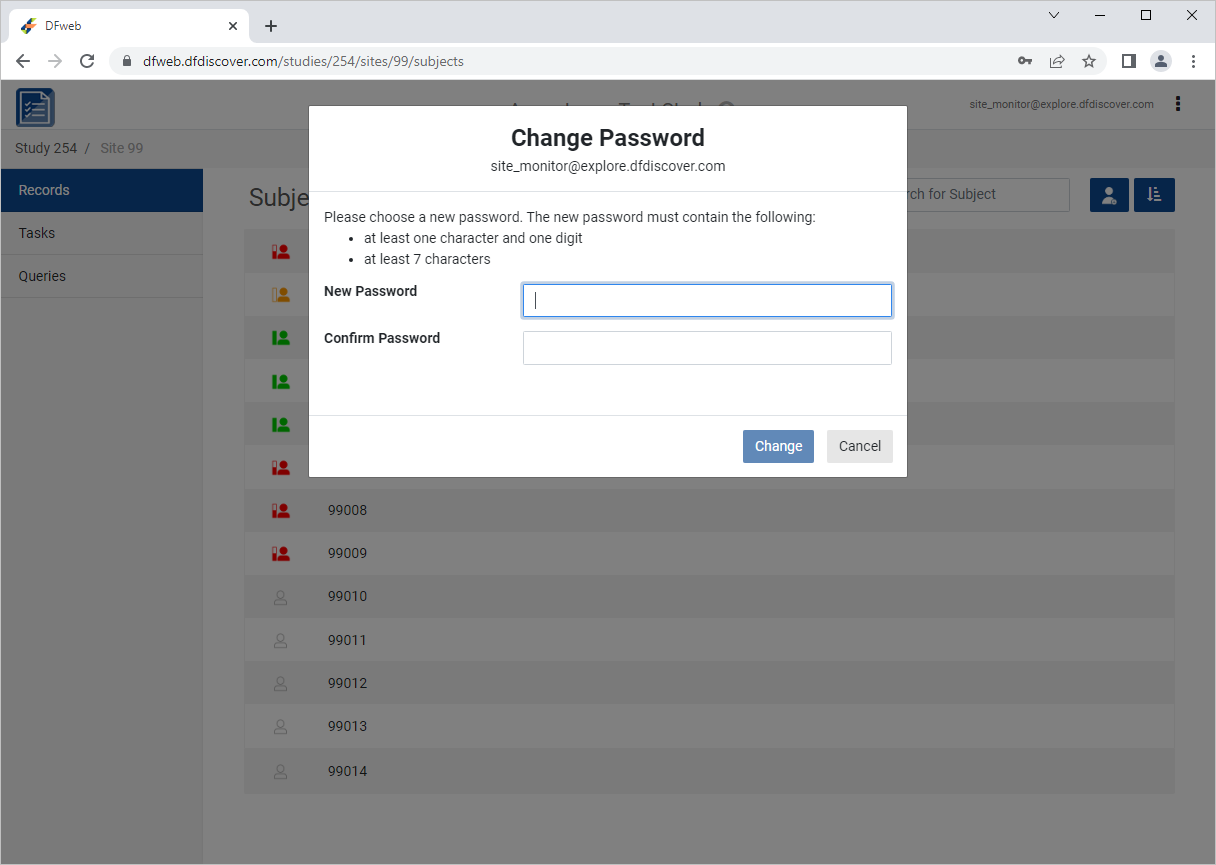
-
From the Subjects list, click Subject 99010 to open the 0: Screening Visits 1:Form 1 page.
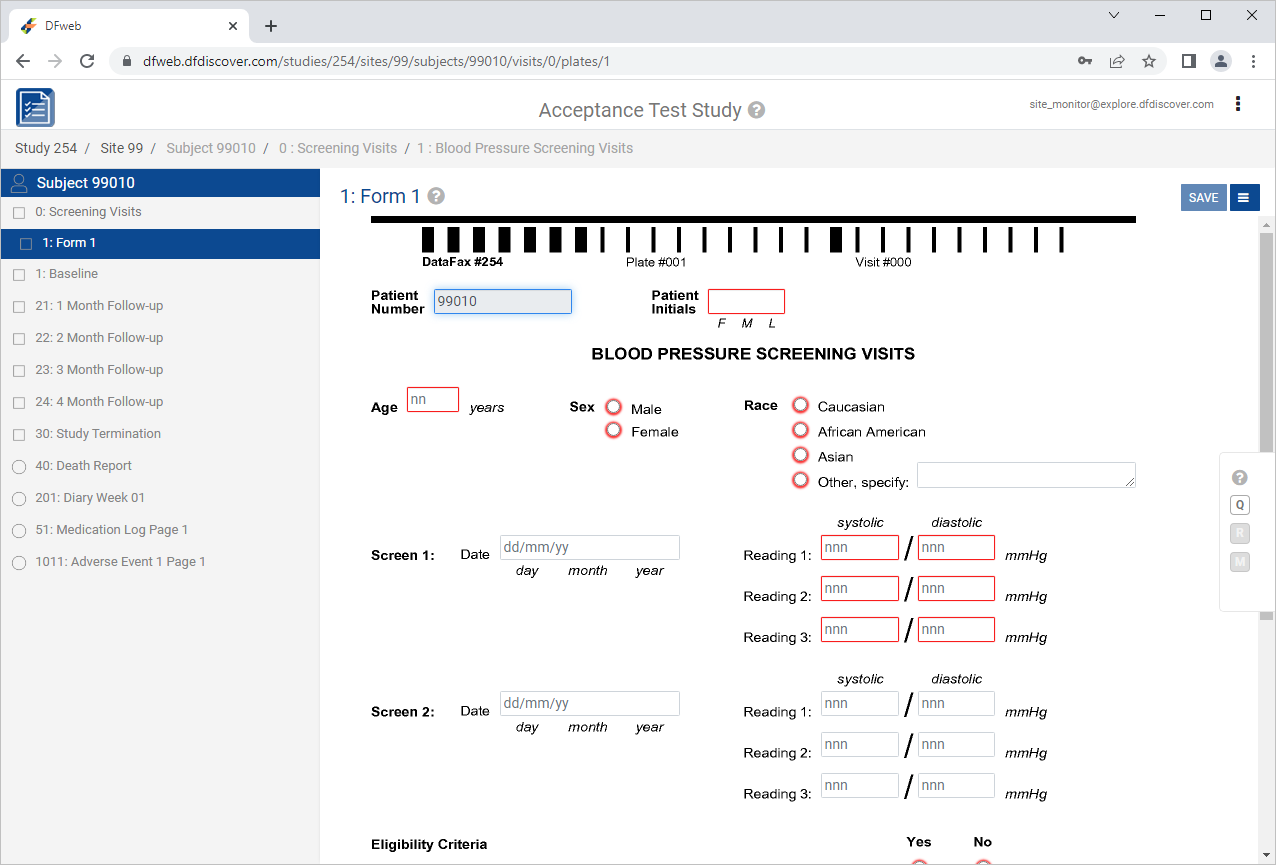
-
Click Patient Initials enter
ARX, Set:Age (years) =
49Sex = male
Race = caucasian
Screen 1 Date = Click
 icon, select
 11-Nov-2018
Click
 .
.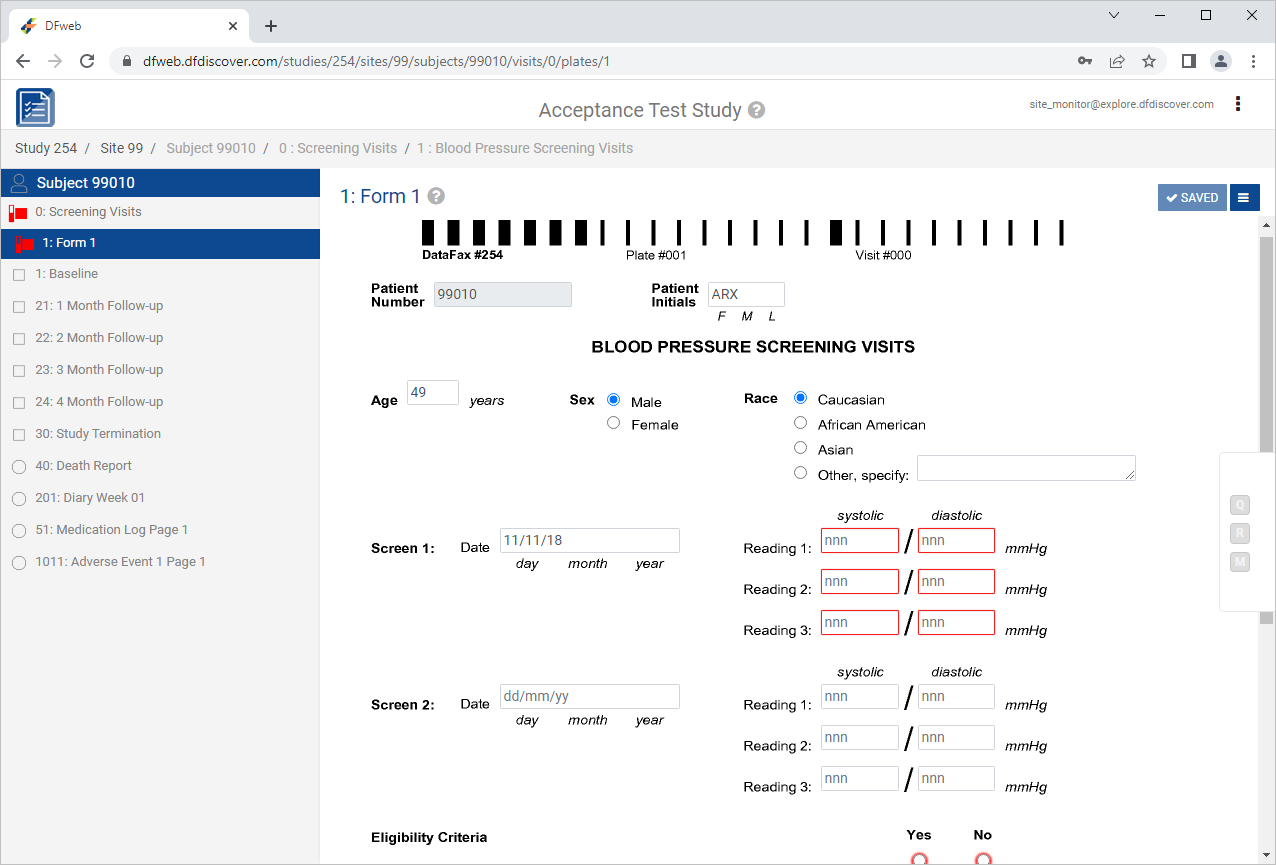
Select 1:Baseline > 21:Lab Results page. Click Patient Initials field.
Note The
SetInitedit check executes upon entry to the field. If the initials are available on 1 : Form 1 (previously entered), they are retrieved and populate the Patient Initials field.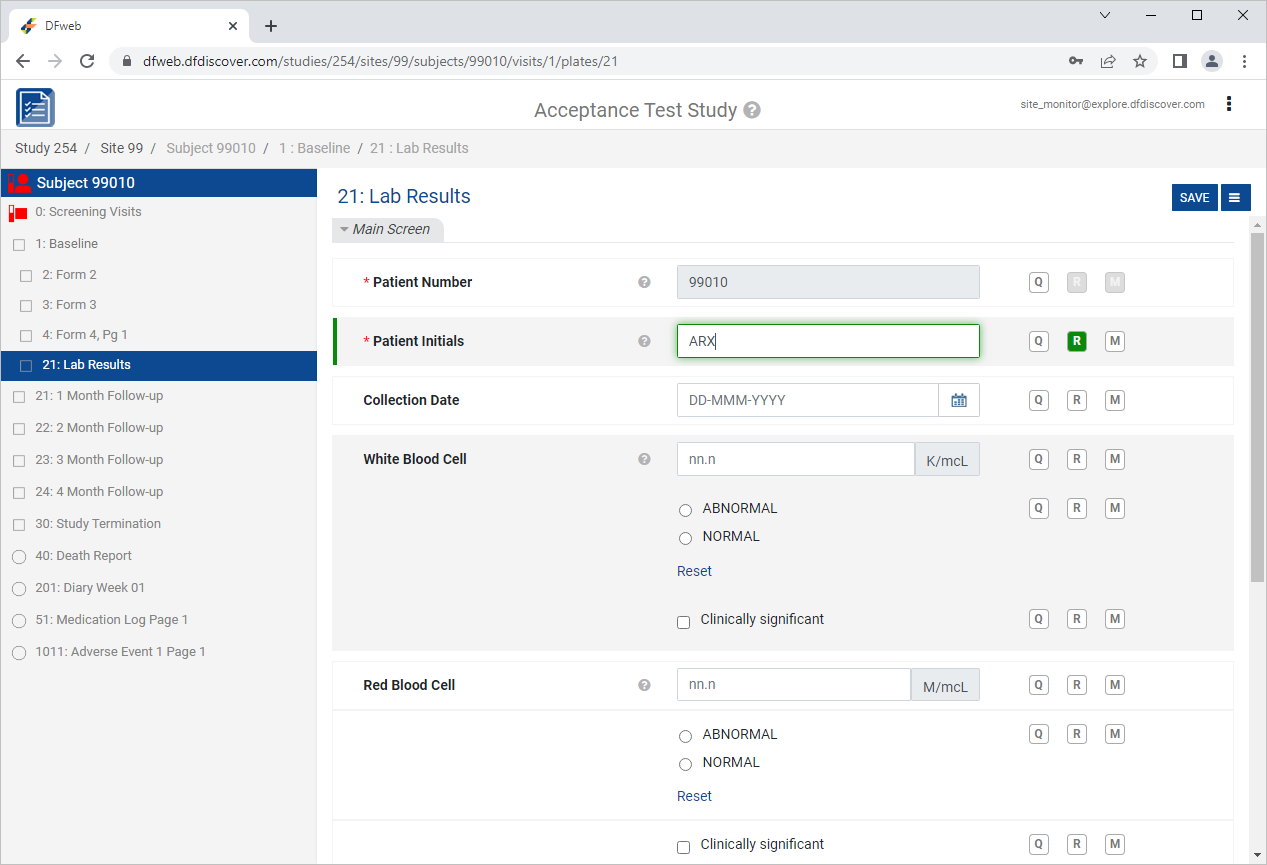
-
Set the remaining fields within the 21: Lab Results form as follows:
Collection Date =
13-NOV-2018White Blood Cell =
15.3, Check (enable) NORMALRed Blood Cell =
04.3, Check (enable) NORMALHemoglobin =
14.2, Check (enable) NORMALMean Cell Hemoglobin Conc =
46.5, Check (enable) ABNORMAL
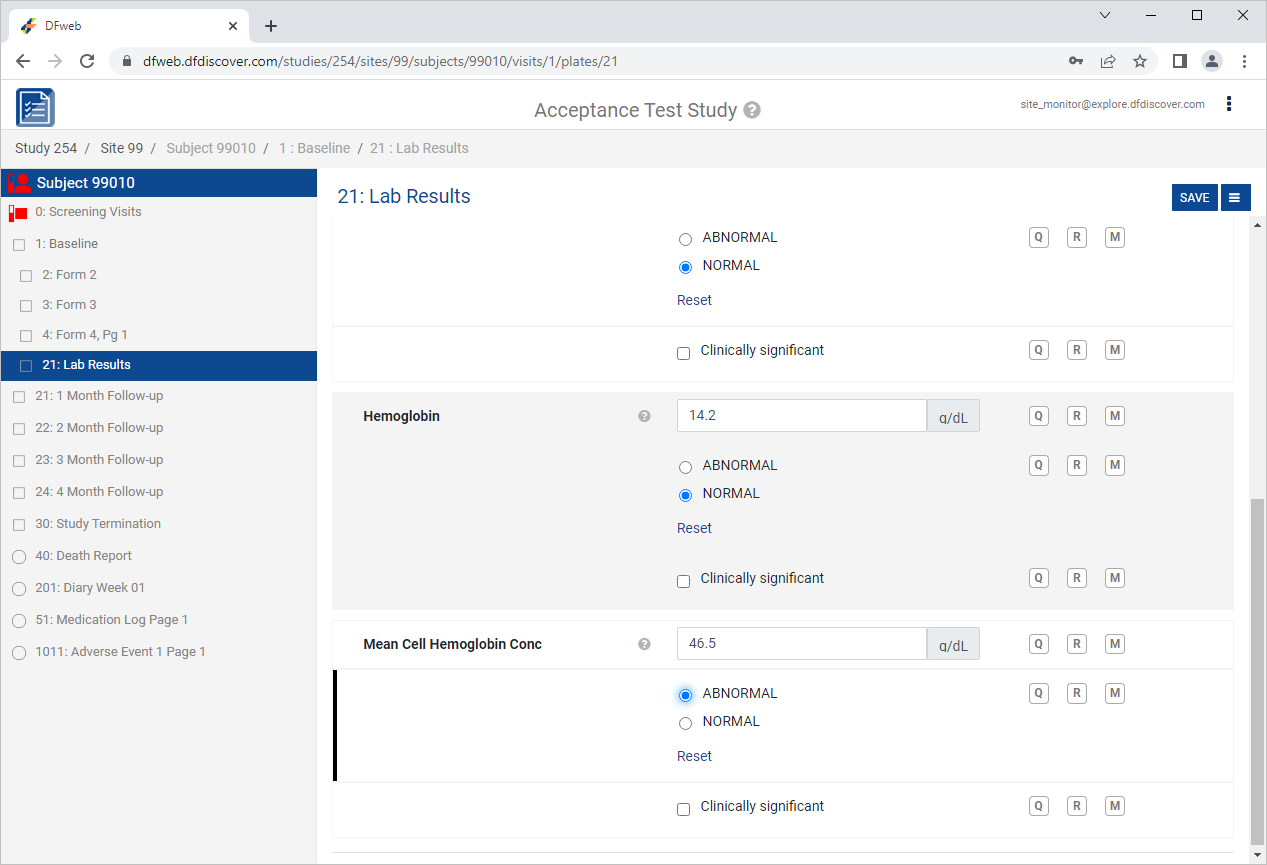
-
Click
 to the right of the Mean Cell Hemoglobin Conc field.
 -
Click next to Reason. The DFlookup: REASON dialog is displayed.
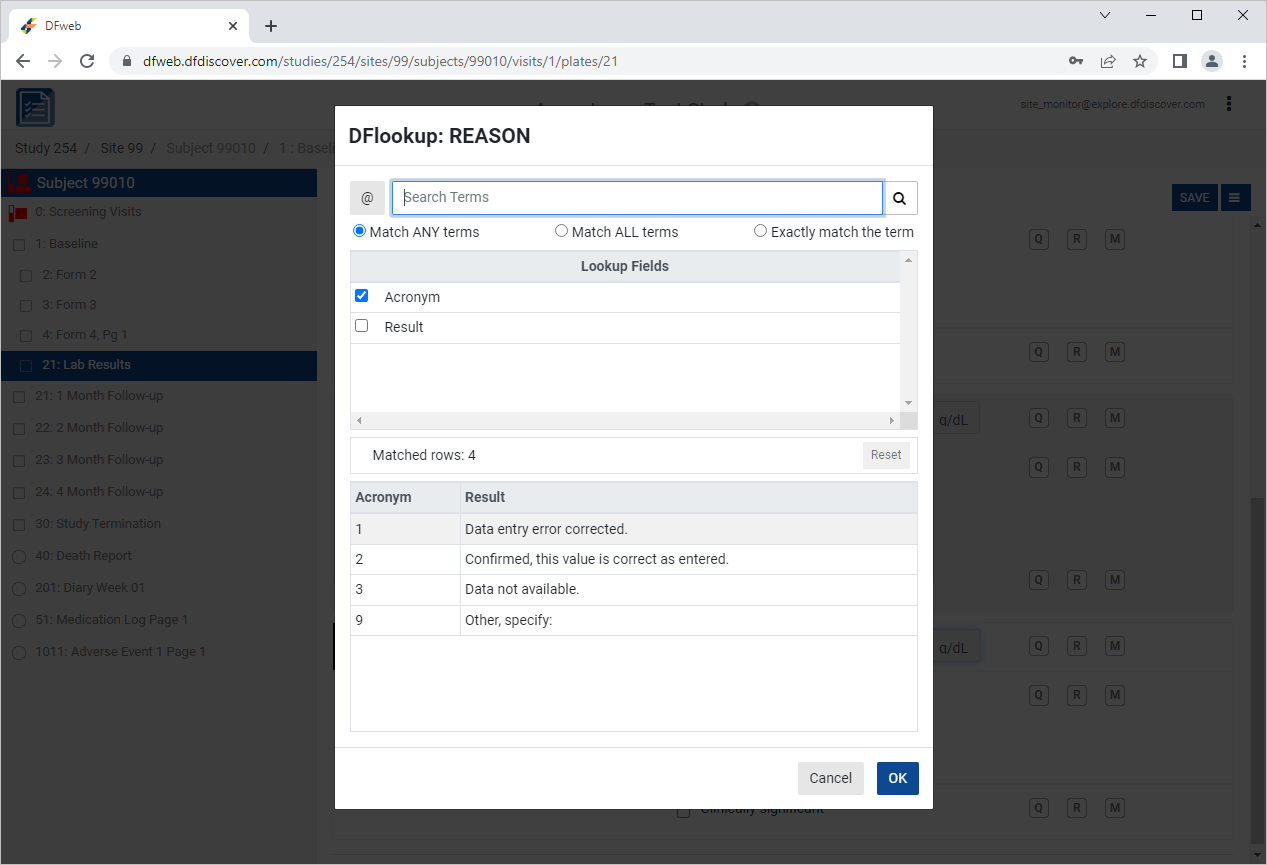
-
Select the Result of Confirmed, this value is correct as entered., Click , followed by then
.
-
Select 51: Medication Log Page 1 > 8: Form 8, Pg 51 page. Click Patient Initials field.
Note The
SetInitedit check executes upon entry to the field. If the initials are available on 1 : Form 1 (previously entered), they are retrieved and populate the Patient Initials field.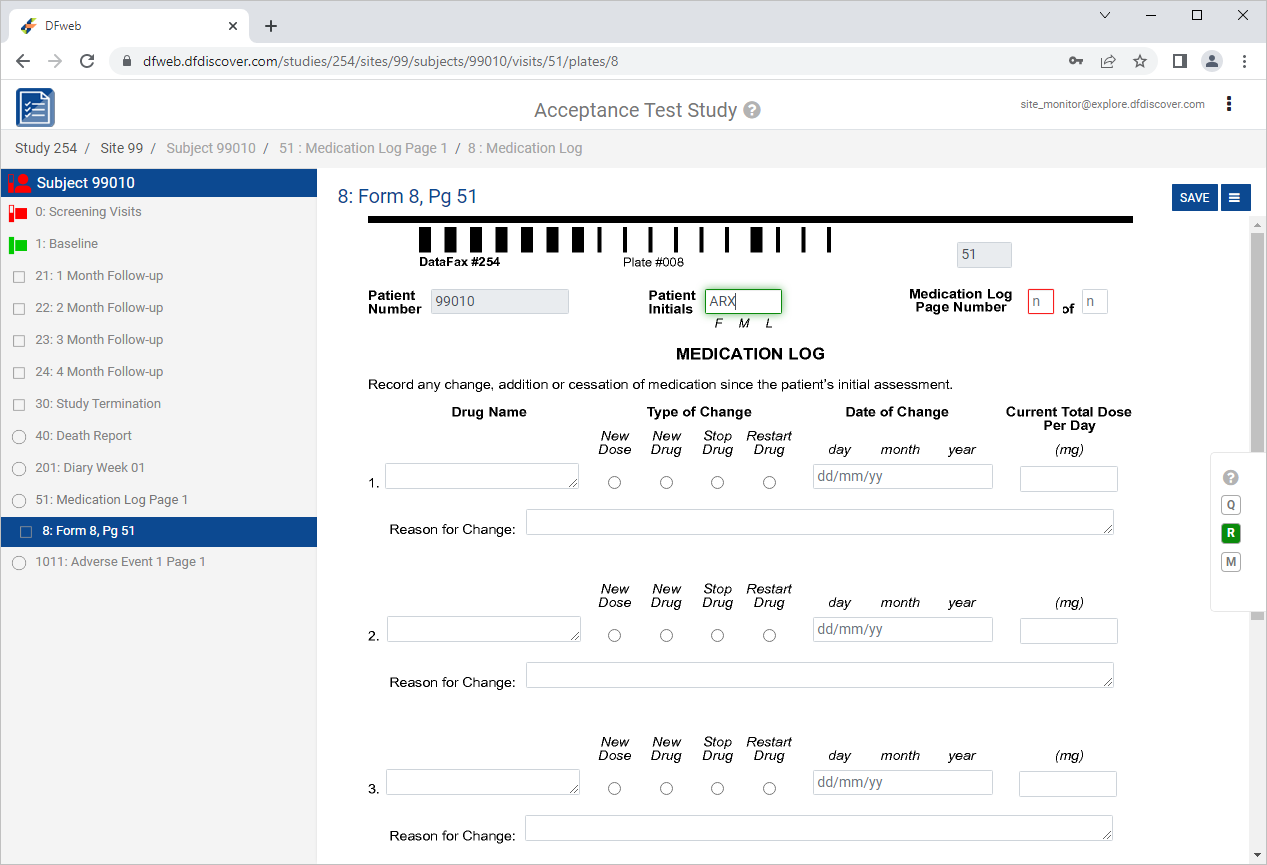
-
Press Tab. In the Medication Log Page Number field, enter values
1of1.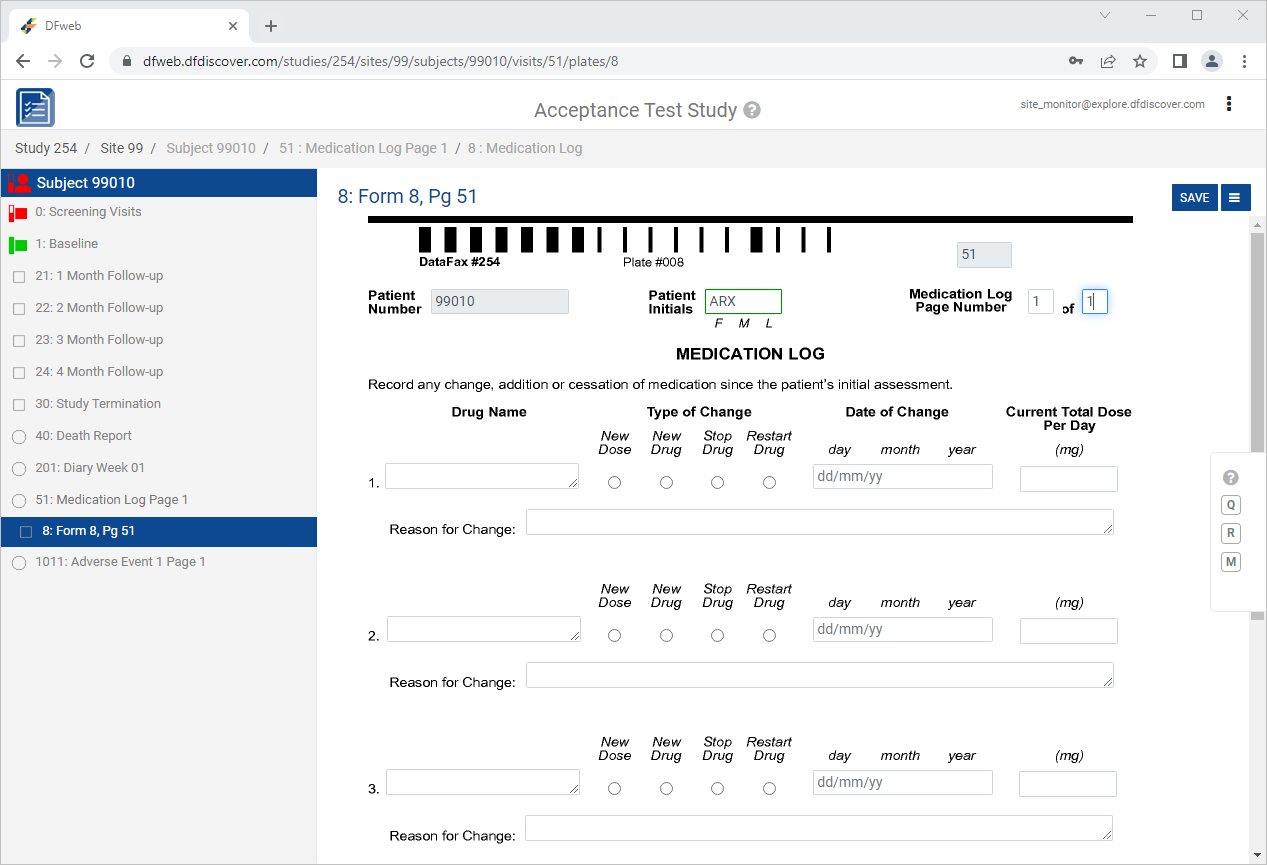
-
Press Tab to advance to 1. Drug Name field. Enter
Vitamin B-12in the 1. Drug Name text field, press Tab. Upon leaving the field, an edit check is executed and DFlookup: drugs dialog appears.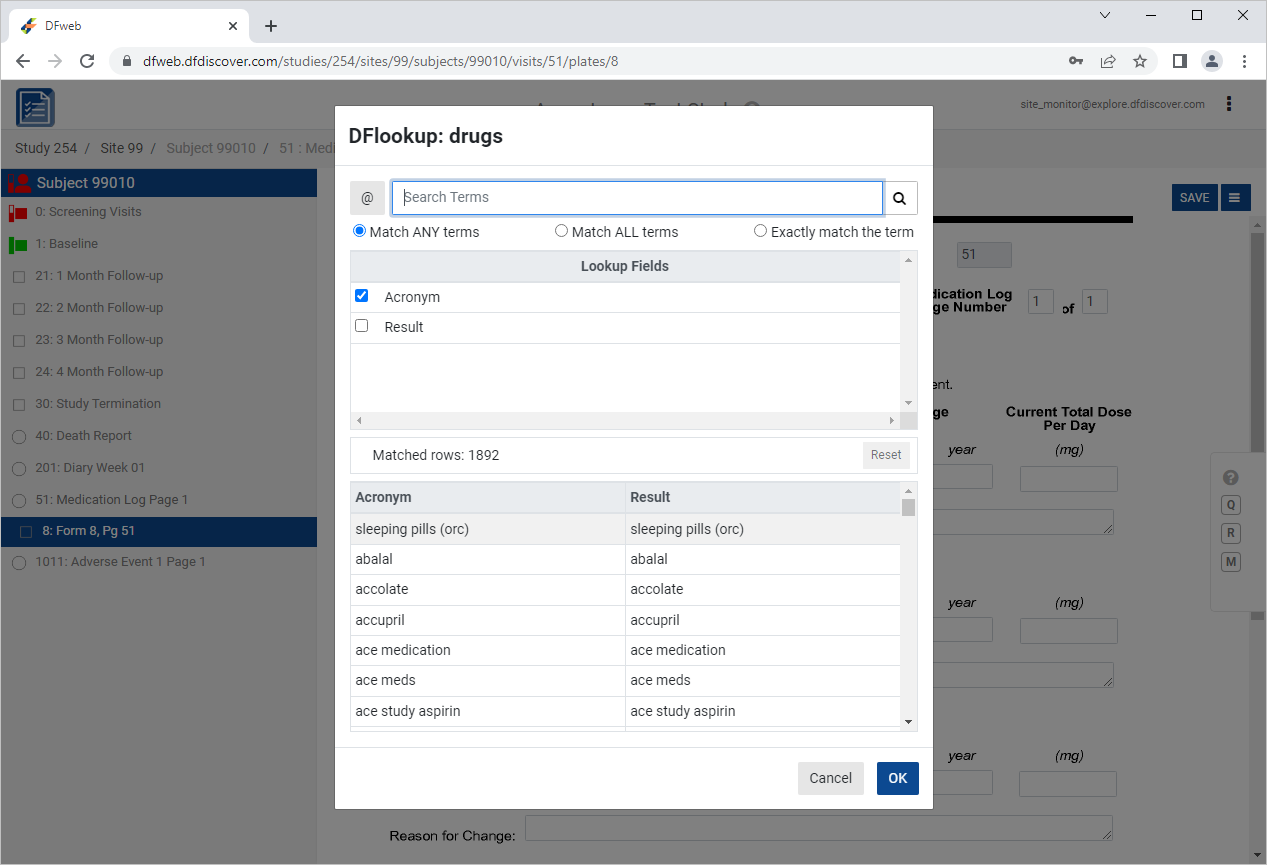
-
Enter
vitamin b12in the Search Terms, Check Match ALL terms and click to filter the results.
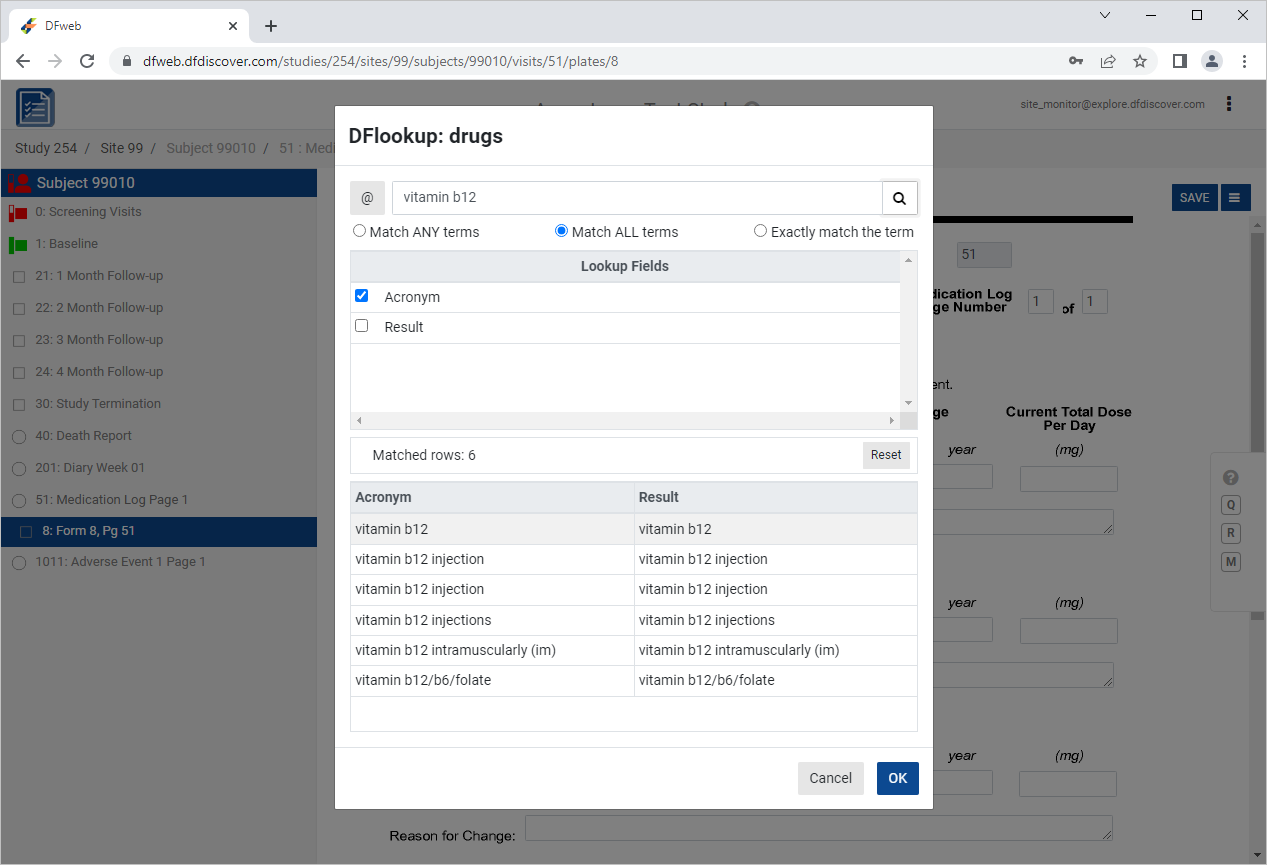
-
Select the result of vitamin b12 from the table. Click . The 1. Drug Name field becomes auto-populated with
vitamin b12result.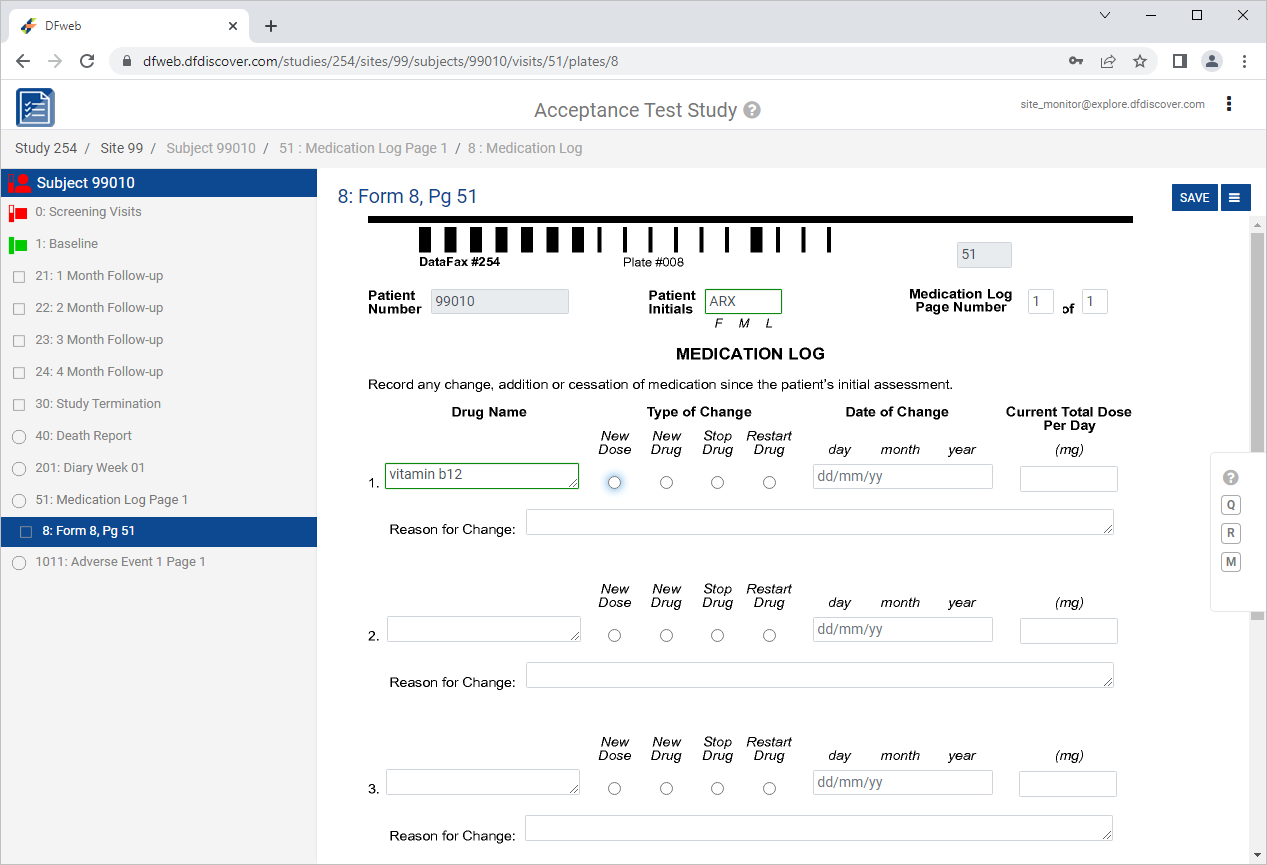
-
Beginning with the Type of Change field complete the remaining data fields as follows:
Type of Change = Select New Drug
Date of Change = Select
15/11/18Current Total Dose Per Day =
250Reason for Change =
Increased Mean Cell Hemoglobin Conc.
Click
.
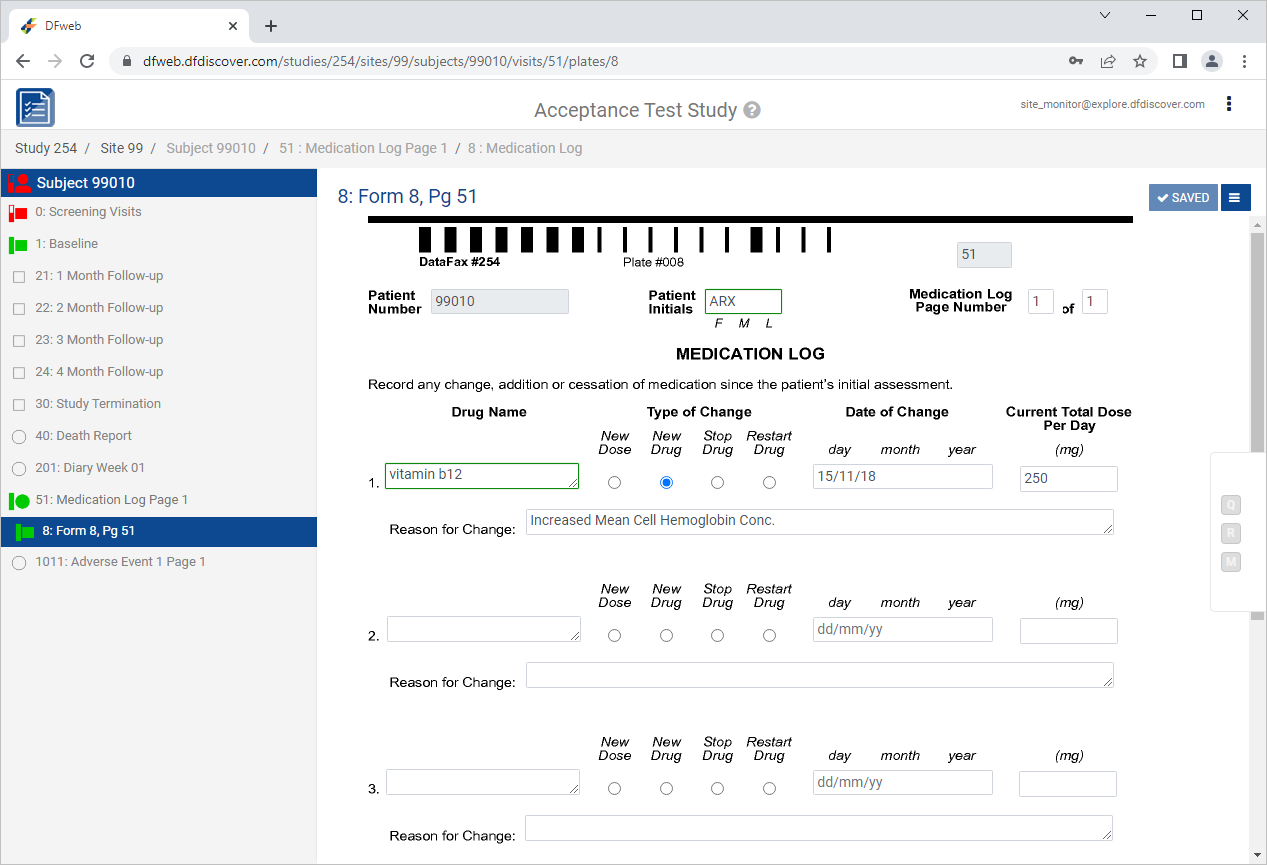
From the breadcrumb bar, click Site 99 > Queries. Locate and select the outstanding query for Subject 99008 > Screening Visits > Form 1.
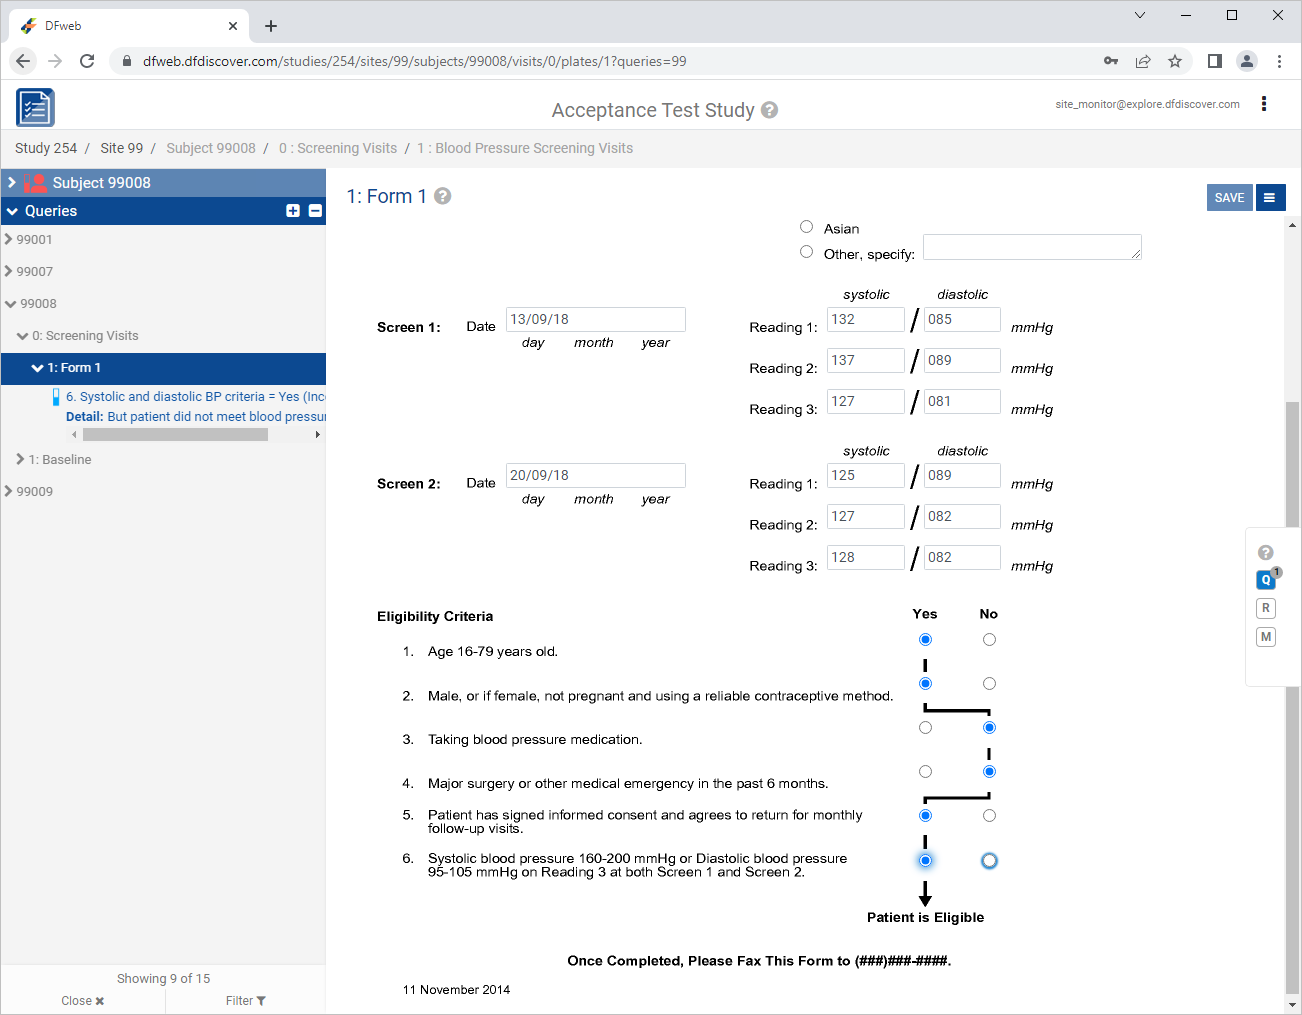
Change 6. Systolic and diastolic BP criteria from 'Yes' to 'No', Click
 then
then  , select Resolved from the Status drop-down list. Click , and to save the data record changes.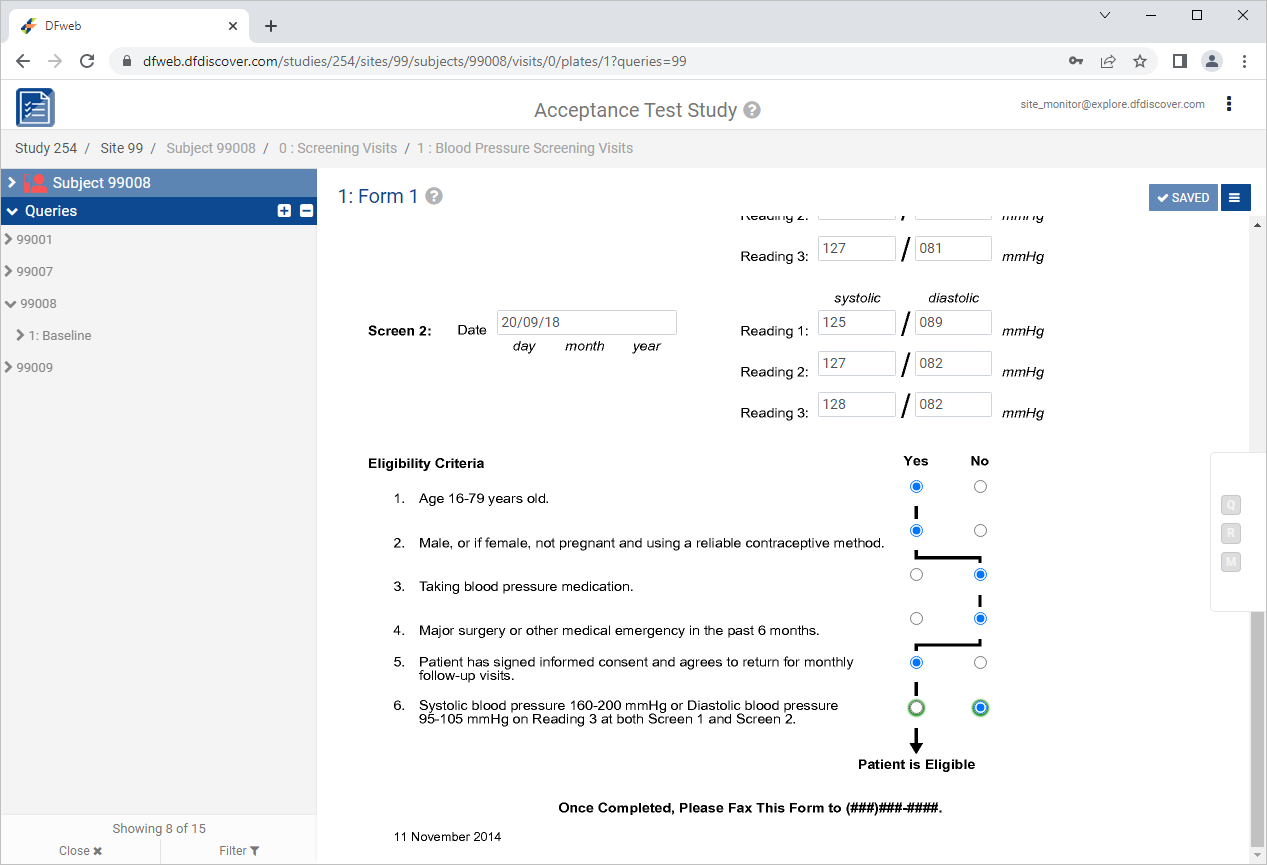
Click 99008 > 1:Baseline > 2: Form 2. Select Date of Birth (dd/mm/yy) query. Correct Date of Birth (dd/mm/yy) to
14/01/68.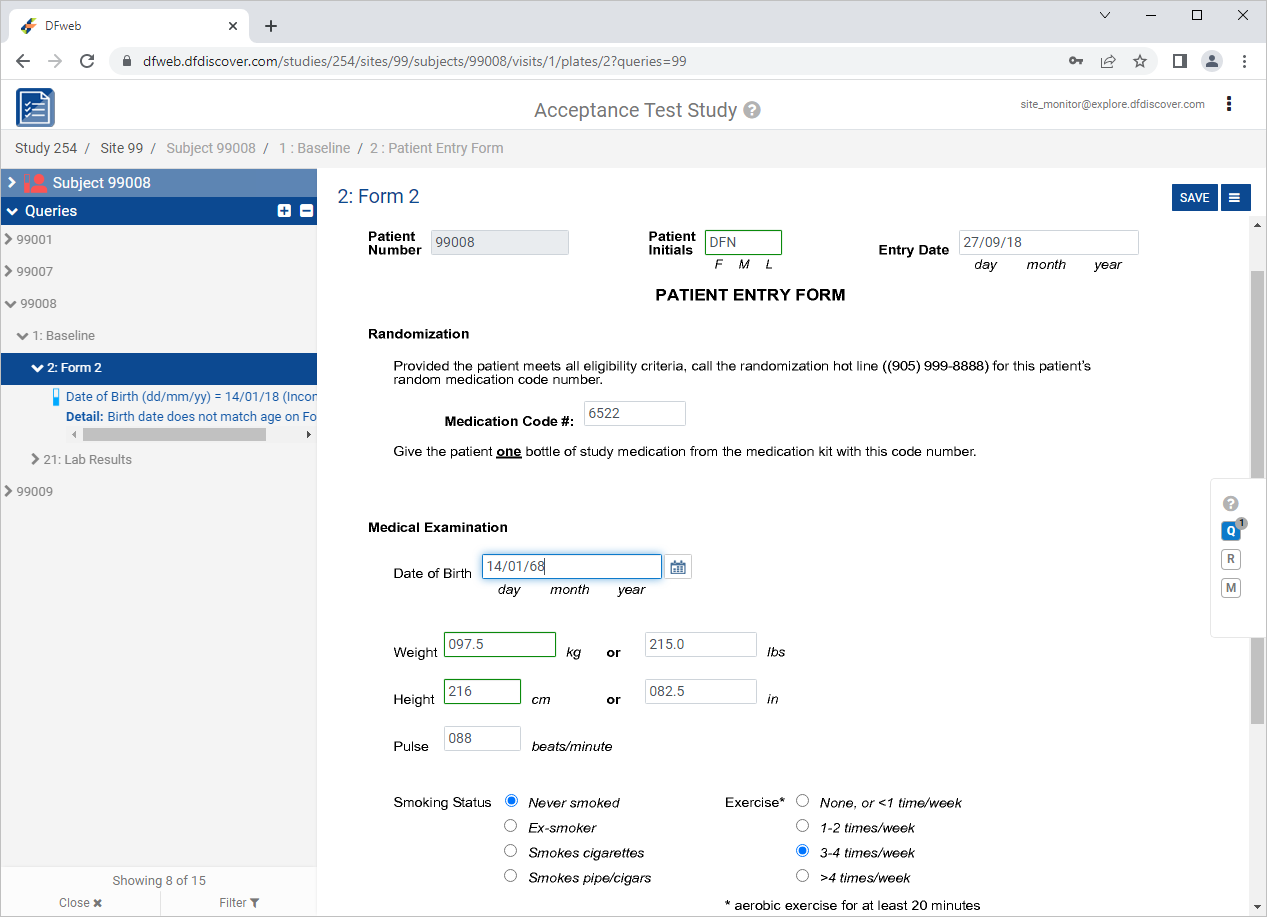
-
Click
then , select Resolved from the Status drop-down list. Click , to save the query changes. Click .
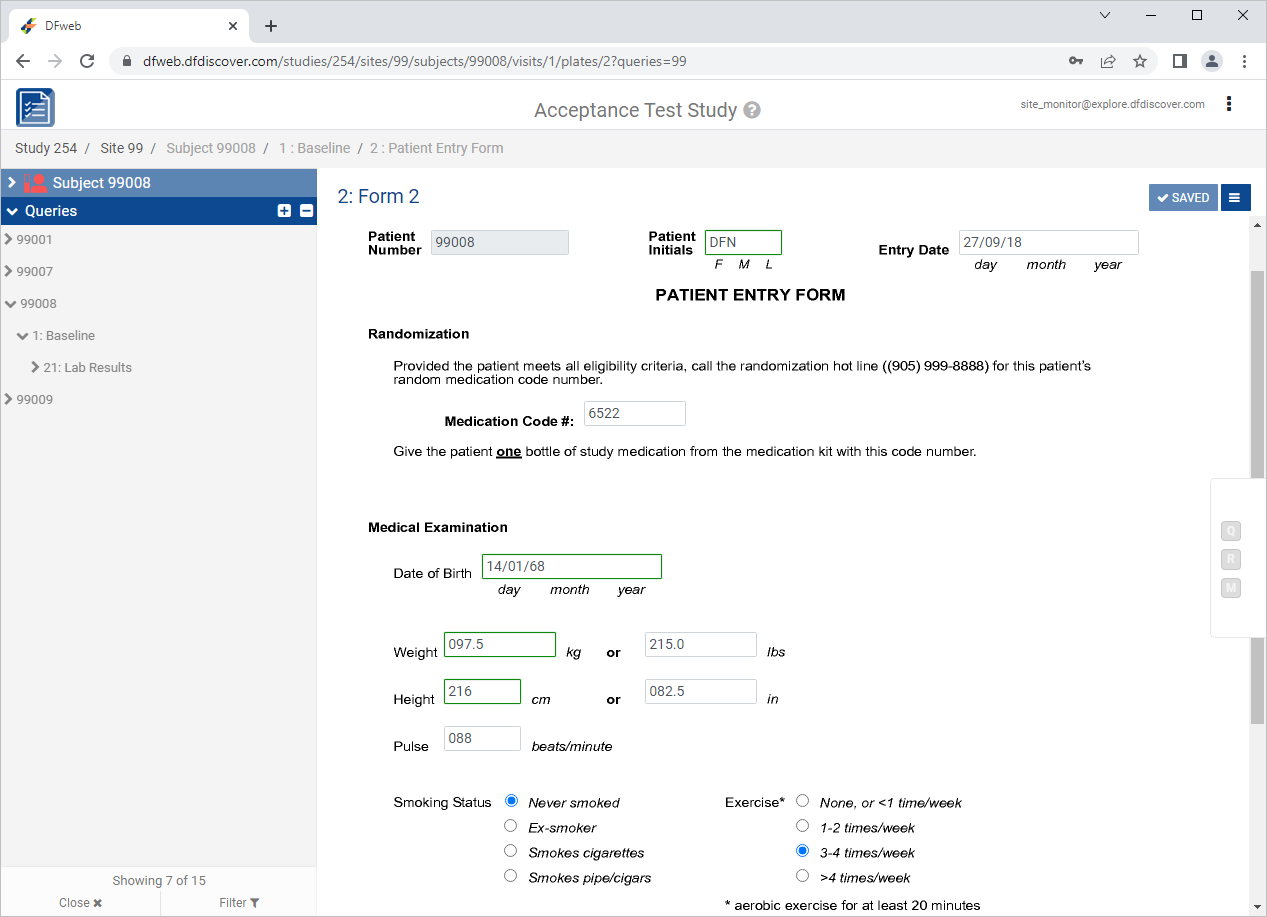
-
Click 21: Lab Results, select the outstanding query. To the right of the Mean Cell Hemoglobin Conc “ABNORMAL/NORMAL” field click
. Enter Lab value confirmed as out of range.in the Reason field. Click , followed by.
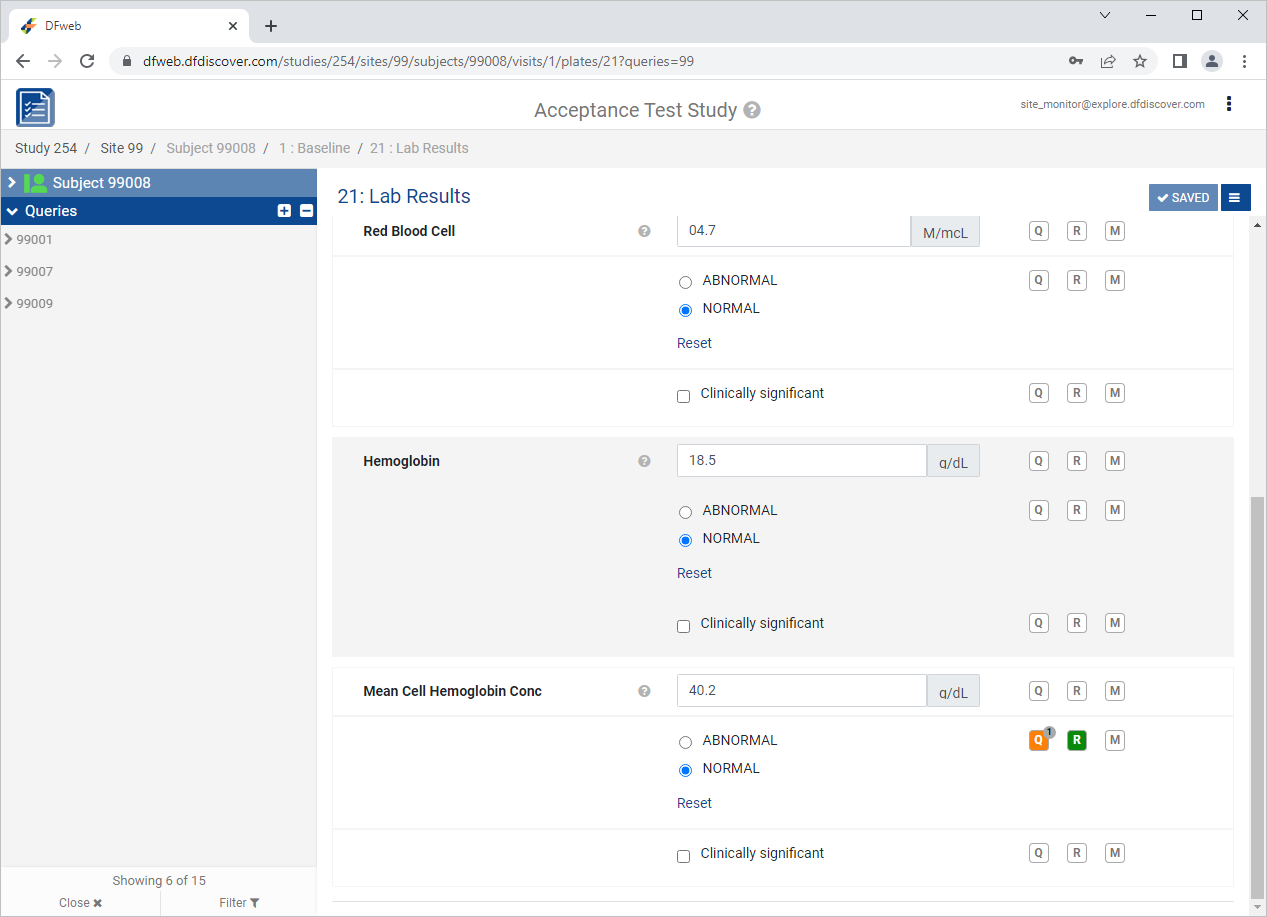
In the Queries window, click to close Queries view. Click
 > Manage documents to open the Manage documents window.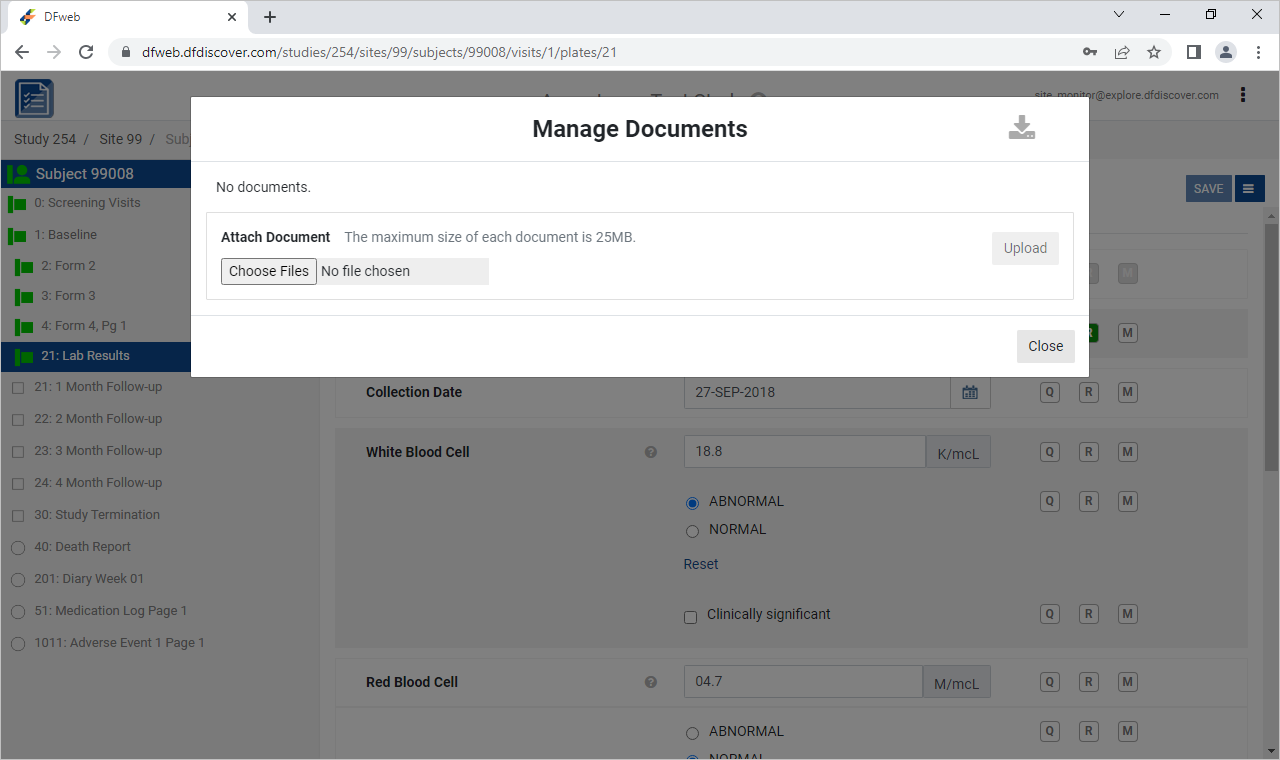
Click , select the previously saved
labreport99008_module17.pdf(Refer to Step 2). Click > to upload the document.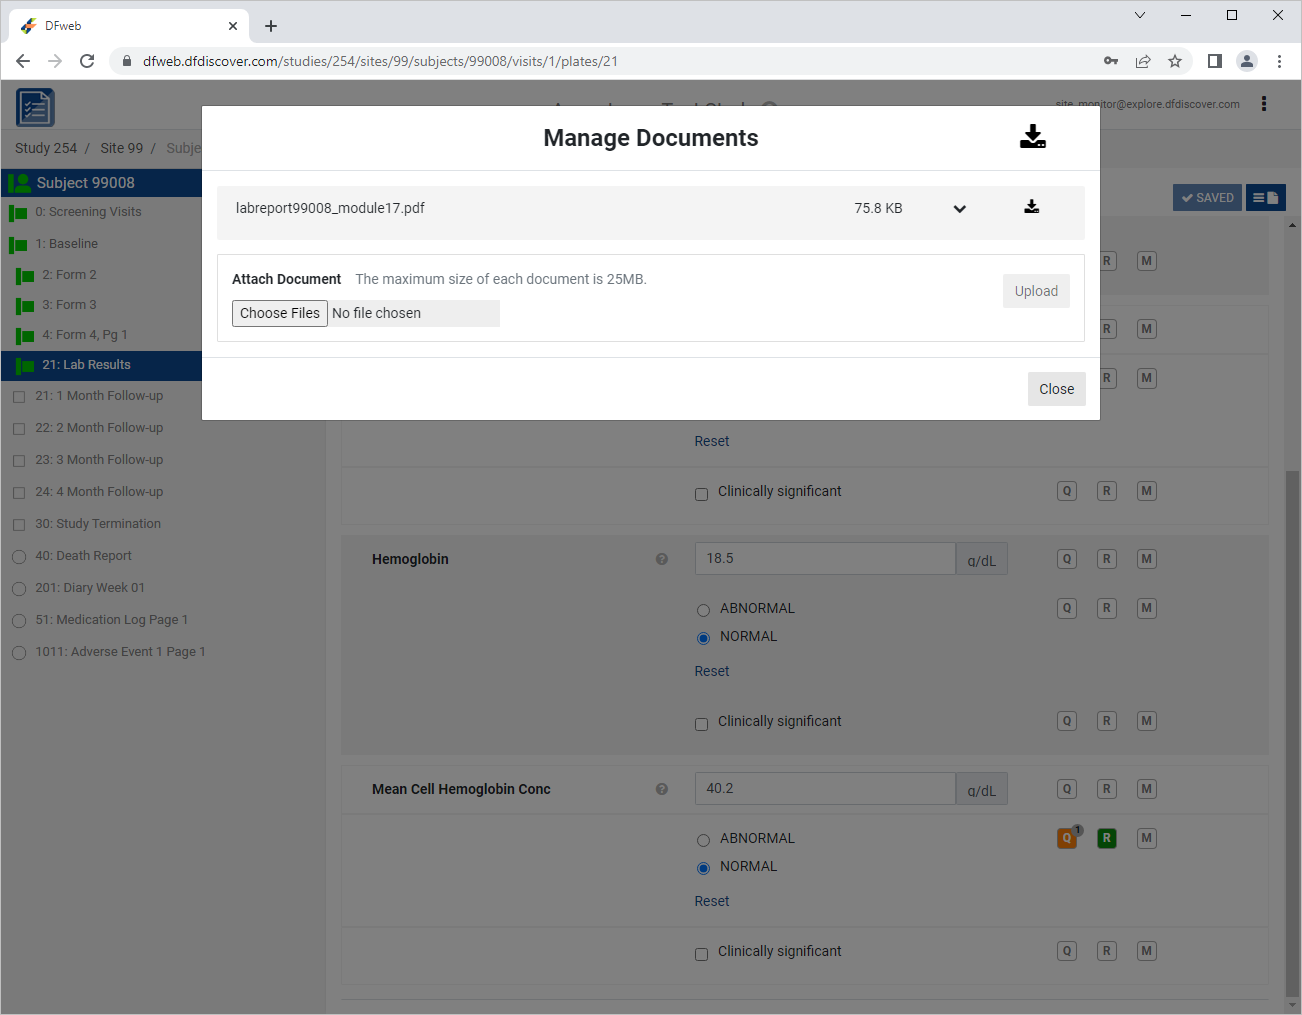
Click
 to view the newly uploaded document.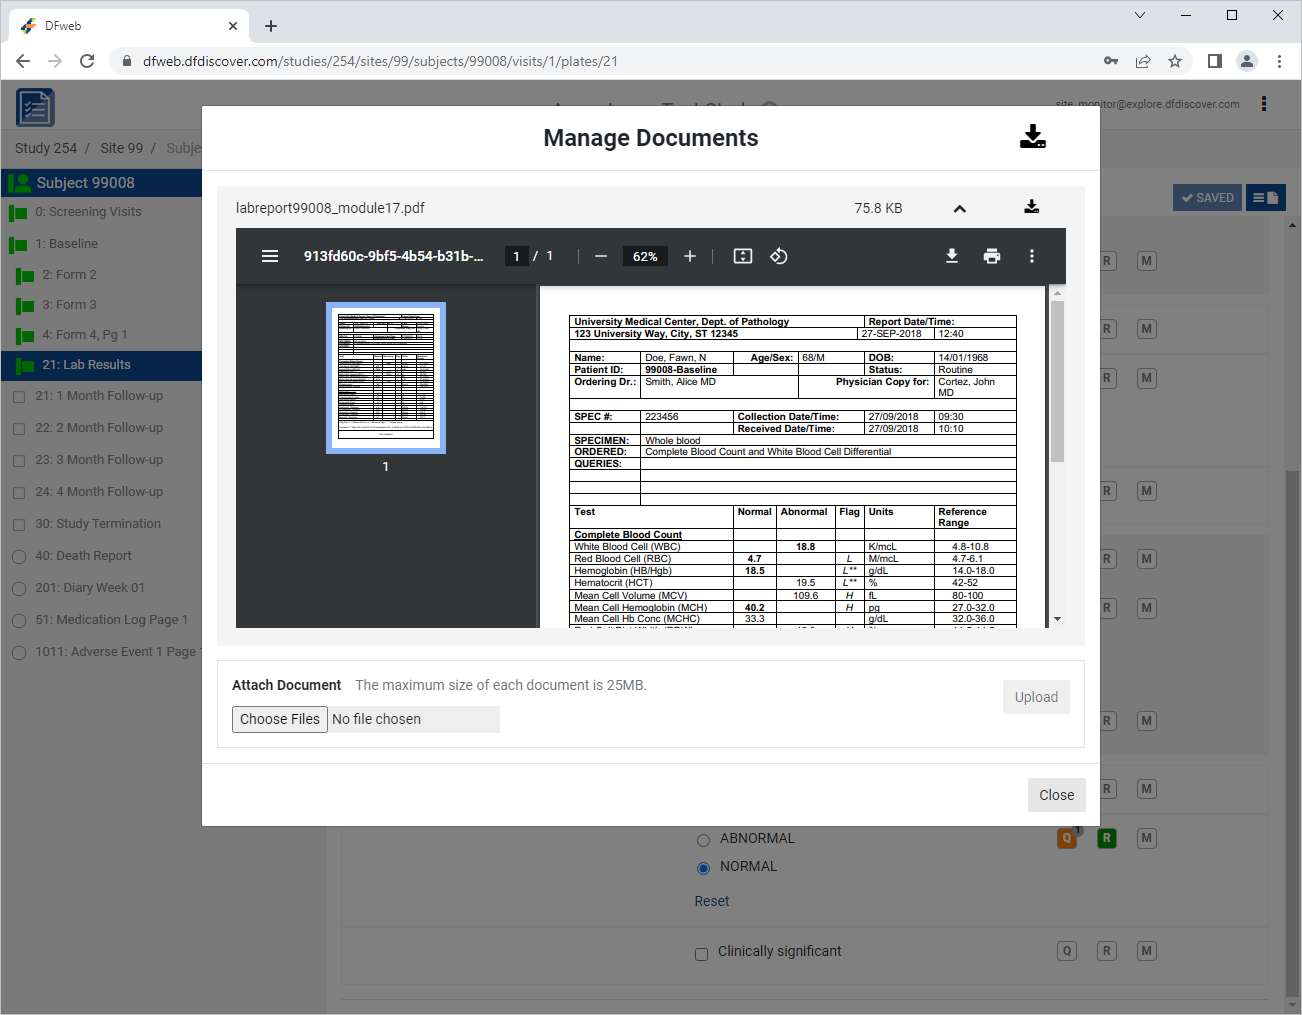
The document can be zoomed in/out by using the navigation buttons within the document window.
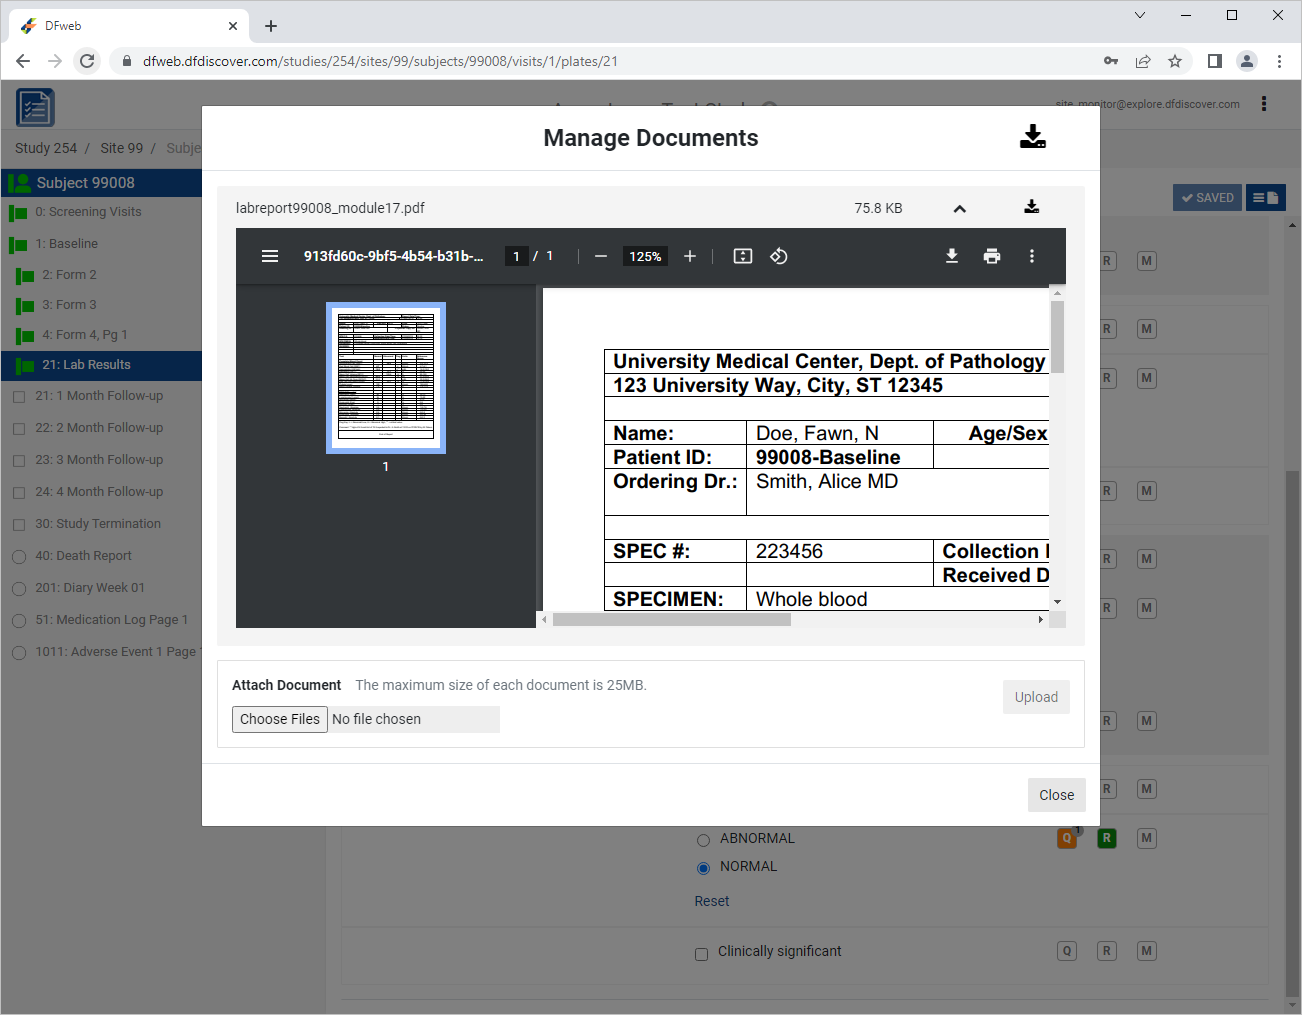
Click to close the Manage Documents window. Notice the
icon has now changed to  indicating the data record now has associated documents.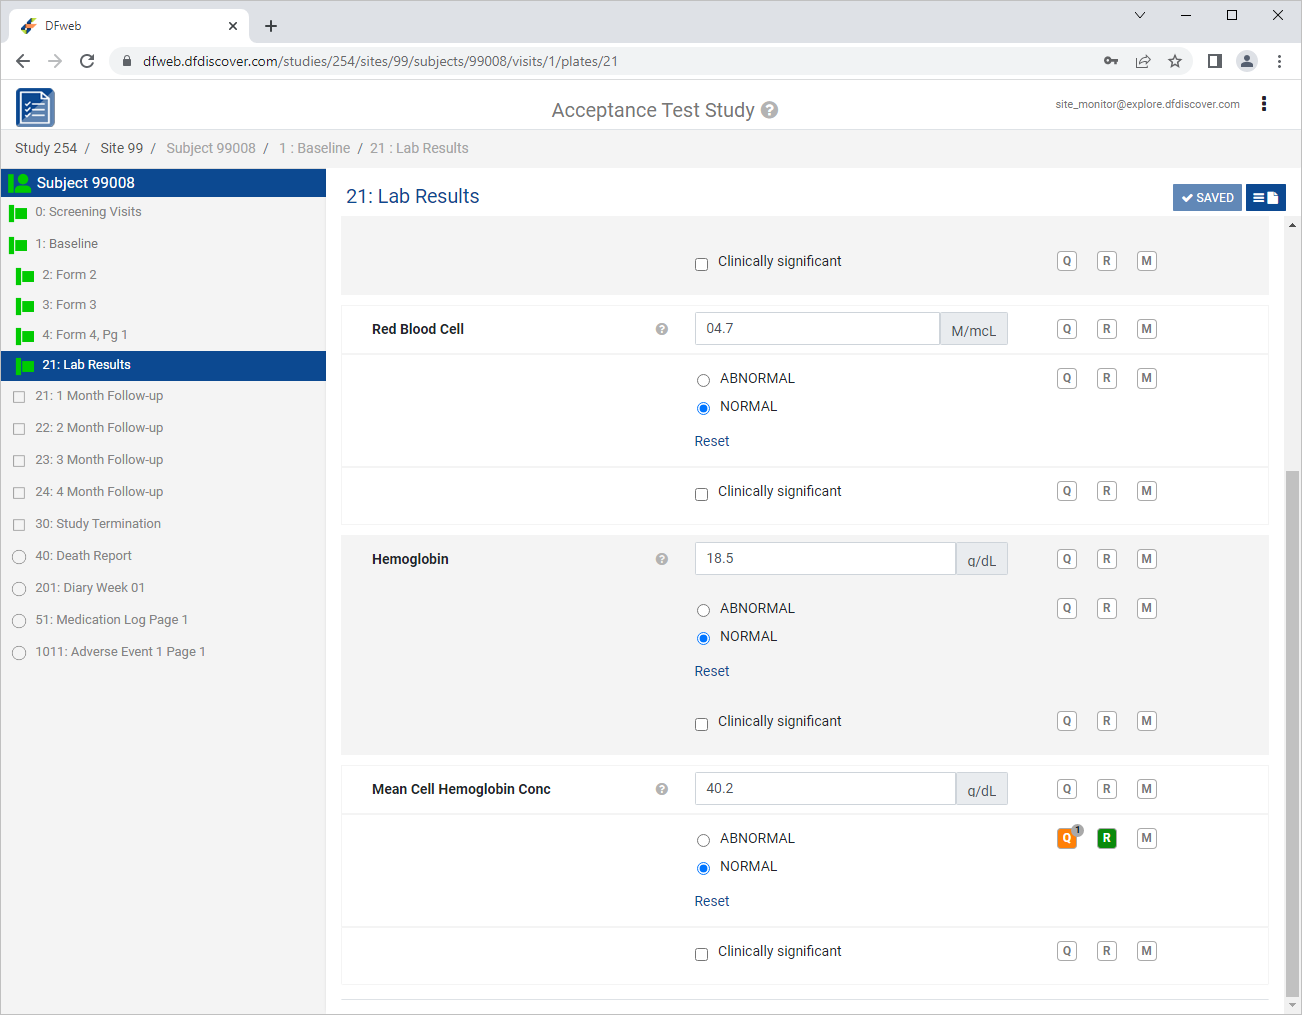
Click
> to exit DFweb.
| Note |
|---|---|
|
eSignatures require password permission to be set in the user role at the DFadmin level. The Password permission must be granted for the specific eSignature plate. |
-
In the DFweb login dialog, enter the DFdiscover Server name that has been provided by your administrator. Enter
site_investin the Username field and the previously assigned password in the Password field. Click to login. -
As user
site_investhas 2FA enabled, enter security code received by email as previously defined.Note Refer to Section 1.8, “Creating user accounts and assigning study permissions.” as a valid email address is required for
site_investto receive 2FA codes. -
From the Subjects list, click Subject 99011 > 30: Study Termination > 7: Form 7.
-
Click Patient Initials enter
SIG, Set:Final Visit Date =
03/06/221. Did the patient complete the entire 16 week study? = No
Check (enable) Moved away
2. Last does of study medication was taken on = Check (enable) Unknown
Click
to save and eSign the Study Termination form.
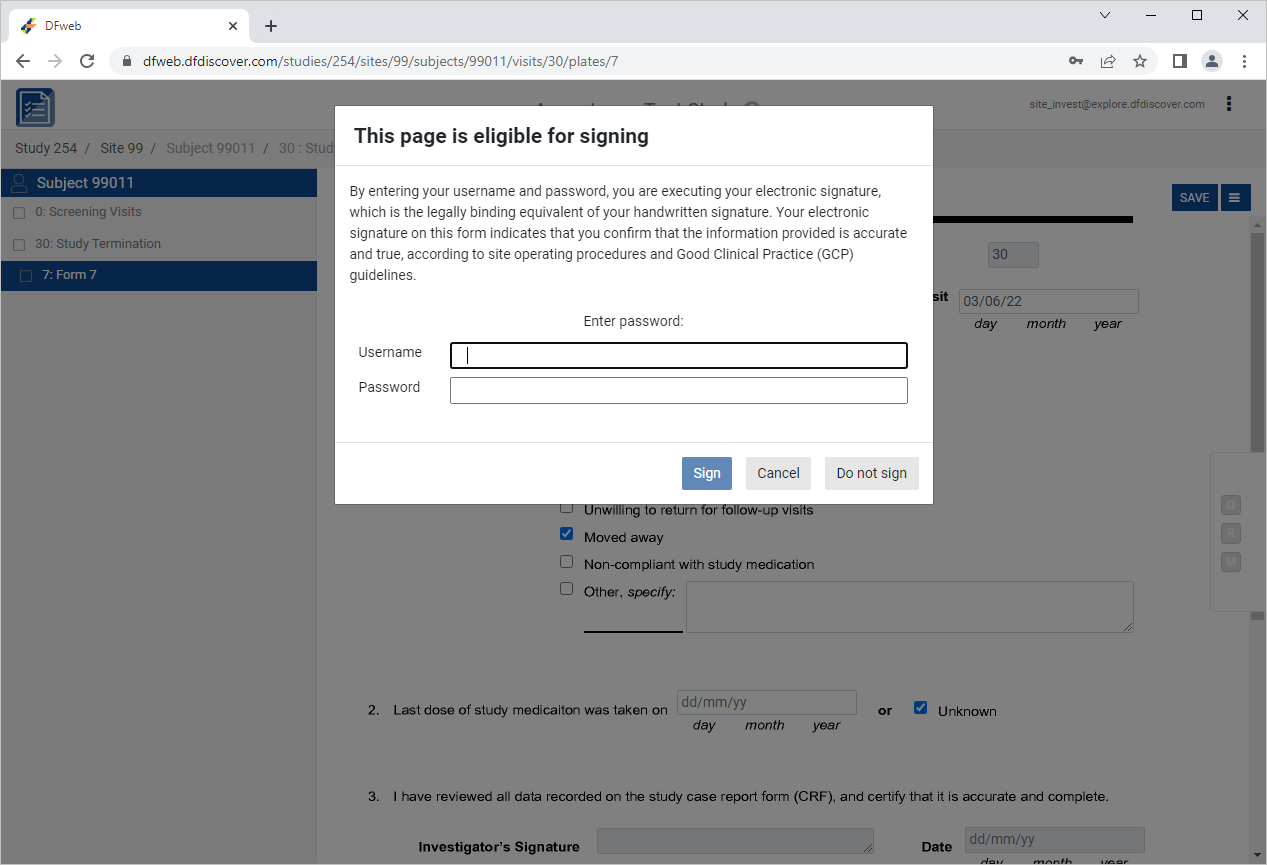
-
In the dfpassword confirmation dialog enter the user name
site_investand the corresponding password. Click to apply the electronic signature to the current page.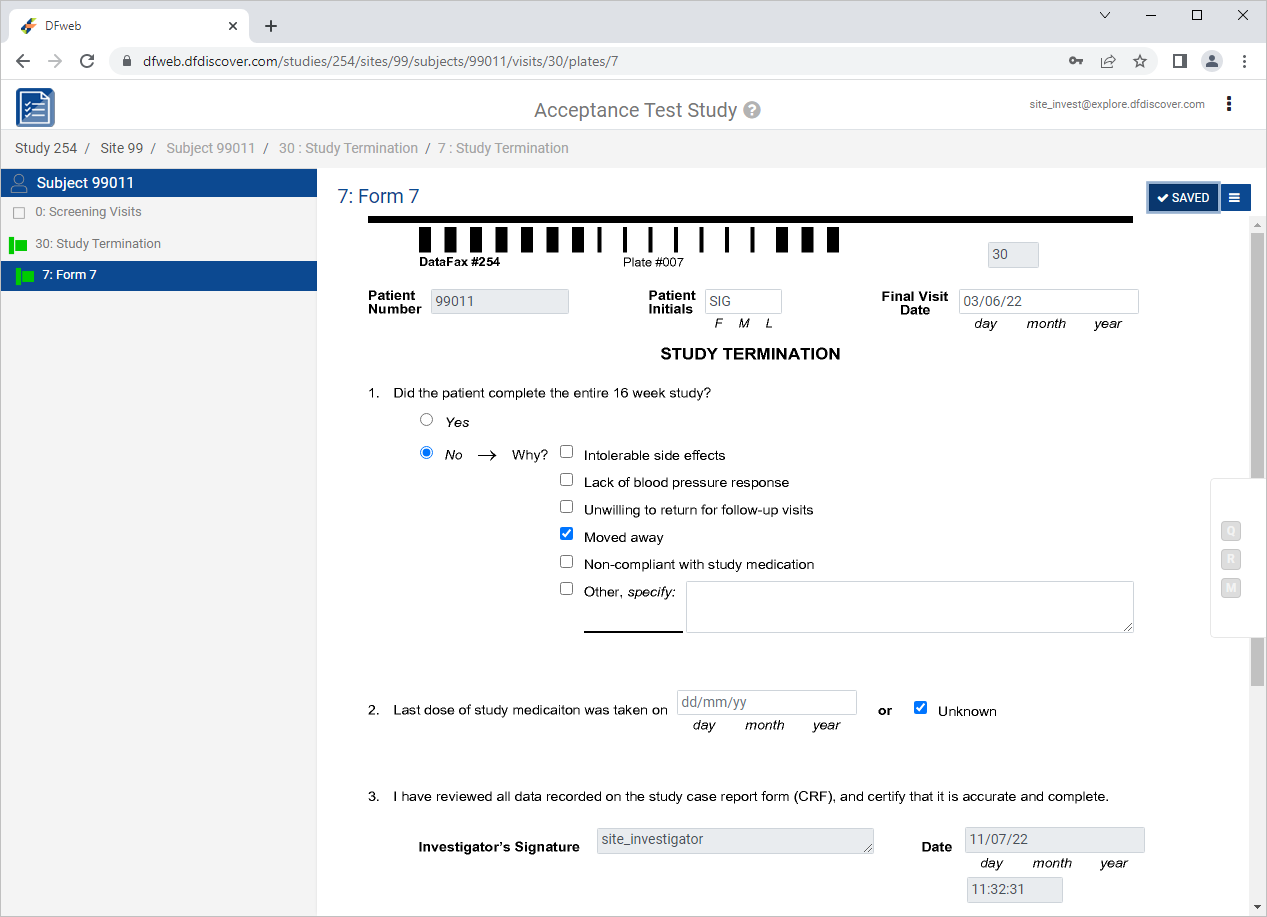
-
Examine the 3 eSignature fields at the bottom of the page.
-
Click
> to exit DFweb.
-
In the DFweb login dialog, enter the DFdiscover Server name that has been provided by your administrator. Enter
site_monitorin the Username field and the previously assigned password in the Password field. Click to login. -
From the Subjects list, click Subject 99011 > 30: Study Termination > 7: Form 7.
-
Click 2. Last dose of study medication was taken on field. Click
 to open the Add Query dialog. In the dialog, set:
-
Category = Missing
-
Enter
Investigator to confirm last dose taken with subject during clinic visit.in the Note field. -
Click > .
-
-
Press Tab to advance to the Unknown field. Un-check (disable) the checkbox. Click
.
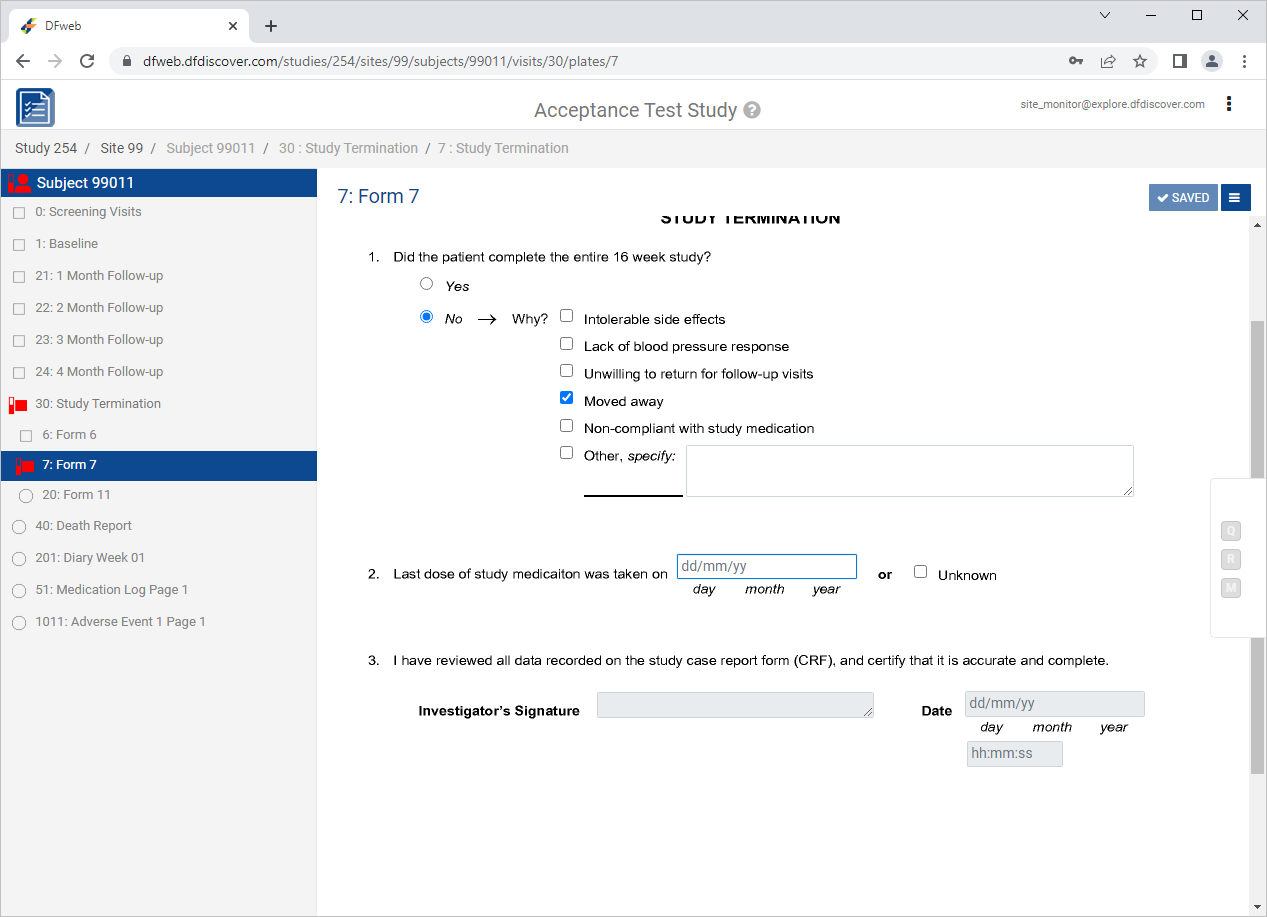
-
Click
> to exit DFweb. -
In the DFweb login dialog, enter the DFdiscover Server name that has been provided by your administrator. Enter
site_investin the Username field and the previously assigned password in the Password field. Click to login. -
From the breadcrumb window, Click Tasks.
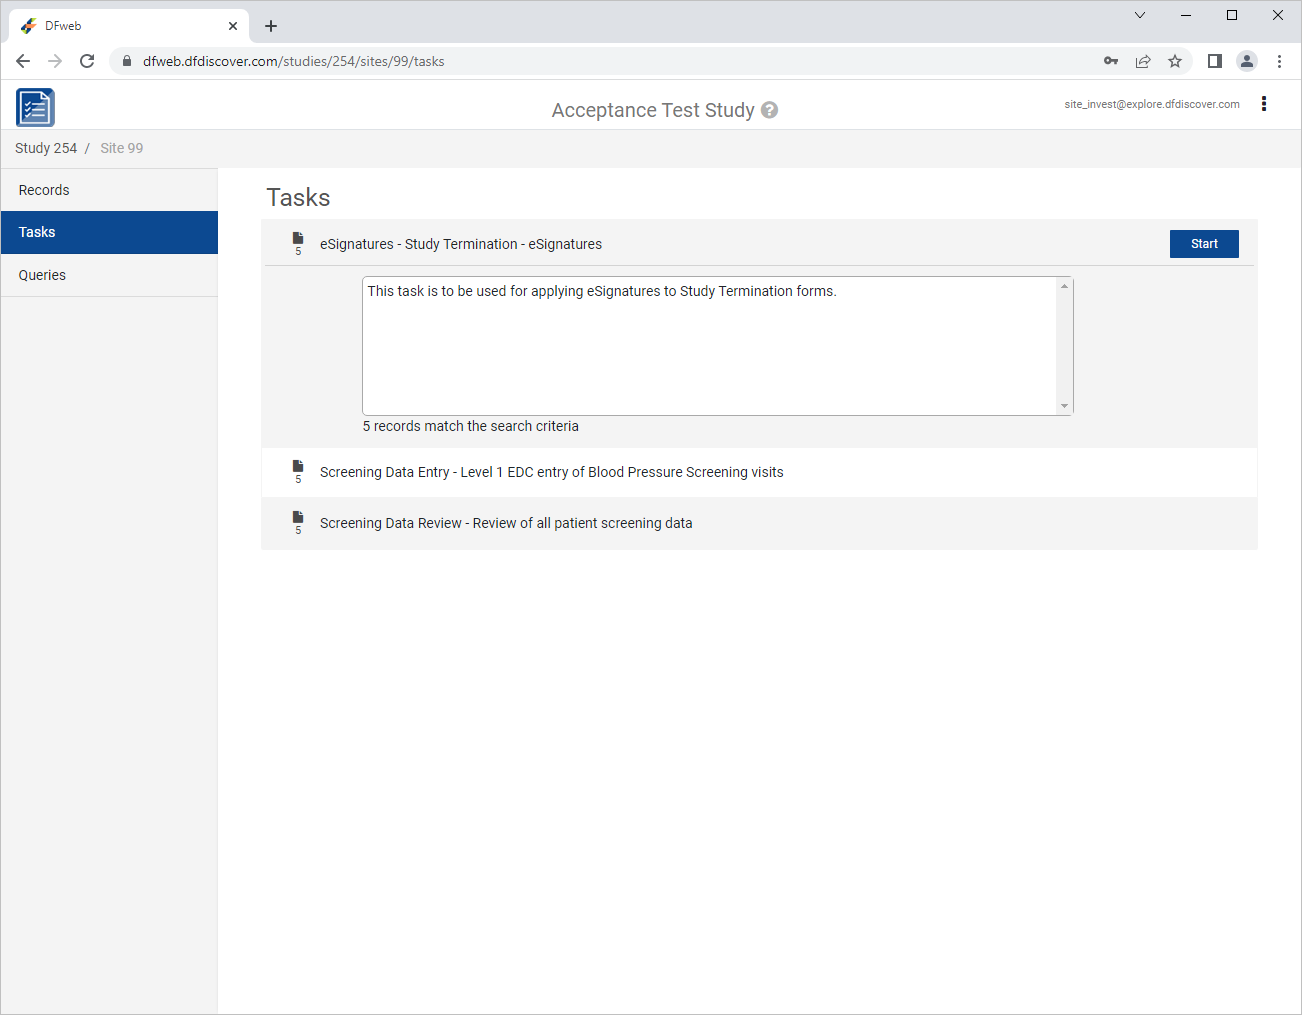
-
Locate the eSignatures - Study Termination - eSignatures task. Click .
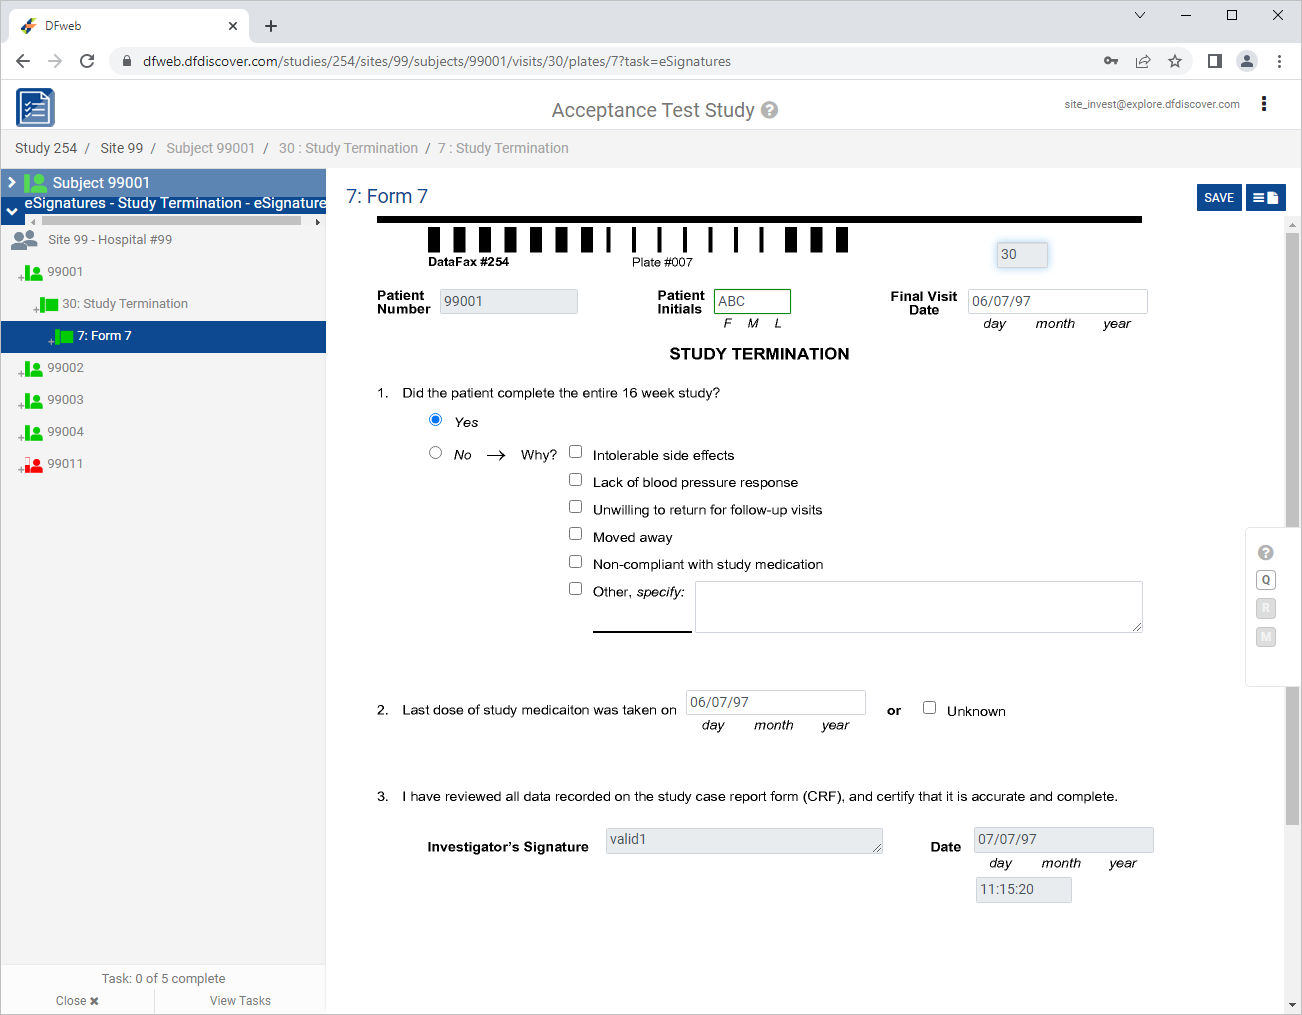
-
From the Subjects list, click Subject 99011 > 30: Study Termination > 7: Form 7.
-
Click the 2. Last dose of study medication was taken on field. Click
then . Select Resolved from the Status drop-down list. Enter Confirmed date of last medication dose verbally with subject during clinic visit.in the Note field. Click , .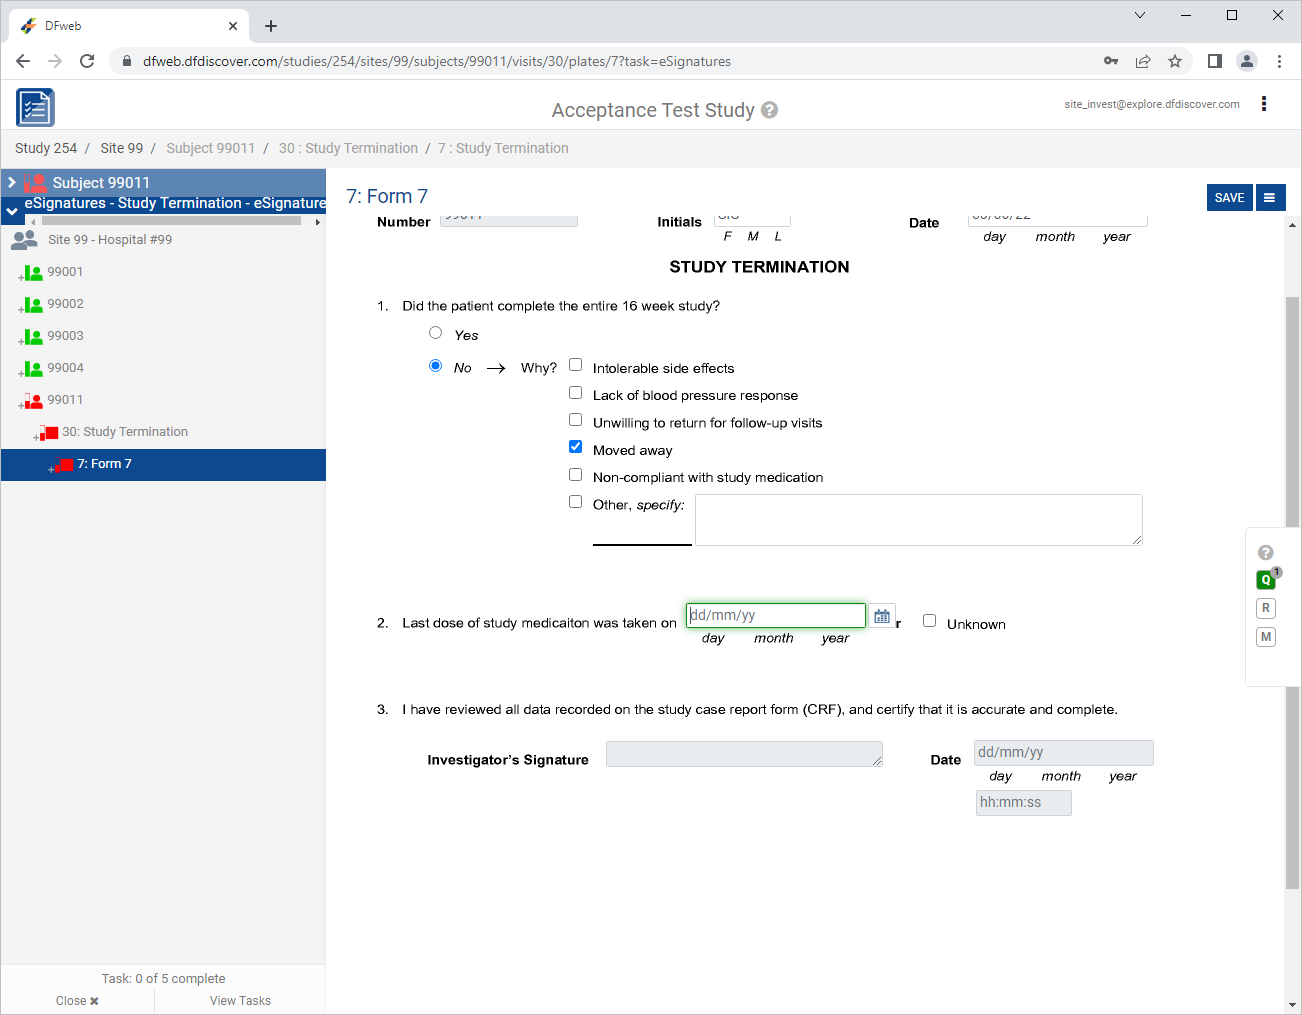
-
Enter the 2. Last dose of study medication was taken on date as
02/06/22. Click.
-
In the dfpassword confirmation dialog enter the user name
site_investand the corresponding password used for login in Section 13.6, “Add an Electronic Signature (eSign) to a set of completed subject records.”. Click to apply the electronic signature to the current page.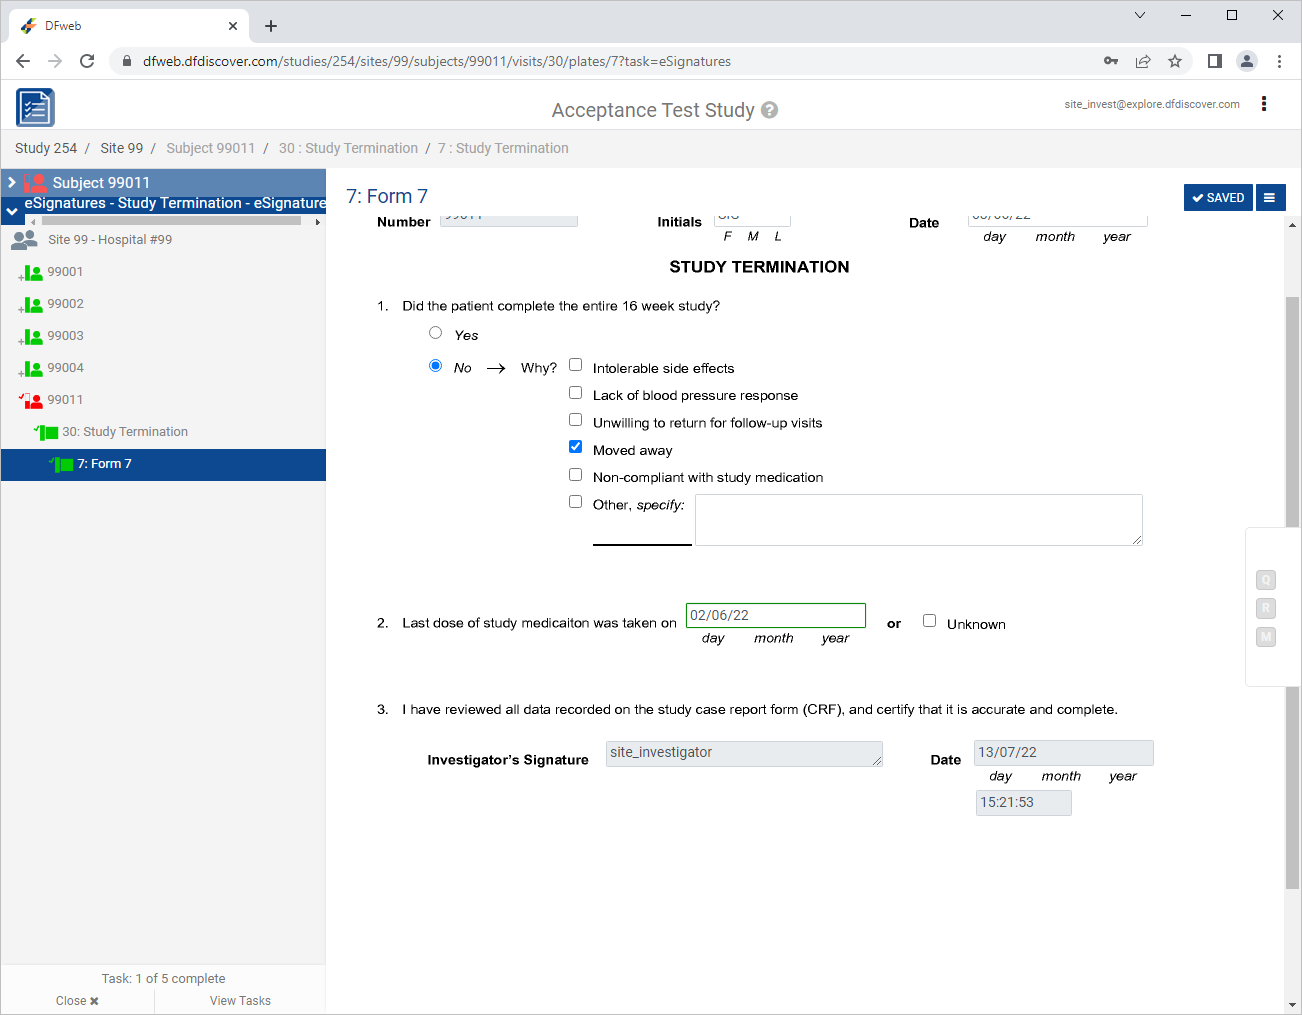
-
Examine the 3 eSignature fields at the bottom of the page.
-
Click to close Tasks view. In the resulting warning dialog click .
-
Click
> to open the Page History window. The Page History is displayed, Click to close the window.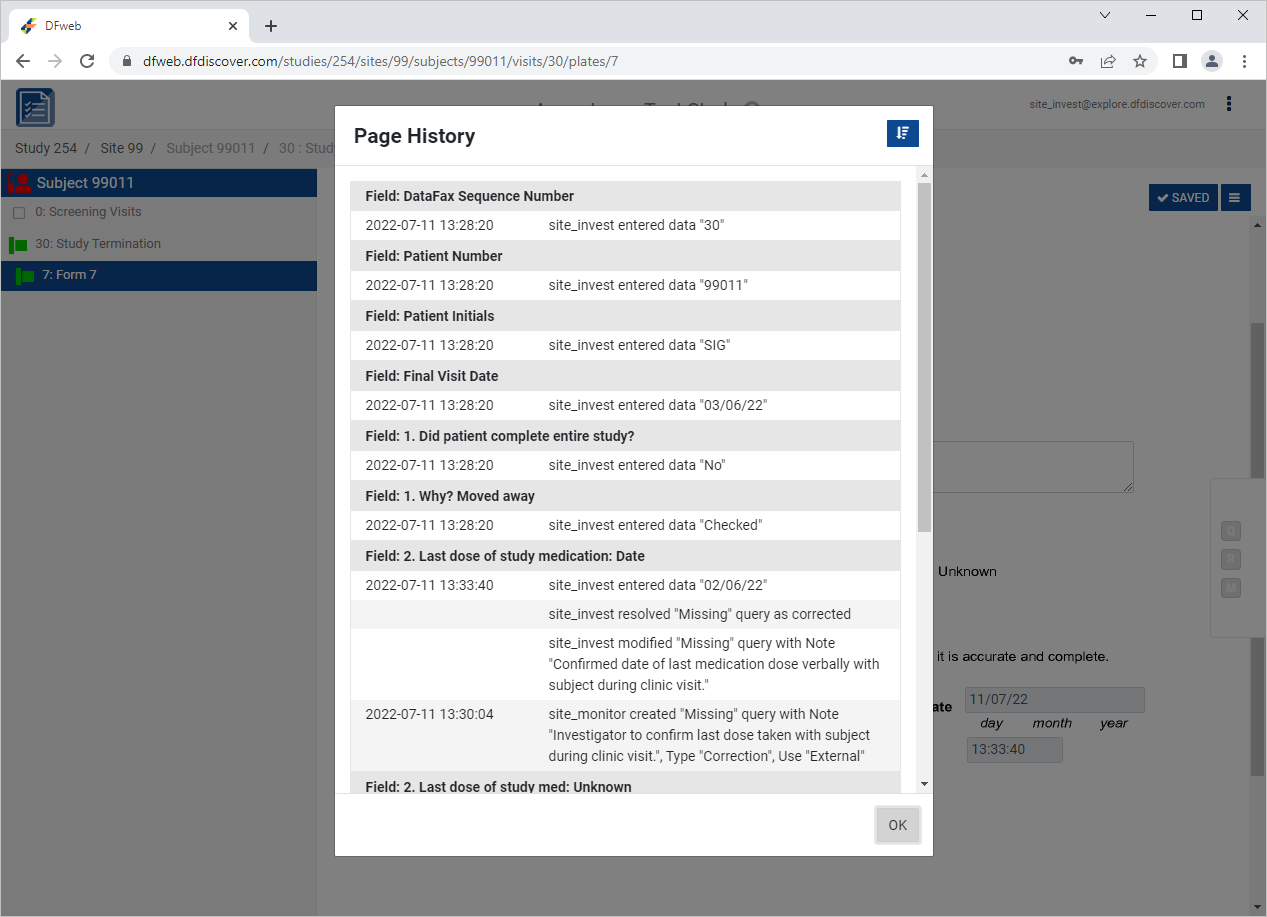
-
Click
> to exit DFweb.
-
Start DFexplore, login as
data_managerand choose 254 Acceptance Test Study as described in Section 1.7, “How to start DFexplore”. -
Select > . Click 007 - Study Termination. Confirm DFVALID displays as "4" for subject 99011.
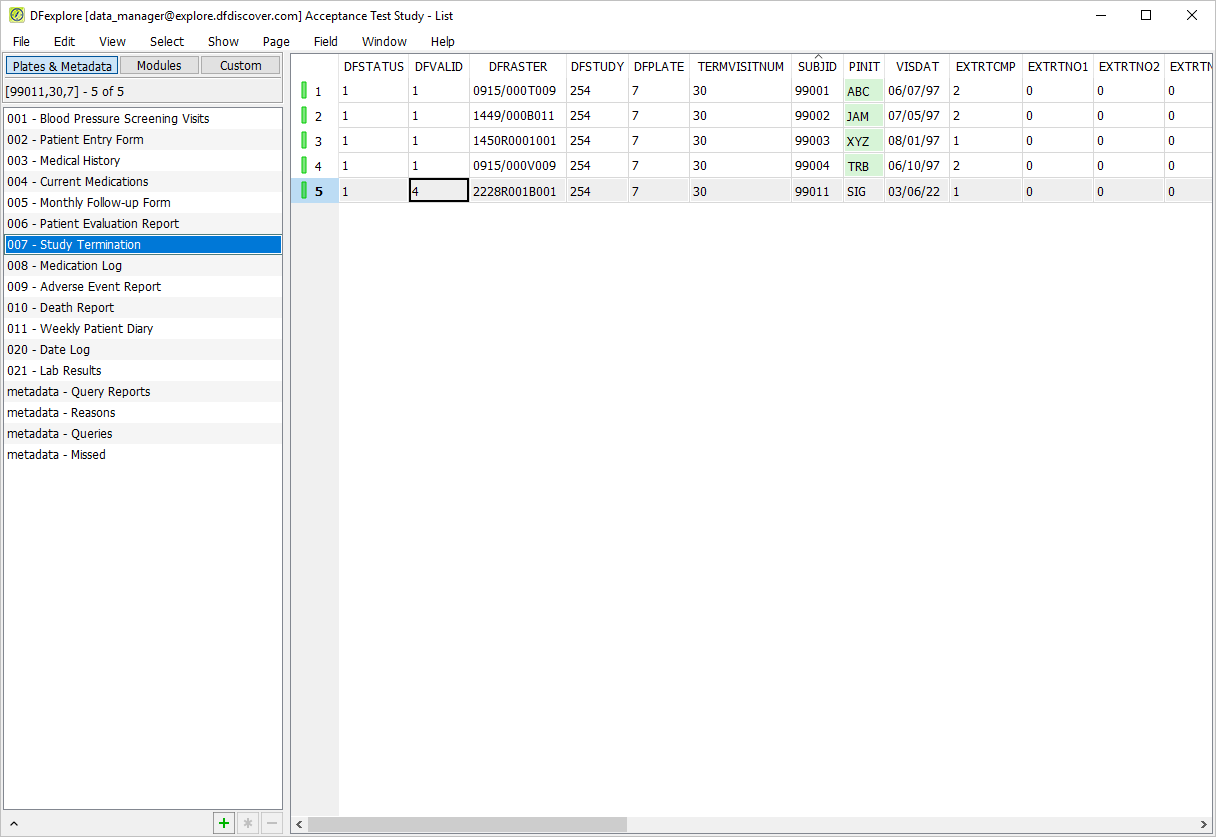
-
Select > to close DFexplore.
Table of Contents
- 18.1. Introduction
- 18.2. Tests & Requirements
- 18.3. Begin Module 18. DFcollect Mobile Data Collection.
- 18.4. Installation, App preferences and initial DFcollect login.
- 18.5. Online data record creation.
- 18.6. Download subject data for offline use.
- 18.7. Create data records in offline mode, query resolution and adding reasons for data values.
- 18.8. Sync data collected offline to your DFdiscover server.
- 18.9. Clearing DFcollect cache.
- 18.10. Adding, reviewing and downloading subject documents.
- 18.11. Confirming data sent to the server using DFexplore.
- 18.12. Add an Electronic Signature (eSign) to a set of completed subject records.
- 18.13. Verify removal and Re-applicaton of eSignatures.
- 18.14. Verify DFcollect saves eSignature task data to the specified level.
- 18.15. End Module 18. DFcollect.
| Warning |
|---|---|
Optional Module. The DFcollect Mobile Data Collection module requires the DFWS feature (web services API). If your DFdiscover server is not licensed for this feature, do not complete this module. DFcollect is compatible with the following mobile device operating systems:
|
Installation, App preferences and initial DFcollect login.
Online data record creation.
Download subject data for offline use.
Create data records in offline mode, query resolution and adding reasons for data values.
Sync data collected offline to your DFdiscover server.
Clearing DFcollect cache.
Adding, reviewing and downloading subject documents.
Confirming data sent to the server using DFexplore.
Add an Electronic Signature (eSign) to a set of completed subject records.
Verify removal and Re-applicaton of eSignatures.
Verify DFcollect saves eSignature task data to the specified level.
Estimate of Time Required: 35 Minutes
-
Start DFATK as described in Module 1 (Installation & Initialization).
-
Click followed by to begin this module.
-
Download and install DFcollect from Google Play™ or Apple® App Store® to your mobile device or tablet.
Open DFcollect.
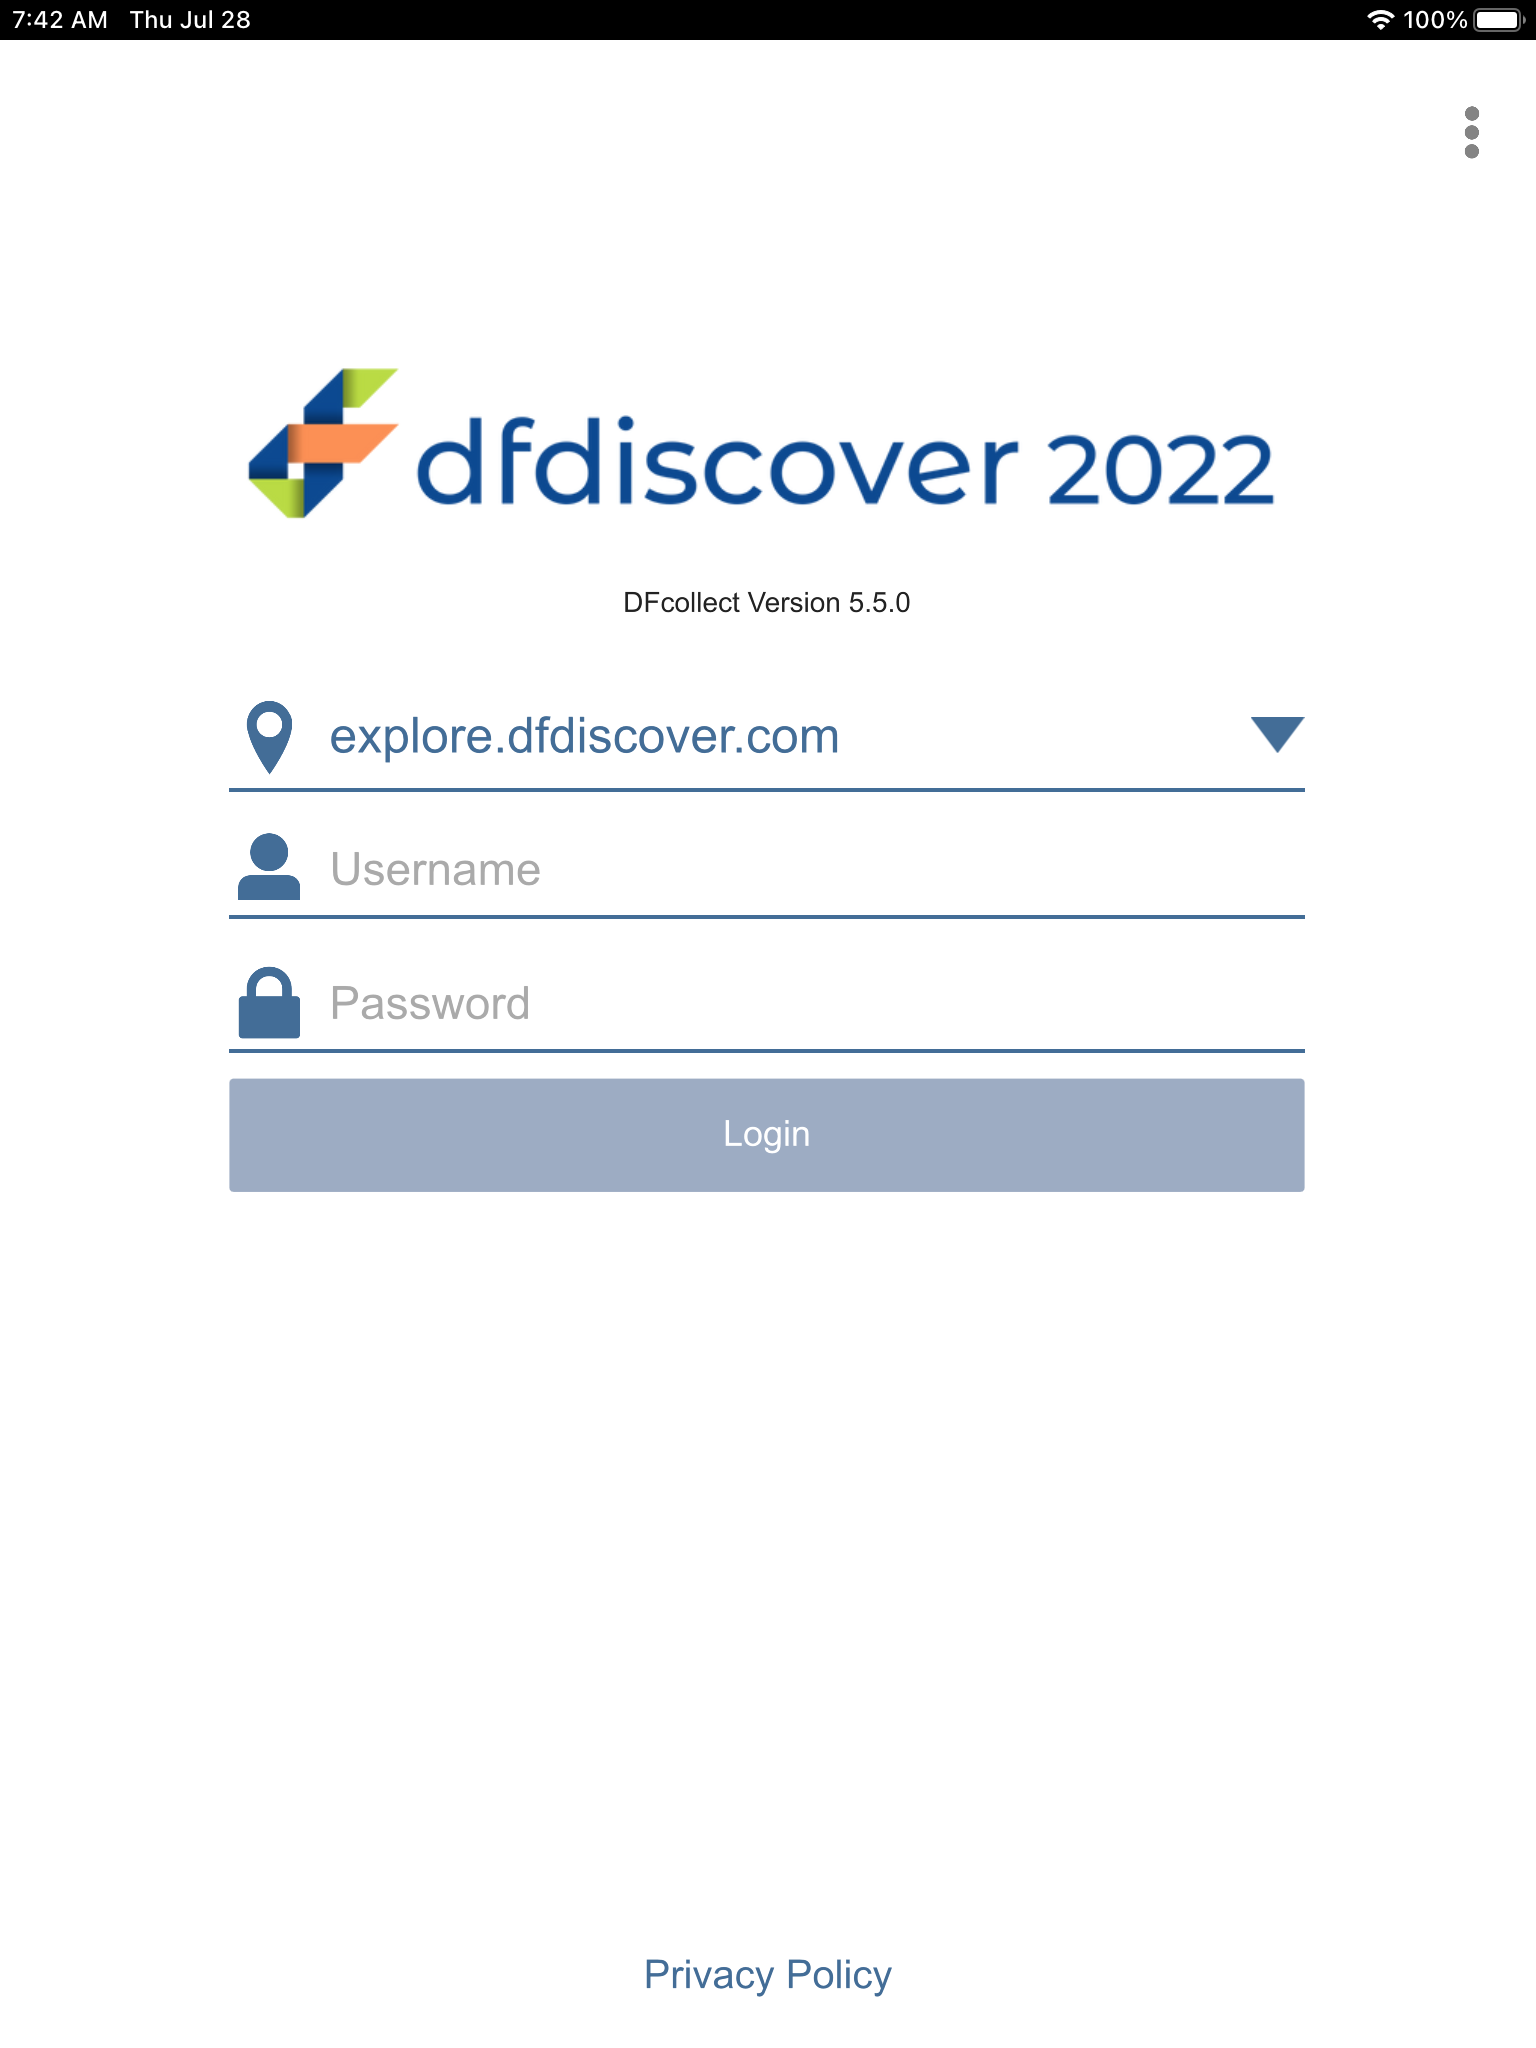
-
System Setting
API Server =
your API servernameOffline Only = Disabled (greyed out)
Click to apply settings.
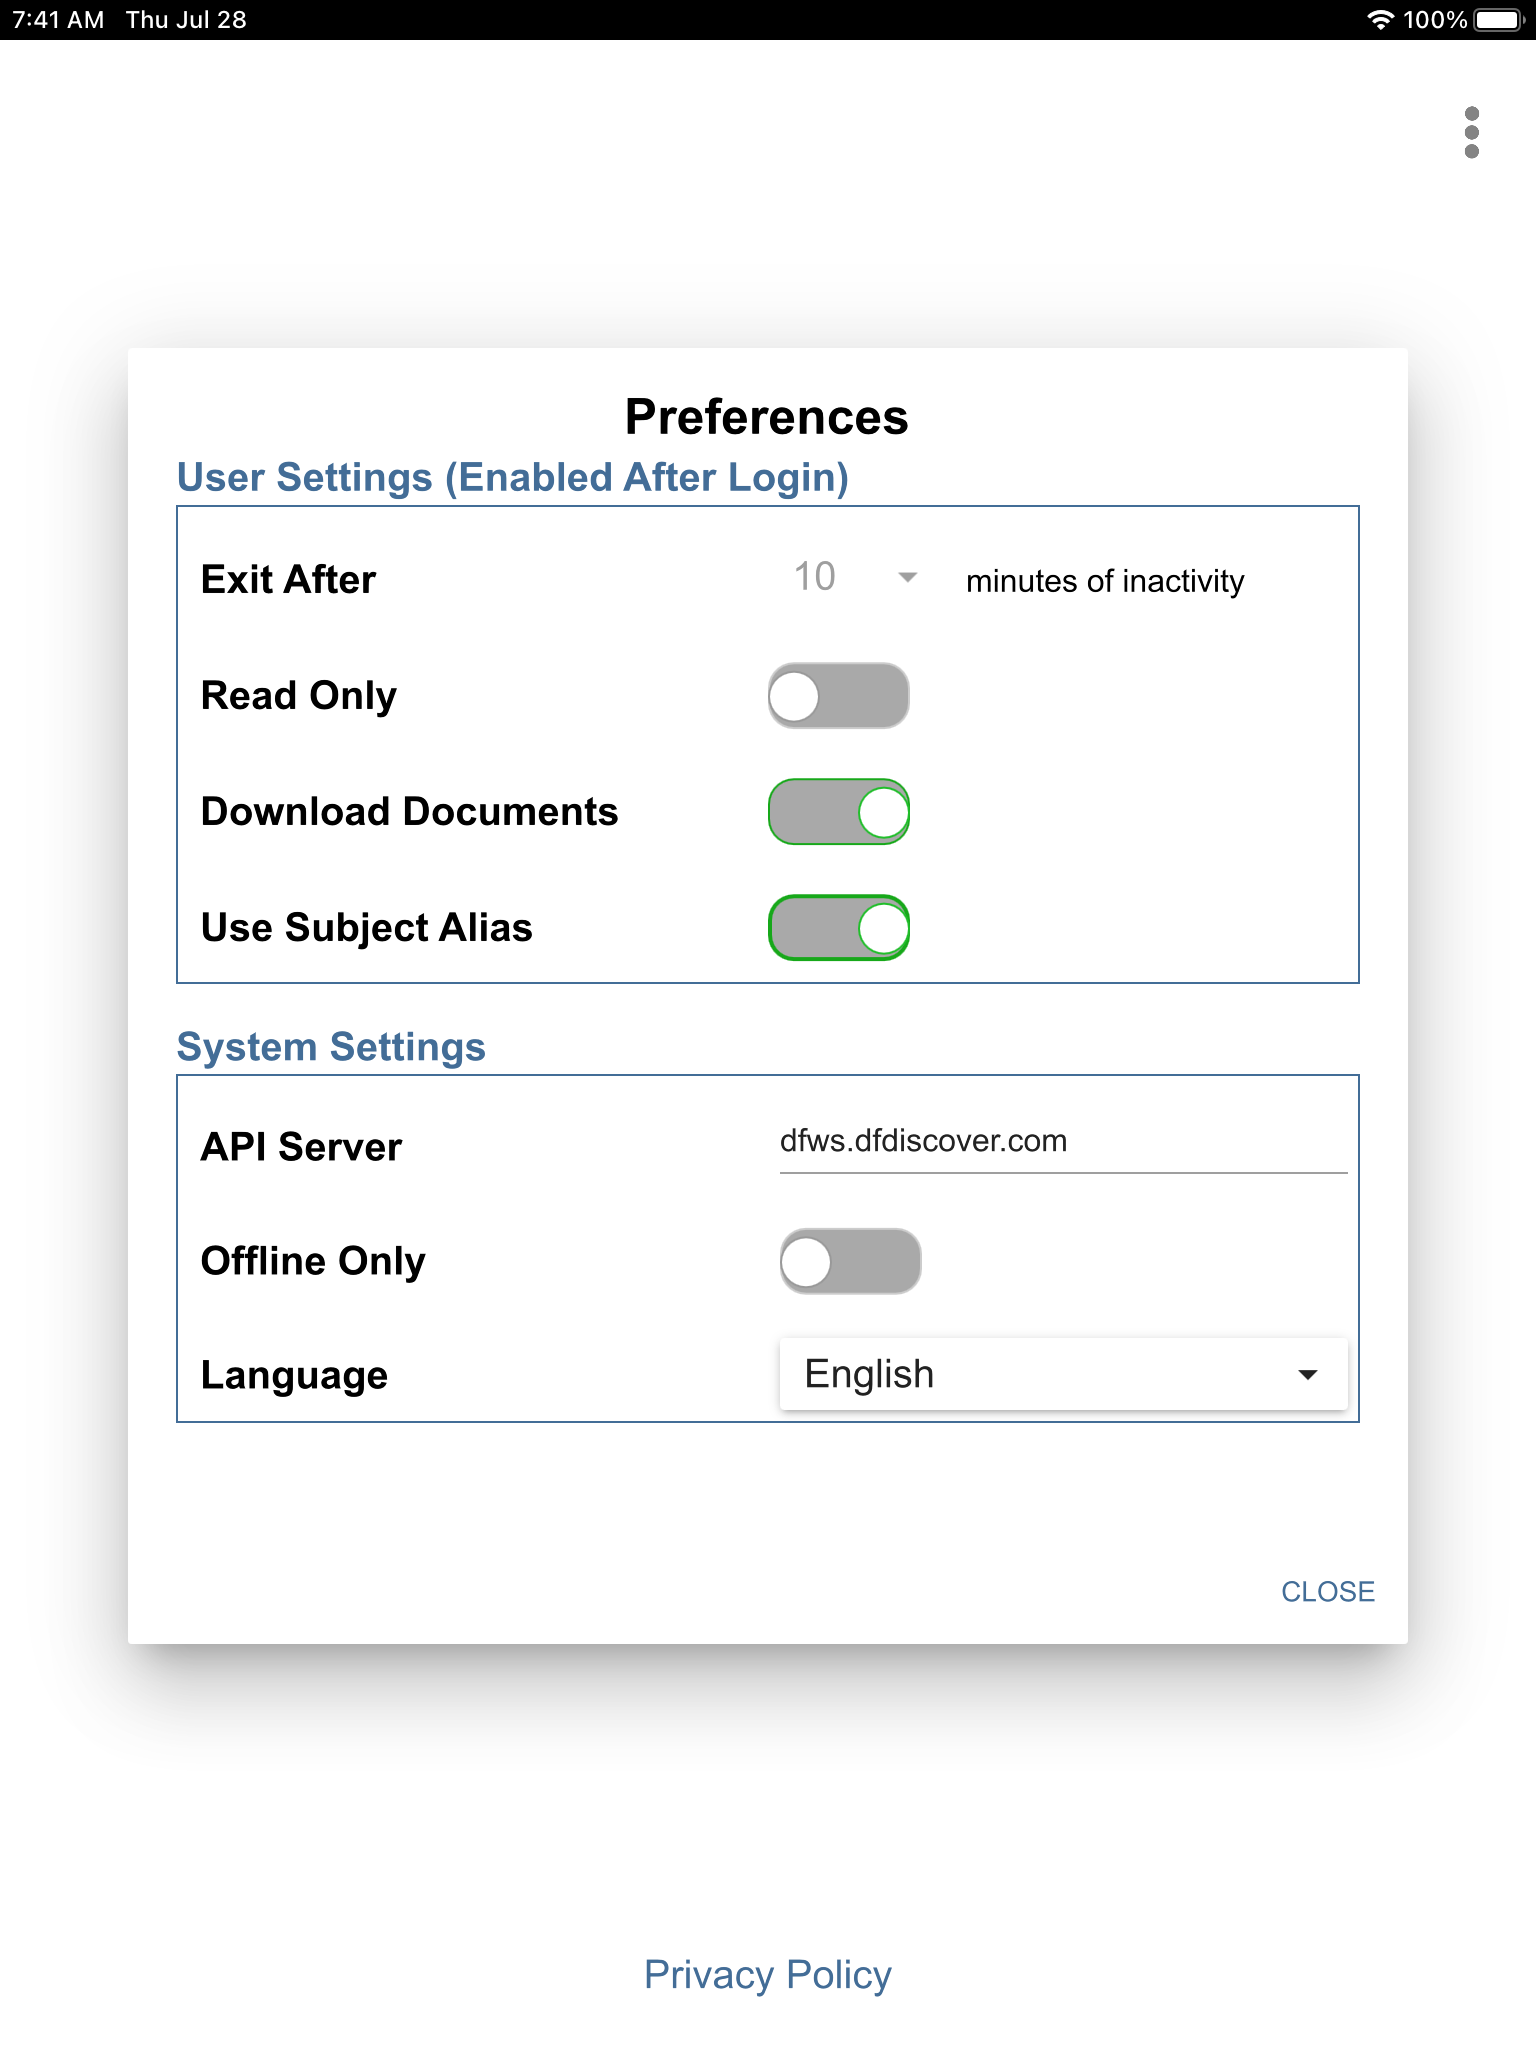
-
Click
 > to display version information. Click to return to the DFcollect login screen.
-
In the DFcollect login dialog, enter the name for DFdiscover Server that has been provided by your administrator. Enter
site_monitorin the Username field and the previously assigned password in the Password field. Click to login.
-
From the list of available studies, click 254 Acceptance Test Study, if not already opened.
Click 99: Hospital #99 to display a list of available subjects.
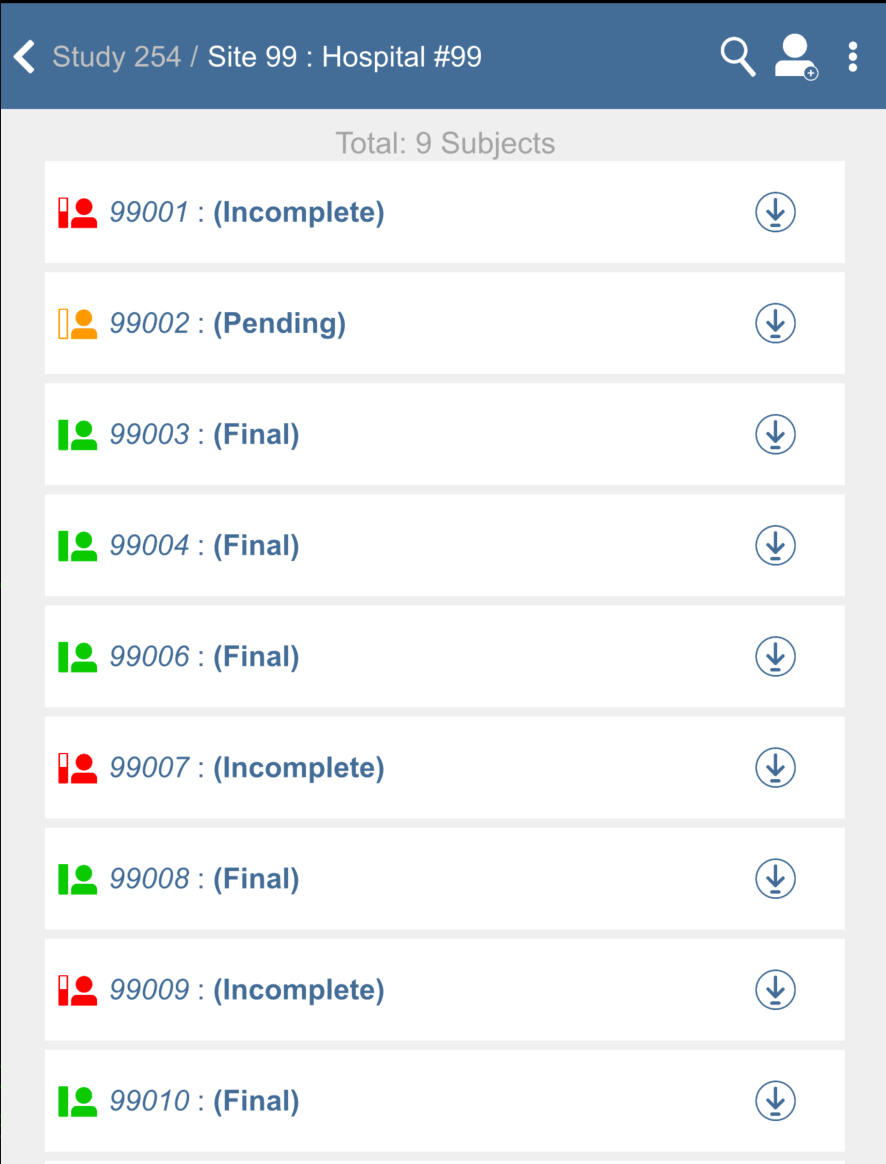
-
Click
 > to view any study related help messages. Click to close the Study Help window.
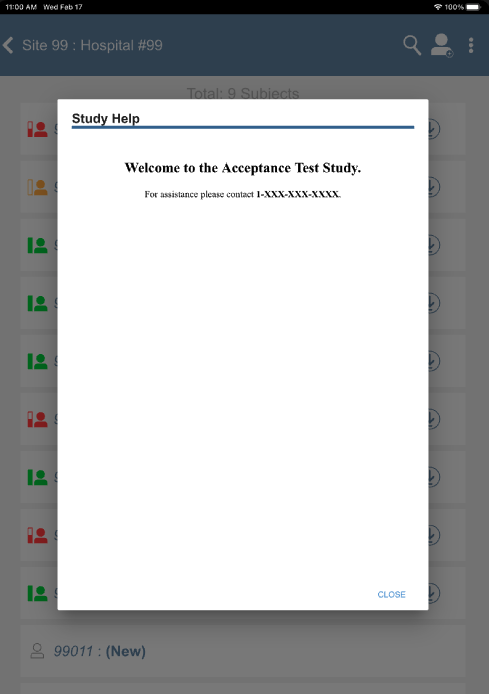
-
Click
 to search for a subject ID number, enter
 99010. Click, subject 99010 : (Final) gains the focus.
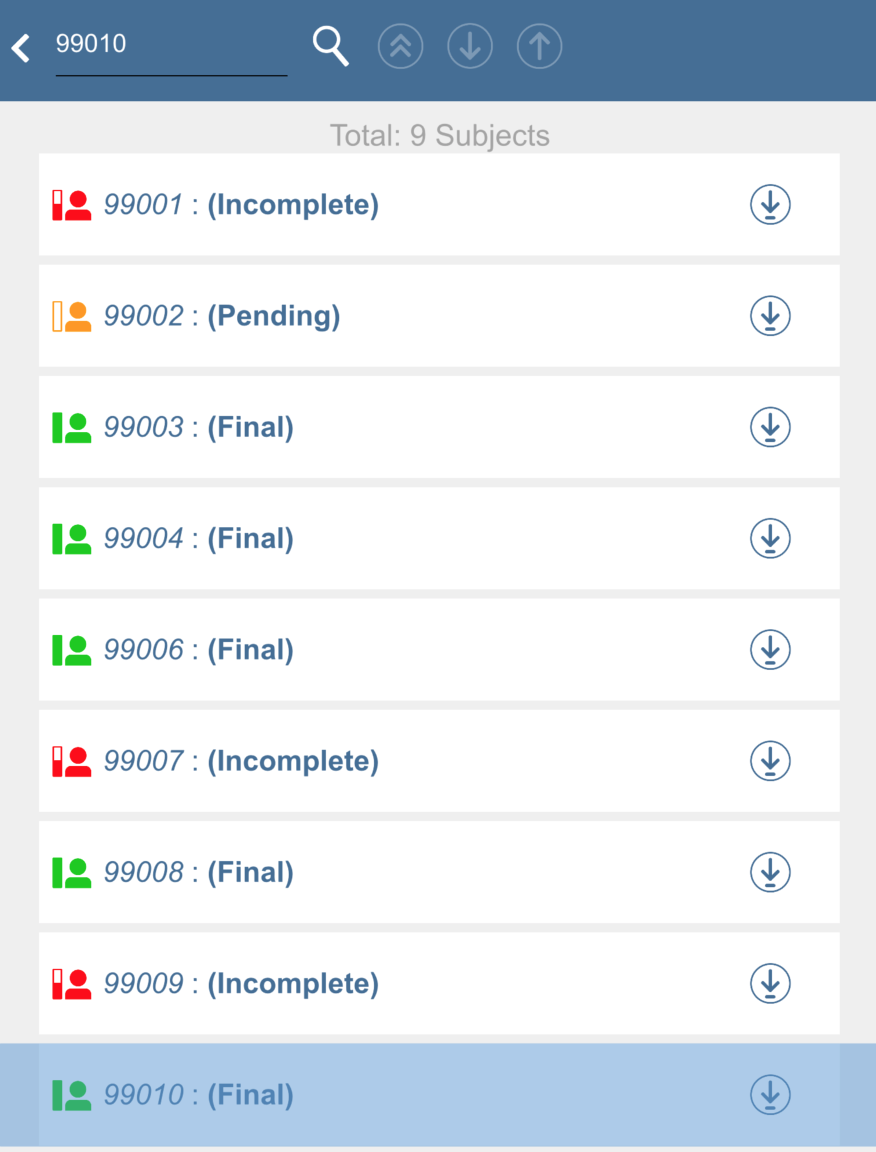
-
Click subject 99010 : (Final) to view the list of study visits.
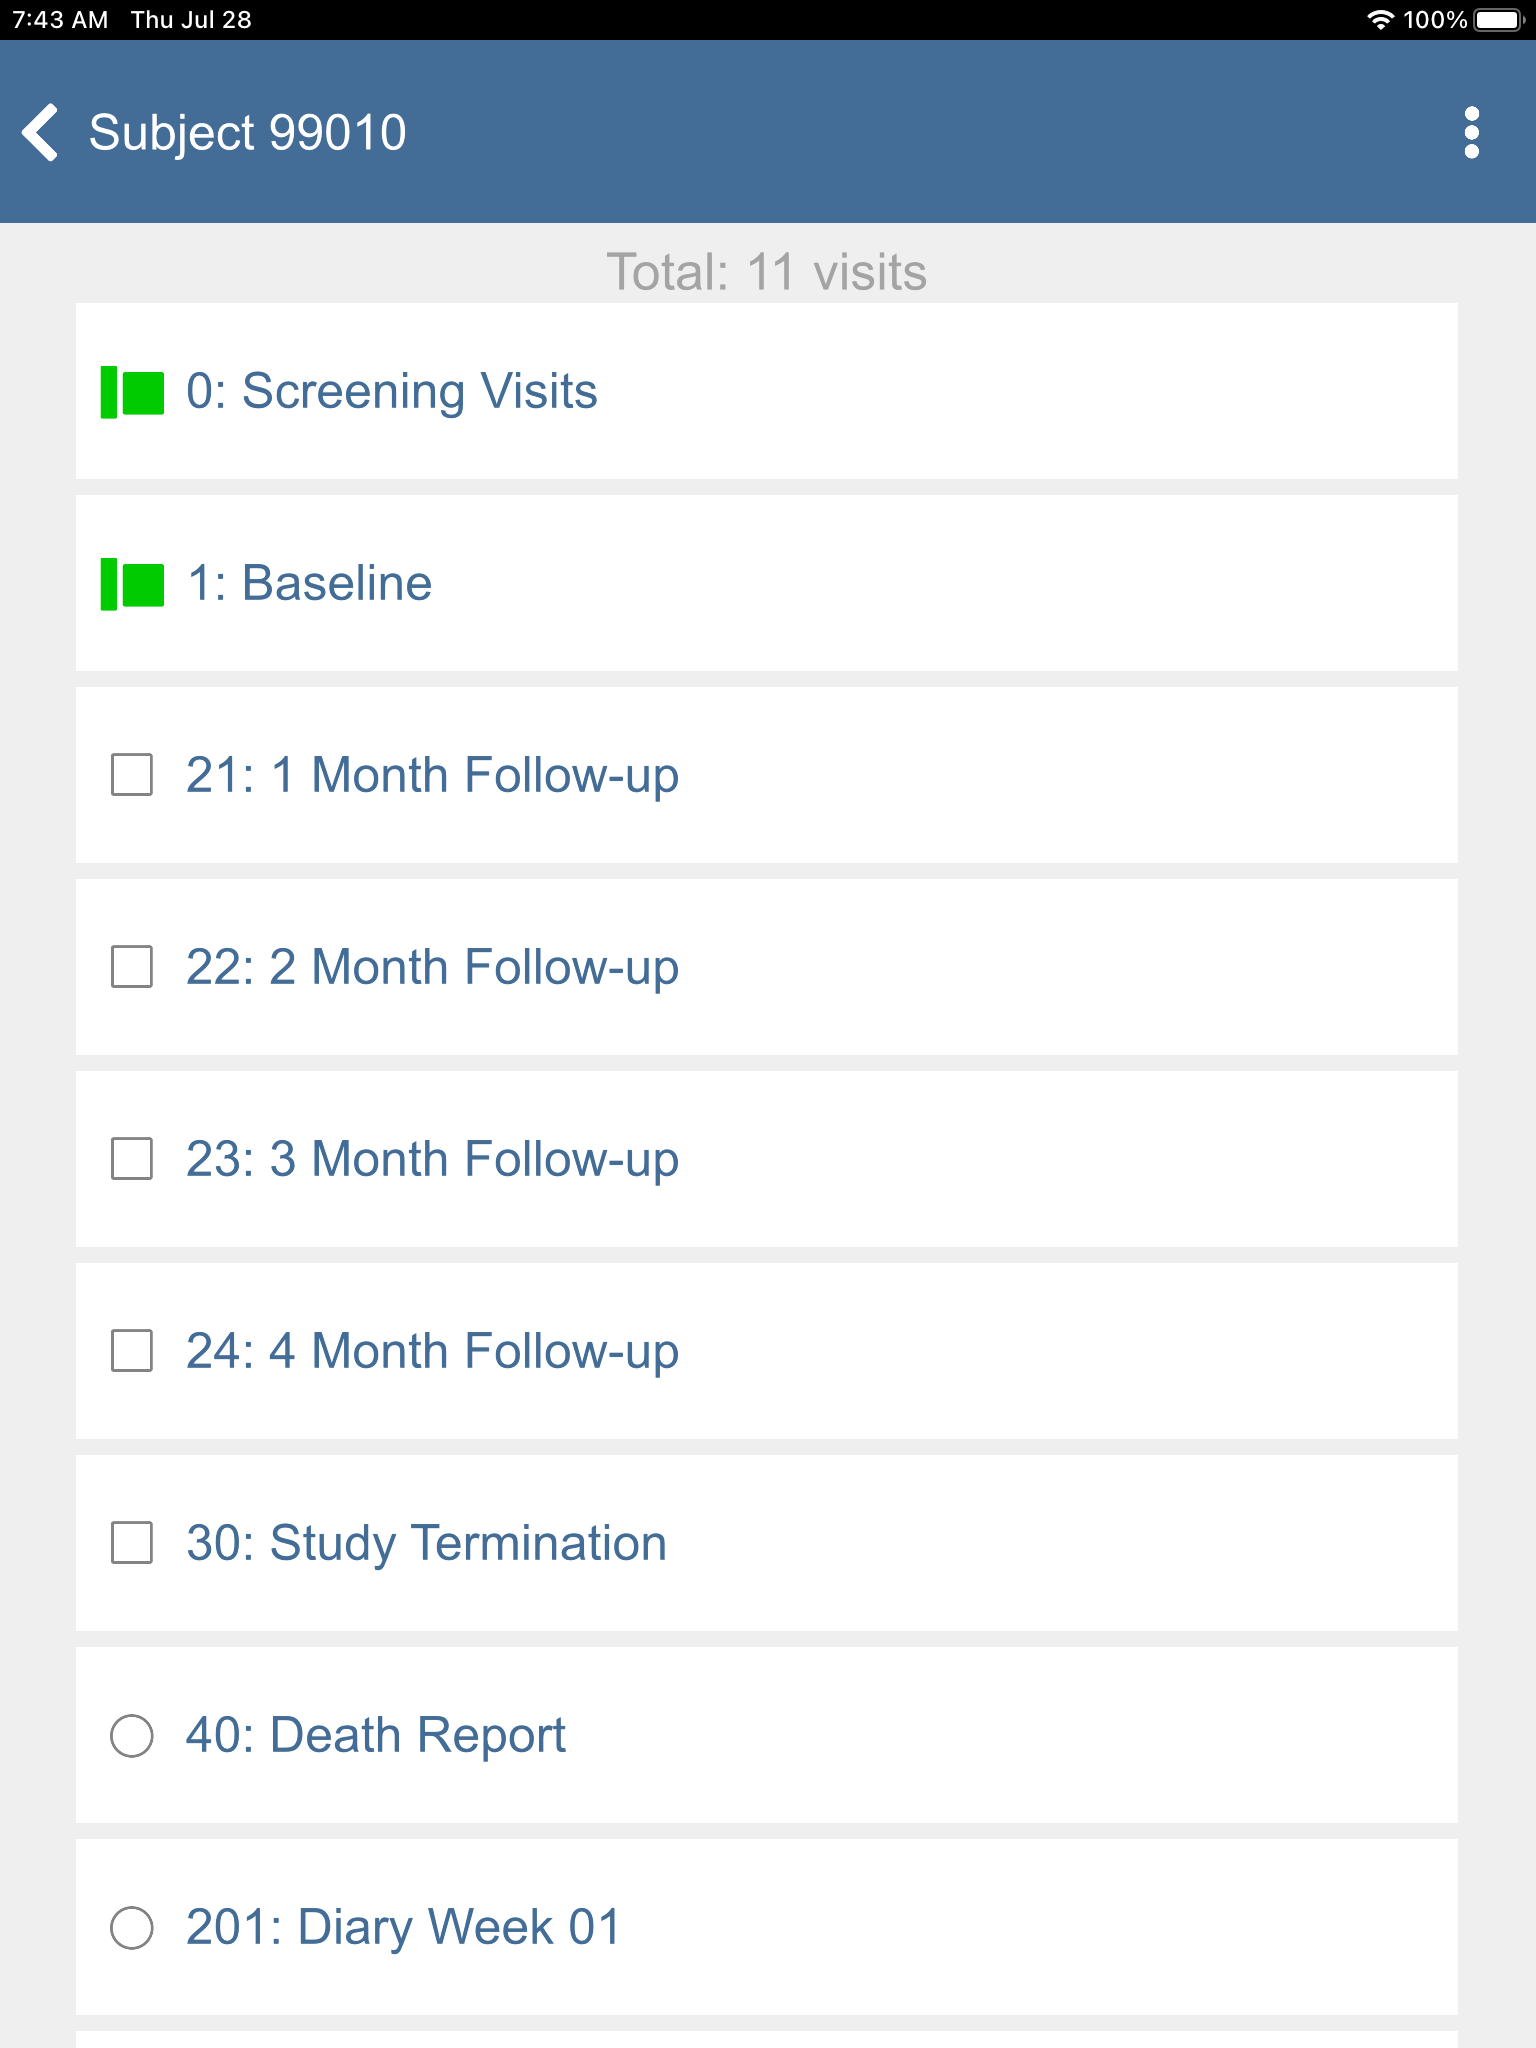
-
Click 1: Baseline > 2: Form 2. Plate Form 2 becomes the active page.
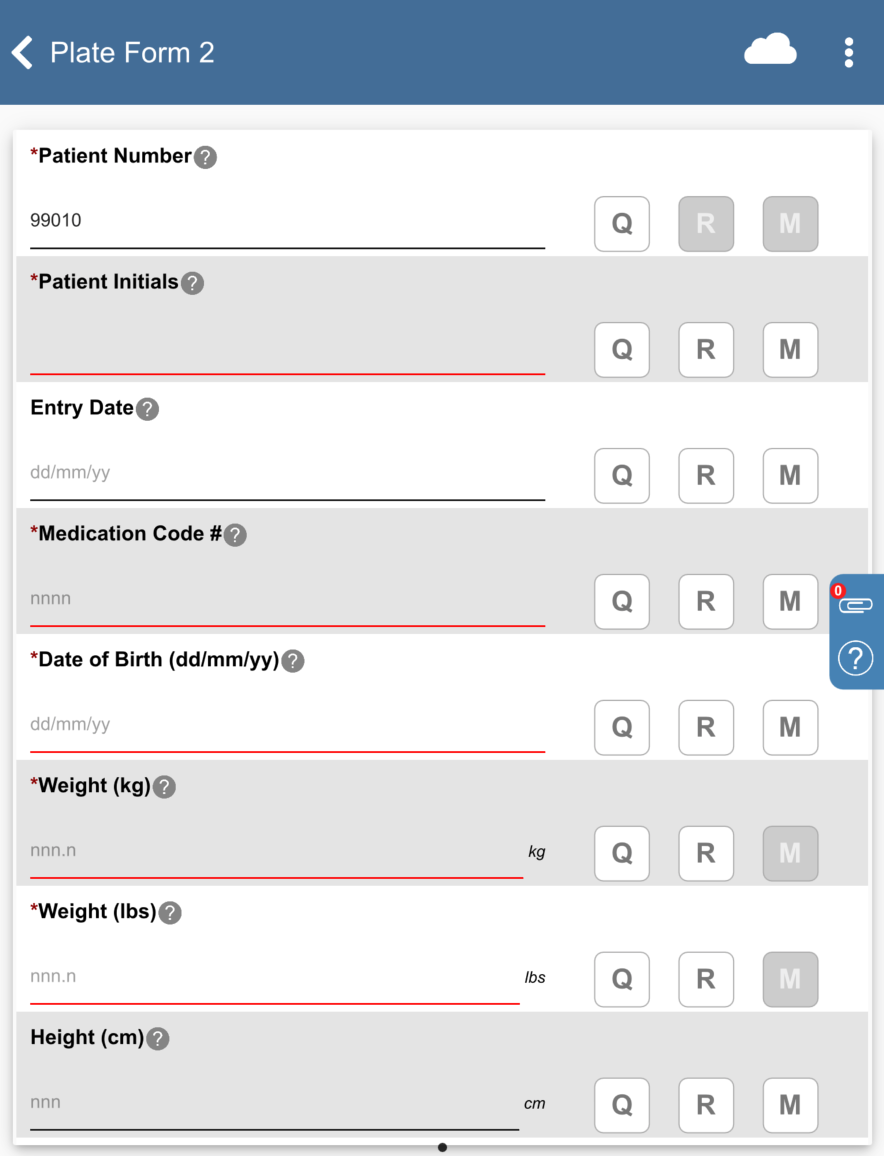
-
Click Patient Initials. The initials automatically populate this field as a result of the edit check
SetInitdescribed in Module 8. Image Data Entry. Set:Entry Date = Click
 , select
 14/11/18.Medication Code # =
2524Date of Birth = Click
, select 11/05/69.
Click
 .
.
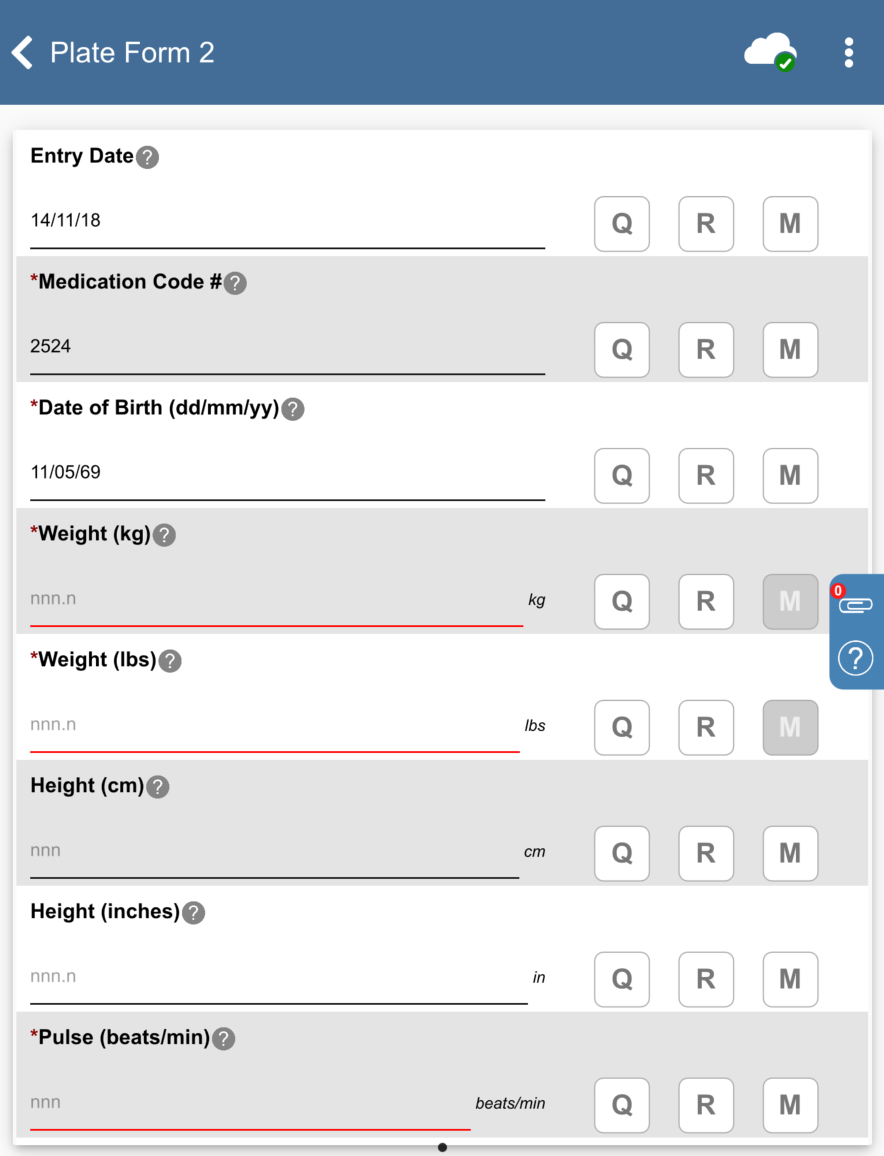
-
Click
 > > 99009 : (Incomplete) > 21: 1 Month Follow-up > 5: Form 5, 1 Month.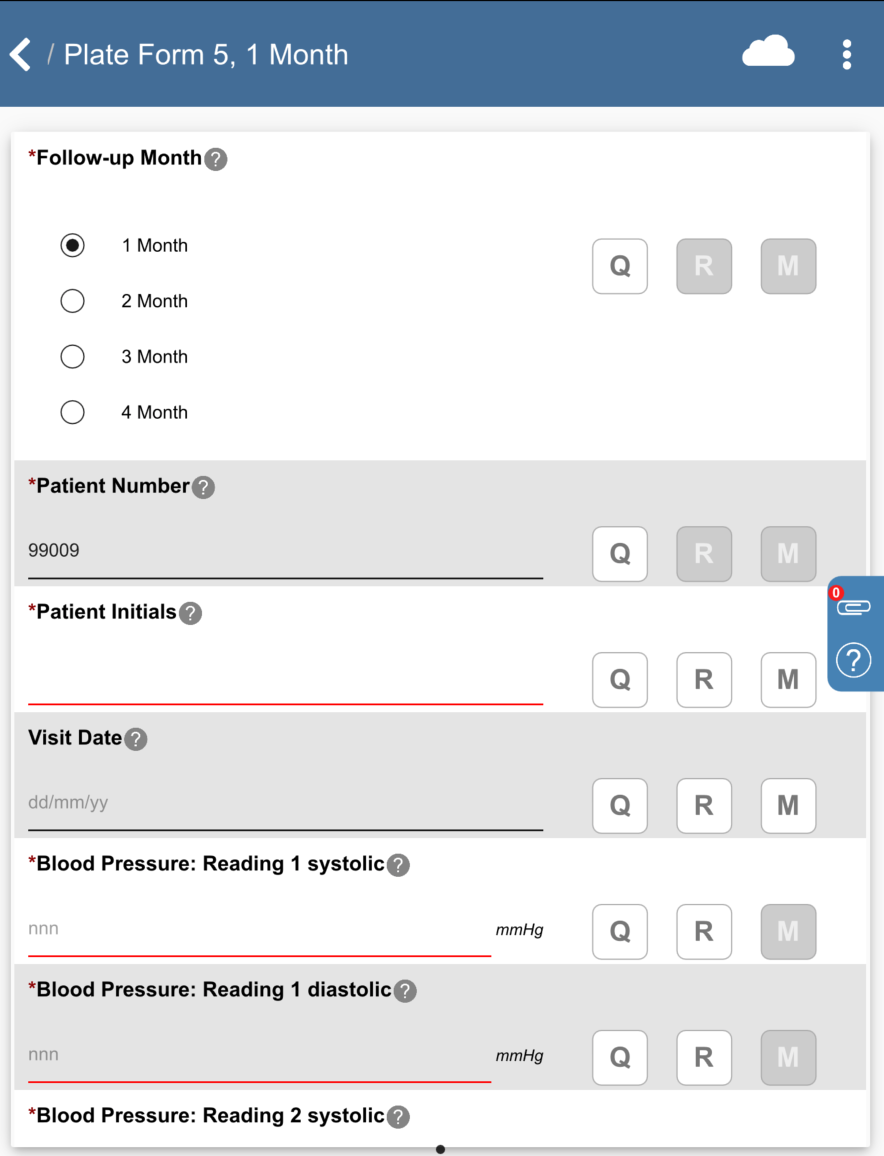
-
Click Patient Initials. The initials automatically populate this field as a result of the edit check
SetInitdescribed in Module 8. Image Data Entry. Set:Visit Date = Click
, select 14/11/18.
Click
.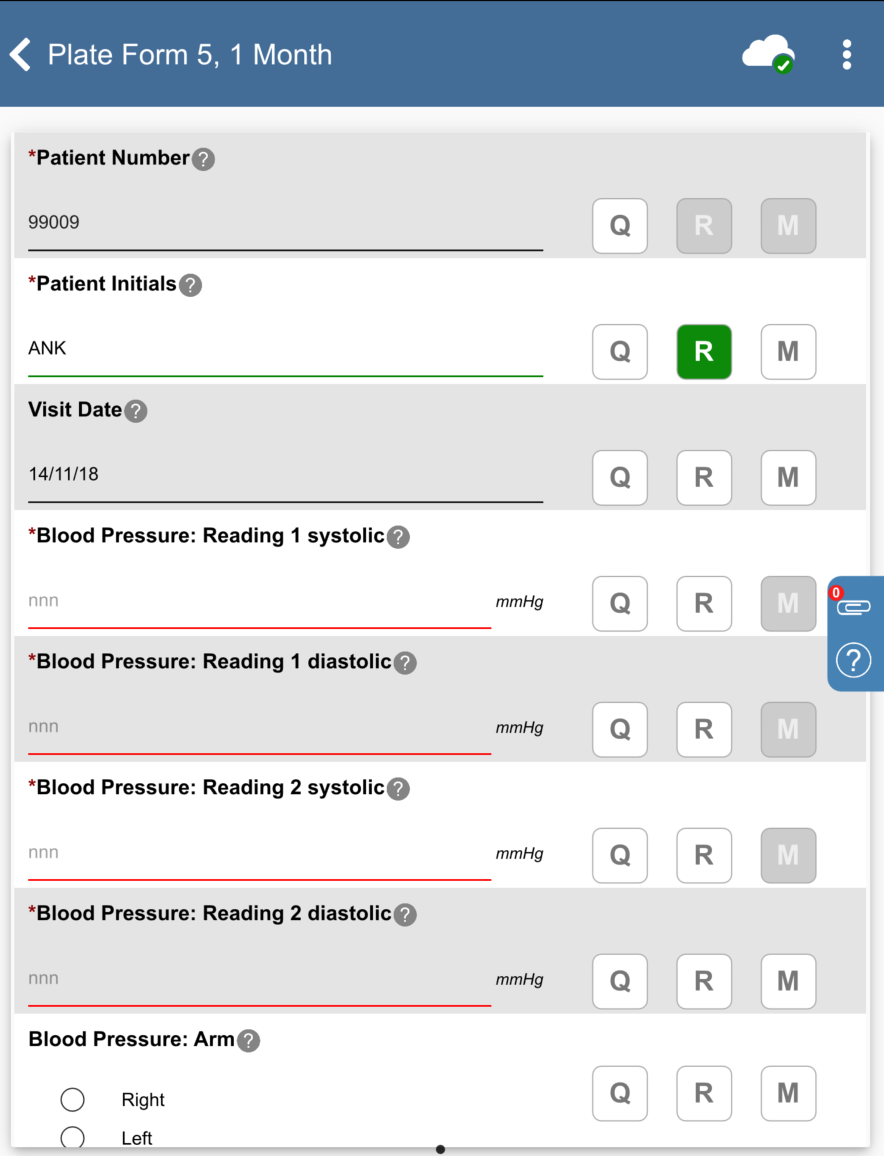
-
Click
> > 99010 : (Incomplete) 51: Medication Log Page 1 > 8: Form 8, Pg 51.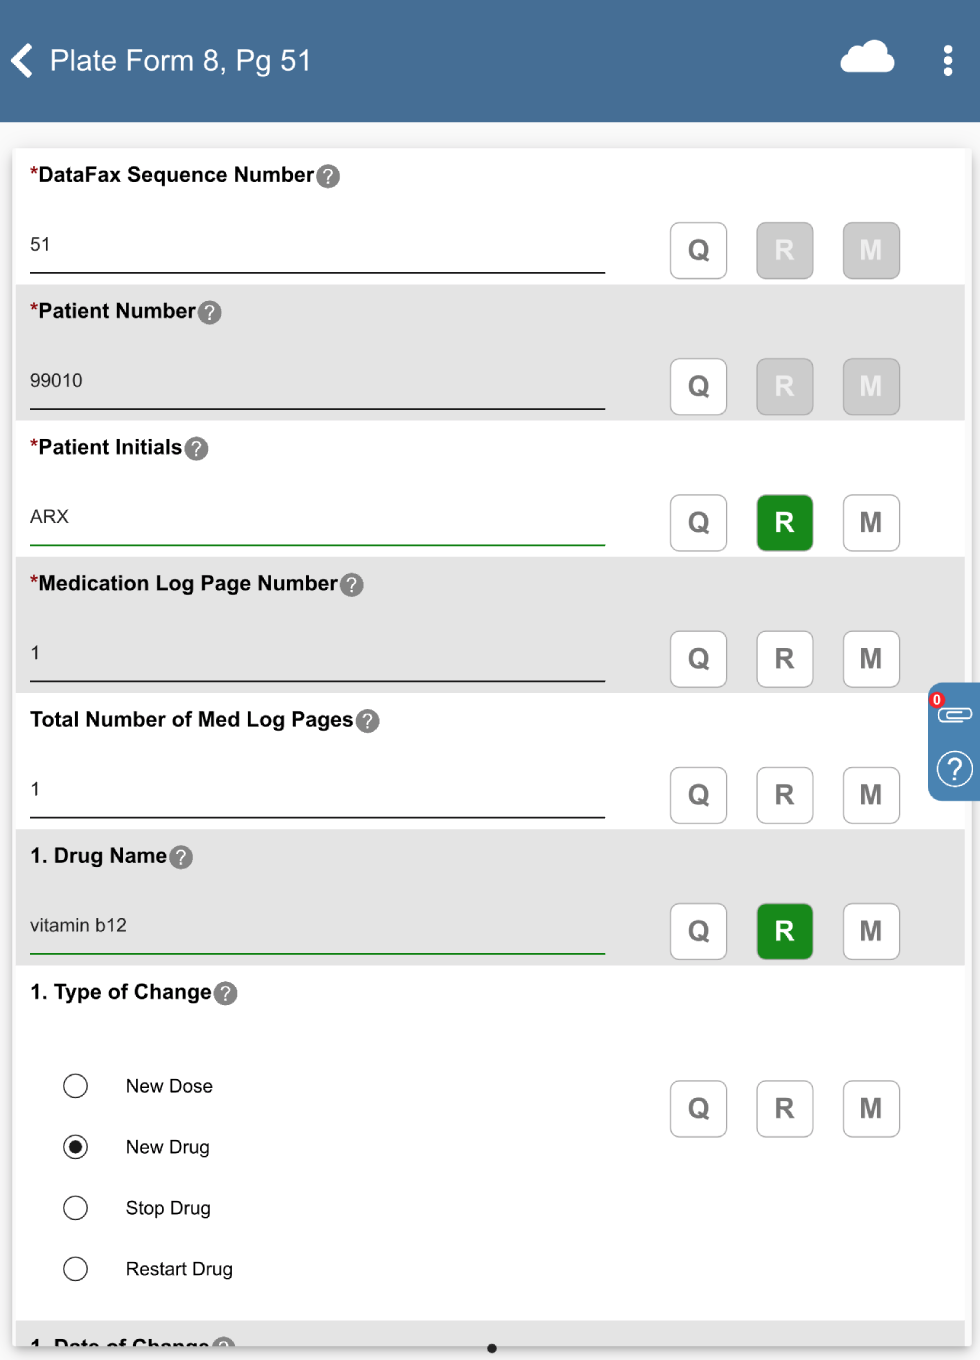
-
Enter
Predin the 2. Drug Name text field, press Tab. Upon leaving the field, an edit check is executed and DFlookup: drugs dialog appears.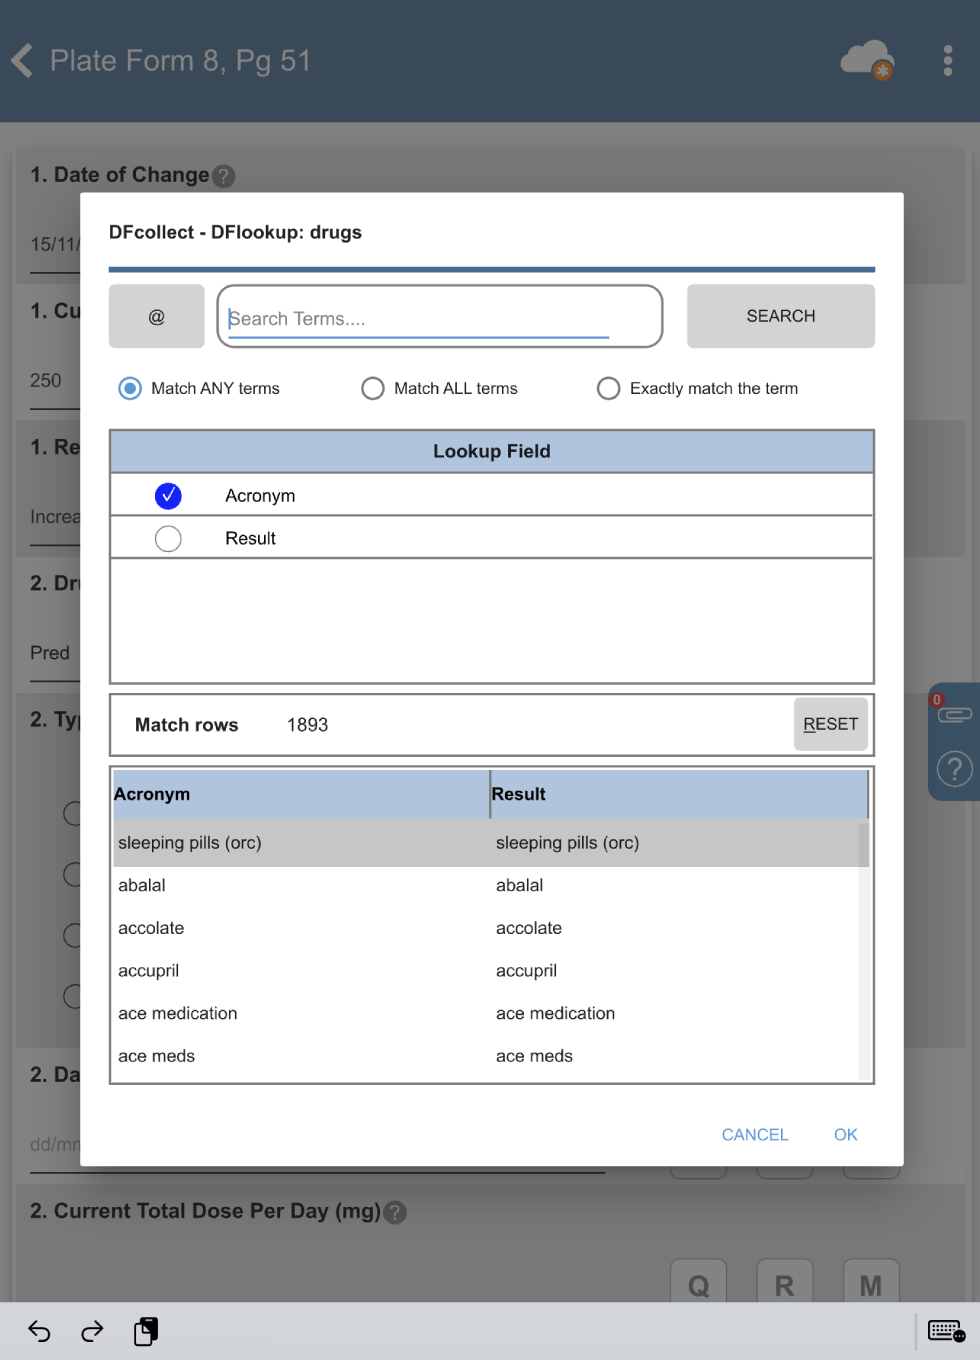
-
Enter
prednisonein the Search Terms, Check Match ANY terms. Click to filter results.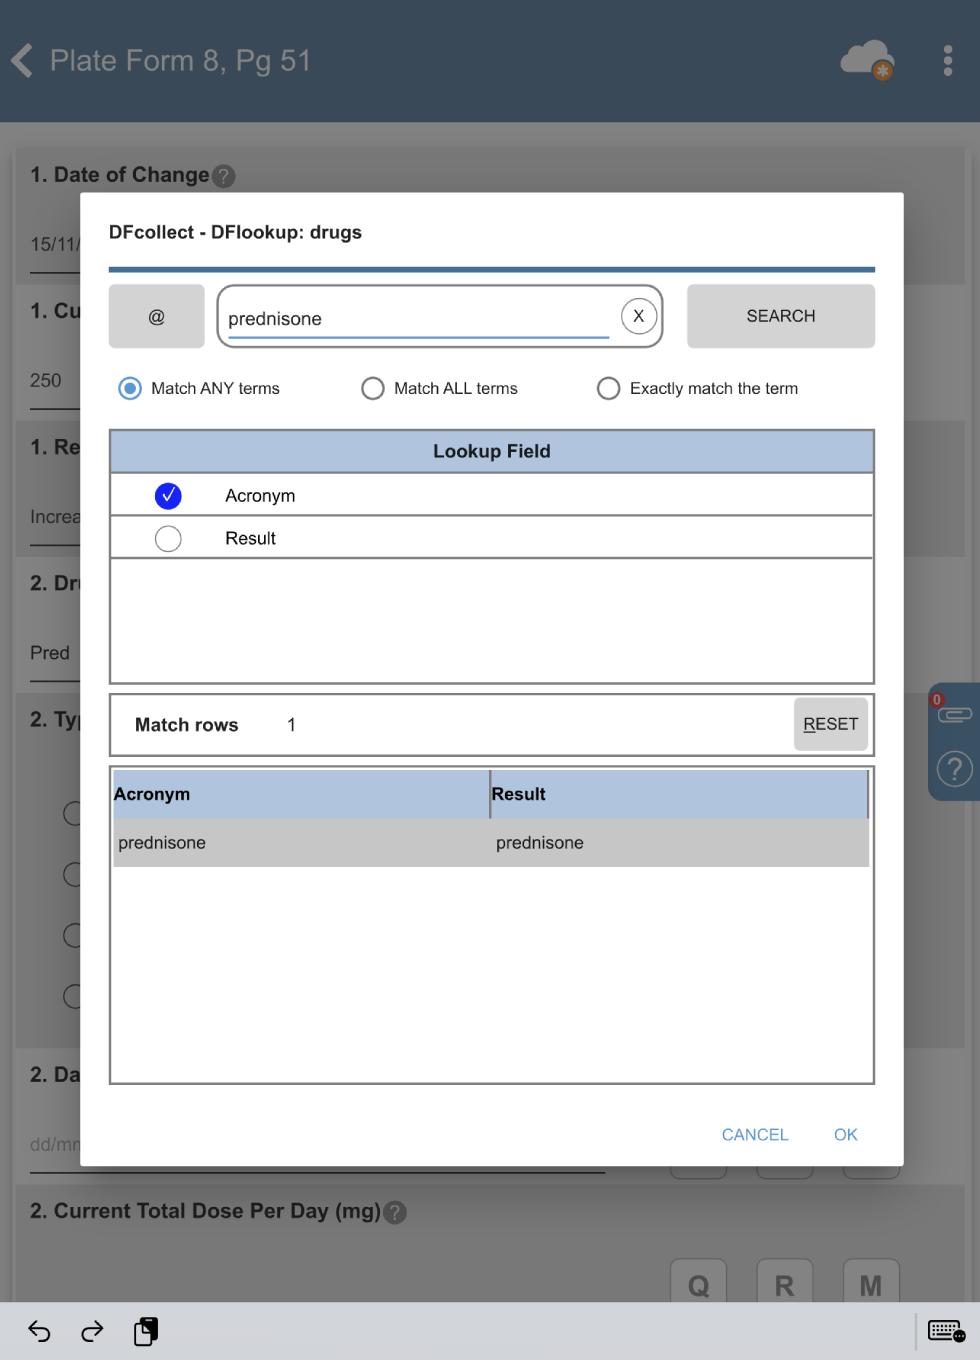
-
Locate the entry for prednisone in the results table. Double-click the entry to auto-populate the field. The 2. Drug Name field is auto-populated with
prednisone, the field contains a Reason for Data Value and Type of Change field gains focus.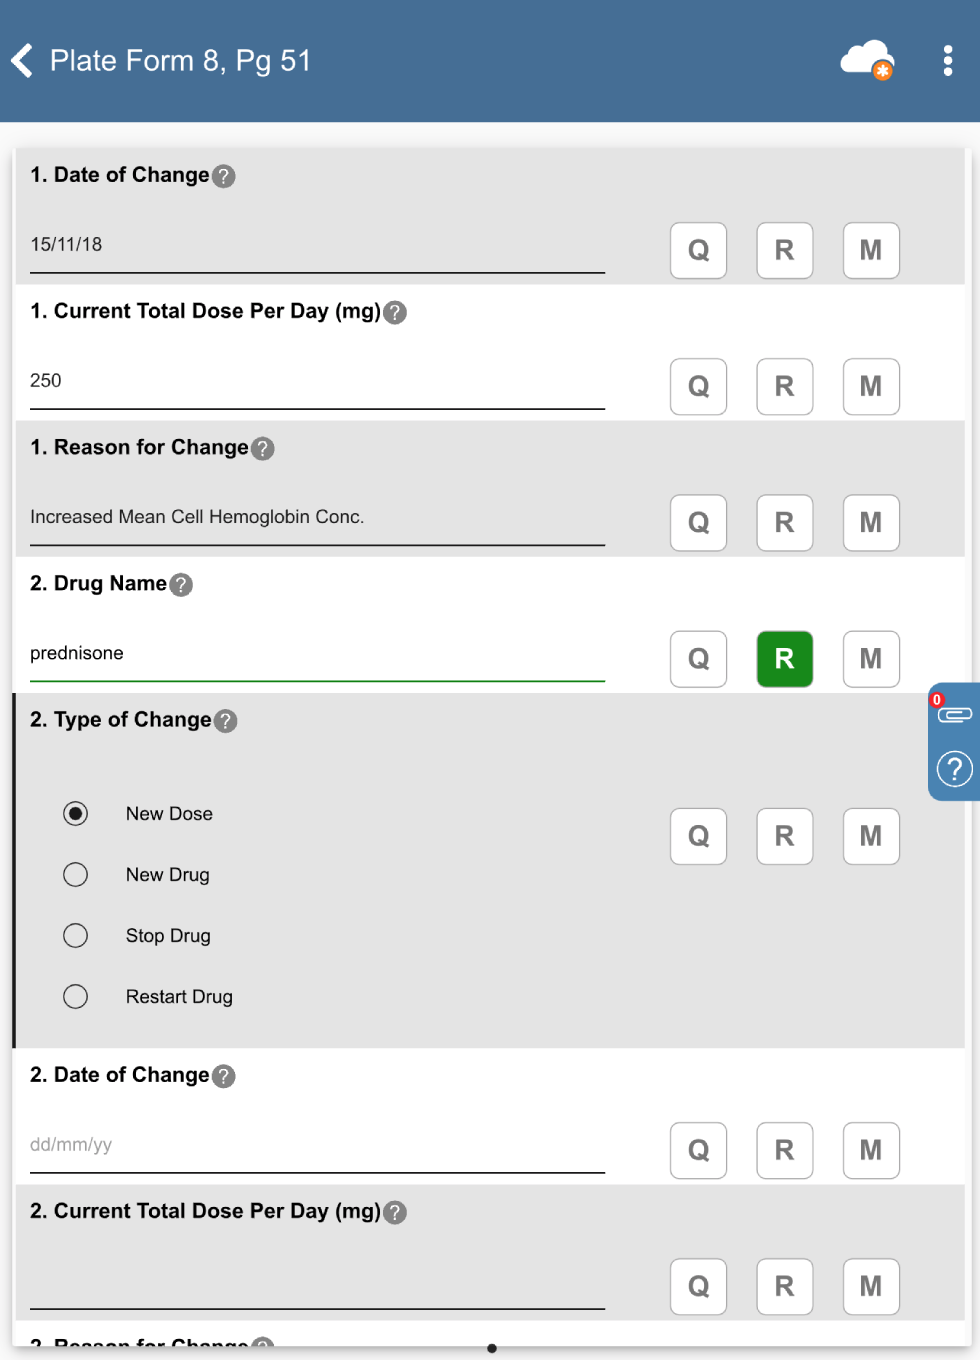
-
Beginning with the Type of Change field complete the remaining data fields as follows:
Type of Change = Select New Drug
Date of Change = Select
22/11/18Current Total Dose Per Day =
250
Click
.
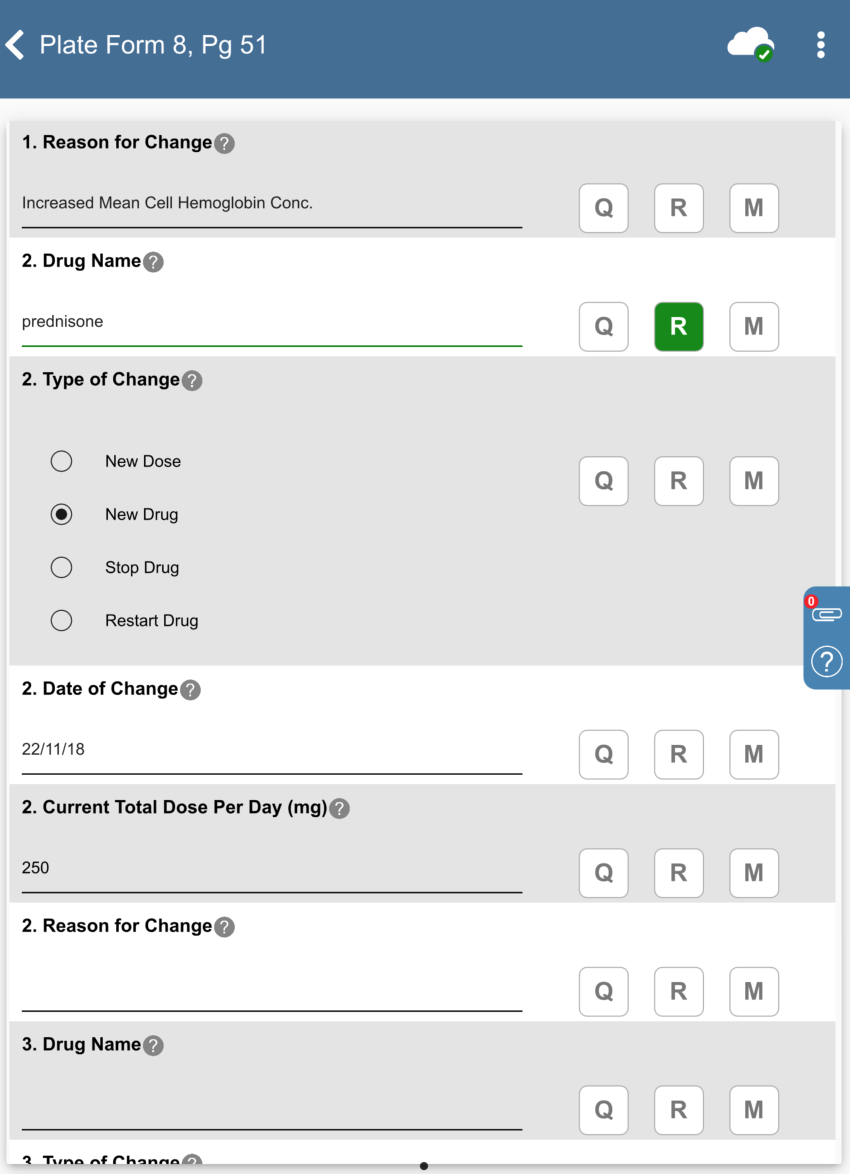
-
Click
> .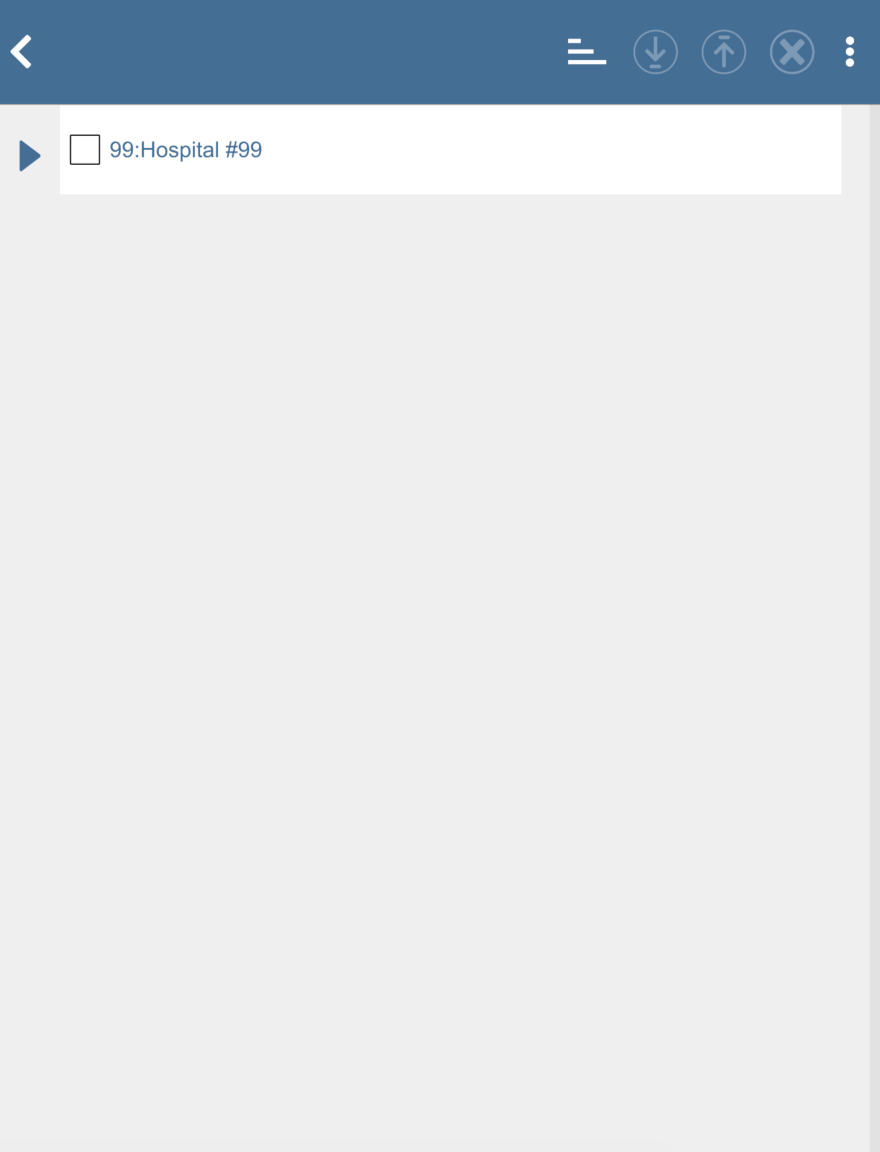
-
Click
 to show the subject listing for 99: Hospital #99.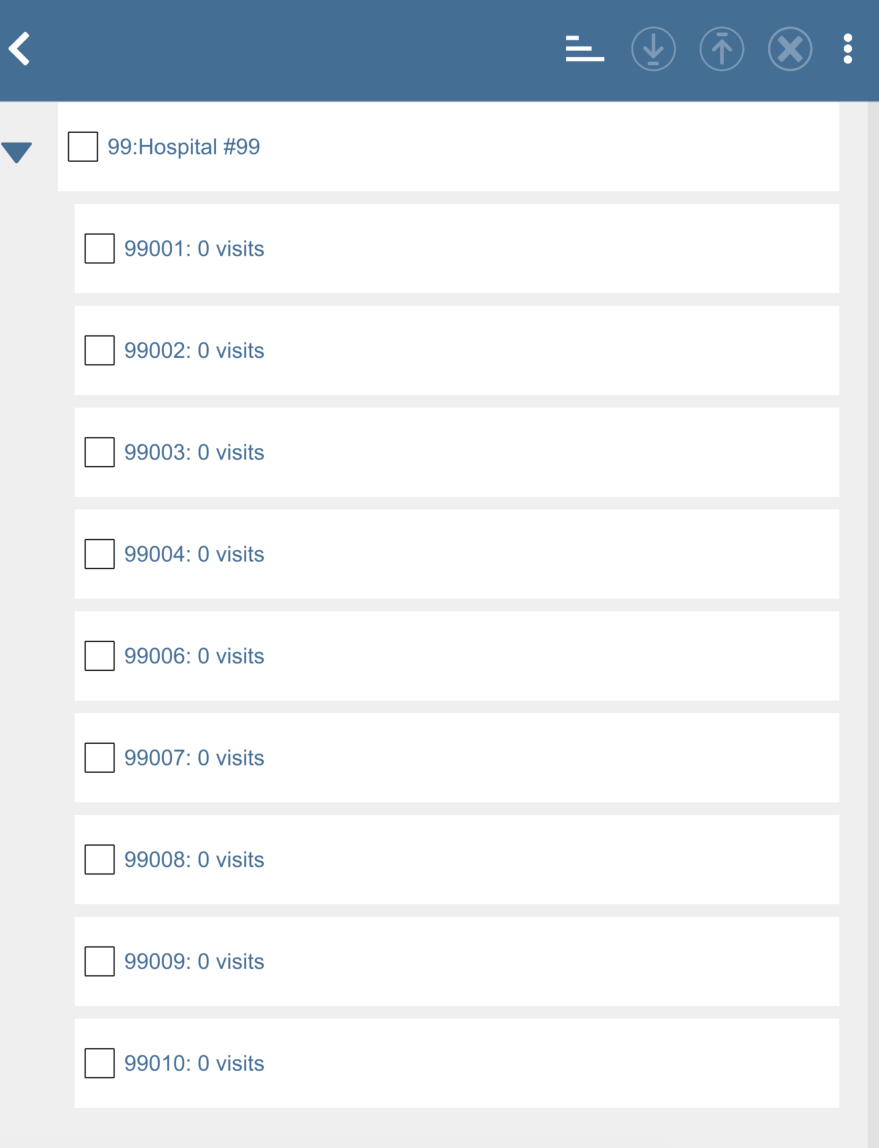
-
Check (enable) subjects 99008: 0 visits, 99009: 0 visits and 99010: 0 visits.
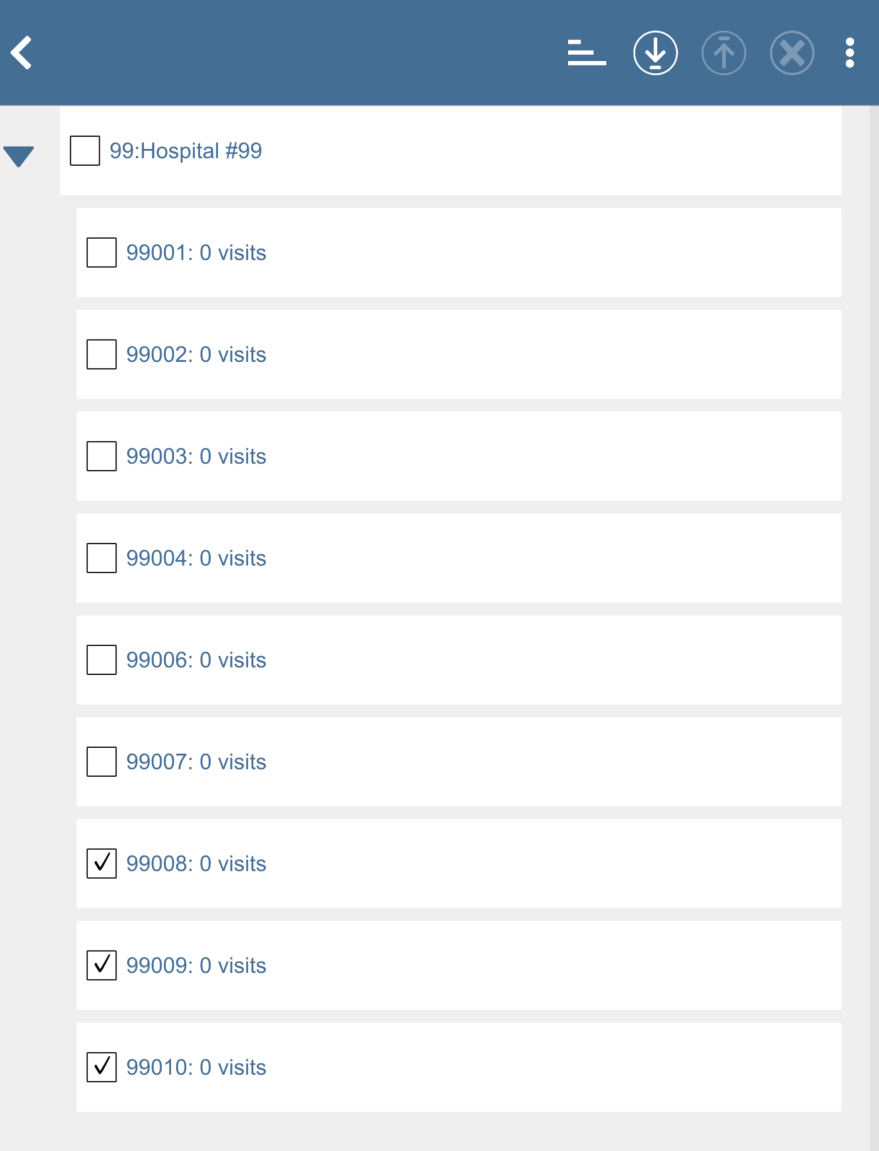
Click
 to download the subjects. Click to dismiss the
Download Documents Preference dialog.
After completion, click to dismiss the Download Progress: Documents window. Upon successful download there is an
to download the subjects. Click to dismiss the
Download Documents Preference dialog.
After completion, click to dismiss the Download Progress: Documents window. Upon successful download there is an  icon showing the date and time the download was performed.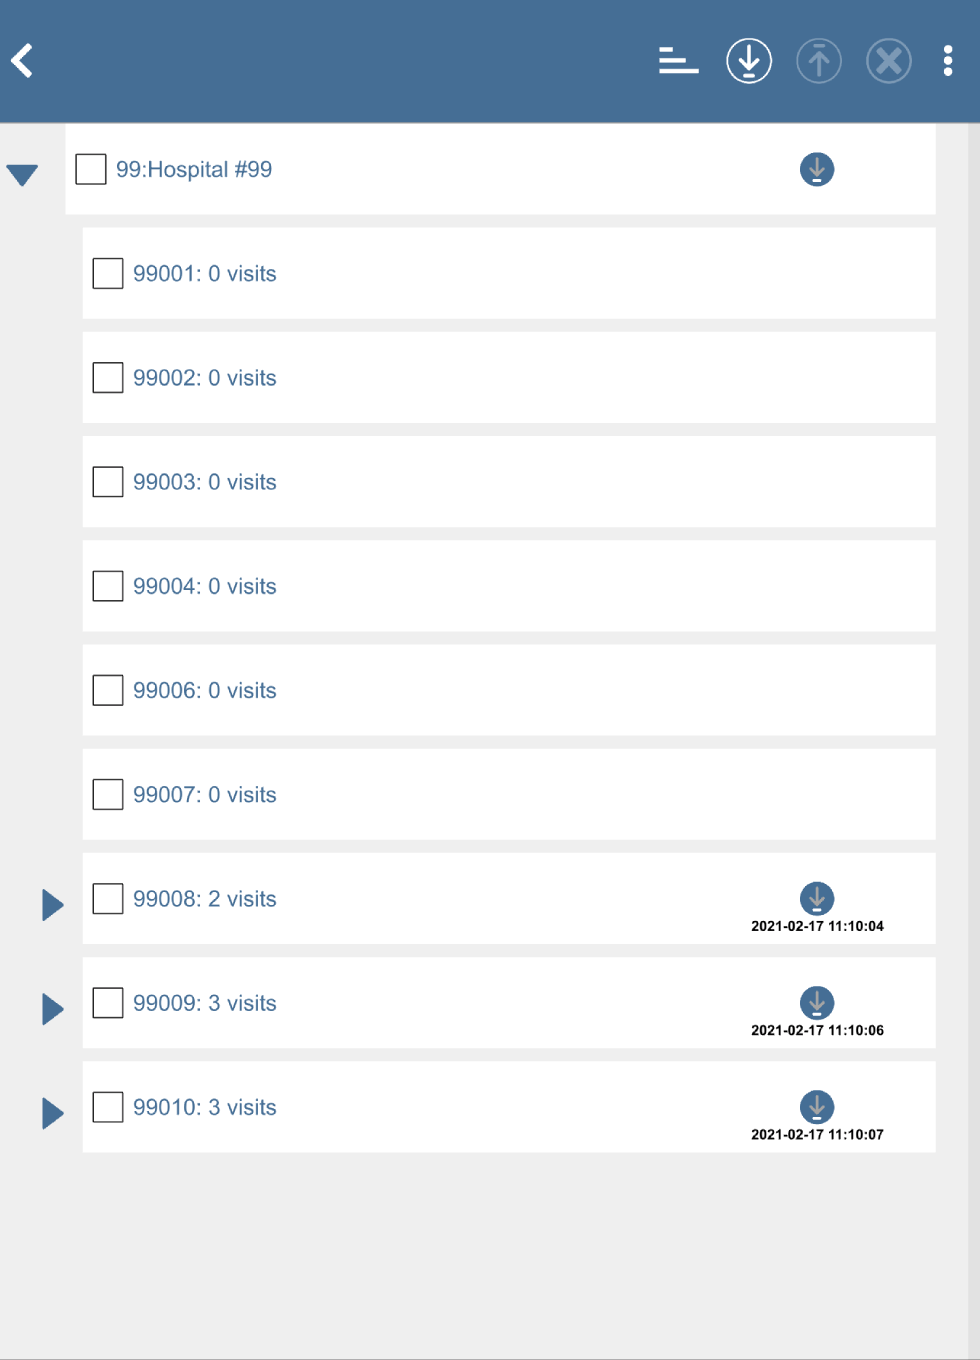
-
Click
> to logout of DFcollect.
-
Click
> Preferences > Offline Only toggle button to enable Offline Only mode (becomes green). Click .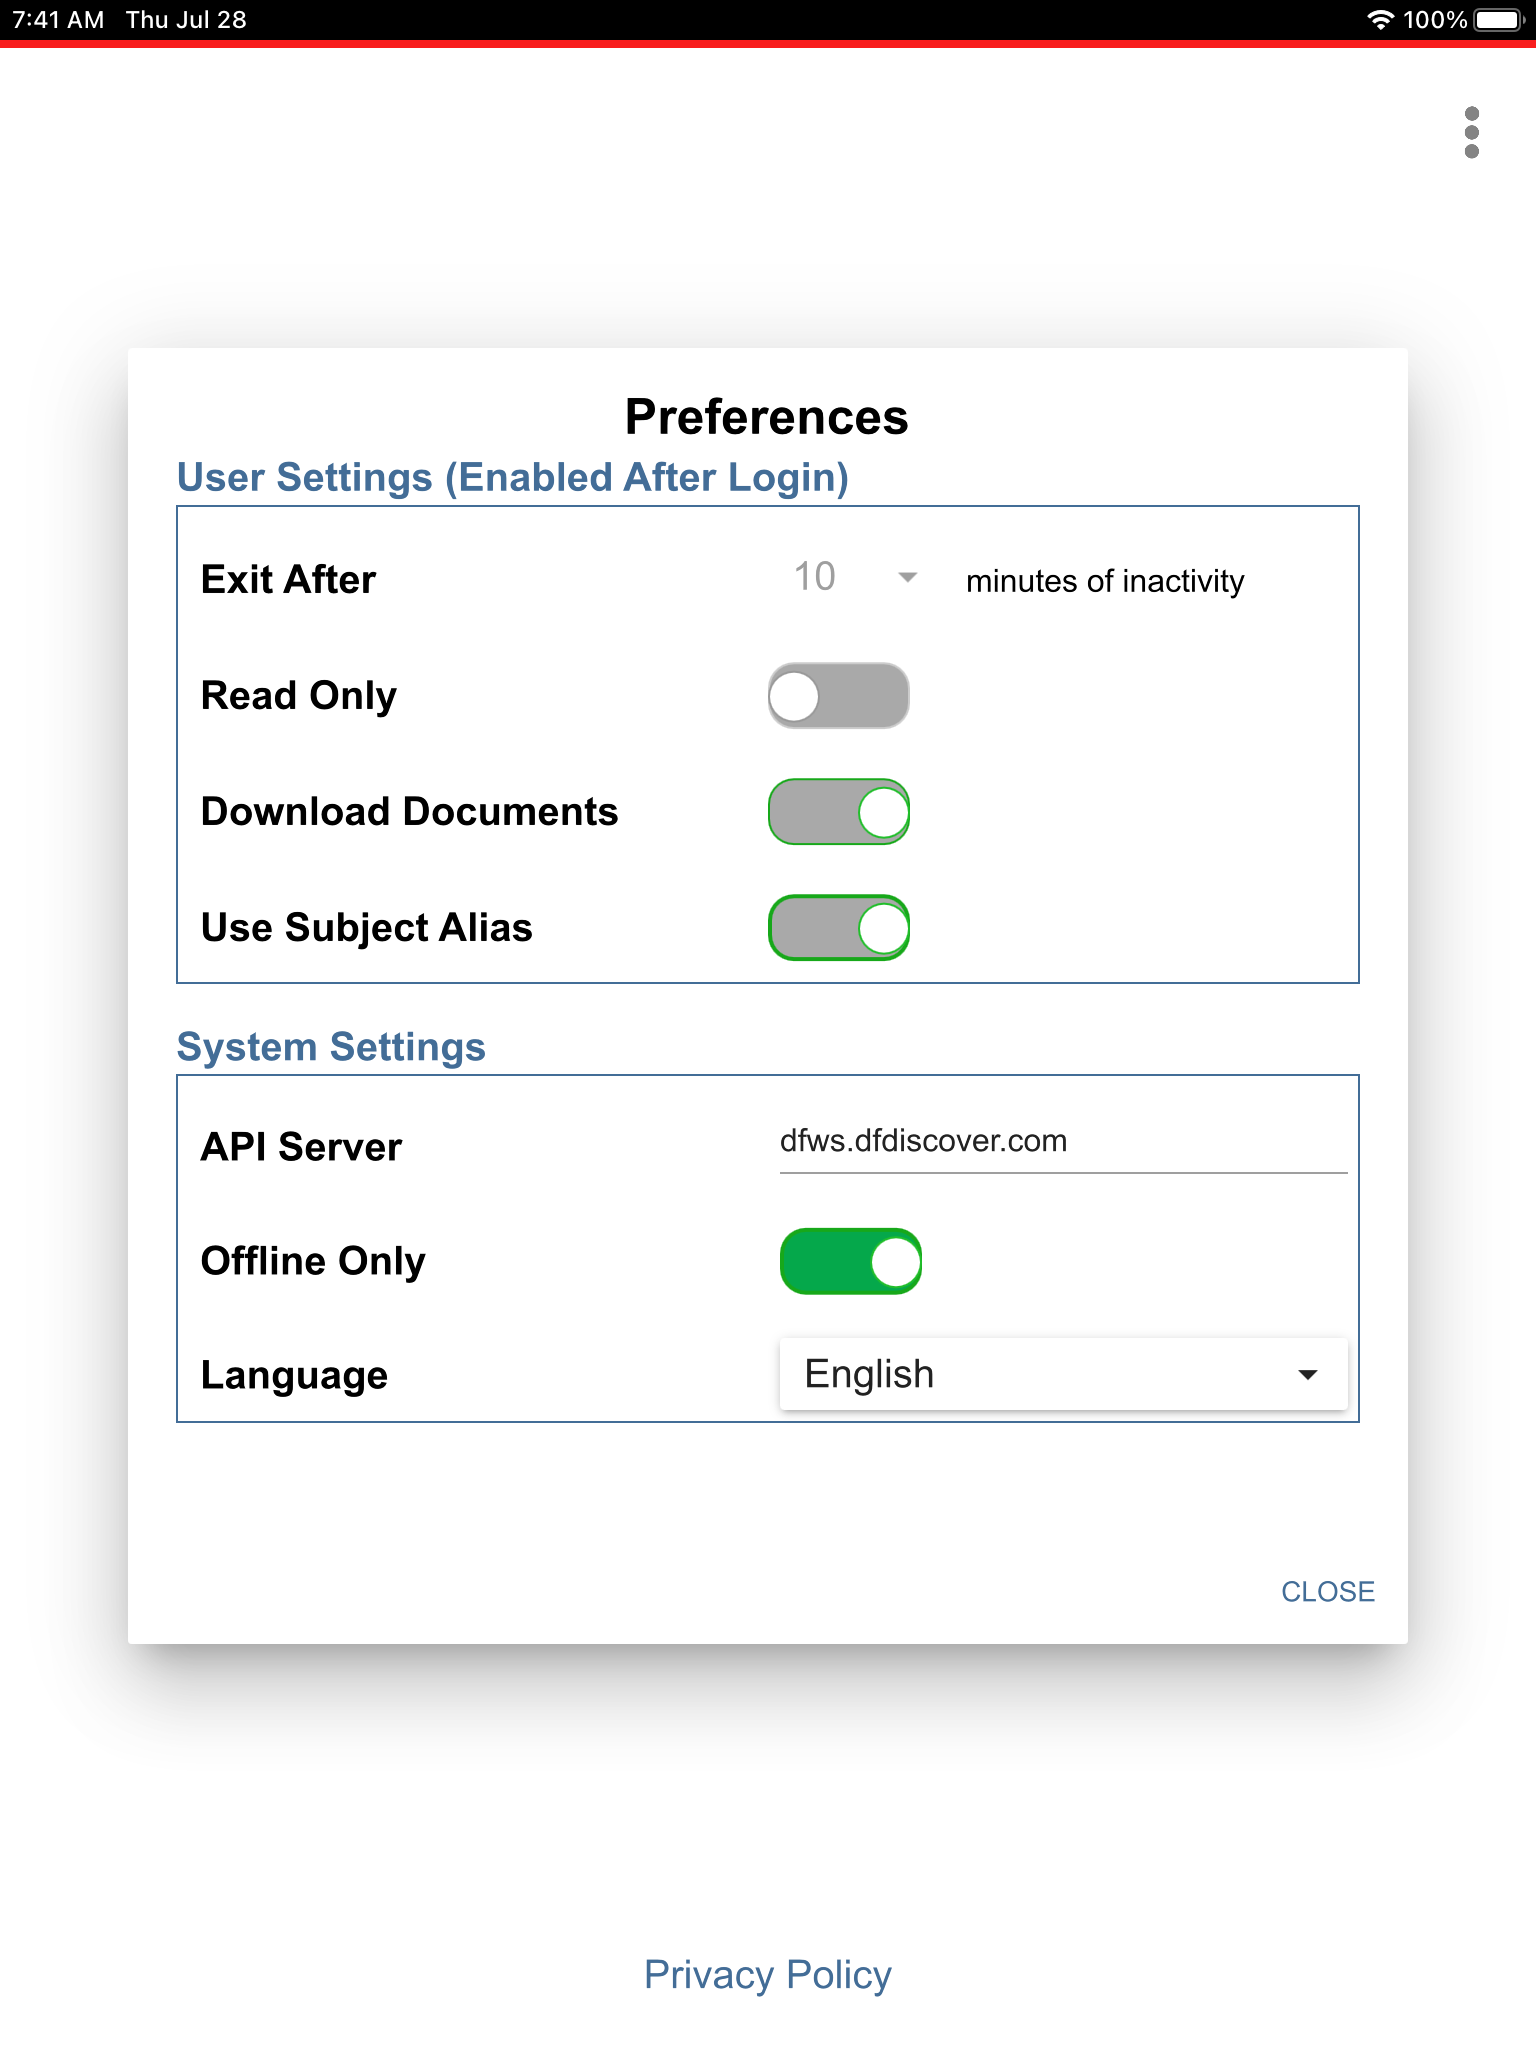
-
In the DFcollect login dialog, enter the name for DFdiscover Server that has been provided by your administrator. Enter
site_monitorin the Username field and the previously assigned password in the Password field. Click to login.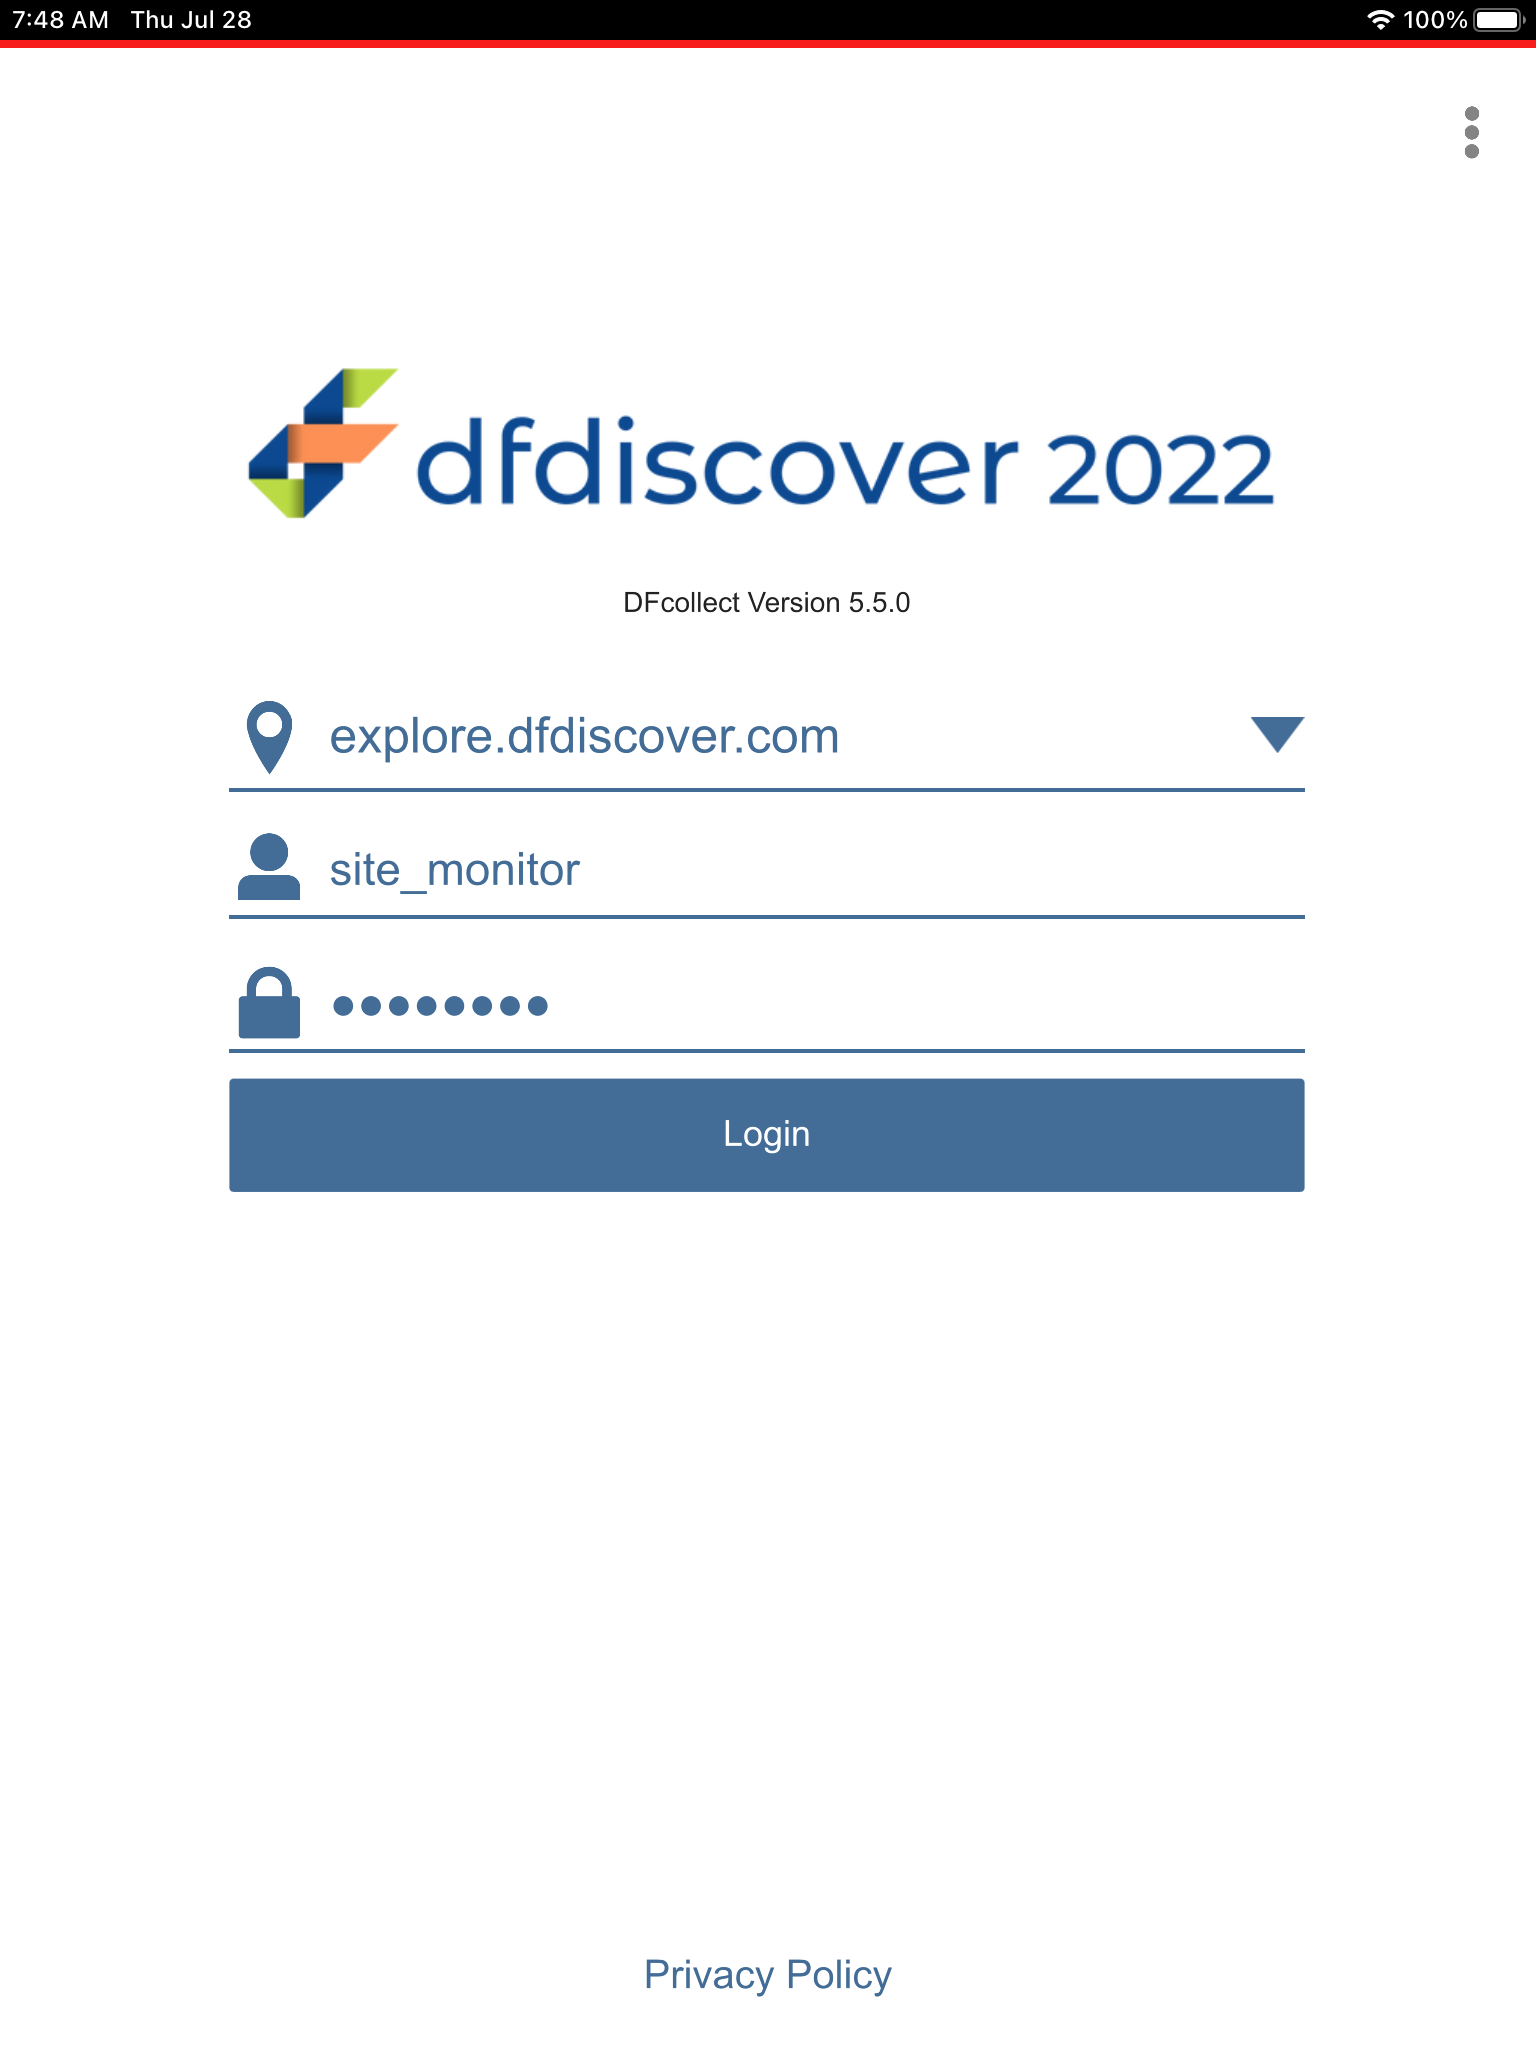
-
Click 99: Hospital #99 > 99009 : (incomplete) > 21: 1 Month Follow-up > 5: Form 5, 1 Month. Set:
Blood Pressure: Reading 1: systolic =
142, diastolic =097Blood Pressure: Reading 2: systolic =
134, diastolic =091Blood Pressure: Arm = Right
Weight (lbs) = Click
 , select Missing Value from the Code drop-down list. Click .
Click
 . Click in the resulting Add Query dialog.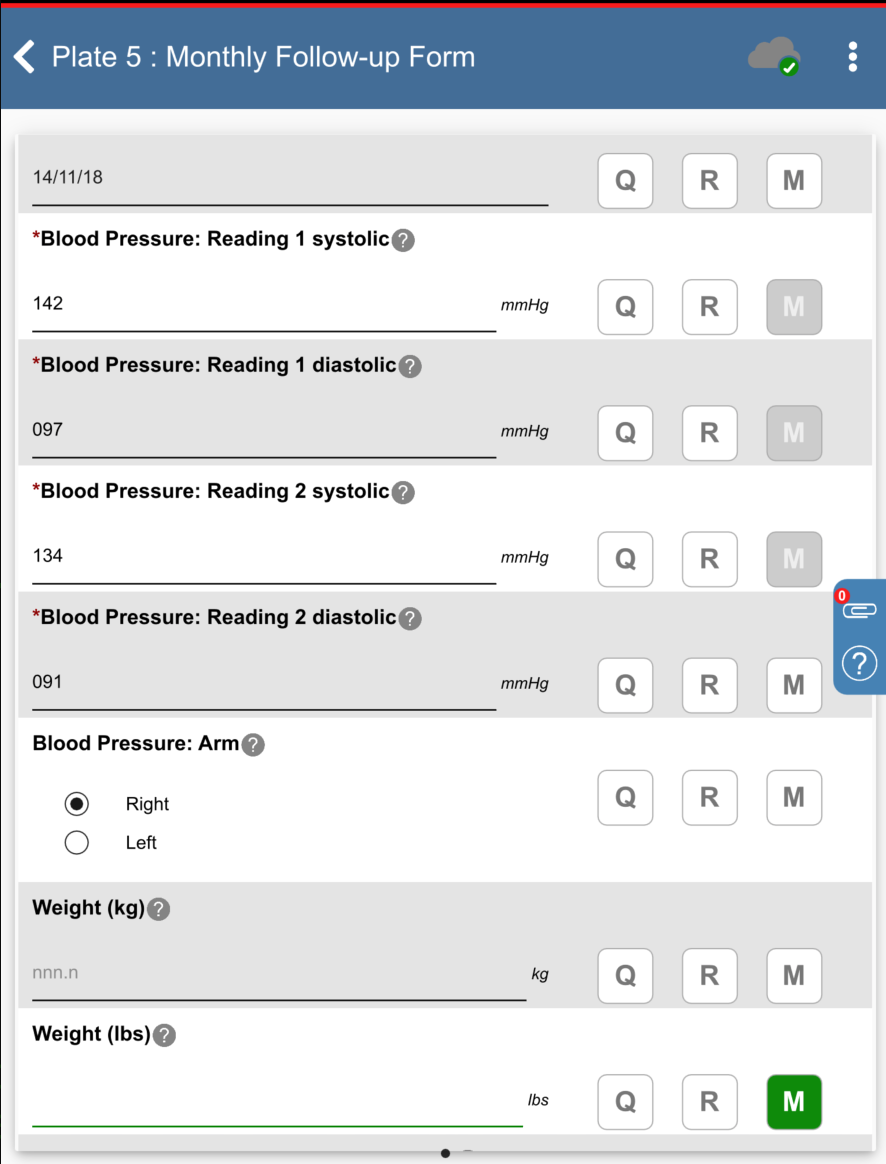
-
Click
> 21: Lab Results.
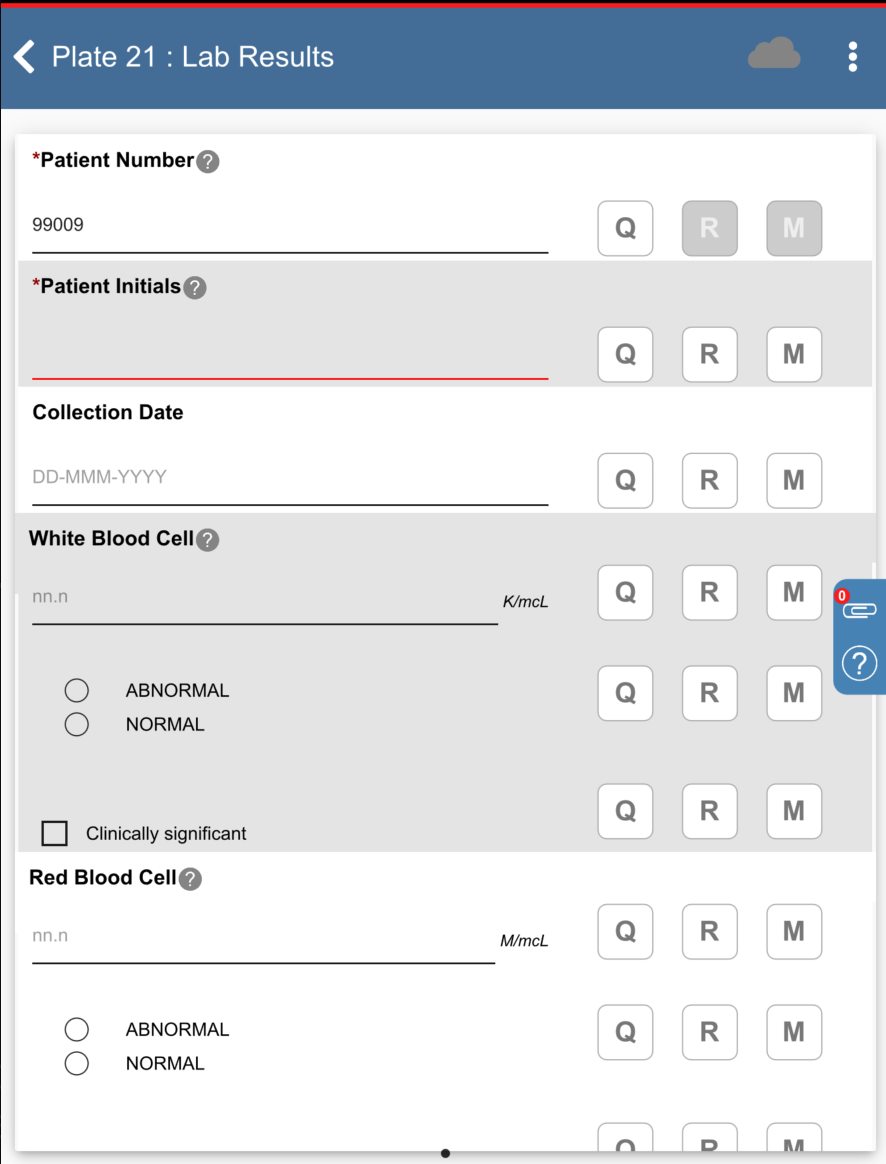
-
Click Patient Initials. The initials automatically populate this field as a result of the edit check
SetInitdescribed in Module 8. Image Data Entry, Set:Collection Date = Click
, select 11-NOV-2018.White Blood Cell =
07.8, check (enable) NORMALRed Blood Cell =
02.9check (enable) NORMALHemoglobin =
06.5, check (enable) ABNORMALMean Cell Hemoglobin Conc =
14.1, check (enable) NORMAL
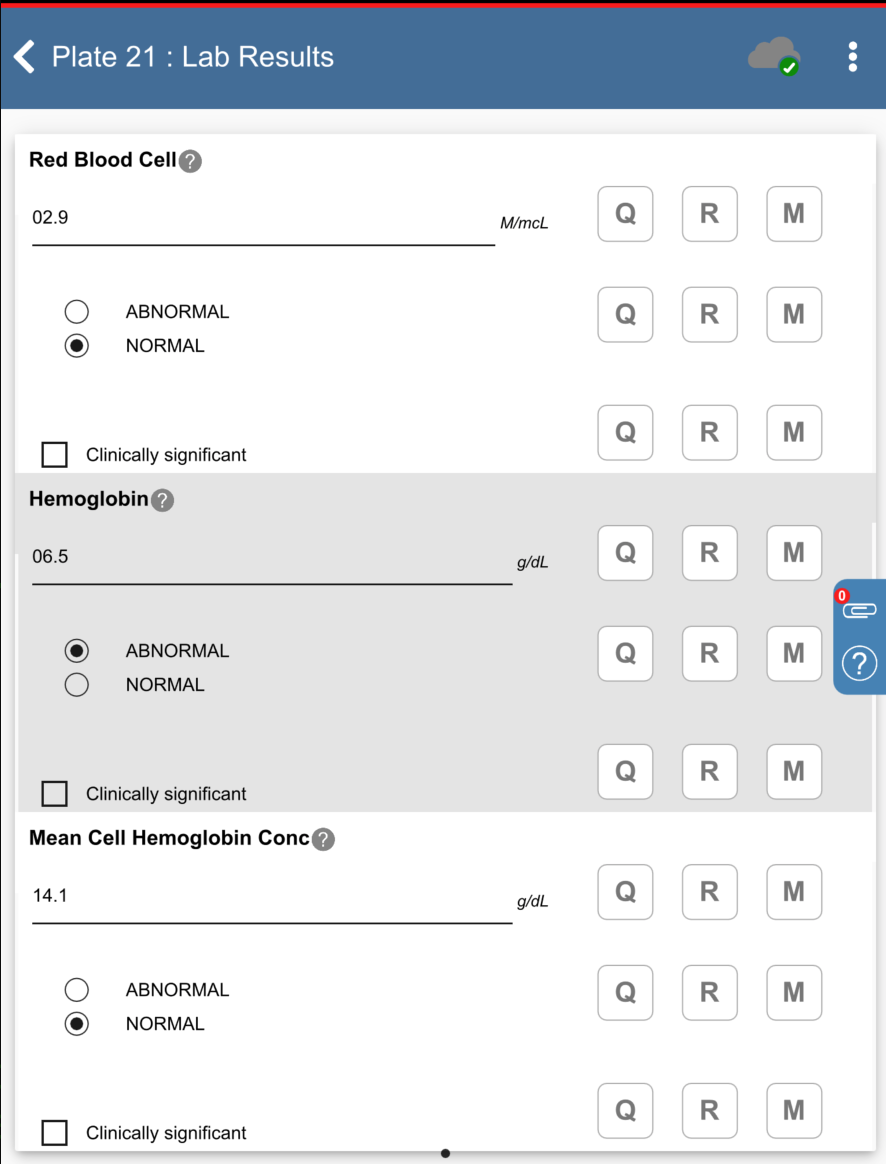
Click
 , to the right of the
Hemoglobin “ABNORMAL/NORMAL” field.
, to the right of the
Hemoglobin “ABNORMAL/NORMAL” field.
-
Click next to Reason. The DFlookup: REASON dialog is displayed.
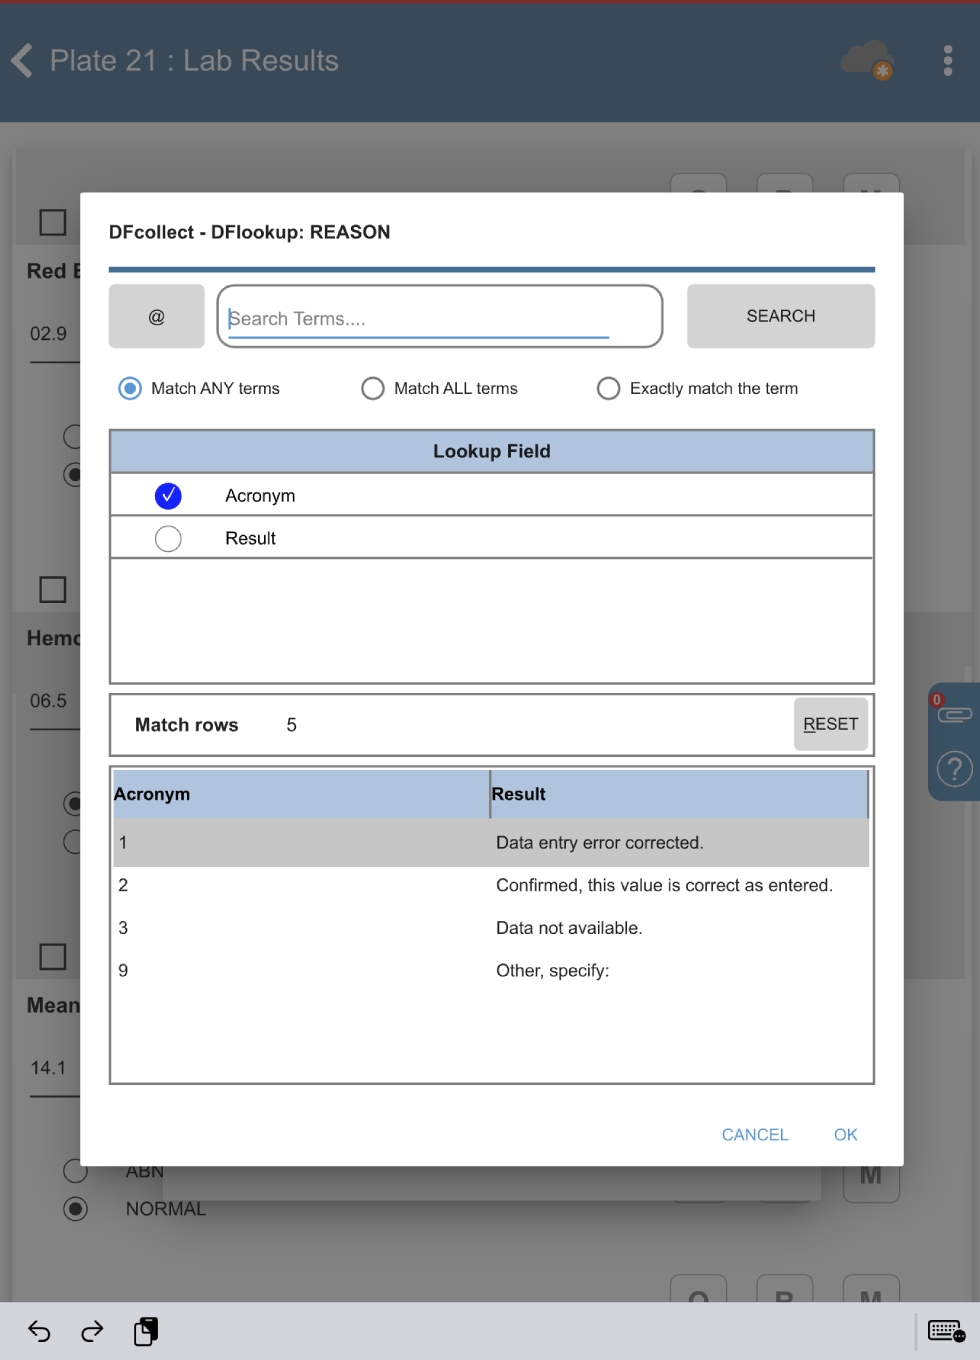
-
Select the Result of Confirmed, this value is correct as entered., Click , followed by then Click
.
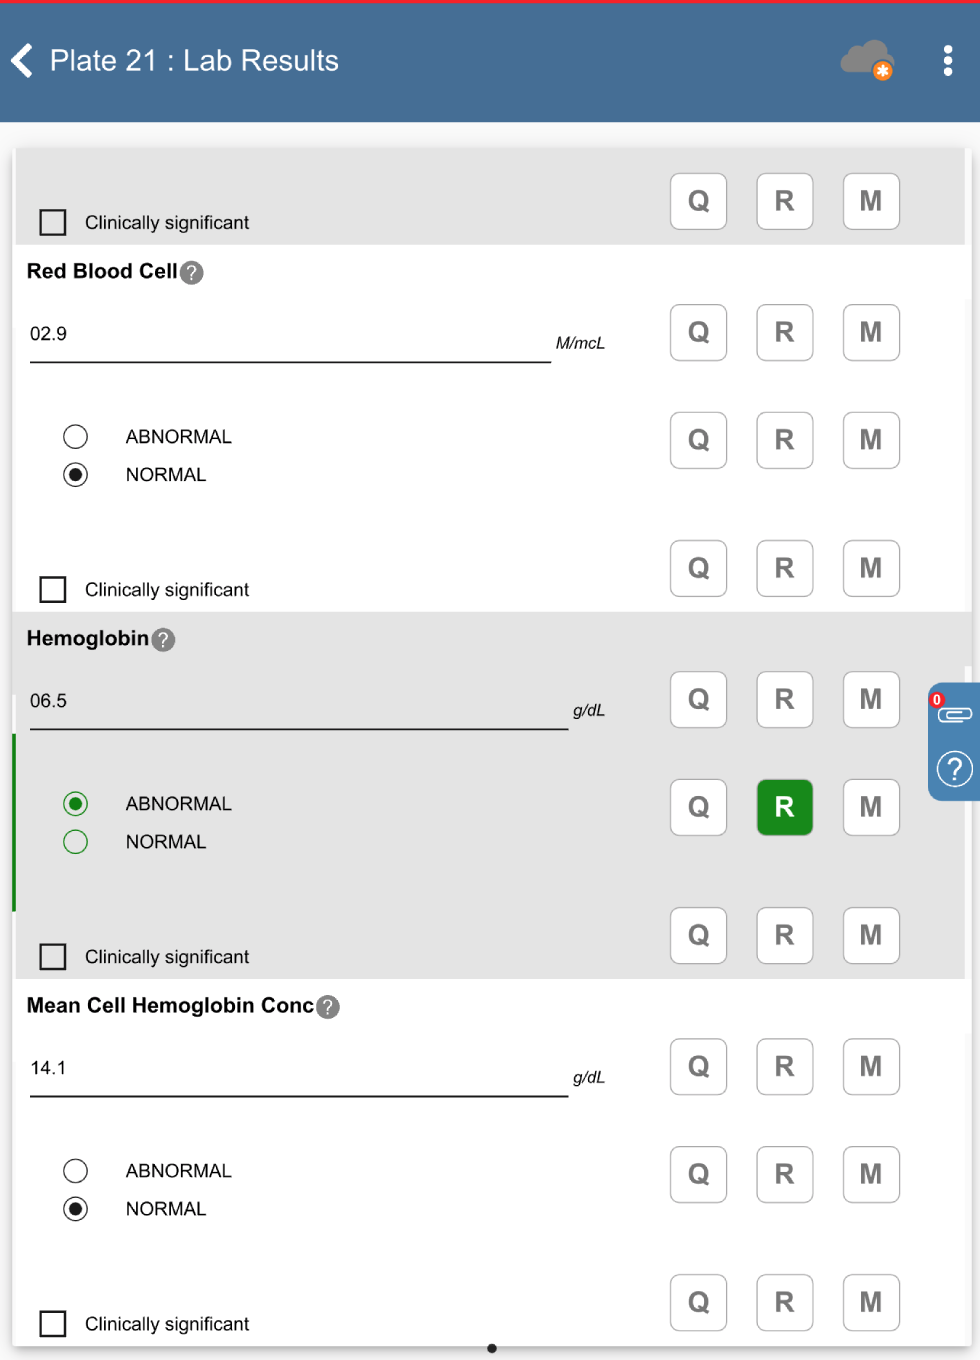
-
Return to the subject listing for 99: Hospital #99 by clicking
> .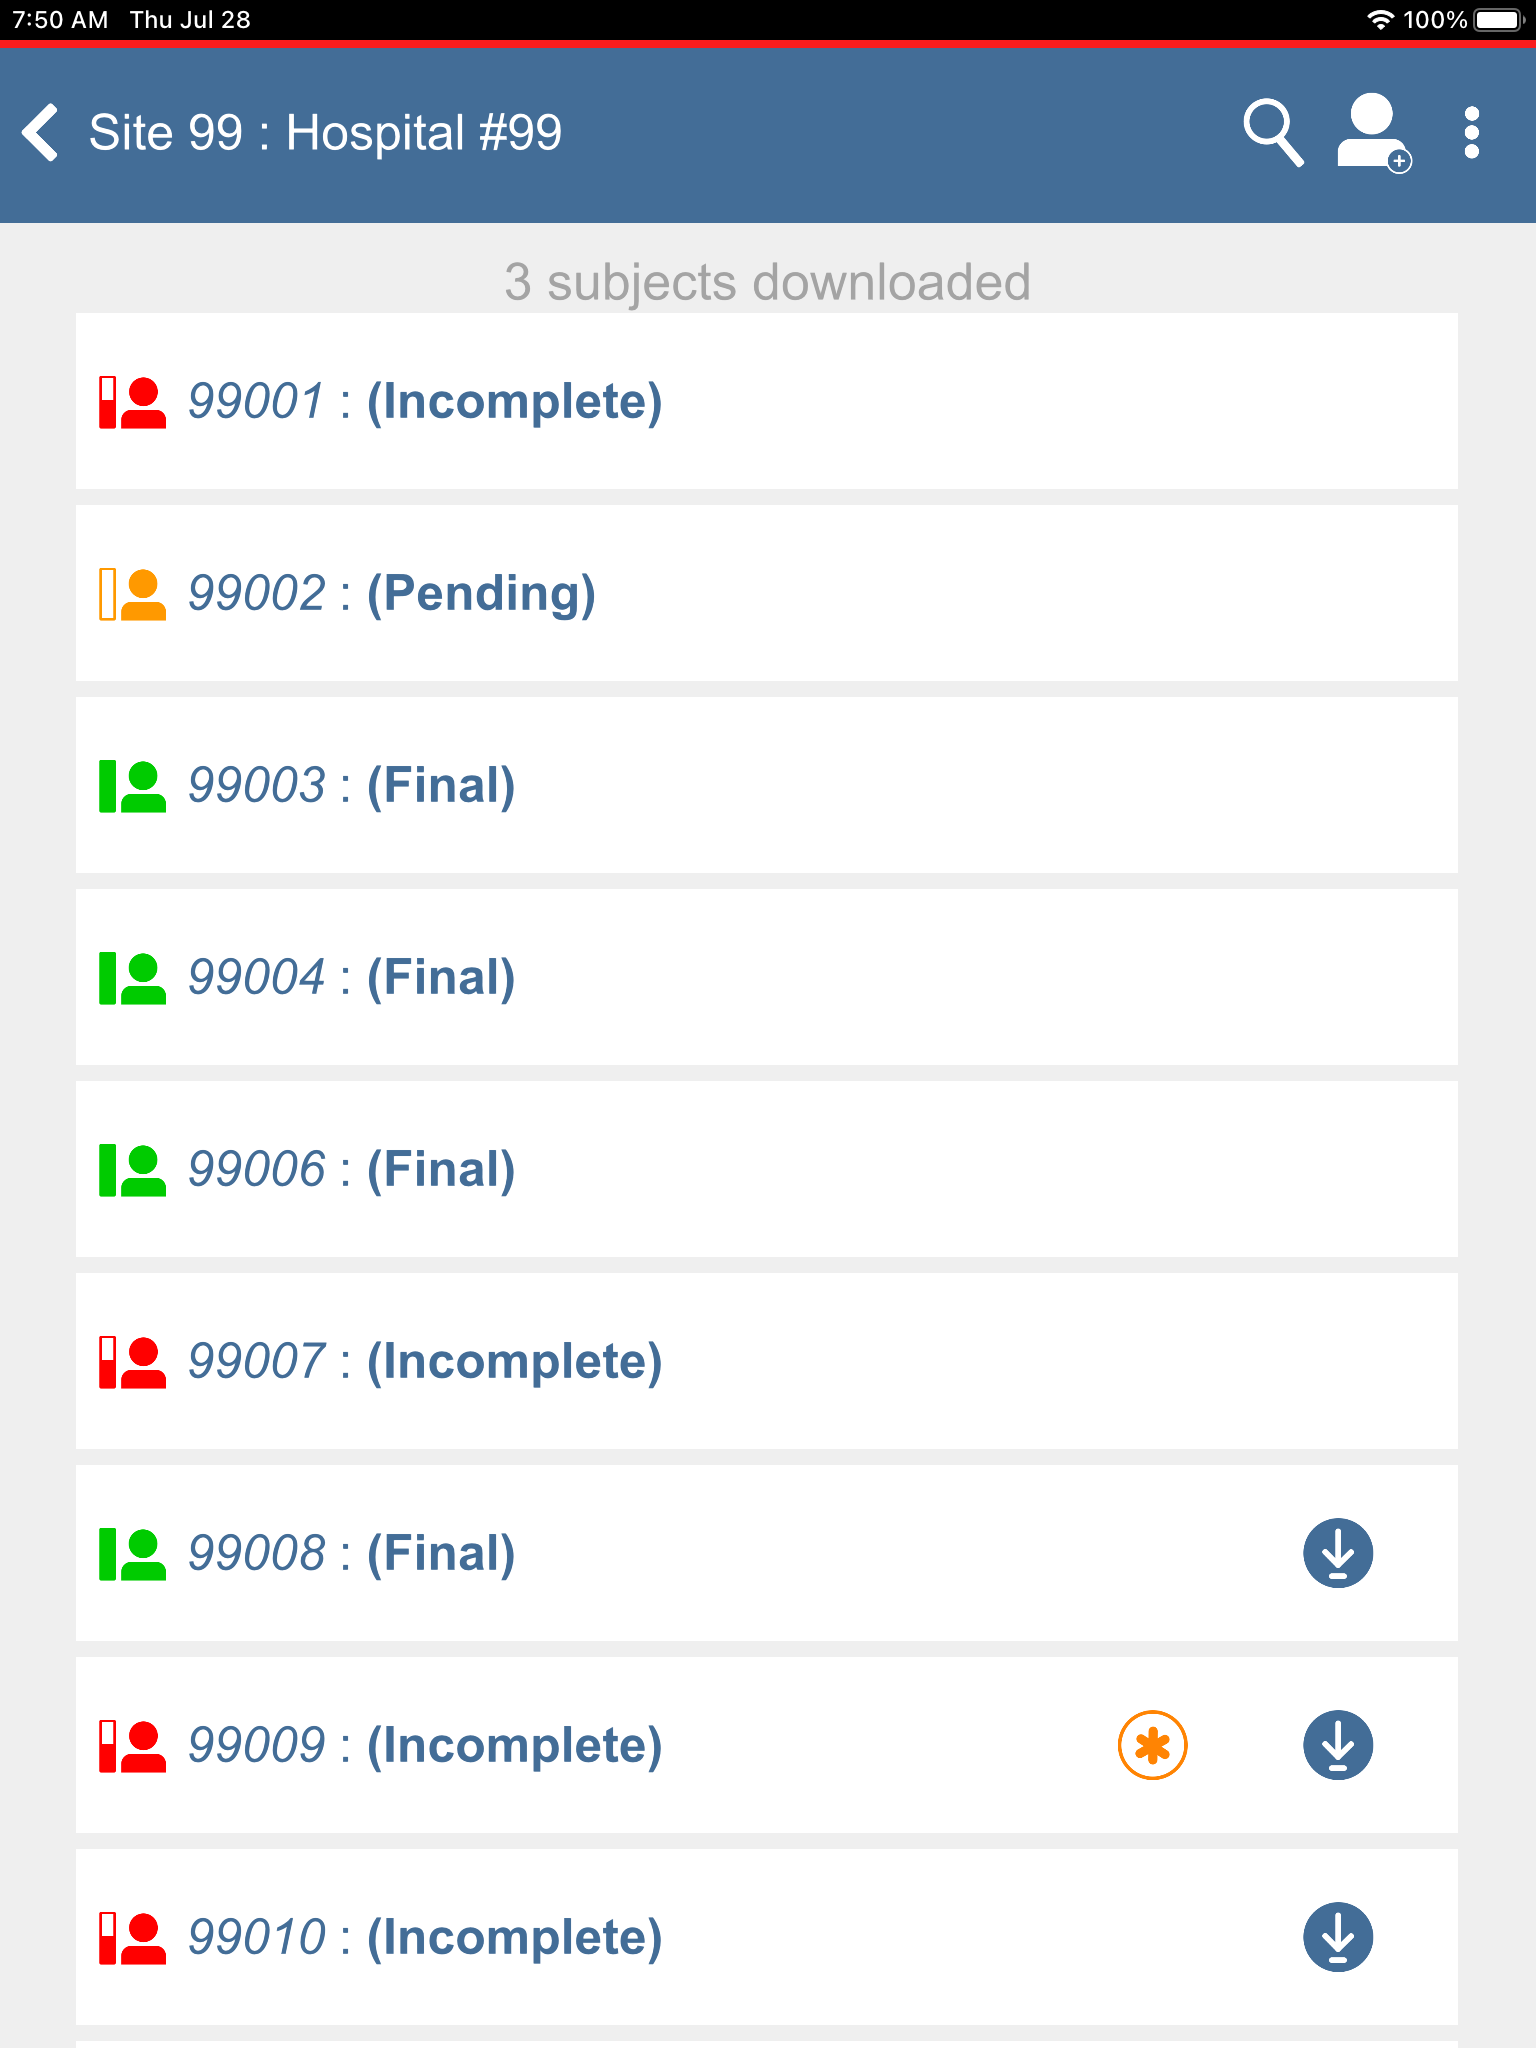
-
Click
> to view outstanding queries.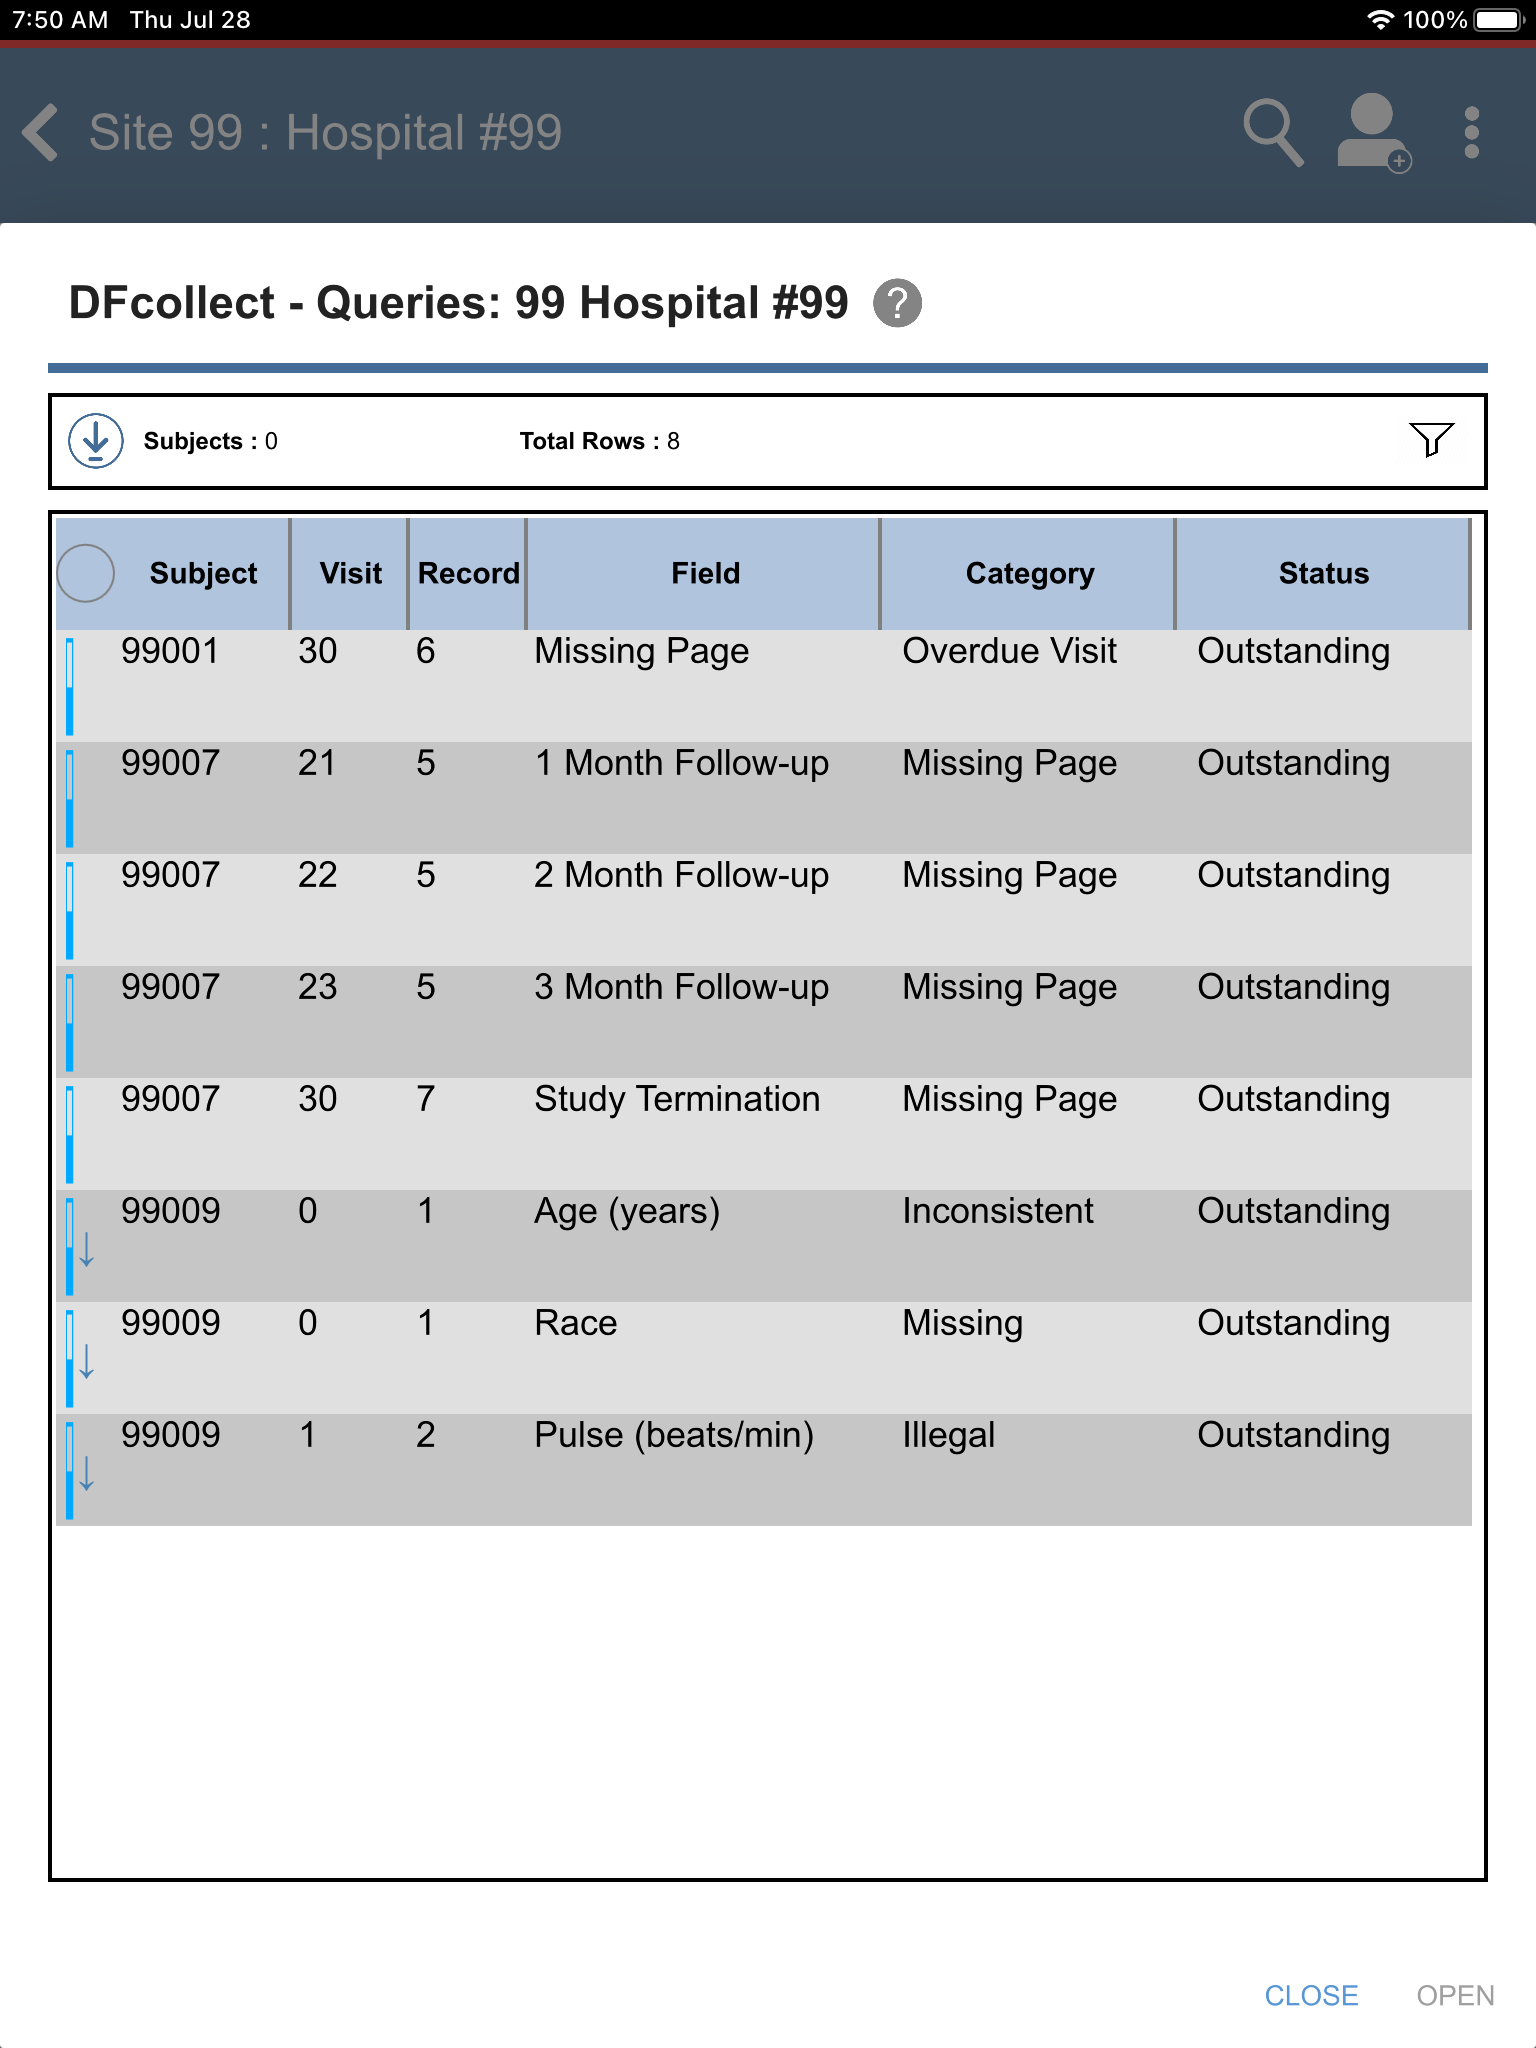
-
Locate and select the outstanding query for subject 99009 > Pulse(beats/min) field. Click . The Pulse(beats/min) field gains focus.
-
Click
next to the Pulse field. In the Reason field specify Value of 95 for pulse is confirmed.. Click >. 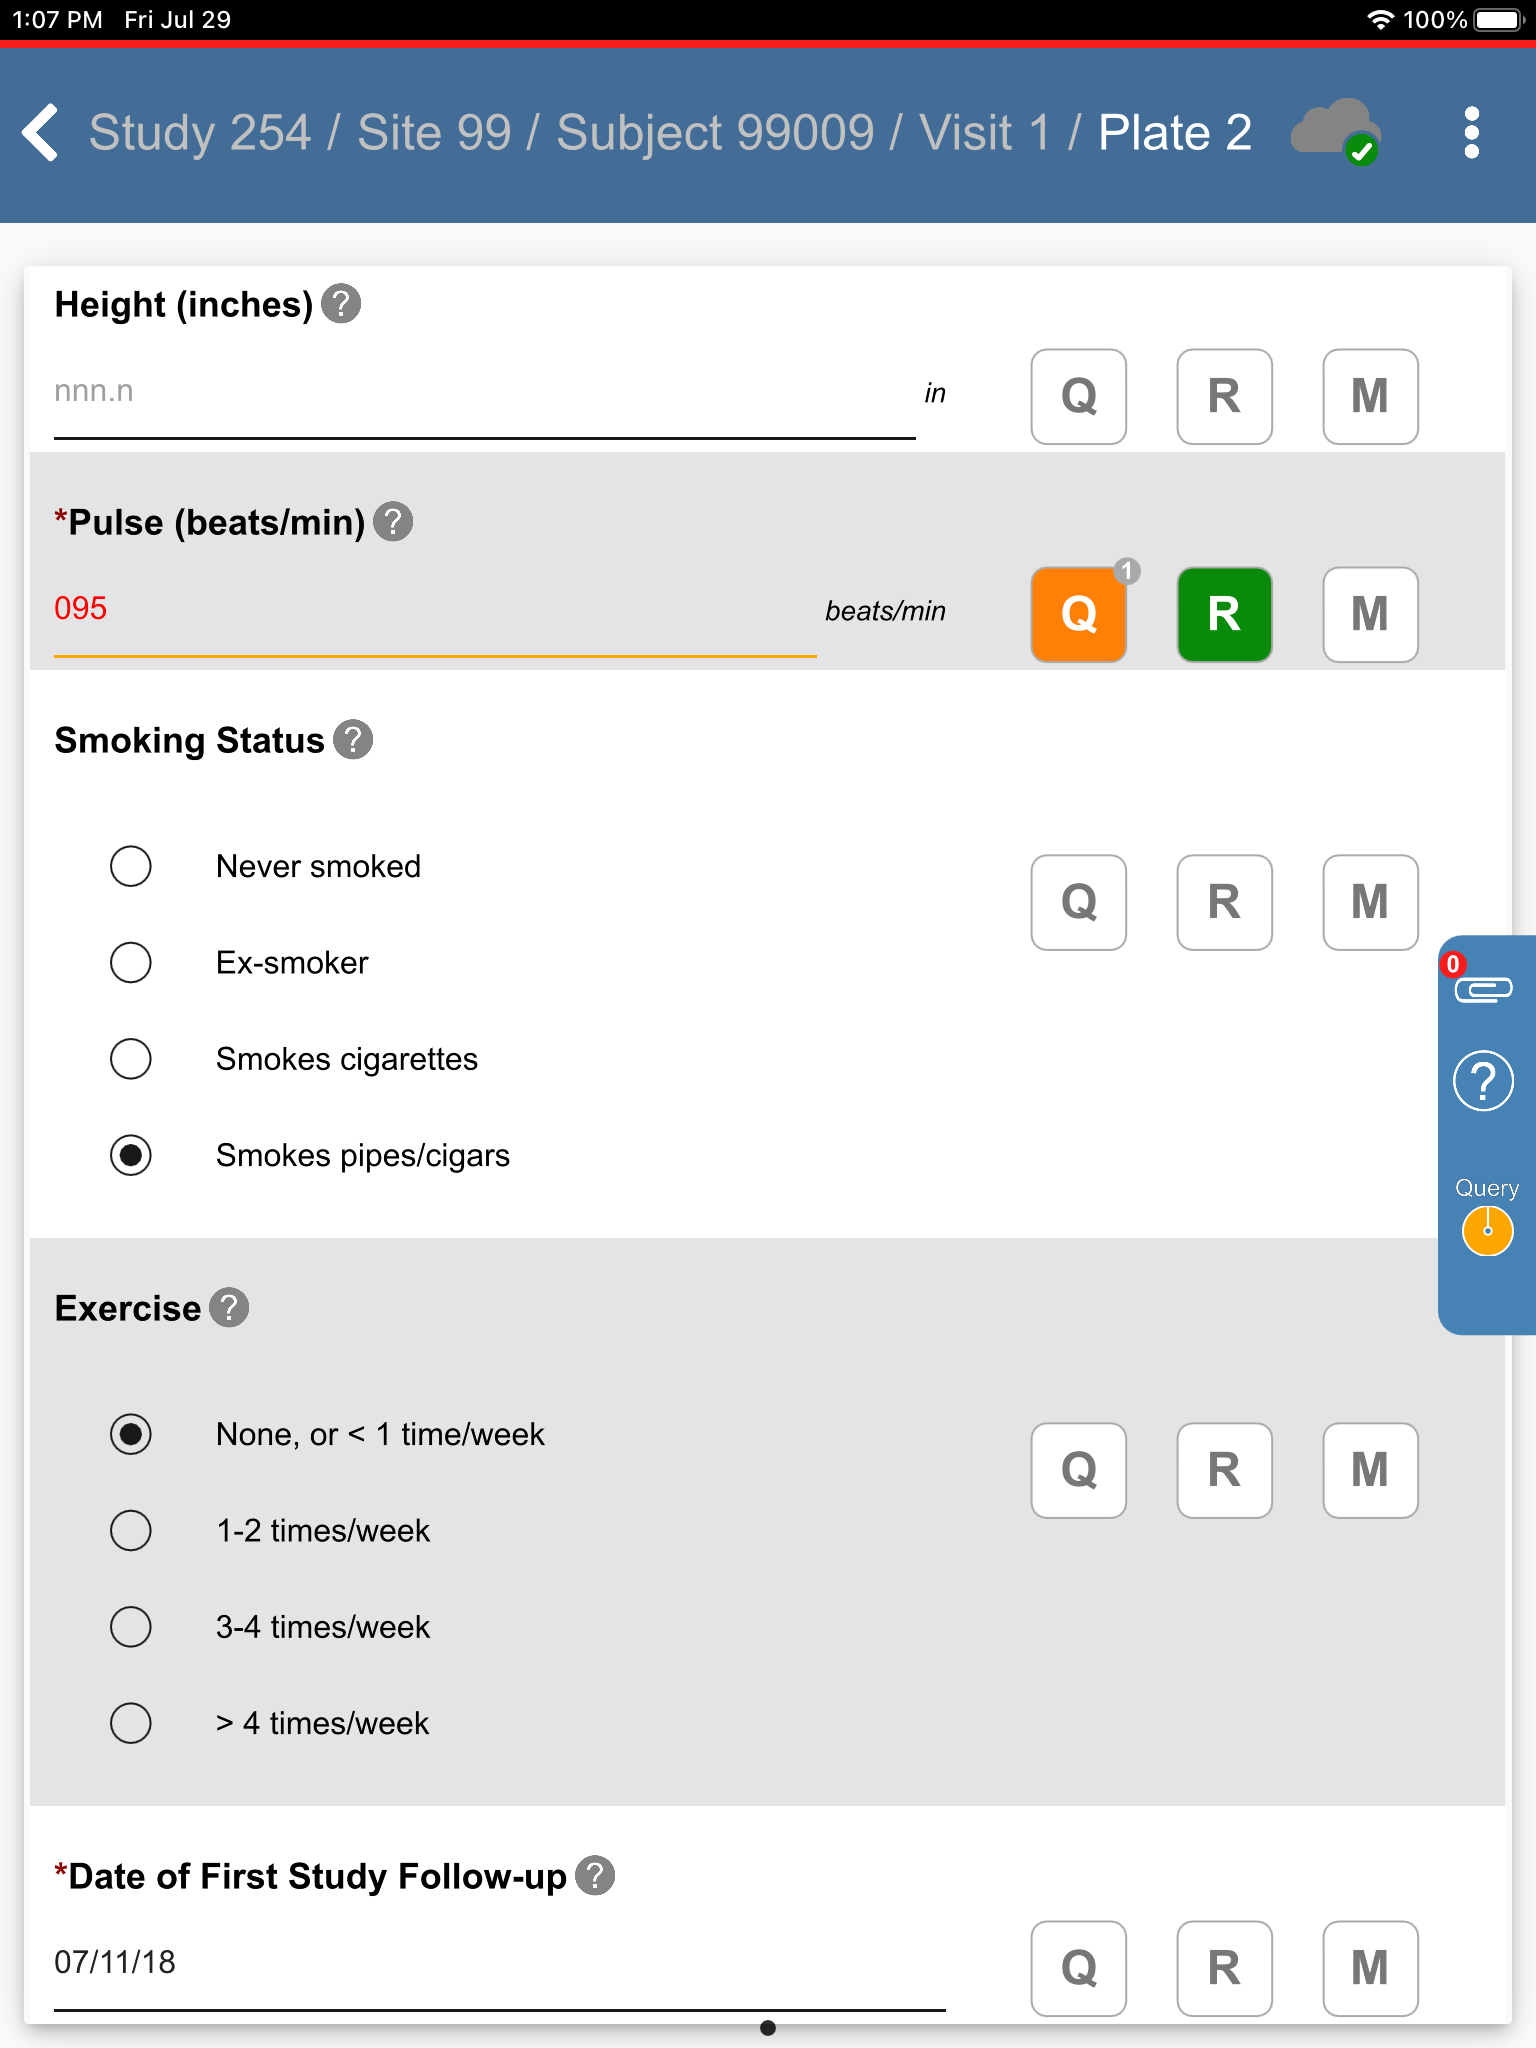
-
Click
to return to Query View. Confirm the outstanding query for 99009 > Pulse(beats/min) field is no longer present. Click .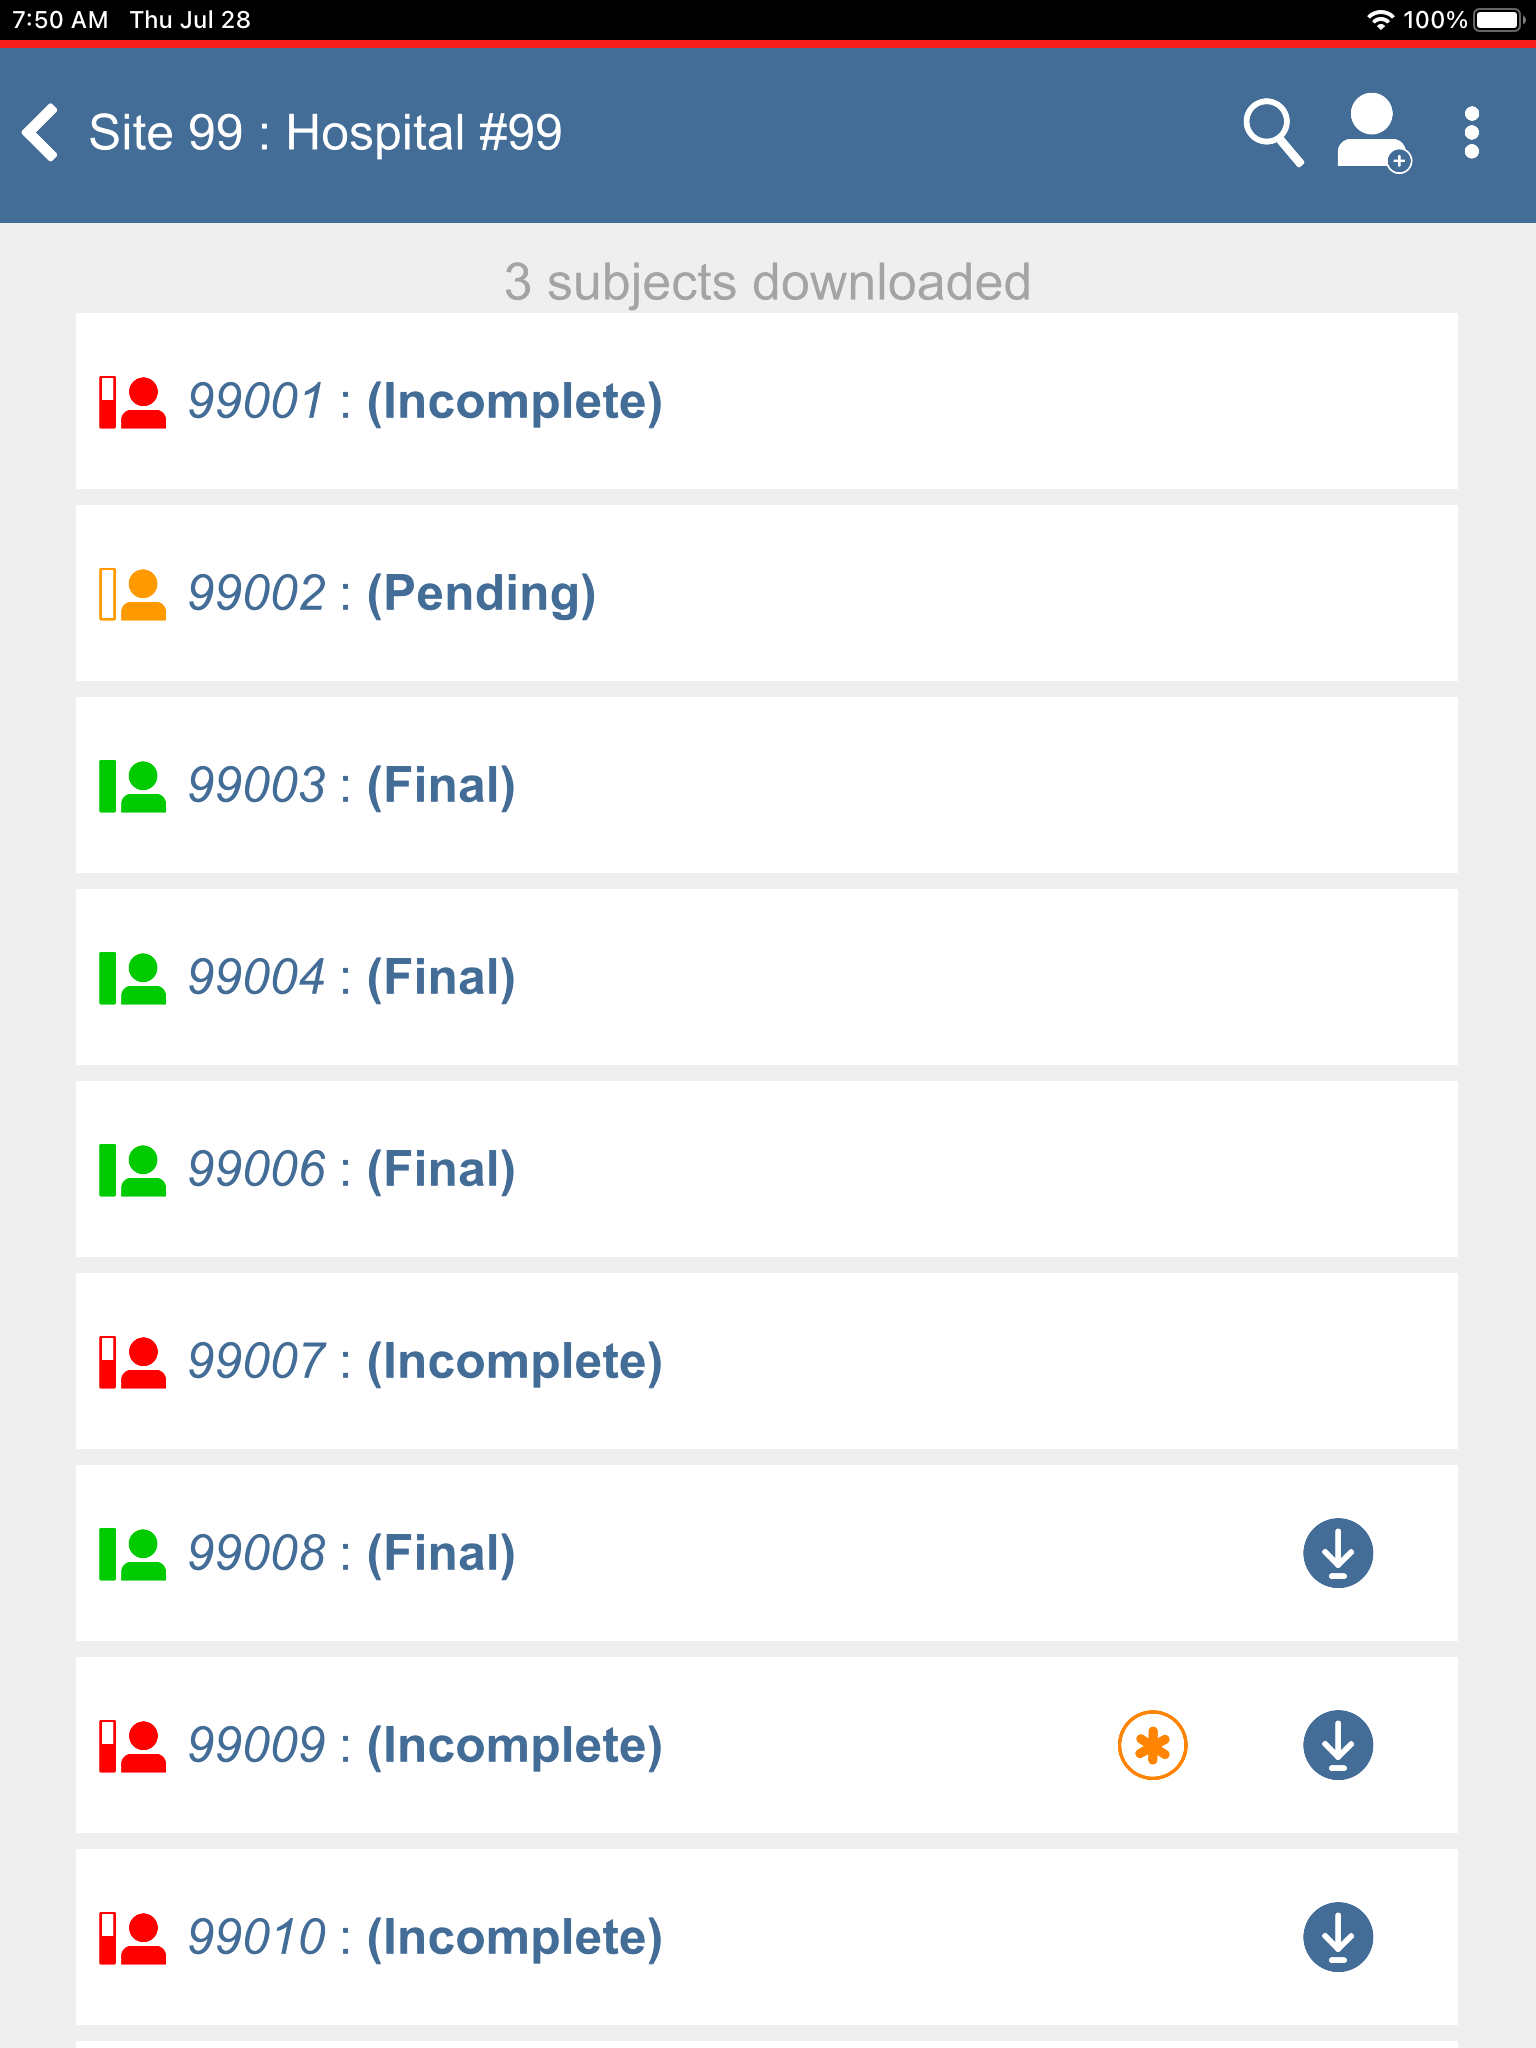
-
Click 99008 : (Final) > 1: Baseline > 2: Form 2. In the Date of First Study Follow-up field click
, select 14/11/18.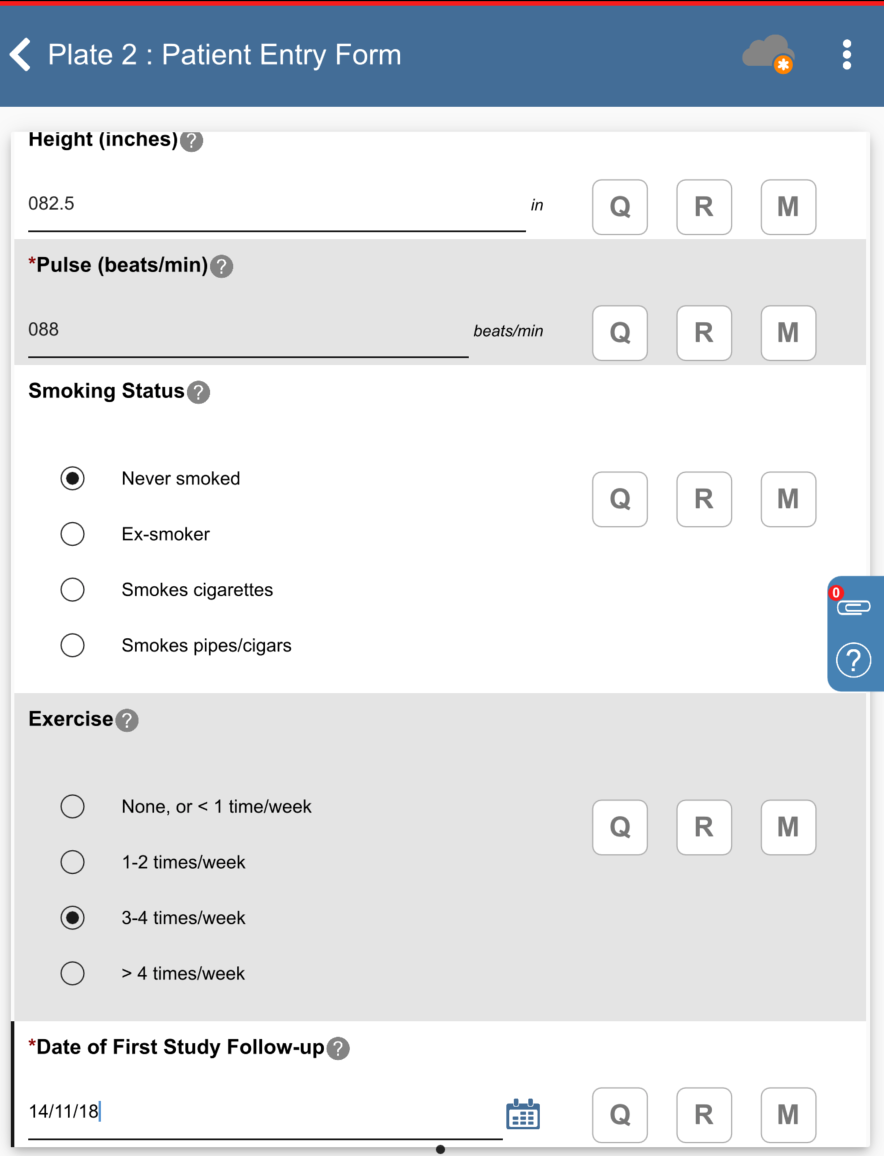
-
Click
. In the Reason field specify Subject has to reschedule due to conflict.. Click >. 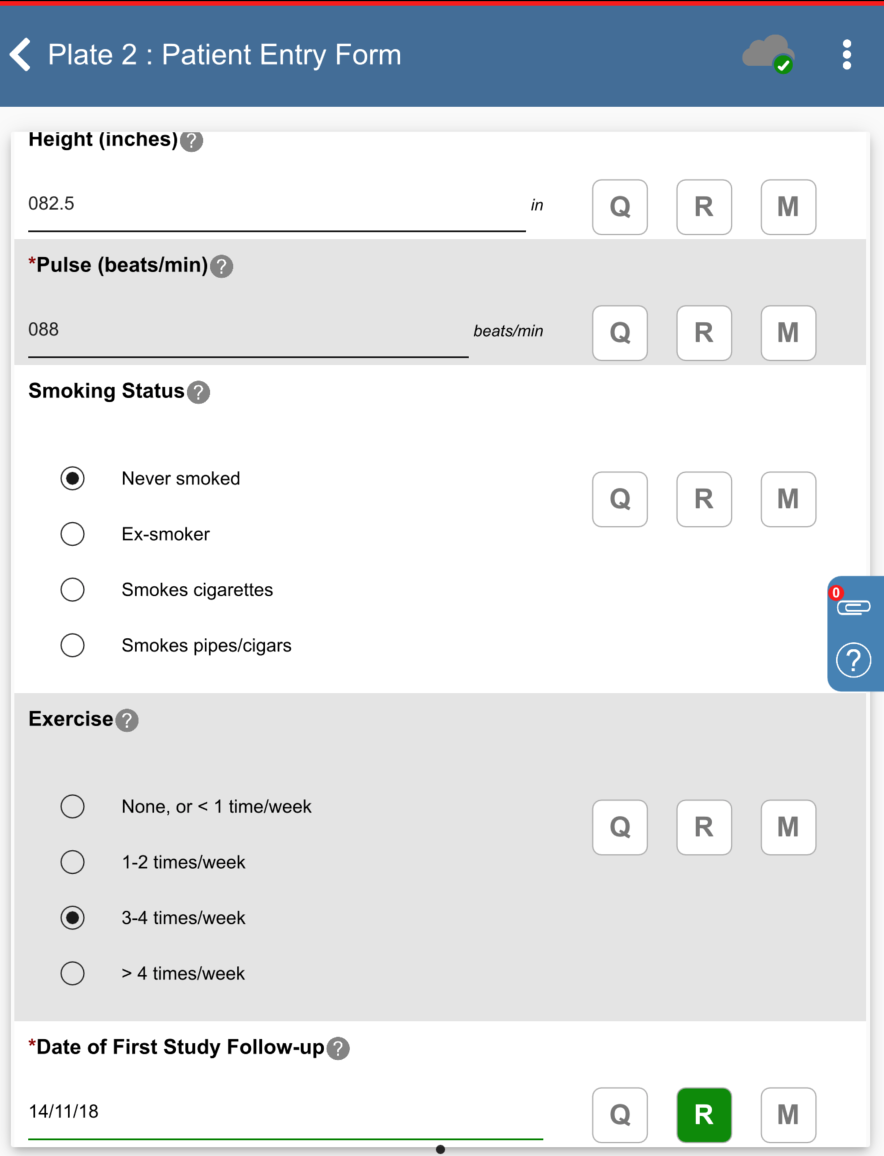
-
Return to the subject listing for 99: Hospital #99 by clicking
> . Re-open Query View by clicking > .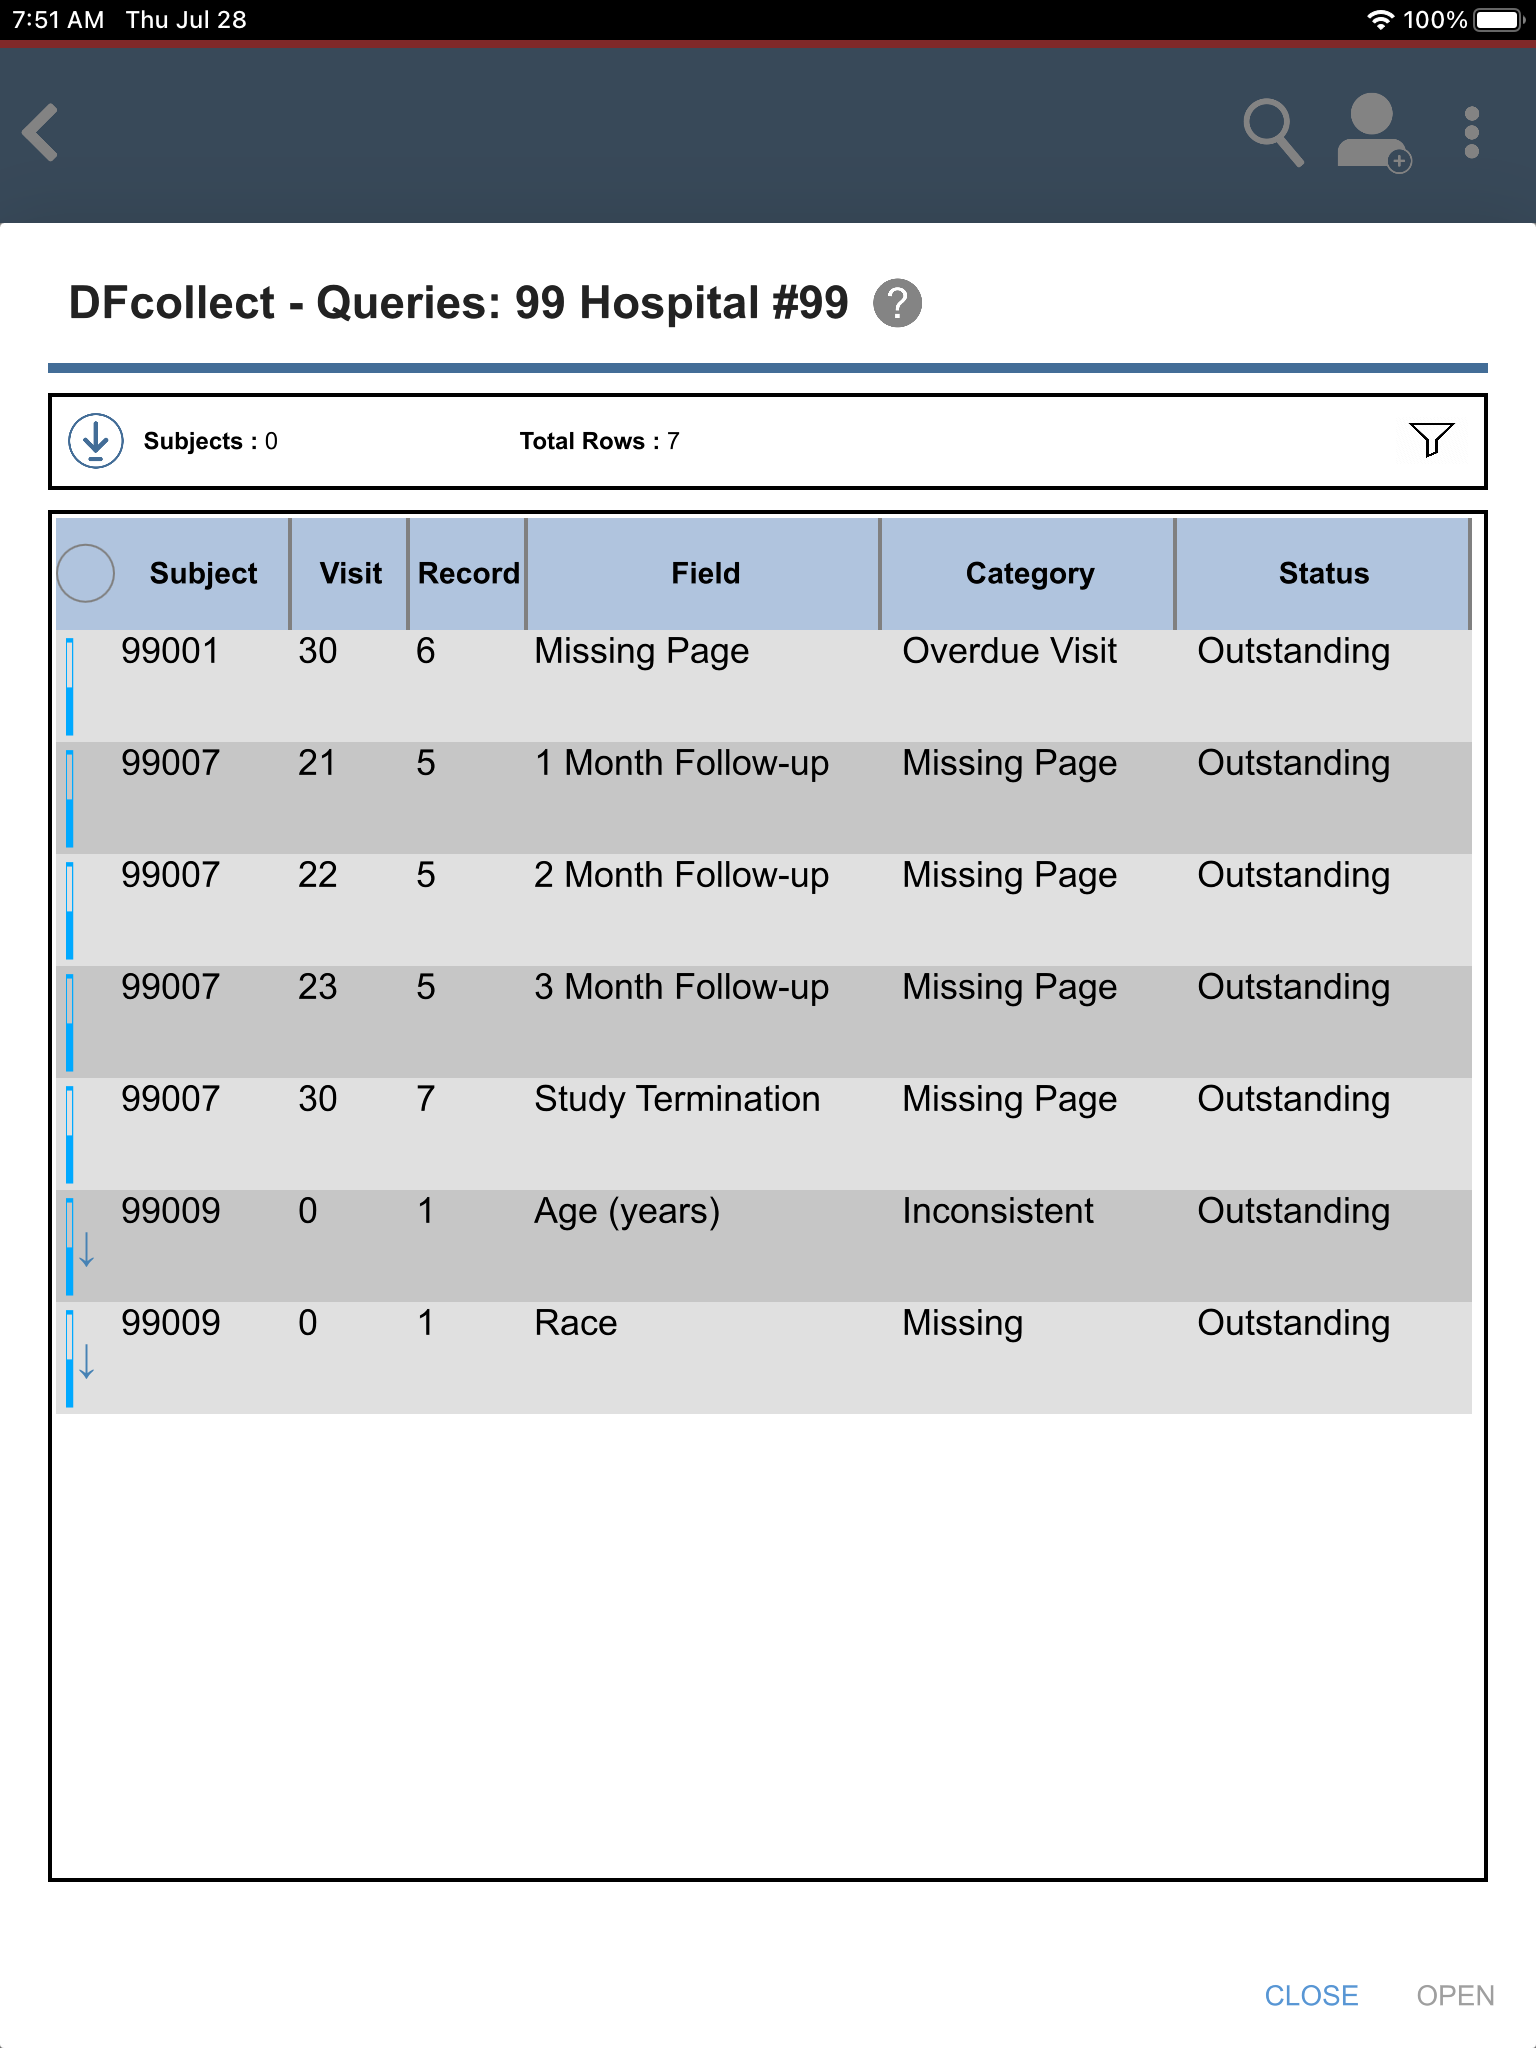
Locate and select the outstanding query for subject 99009 > Age (years). Click . The Age (years) field gains focus.
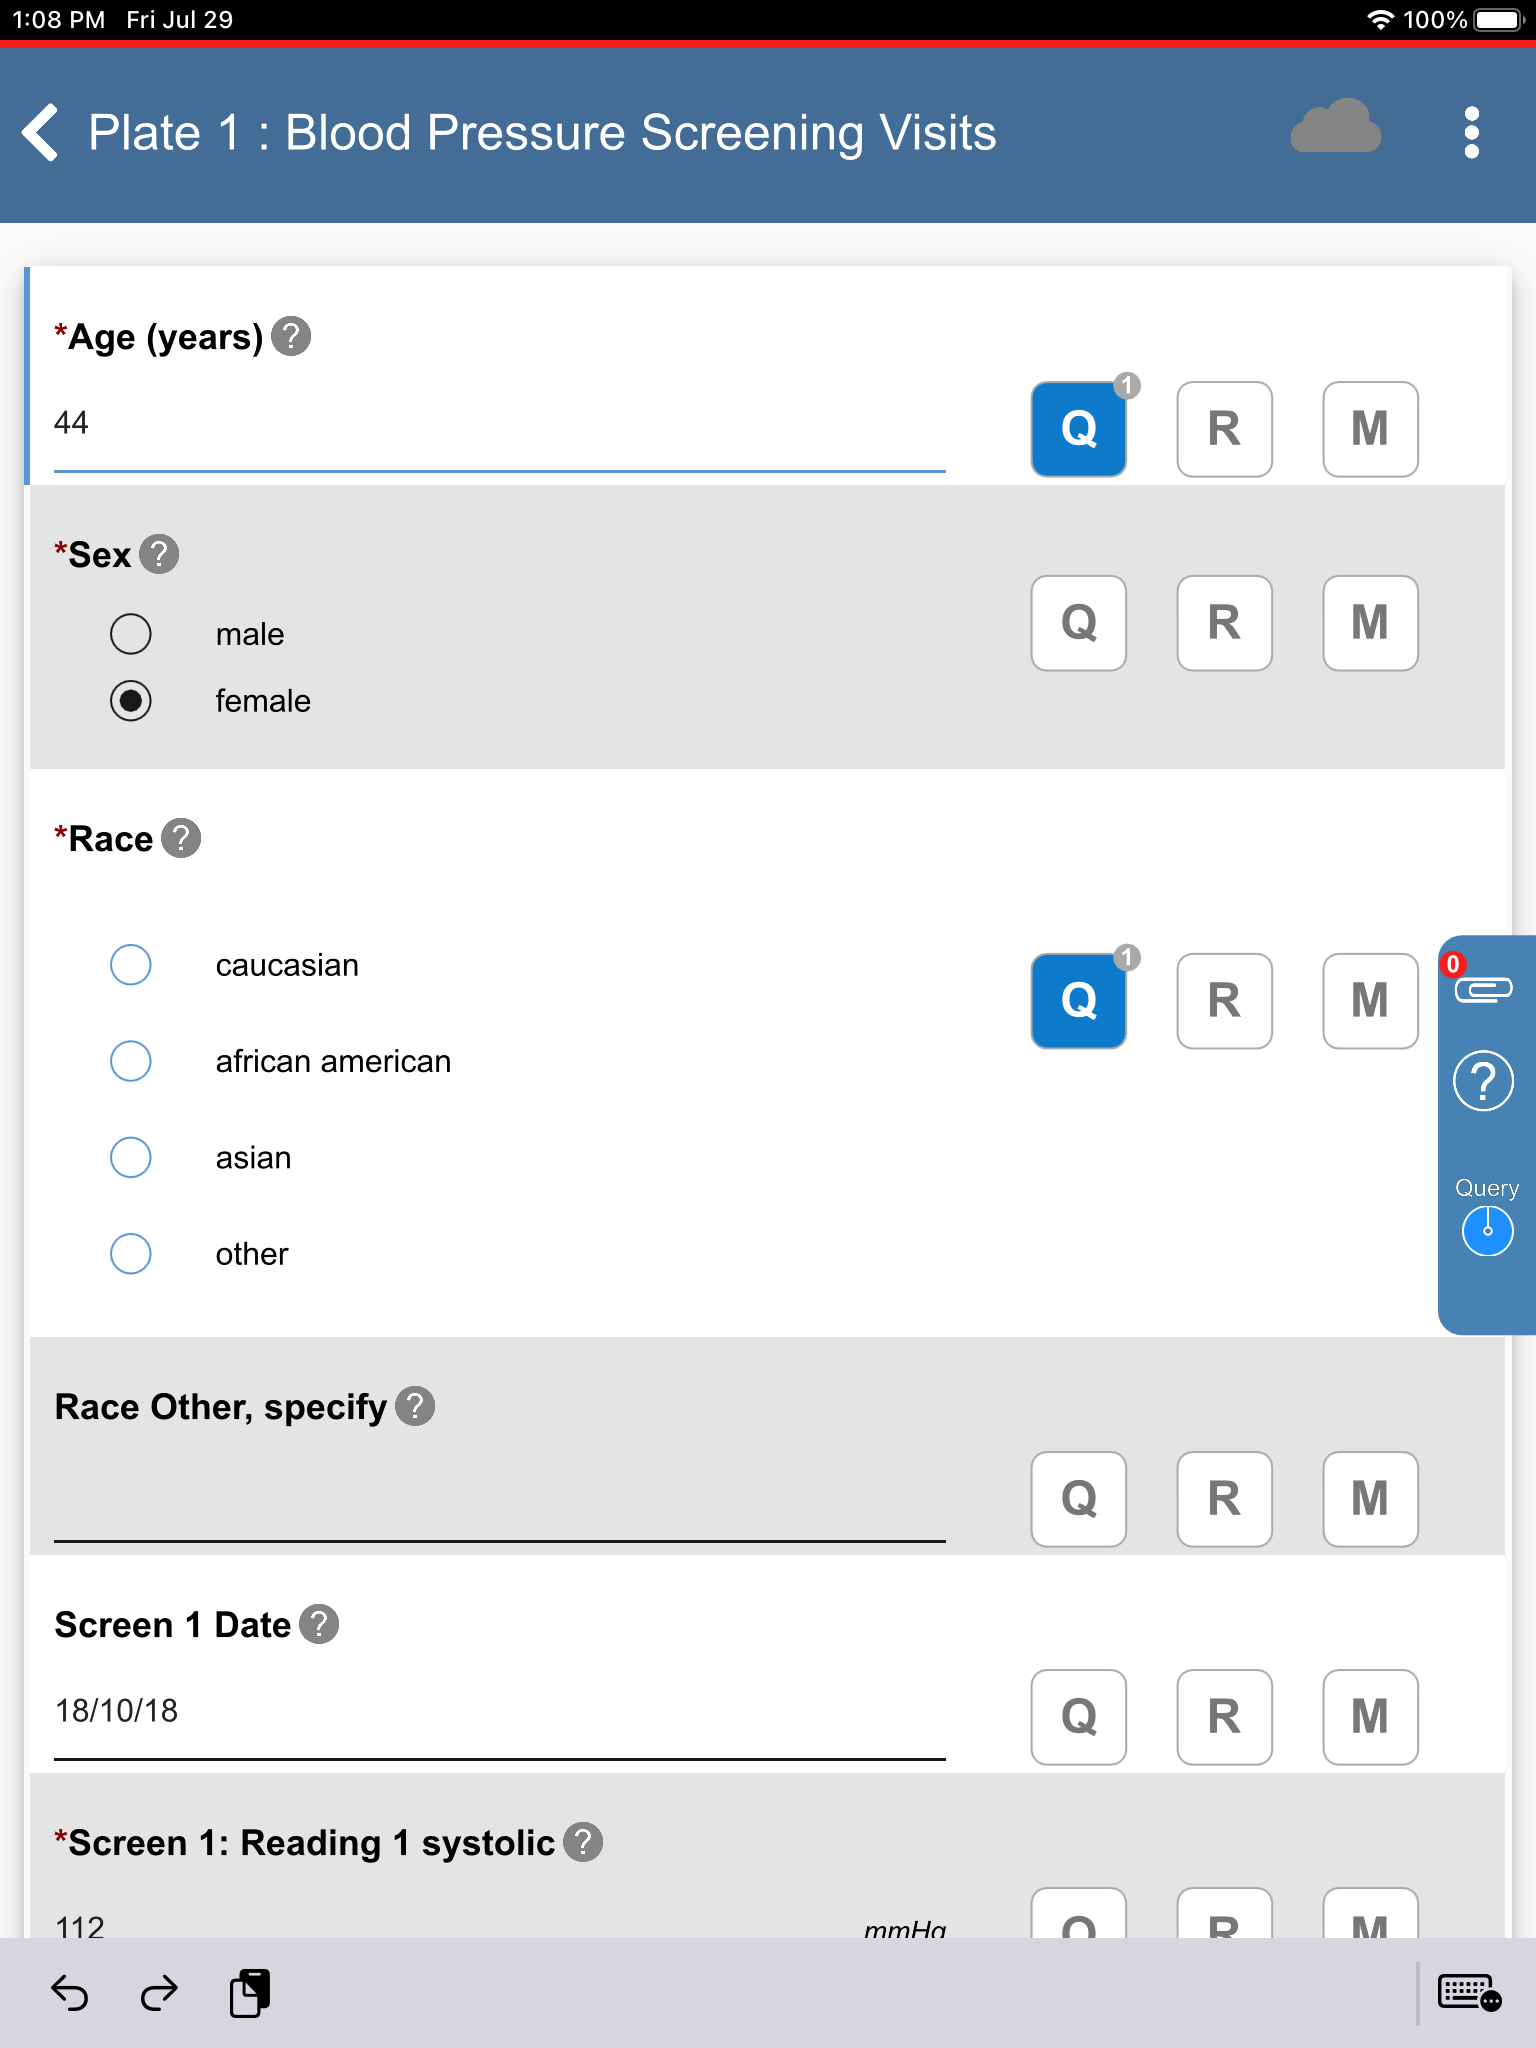
-
Correct Age (years) from
44to68. Click >
>  , select Resolved from the Status drop-down list. Click > .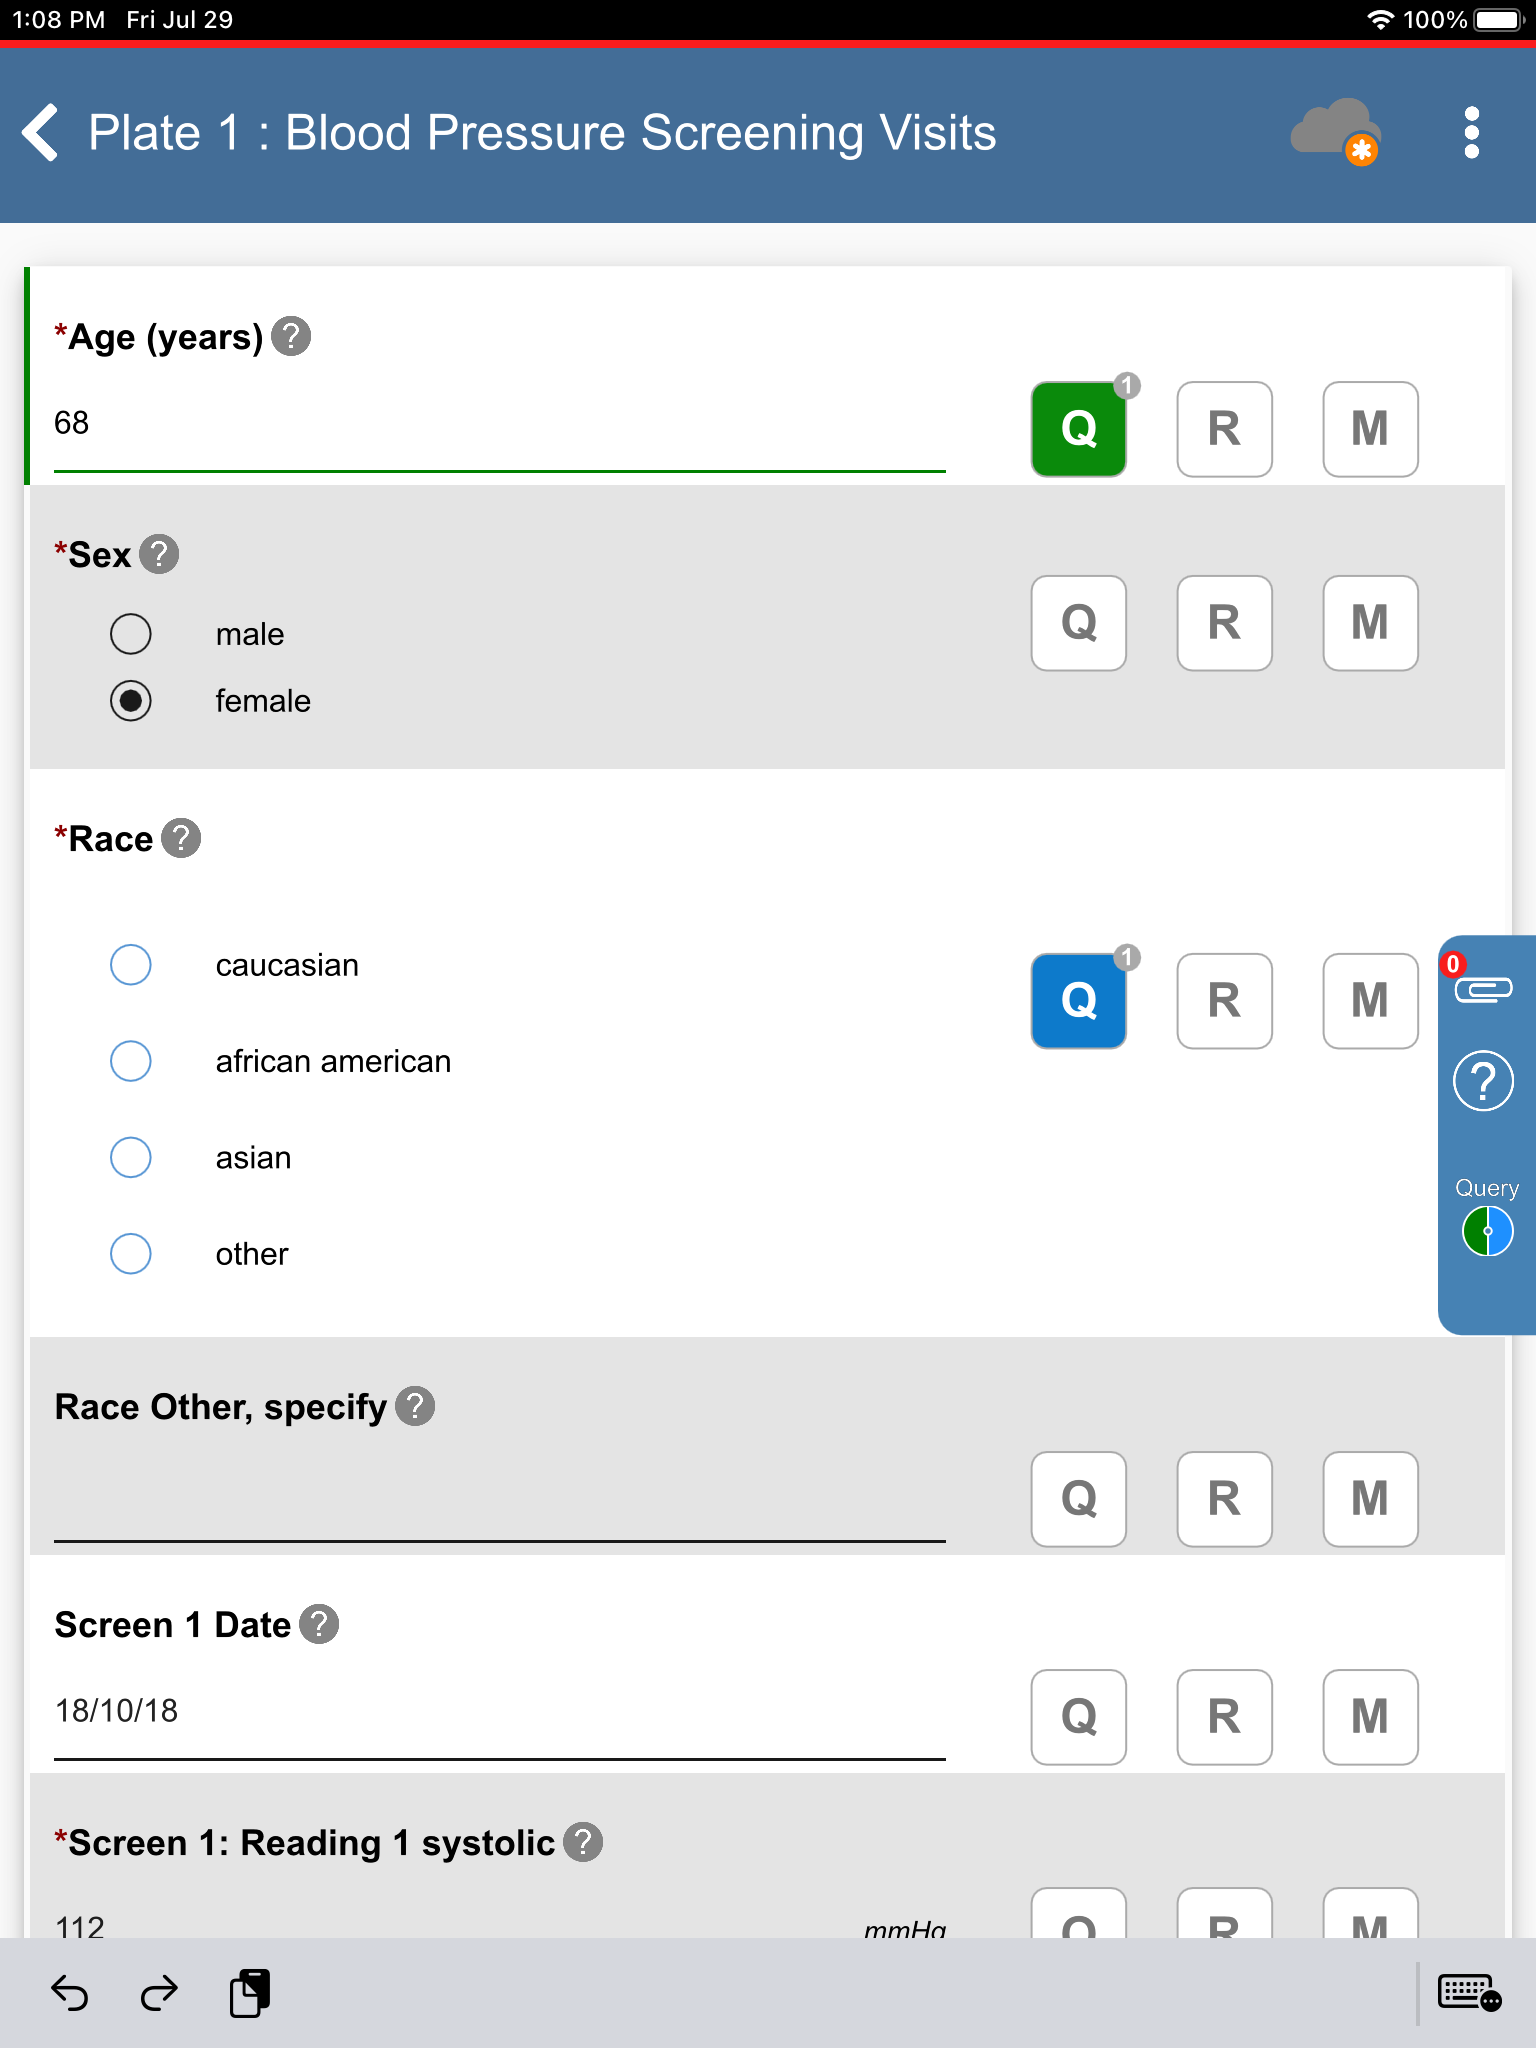
-
Click Race. Select african american, the query box changes from outstanding to resolved. Click
. 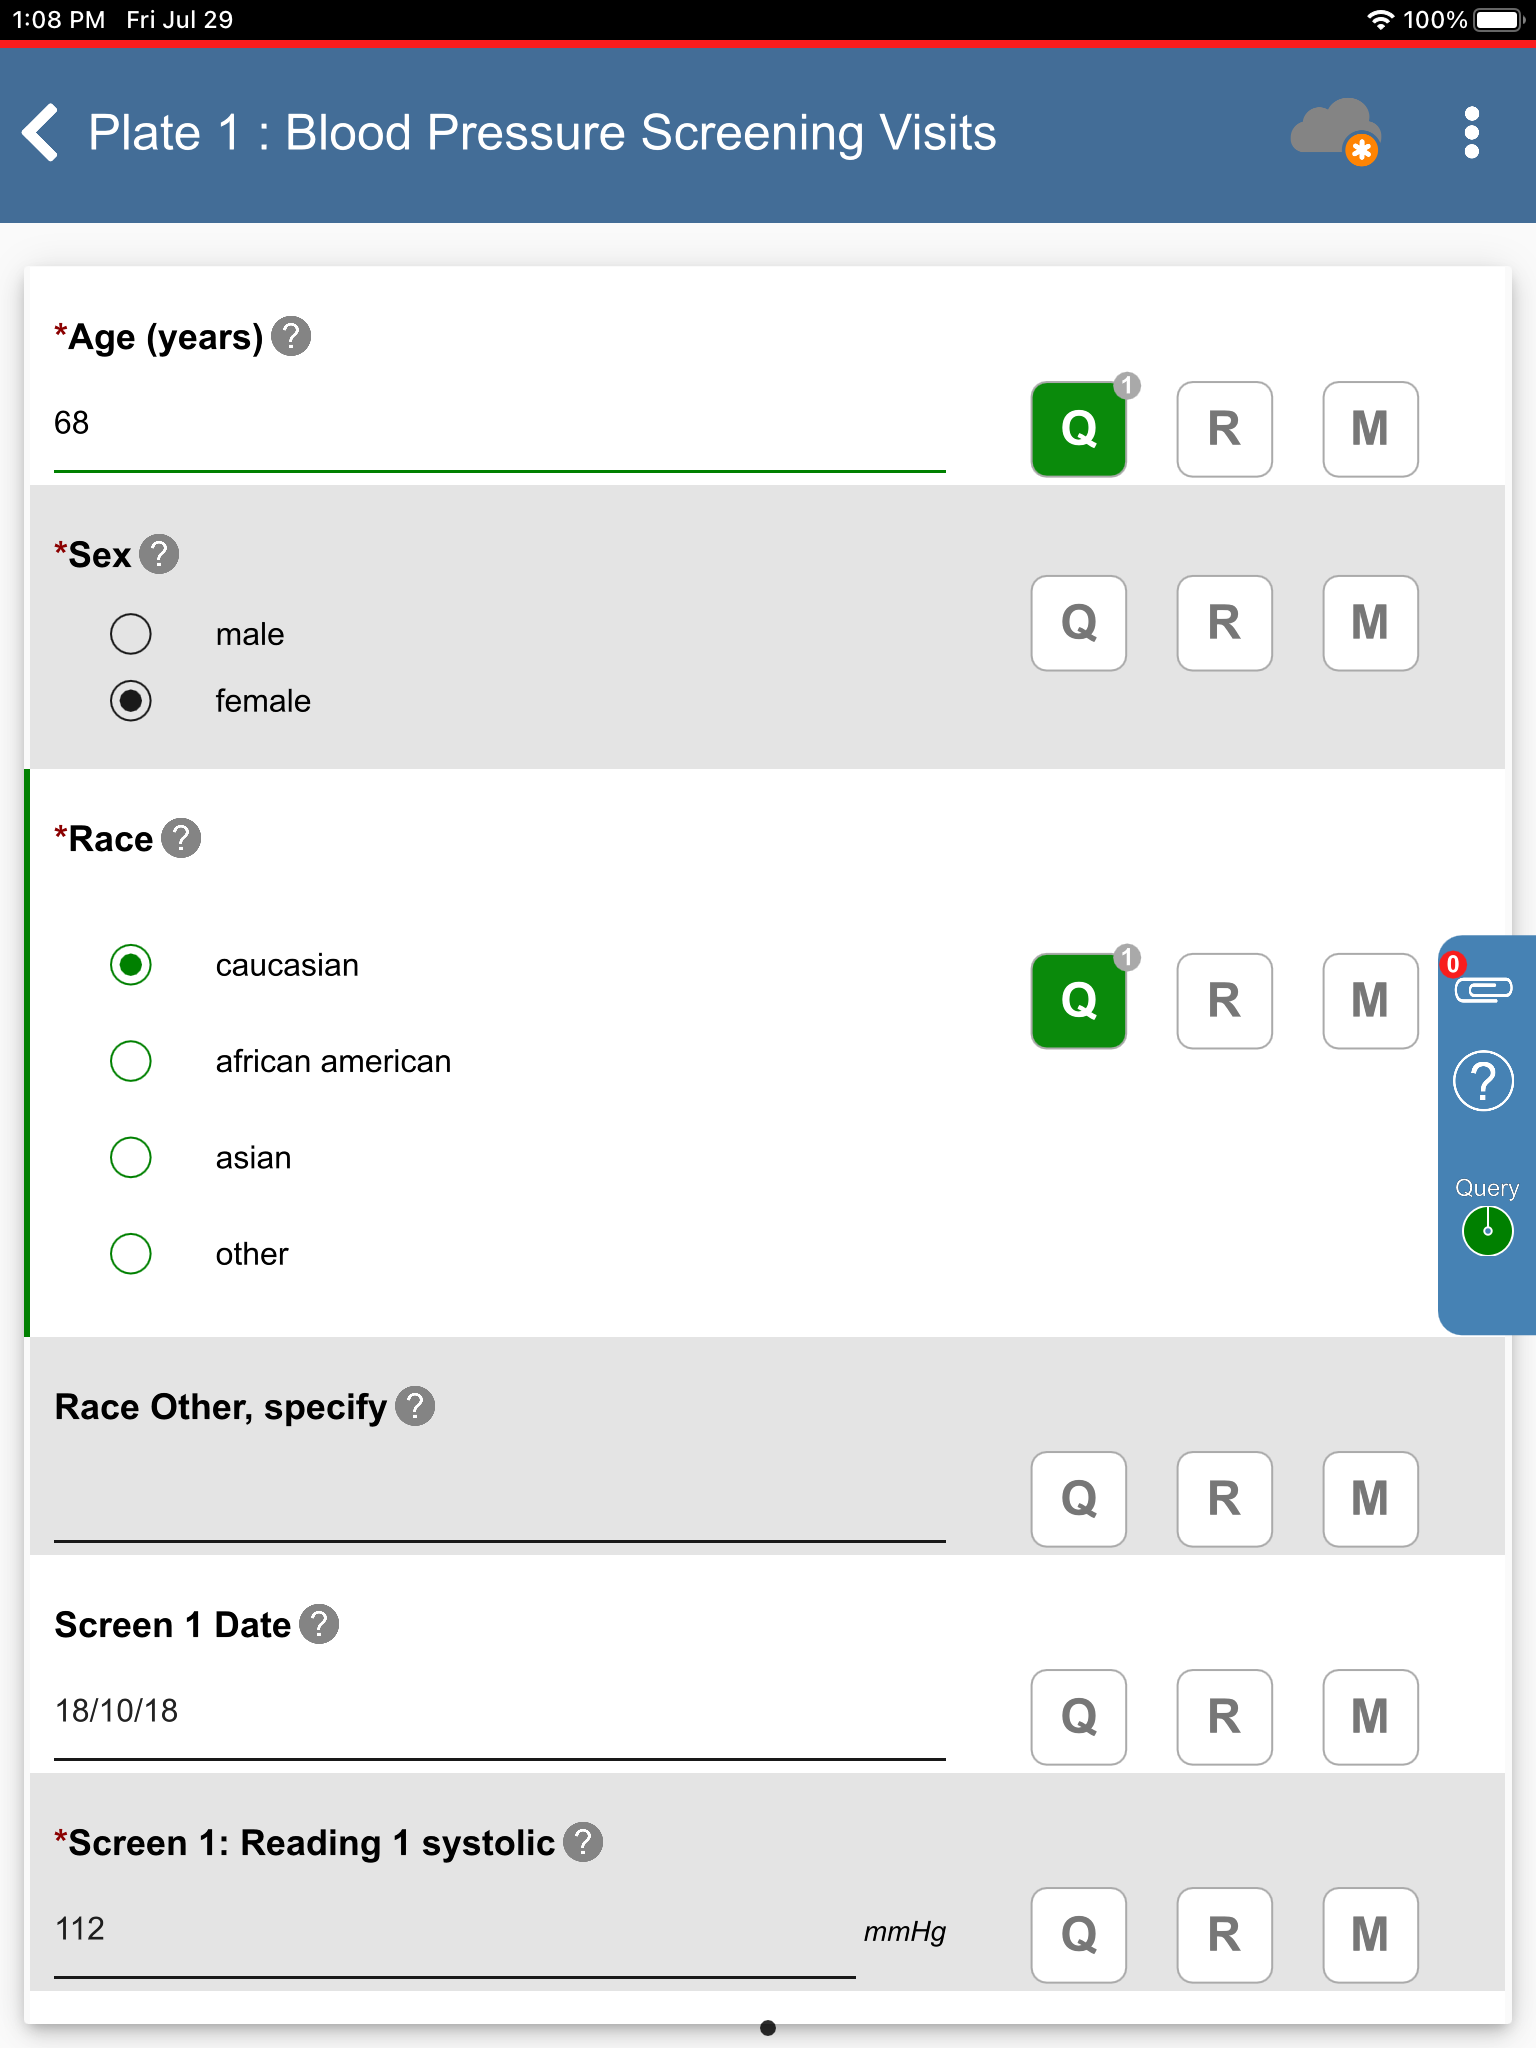
-
Click
to return to Query View. Confirm the outstanding query for 99009 > Age (years) and Race fields are no longer present. Click .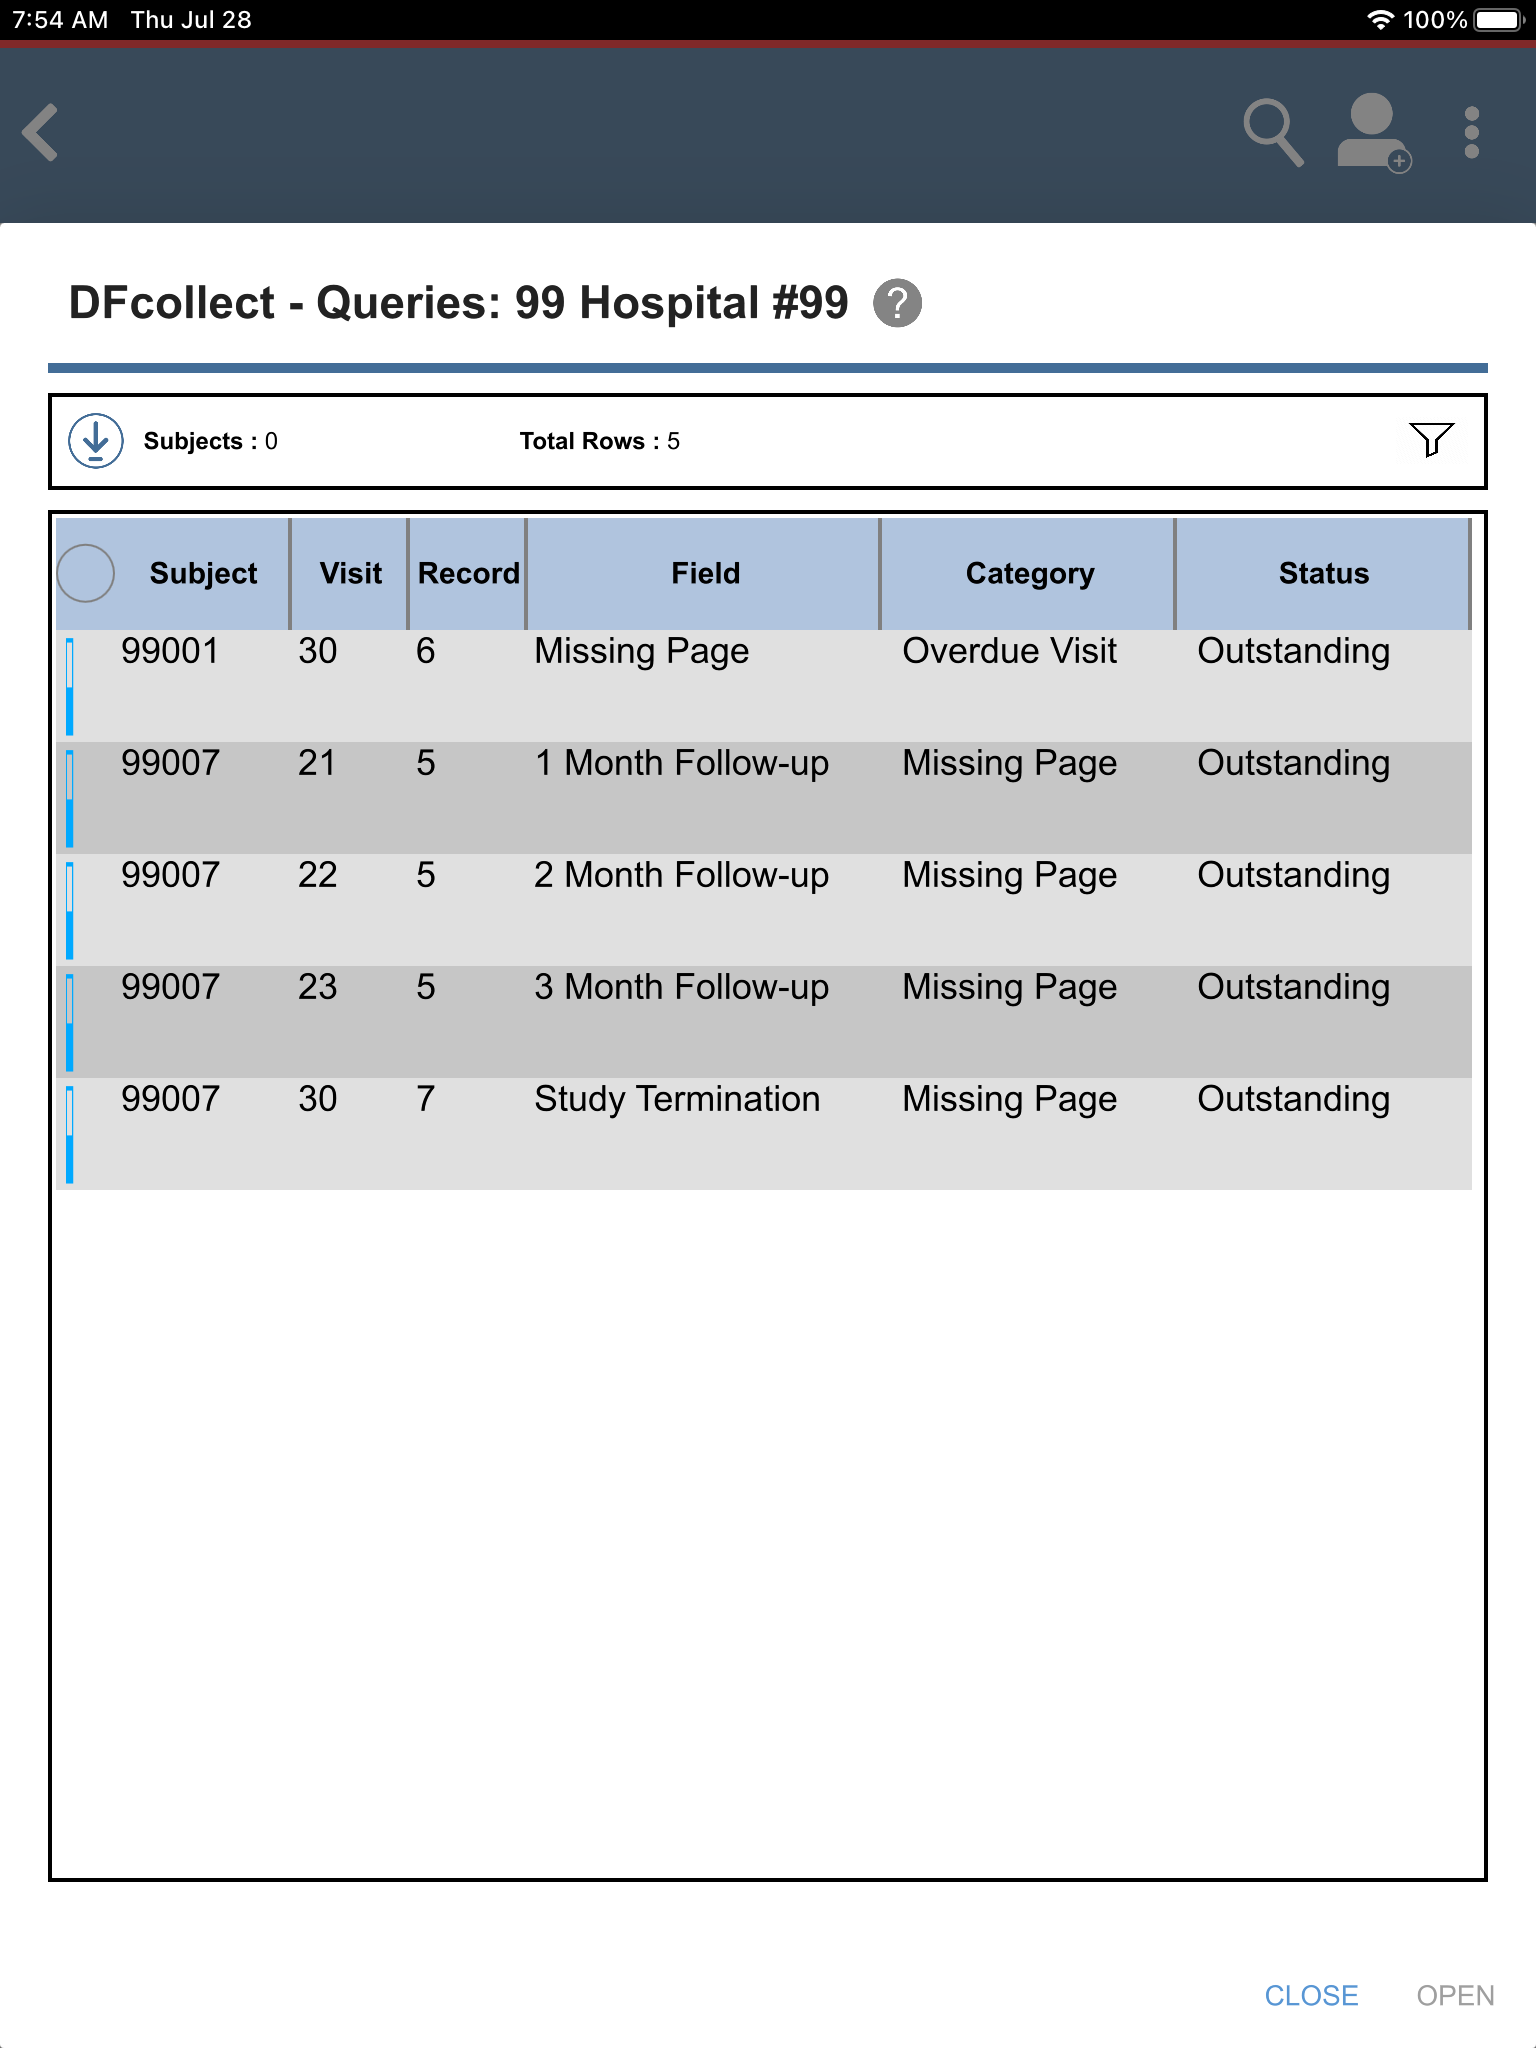
-
Click 99010 : (Incomplete) > 1: Baseline > 2: Form 2. Set:
Weight (lbs) =
267, click in the resulting dialog.Height (in) =
072.8Pulse = click
, select Missing Value from the Code drop-down list. Smoking Status = Never smoked
Date of First Study Follow-up = Click
, select 05/12/18.
Click
. Note The Weight (kgs) and Height (cm) fields are auto-populated as a result of edit checks.
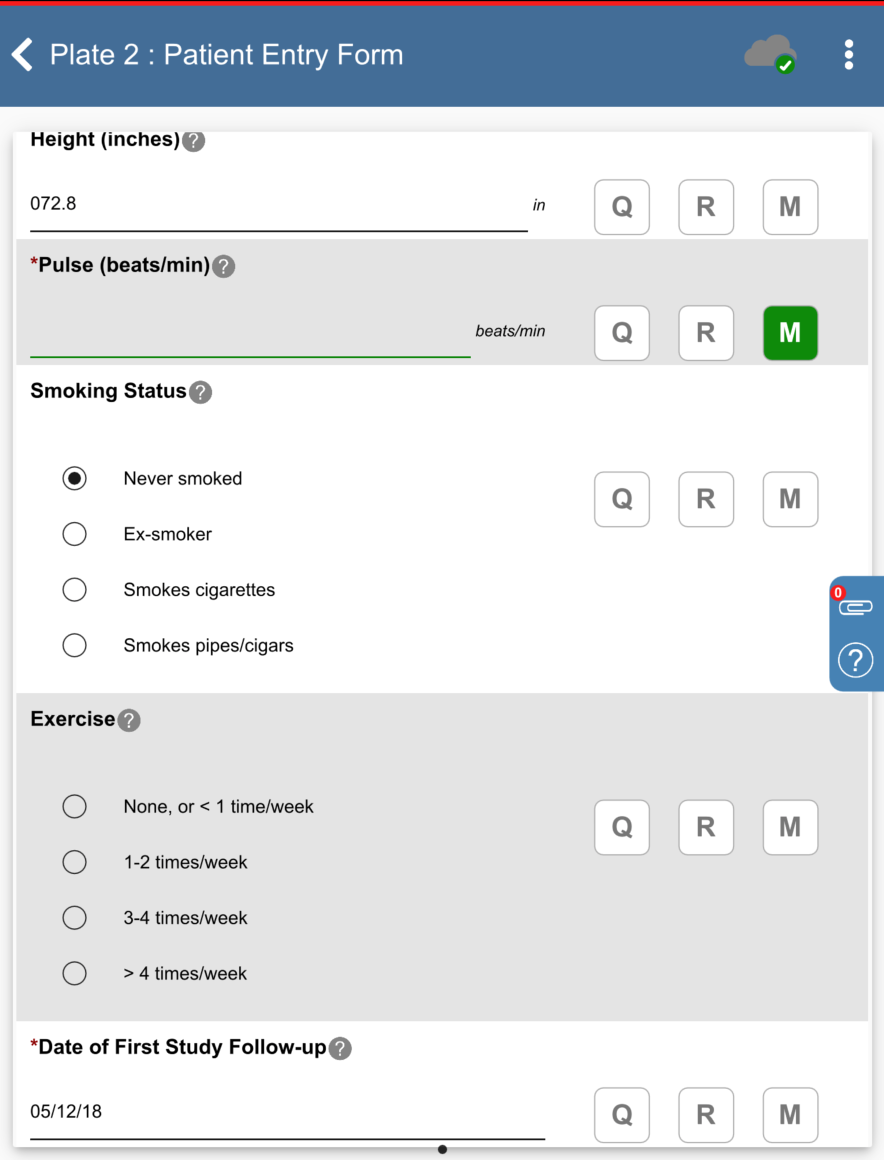
-
Click
> , to logout of DFcollect.
-
Click
> Preferences > Offline Only toggle button to disable the Offline Only mode (becomes greyed out). Click .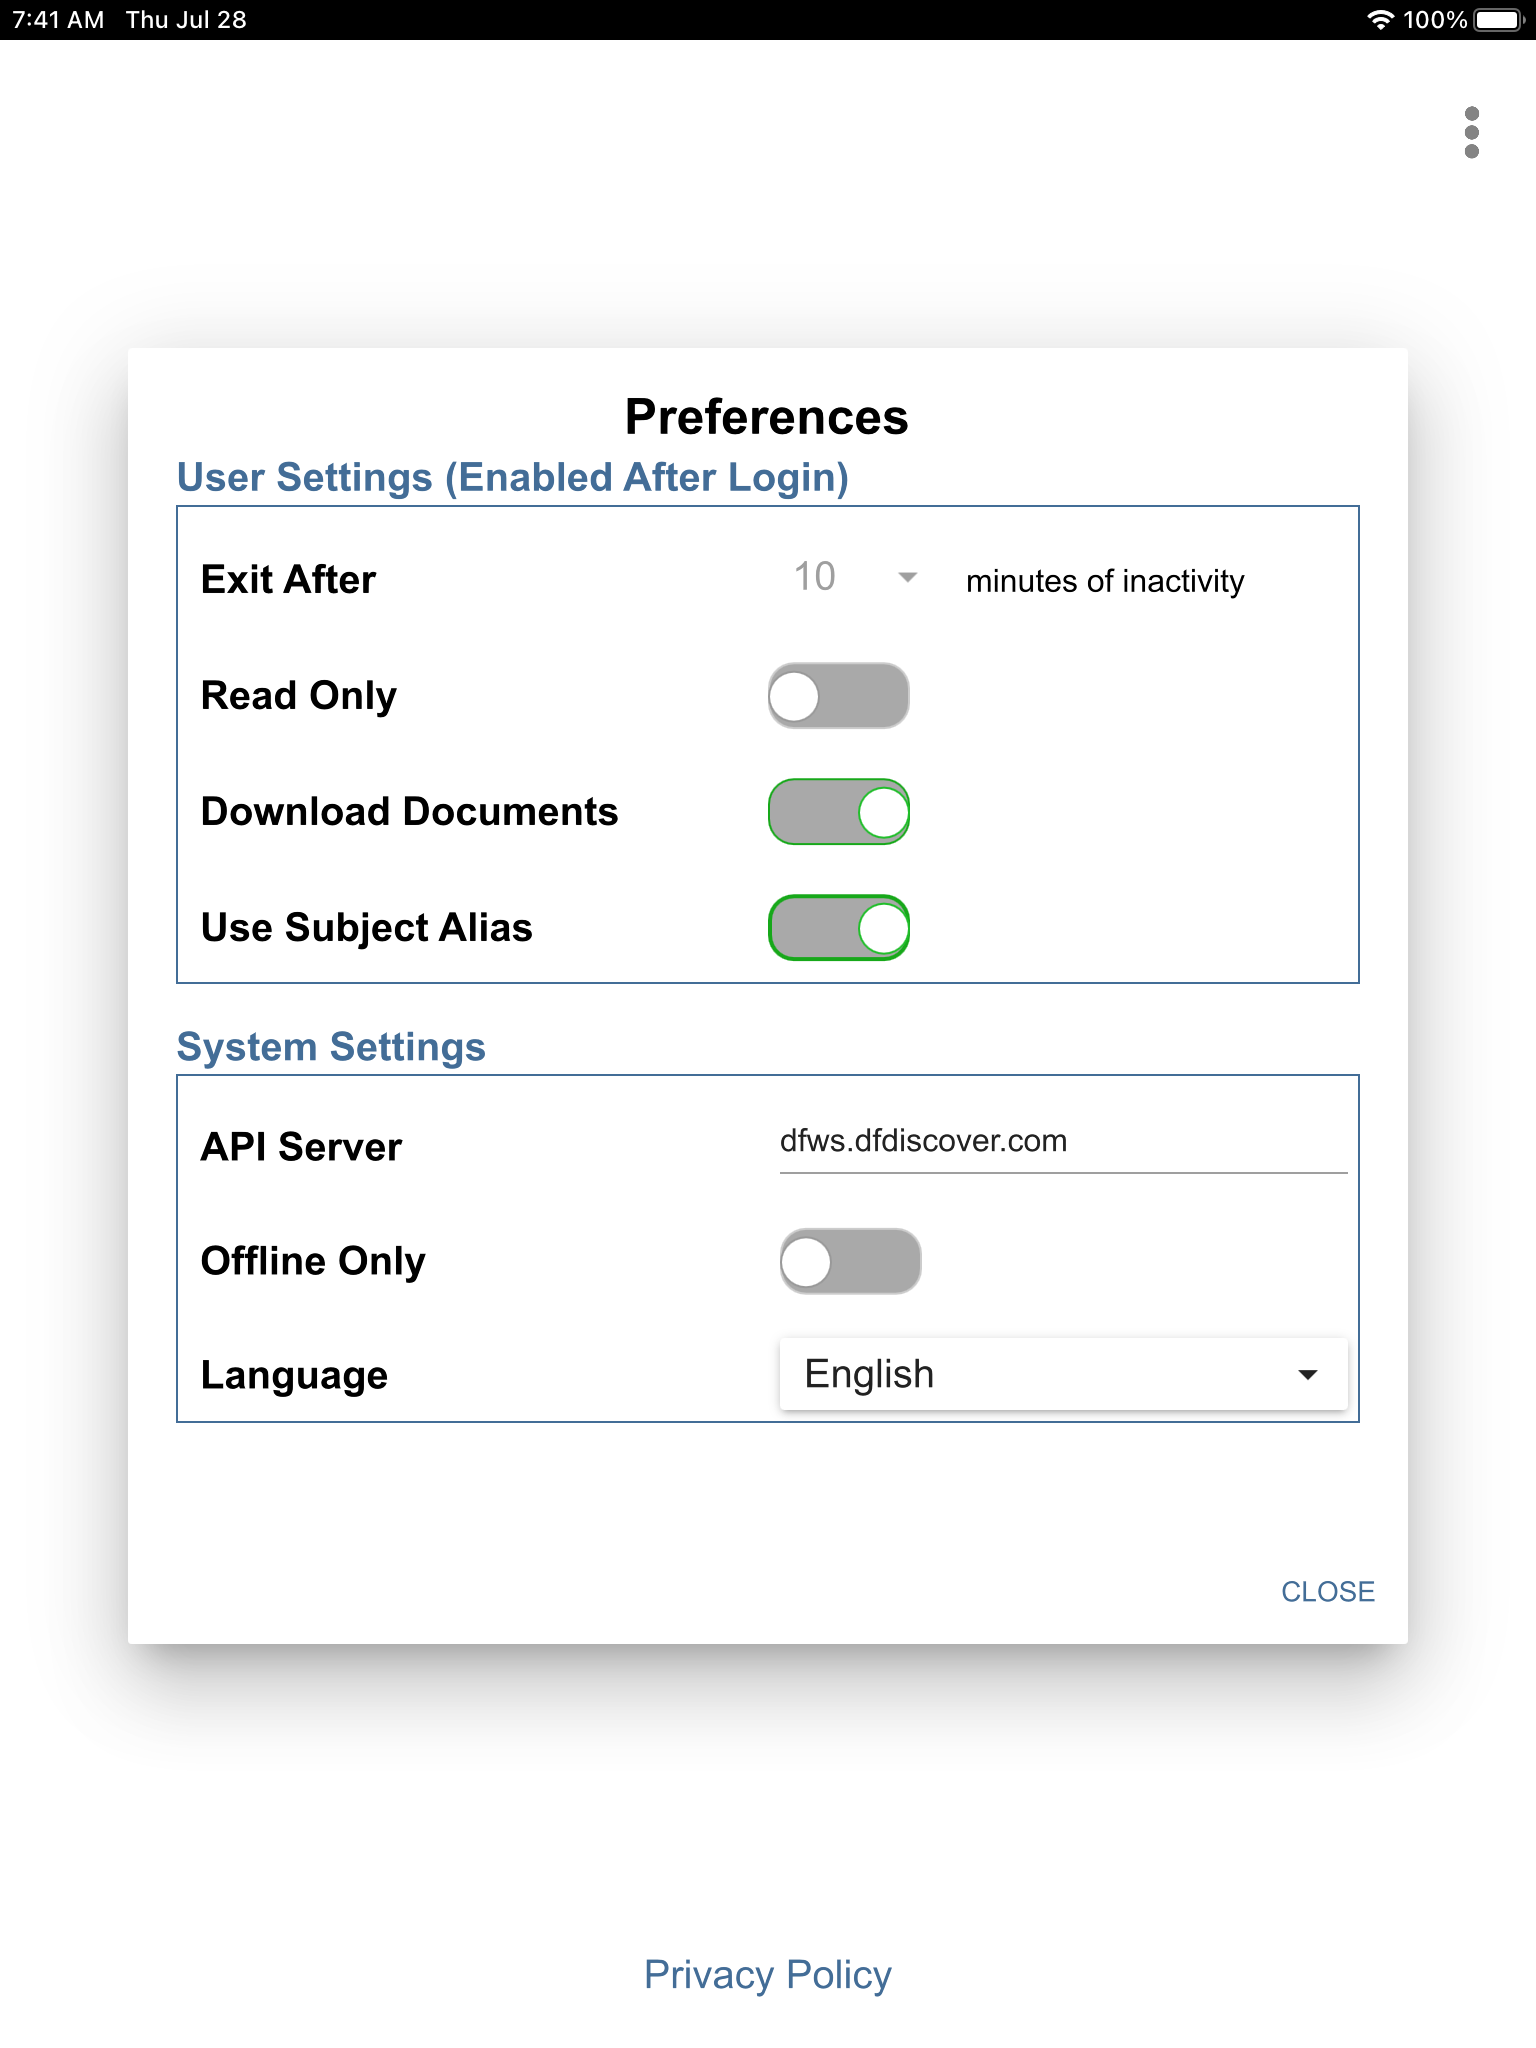
-
In the DFcollect login dialog, enter the name for DFdiscover Server that has been provided by your administrator. Enter
site_monitorin the Username field and the previously assigned password in the Password field. Click to login. -
Upon logging into DFcollect, the
 icon is displayed next to 99: Hospital #99 indicating there are cached changes in DFcollect that have not been saved to the database.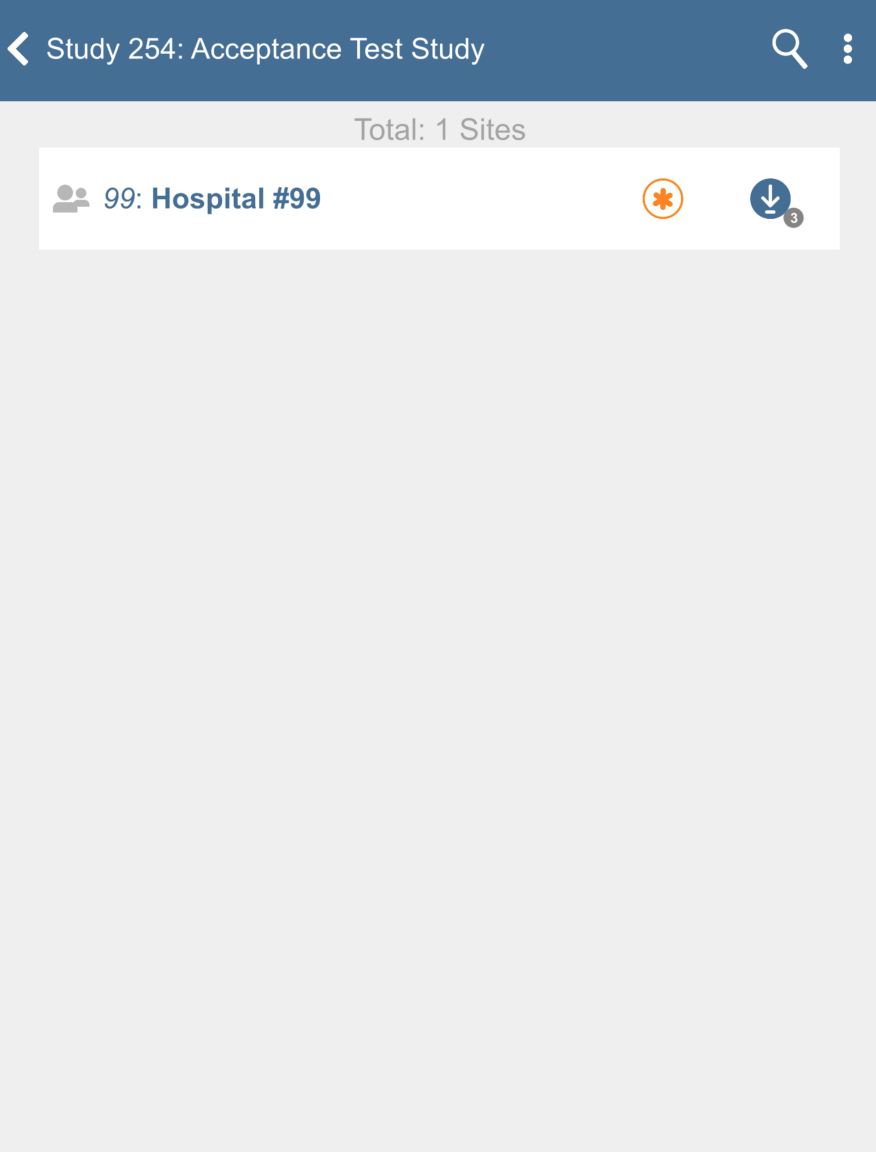
-
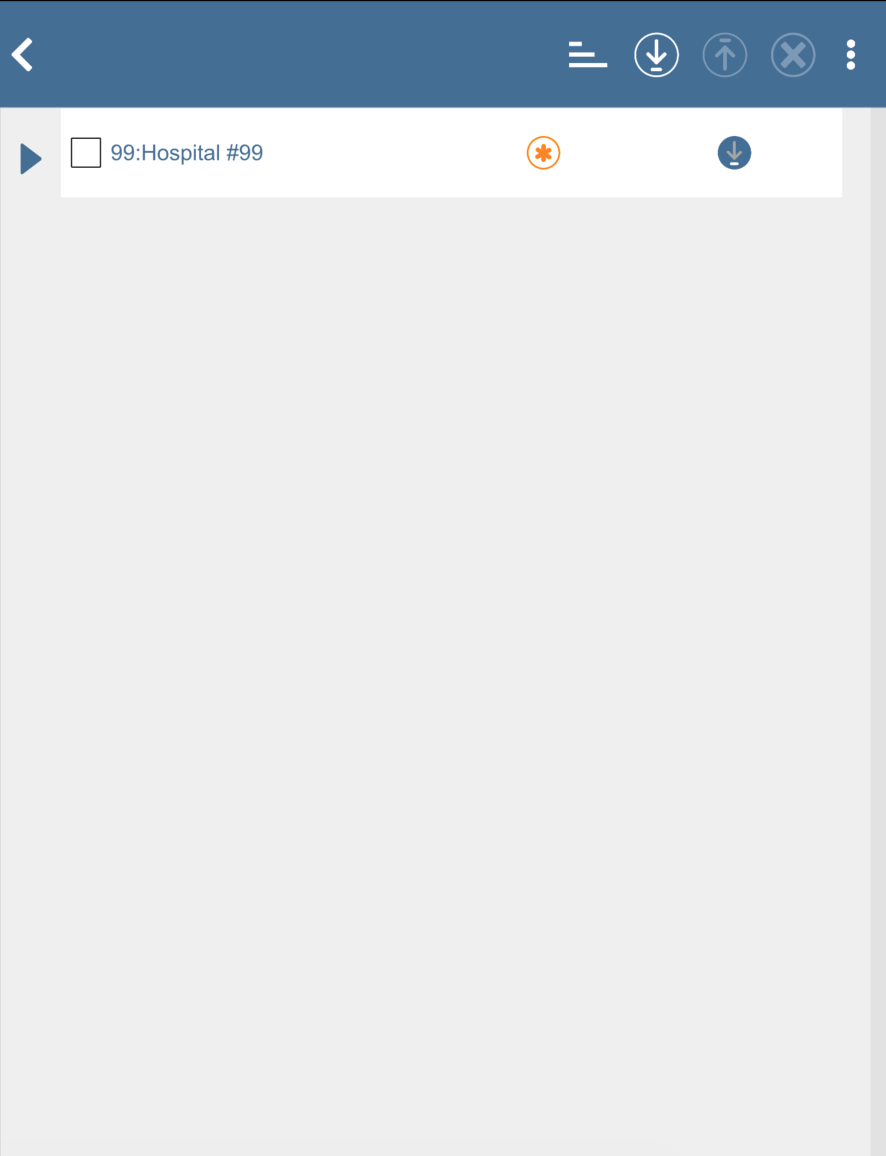
-
Click
to expand list of subjects. Check (enable) subjects 99008: 2 Visits, 99009: 3 visits and 99010: 3 visits.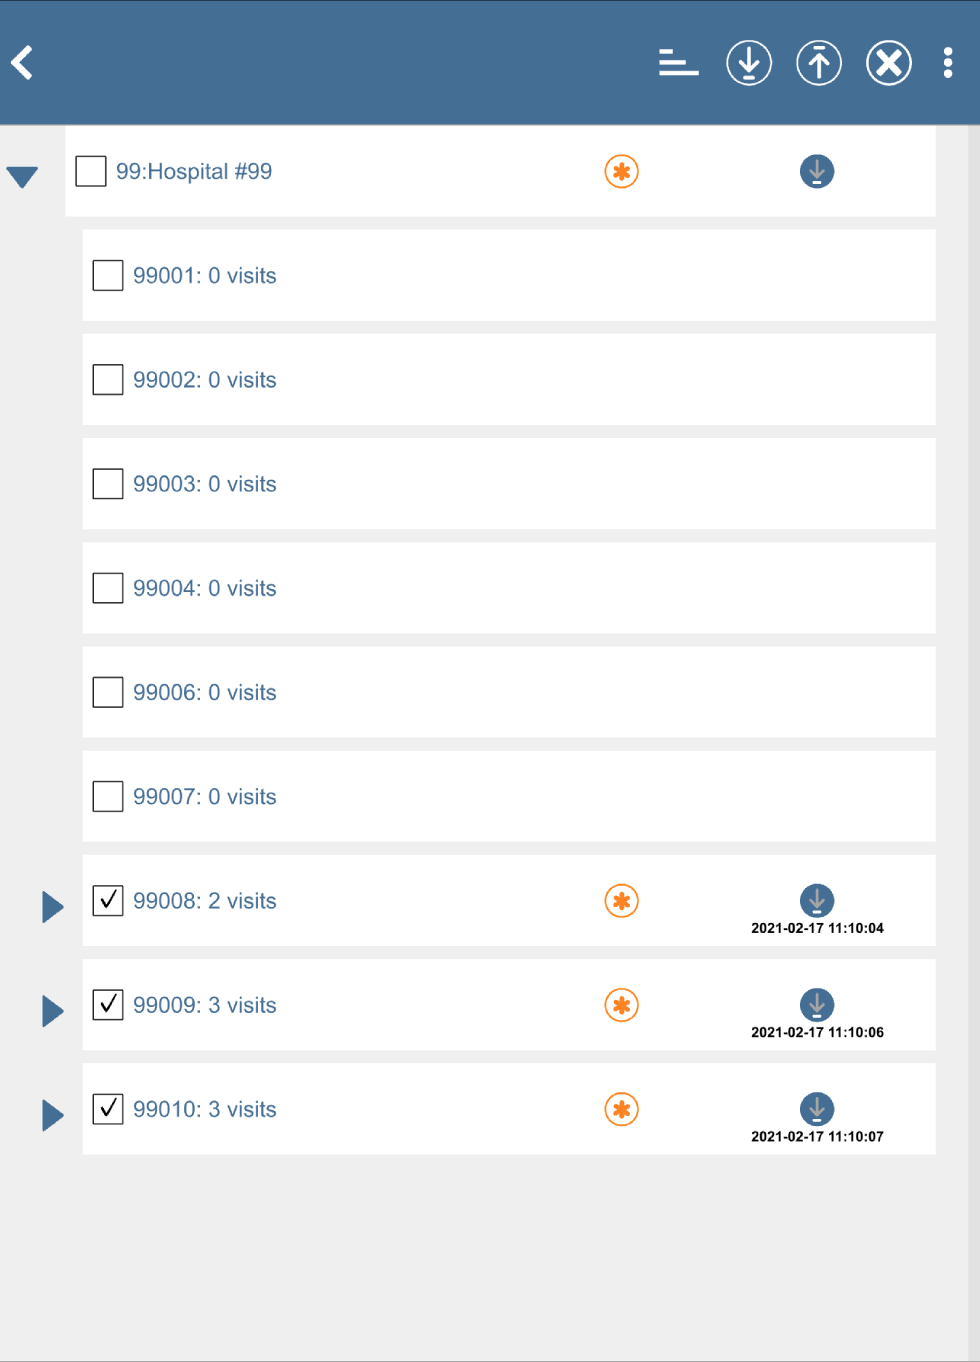
-
Click
 to upload the previously entered subject data. When the upload is complete, click to dismiss the Upload Progress window. The icon shows the date and time of successful upload.
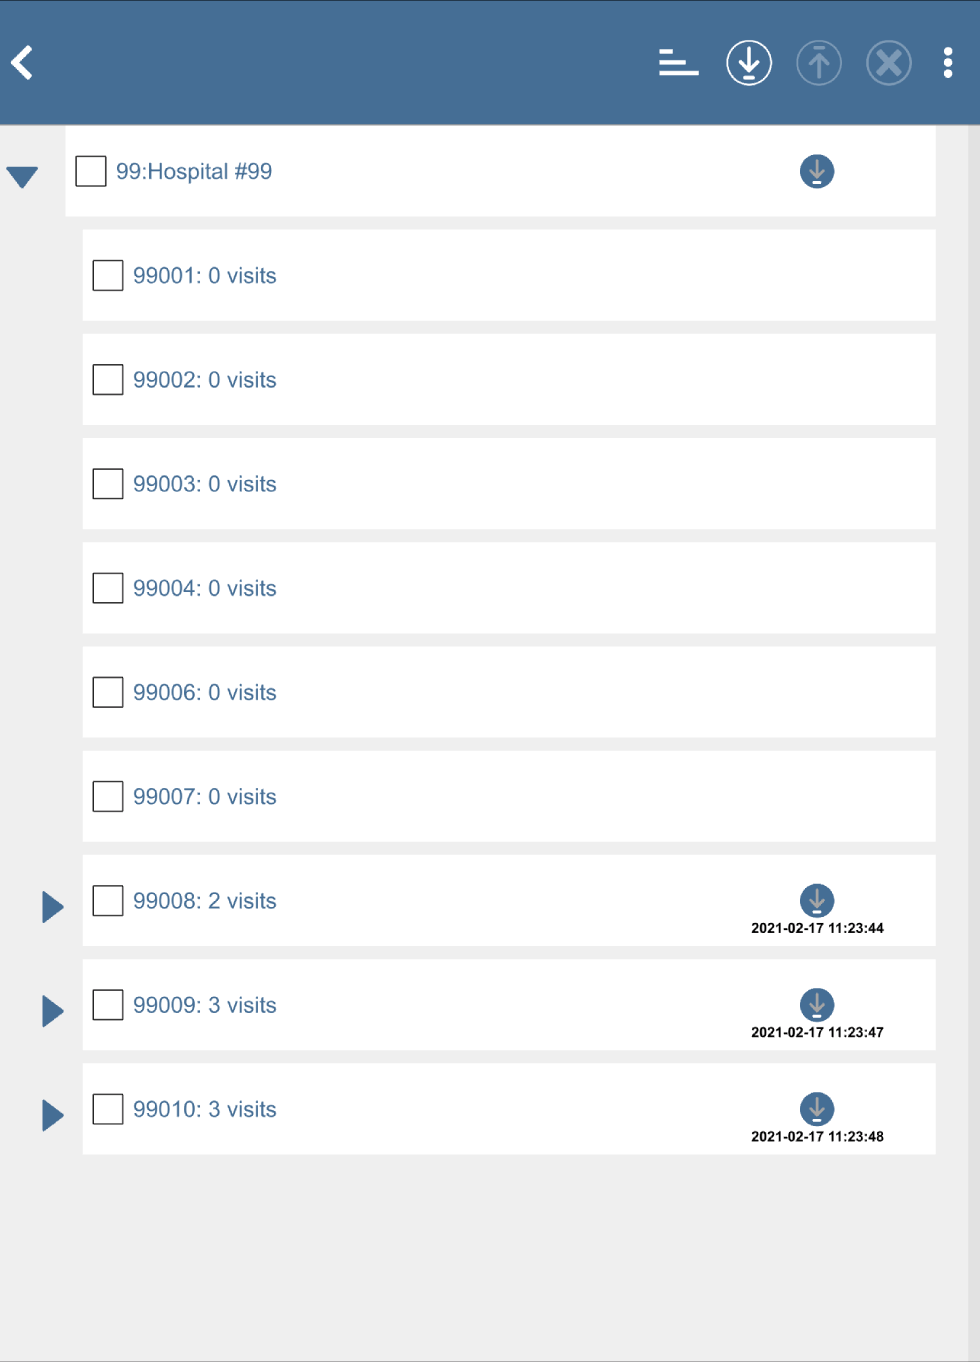
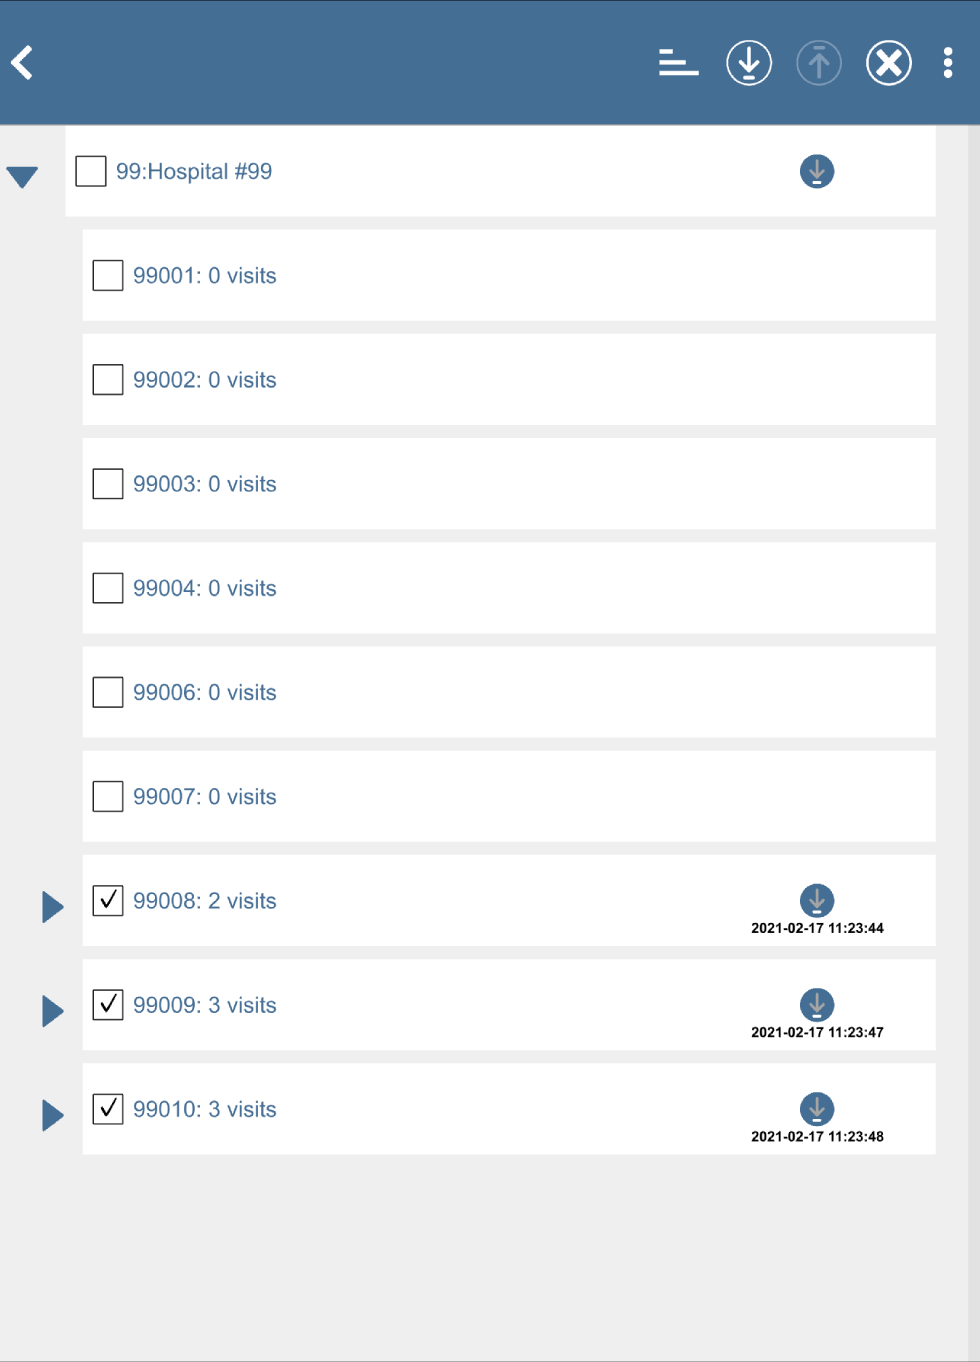

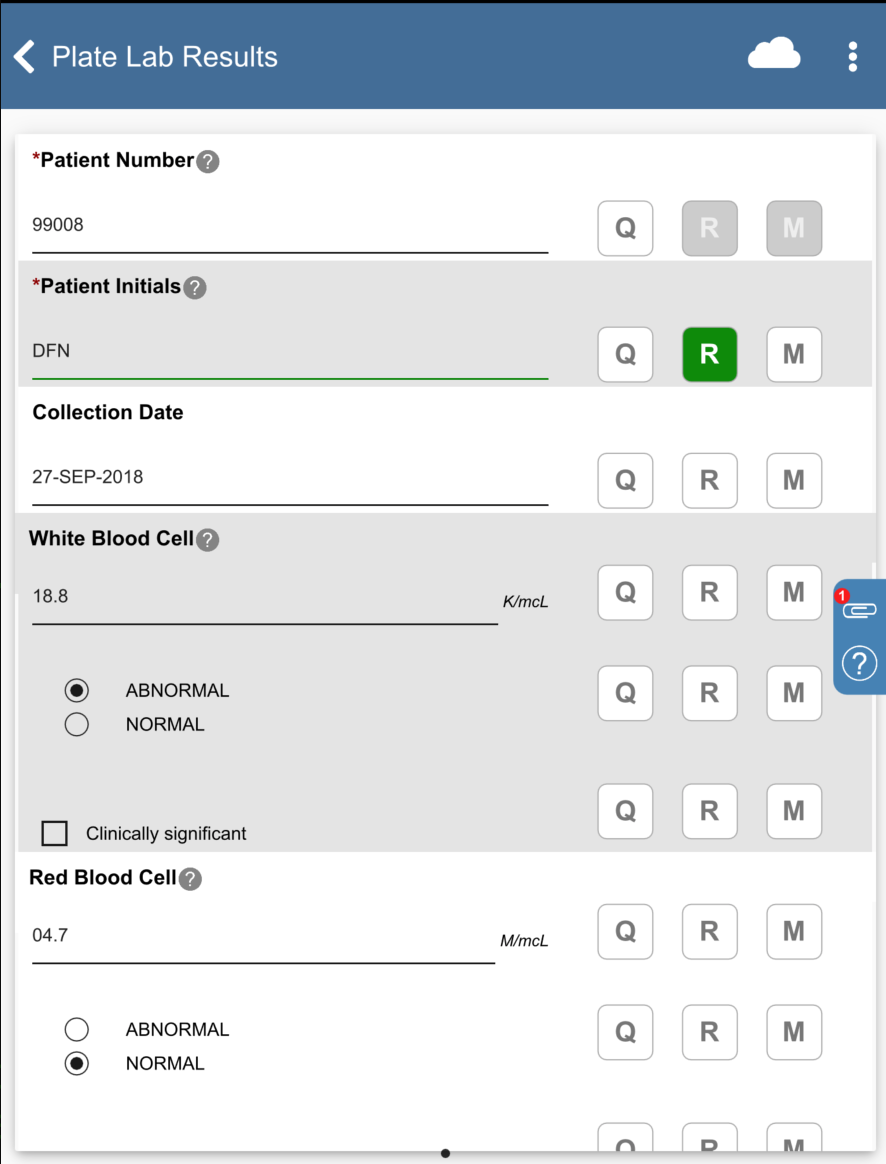

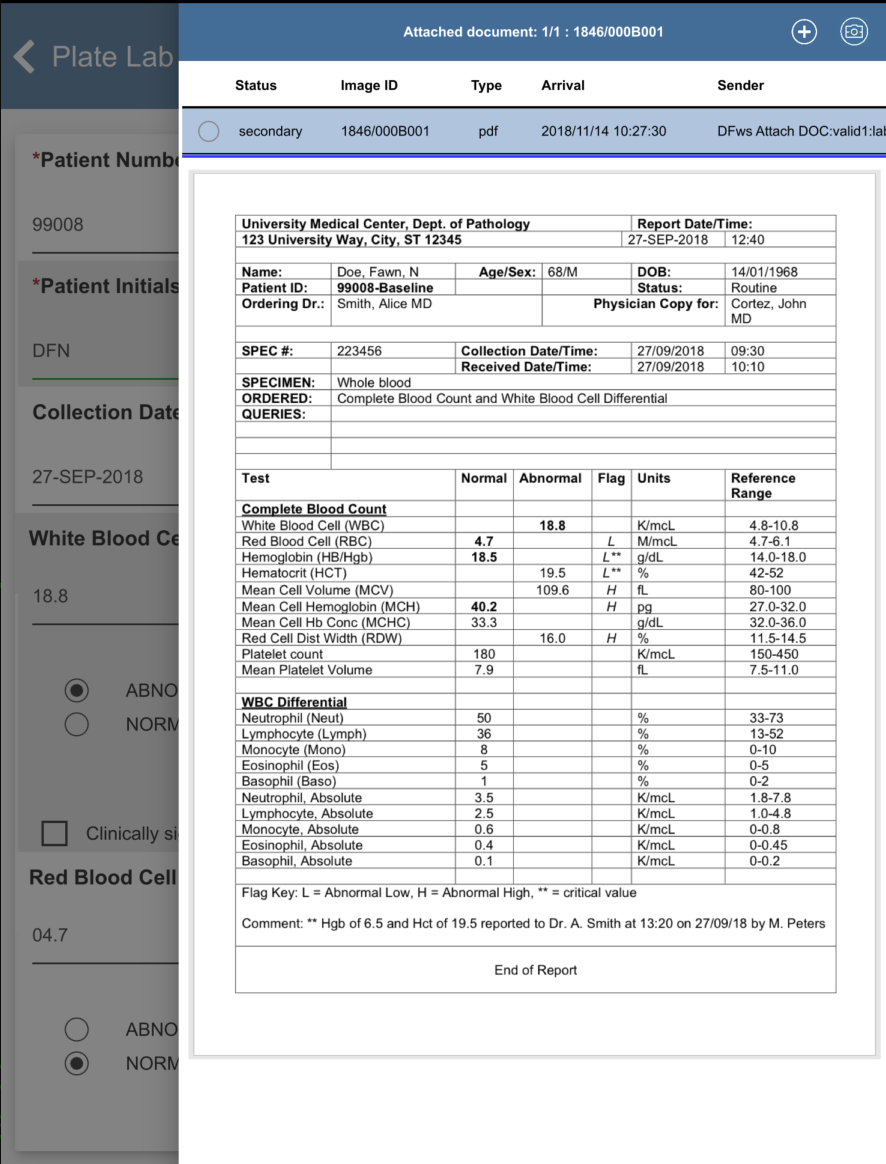
-
Start DFexplore, login as
data_managerand choose 254 Acceptance Test Study as described in Section 1.7, “How to start DFexplore”. -
Select Site 99: Hospital #99 > subject 99009 > 0: Screening Visits > 1: Form 1. Verify and review the data uploaded is correct.
Age (years) = 68 with a resolved corrected query.
Race = 2 (african american) with a resolved corrected query.
-
Select > to close DFexplore.
| Note |
|---|---|
|
eSignatures require password permission to be set in the user role at the DFadmin level. The Password permission must be granted for the specific eSignature plate. |
-
In the DFcollect; login dialog, enter the DFdiscover Server name that has been provided by your administrator. Enter
site_investin the Username field and the previously assigned password in the Password field. Click to login. -
As user
site_investhas 2FA enabled, enter security code received by email as previously defined.Note Refer to Section 1.8, “Creating user accounts and assigning study permissions.” as a valid email address is required for
site_investto receive 2FA codes. -
From the Subjects list, click Subject 99011 > 30: Study Termination > 7: Form 7.
-
Click Patient Initials enter
SIG, Set:Final Visit Date =
03/06/221. Did patient complete the entire study? = No
Check (enable) Why? Moved away
Check (enable) 2. Last does of study medication: Unknown
Click
. to save and eSign the Study Termination form.
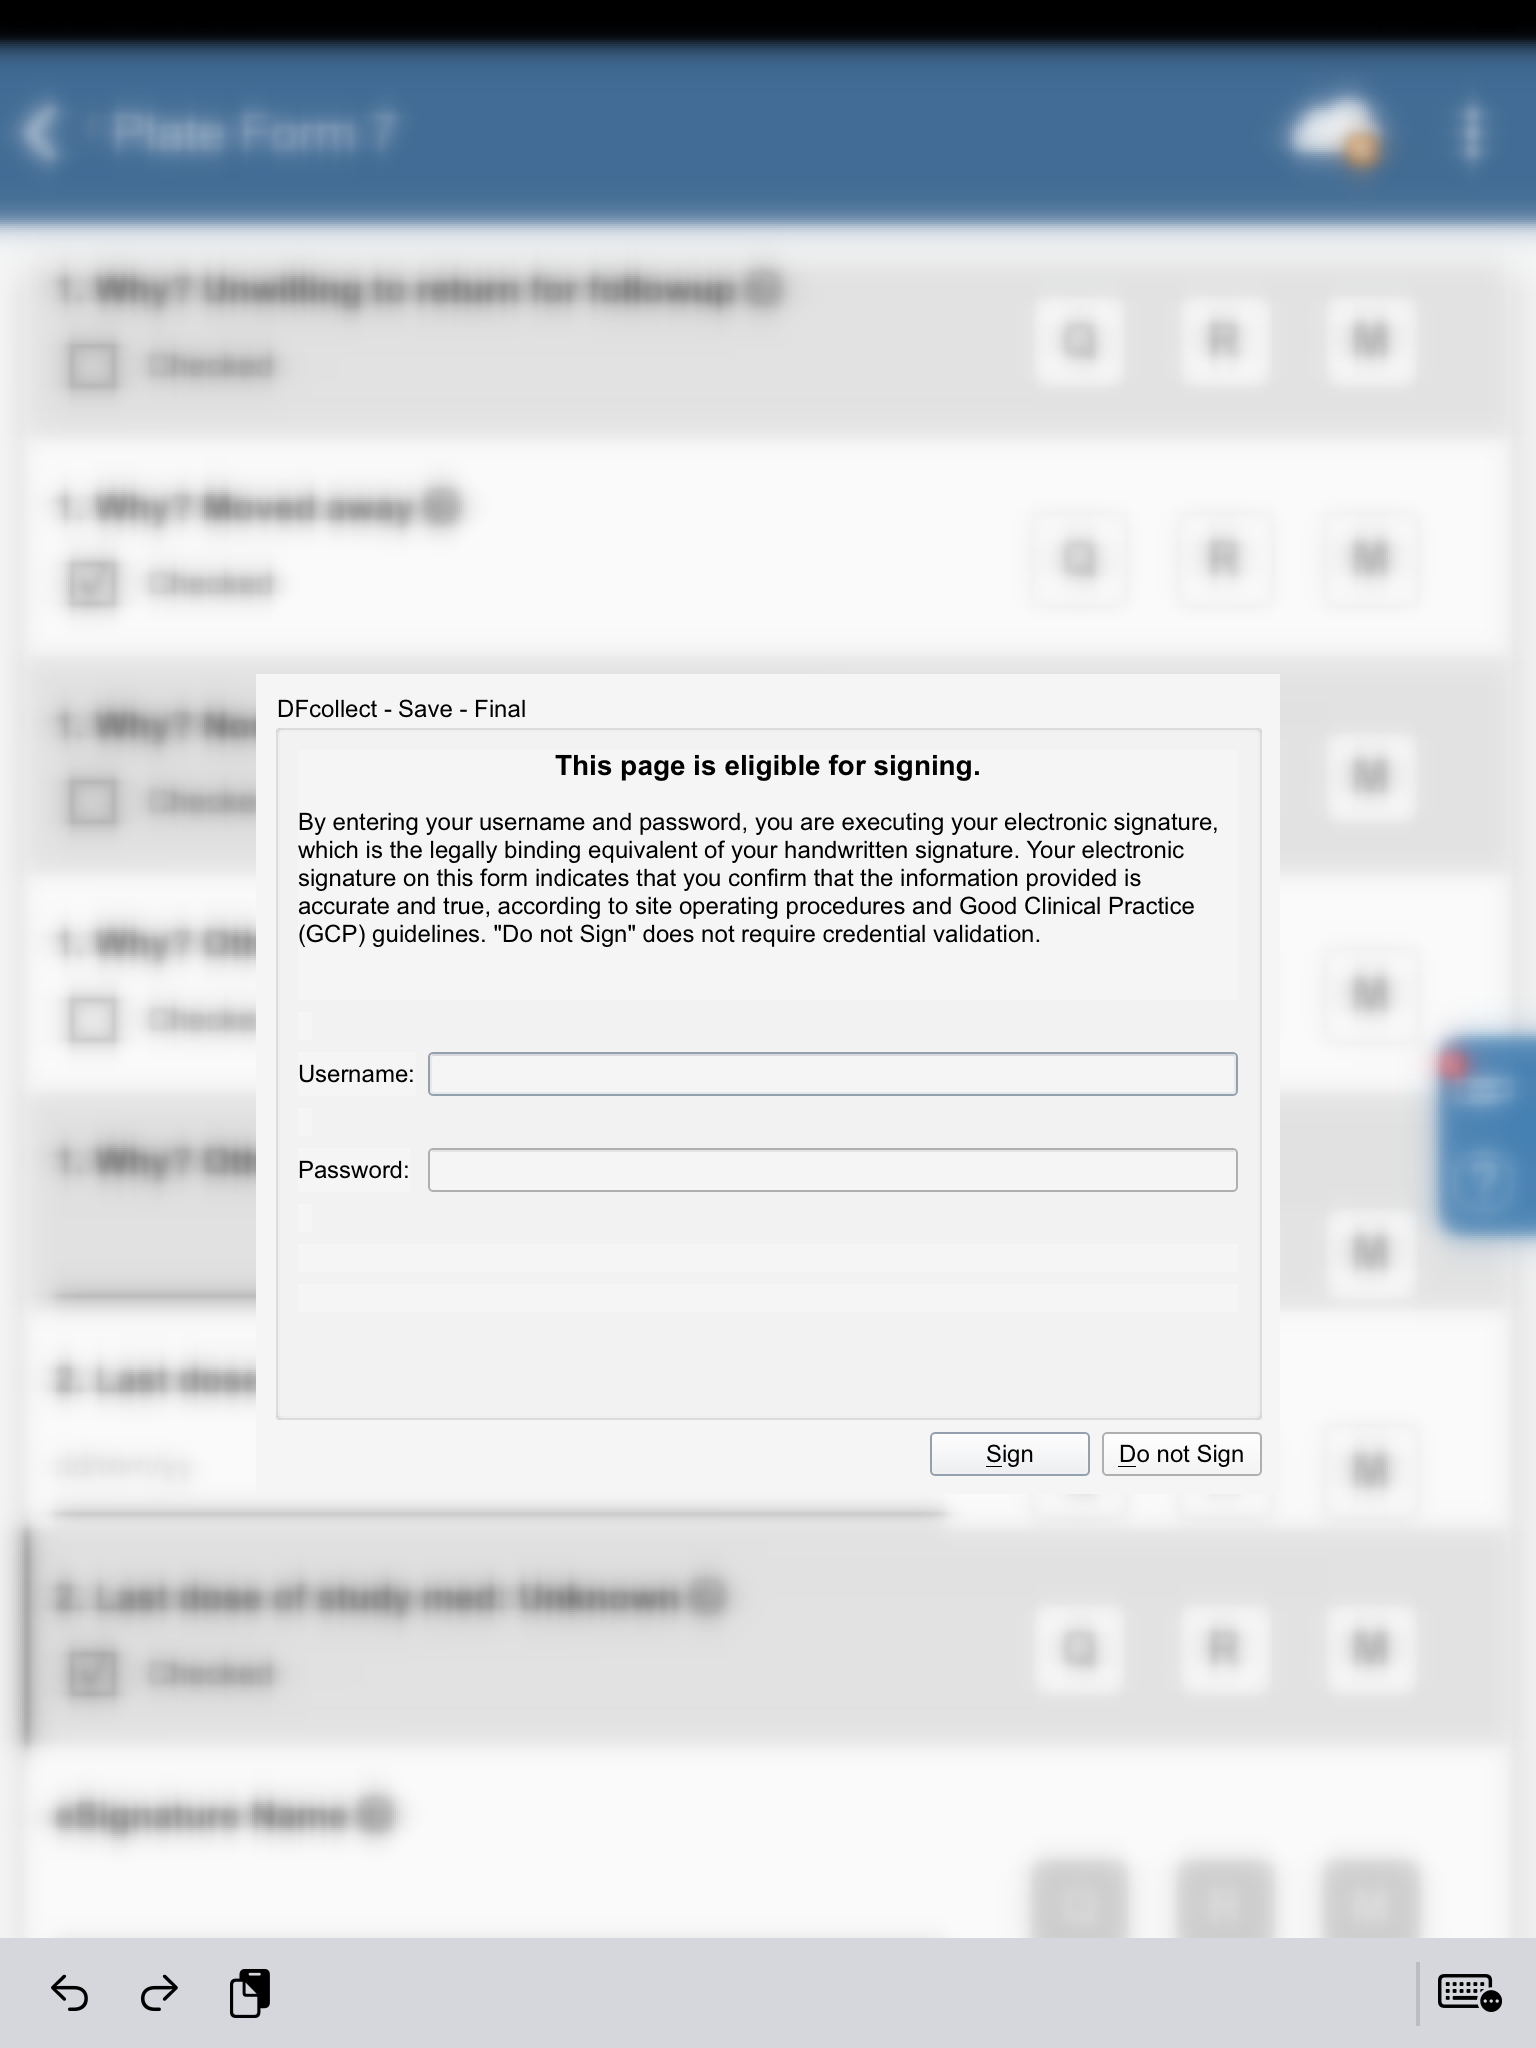
-
In the dfpassword confirmation dialog enter the user name
site_investand the corresponding password. Click to apply the electronic signature to the current page.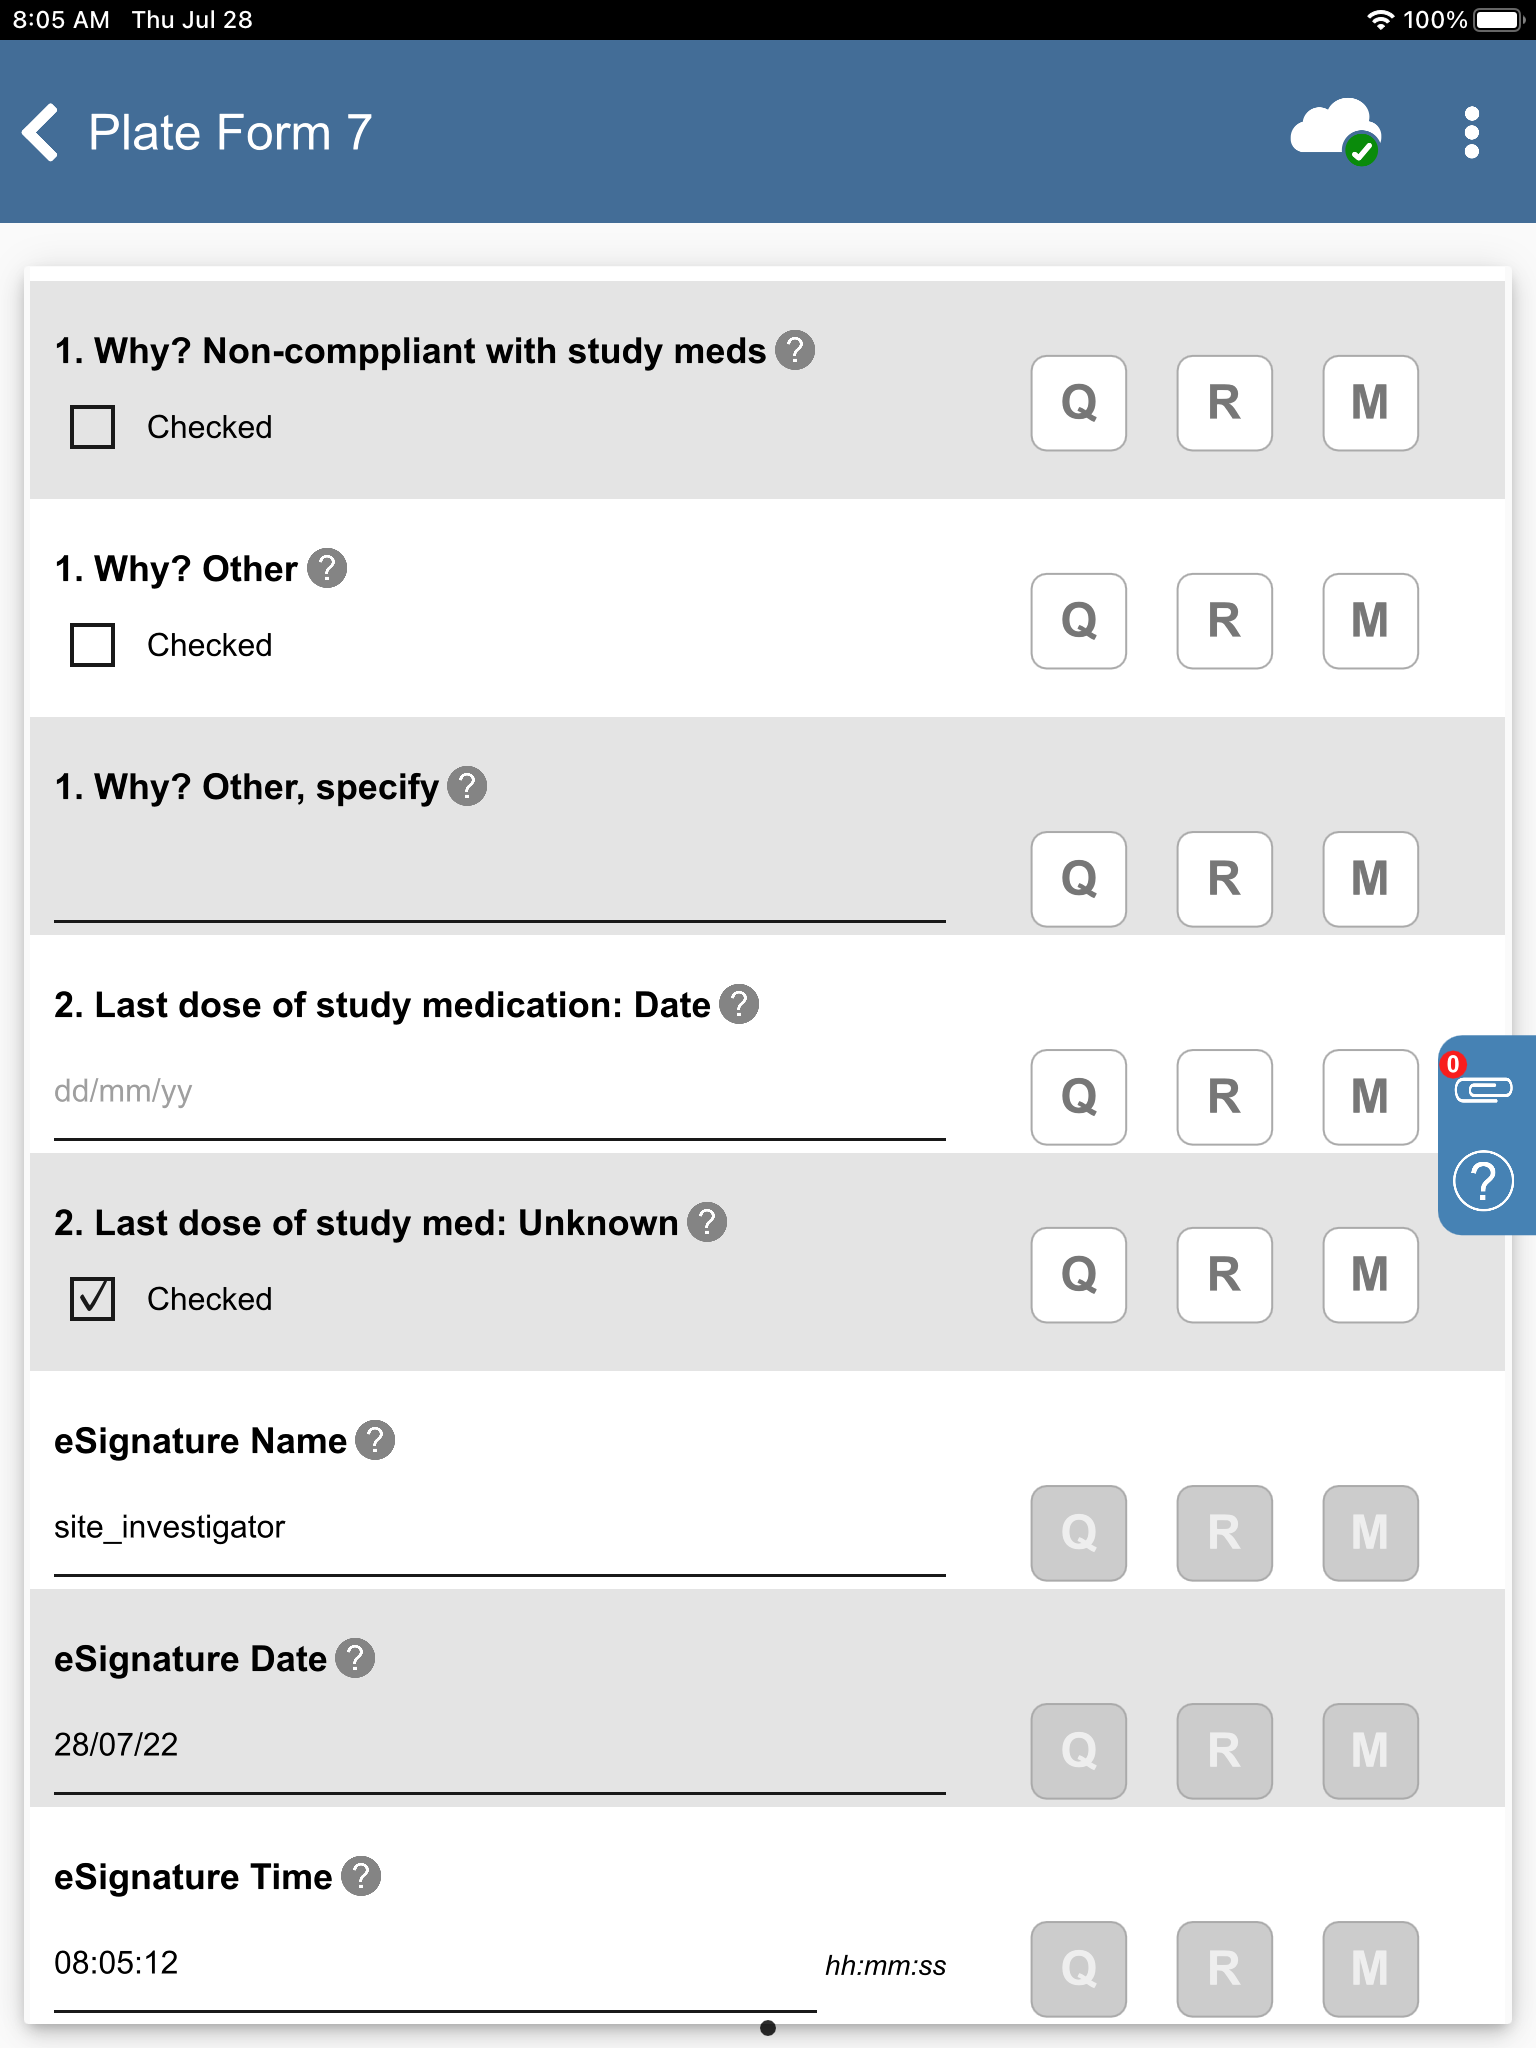
-
Examine the 3 eSignature fields at the bottom of the page.
-
Click
> to exit DFcollect.
-
In the DFcollect login dialog, enter the DFdiscover Server name that has been provided by your administrator. Enter
site_monitorin the Username field and the previously assigned password in the Password field. Click to login. -
From the Subjects list, click Subject 99011 > 30: Study Termination > 7: Form 7.
-
Click 2. Last dose of study medication: Date field. Click
to open the Add Query dialog. In the dialog, set:
-
Category = Missing
-
Enter
Investigator to confirm last dose taken with subject during clinic visit.in the Note field. -
Click > to apply the query.
-
-
Press Tab to advance to the 2. Last dose of study med: Unknown field. Un-check (disable) the checkbox. Click
.
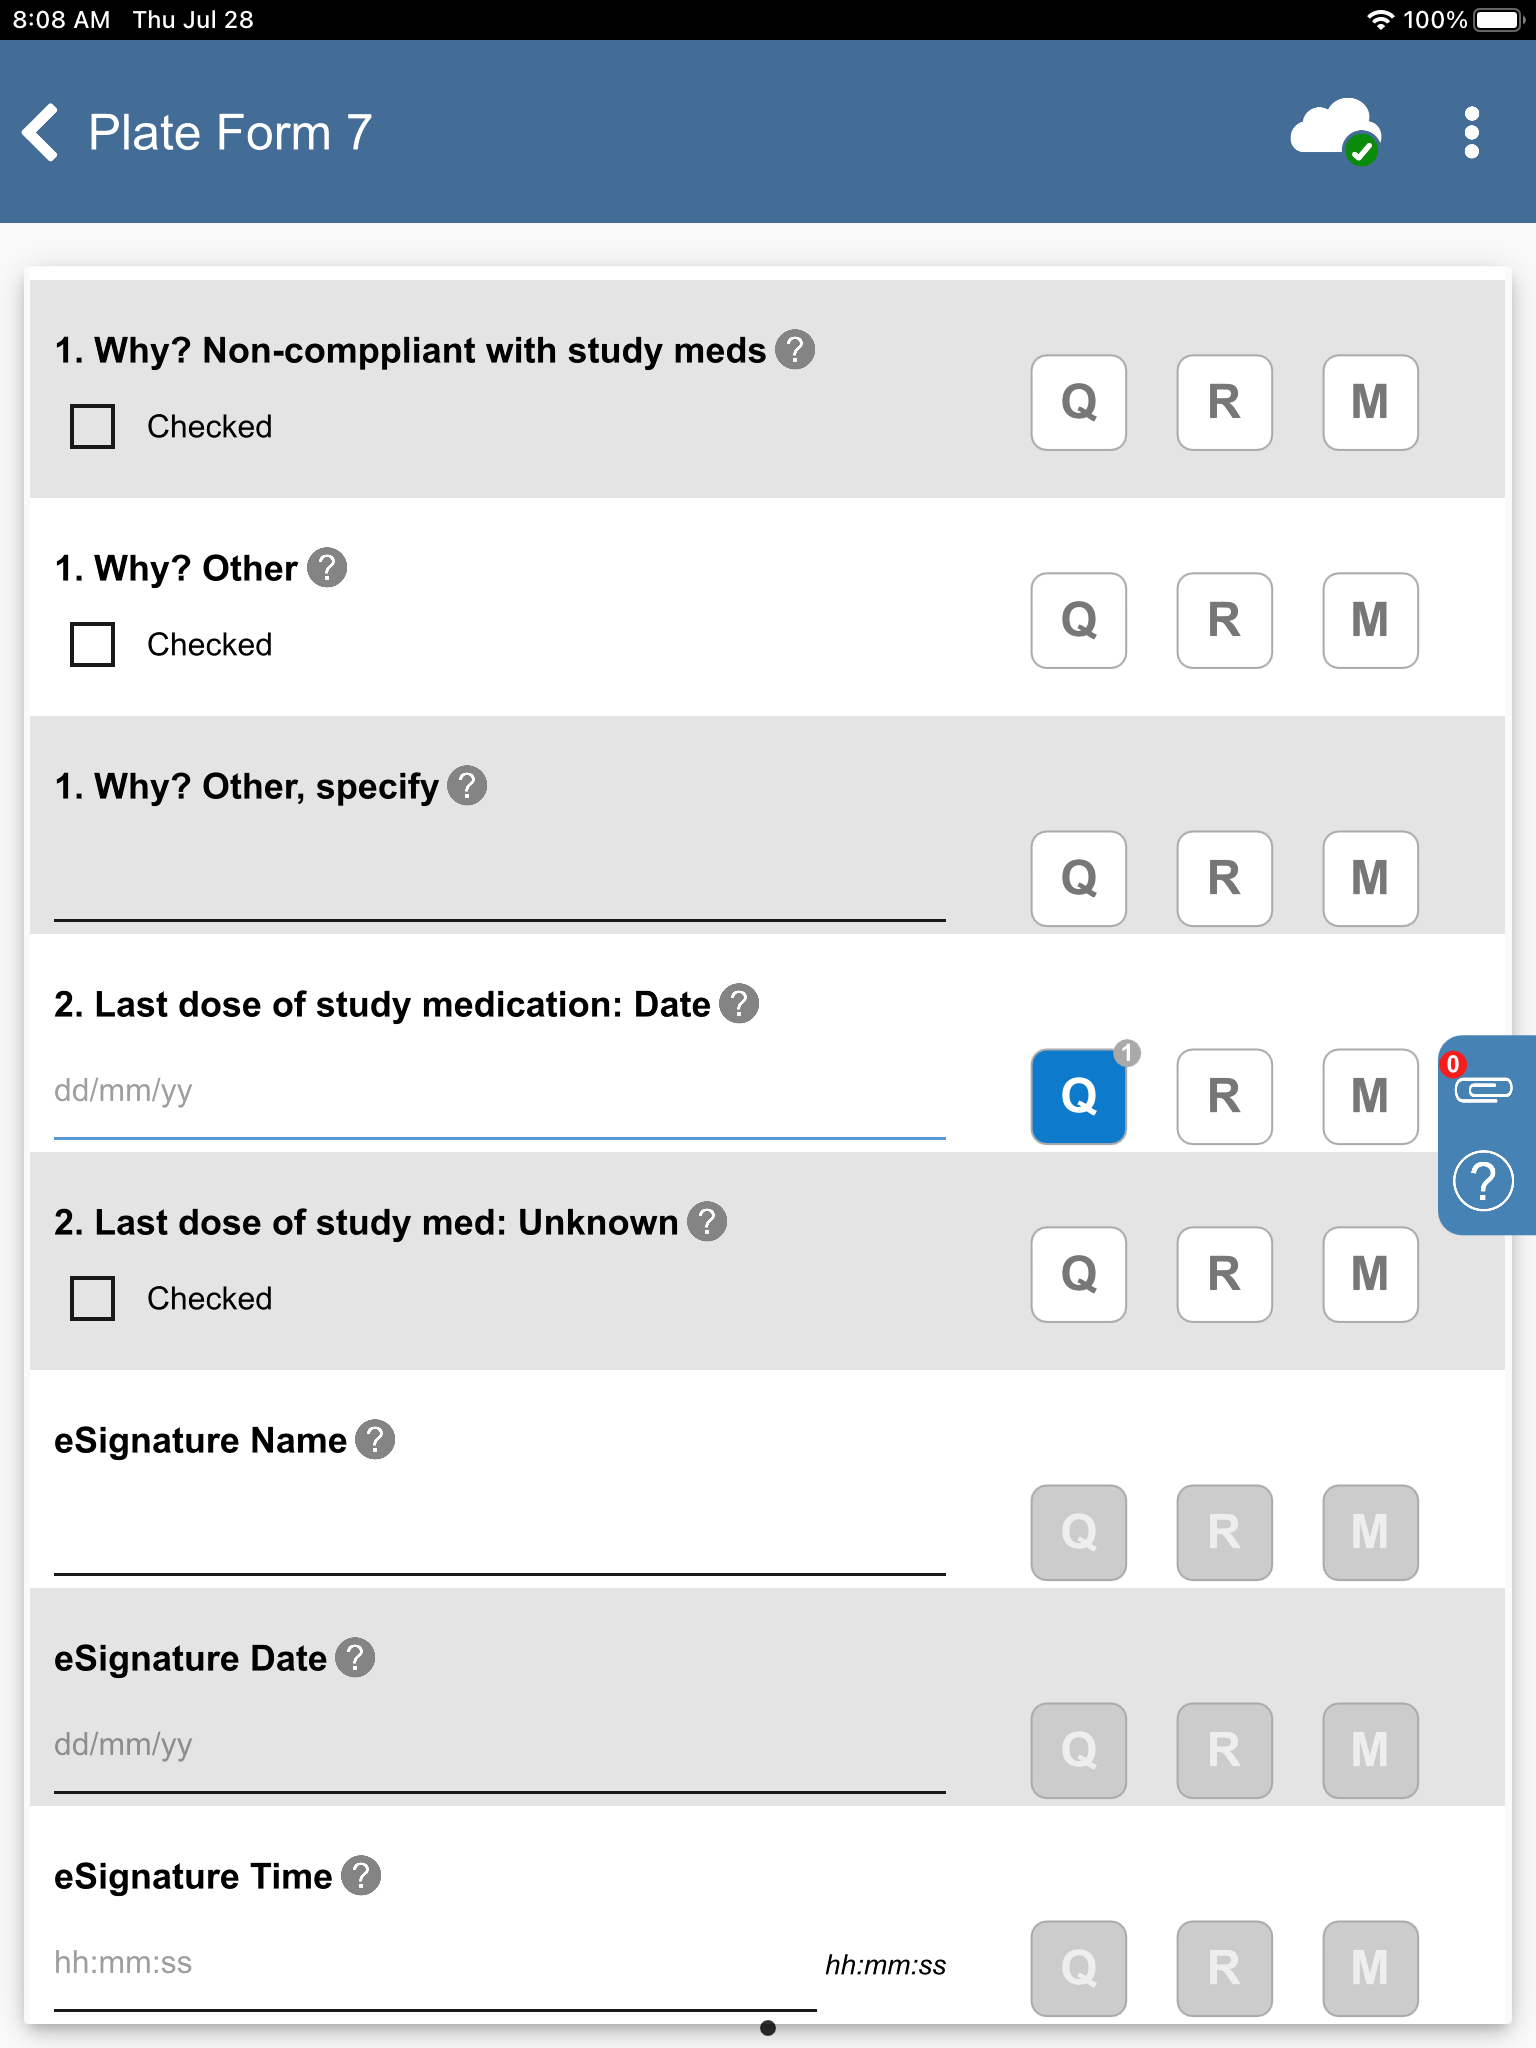
-
Click
> to exit DFcollect. -
In the DFcollect login dialog, enter the DFdiscover Server name that has been provided by your administrator. Enter
site_investin the Username field and the previously assigned password in the Password field. Click to login. -
Click
> .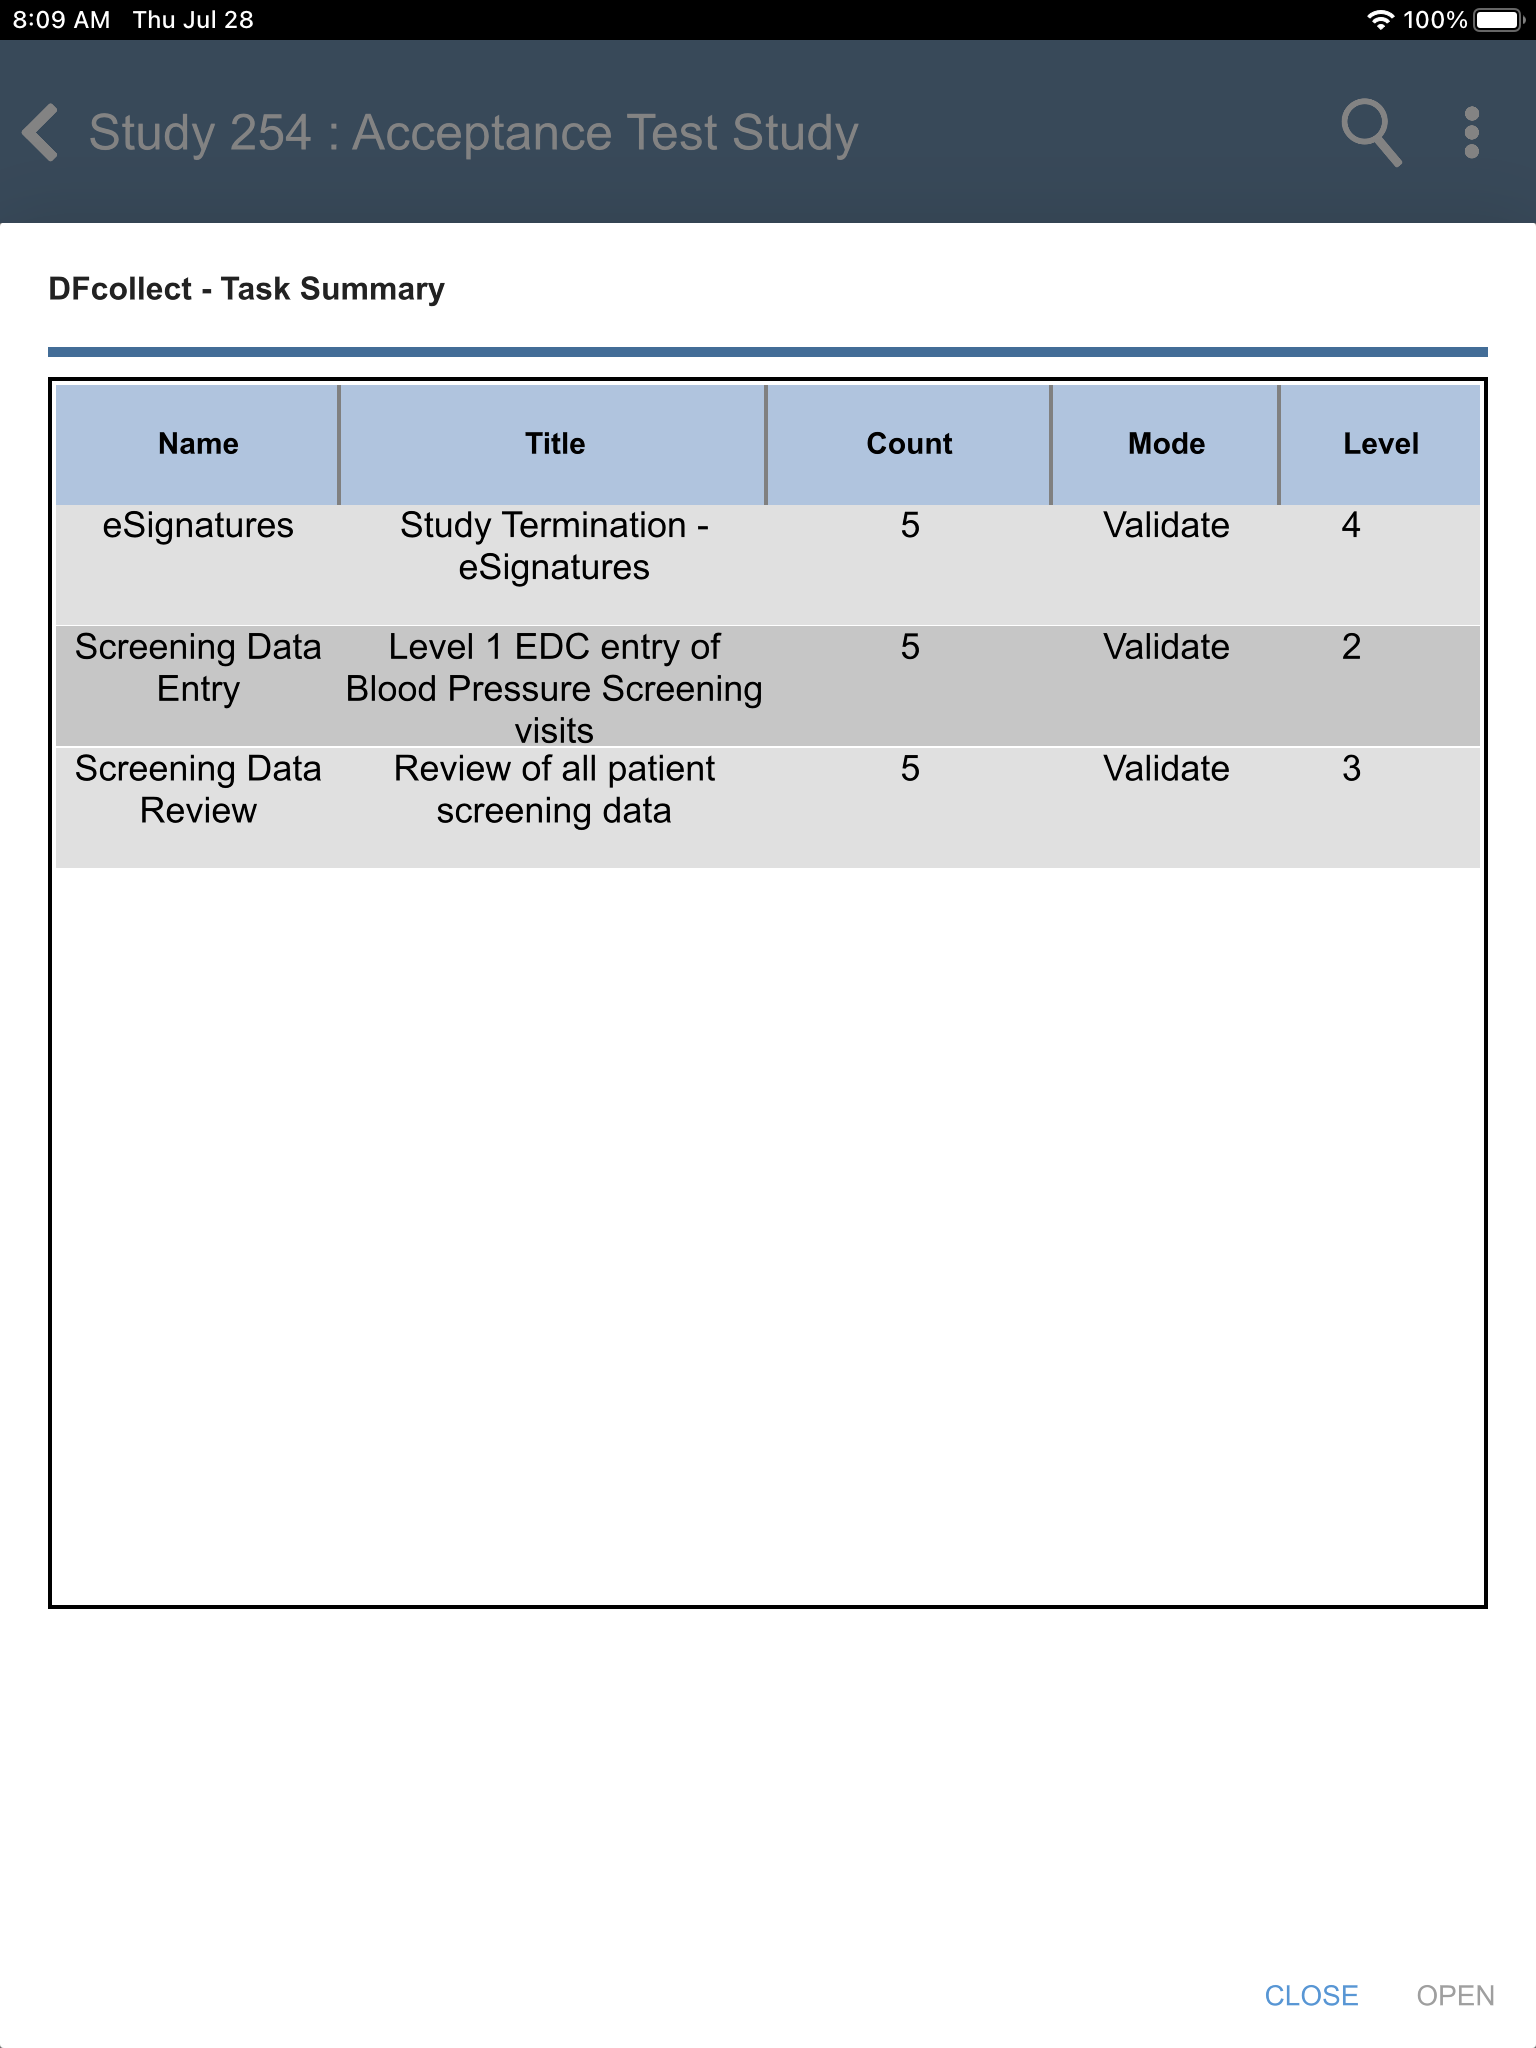
-
Locate the eSignatures - Study Termination - eSignatures task. Click .
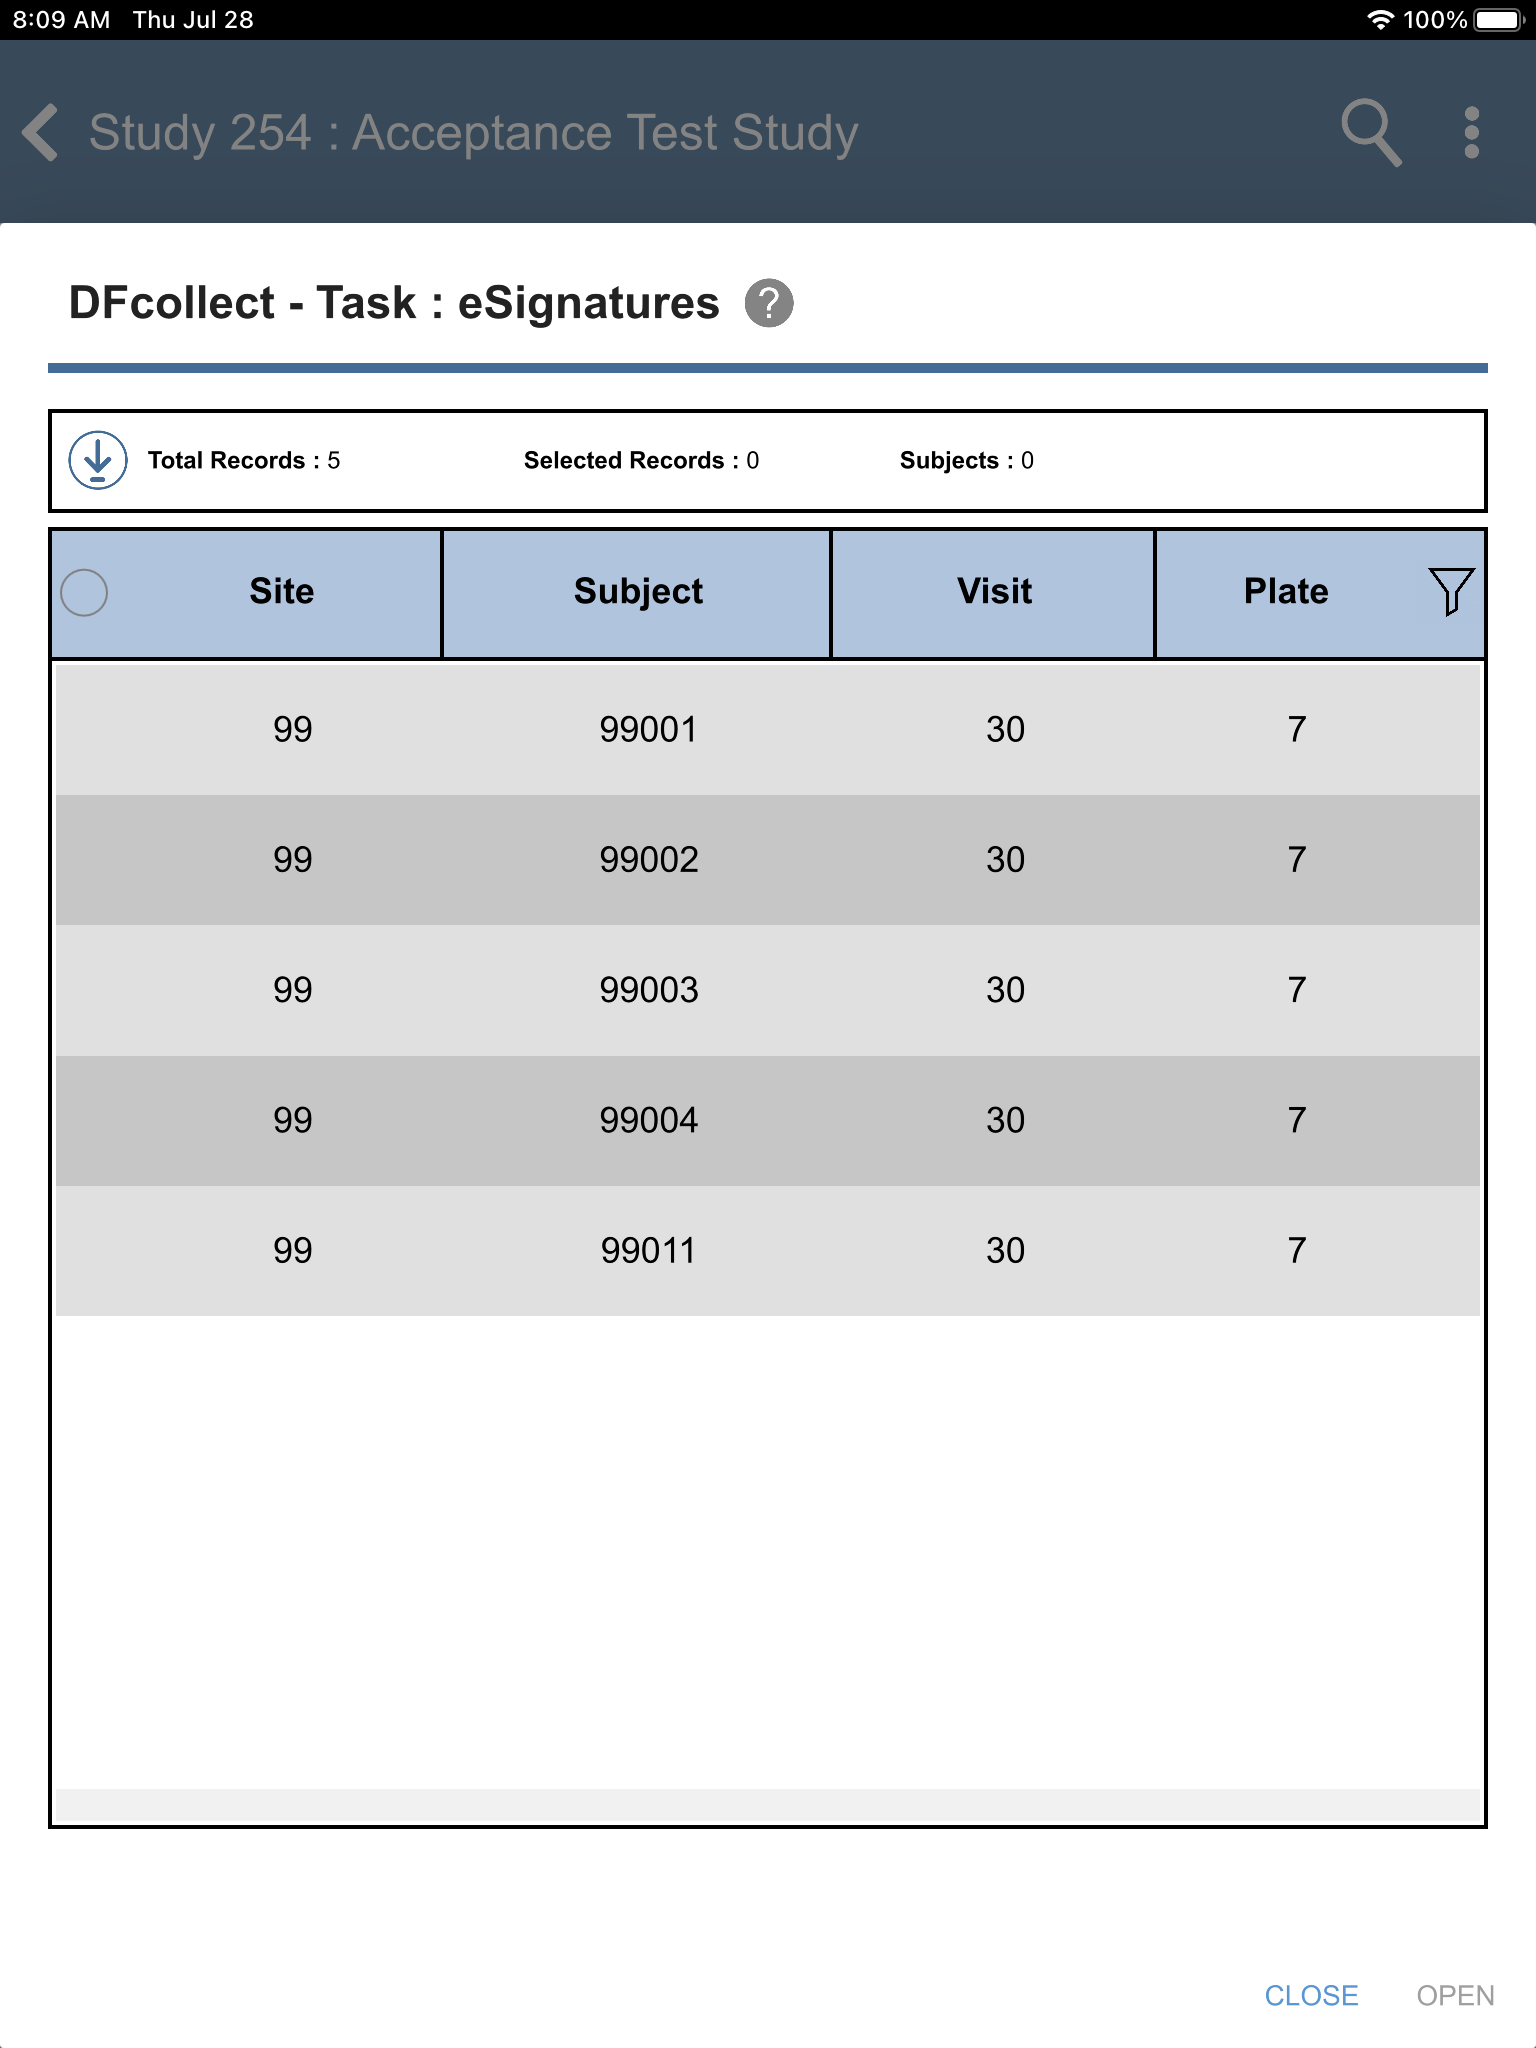
-
From the Subjects list, select subject 99011 > 30: Study Termination > 7: Form 7. Click
-
Click the 2. Last dose of study medication: Date field. Click
then . Select Resolved from the Status drop-down list. Enter Confirmed date of last medication dose verbally with subject during clinic visit.in the Note field. Click , .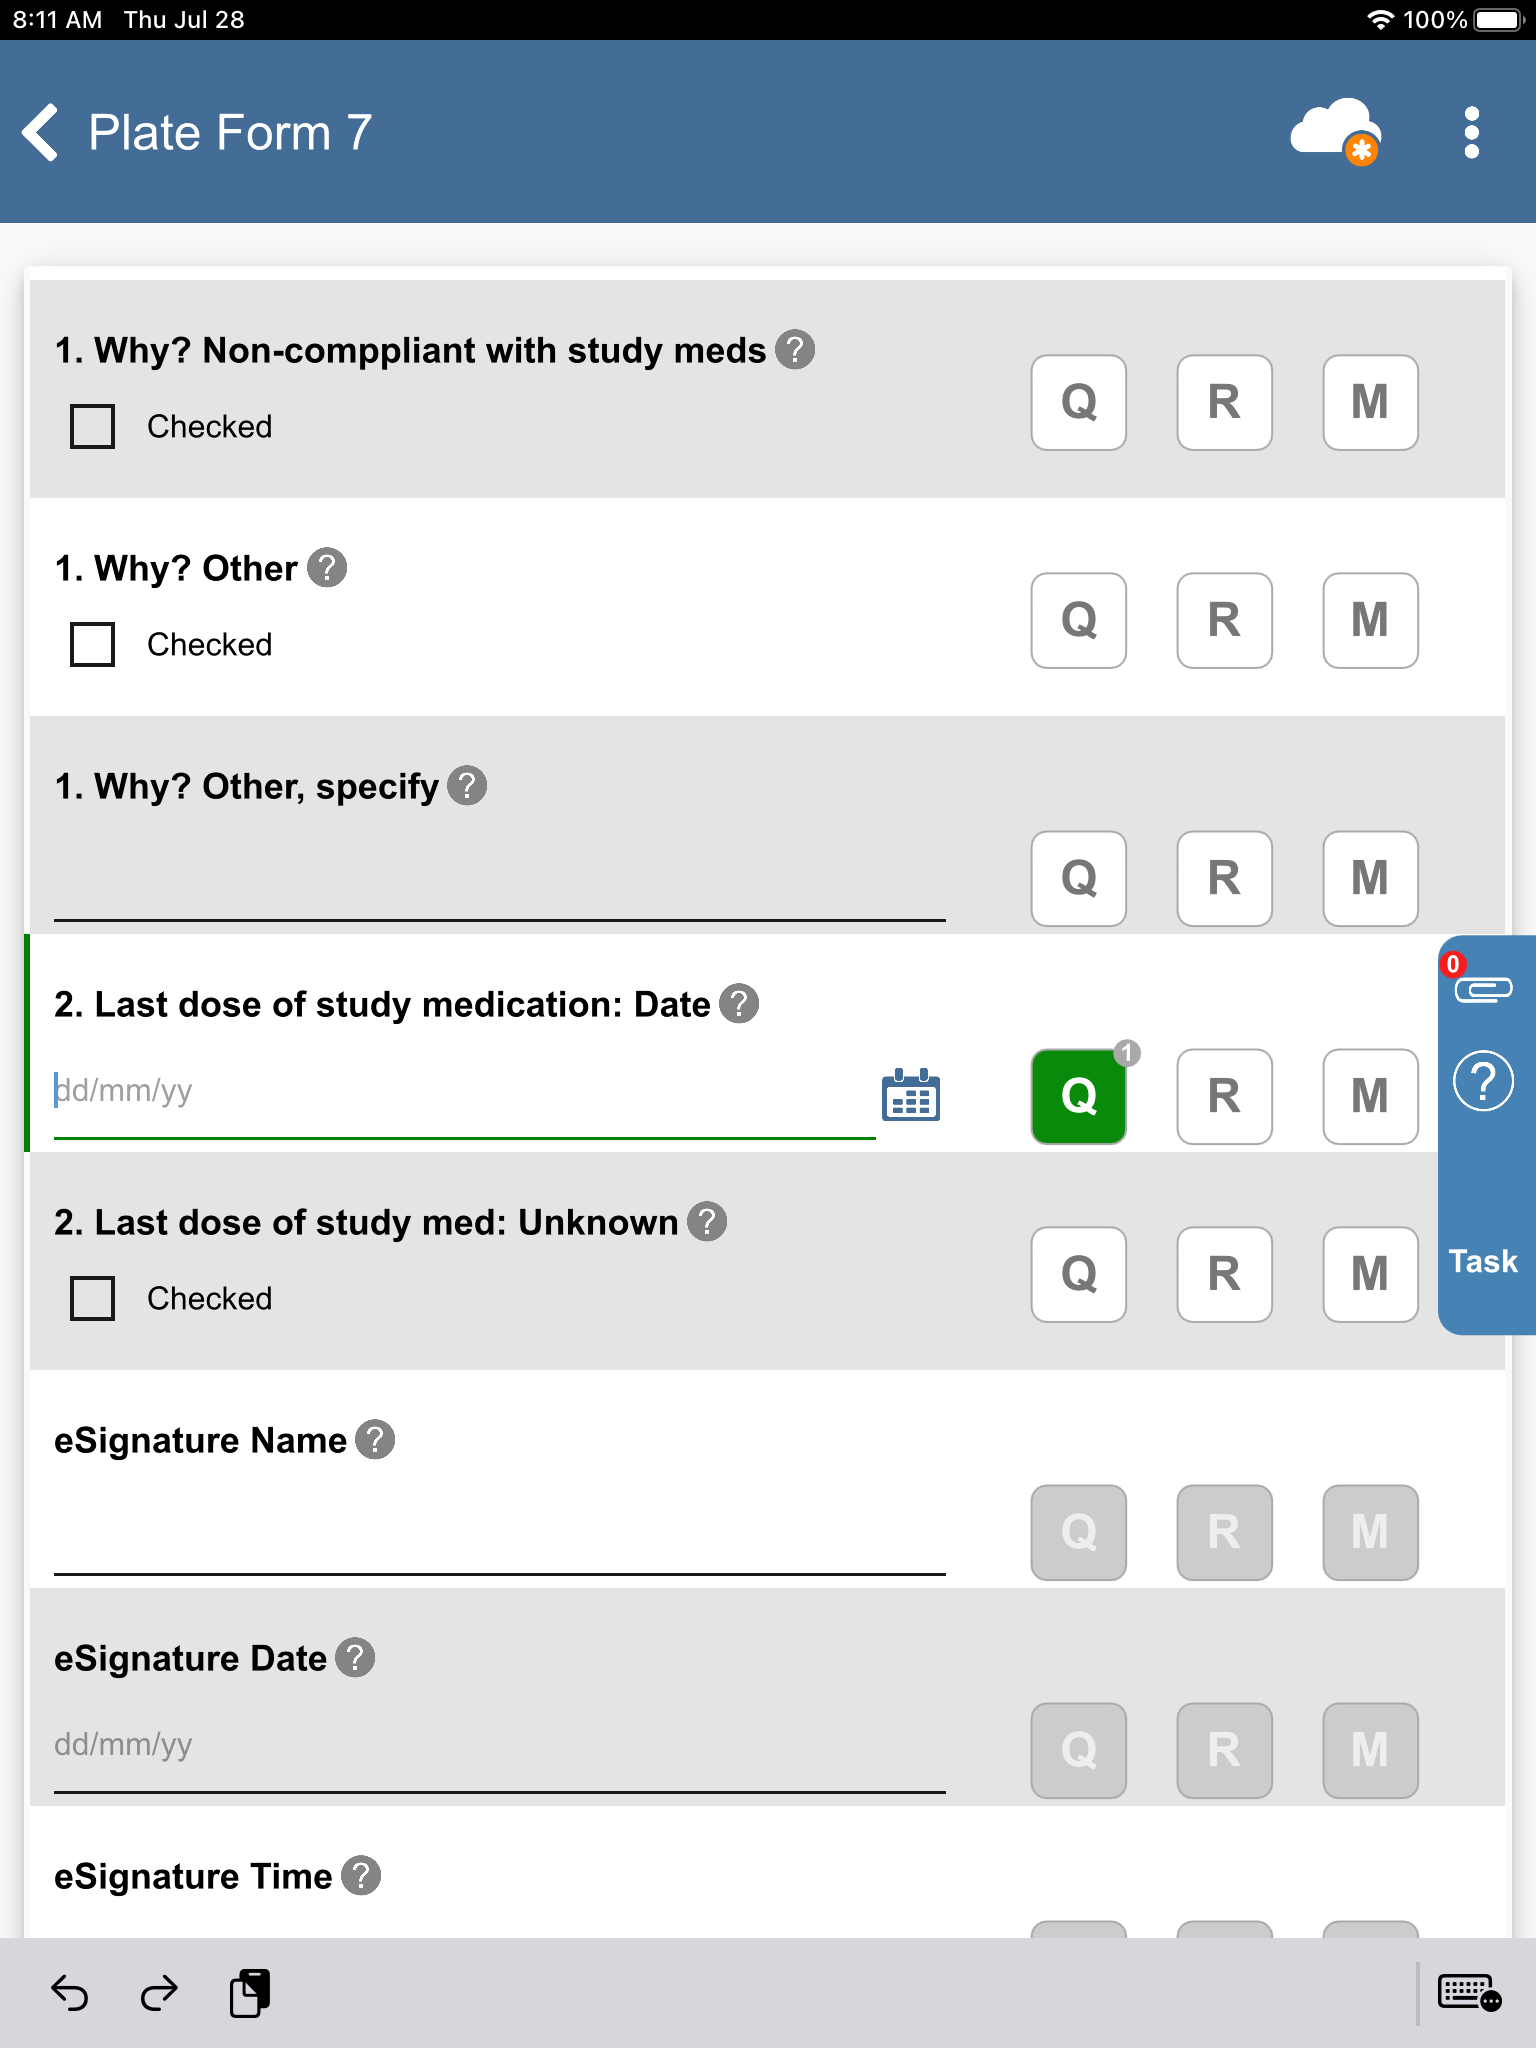
-
Enter the 2. Last dose of study medication: Date as
02/06/22. Click.
-
In the dfpassword confirmation dialog enter the user name
site_investand the corresponding password used for login in Section 13.6, “Add an Electronic Signature (eSign) to a set of completed subject records.”. Click to apply the electronic signature to the current page.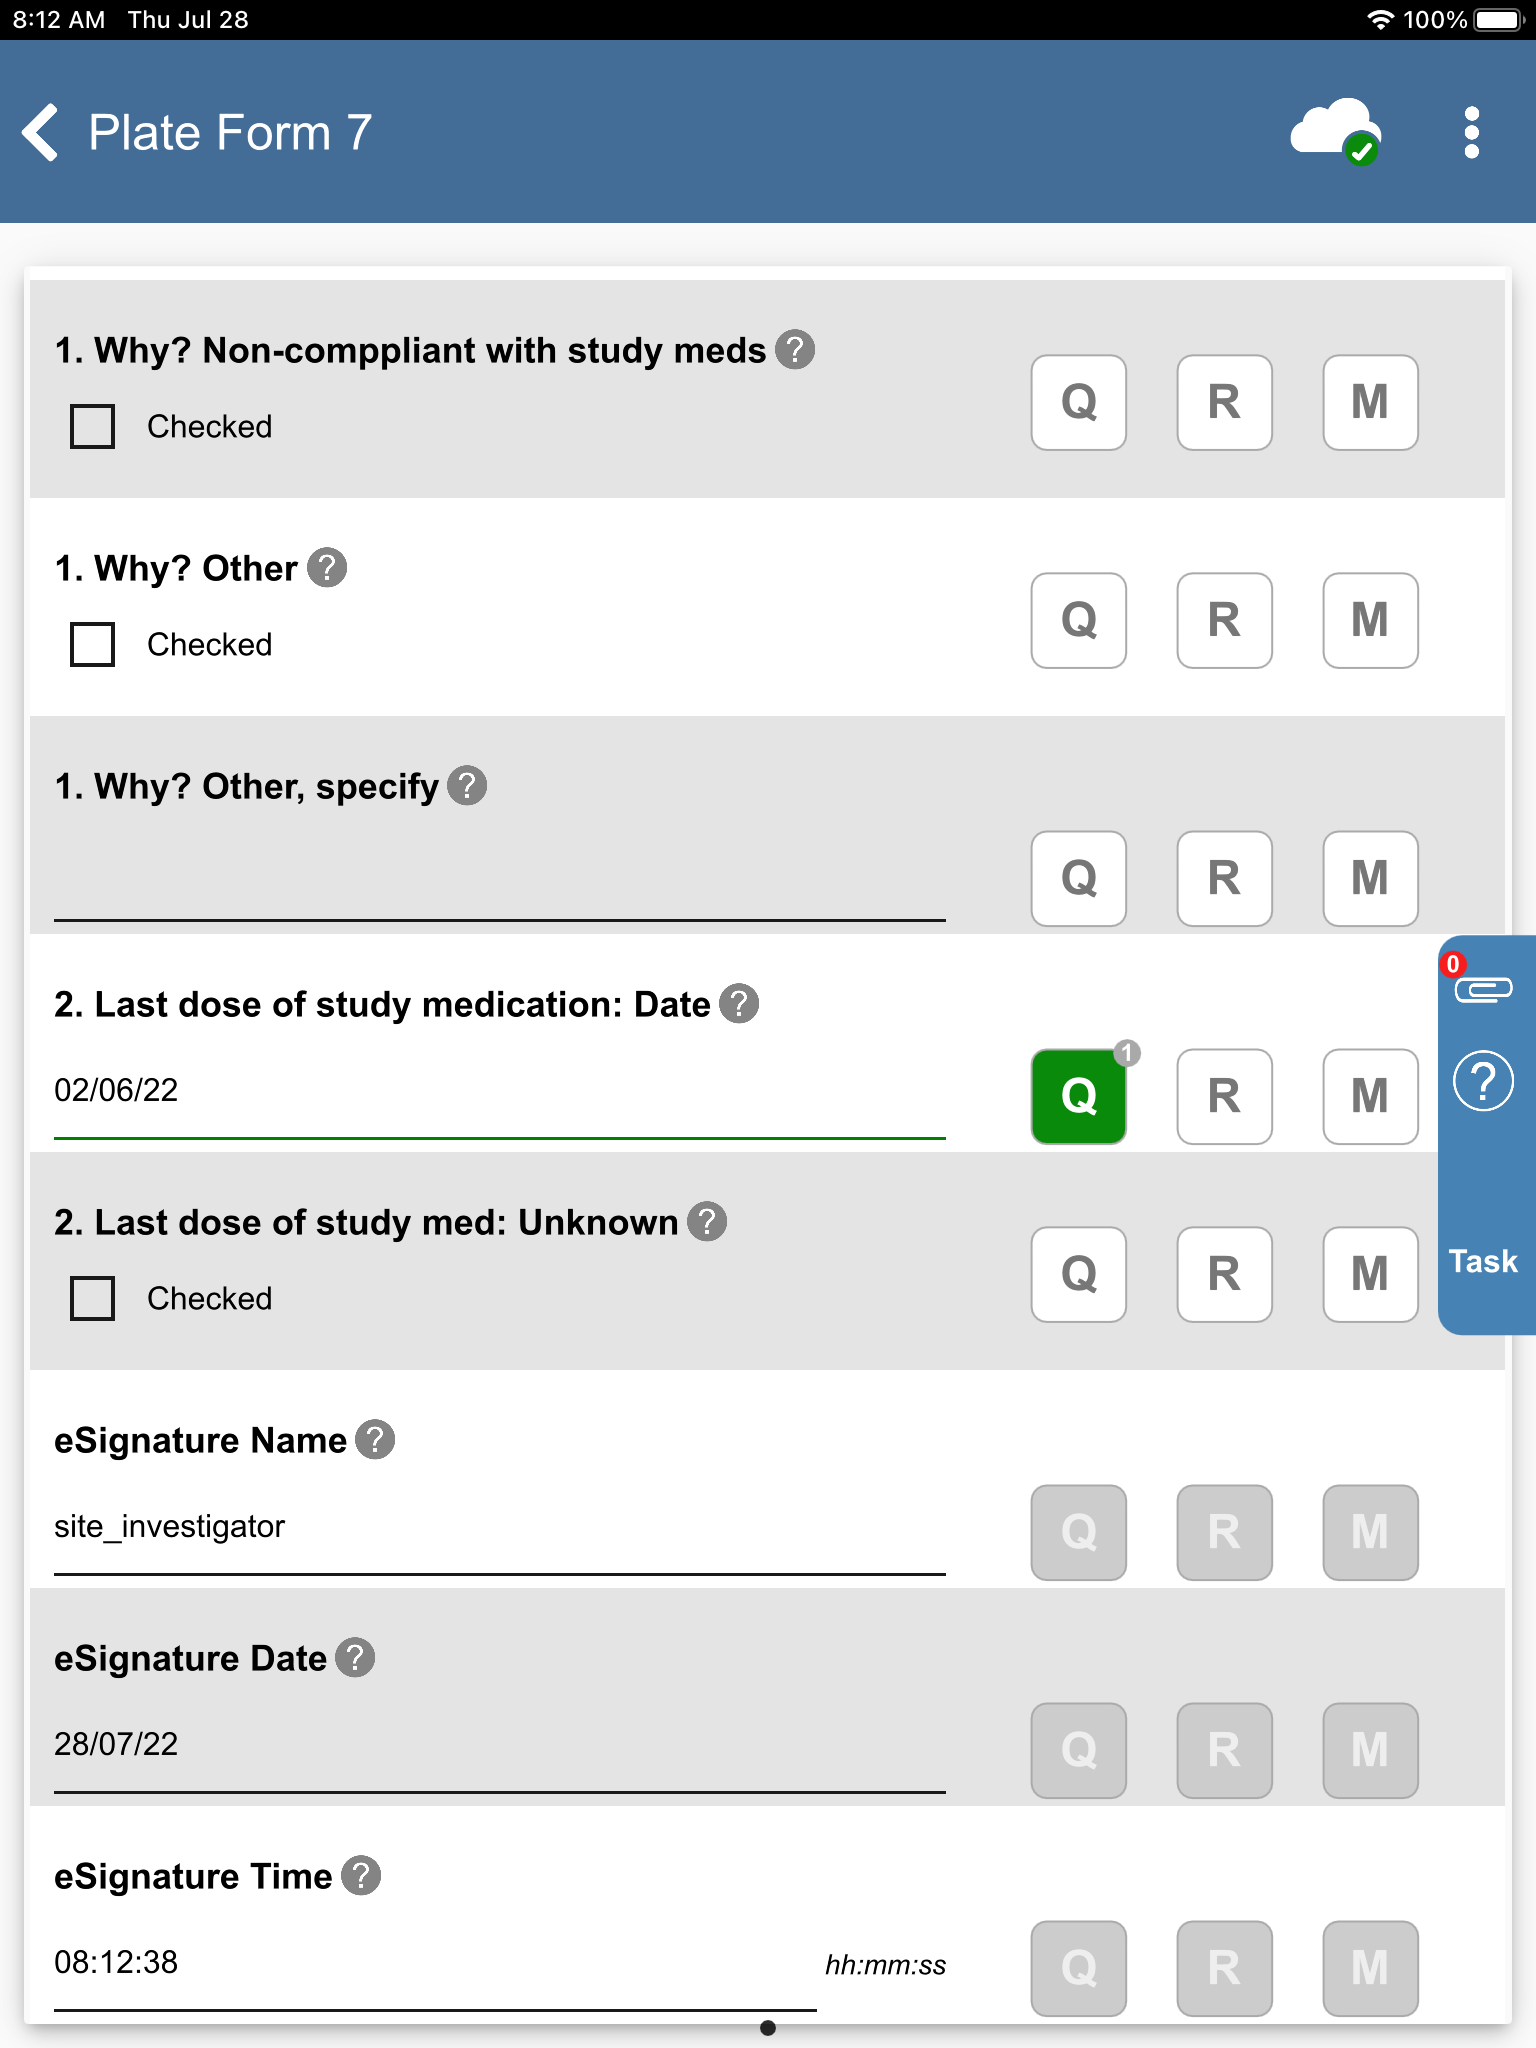
-
Examine the 3 eSignature fields at the bottom of the page.
-
Click
> to open the Page History window. The Page History is displayed, Click to close the window.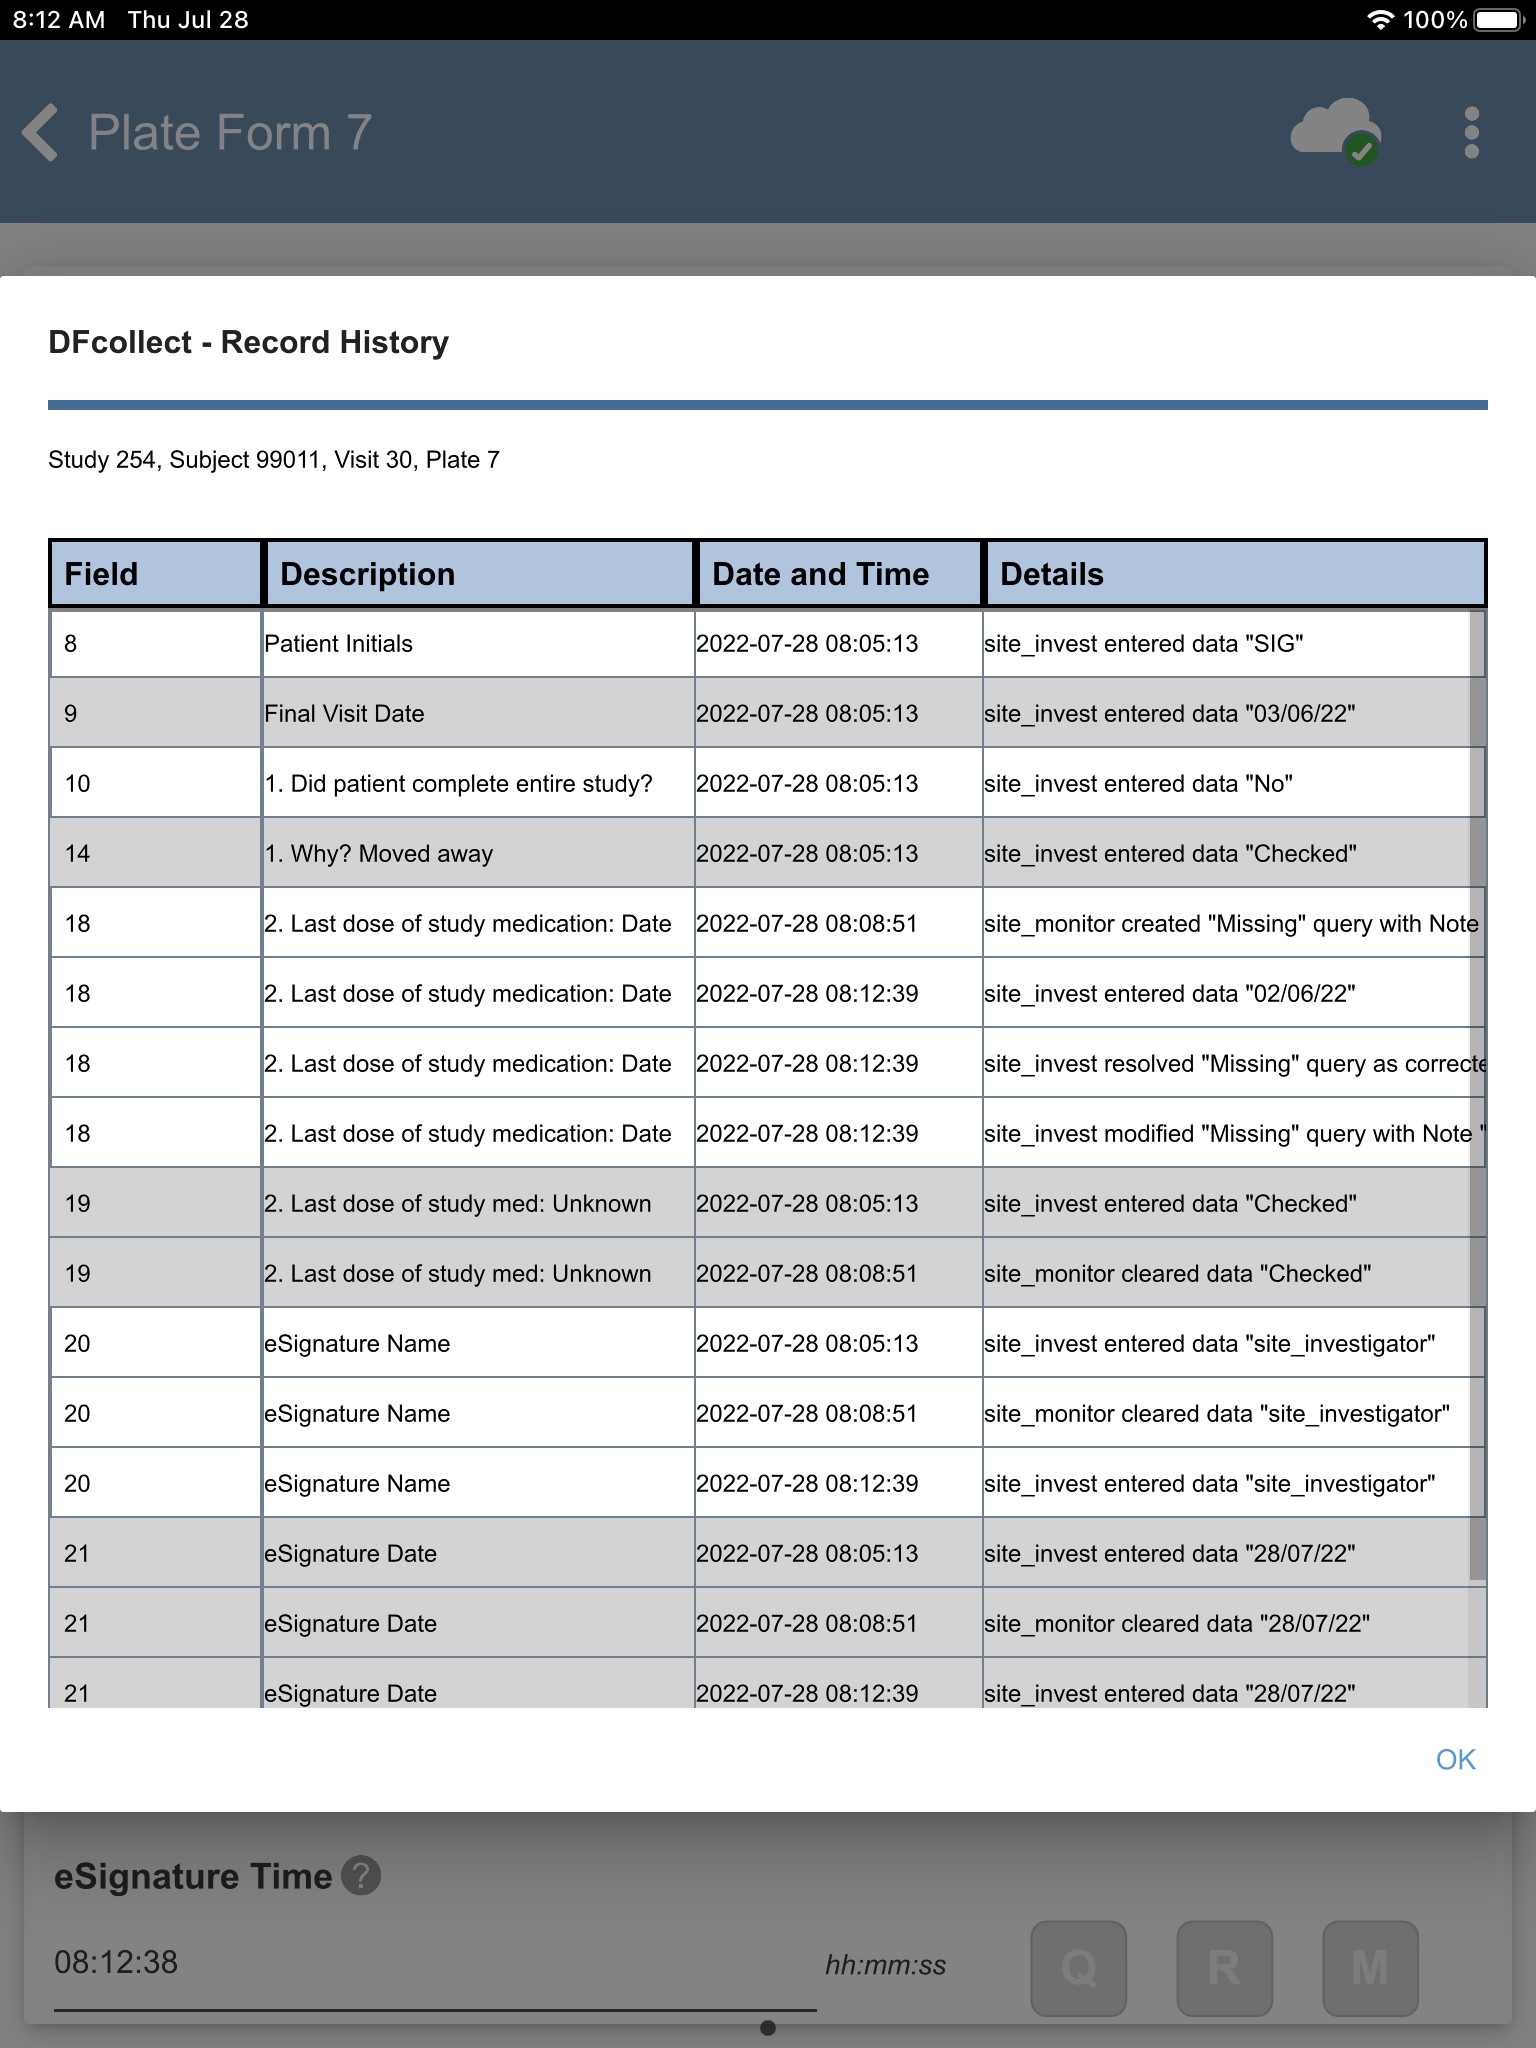
-
Click
> to exit DFcollect.
-
Start DFexplore, login as
data_managerand choose 254 Acceptance Test Study as described in Section 1.7, “How to start DFexplore”. -
Select > . Click 007 - Study Termination. Confirm DFVALID displays as "4" for subject 99011.
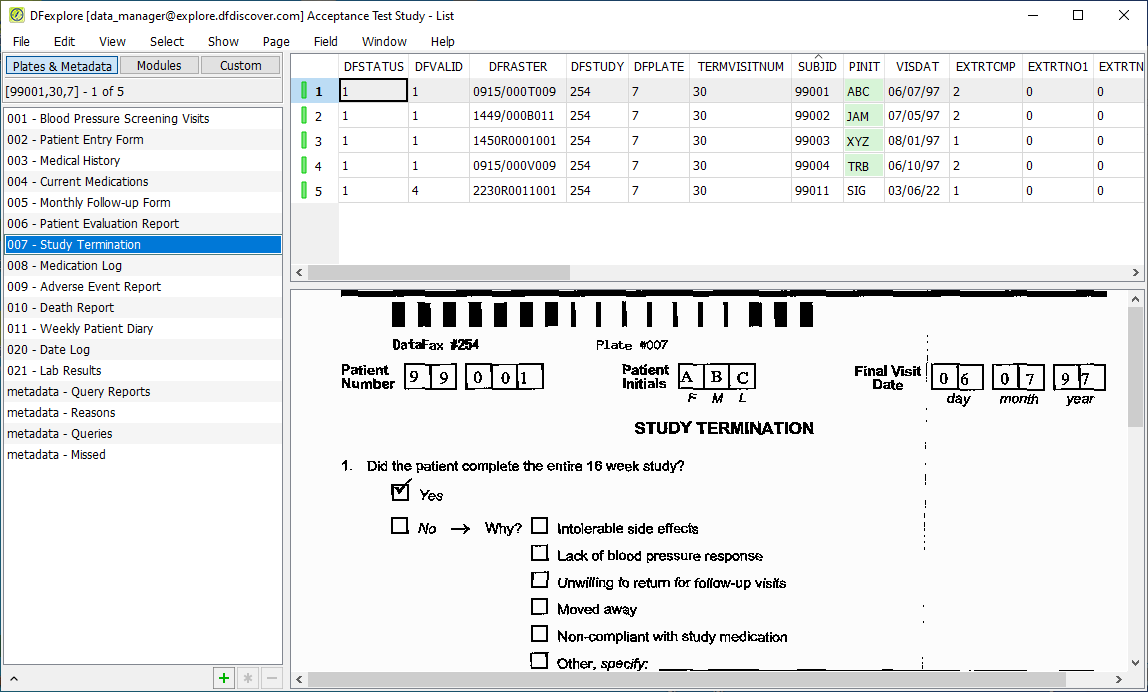
-
Select > to close DFexplore.
Table of Contents
- A.1. External Software Copyrights
- A.1.1. DCMTK software package
- A.1.2. Jansson License
- A.1.3. Mimencode
- A.1.4. RSA Data Security, Inc., MD5 message-digest algorithm
- A.1.5. mpack/munpack
- A.1.6. TIFF
- A.1.7. PostgreSQL
- A.1.8. OpenSSL License
- A.1.9. Original SSLeay License
- A.1.10. gawk
- A.1.11. Ghostscript
- A.1.12. MariaDB and FreeTDS
- A.1.13. QtAV
- A.1.14. FFmpeg
- A.1.15. c3.js
- A.1.16. d3.js
DFdiscover software uses several third-party software components as part of its server side and/or client tools.
The copyright information for each is provided below. If you would like to receive source codes of these third-party components, please send us your request at <help@dfnetresearch.com>.
Copyright © 1994-2011, OFFIS e.V. All rights reserved.
This software and supporting documentation were developed by
OFFIS e.V.
R&D Division Health
Eschereg 2
26121 Oldenburg, Germany
Redistribution and use in source and binary forms, with or without modification, are permitted provided that the following conditions are met:
Redistributions of source code must retain the above copyright notice, this list of conditions and the following disclaimer.
Redistributions in binary form must reproduce the above copyright notice, this list of conditions and the following disclaimer in the documentation and/or other materials provided with the distribution.
Neither the name of OFFIS nor the names of its contributors may be used to endorse or promote products derived from this software without specific prior written permission.
THIS SOFTWARE IS PROVIDED BY THE COPYRIGHT HOLDERS AND CONTRIBUTORS “AS IS” AND ANY EXPRESS OR IMPLIED WARRANTIES, INCLUDING, BUT NOT LIMITED TO, THE IMPLIED WARRANTIES OF MERCHANTABILITY AND FITNESS FOR A PARTICULAR PURPOSE ARE DISCLAIMED. IN NO EVENT SHALL THE COPYRIGHT HOLDER OR CONTRIBUTORS BE LIABLE FOR ANY DIRECT, INDIRECT, INCIDENTAL, SPECIAL, EXEMPLARY, OR CONSEQUENTIAL DAMAGES (INCLUDING, BUT NOT LIMITED TO, PROCUREMENT OF SUBSTITUTE GOODS OR SERVICES; LOSS OF USE, DATA, OR PROFITS; OR BUSINESS INTERRUPTION) HOWEVER CAUSED AND ON ANY THEORY OF LIABILITY, WHETHER IN CONTRACT, STRICT LIABILITY, OR TORT (INCLUDING NEGLIGENCE OR OTHERWISE) ARISING IN ANY WAY OUT OF THE USE OF THIS SOFTWARE, EVEN IF ADVISED OF THE POSSIBILITY OF SUCH DAMAGE.
Copyright © 2009-2014 Petri Lehtinen <petri&digip.org>
Permission is hereby granted, free of charge, to any person obtaining a copy of this software and associated documentation files (the “Software”), to deal in the Software without restriction, including without limitation the rights to use, copy, modify, merge, publish, distribute, sublicense, and/or sell copies of the Software, and to permit persons to whom the Software is furnished to do so, subject to the following conditions:
The above copyright notice and this permission notice shall be included in all copies or substantial portions of the Software.
THE SOFTWARE IS PROVIDED “AS IS”, WITHOUT WARRANTY OF ANY KIND, EXPRESS OR IMPLIED, INCLUDING BUT NOT LIMITED TO THE WARRANTIES OF MERCHANTABILITY, FITNESS FOR A PARTICULAR PURPOSE AND NONINFRINGEMENT. IN NO EVENT SHALL THE AUTHORS OR COPYRIGHT HOLDERS BE LIABLE FOR ANY CLAIM, DAMAGES OR OTHER LIABILITY, WHETHER IN AN ACTION OF CONTRACT, TORT OR OTHERWISE, ARISING FROM, OUT OF OR IN CONNECTION WITH THE SOFTWARE OR THE USE OR OTHER DEALINGS IN THE SOFTWARE.
Copyright © 1991 Bell Communications Research, Inc. (Bellcore)
Permission to use, copy, modify, and distribute this material for any purpose and without fee is hereby granted, provided that the above copyright notice and this permission notice appear in all copies, and that the name of Bellcore not be used in advertising or publicity pertaining to this material without the specific, prior written permission of an authorized representative of Bellcore. BELLCORE MAKES NO REPRESENTATIONS ABOUT THE ACCURACY OR SUITABILITY OF THIS MATERIAL FOR ANY PURPOSE. IT IS PROVIDED “AS IS”, WITHOUT ANY EXPRESS OR IMPLIED WARRANTIES.
Copyright © 1991-2, RSA Data Security, Inc. Created 1991. All rights reserved. License to copy and use this software is granted provided that it is identified as the “RSA Data Security, Inc. MD5 Message-Digest Algorithm” in all material mentioning or referencing this software or this function. License is also granted to make and use derivative works provided that such works are identified as “derived from the RSA Data Security, Inc. MD5 Message-Digest Algorithm” in all material mentioning or referencing the derived work. RSA Data Security, Inc. makes no representations concerning either the merchantability of this software or the suitability of this software for any particular purpose. It is provided “as is” without express or implied warranty of any kind. These notices must be retained in any copies of any part of this documentation and/or software.
Copyright © 1993,1994 by Carnegie Mellon University All Rights Reserved.
Permission to use, copy, modify, distribute, and sell this software and its documentation for any purpose is hereby granted without fee, provided that the above copyright notice appear in all copies and that both that copyright notice and this permission notice appear in supporting documentation, and that the name of Carnegie Mellon University not be used in advertising or publicity pertaining to distribution of the software without specific, written prior permission. Carnegie Mellon University makes no representations about the suitability of this software for any purpose. It is provided “as is” without express or implied warranty.
CARNEGIE MELLON UNIVERSITY DISCLAIMS ALL WARRANTIES WITH REGARD TO THIS SOFTWARE, INCLUDING ALL IMPLIED WARRANTIES OF MERCHANTABILITY AND FITNESS, IN NO EVENT SHALL CARNEGIE MELLON UNIVERSITY BE LIABLE FOR ANY SPECIAL, INDIRECT OR CONSEQUENTIAL DAMAGES OR ANY DAMAGES WHATSOEVER RESULTING FROM LOSS OF USE, DATA OR PROFITS, WHETHER IN AN ACTION OF CONTRACT, NEGLIGENCE OR OTHER TORTIOUS ACTION, ARISING OUT OF OR IN CONNECTION WITH THE USE OR PERFORMANCE OF THIS SOFTWARE.
Copyright © 1988-1997 Sam Leffler Copyright © 1991-1997 Silicon Graphics, Inc.
Permission to use, copy, modify, distribute, and sell this software and its documentation for any purpose is hereby granted without fee, provided that (i) the above copyright notices and this permission notice appear in all copies of the software and related documentation, and (ii) the names of Sam Leffler and Silicon Graphics may not be used in any advertising or publicity relating to the software without the specific, prior written permission of Sam Leffler and Silicon Graphics.
THE SOFTWARE IS PROVIDED “AS-IS” AND WITHOUT WARRANTY OF ANY KIND, EXPRESS, IMPLIED OR OTHERWISE, INCLUDING WITHOUT LIMITATION, ANY WARRANTY OF MERCHANTABILITY OR FITNESS FOR A PARTICULAR PURPOSE. IN NO EVENT SHALL SAM LEFFLER OR SILICON GRAPHICS BE LIABLE FOR ANY SPECIAL, INCIDENTAL, INDIRECT OR CONSEQUENTIAL DAMAGES OF ANY KIND, OR ANY DAMAGES WHATSOEVER RESULTING FROM LOSS OF USE, DATA OR PROFITS, WHETHER OR NOT ADVISED OF THE POSSIBILITY OF DAMAGE, AND ON ANY THEORY OF LIABILITY, ARISING OUT OF OR IN CONNECTION WITH THE USE OR PERFORMANCE OF THIS SOFTWARE.
Portions © 1996-2019, PostgreSQL Global Development Group Portions © 1994, The Regents of the University of California
Permission to use, copy, modify, and distribute this software and its documentation for any purpose, without fee, and without a written agreement is hereby granted, provided that the above copyright notice and this paragraph and the following two paragraphs appear in all copies.
IN NO EVENT SHALL THE UNIVERSITY OF CALIFORNIA BE LIABLE TO ANY PARTY FOR DIRECT, INDIRECT, SPECIAL, INCIDENTAL, OR CONSEQUENTIAL DAMAGES, INCLUDING LOST PROFITS, ARISING OUT OF THE USE OF THIS SOFTWARE AND ITS DOCUMENTATION, EVEN IF THE UNIVERSITY OF CALIFORNIA HAS BEEN ADVISED OF THE POSSIBILITY OF SUCH DAMAGE.
THE UNIVERSITY OF CALIFORNIA SPECIFICALLY DISCLAIMS ANY WARRANTIES, INCLUDING, BUT NOT LIMITED TO, THE IMPLIED WARRANTIES OF MERCHANTABILITY AND FITNESS FOR A PARTICULAR PURPOSE. THE SOFTWARE PROVIDED HEREUNDER IS ON AN "AS IS" BASIS, AND THE UNIVERSITY OF CALIFORNIA HAS NO OBLIGATIONS TO PROVIDE MAINTENANCE, SUPPORT, UPDATES, ENHANCEMENTS, OR MODIFICATIONS.
Copyright © 1998-2019 The OpenSSL Project. All rights reserved.
Redistribution and use in source and binary forms, with or without modification, are permitted provided that the following conditions are met:
Redistributions of source code must retain the above copyright notice, this list of conditions and the following disclaimer.
Redistributions in binary form must reproduce the above copyright notice, this list of conditions and the following disclaimer in the documentation and/or other materials provided with the distribution.
All advertising materials mentioning features or use of this software must display the following acknowledgment: “This product includes software developed by the OpenSSL Project for use in .the OpenSSL Toolkit.” (http://www.openssl.org/)
The names “OpenSSL Toolkit” and "OpenSSL Project" must not be used to endorse or promote products derived from this software without prior written permission. For written permission, please contact openssl-core@openssl.org.
Products derived from this software may not be called “OpenSSL” nor may “OpenSSL” appear in their names without prior written permission of the OpenSSL Project.
Redistributions of any form whatsoever must retain the following acknowledgment: “This product includes software developed by the OpenSSL Project for use in the OpenSSL Toolkit. (http://www.openssl.org)”
THIS SOFTWARE IS PROVIDED BY THE OpenSSL PROJECT “AS IS” AND ANY EXPRESSED OR IMPLIED WARRANTIES, INCLUDING, BUT NOT LIMITED TO, THE IMPLIED WARRANTIES OF MERCHANTABILITY AND FITNESS FOR A PARTICULAR PURPOSE ARE DISCLAIMED. IN NO EVENT SHALL THE OpenSSL PROJECT OR ITS CONTRIBUTORS BE LIABLE FOR ANY DIRECT, INDIRECT, INCIDENTAL, SPECIAL, EXEMPLARY, OR CONSEQUENTIAL DAMAGES (INCLUDING, BUT NOT LIMITED TO, PROCUREMENT OF SUBSTITUTE GOODS OR SERVICES; LOSS OF USE, DATA, OR PROFITS; OR BUSINESS INTERRUPTION) HOWEVER CAUSED AND ON ANY THEORY OF LIABILITY, WHETHER IN CONTRACT, STRICT LIABILITY, OR TORT (INCLUDING NEGLIGENCE OR OTHERWISE) ARISING IN ANY WAY OUT OF THE USE OF THIS SOFTWARE, EVEN IF ADVISED OF THE POSSIBILITY OF SUCH DAMAGE.
This product includes cryptographic software written by Eric Young (<eay@cryptsoft.com>). This product includes software written by Tim Hudson (<tjh@cryptsoft.com>).
Copyright © 1995-1998 Eric Young (<eay@cryptsoft.com>)
All rights reserved.
This package is an SSL implementation written
by Eric Young (<eay@cryptsoft.com>).
The implementation was written so as to conform with Netscapes SSL.
This library is free for commercial and non-commercial use as long as
the following conditions are aheared to. The following conditions
apply to all code found in this distribution, be it the RC4, RSA,
lhash, DES, etc., code; not just the SSL code. The SSL documentation
included with this distribution is covered by the same copyright terms
except that the holder is Tim Hudson (<tjh@cryptsoft.com>).
Copyright remains Eric Young's, and as such any Copyright notices in the code are not to be removed. If this package is used in a product, Eric Young should be given attribution as the author of the parts of the library used. This can be in the form of a textual message at program startup or in documentation (online or textual) provided with the package.
Redistribution and use in source and binary forms, with or without modification, are permitted provided that the following conditions are met:
-
Redistributions of source code must retain the copyright notice, this list of conditions and the following disclaimer.
Redistributions in binary form must reproduce the above copyright notice, this list of conditions and the following disclaimer in the documentation and/or other materials provided with the distribution.
All advertising materials mentioning features or use of this software must display the following acknowledgement: “This product includes cryptographic software written by Eric Young (
<eay@cryptsoft.com>)” The word “cryptographic” can be left out if the rouines from the library being used are not cryptographic related :-).If you include any Windows specific code (or a derivative thereof) from the apps directory (application code) you must include an acknowledgement: “This product includes software written by Tim Hudson (
<tjh@cryptsoft.com>)”
THIS SOFTWARE IS PROVIDED BY ERIC YOUNG “AS IS” AND ANY EXPRESS OR IMPLIED WARRANTIES, INCLUDING, BUT NOT LIMITED TO, THE IMPLIED WARRANTIES OF MERCHANTABILITY AND FITNESS FOR A PARTICULAR PURPOSE ARE DISCLAIMED. IN NO EVENT SHALL THE AUTHOR OR CONTRIBUTORS BE LIABLE FOR ANY DIRECT, INDIRECT, INCIDENTAL, SPECIAL, EXEMPLARY, OR CONSEQUENTIAL DAMAGES (INCLUDING, BUT NOT LIMITED TO, PROCUREMENT OF SUBSTITUTE GOODS OR SERVICES; LOSS OF USE, DATA, OR PROFITS; OR BUSINESS INTERRUPTION) HOWEVER CAUSED AND ON ANY THEORY OF LIABILITY, WHETHER IN CONTRACT, STRICT LIABILITY, OR TORT (INCLUDING NEGLIGENCE OR OTHERWISE) ARISING IN ANY WAY OUT OF THE USE OF THIS SOFTWARE, EVEN IF ADVISED OF THE POSSIBILITY OF SUCH DAMAGE.
The licence and distribution terms for any publically available version or derivative of this code cannot be changed. i.e. this code cannot simply be copied and put under another distribution licence [including the GNU Public Licence.]
GNU GENERAL PUBLIC LICENSE Version 2, June 1991
http://www.gnu.org/licenses/gpl-2.0.html
Copyright © 1989, 1991 Free Software Foundation, Inc.
51 Franklin Street, Fifth Floor,
Boston, MA 02110-1301, USA
Everyone is permitted to copy and distribute verbatim copies of this license document, but changing it is not allowed.
The licenses for most software are designed to take away your freedom to share and change it. By contrast, the GNU General Public License is intended to guarantee your freedom to share and change free software--to make sure the software is free for all its users. This General Public License applies to most of the Free Software Foundation's software and to any other program whose authors commit to using it. (Some other Free Software Foundation software is covered by the GNU Lesser General Public License instead.) You can apply it to your programs, too.
When we speak of free software, we are referring to freedom, not price. Our General Public Licenses are designed to make sure that you have the freedom to distribute copies of free software (and charge for this service if you wish), that you receive source code or can get it if you want it, that you can change the software or use pieces of it in new free programs; and that you know you can do these things.
To protect your rights, we need to make restrictions that forbid anyone to deny you these rights or to ask you to surrender the rights. These restrictions translate to certain responsibilities for you if you distribute copies of the software, or if you modify it.
For example, if you distribute copies of such a program, whether gratis or for a fee, you must give the recipients all the rights that you have. You must make sure that they, too, receive or can get the source code. And you must show them these terms so they know their rights.
We protect your rights with two steps: (1) copyright the software, and (2) offer you this license which gives you legal permission to copy, distribute and/or modify the software.
Also, for each author's protection and ours, we want to make certain that everyone understands that there is no warranty for this free software. If the software is modified by someone else and passed on, we want its recipients to know that what they have is not the original, so that any problems introduced by others will not reflect on the original authors' reputations.
Finally, any free program is threatened constantly by software patents. We wish to avoid the danger that redistributors of a free program will individually obtain patent licenses, in effect making the program proprietary. To prevent this, we have made it clear that any patent must be licensed for everyone's free use or not licensed at all.
The precise terms and conditions for copying, distribution and modification follow.
TERMS AND CONDITIONS FOR COPYING, DISTRIBUTION AND MODIFICATION
This License applies to any program or other work which contains a notice placed by the copyright holder saying it may be distributed under the terms of this General Public License. The “Program”, below, refers to any such program or work, and a “work based on the Program” means either the Program or any derivative work under copyright law: that is to say, a work containing the Program or a portion of it, either verbatim or with modifications and/or translated into another language. (Hereinafter, translation is included without limitation in the term “modification”.) Each licensee is addressed as “you”.
Activities other than copying, distribution and modification are not covered by this License; they are outside its scope. The act of running the Program is not restricted, and the output from the Program is covered only if its contents constitute a work based on the Program (independent of having been made by running the Program). Whether that is true depends on what the Program does.
You may copy and distribute verbatim copies of the Program's source code as you receive it, in any medium, provided that you conspicuously and appropriately publish on each copy an appropriate copyright notice and disclaimer of warranty; keep intact all the notices that refer to this License and to the absence of any warranty; and give any other recipients of the Program a copy of this License along with the Program.
You may charge a fee for the physical act of transferring a copy, and you may at your option offer warranty protection in exchange for a fee.
You may modify your copy or copies of the Program or any portion of it, thus forming a work based on the Program, and copy and distribute such modifications or work under the terms of Section 1 above, provided that you also meet all of these conditions:
You must cause the modified files to carry prominent notices stating that you changed the files and the date of any change.
-
You must cause any work that you distribute or publish, that in whole or in part contains or is derived from the Program or any part thereof, to be licensed as a whole at no charge to all third parties under the terms of this License.
If the modified program normally reads commands interactively when run, you must cause it, when started running for such interactive use in the most ordinary way, to print or display an announcement including an appropriate copyright notice and a notice that there is no warranty (or else, saying that you provide a warranty) and that users may redistribute the program under these conditions, and telling the user how to view a copy of this License. (Exception: if the Program itself is interactive but does not normally print such an announcement, your work based on the Program is not required to print an announcement.) These requirements apply to the modified work as a whole. If identifiable sections of that work are not derived from the Program, and can be reasonably considered independent and separate works in themselves, then this License, and its terms, do not apply to those sections when you distribute them as separate works. But when you distribute the same sections as part of a whole which is a work based on the Program, the distribution of the whole must be on the terms of this License, whose permissions for other licensees extend to the entire whole, and thus to each and every part regardless of who wrote it.
Thus, it is not the intent of this section to claim rights or contest your rights to work written entirely by you; rather, the intent is to exercise the right to control the distribution of derivative or collective works based on the Program.
In addition, mere aggregation of another work not based on the Program with the Program (or with a work based on the Program) on a volume of a storage or distribution medium does not bring the other work under the scope of this License.
You may copy and distribute the Program (or a work based on it, under Section 2) in object code or executable form under the terms of Sections 1 and 2 above provided that you also do one of the following:
Accompany it with the complete corresponding machine-readable source code, which must be distributed under the terms of Sections 1 and 2 above on a medium customarily used for software interchange; or,
-
Accompany it with a written offer, valid for at least three years, to give any third party, for a charge no more than your cost of physically performing source distribution, a complete machine-readable copy of the corresponding source code, to be distributed under the terms of Sections 1 and 2 above on a medium customarily used for software interchange; or,
-
Accompany it with the information you received as to the offer to distribute corresponding source code. (This alternative is allowed only for noncommercial distribution and only if you received the program in object code or executable form with such an offer, in accord with Subsection b above.) The source code for a work means the preferred form of the work for making modifications to it. For an executable work, complete source code means all the source code for all modules it contains, plus any associated interface definition files, plus the scripts used to control compilation and installation of the executable. However, as a special exception, the source code distributed need not include anything that is normally distributed (in either source or binary form) with the major components (compiler, kernel, and so on) of the operating system on which the executable runs, unless that component itself accompanies the executable.
If distribution of executable or object code is made by offering access to copy from a designated place, then offering equivalent access to copy the source code from the same place counts as distribution of the source code, even though third parties are not compelled to copy the source along with the object code.
You may not copy, modify, sublicense, or distribute the Program except as expressly provided under this License. Any attempt otherwise to copy, modify, sublicense or distribute the Program is void, and will automatically terminate your rights under this License. However, parties who have received copies, or rights, from you under this License will not have their licenses terminated so long as such parties remain in full compliance.
You are not required to accept this License, since you have not signed it. However, nothing else grants you permission to modify or distribute the Program or its derivative works. These actions are prohibited by law if you do not accept this License. Therefore, by modifying or distributing the Program (or any work based on the Program), you indicate your acceptance of this License to do so, and all its terms and conditions for copying, distributing or modifying the Program or works based on it.
Each time you redistribute the Program (or any work based on the Program), the recipient automatically receives a license from the original licensor to copy, distribute or modify the Program subject to these terms and conditions. You may not impose any further restrictions on the recipients' exercise of the rights granted herein. You are not responsible for enforcing compliance by third parties to this License.
-
If, as a consequence of a court judgment or allegation of patent infringement or for any other reason (not limited to patent issues), conditions are imposed on you (whether by court order, agreement or otherwise) that contradict the conditions of this License, they do not excuse you from the conditions of this License. If you cannot distribute so as to satisfy simultaneously your obligations under this License and any other pertinent obligations, then as a consequence you may not distribute the Program at all. For example, if a patent license would not permit royalty-free redistribution of the Program by all those who receive copies directly or indirectly through you, then the only way you could satisfy both it and this License would be to refrain entirely from distribution of the Program.
If any portion of this section is held invalid or unenforceable under any particular circumstance, the balance of the section is intended to apply and the section as a whole is intended to apply in other circumstances.
It is not the purpose of this section to induce you to infringe any patents or other property right claims or to contest validity of any such claims; this section has the sole purpose of protecting the integrity of the free software distribution system, which is implemented by public license practices. Many people have made generous contributions to the wide range of software distributed through that system in reliance on consistent application of that system; it is up to the author/donor to decide if he or she is willing to distribute software through any other system and a licensee cannot impose that choice.
This section is intended to make thoroughly clear what is believed to be a consequence of the rest of this License.
If the distribution and/or use of the Program is restricted in certain countries either by patents or by copyrighted interfaces, the original copyright holder who places the Program under this License may add an explicit geographical distribution limitation excluding those countries, so that distribution is permitted only in or among countries not thus excluded. In such case, this License incorporates the limitation as if written in the body of this License.
The Free Software Foundation may publish revised and/or new versions of the General Public License from time to time. Such new versions will be similar in spirit to the present version, but may differ in detail to address new problems or concerns.
Each version is given a distinguishing version number. If the Program specifies a version number of this License which applies to it and "any later version", you have the option of following the terms and conditions either of that version or of any later version published by the Free Software Foundation. If the Program does not specify a version number of this License, you may choose any version ever published by the Free Software Foundation.
If you wish to incorporate parts of the Program into other free programs whose distribution conditions are different, write to the author to ask for permission. For software which is copyrighted by the Free Software Foundation, write to the Free Software Foundation; we sometimes make exceptions for this. Our decision will be guided by the two goals of preserving the free status of all derivatives of our free software and of promoting the sharing and reuse of software generally. NO WARRANTY
BECAUSE THE PROGRAM IS LICENSED FREE OF CHARGE, THERE IS NO WARRANTY FOR THE PROGRAM, TO THE EXTENT PERMITTED BY APPLICABLE LAW. EXCEPT WHEN OTHERWISE STATED IN WRITING THE COPYRIGHT HOLDERS AND/OR OTHER PARTIES PROVIDE THE PROGRAM “AS IS” WITHOUT WARRANTY OF ANY KIND, EITHER EXPRESSED OR IMPLIED, INCLUDING, BUT NOT LIMITED TO, THE IMPLIED WARRANTIES OF MERCHANTABILITY AND FITNESS FOR A PARTICULAR PURPOSE. THE ENTIRE RISK AS TO THE QUALITY AND PERFORMANCE OF THE PROGRAM IS WITH YOU. SHOULD THE PROGRAM PROVE DEFECTIVE, YOU ASSUME THE COST OF ALL NECESSARY SERVICING, REPAIR OR CORRECTION.
-
IN NO EVENT UNLESS REQUIRED BY APPLICABLE LAW OR AGREED TO IN WRITING WILL ANY COPYRIGHT HOLDER, OR ANY OTHER PARTY WHO MAY MODIFY AND/OR REDISTRIBUTE THE PROGRAM AS PERMITTED ABOVE, BE LIABLE TO YOU FOR DAMAGES, INCLUDING ANY GENERAL, SPECIAL, INCIDENTAL OR CONSEQUENTIAL DAMAGES ARISING OUT OF THE USE OR INABILITY TO USE THE PROGRAM (INCLUDING BUT NOT LIMITED TO LOSS OF DATA OR DATA BEING RENDERED INACCURATE OR LOSSES SUSTAINED BY YOU OR THIRD PARTIES OR A FAILURE OF THE PROGRAM TO OPERATE WITH ANY OTHER PROGRAMS), EVEN IF SUCH HOLDER OR OTHER PARTY HAS BEEN ADVISED OF THE POSSIBILITY OF SUCH DAMAGES.
The files in the base, psi, lib, toolbin, examples, doc and man directories (folders) and any subdirectories (sub-folders) thereof are part of GPL Ghostscript.
The files in the Resource directory and any subdirectories thereof are also part of GPL Ghostscript, with the explicit exception of the files in the CMap subdirectory (except “Identity-UTF16-H”, which is part of GPL Ghostscript). The CMap files are copyright Adobe Systems Incorporated and covered by a separate, GPL compatible license.
The files under the jpegxr directory and any subdirectories thereof are distributed under a no cost, open source license granted by the ITU/ISO/IEC but it is not GPL compatible - see jpegxr/COPYRIGHT.txt for details.
GPL Ghostscript is free software; you can redistribute it and/or modify it under the terms the GNU General Public License as published by the Free Software Foundation, either version 3 of the License, or (at your option) any later version.
GPL Ghostscript is distributed in the hope that it will be useful, but WITHOUT ANY WARRANTY; without even the implied warranty of MERCHANTABILITY or FITNESS FOR A PARTICULAR PURPOSE. See the GNU General Public License for more details.
You should have received a copy of the GNU General Public License along with this program so you can know your rights and responsibilities. It should be in a file named doc/COPYING. If not, write to the
Free Software Foundation, Inc., 59 Temple Place Suite 330, Boston, MA
02111-1307, USA.
GPL Ghostscript contains an implementation of techniques covered by US Patents 5,055,942 and 5,917,614, and corresponding international patents. These patents are licensed for use with GPL Ghostscript under the following grant:
Whereas, Raph Levien (hereinafter “Inventor”) has obtained patent protection for related technology (hereinafter “Patented Technology”), Inventor wishes to aid the the GNU free software project in achieving its goals, and Inventor also wishes to increase public awareness of Patented Technology, Inventor hereby grants a fully paid up, nonexclusive, royalty free license to practice the patents listed below (“the Patents”) if and only if practiced in conjunction with software distributed under the terms of any version of the GNU General Public License as published by the
Free Software Foundation, 59 Temple Place, Suite
330, Boston, MA 02111.
Inventor reserves all other rights, including without limitation, licensing for software not distributed under the GNU General Public License.
5055942 Photographic image reproduction device using digital halftoning to para images allowing adjustable coarseness 5917614 Method and apparatus for error diffusion paraing of images with improved smoothness in highlight and shadow regions
GNU LESSER GENERAL PUBLIC LICENSE Version 2.1, February 1999 http://www.gnu.org/licenses/lgpl-2.1.html
Copyright © 1991, 1999
Free Software Foundation, Inc.
51 Franklin Street, Fifth Floor, Boston, MA 02110-1301 USA
Everyone is permitted to copy and distribute verbatim copies of this license document, but changing it is not allowed.
[This is the first released version of the Lesser GPL. It also counts as the successor of the GNU Library Public License, version 2, hence the version number 2.1.]
Preamble The licenses for most software are designed to take away your freedom to share and change it. By contrast, the GNU General Public Licenses are intended to guarantee your freedom to share and change free software--to make sure the software is free for all its users.
This license, the Lesser General Public License, applies to some specially designated software packages--typically libraries--of the Free Software Foundation and other authors who decide to use it. You can use it too, but we suggest you first think carefully about whether this license or the ordinary General Public License is the better strategy to use in any particular case, based on the explanations below.
When we speak of free software, we are referring to freedom of use, not price. Our General Public Licenses are designed to make sure that you have the freedom to distribute copies of free software (and charge for this service if you wish); that you receive source code or can get it if you want it; that you can change the software and use pieces of it in new free programs; and that you are informed that you can do these things.
To protect your rights, we need to make restrictions that forbid distributors to deny you these rights or to ask you to surrender these rights. These restrictions translate to certain responsibilities for you if you distribute copies of the library or if you modify it.
For example, if you distribute copies of the library, whether gratis or for a fee, you must give the recipients all the rights that we gave you. You must make sure that they, too, receive or can get the source code. If you link other code with the library, you must provide complete object files to the recipients, so that they can relink them with the library after making changes to the library and recompiling it. And you must show them these terms so they know their rights.
We protect your rights with a two-step method:
we copyright the library, and
-
we offer you this license, which gives you legal permission to copy, distribute and/or modify the library.
To protect each distributor, we want to make it very clear that there is no warranty for the free library. Also, if the library is modified by someone else and passed on, the recipients should know that what they have is not the original version, so that the original author's reputation will not be affected by problems that might be introduced by others.
Finally, software patents pose a constant threat to the existence of any free program. We wish to make sure that a company cannot effectively restrict the users of a free program by obtaining a restrictive license from a patent holder. Therefore, we insist that any patent license obtained for a version of the library must be consistent with the full freedom of use specified in this license.
Most GNU software, including some libraries, is covered by the ordinary GNU General Public License. This license, the GNU Lesser General Public License, applies to certain designated libraries, and is quite different from the ordinary General Public License. We use this license for certain libraries in order to permit linking those libraries into non-free programs.
When a program is linked with a library, whether statically or using a shared library, the combination of the two is legally speaking a combined work, a derivative of the original library. The ordinary General Public License therefore permits such linking only if the entire combination fits its criteria of freedom. The Lesser General Public License permits more lax criteria for linking other code with the library.
We call this license the "Lesser" General Public License because it does Less to protect the user's freedom than the ordinary General Public License. It also provides other free software developers Less of an advantage over competing non-free programs. These disadvantages are the reason we use the ordinary General Public License for many libraries. However, the Lesser license provides advantages in certain special circumstances.
For example, on rare occasions, there may be a special need to encourage the widest possible use of a certain library, so that it becomes a de-facto standard. To achieve this, non-free programs must be allowed to use the library. A more frequent case is that a free library does the same job as widely used non-free libraries. In this case, there is little to gain by limiting the free library to free software only, so we use the Lesser General Public License.
In other cases, permission to use a particular library in non-free programs enables a greater number of people to use a large body of free software. For example, permission to use the GNU C Library in non-free programs enables many more people to use the whole GNU operating system, as well as its variant, the GNU/Linux operating system.
Although the Lesser General Public License is Less protective of the users' freedom, it does ensure that the user of a program that is linked with the Library has the freedom and the wherewithal to run that program using a modified version of the Library.
The precise terms and conditions for copying, distribution and modification follow. Pay close attention to the difference between a “work based on the library” and a “work that uses the library”. The former contains code derived from the library, whereas the latter must be combined with the library in order to run.
TERMS AND CONDITIONS FOR COPYING, DISTRIBUTION AND MODIFICATION
-
This License Agreement applies to any software library or other program which contains a notice placed by the copyright holder or other authorized party saying it may be distributed under the terms of this Lesser General Public License (also called “this License”). Each licensee is addressed as “you”.
A “library” means a collection of software functions and/or data prepared so as to be conveniently linked with application programs (which use some of those functions and data) to form executables.
The “Library”, below, refers to any such software library or work which has been distributed under these terms. A “work based on the Library” means either the Library or any derivative work under copyright law: that is to say, a work containing the Library or a portion of it, either verbatim or with modifications and/or translated straightforwardly into another language. (Hereinafter, translation is included without limitation in the term “modification”.)
“Source code” for a work means the preferred form of the work for making modifications to it. For a library, complete source code means all the source code for all modules it contains, plus any associated interface definition files, plus the scripts used to control compilation and installation of the library.
Activities other than copying, distribution and modification are not covered by this License; they are outside its scope. The act of running a program using the Library is not restricted, and output from such a program is covered only if its contents constitute a work based on the Library (independent of the use of the Library in a tool for writing it). Whether that is true depends on what the Library does and what the program that uses the Library does.
You may copy and distribute verbatim copies of the Library's complete source code as you receive it, in any medium, provided that you conspicuously and appropriately publish on each copy an appropriate copyright notice and disclaimer of warranty; keep intact all the notices that refer to this License and to the absence of any warranty; and distribute a copy of this License along with the Library.
You may charge a fee for the physical act of transferring a copy, and you may at your option offer warranty protection in exchange for a fee.
You may modify your copy or copies of the Library or any portion of it, thus forming a work based on the Library, and copy and distribute such modifications or work under the terms of Section 1 above, provided that you also meet all of these conditions:
The modified work must itself be a software library.
You must cause the files modified to carry prominent notices stating that you changed the files and the date of any change.
You must cause the whole of the work to be licensed at no charge to all third parties under the terms of this License.
If a facility in the modified Library refers to a function or a table of data to be supplied by an application program that uses the facility, other than as an argument passed when the facility is invoked, then you must make a good faith effort to ensure that, in the event an application does not supply such function or table, the facility still operates, and performs whatever part of its purpose remains meaningful. (For example, a function in a library to compute square roots has a purpose that is entirely well-defined independent of the application. Therefore, Subsection 2d requires that any application-supplied function or table used by this function must be optional: if the application does not supply it, the square root function must still compute square roots.)
These requirements apply to the modified work as a whole. If identifiable sections of that work are not derived from the Library, and can be reasonably considered independent and separate works in themselves, then this License, and its terms, do not apply to those sections when you distribute them as separate works. But when you distribute the same sections as part of a whole which is a work based on the Library, the distribution of the whole must be on the terms of this License, whose permissions for other licensees extend to the entire whole, and thus to each and every part regardless of who wrote it.
Thus, it is not the intent of this section to claim rights or contest your rights to work written entirely by you; rather, the intent is to exercise the right to control the distribution of derivative or collective works based on the Library.
In addition, mere aggregation of another work not based on the Library with the Library (or with a work based on the Library) on a volume of a storage or distribution medium does not bring the other work under the scope of this License.
You may opt to apply the terms of the ordinary GNU General Public License instead of this License to a given copy of the Library. To do this, you must alter all the notices that refer to this License, so that they refer to the ordinary GNU General Public License, version 2, instead of to this License. (If a newer version than version 2 of the ordinary GNU General Public License has appeared, then you can specify that version instead if you wish.) Do not make any other change in these notices.
Once this change is made in a given copy, it is irreversible for that copy, so the ordinary GNU General Public License applies to all subsequent copies and derivative works made from that copy.
This option is useful when you wish to copy part of the code of the Library into a program that is not a library.
You may copy and distribute the Library (or a portion or derivative of it, under Section 2) in object code or executable form under the terms of Sections 1 and 2 above provided that you accompany it with the complete corresponding machine-readable source code, which must be distributed under the terms of Sections 1 and 2 above on a medium customarily used for software interchange.
If distribution of object code is made by offering access to copy from a designated place, then offering equivalent access to copy the source code from the same place satisfies the requirement to distribute the source code, even though third parties are not compelled to copy the source along with the object code.
A program that contains no derivative of any portion of the Library, but is designed to work with the Library by being compiled or linked with it, is called a "work that uses the Library". Such a work, in isolation, is not a derivative work of the Library, and therefore falls outside the scope of this License.
However, linking a "work that uses the Library" with the Library creates an executable that is a derivative of the Library (because it contains portions of the Library), rather than a “work that uses the library”. The executable is therefore covered by this License. Section 6 states terms for distribution of such executables.
When a “work that uses the Library” uses material from a header file that is part of the Library, the object code for the work may be a derivative work of the Library even though the source code is not. Whether this is true is especially significant if the work can be linked without the Library, or if the work is itself a library. The threshold for this to be true is not precisely defined by law.
If such an object file uses only numerical parameters, data structure layouts and accessors, and small macros and small inline functions (ten lines or less in length), then the use of the object file is unrestricted, regardless of whether it is legally a derivative work. (Executables containing this object code plus portions of the Library will still fall under Section 6.)
Otherwise, if the work is a derivative of the Library, you may distribute the object code for the work under the terms of Section 6. Any executables containing that work also fall under Section 6, whether or not they are linked directly with the Library itself.
As an exception to the Sections above, you may also combine or link a "work that uses the Library" with the Library to produce a work containing portions of the Library, and distribute that work under terms of your choice, provided that the terms permit modification of the work for the customer's own use and reverse engineering for debugging such modifications.
You must give prominent notice with each copy of the work that the Library is used in it and that the Library and its use are covered by this License. You must supply a copy of this License. If the work during execution displays copyright notices, you must include the copyright notice for the Library among them, as well as a reference directing the user to the copy of this License.
Also, you must do one of these things:
Accompany the work with the complete corresponding machine-readable source code for the Library including whatever changes were used in the work (which must be distributed under Sections 1 and 2 above); and, if the work is an executable linked with the Library, with the complete machine-readable "work that uses the Library", as object code and/or source code, so that the user can modify the Library and then relink to produce a modified executable containing the modified Library. (It is understood that the user who changes the contents of definitions files in the Library will not necessarily be able to recompile the application to use the modified definitions.)
Use a suitable shared library mechanism for linking with the Library. A suitable mechanism is one that
uses at run time a copy of the library already present on the user's computer system, rather than copying library functions into the executable, and
will operate properly with a modified version of the library, if the user installs one, as long as the modified version is interface-compatible with the version that the work was made with.
Accompany the work with a written offer, valid for at least three years, to give the same user the materials specified in Subsection 6a, above, for a charge no more than the cost of performing this distribution.
If distribution of the work is made by offering access to copy from a designated place, offer equivalent access to copy the above specified materials from the same place.
-
Verify that the user has already received a copy of these materials or that you have already sent this user a copy. For an executable, the required form of the “work that uses the Library” must include any data and utility programs needed for reproducing the executable from it. However, as a special exception, the materials to be distributed need not include anything that is normally distributed (in either source or binary form) with the major components (compiler, kernel, and so on) of the operating system on which the executable runs, unless that component itself accompanies the executable.
It may happen that this requirement contradicts the license restrictions of other proprietary libraries that do not normally accompany the operating system. Such a contradiction means you cannot use both them and the Library together in an executable that you distribute.
You may place library facilities that are a work based on the Library side-by-side in a single library together with other library facilities not covered by this License, and distribute such a combined library, provided that the separate distribution of the work based on the Library and of the other library facilities is otherwise permitted, and provided that you do these two things:
Accompany the combined library with a copy of the same work based on the Library, uncombined with any other library facilities. This must be distributed under the terms of the Sections above.
Give prominent notice with the combined library of the fact that part of it is a work based on the Library, and explaining where to find the accompanying uncombined form of the same work.
You may not copy, modify, sublicense, link with, or distribute the Library except as expressly provided under this License. Any attempt otherwise to copy, modify, sublicense, link with, or distribute the Library is void, and will automatically terminate your rights under this License. However, parties who have received copies, or rights, from you under this License will not have their licenses terminated so long as such parties remain in full compliance.
You are not required to accept this License, since you have not signed it. However, nothing else grants you permission to modify or distribute the Library or its derivative works. These actions are prohibited by law if you do not accept this License. Therefore, by modifying or distributing the Library (or any work based on the Library), you indicate your acceptance of this License to do so, and all its terms and conditions for copying, distributing or modifying the Library or works based on it.
Each time you redistribute the Library (or any work based on the Library), the recipient automatically receives a license from the original licensor to copy, distribute, link with or modify the Library subject to these terms and conditions. You may not impose any further restrictions on the recipients' exercise of the rights granted herein. You are not responsible for enforcing compliance by third parties with this License.
If, as a consequence of a court judgment or allegation of patent infringement or for any other reason (not limited to patent issues), conditions are imposed on you (whether by court order, agreement or otherwise) that contradict the conditions of this License, they do not excuse you from the conditions of this License. If you cannot distribute so as to satisfy simultaneously your obligations under this License and any other pertinent obligations, then as a consequence you may not distribute the Library at all. For example, if a patent license would not permit royalty-free redistribution of the Library by all those who receive copies directly or indirectly through you, then the only way you could satisfy both it and this License would be to refrain entirely from distribution of the Library.
If any portion of this section is held invalid or unenforceable under any particular circumstance, the balance of the section is intended to apply, and the section as a whole is intended to apply in other circumstances.
It is not the purpose of this section to induce you to infringe any patents or other property right claims or to contest validity of any such claims; this section has the sole purpose of protecting the integrity of the free software distribution system which is implemented by public license practices. Many people have made generous contributions to the wide range of software distributed through that system in reliance on consistent application of that system; it is up to the author/donor to decide if he or she is willing to distribute software through any other system and a licensee cannot impose that choice.
This section is intended to make thoroughly clear what is believed to be a consequence of the rest of this License.
-
If the distribution and/or use of the Library is restricted in certain countries either by patents or by copyrighted interfaces, the original copyright holder who places the Library under this License may add an explicit geographical distribution limitation excluding those countries, so that distribution is permitted only in or among countries not thus excluded. In such case, this License incorporates the limitation as if written in the body of this License.
-
The Free Software Foundation may publish revised and/or new versions of the Lesser General Public License from time to time. Such new versions will be similar in spirit to the present version, but may differ in detail to address new problems or concerns.
Each version is given a distinguishing version number. If the Library specifies a version number of this License which applies to it and "any later version", you have the option of following the terms and conditions either of that version or of any later version published by the Free Software Foundation. If the Library does not specify a license version number, you may choose any version ever published by the Free Software Foundation.
If you wish to incorporate parts of the Library into other free programs whose distribution conditions are incompatible with these, write to the author to ask for permission. For software which is copyrighted by the Free Software Foundation, write to the Free Software Foundation; we sometimes make exceptions for this. Our decision will be guided by the two goals of preserving the free status of all derivatives of our free software and of promoting the sharing and reuse of software generally.
NO WARRANTY
BECAUSE THE LIBRARY IS LICENSED FREE OF CHARGE, THERE IS NO WARRANTY FOR THE LIBRARY, TO THE EXTENT PERMITTED BY APPLICABLE LAW. EXCEPT WHEN OTHERWISE STATED IN WRITING THE COPYRIGHT HOLDERS AND/OR OTHER PARTIES PROVIDE THE LIBRARY "AS IS" WITHOUT WARRANTY OF ANY KIND, EITHER EXPRESSED OR IMPLIED, INCLUDING, BUT NOT LIMITED TO, THE IMPLIED WARRANTIES OF MERCHANTABILITY AND FITNESS FOR A PARTICULAR PURPOSE. THE ENTIRE RISK AS TO THE QUALITY AND PERFORMANCE OF THE LIBRARY IS WITH YOU. SHOULD THE LIBRARY PROVE DEFECTIVE, YOU ASSUME THE COST OF ALL NECESSARY SERVICING, REPAIR OR CORRECTION.
IN NO EVENT UNLESS REQUIRED BY APPLICABLE LAW OR AGREED TO IN WRITING WILL ANY COPYRIGHT HOLDER, OR ANY OTHER PARTY WHO MAY MODIFY AND/OR REDISTRIBUTE THE LIBRARY AS PERMITTED ABOVE, BE LIABLE TO YOU FOR DAMAGES, INCLUDING ANY GENERAL, SPECIAL, INCIDENTAL OR CONSEQUENTIAL DAMAGES ARISING OUT OF THE USE OR INABILITY TO USE THE LIBRARY (INCLUDING BUT NOT LIMITED TO LOSS OF DATA OR DATA BEING RENDERED INACCURATE OR LOSSES SUSTAINED BY YOU OR THIRD PARTIES OR A FAILURE OF THE LIBRARY TO OPERATE WITH ANY OTHER SOFTWARE), EVEN IF SUCH HOLDER OR OTHER PARTY HAS BEEN ADVISED OF THE POSSIBILITY OF SUCH DAMAGES.
© Wang Bin <wbsecg1@gmail.com>
Shanghai University->S3 Graphics->Deepin, Shanghai, China
2013-01-21
**QtAV is free software licensed under the term of LGPL v2.1. The player example is licensed under GPL v3. If you use QtAV or its constituent libraries, you must adhere to the terms of the license in question.**
Rather than repeating the text of the LGPL v2.1, the original text can be found in GNU LESSER GENERAL PUBLIC LICENSE, Version 2.1.
Most files in FFmpeg are under the GNU Lesser General Public License version 2.1 or later (LGPL v2.1+). Read the file `COPYING.LGPLv2.1` for details. Some other files have MIT/X11/BSD-style licenses. In combination the LGPL v2.1+ applies to FFmpeg.
Rather than repeating the text of the LGPL v2.1, the original text can be found in GNU LESSER GENERAL PUBLIC LICENSE, Version 2.1.
The MIT License (MIT) © 2013 Masayuki Tanaka
Permission is hereby granted, free of charge, to any person obtaining a copy of this software and associated documentation files (the "Software"), to deal in the Software without restriction, including without limitation the rights to use, copy, modify, merge, publish, distribute, sublicense, and/or sell copies of the Software, and to permit persons to whom the Software is furnished to do so, subject to the following conditions:
The above copyright notice and this permission notice shall be included in all copies or substantial portions of the Software.
THE SOFTWARE IS PROVIDED “AS IS”, WITHOUT WARRANTY OF ANY KIND, EXPRESS OR IMPLIED, INCLUDING BUT NOT LIMITED TO THE WARRANTIES OF MERCHANTABILITY, FITNESS FOR A PARTICULAR PURPOSE AND NONINFRINGEMENT. IN NO EVENT SHALL THE AUTHORS OR COPYRIGHT HOLDERS BE LIABLE FOR ANY CLAIM, DAMAGES OR OTHER LIABILITY, WHETHER IN AN ACTION OF CONTRACT, TORT OR OTHERWISE, ARISING FROM, OUT OF OR IN CONNECTION WITH THE SOFTWARE OR THE USE OR OTHER DEALINGS IN THE SOFTWARE.
Copyright 2010-2017 Mike Bostock All rights reserved.
Redistribution and use in source and binary forms, with or without modification, are permitted provided that the following conditions are met: * Redistributions of source code must retain the above copyright notice, this list of conditions and the following disclaimer. * Redistributions in binary form must reproduce the above copyright notice, this list of conditions and the following disclaimer in the documentation and/or other materials provided with the distribution. * Neither the name of the author nor the names of contributors may be used to endorse or promote products derived from this software without specific prior written permission.
THIS SOFTWARE IS PROVIDED BY THE COPYRIGHT HOLDERS AND CONTRIBUTORS “AS IS” AND ANY EXPRESS OR IMPLIED WARRANTIES, INCLUDING, BUT NOT LIMITED TO, THE IMPLIED WARRANTIES OF MERCHANTABILITY AND FITNESS FOR A PARTICULAR PURPOSE ARE DISCLAIMED. IN NO EVENT SHALL THE COPYRIGHT OWNER OR CONTRIBUTORS BE LIABLE FOR ANY DIRECT, INDIRECT, INCIDENTAL, SPECIAL, EXEMPLARY, OR CONSEQUENTIAL DAMAGES (INCLUDING, BUT NOT LIMITED TO, PROCUREMENT OF SUBSTITUTE GOODS OR SERVICES; LOSS OF USE, DATA, OR PROFITS; OR BUSINESS INTERRUPTION) HOWEVER CAUSED AND ON ANY THEORY OF LIABILITY, WHETHER IN CONTRACT, STRICT LIABILITY, OR TORT (INCLUDING NEGLIGENCE OR OTHERWISE) ARISING IN ANY WAY OUT OF THE USE OF THIS SOFTWARE, EVEN IF ADVISED OF THE POSSIBILITY OF SUCH DAMAGE.