Table of Contents
On the Subjects page, click a subject ID from the list to open the subject binder page.
If the subject ID you need is not in the list, click
 to add a new subject ID.
This opens a dialog with two text input fields. Enter the subject ID to add to the current site. Confirm the subject ID by entering it again. Click to confirm the subject creation, or to close the dialog without creating a subject.
to add a new subject ID.
This opens a dialog with two text input fields. Enter the subject ID to add to the current site. Confirm the subject ID by entering it again. Click to confirm the subject creation, or to close the dialog without creating a subject.
The subject binder page displays the available visits for that
subject. Under each visit, the CRFs available at that visit are presented.
Click a visit
to see the list of CRFs in that visit. To begin data entry,
select the appropriate visit and CRF. To change to a different visit or CRF,
click
 in the CRF page header area to return to the subject binder page.
The last in-focused field displays a vertical bar on the left edge of the field. It may contain color information, including red (required and missing or illegal values), blue (outstanding query), green (resolved), orange (pending), and black (otherwise).
Some fields only accept specific data formats. Field formatting is shown in the blank field to help guide data entry. For example, a date field may have the format YYYY/MM/DD
or a lab result field may have the format nn.nn.
Some fields may have legal ranges defined. If you enter an illegal value, the value turns red, and you are shown a warning similar to: "Input value is not in the legal range." The warning disappears after a few seconds, though the value remains red until corrected.
In addition to the description for each field on the CRF, help information may be available for the field. This is indicated with a
 icon. Click
to view the help message.
icon. Click
to view the help message.
Keyboard navigation on DFcollect is not standardized on tablet devices, hence field skipping is not implemented. Navigate directly to fields by selecting them.
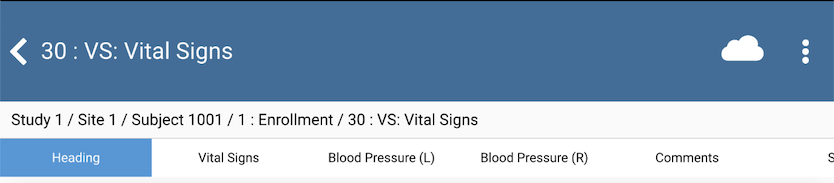
Numeric digits (0-9), and a sign symbol (+ or -) can be entered in number fields. If a decimal or other character is required, it is entered automatically to match the required format for the field.
Except for the | character,
any text may be entered in a string field. A maximum field length may be defined which limits the number of characters that can be entered.
Use the date picker to select a date. If a date is entered using the keyboard, it must follow the defined format, e.g. DD-MMM-YYYY, YYYY/MM/DD, DDMMYY. Partial dates may only be entered via the keyboard.
Only one response option can be selected for each choice field. The field is displayed as radio buttons if there are three or fewer response options, otherwise they are displayed in a drop-down menu. To clear a response on a radio button, click the currently selected radio button again. Drop-down menus show the empty response as the first option - use that to clear the response.
A check field can be checked or unchecked. Multiple check fields may be included in one item; check all that apply.
Select a point along the scale by clicking that point. Drag the slider to select values more precisely. The selected value is shown above the scale in the middle, with the low and high limits of the scale shown on the left and right respectively. To remove the value, click , select from the dropdown, and click .
Edit checks are defined during study setup. They are fragments of logic that enforce study expectations for the data collected. They run interactively during data entry and data review. Edit checks may be run when you enter a CRF or a field, or when you leave a CRF or a field. Edit checks perform various actions, such as displaying a warning message, adding a query, calculating data, or changing data to view only.
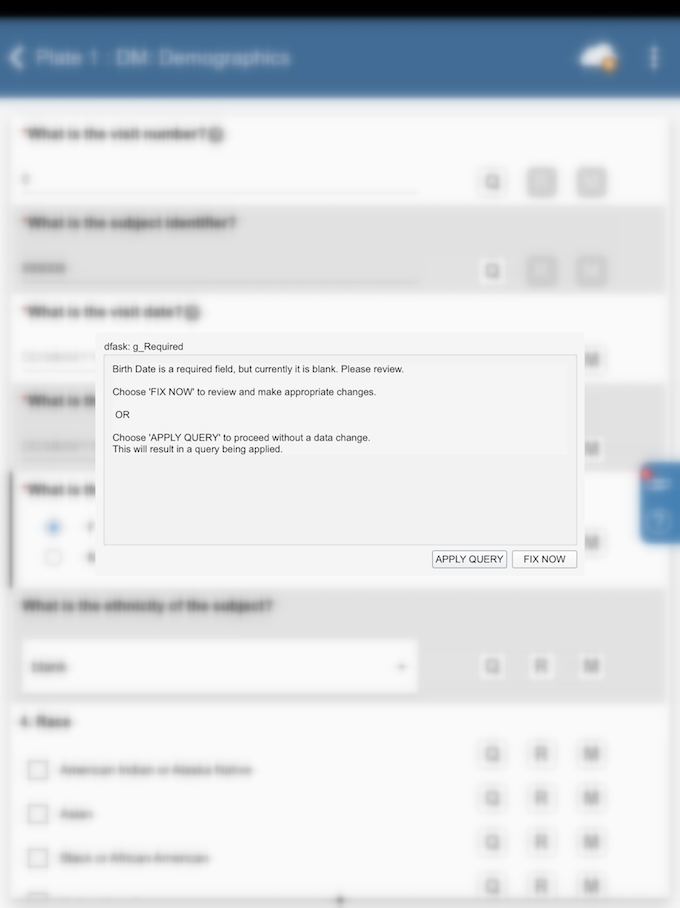
The following is an example edit check. Your own study will likely have similar edit checks that also display messages and request input. In the edit check example shown below, the edit check has detected an inconsistency in the response. The user is asked to click to return to the data field to make a correction, or click to add a query to the field and fix the problem later.
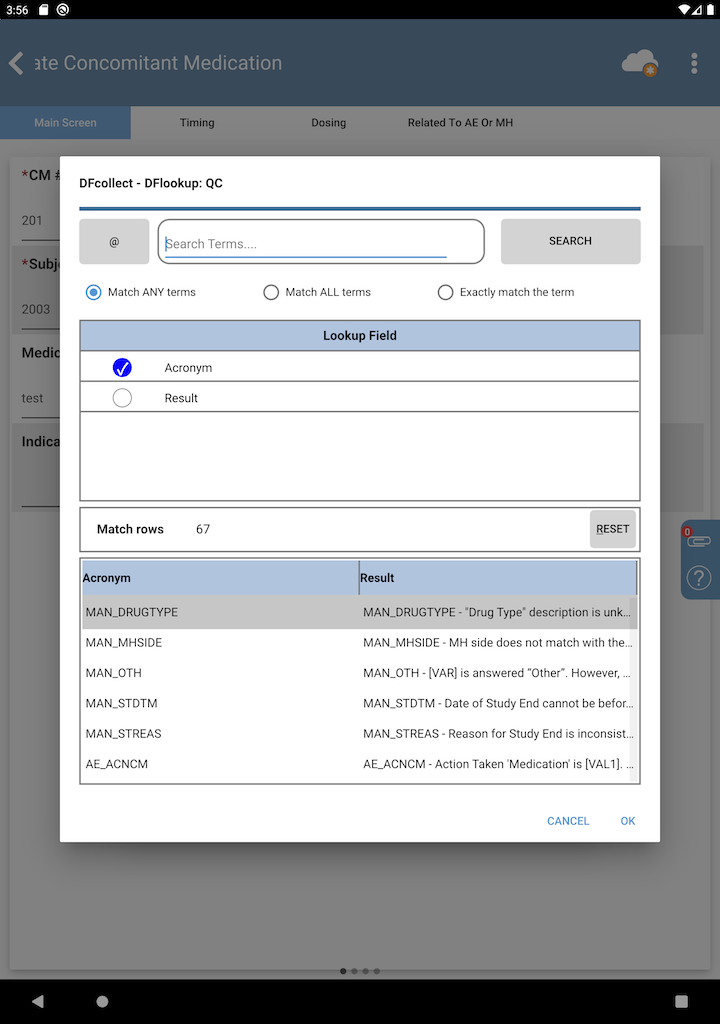
Certain edit checks may offer the opportunity to select a value from a lookup table. The behavior of lookup tables is identical to the behavior in DFexplore, except that DFcollect only supports lookup tables with a file size below 40 MB. For further information, refer to DFexplore User Guide, Using Lookup Tables.
When you have completed data entry on a CRF, you must save your changes before
leaving the CRF. To do so, click
 if you are online, or
 if you are offline, which are located in the Header Panel.
If you are offline,
you must remember to upload the changes to the server when you connect to a network.
More details on this process, including handling conflicts, can be found in
Working Offline.
if you are offline, which are located in the Header Panel.
If you are offline,
you must remember to upload the changes to the server when you connect to a network.
More details on this process, including handling conflicts, can be found in
Working Offline.
If you leave the CRF before saving, the following dialog is presented:
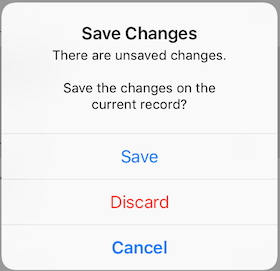
Click to remain on the CRF. Click to save your changes before leaving, or click to discard the data on the CRF. If you discard the data, your changes are not saved and cannot be retrieved.
If the CRF you have saved requires an electronic signature, after clicking
if you are online, or
if you are offline, a dialog will appear indicating that the page is eligible for signing.
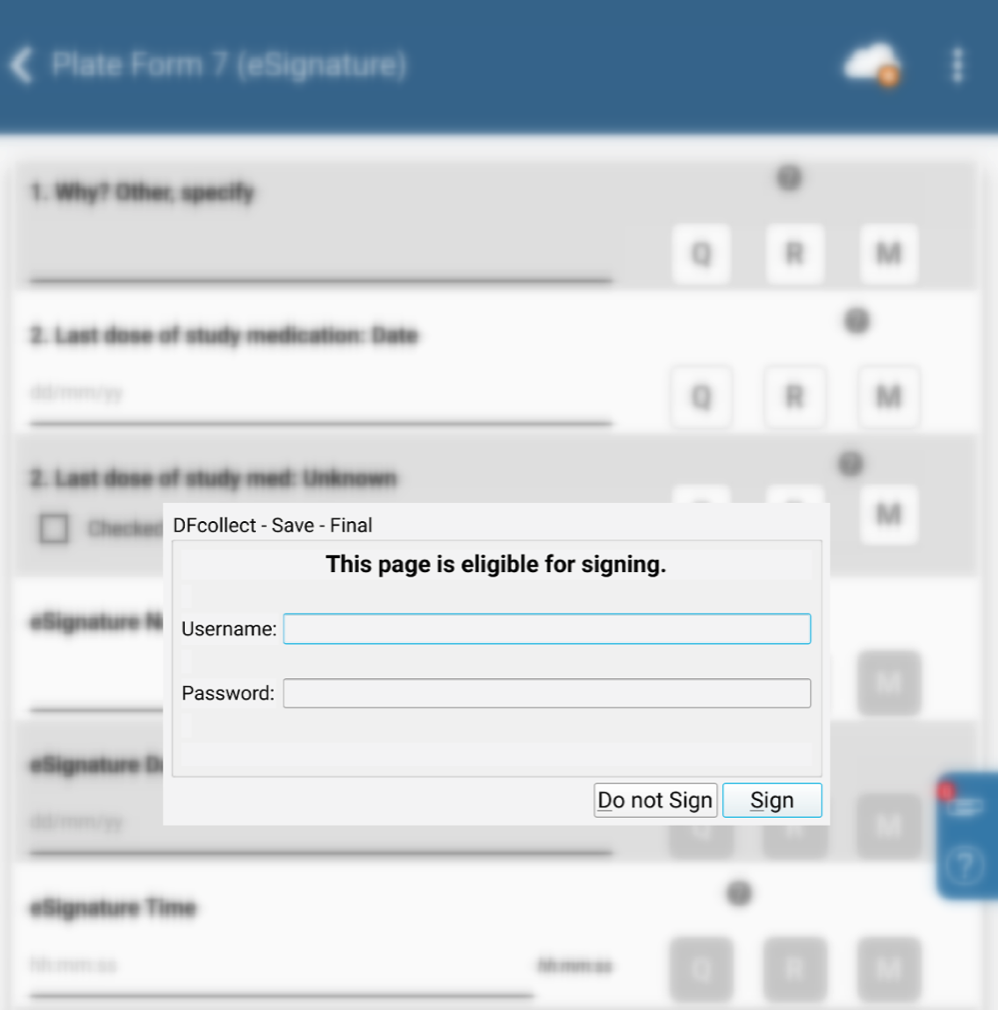
Provide your username and password and click to execute your electronic signature and save the CRF. The eSignature fields on the CRF (signature, date, time, reason) will be autofilled on the CRF once signed. The eSignature fields cannot be manually entered or changed during data entry.
You have a limited number of tries to enter the correct username and password. If you provide an incorrect password more than the number of tries indicated, the CRF changes will not be saved and you will be automatically logged out of DFcollect.
If you do not want to sign the record, click to save the CRF without providing your signature.
Once you have signed one CRF, you will only need to provide your password when you sign additional CRFs during that login session.
If data on a signed CRF changes after it was signed, it will need to be signed again.
A missed CRF is a page that will not be completed, for example if an expected procedure was not performed at a visit or a form is not applicable for specific subject.
CRFs may be set as missed if your user permissions allow it. To set a CRF as missed, open the blank CRF, click  in the page header, and select .
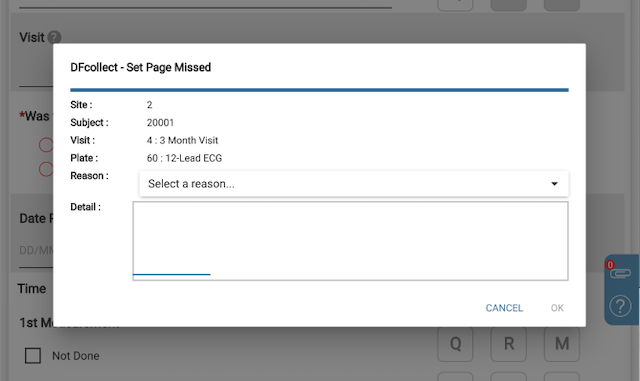
Choose a reason category and enter details describing the circumstances. Click to set the CRF as missed or to return to the empty CRF. After clicking , the CRF status is missed and you will return to the subject binder. This CRF is now view only.
CRFs may be set to missed while online only.
To see the reason why a CRF is missed, click in the page header and select .
If a missed CRF needs to be completed or was set missed in error, open the blank CRF, click in the page header, and select .
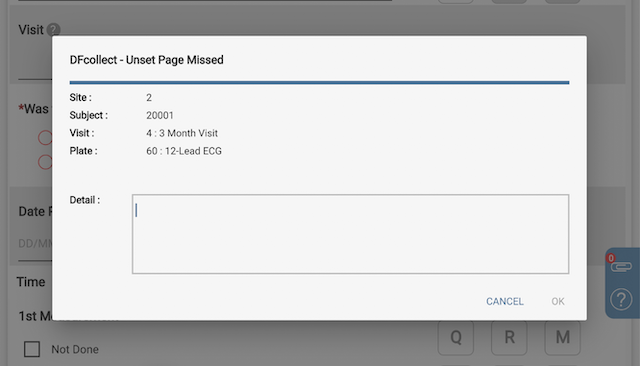
Complete the Detail section to explain why page is no longer missed. Click to remove the missed status or to return to the missed CRF. After clicking , the CRF is blank and data may be entered.
If a CRF's missed status is removed while offline and the CRF remains blank, the CRF will remain missed when it syncs with the server.
Missed CRFs are only supported when connected to DFdiscover server and API version 5.6 or later.
You can view the history of changes made to a CRF (audit trail) using the Page History option. With any saved CRF open, click in the page header and select to view the history of changes for the current CRF page.
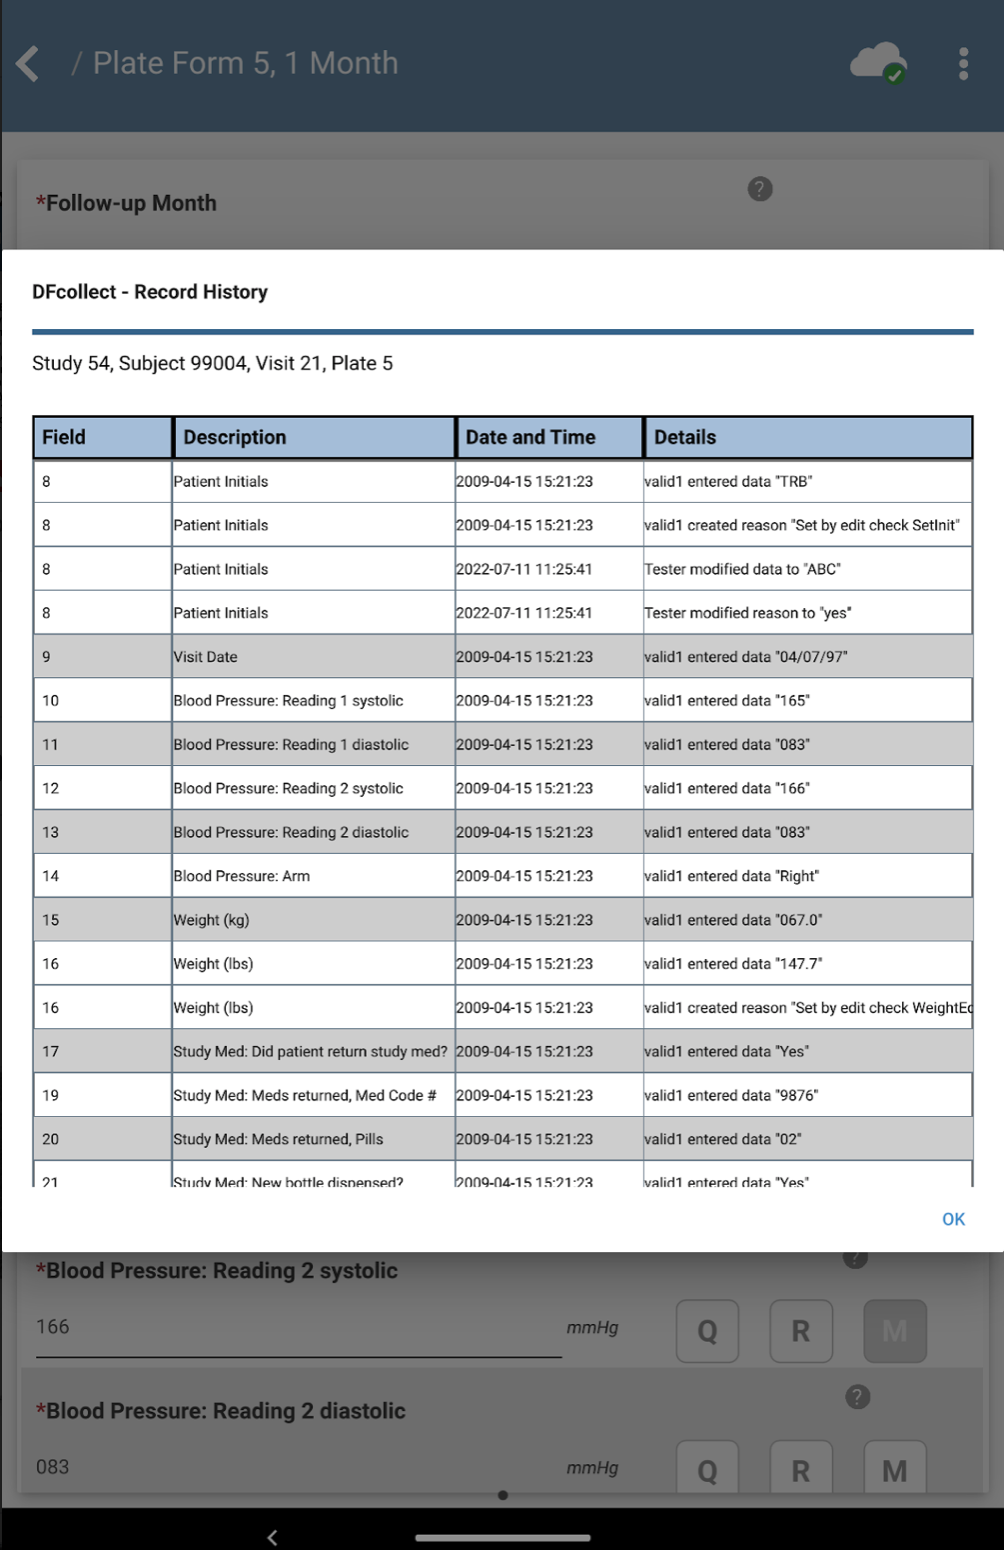
The Page History dialog displays a table with the headers: field number, field description, date and time, and details. The details includes what changes were made to data and metadata along with the username of the person making the changes. All changes to a field are grouped together, from oldest change to newest change, with the background row color alternating for each field.
On smaller screens, the field number is not displayed, and you may need to scroll across to view the full details.
Click to close the dialog and return to the data entry screen.
Page History is only available while online. While offline, the Page History dialog will indicate that history of changes is not available.
Page History is only available when DFcollect is connected to DFdiscover server and API version 5.5 or later.
To return to the Subjects list from a subject binder or CRF, click
until you arrive at the Subjects list.
To search for a specific subject ID, click
 to open the search bar. Type the subject ID into the search bar and click
.
You are taken to the first subject ID in the list that matches your search.
Click
to open the search bar. Type the subject ID into the search bar and click
.
You are taken to the first subject ID in the list that matches your search.
Click
 and
and
 to move to the next or the previous subject IDs that match your search.
Clicking
to move to the next or the previous subject IDs that match your search.
Clicking
 takes you back to the first subject ID in the list that matches the search.