Table of Contents
- 10.1. Tests & Requirements
- 10.2. Begin Module 10.
- 10.3. Obtain database query metrics and details using Status and List Views to review all outstanding queries prior to query report creation.
- 10.4. Run database integrity check report DF_XXkeys to export all key fields and visit dates from required plates in the database.
- 10.5. Use Data View to check and, if necessary correct, illegal visit dates by retrieving the problems keys identified by DF_XXkeys.
- 10.6. Execute DF_QCupdate to update the query database and lock all records for query report generation.
- 10.7. Execute DF_QCreports to create a standard, 3-part external query report for a study site.
- 10.8. Confirm the status of external queries following query report creation.
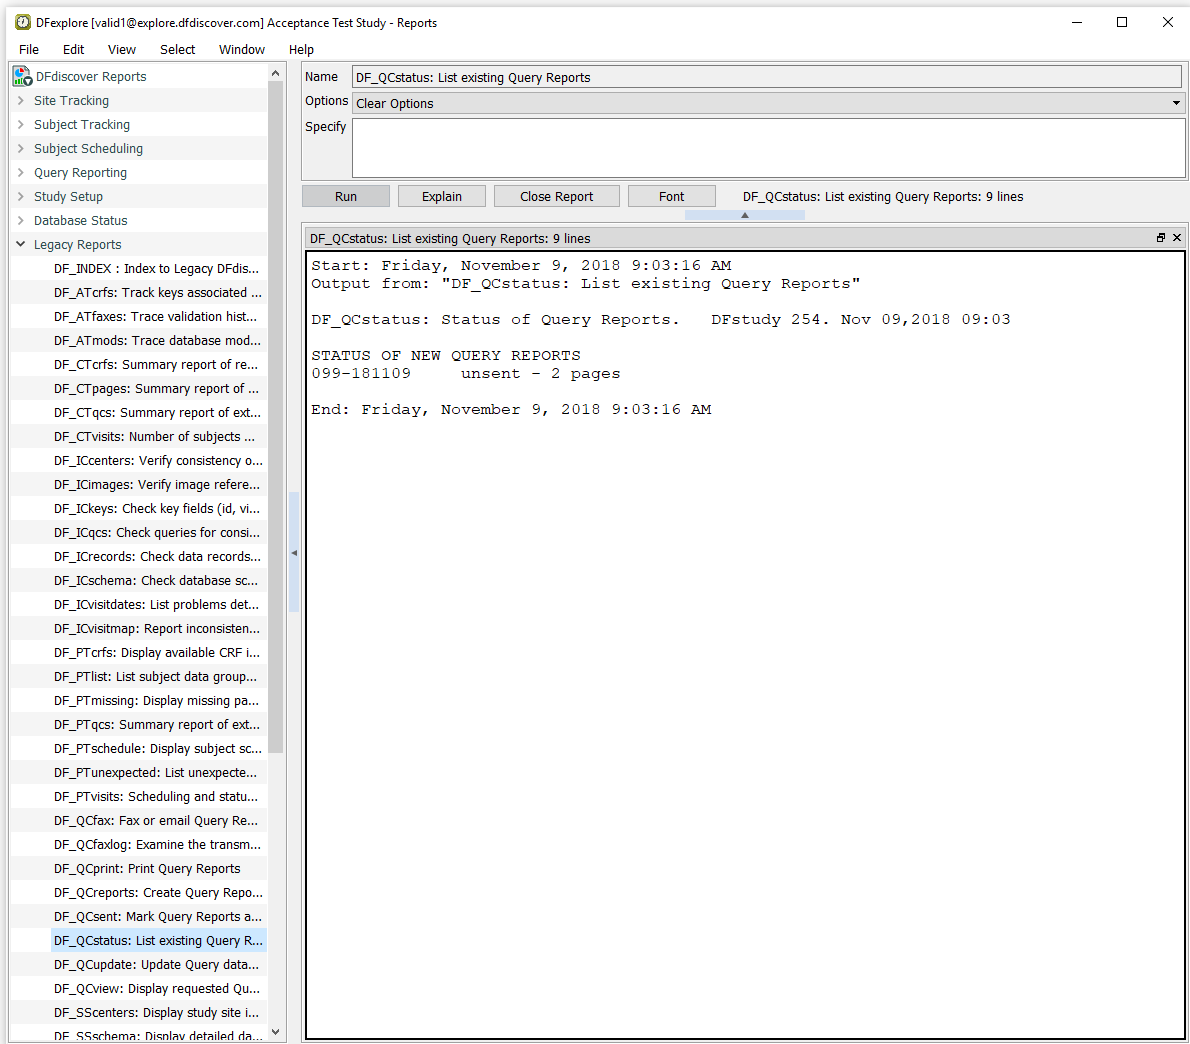
- 10.9. Execute DF_QCstatus to verify that a new query report was created by listing all reports in the QC/NEW directory.
- 10.10. Execute DF_QCview to display the newly created query report.
- 10.11. Execute DF_QCprint to print the query report from the QC/NEW directory.
- 10.12. Comparing several examples from the printed query report against their corresponding queries in the study database.
- 10.13. Execute DF_QCfax to email the query report to a valid email account.
- 10.14. Verify the status of the queries in the sent report.
- 10.15. End Module 10.
Obtain database query metrics and details using Status and List Views to review all outstanding queries prior to query report creation.
Run database integrity check report DF_XXkeys to export all key fields and visit dates from required plates in the database.
Use Data View to check and, if necessary correct, illegal visit dates by retrieving the problems keys identified by DF_XXkeys.
Execute DF_QCupdate to update the query database and lock all records for query report generation.
Execute DF_QCreports to create a standard, 3-part external query report for a study site.
Confirm the status of external queries following query report creation.
Execute DF_QCstatus to verify that a new query report was created by listing all reports in the QC/NEW directory.
Execute DF_QCview to display the newly created query report.
Execute DF_QCprint to print the query report from the QC/NEW directory.
Comparing several examples from the printed query report against their corresponding queries in the study database.
Execute DF_QCfax to email the query report to a valid email account.
Verify the status of the queries in the sent report.
Estimate of Time Required: 40 Minutes
-
Start DFATK as described in Module 1 (Installation & Initialization).
-
Click followed by to begin this module.
-
Start DFexplore.

-
In the DFexplore login dialog, enter the name for DFdiscover Server that has been provided by your administrator. Enter
valid1in the Username field and the previously assigned password in the Password field. Click to login.
-
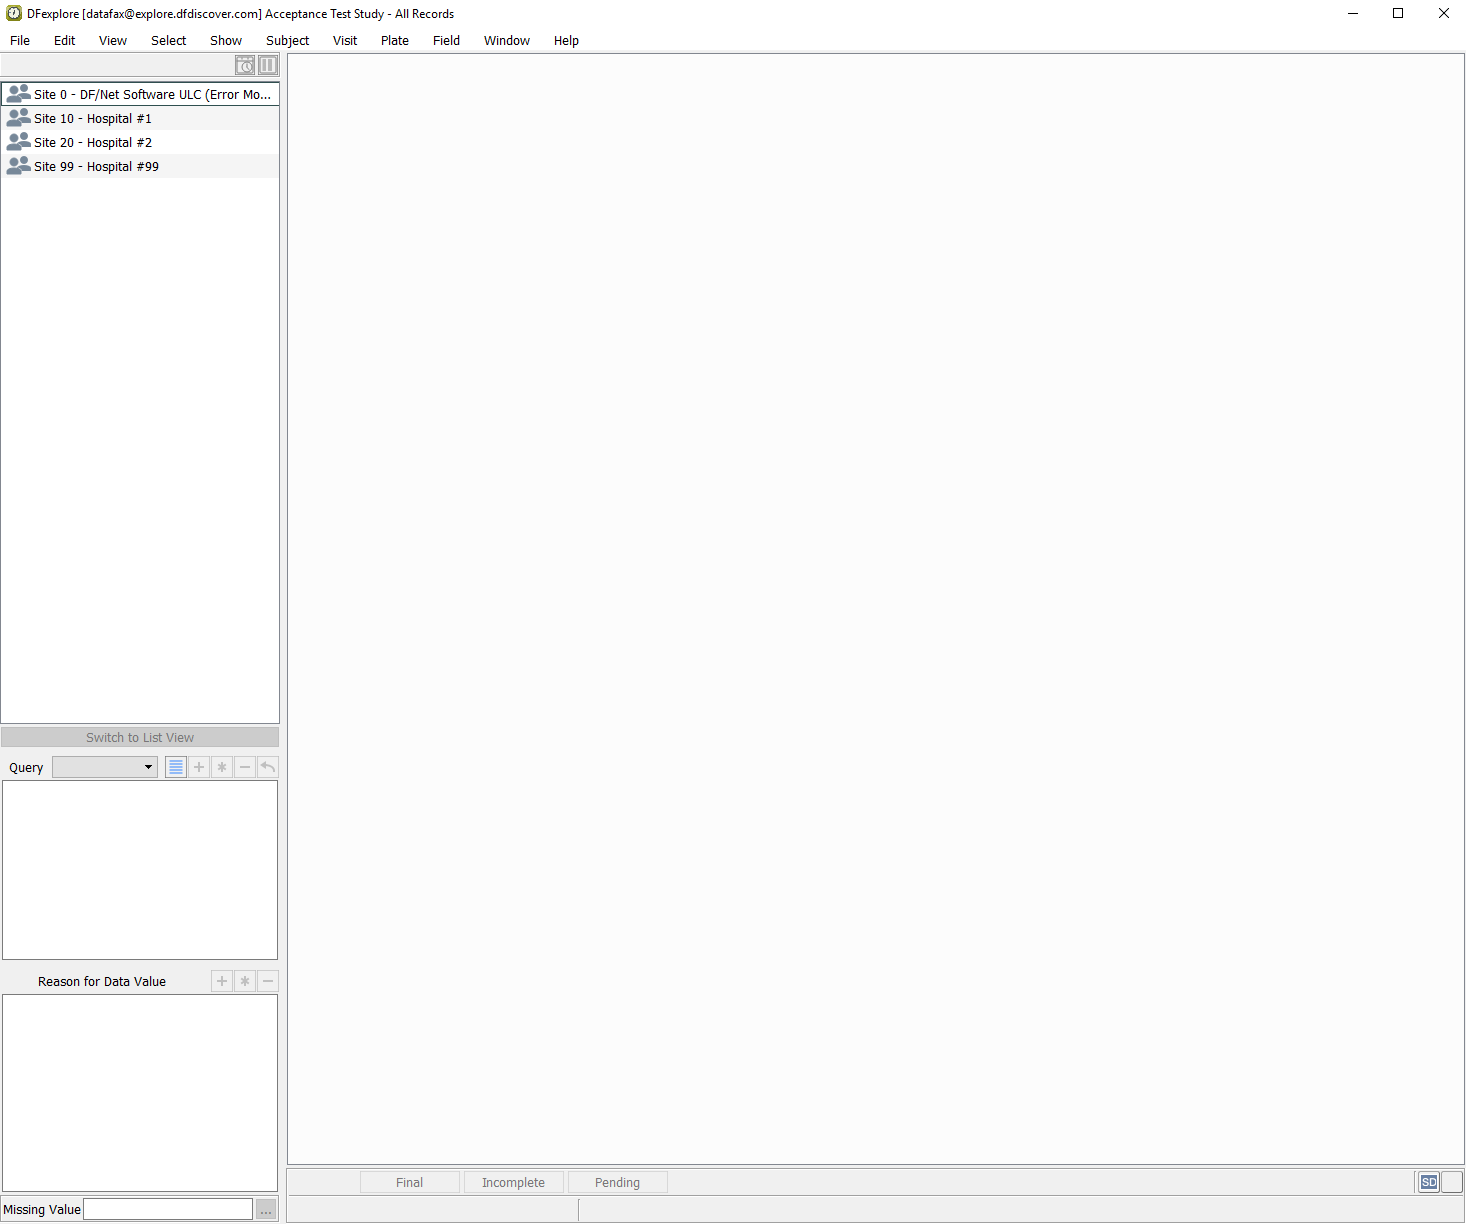
From the list of available studies, select the 254 Acceptance Test Study then click to open its database.
-
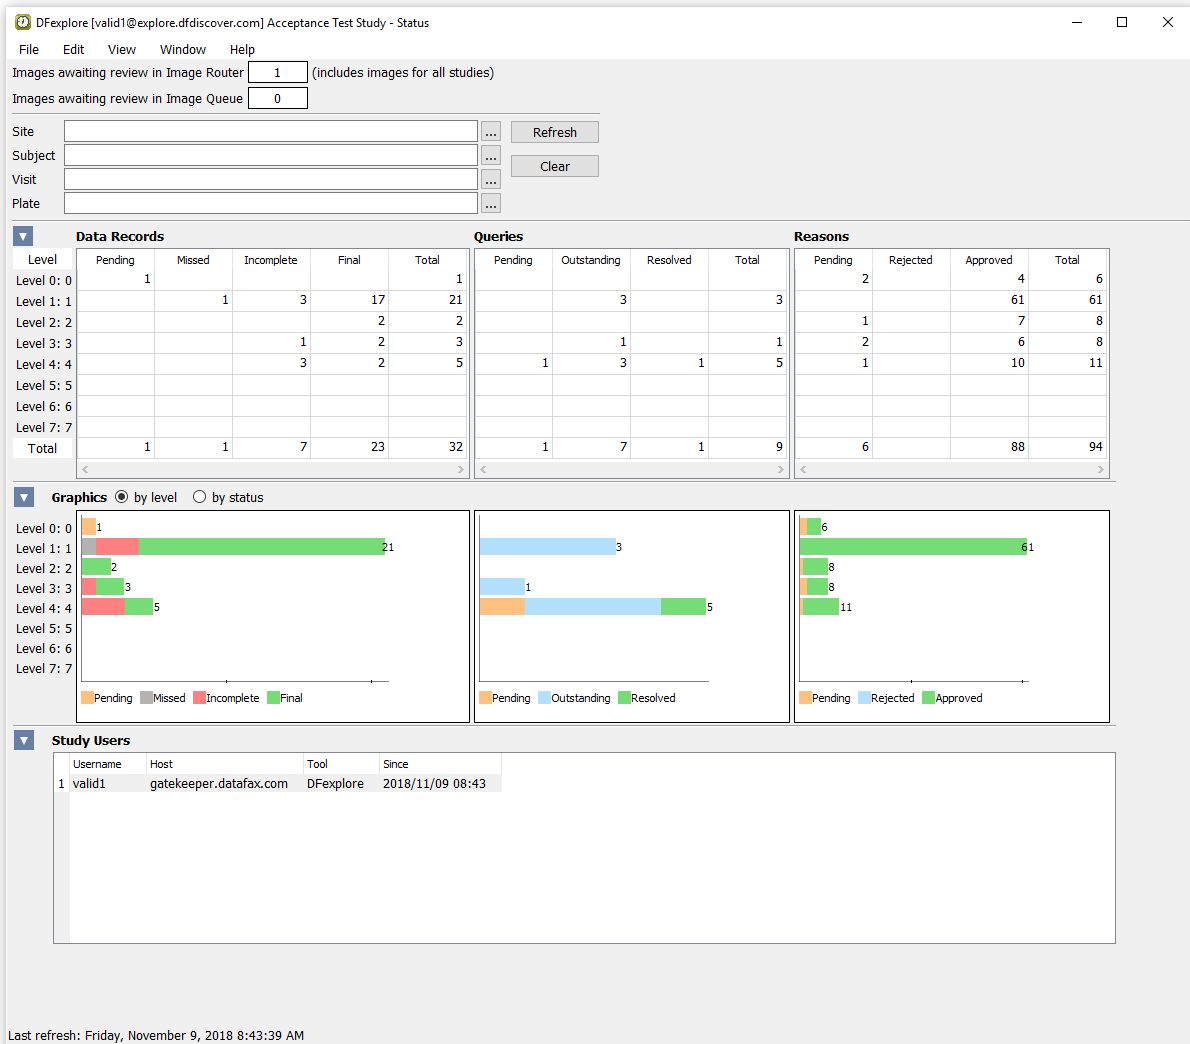
Select > . Examine the Queries table to view the status and count of all queries in the database.
-
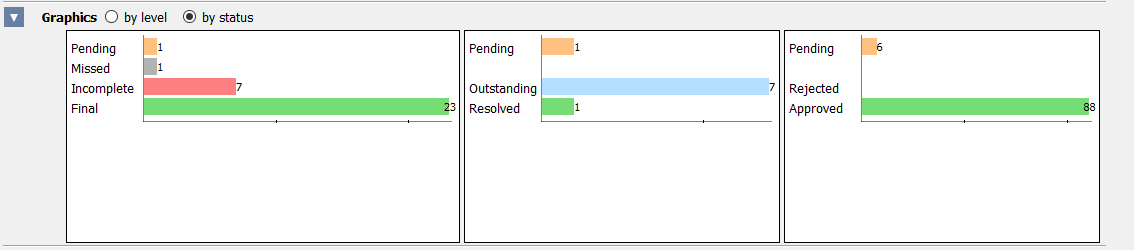
Open the Graphics section and select the toggle button for by status. Confirm the count of Pending and Outstanding queries.
-
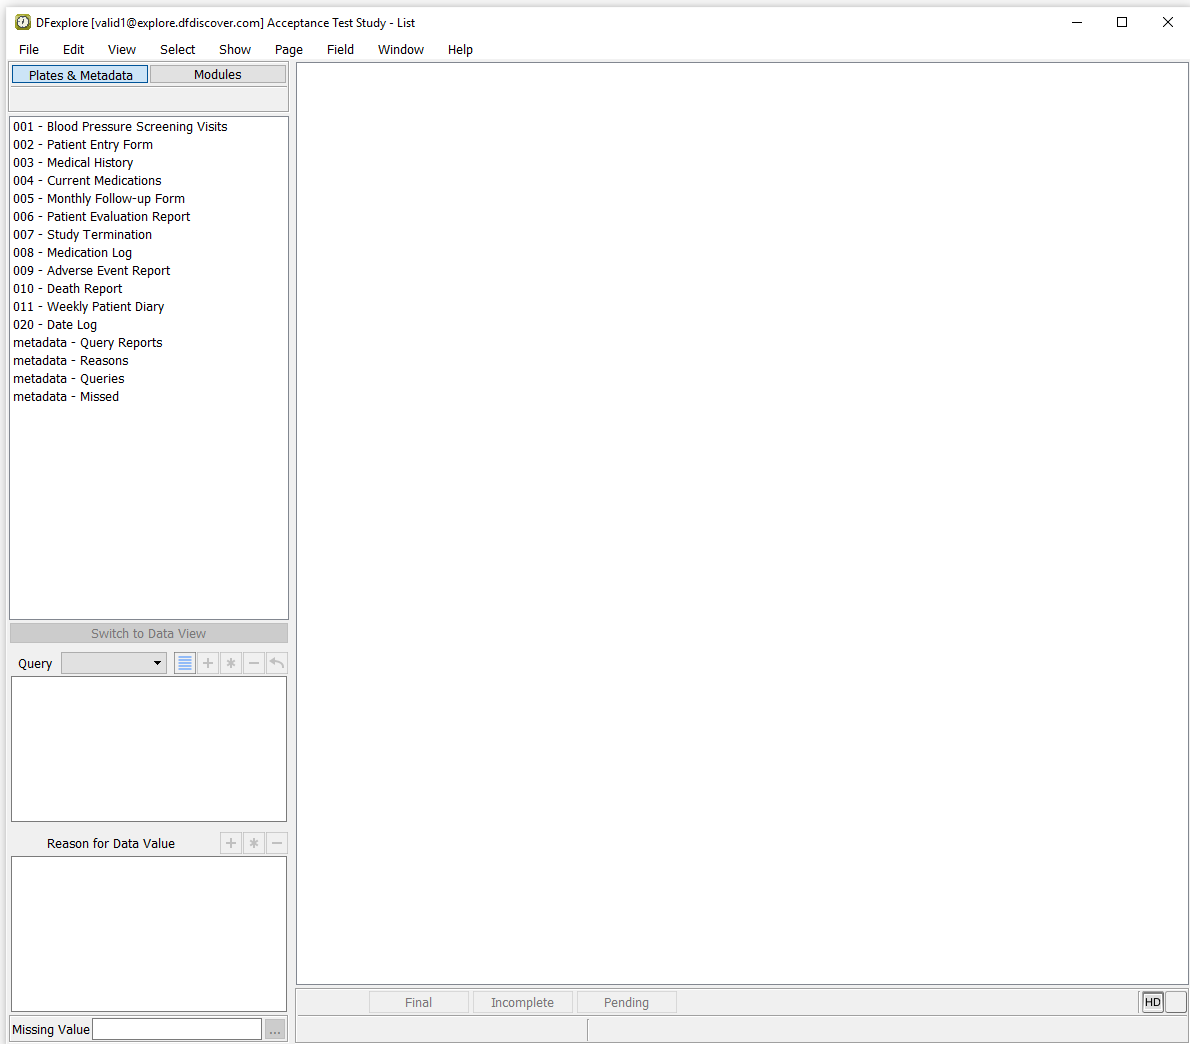
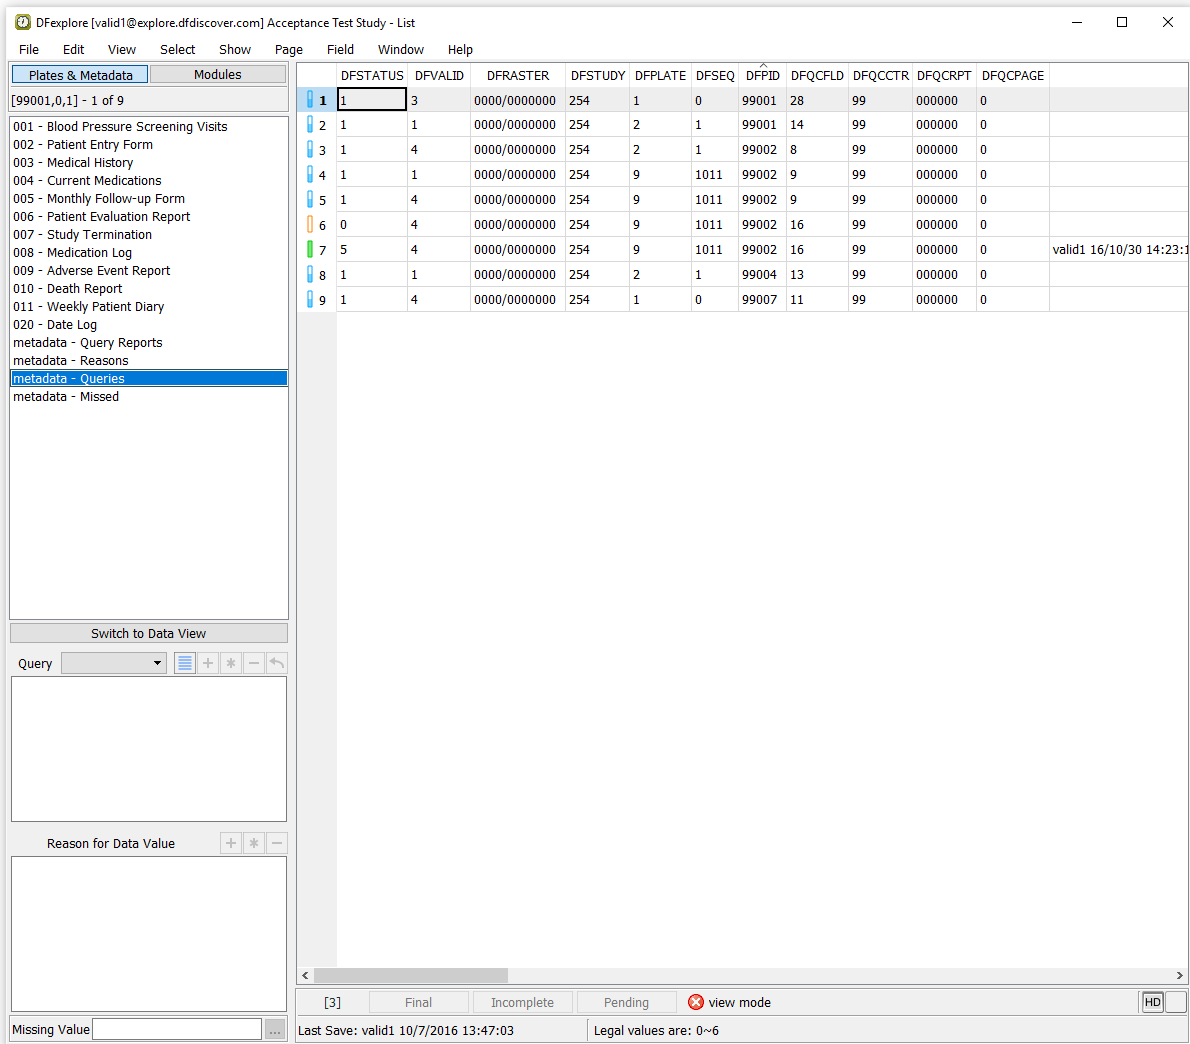
Select > . select the Plates & Metadata tab.
-
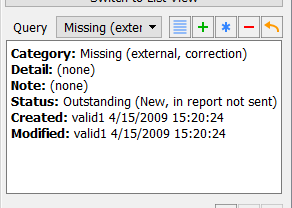
Click metadata - Queries from the plate list to display information about database queries.
-
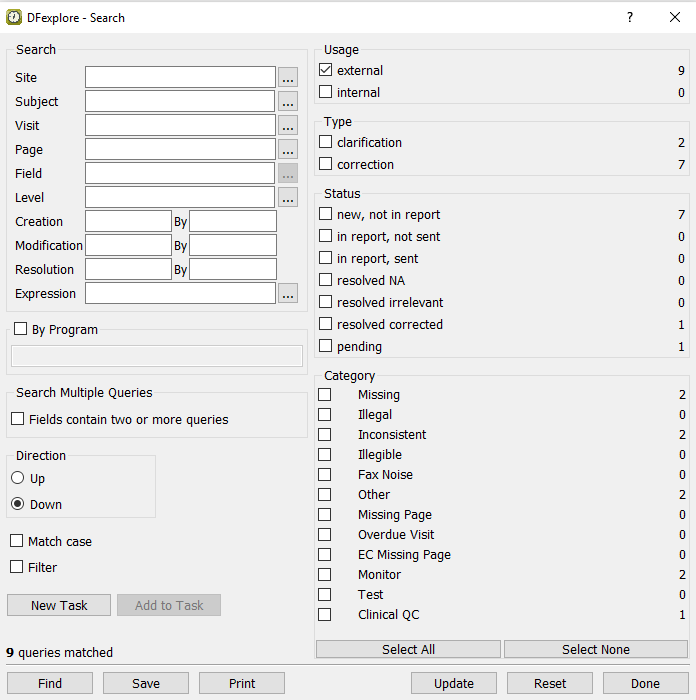
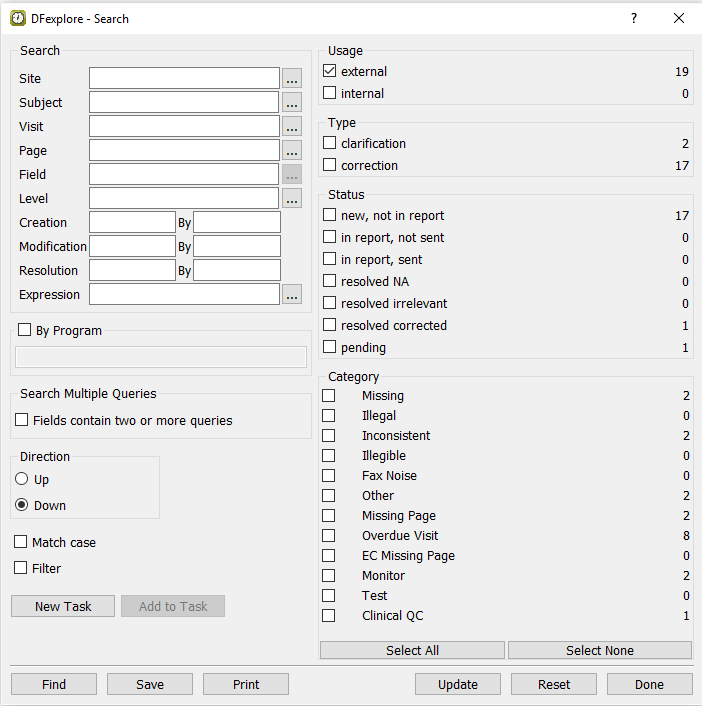
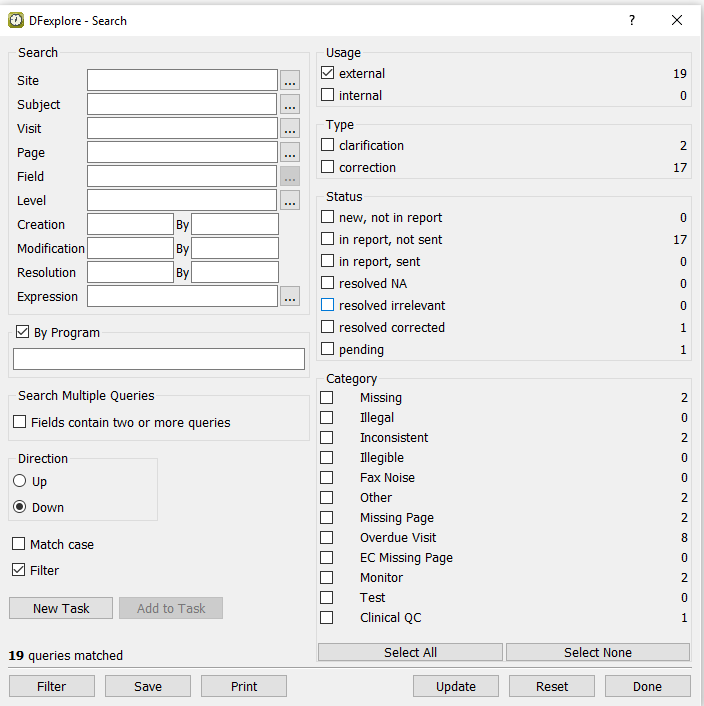
Select > from the menubar to specify a set of query search criteria. In the resulting search dialog, check (enable) the Usage = external, click to update the dialog with details and a count of external queries.
-
Click to close the Search dialog.
-
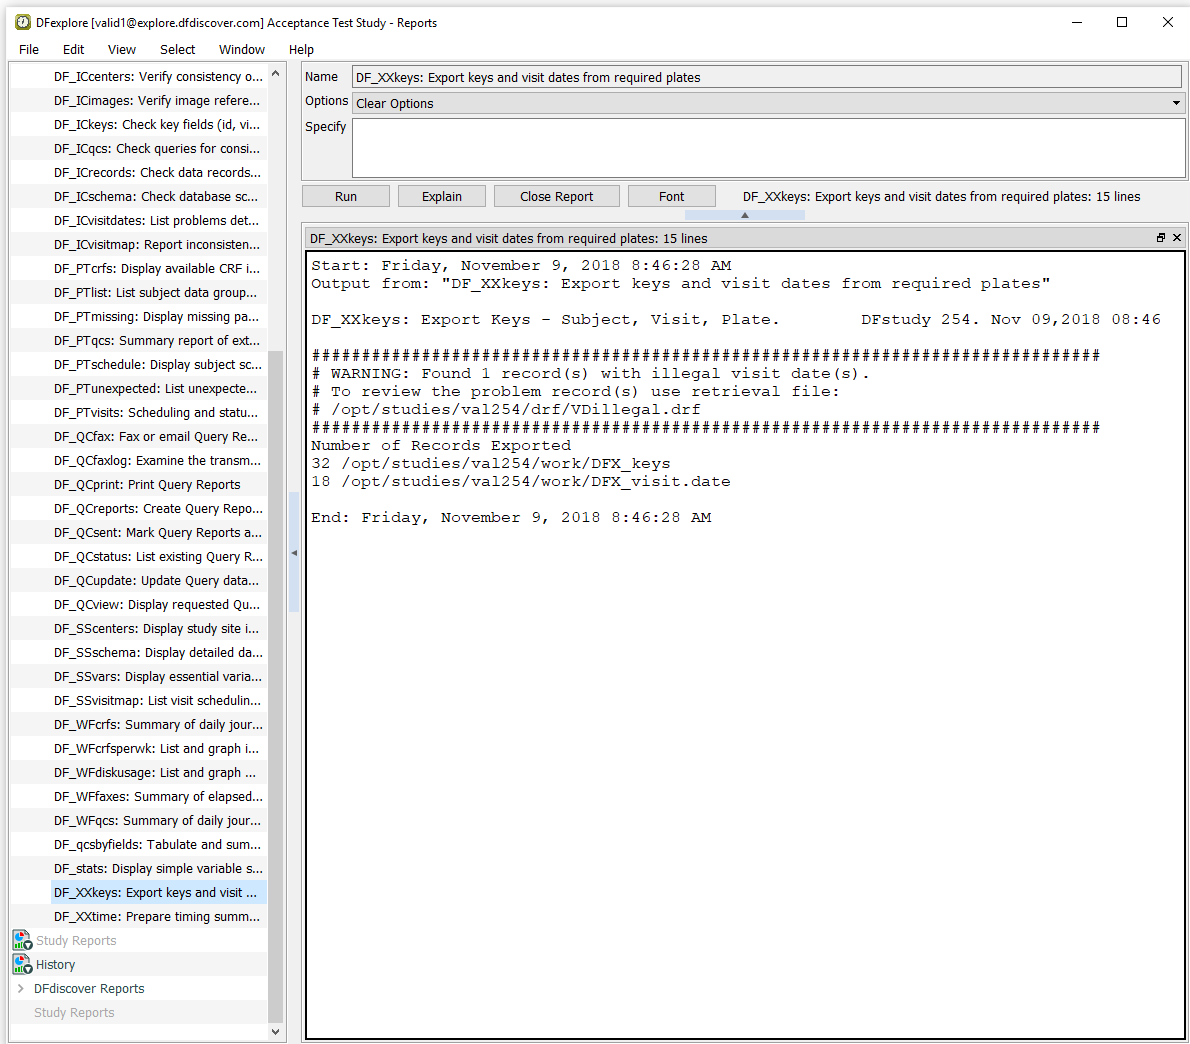
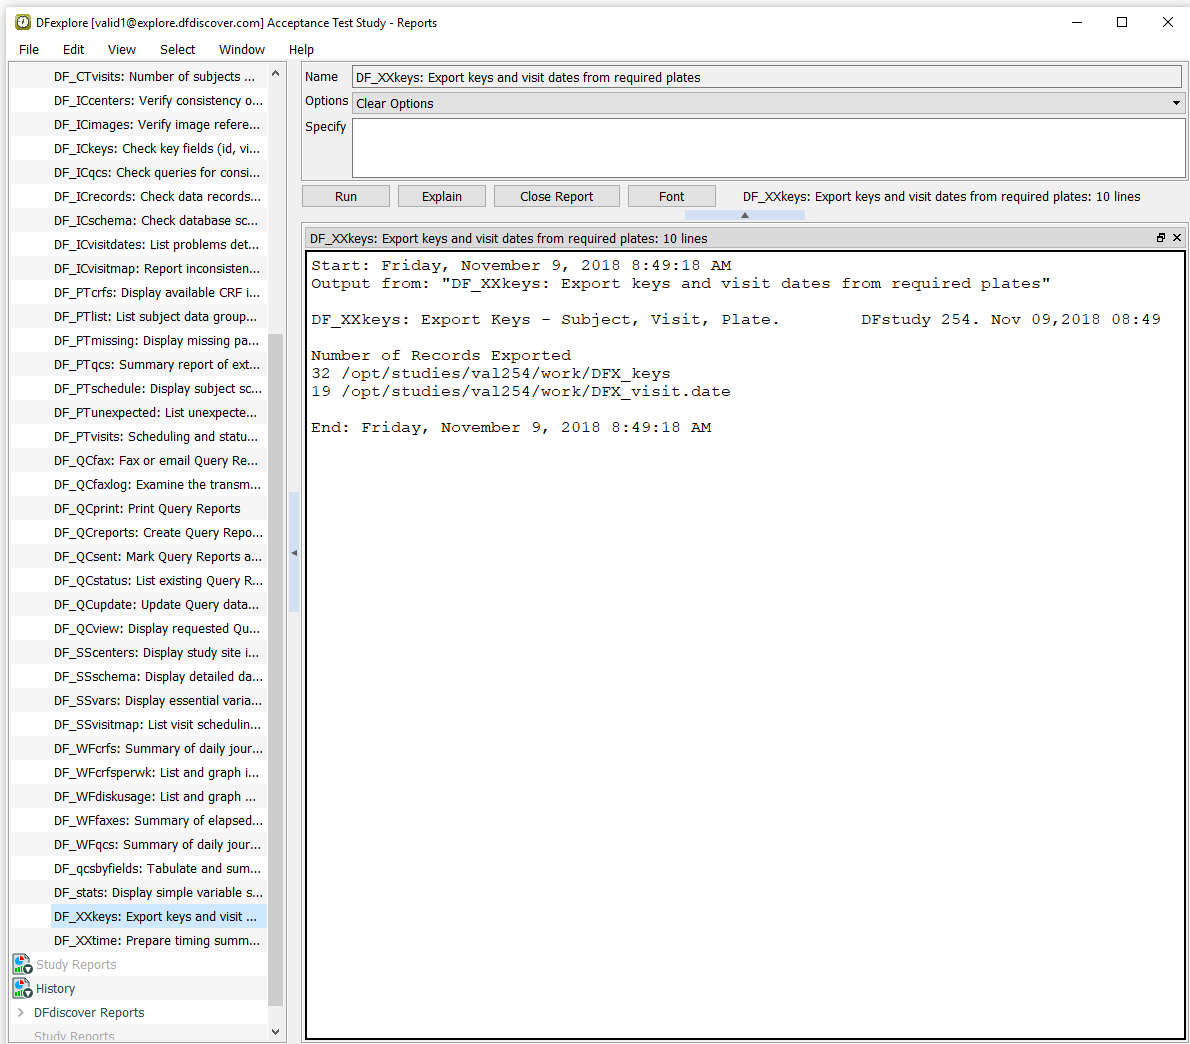
Double-click DFdiscover Reports then Legacy Reports list by clicking the . Select the report name DF_XXkeys from the list. Click to view a detailed description of the report. As options do not exist for this report, click to execute DF_XXkeys.
-
In Step 2, DF_XXkeys detected an illegal visit date. As indicated by the message in the reports window, a data retrieval file called
VDillegal.drfwas created. This file contains the plate(s) on which the illegal visit date was detected, and can be reviewed and edited in DFexplore Data View. Click to close the report output window. Select > to change to Data View.
-
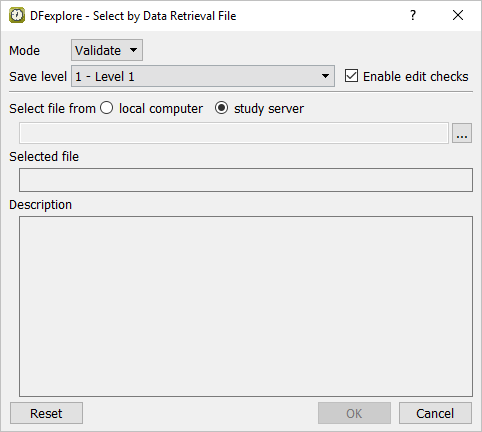
To review the data retrieval file created in Step 2, select > . In the retrieval file dialog, set:
Mode = Validate
Save level = 1 - Level 1
Check (enable) Enable edit checks
Select from file = study server
-
To locate the data retrieval file
VDillegal.drf, click next to Select from file option. In the file selection dialog, choose the fileVDillegal.drf, then click .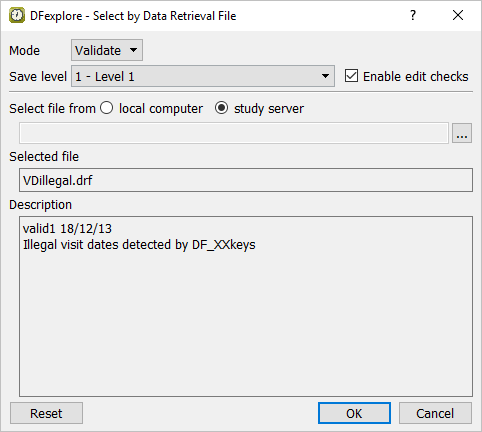
-
Click in the dialog. Click in the resulting confirmation dialog to retrieve all data records having illegal visit dates.
-
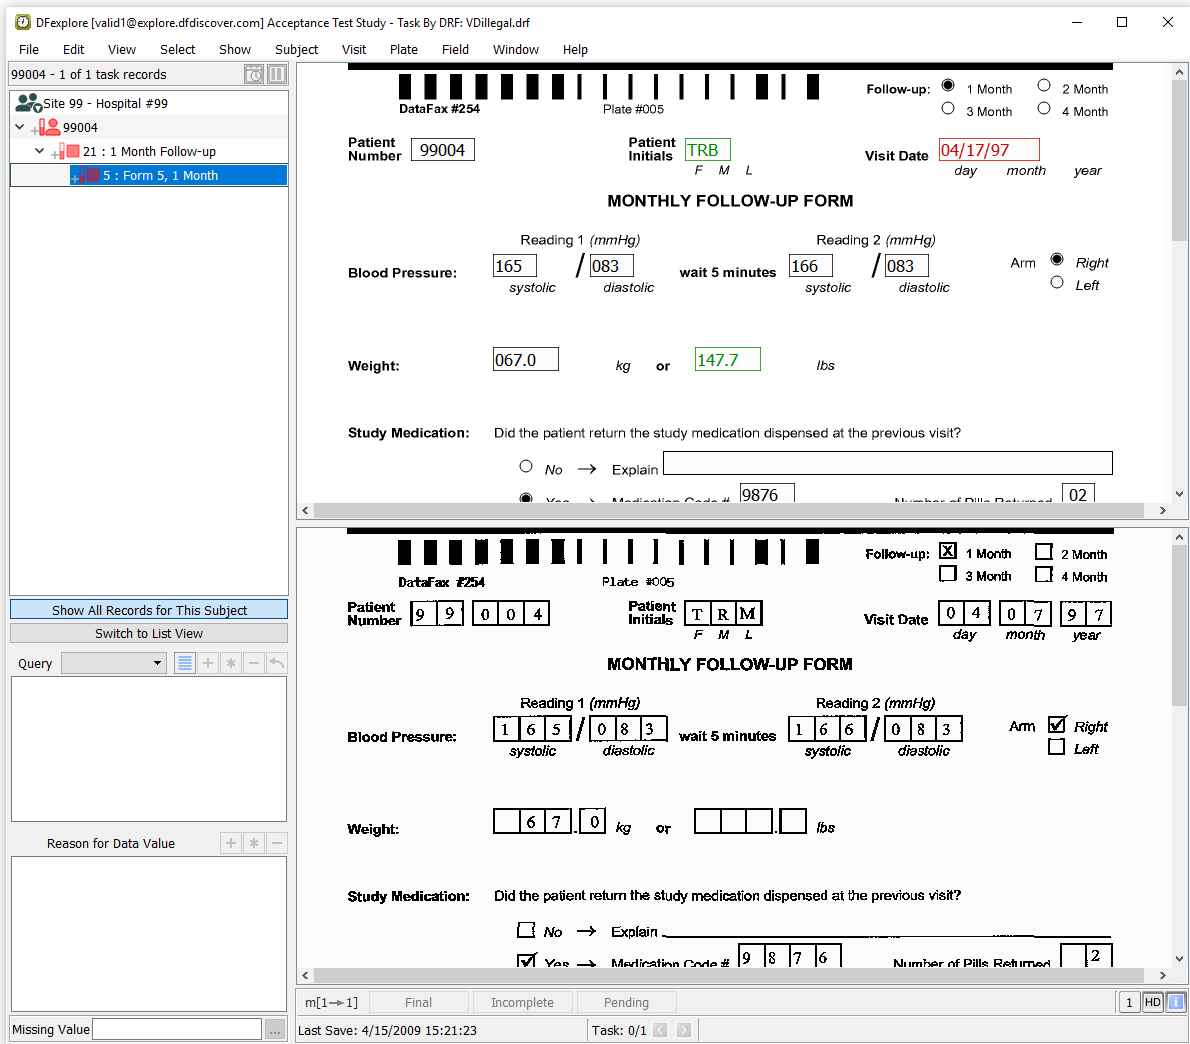
Click anywhere in the page background to make it active for data entry. Starting with the Follow-up choice field, press Tab to advance to the Visit Date. The Visit Date value has been entered as
04/17/97(an illegal date), rather than04/07/97as shown on the CRF image. Enter the correct date and press Tab to exit the field. -
As problems no longer exist on the corrected page, the page can be saved to the database with a status of Final. Click to save the page.
-
Select > to return to Reports View. Again choose the report name DF_XXkeys from the list and click button. Confirm that the output no longer reports illegal visit dates.
-
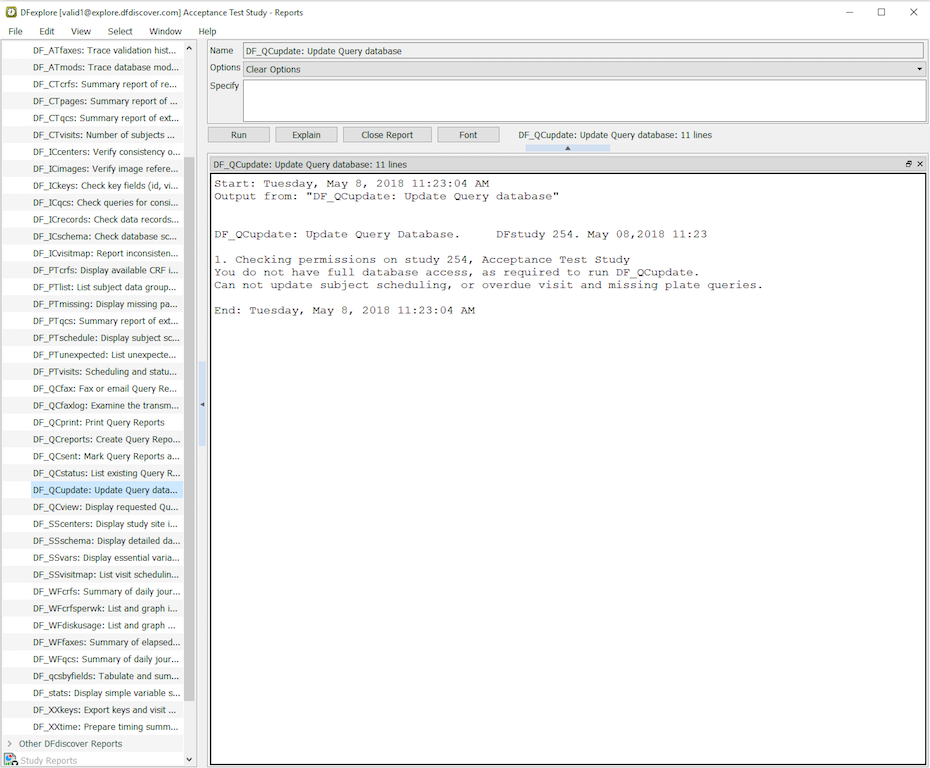
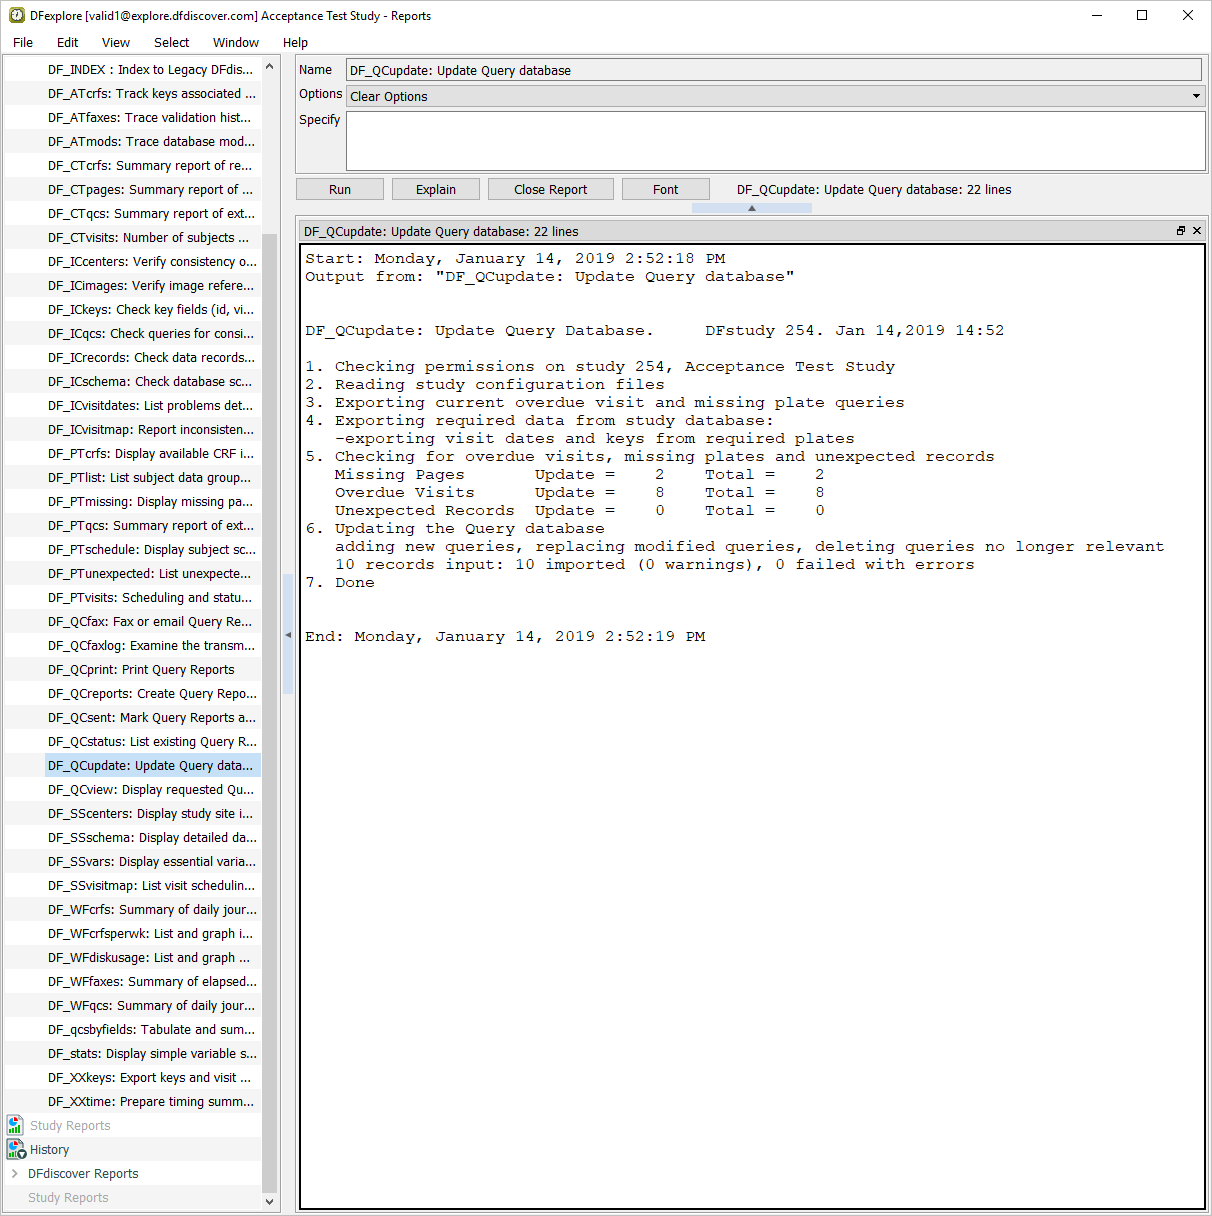
Choose DF_QCupdate from the list of Legacy reports and click to view a report description. Do not enter any options in the Specify field and click to update the Query database.
-
A user requires unrestricted permissions to execute DF_QCupdate. As user
valid1is restricted to database Modify and Write levels of 0-4 (as set in Chapter 1, Module 1: Installation and Initialization), it is not possible to execute DF_QCupdate successfully. Click > to close DFexplore. -
In order for
valid1to be able to successfully execute DF_QCupdate, the role permissions must be changed at the DFdiscover system level. Start DFadmin. Enter your server name as the value for DFdiscover Server,datafaxin the Username field, and the value for Password assigned todatafax. Click .
-
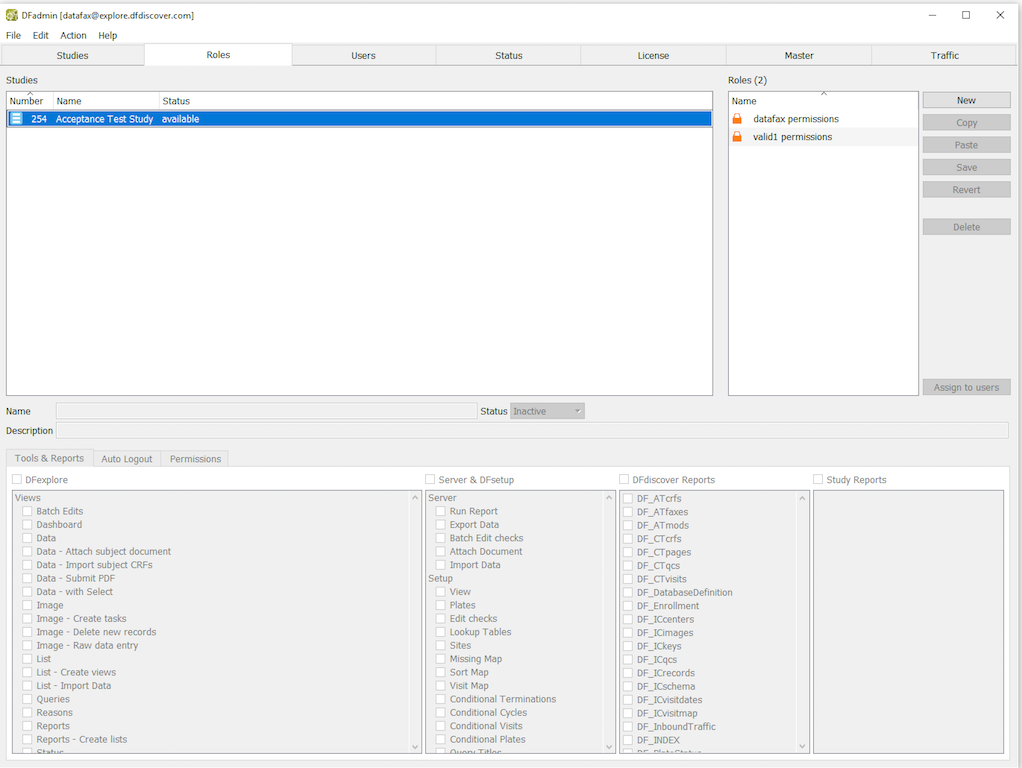
In DFadmin, select the Roles tab to open the Role definition window. Select 254 Acceptance Test Study from the list of studies.
-
Select the role valid1 permissions from the Roles list. Click Permissions tab to open the permissions for editing.

-
Change the Get Level from
0-4toALL, and the Modify and Write Level settings from0-4to0-7. Select > or click to apply and save the level changes.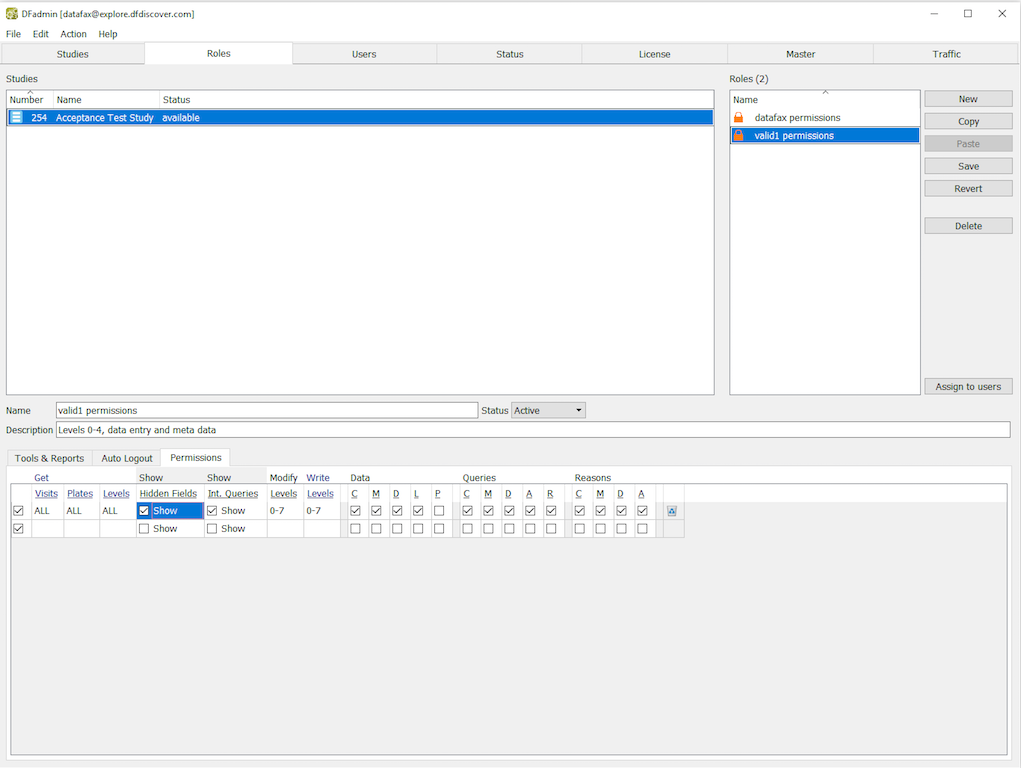
-
Select > to exit DFadmin.
-
Start DFexplore and login to the 254 Acceptance Test Study as described in Section 10.3, “Obtain database query metrics and details using Status and List Views to review all outstanding queries prior to query report creation.” as user
valid1. -
Select > .
-
Double-click DFdiscover Reports, expand Legacy Reports by clicking . Choose DF_QCupdate from the list of reports. Click to re-execute DF_QCupdate with the correct database permissions.
-
Choose DF_QCreports from the list of Legacy Reports and click to view a report description.
-
Do not enter any options in the Specify field so that a complete query report is generated. Click to execute DF_QCreports.

![[Note]](../../imagedata/note.png)
Note DFdiscover report numbers are comprised of a site number followed by the date of report creation (as yy/mm/dd). The two are separated by a hyphen. Your Query report has been created for Site 99 and the date of creation is the date on which DF_QCreports was executed (i.e.today).
-
To print the output displayed, select > . In the Print dialog, the Printer Name field contains the name of your printer. Click . Keep this printout to reference the query report number in Section 10.12, “Comparing several examples from the printed query report against their corresponding queries in the study database.”. Click to close the report output window.
-
Select > . Click to update the database counts. Examine the Queries table to view the status and count of all queries in the database.

Note The counts in the Queries table have changed because the query database has been updated by the running of the report DF_QCupdate in Section 10.6, “Execute DF_QCupdate to update the query database and lock all records for query report generation.”. If applicable, DF_QCupdate will create new queries for missing pages and overdue assessments based on the study scheduling information present in the study visit map files.
-
Click metadata - Queries to display information about database queries.

-
Select > to specify a set of query search criteria. In the resulting search dialog, Select (enable) Usage = External and click to update the dialog with details and a count of external queries.
-
Click to close the dialog.
-
To display the query report created for Site 099 - Hospital #99, choose DF_QCview. Click to view a description of the report. As the report for Site 099 - Hospital #99 still resides in the QC/NEW directory (it has not yet been sent to the site), click to execute DF_QCview.

-
Click to close the report output window.
-
Print a copy of the query report for Site 099 - Hospital #99 by choosing DF_QCprint. Click to view a description of the report. Enter
-uin the Specify field, to print the newly created, but unsent report. Click to execute DF_QCprint.number of your query reportNote If you do not have a printer connected to the DFdiscover server or if you are a hosted client, the query report will not be printed. Instead you can choose to print the query report displayed in the DF_QCview output window from the previous Step 1.
-
Click to close the report output window.
| Note |
|---|---|
For this test you will need to reference the query report printed in Section 10.11, “Execute DF_QCprint to print the query report from the QC/NEW directory.” to verify the information contained in the report against the study database. Three examples of queries will be verified in this test. You may choose to check the remainder of the notes yourself. |
-
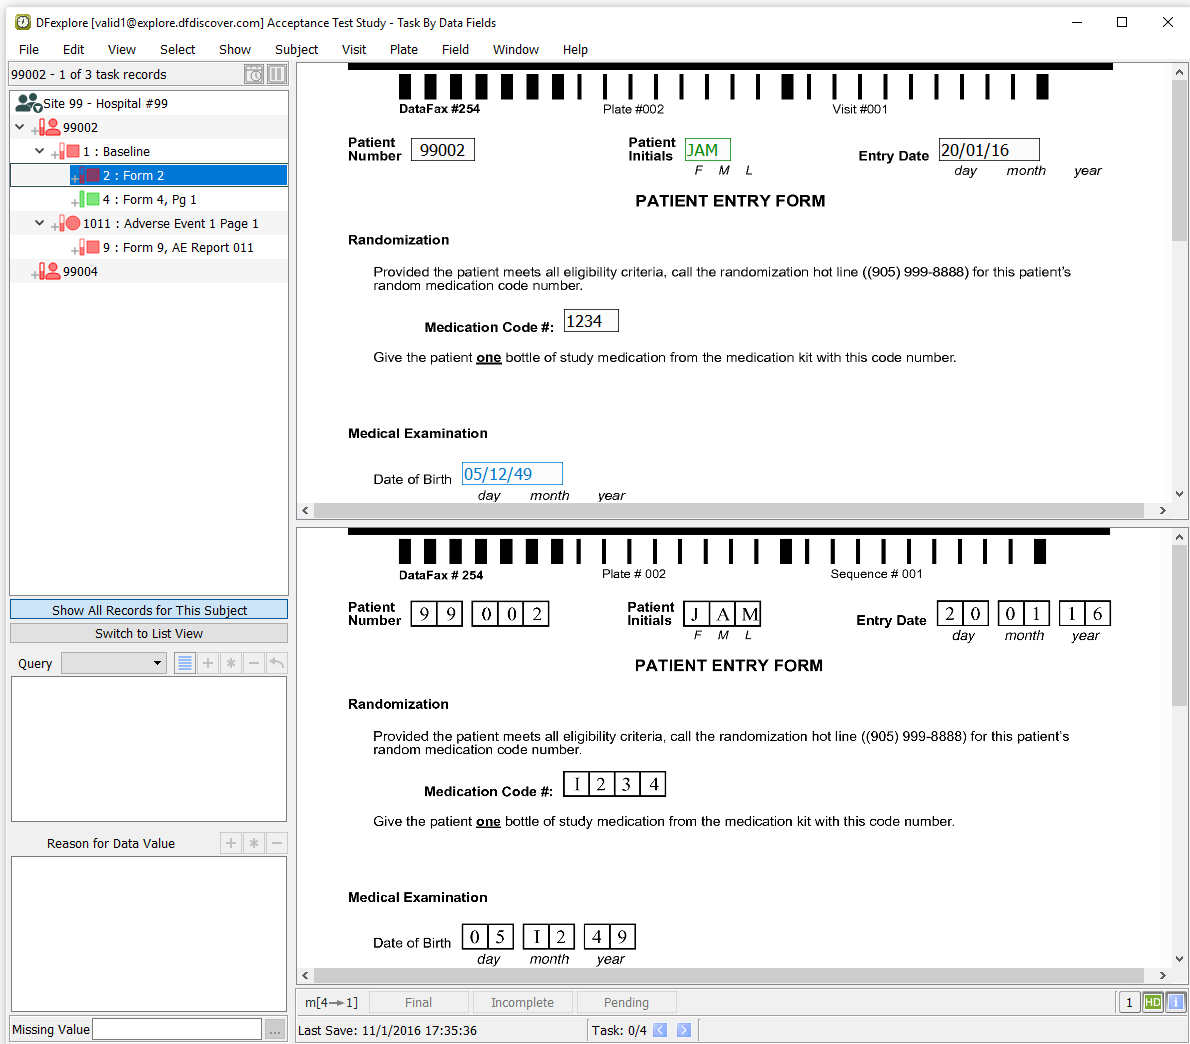
In the printed query report, find the entries for patients 99002 and 99004 in the FAX/REFAX section of the report. For patient 99002, locate the entry for Form 9, AE Report 011 having multiple queries in the Intensity field. For Patient 99004, locate the entry for Form Number 4, Pg 1 having the problem “Missing Page”. Form 4 corresponds to Plate 4 in the database. Now locate the entry for Form Number 2, having the problem “Pulse beats/minute (Missing)”. Form 2 corresponds to Plate 2 in the database.
-
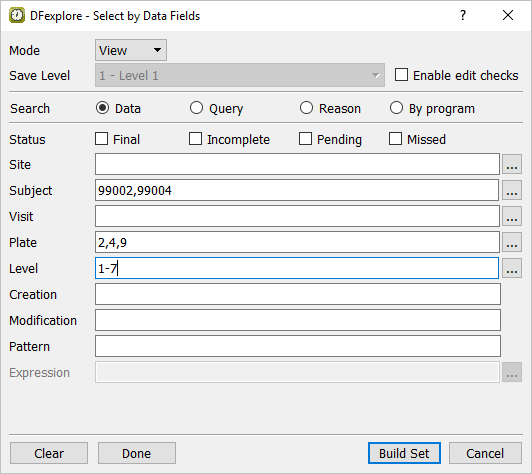
Select > . In the dialog, set:
Mode = View.
Subject =
99002,99004Plate =
2,4,9Level =
1-7
-
Click then to apply the record selection criteria and retrieve the applicable pages.
-
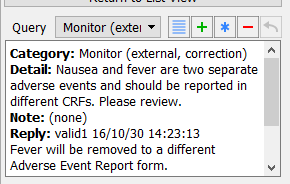
Highlight the 9: Form 9, AE Report 011 page in the page list. Press Tab to advance through the fields until the Intensity becomes the current field. Confirm that this field is blue and the QC count “2” is displayed on the field widget. Examine the Query window to view the details of the queries. Verify that the information in the Query window is consistent with the corresponding printed Query report.
-
In the record list, double-click entry for subject 99004.

-
Press Tab to advance to the Pulse field to make it the current field. Verify that the field is blue (indicating that an outstanding query exists). Examine the Query to view the details of the query.
-
Examine the record list for an entry for Form 4 for Subject 99004 (identified as a Missing Page on the query report).
-
Select > . Confirm the settings:
Mode = Modify
Save level= 1 - Level 1
Enable (check) edit checks
Click to release the task set and display all records in the database.
-
Choose DF_QCfax and click to view a description of the report. Send the query report generated in Section 10.7, “Execute DF_QCreports to create a standard, 3-part external query report for a study site.” to a valid email address. Enter
-f mailto:user@localhostin the Specify field, substituting “user@localhost” with your email address as defined on your mail system. Click to execute DF_QCfax..
-
Wait for several minutes, then check the recipient's email account for the arrival of the query report emailed in Step 2. Once the report has arrived, click to close the report output window.
-
Select > . Click to update the database counts. Examine the Queries table to view the status and count of all queries in the database.
Note The counts in the Queries table are the same as those in Step 1 because queries have been sent to the site but not resolved.
-
Select > , click Plates & Metadata.
-
Select > . Click List View to expand and click Label for Display coded field as, click . To display information about database queries, click metadata - Queries.

-
Select > to specify a set of query search criteria. In the resulting search dialog, select (enable) Usage = external. Click to update the dialog with details and a count of external queries.
-
Click to close the Search dialog.
-
Select > to close and exit DFexplore.