Table of Contents
- 1.1. Tests & Requirements
- 1.2. Confirm version information can be obtained for DFdiscover.
- 1.3. Obtain super-user privileges and remove older Acceptance Test Study, if one exists.
- 1.4. Install the Acceptance Test Study.
- 1.5. Define Acceptance Test Study to the DFdiscover server.
- 1.6. Create a role and permissions for
valid1. - 1.7. Create a DFdiscover account for
valid1. - 1.8. Create a role and permissions for
datafax. - 1.9. Enable high definition imaging.
- 1.10. Start the Acceptance Test Study Control Panel application.
Confirm version information can be obtained for DFdiscover.
Obtain super-user privileges and remove older Acceptance Test Study, if one exists.
Install the Acceptance Test Study.
Define Acceptance Test Study to the DFdiscover server.
Create a role and permissions for
valid1.Create a DFdiscover account for
valid1.Create a role and permissions for
datafax.Enable high definition imaging.
Start the Acceptance Test Study Control Panel application.
Estimate of Time Required: 30 Minutes
-
Confirm the Acceptance Test Kit is installed on the following Linux operating system:
Red Hat / CentOS
SUSE
-
Confirm DFdiscover version information by starting DFexplore.

-
In the login dialog, click and choose . Confirm that the version information in the dialog matches the installed software version 5.1.0. Click X to close the version information dialog.
If the DFexplore release is not DFdiscover 2018 Version 5.1.0, you must stop at this point. The Acceptance Test Kit is specifically designed for release DFdiscover 2018 Version 5.1.0.
Exit DFexplore.
![[Note]](../../imagedata/note.png) | Note |
|---|---|
This step is required only if 254 Acceptance Test Study already exists on your DFdiscover server. If it does not currently exist on your DFdiscover server, skip this section and continue with Section 1.4, “Install the Acceptance Test Study. ”. If an earlier version does exist on your server, delete it prior to installation by following these steps. |
-
Start DFadmin. Login to your DFdiscover Server as
datafax.
-
Specify a Username of
datafax, and the assigned user password in the Password field. Click to complete login and continue.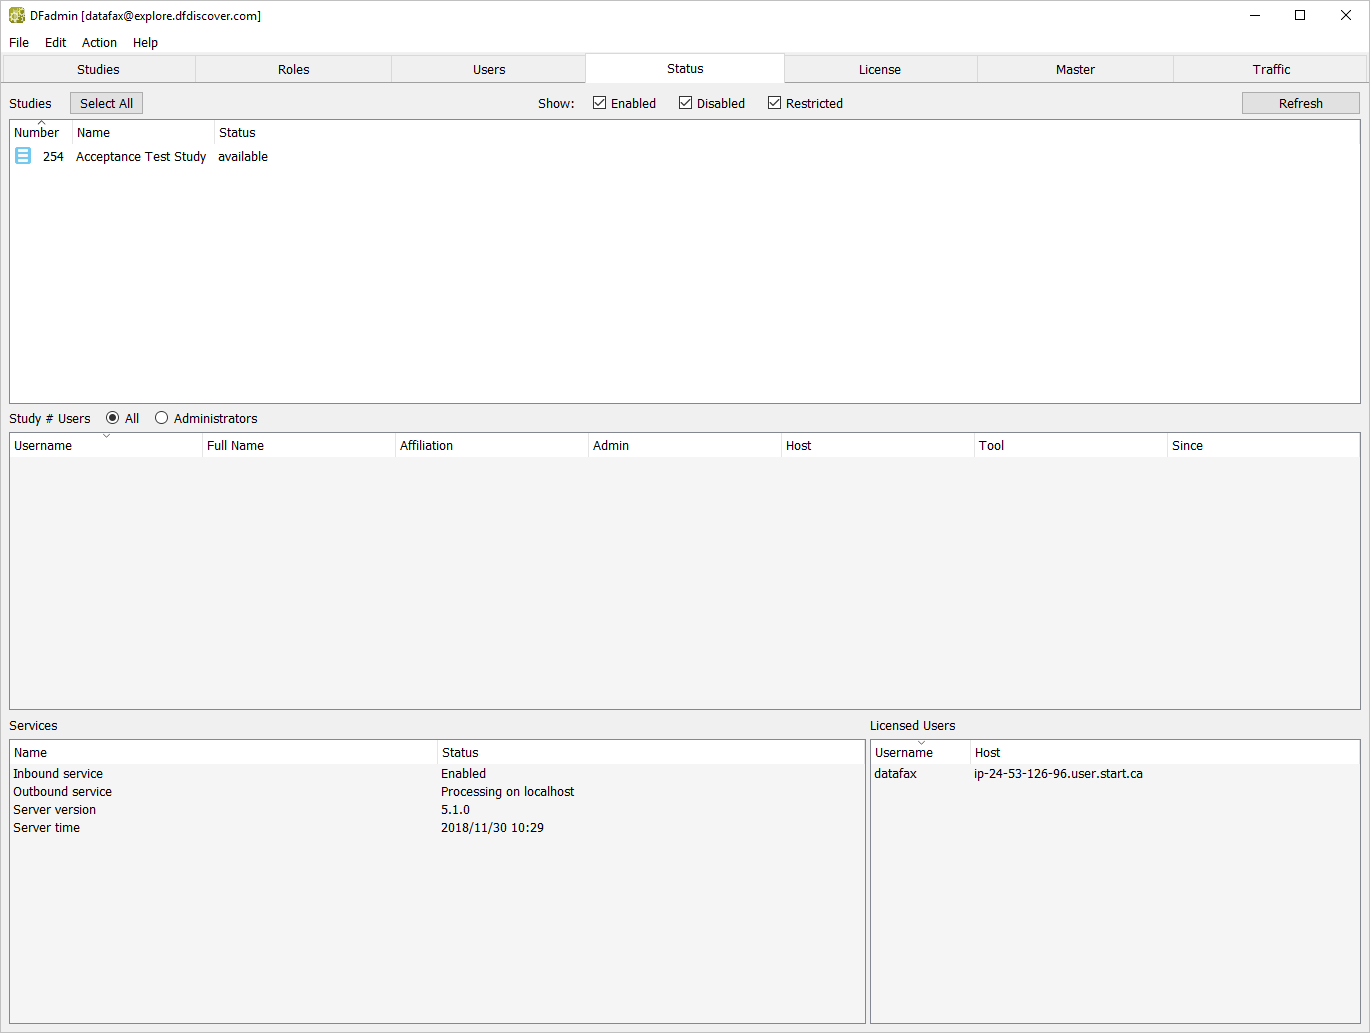
Click Status Tab. This illustration shows that the 254 Acceptance Test Study is already defined.
The list of studies defined on your DFdiscover Server will be displayed in the studies list.
-
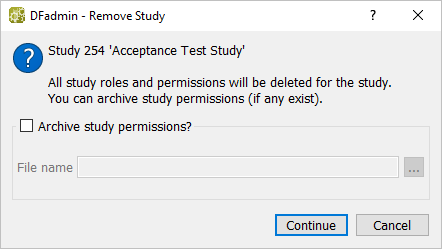
Select the entry for 254 Acceptance Test Study from the list of studies. Select > . In the confirmation dialog, enter the text
Study Removal.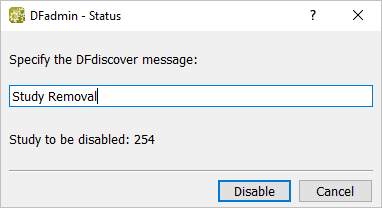
-
Click to disable the Acceptance Test Kit.
-
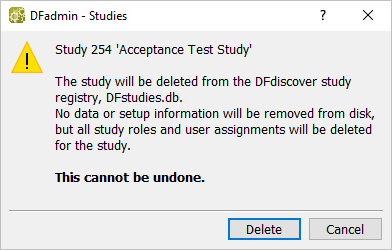
Click Studies tab. Select the entry for 254 Acceptance Test Study if it is not already highlighted. Click .
From the 3 delete options, choose Remove Study from DFdiscover.
-
Click in the confirmation dialog to continue with the delete.
-
In the Remove Study dialog, de-select (disable) Archive Study Permissions and click .
-
To confirm, enter the password for
datafaxand click . Close the study removal confirmation dialog by clicking .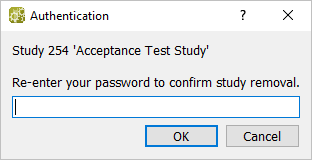
| Note |
|---|---|
Existing Acceptance Test Kit directories,
If the directories are present at this time,
installation of the DFdiscover 2018 Acceptance Test Kit will rename them and re-install the updated DFdiscover 2018 |
-
The DFATK-5.1-0.x86_64.rpm file can be found on www.dfnetresearch.com in the Support section. After downloading the DFATK-5.1-0.x86_64.rpm execute the installation command appropriate for the operating system.
On openSUSE, use zypper, which will automatically download and install any dependencies required:
#zypper --no-gpg-check install DFATK-5.1-0.x86_64.rpmOn RHEL, use yum, which has slightly different syntax:
#yum --nogpgcheck install DFATK-5.1-0.x86_64.rpmConfirm the presence of 254 Acceptance Test Study with the command:
# ls -d /opt/studies/val254As
rootopen DFserveradmin to the Study Spaces view. If not already present, add a Study Space for the directory/opt/studies. Name the Study Spaceopt_studies. Check (enable) the Active box and apply the entry.
-
Return to DFadmin, select the Studies tab. Add a definition for 254 Acceptance Test Study. Click and complete the dialog with the following values:
Study Number: 254
Study Name: Acceptance Test Study
Study Space:
opt_studies(or the name of the Study Space for the /opt/studies directory)Study Folder: val254
Select Restore previous Study at this location
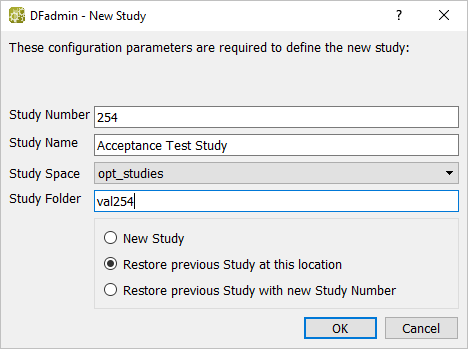
Note The name of your Study Space may differ from that shown here if the Study Space is something other than
opt_studieson your DFdiscover server. Click to confirm the action and add an entry for 254 Acceptance Test Study to the list of studies.
-
Verify configuration information and set the Preset Printer. Select the newly added 254 Acceptance Test Study entry from the list of studies. Click Configurations tab and enter the name of a networked printer in the Preset Printer field.
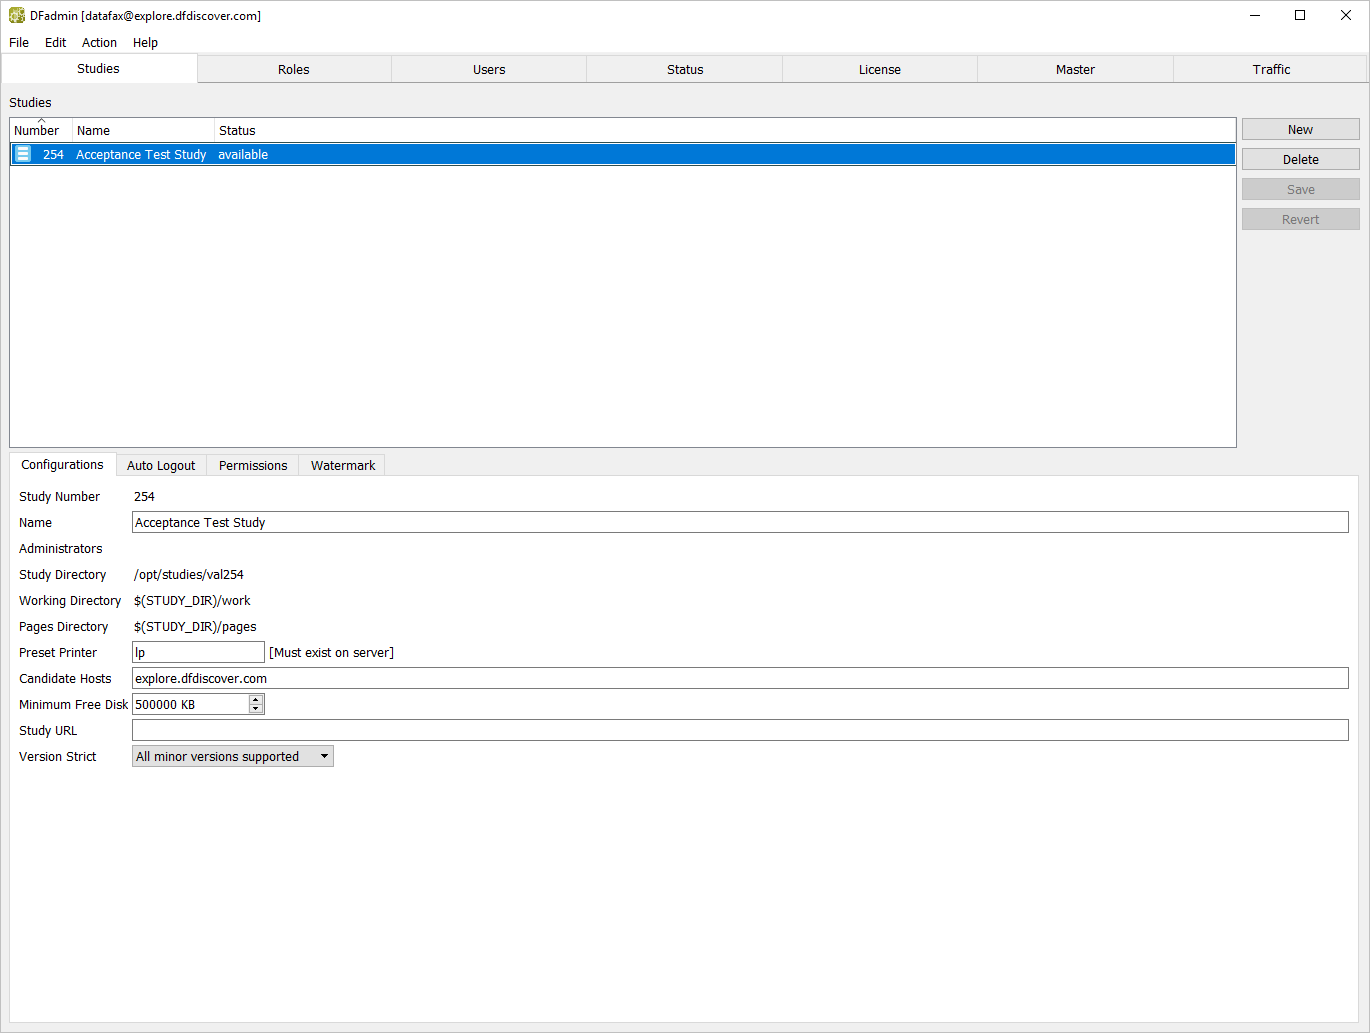
Choose All minor versions supported from the Version Strict drop-down.
Select > or click to save the configuration information.
-
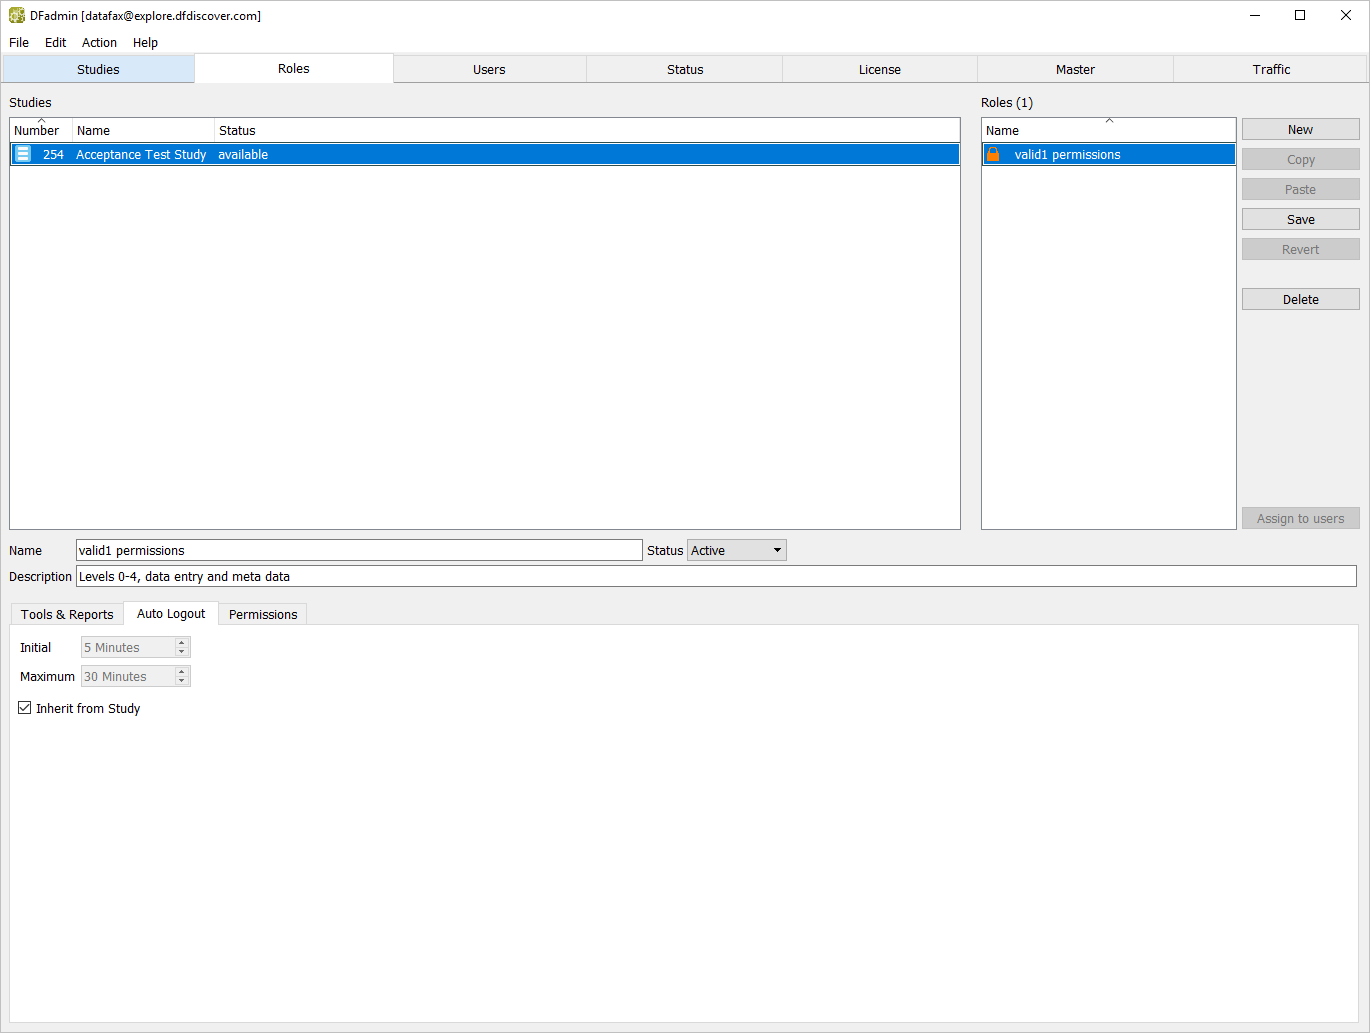
Create a Role for user
valid1. Begin this task by clicking the Roles tab.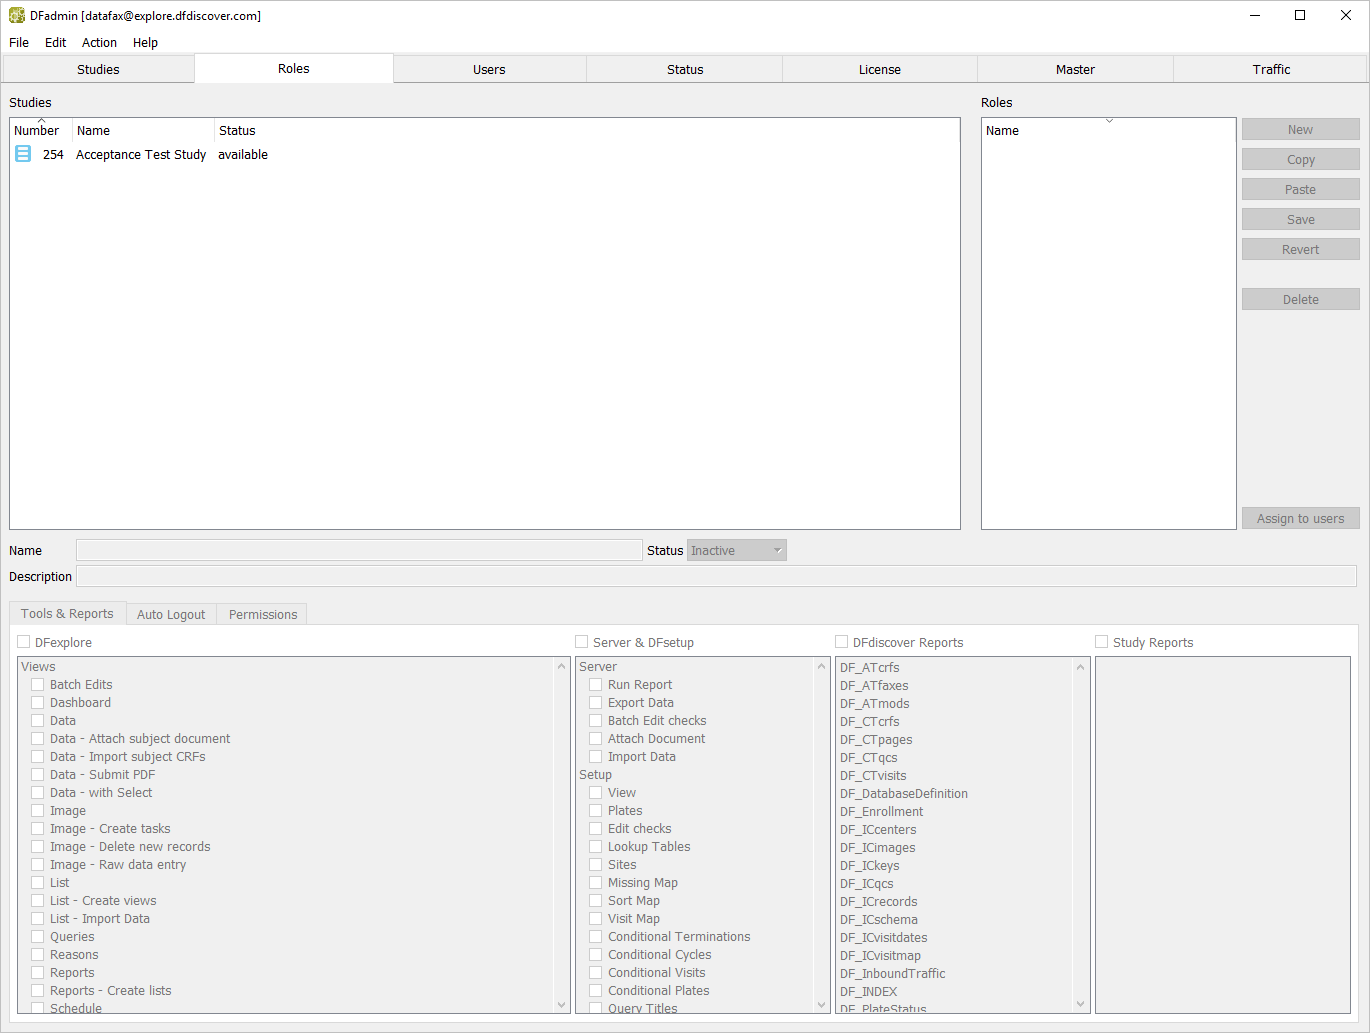
-
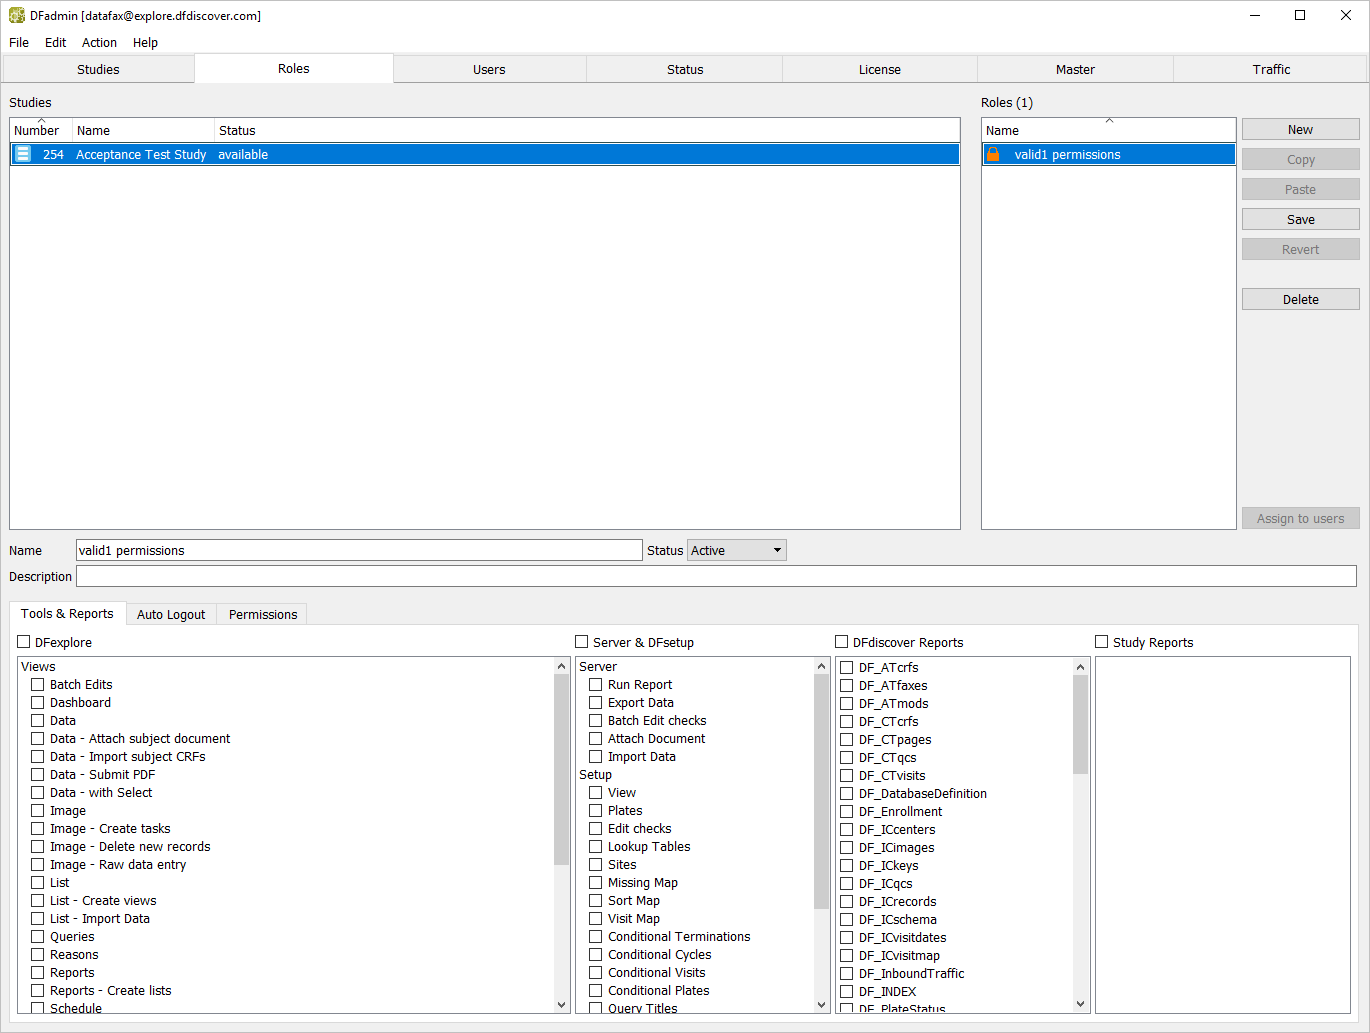
In the list of studies, locate and choose 254 Acceptance Test Study. Click to add a new user role. In the confirmation dialog, enter the role name.
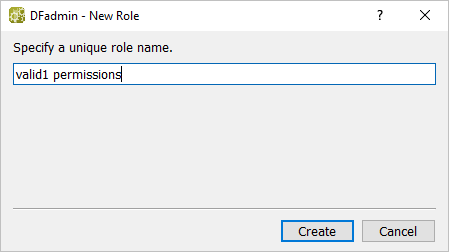
-
Click in the New Role dialog to apply the role name.
-
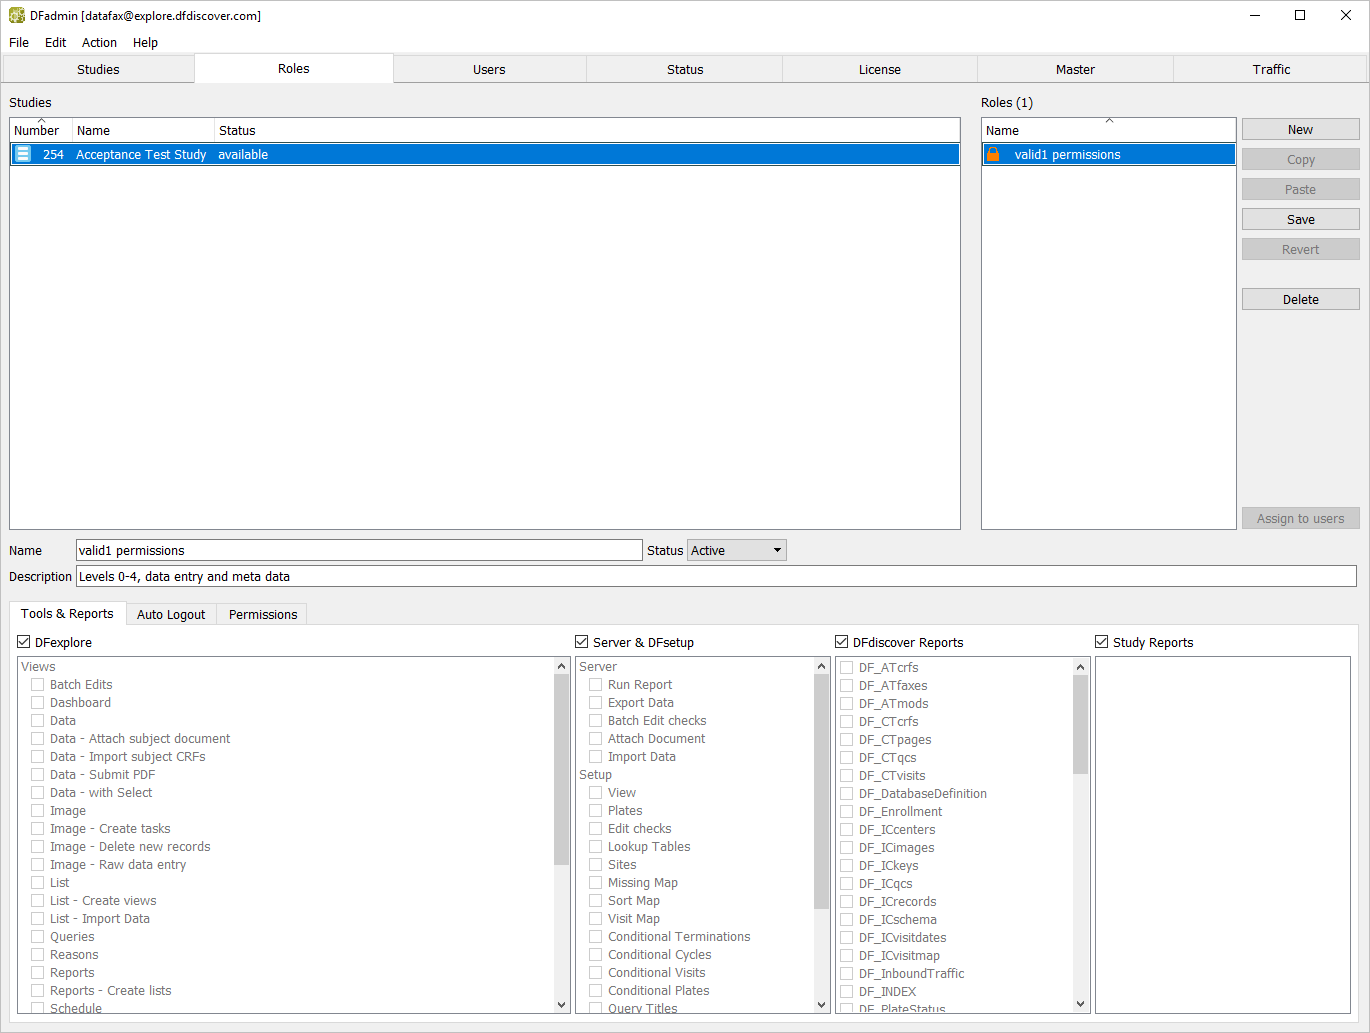
In the Description field enter:
Levels 0-4, data entry and meta data.
-
Click Tools & Reports tab. Check (enable) each of the following: DFexplore, Server & DFsetup, DFdiscover Reports, and Study Reports.
-
Click Auto Logout tab. If not already checked (enabled), check Inherit from Study to override the default Auto Logout setting with the study setting.
-
Click Permissions tab. This view is for the definition of data type permissions associated with the role.
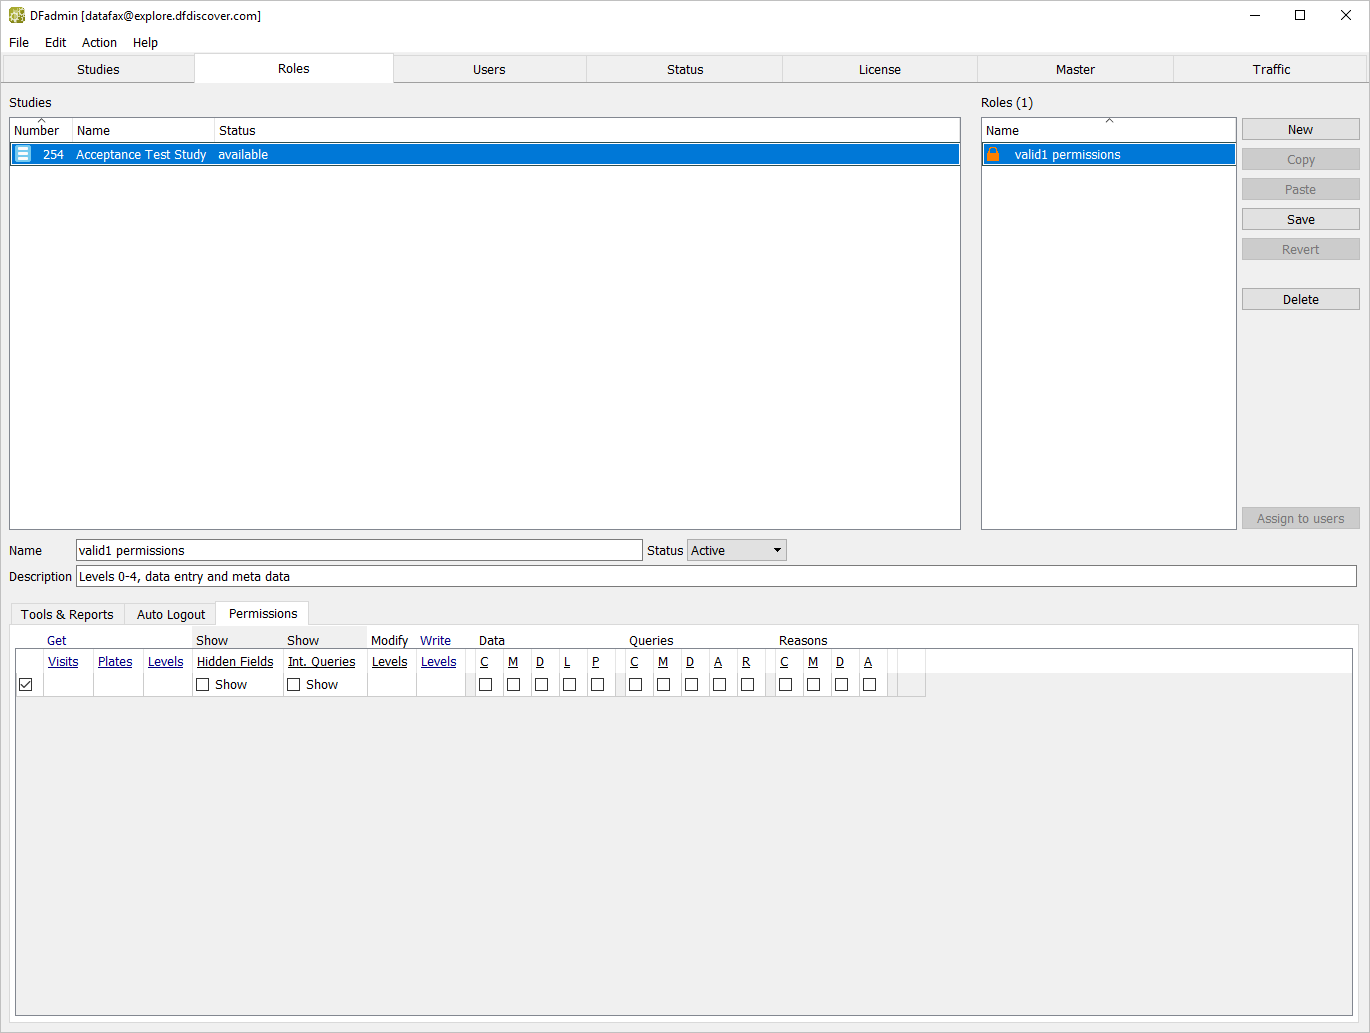
-
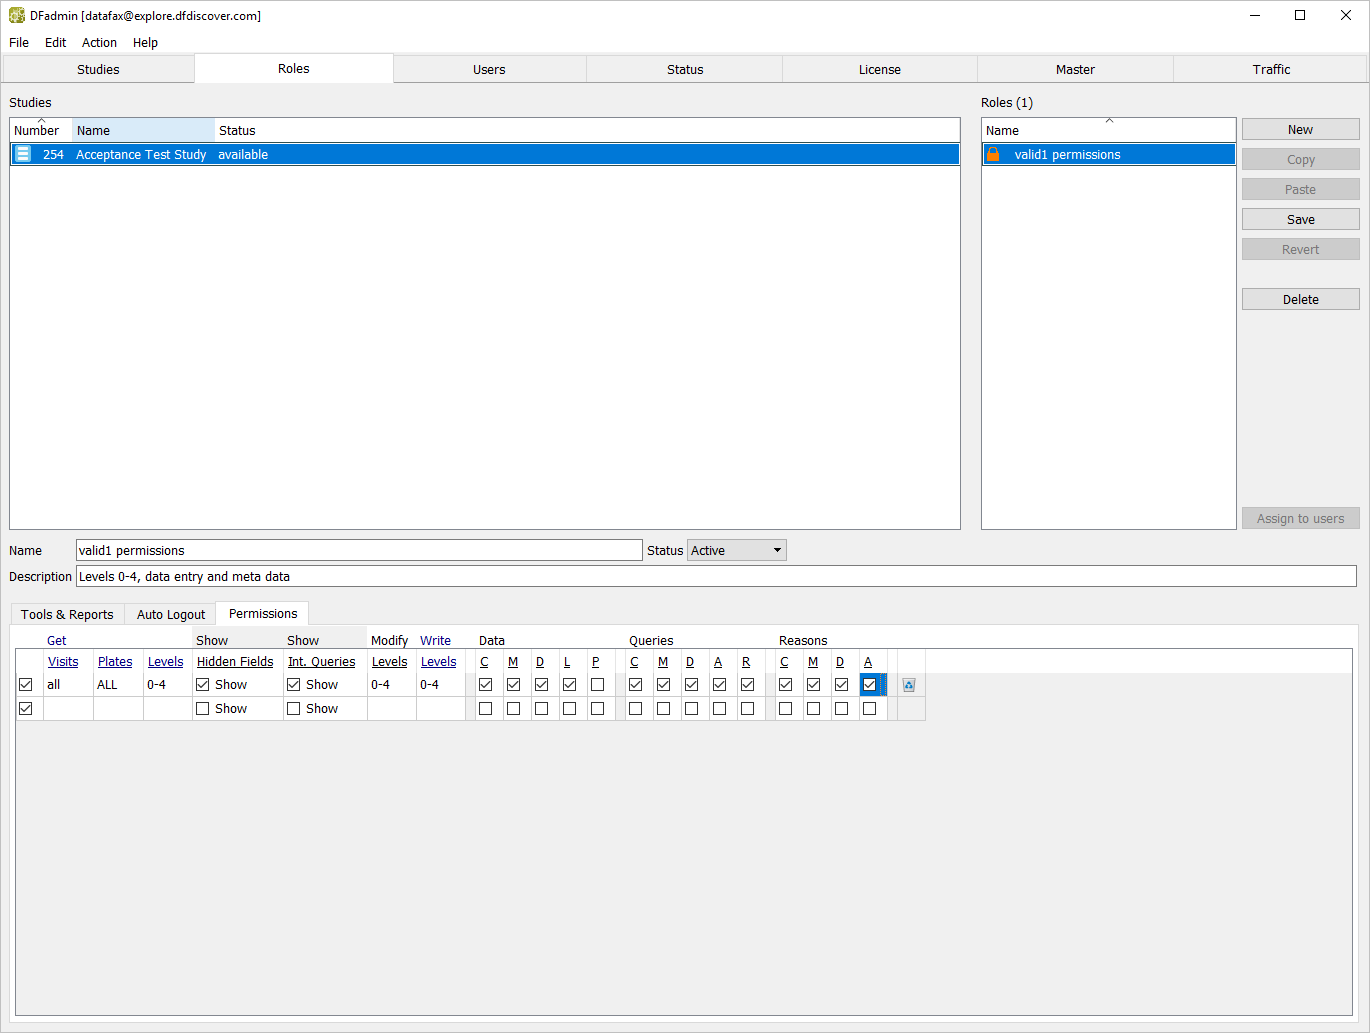
Set data permissions with the following settings:
Visits = ALL
Plates = ALL
Levels = 0-4
Check (enable) Show Hidden Fields
Check (enable) Show Int. Queries
Modify Levels =
0-4Write =
0-4Data Check (enable) = CMDL (Create, Modify, Delete, Missed), but not P (Password).
Queries Check (enable) = CMDAR (Create, Modify, Delete, Approve, Reject)
Reasons Check (enable) = CMDA (Create, Modify, Delete, Approve)
-
Click or select > to save Tool & Reports, Auto Logout and Permissions for role .
Still as
datafaxand with the DFadmin application open, click Users tab to open the user definition window.-
Determine if user
valid1has already been defined. Review the list of users to determine if an entry exists for uservalid1. -
Click to add a DFdiscover account for user
valid1. In the resulting dialog, enter the usernamevalid1as shown.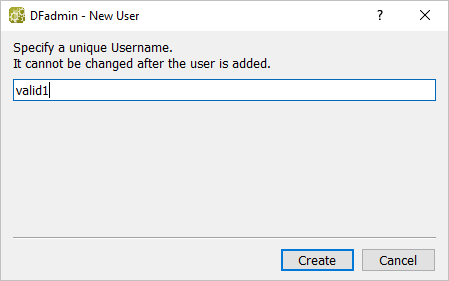
Click to add
valid1to the list of users. An empty icon representsvalid1, the status ofvalid1is set to Inactive.-
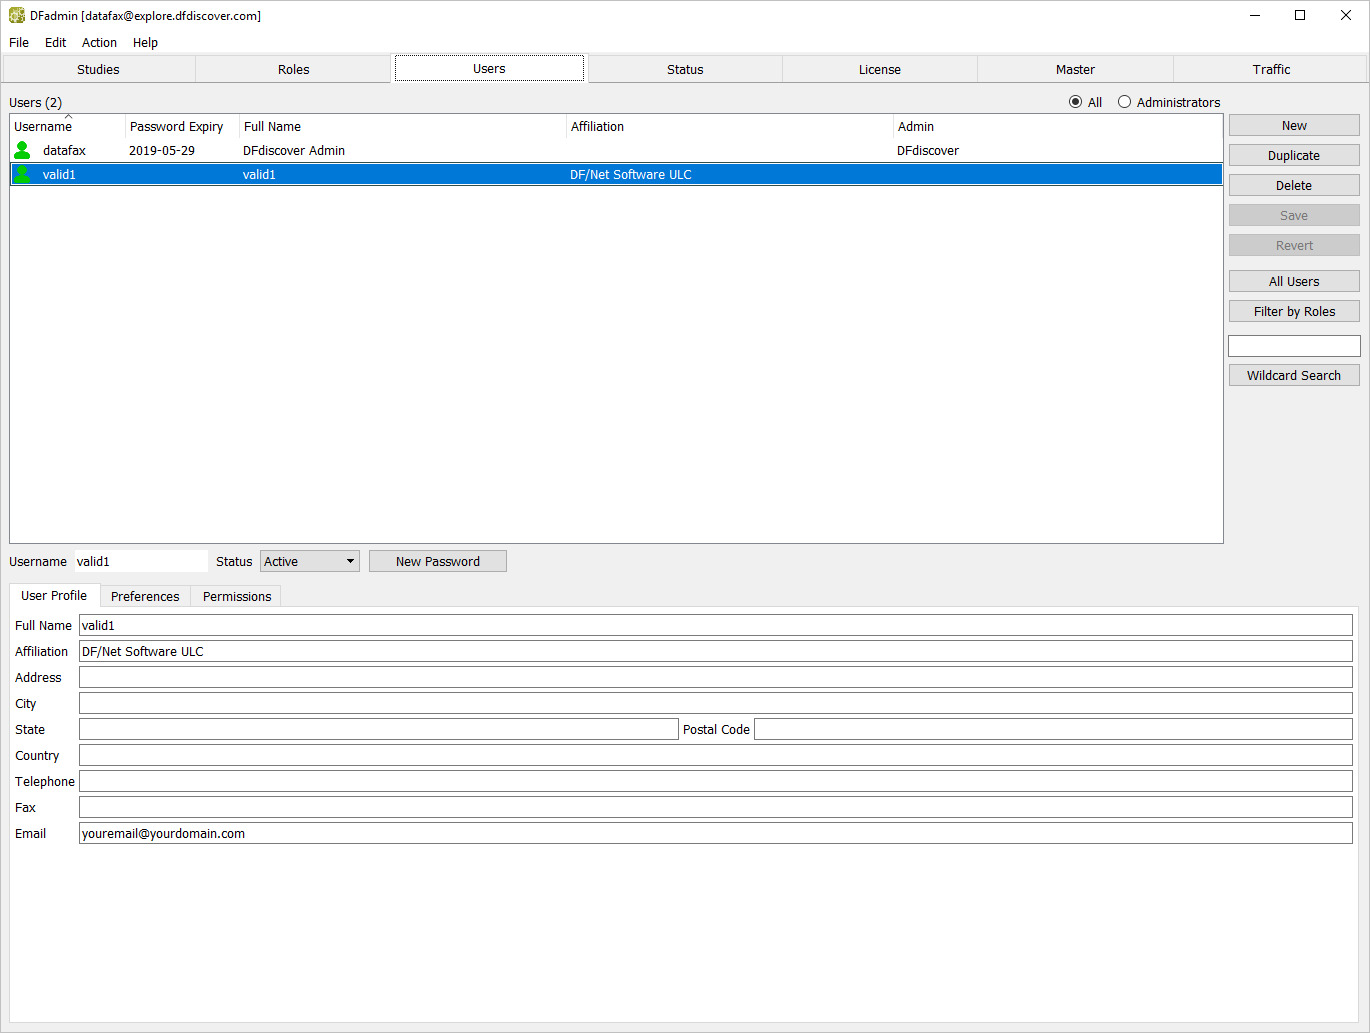
Choose the
valid1entry from the list of users if it is not already highlighted. Click User Profile tab. Enter these settings:Full Name =
valid1Affiliation =
DF/Net Software ULCEmail =
Your email address
Note A valid email address is required to receive module specific PDF files if you have not specified a printer in the Master view.
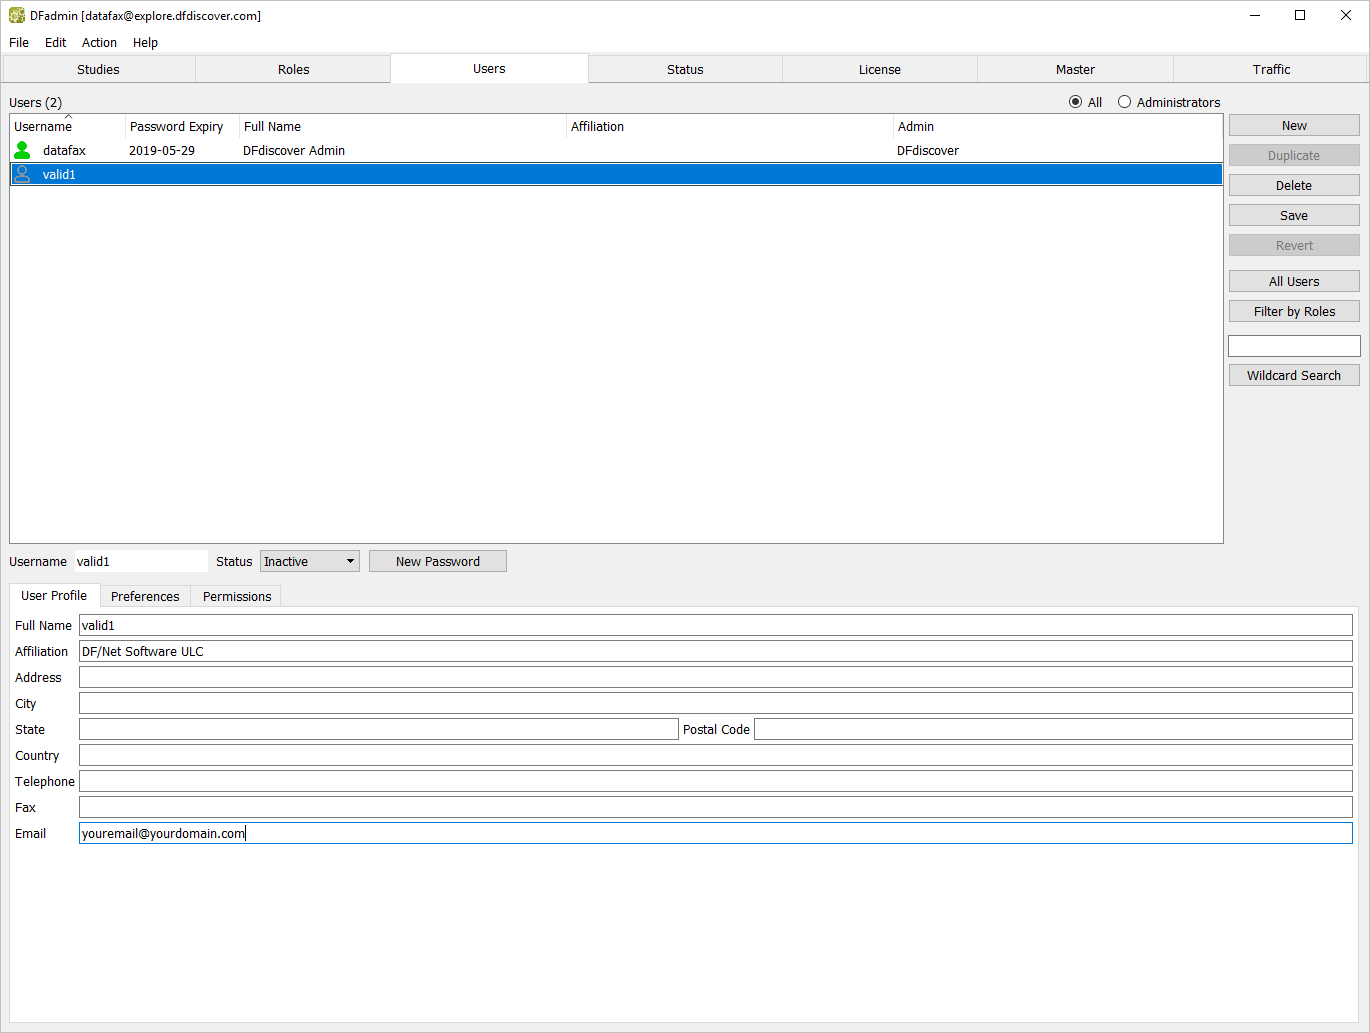
No further user profile information is needed. Select > or click .
-
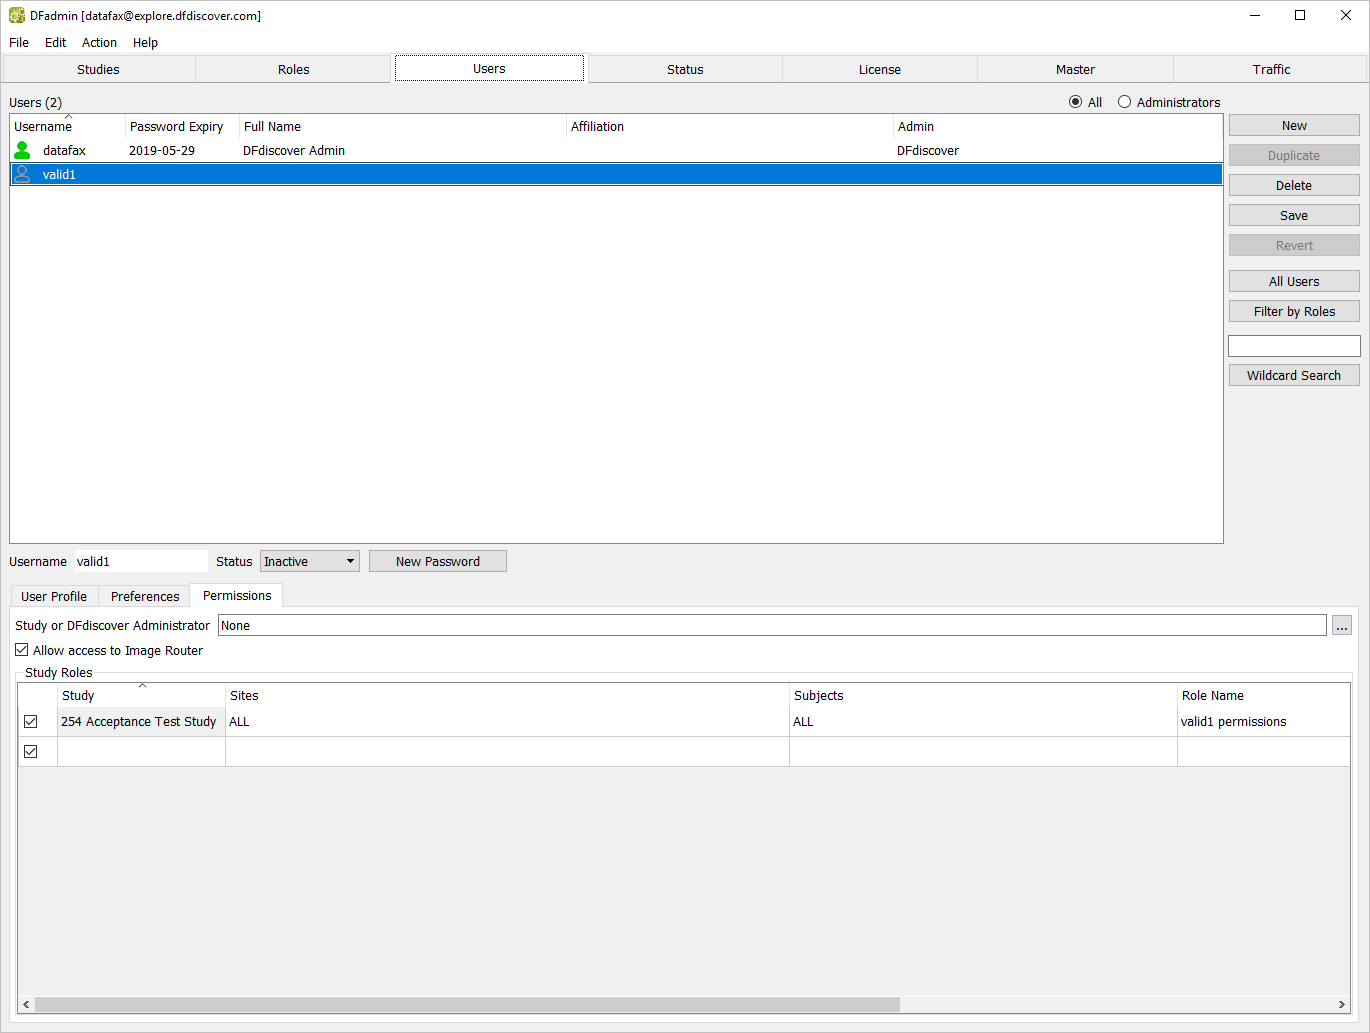
Set permissions for user
valid1. With uservalid1still as the active user, click Permissions tab. Check (enable) Allow access to Image Router to grant permissions to the DFexplore Image Router.
-
To assign a study to
valid1, click the blank area below the Study heading. Select 254 Acceptance Test Study from the Study drop-down. Set:Sites = All
Subjects = All
Role Name = valid1 permissions
-
Select Active from the Status drop-down list to change the status from Inactive to Active for user
valid1.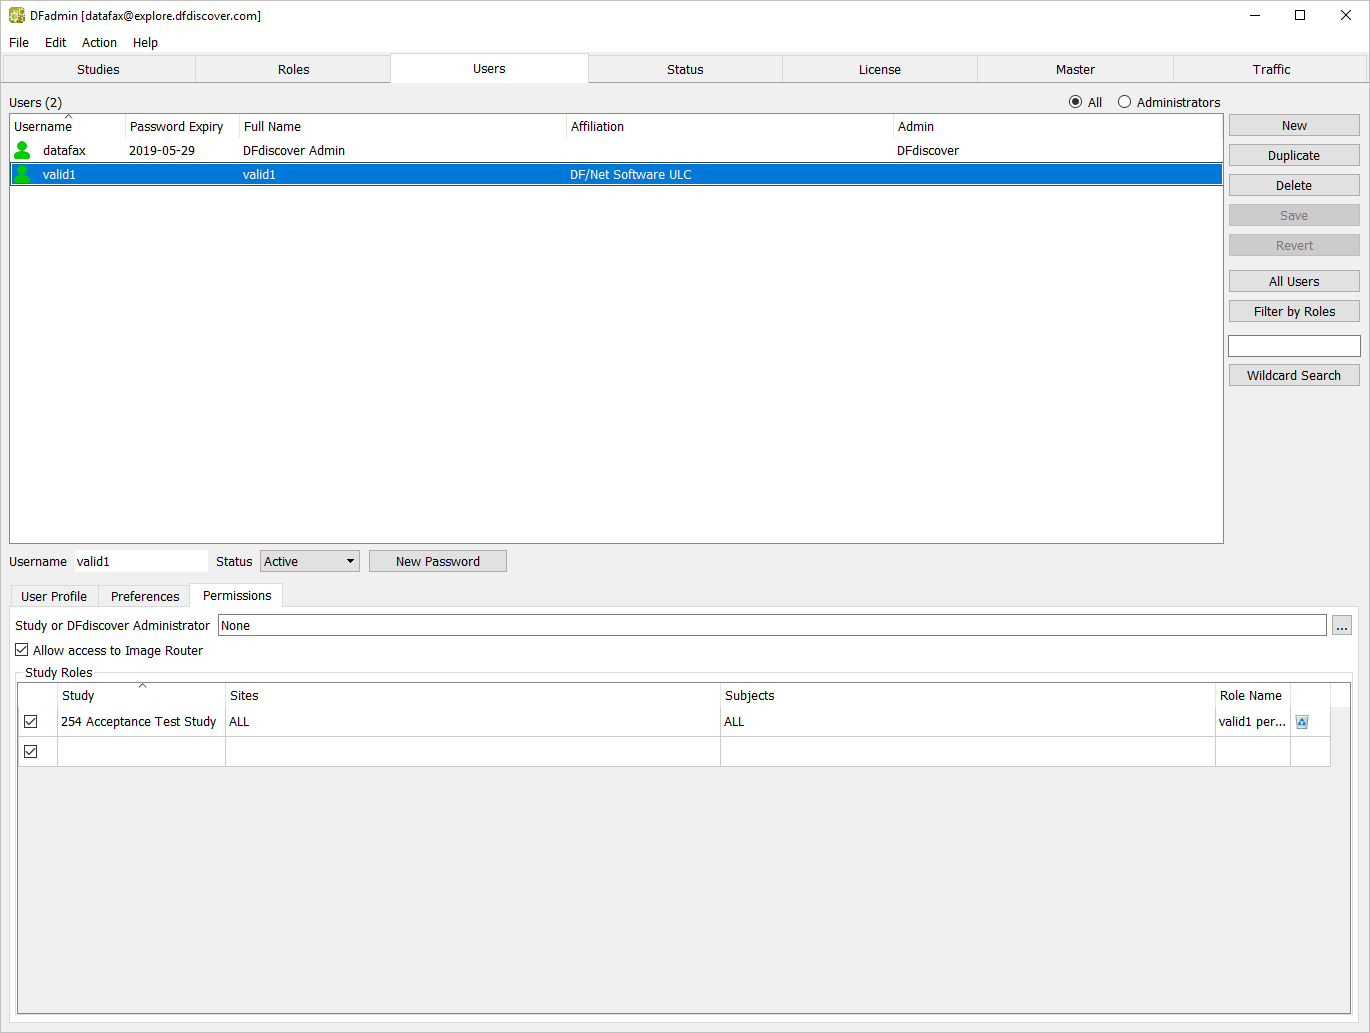
-
Assign a DFdiscover password for
valid1by clicking . Enter a password of your choice in place of the auto-generated system password.Note Remember the password assigned in this step as it is needed in future tests.
Save all previously entered permissions, roles and password by selecting > or by clicking .
-
Locate and choose the entry for user
valid1in the list of users. Click Permissions tab and confirm the following settings. If any of the following permissions do not appear as shown below, set them now.Allow access to Image Router box is checked (enabled)
254 Acceptance Test Study is assigned to user
valid1.Sites = ALL
Subjects = ALL
Role Name = valid1 permissions

Verify the status for
valid1. Ifvalid1is set to Inactive, select Active from the Status drop-down list.-
Assign a DFdiscover password for
valid1by clicking . Enter a password of your choice in place of the auto-generated system password.Note Remember the password assigned in this test step as it is needed in future tests.
Save all previously entered permissions, roles and password by selecting > or by clicking .
User datafax is already defined on your DFdiscover installation, however, you must grant user datafax a role and permissions to be able to access 254 Acceptance Test Study.
-
Click Users tab.
-
Create a Role for user
datafax. Begin this task by clicking the Roles tab.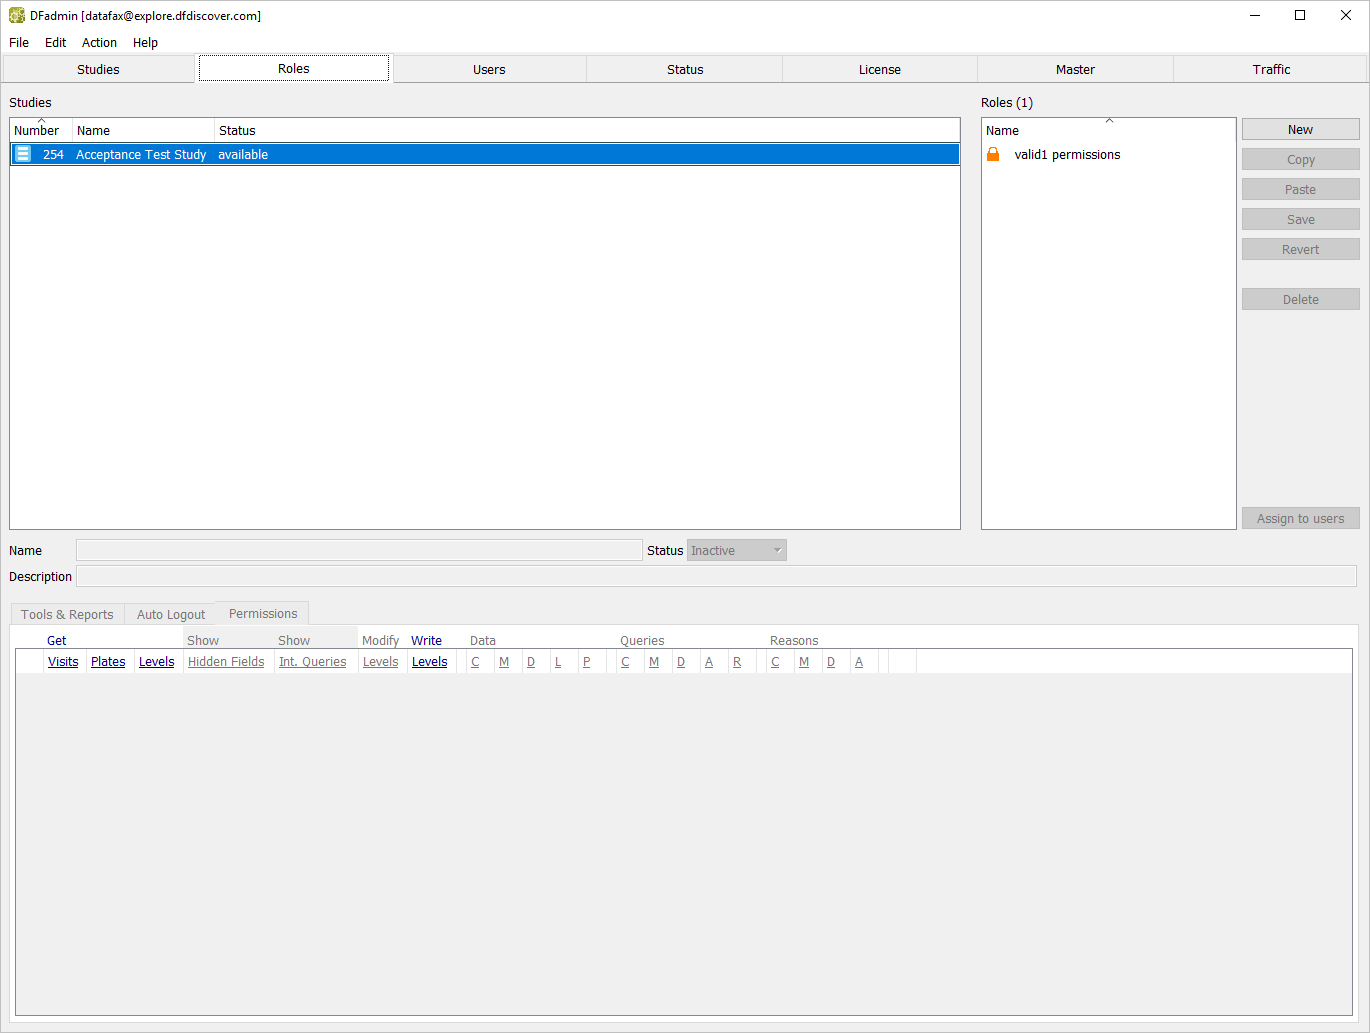
-
Within the list of studies, locate and choose the entry for 254 Acceptance Test Study. Click to the right of the Roles list to add a new user role. In the resulting dialog, enter the role name
datafax permissions.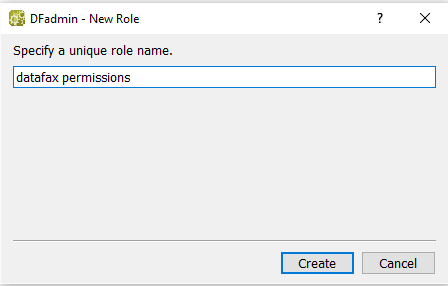
-
Click to create the new role
datafax permissions.
-
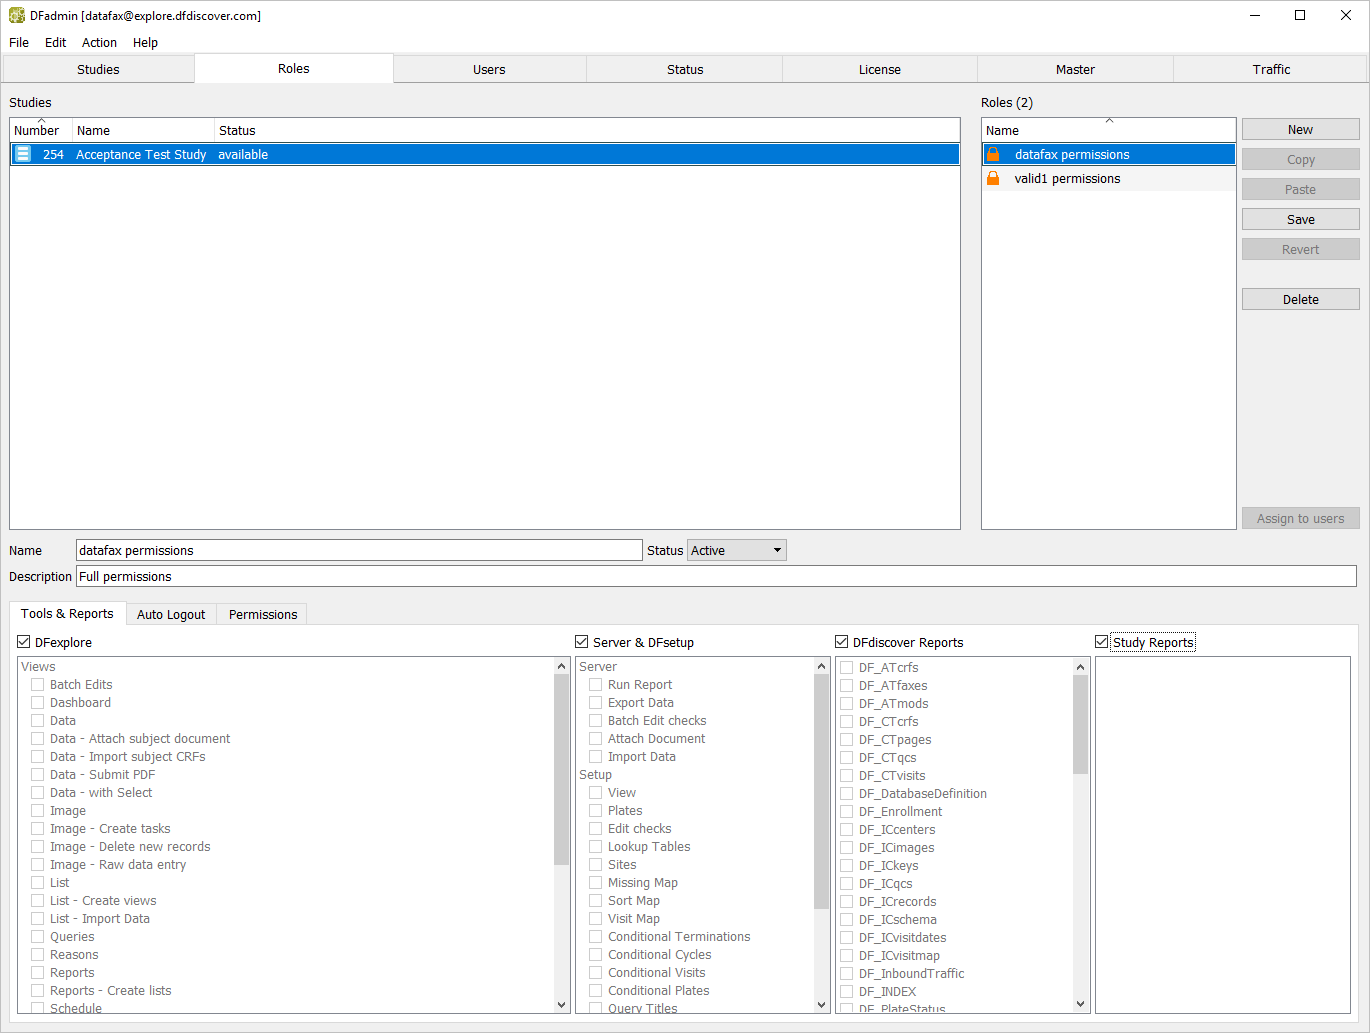
Define Tools & Reports permissions for the
datafax permissionsrole. Highlightdatafax permissionsin the Roles list to make it the active role. EnterFull permissionsin the Description field.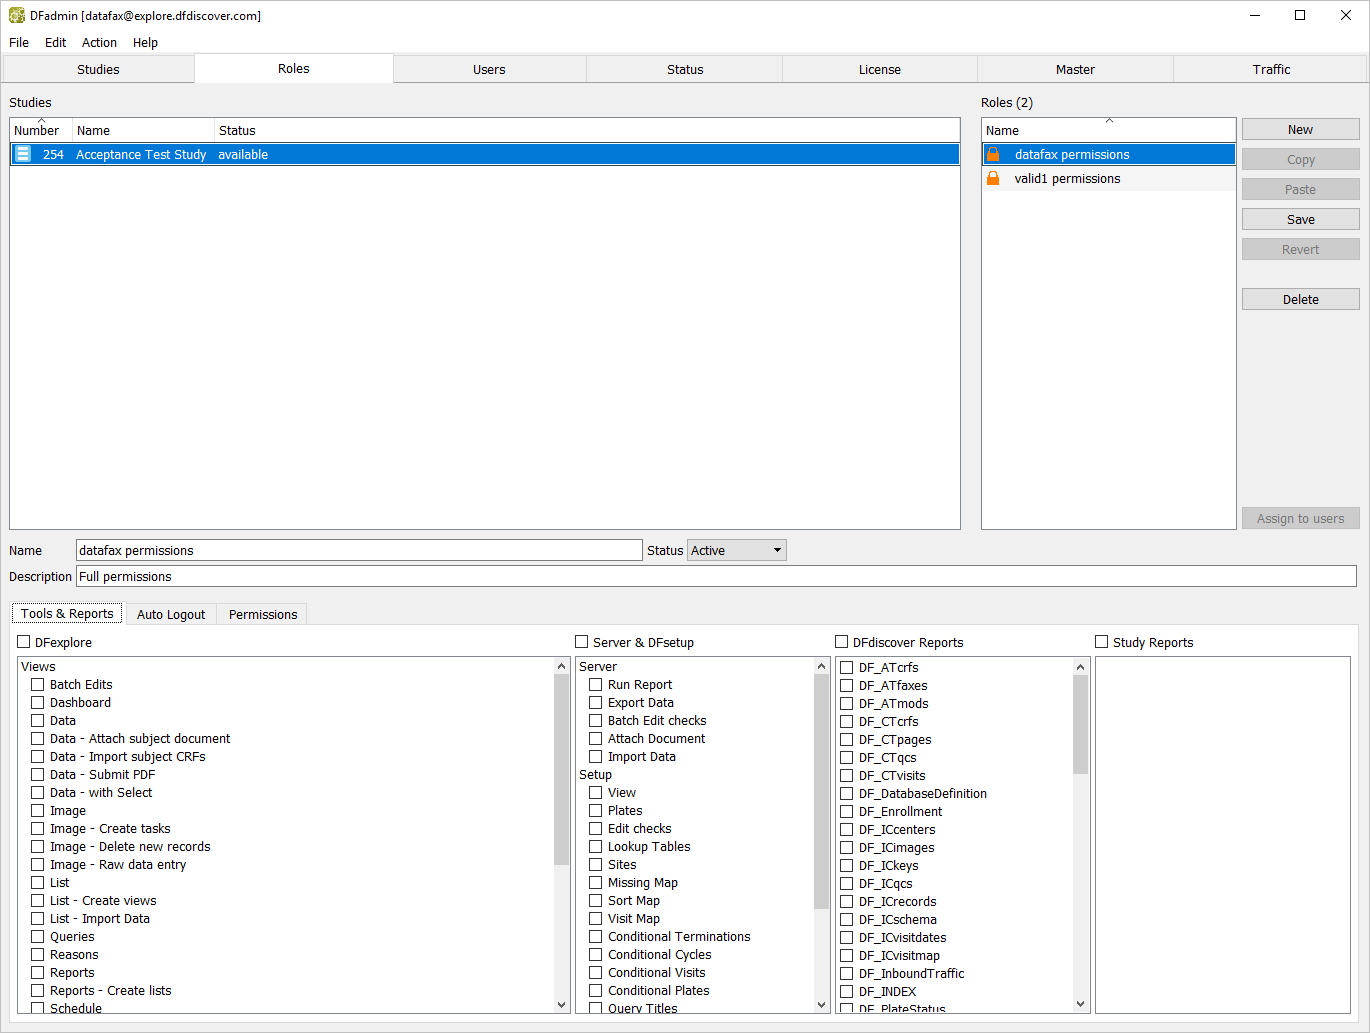
-
Click Tools & Reports tab below the Description field. Check (enable) each of the following: DFexplore, Server & DFsetup, DFdiscover Reports, and Study Reports.
-
Click Auto Logout tab. If not already enabled, check (enable) the Inherit from Study box to override the default Auto Logout settings with those of the ATK study.
-
Click Permissions tab.
-
Set data permissions as follows:
Visits = ALL
Plates = ALL
Levels = ALL
Check (enable) Show Hidden Fields
Check (enable) Show Int. Queries
Modify =
0-7Write Levels =
0-7Data = Check (enable) CMDL (Create, Modify, Delete, Missed), but not P (Password)
Queries = Check (enable) CMDAR (Create, Modify, Delete, Approve, Reject)
Reasons = Check (enable) CMDA (Create, Modify, Delete, Approve)
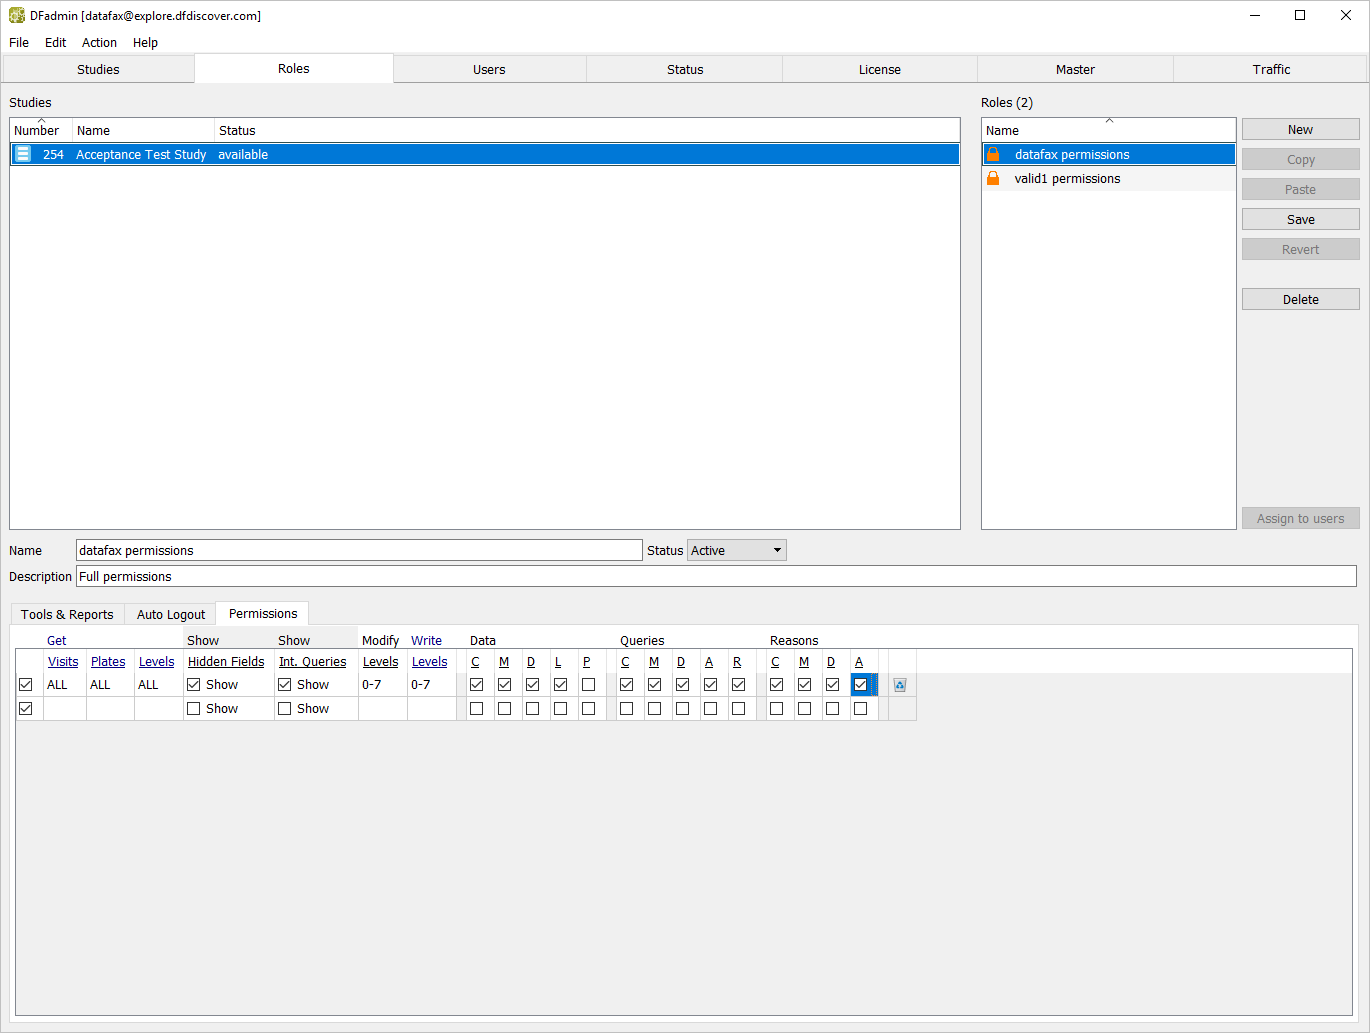
Select > or click to save Tool & Reports, Auto Logout and Permissions settings for role
datafax permissions.Still as
datafaxand with the DFadmin application open, click Users tab to open the Users window.-
Set permissions for
datafax. Click the entry fordatafaxfrom the list of users to make it active. Click Permissions tab. Check (enable) the Allow access to Image Router box to grant permissions to the DFdiscover Image Router.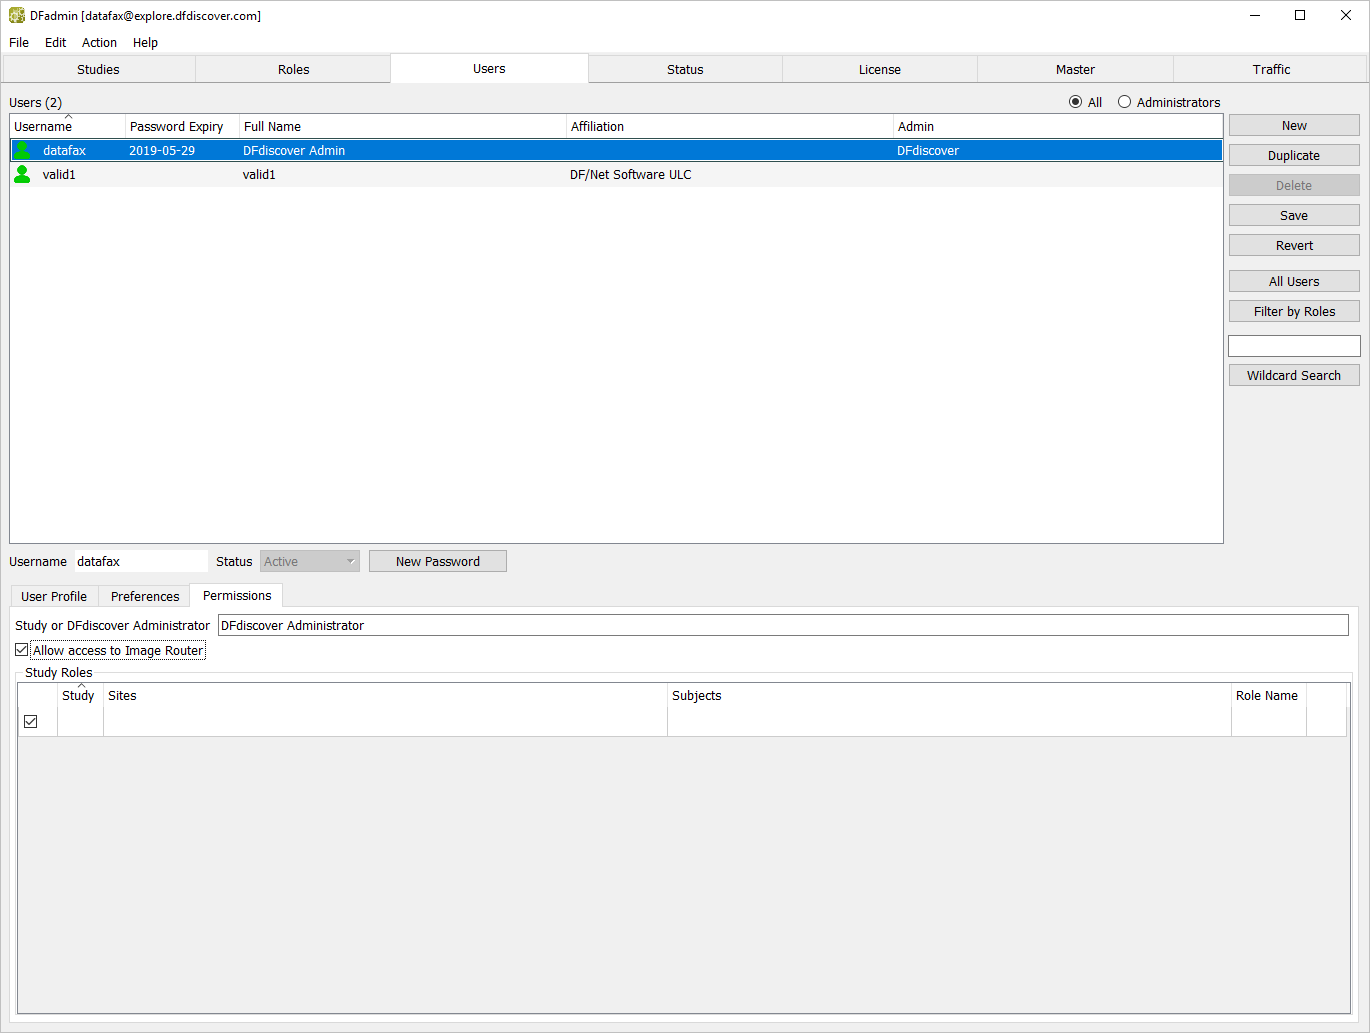
-
To assign a study to
datafax, click the blank area below the Study heading. Select 254 Acceptance Test Study from the Study drop-down. Set:Sites = All
Subjects = All
Role Name = datafax permissions
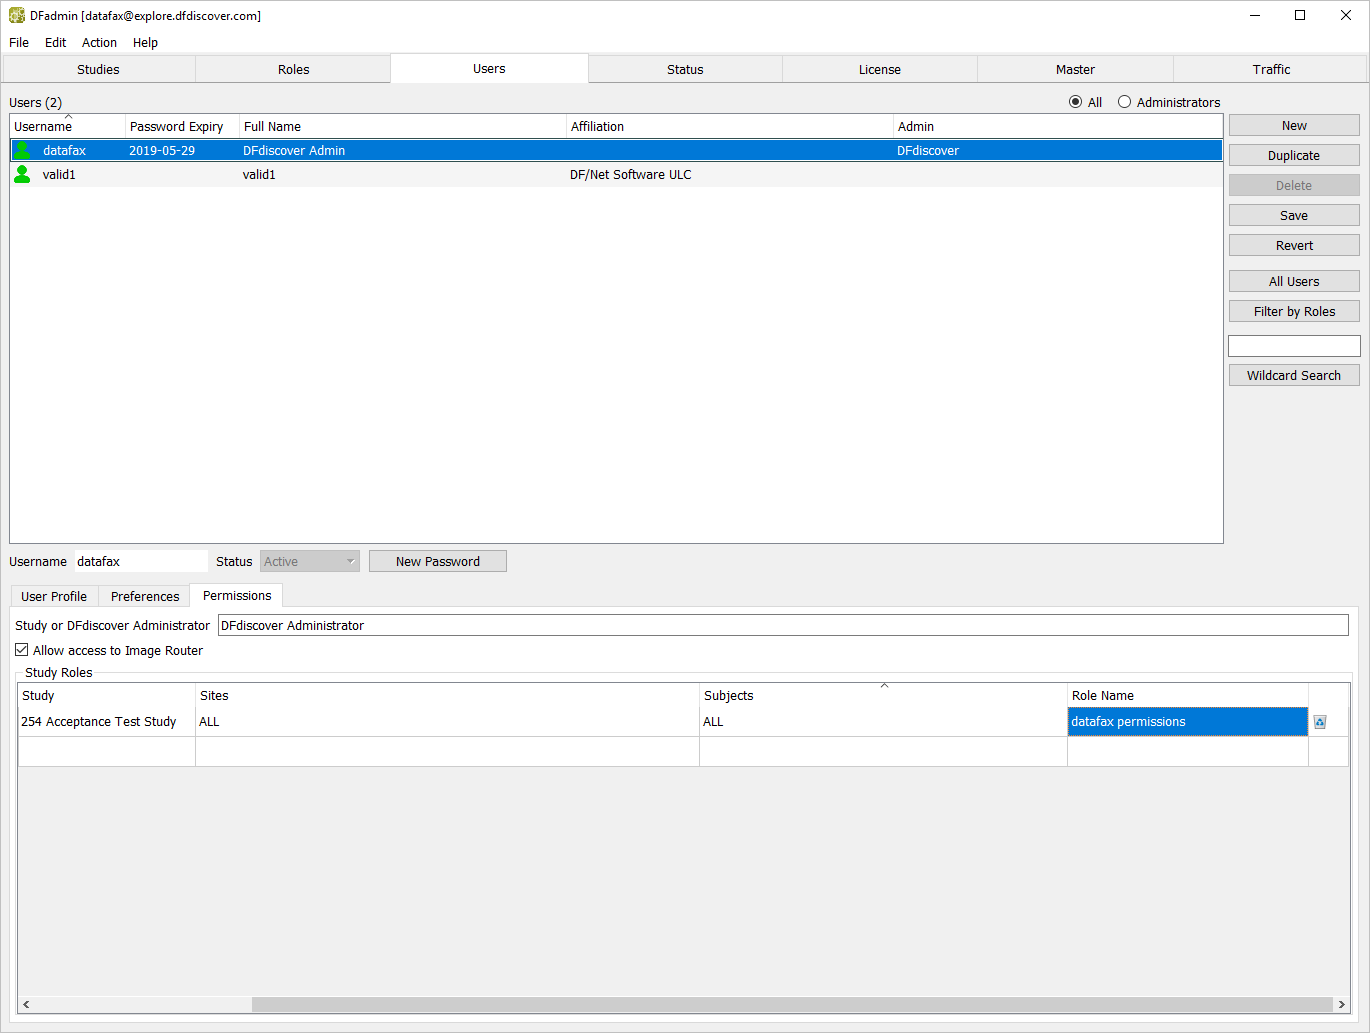
Select > or click to save the previously entered role and permissions for
datafax.
-
The remaining steps in this module require
datafaxprivileges. Open the Acceptance Test Kit login dialog.
-
In the login dialog, enter the name of the study server on which the Acceptance Test Kit has been installed. As the Acceptance Test Kit Control Panel must be run as
datafax, the Username field cannot be edited. Enter the previously specified password fordatafaxand click .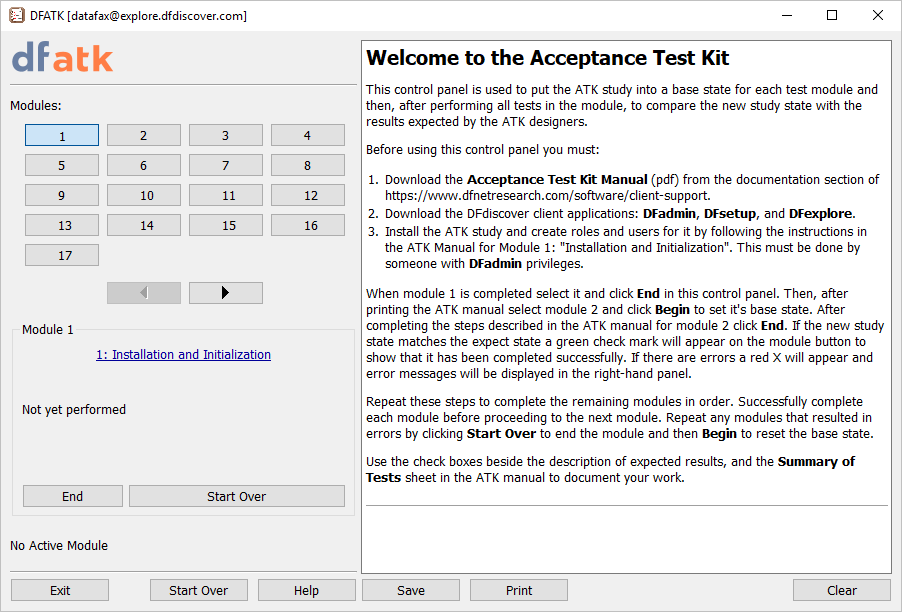
-
In the Control Panel, confirm that Module 1 Installation and Initialization is the current module and that its status is Not yet performed.
Click to complete Module 1.
