Table of Contents
- 2.1. Tests & Requirements
- 2.2. Begin Module 2.
- 2.3. Verify the on-line user documentation. Open the Image Router and verify the appearance of the Welcome Fax.
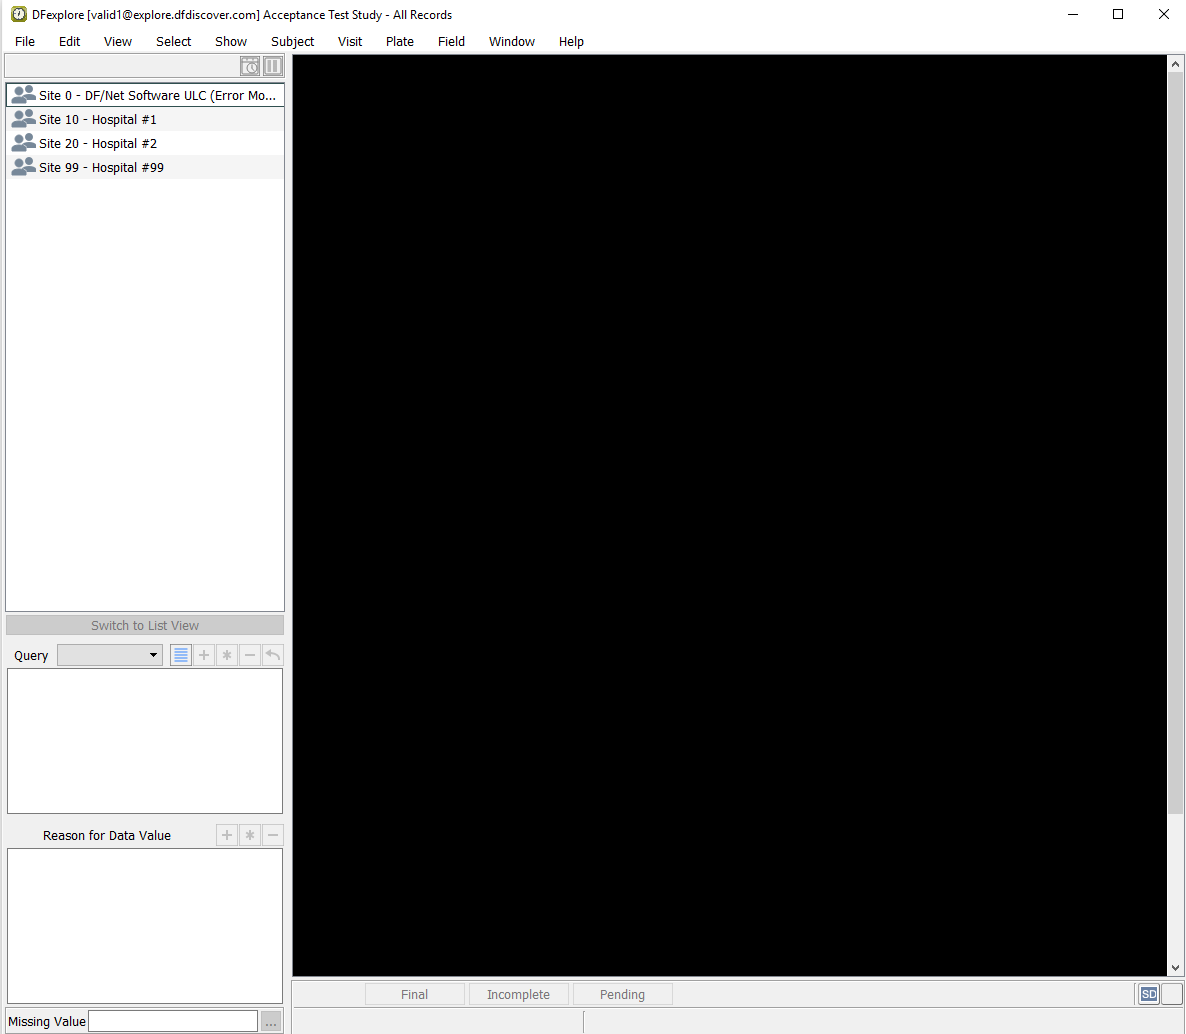
- 2.4. Open the Acceptance Test Study and verify the standard DFexplore views.
- 2.5. Start DFsetup and verify version information.
- 2.6. Login and verify the on-line setup documentation. Open the Acceptance Test Study setup and verify the standard DFsetup views.
- 2.7. End Module 2.
Verify the on-line user documentation. Open the Image Router and verify the appearance of the Welcome Fax.
Open the Acceptance Test Study and verify the standard DFexplore views.
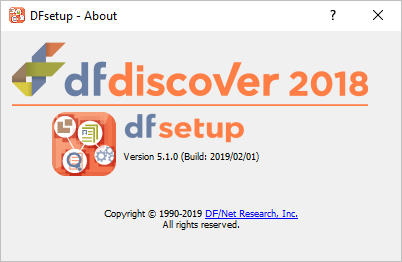
Start DFsetup and verify version information.
Login and verify the on-line setup documentation. Open the Acceptance Test Study setup and verify the standard DFsetup views.
Estimate of Time Required: 20 minutes
-
Start DFATK as described in Module 1 (Installation & Initialization).

-
Click followed by to begin this module.
-
Start DFexplore In the DFexplore login dialog, enter the name for DFdiscover Server that has been provided by your administrator. (This will differ from the value shown here.) Enter
valid1in the Username field and the previously assigned password in the Password field. Click to login.
-
During the first login of
valid1a new password must be chosen. Choose and enter a new password in both the New Password and Confirm Password fields. Click to set the new password and dismiss the dialog. Choose 254 Acceptance Test Study, click . If your DFdiscover server does not allow the re-use of previous passwords, you will be required to setvalid1's password to something other than the initial password chosen previously. The password you choose must satisfy the password requirements specific to your DFdiscover server and will be needed in the remainder of the modules. -
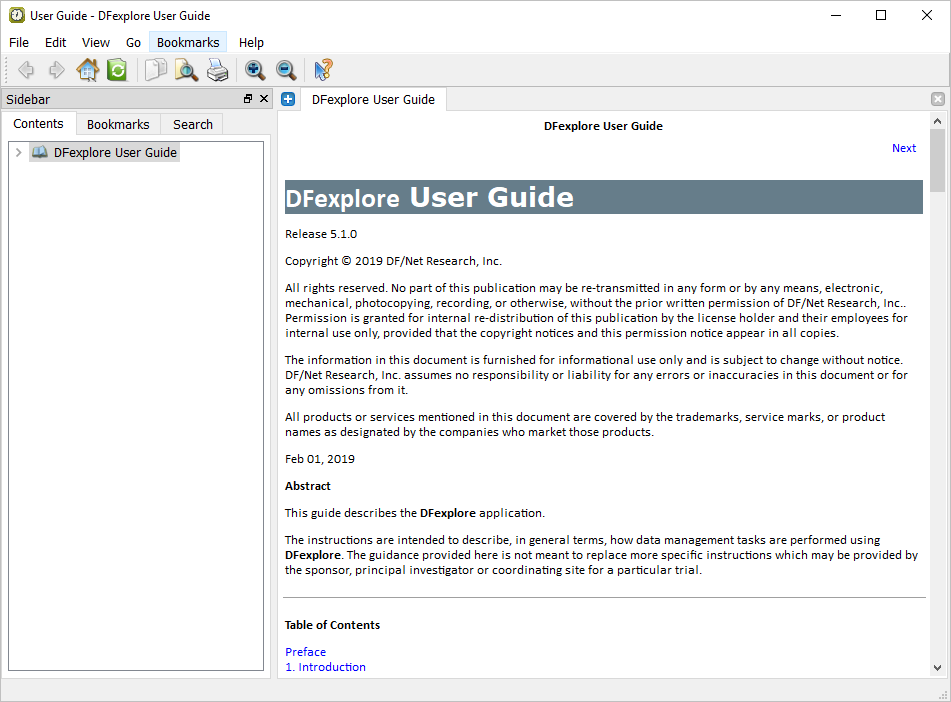
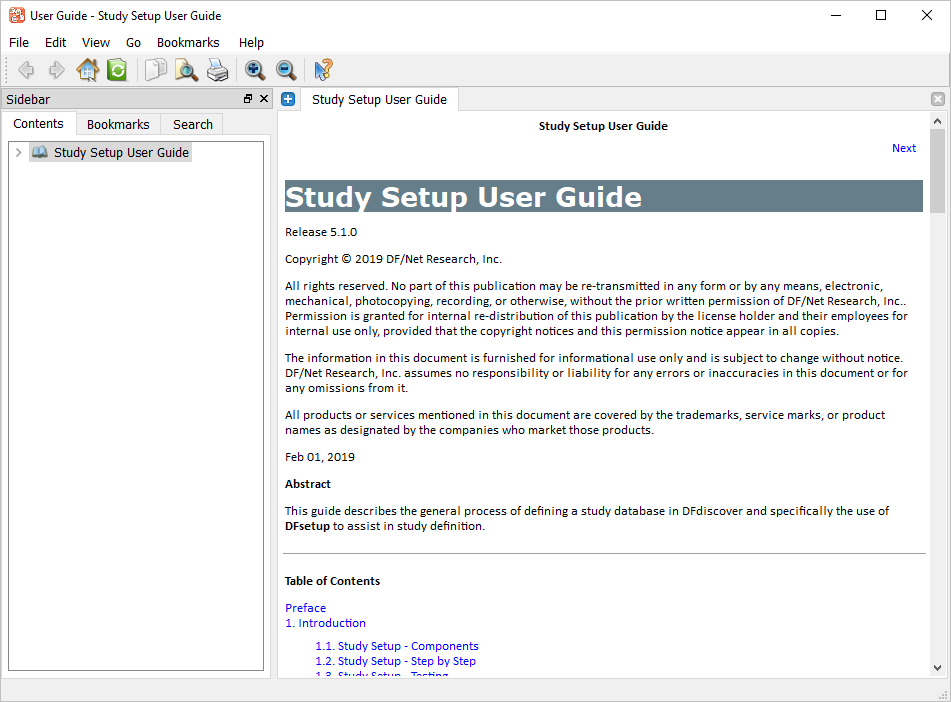
Select > to access the documentation. In the documentation window, confirm the documentation version number. Select > to dismiss the documentation window.
-
Select > to exit the study.
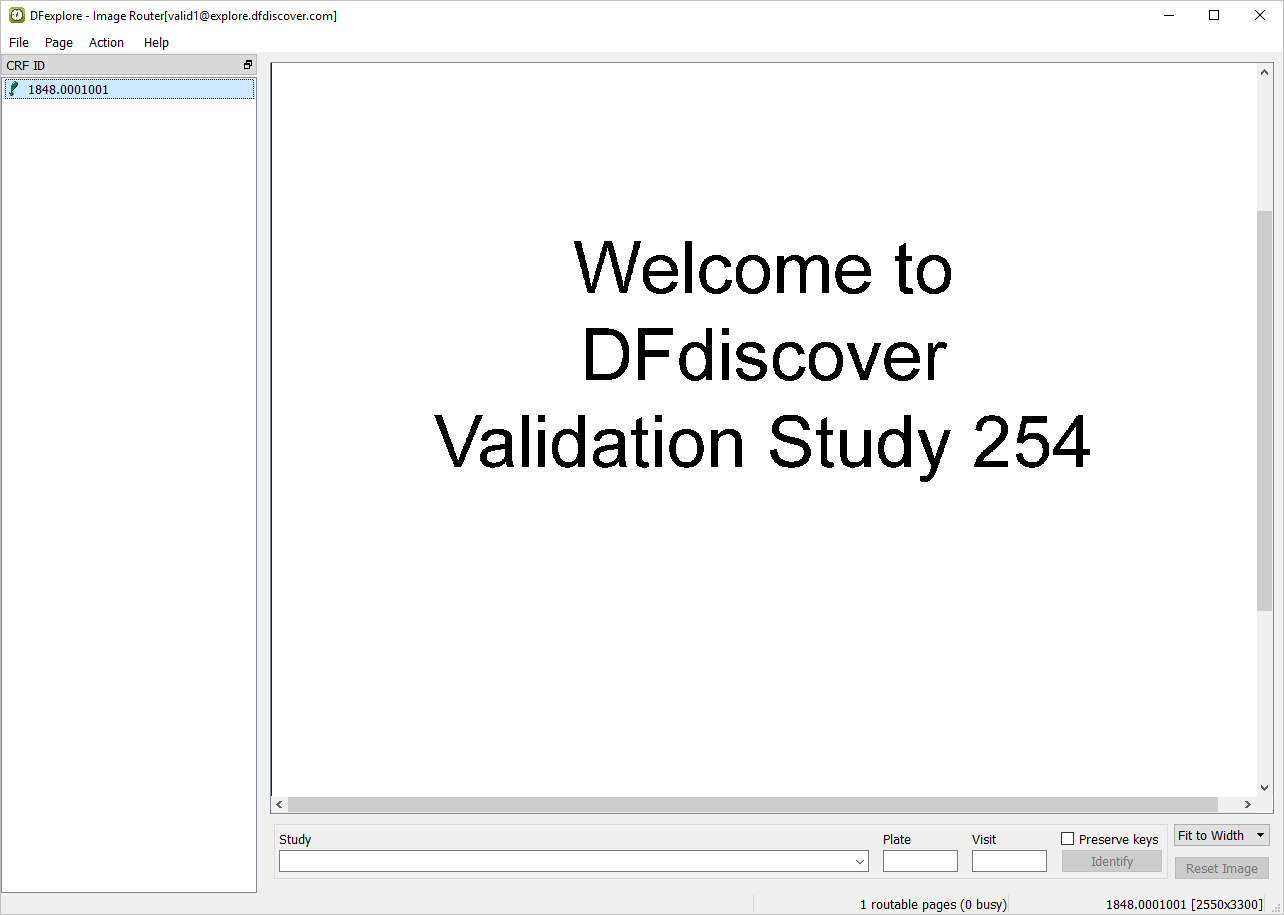
Click to start the Image Router. Locate the Welcome image by selecting the page from the list of documents in the CRF ID panel.
![[Note]](../../imagedata/note.png)
Note Any pages that have been received and which DFdiscover could not identify as CRFs for any of the studies registered at your site, will be found in the Image Router. The Welcome image is added during initialization of the module. If there are more pages than the Welcome image in your Image Router window, you may need to locate the Welcome image in the list of images in the CRF ID panel.
-
Print the Welcome image from the Image Router by selecting > . Choose your locally installed printer, choose All for Page Range, and click .
-
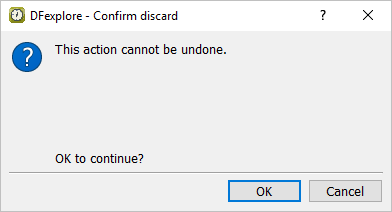
Delete the Welcome image from the Image Router by selecting > . Click to confirm the discard action.
-
Select > to exit the Image Router.
The study selection dialog is presented.
-
In the study selection dialog, highlight the entry for 254 Acceptance Test Study. Click .
Note If user
valid1has only one study defined and Allow access to image router is not enabled within DFadmin the study selection dialog is not displayed.If this step is performed within 60 seconds of closing the Image Router window, the Username, Password and list of studies are still visible. If more than 60 seconds have elapsed, you will first need to re-enter the Password for
valid1, and click to view the study selection dialog. Then highlight the entry for 254 Acceptance Test Study and click to continue. -
Select > . In the Preferences dialog, open each panel and set the options exactly as illustrated. When finished, click to save the settings and close the dialog.

-
Select > to make Image view the current view. Set Quantity = 25. Do not change any other settings in the Automatic Retrieval dialog and click to retrieve the new documents.
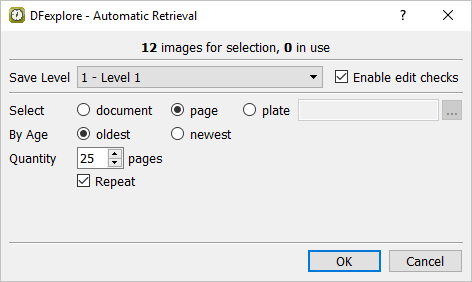
Note The record retrieval dialog displays the last retrieval mode from the session preferences for each user on each computer. If
valid1previously used DFexplore in another mode, you may not see the Automatic Retrieval dialog that is illustrated. You may see a different record retrieval dialog. When this happens, click in that record retrieval dialog. Then select > and, as necessary, correct the settings in the resulting dialog so that they match the illustration. -
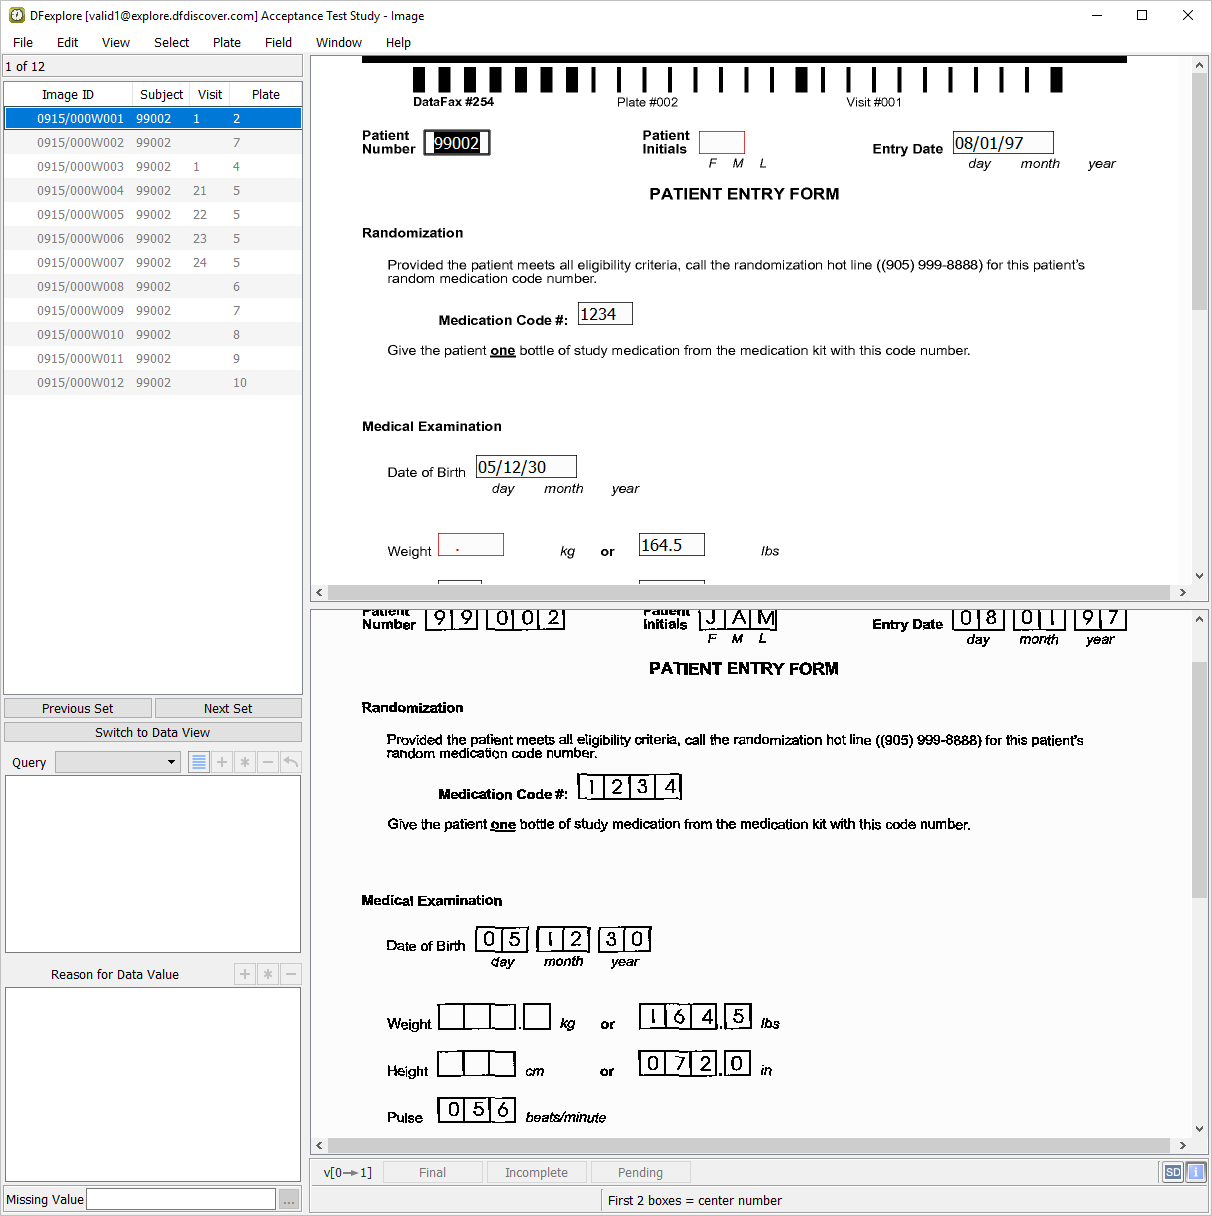
Image view becomes the current view 12 new records are displayed in the record list panel, and the first record is highlighted. The main window displays the data record in the top pane and document image in the bottom pane.
-
Select > to change to Data view. In the confirmation dialog, click to release the set of image records.

-
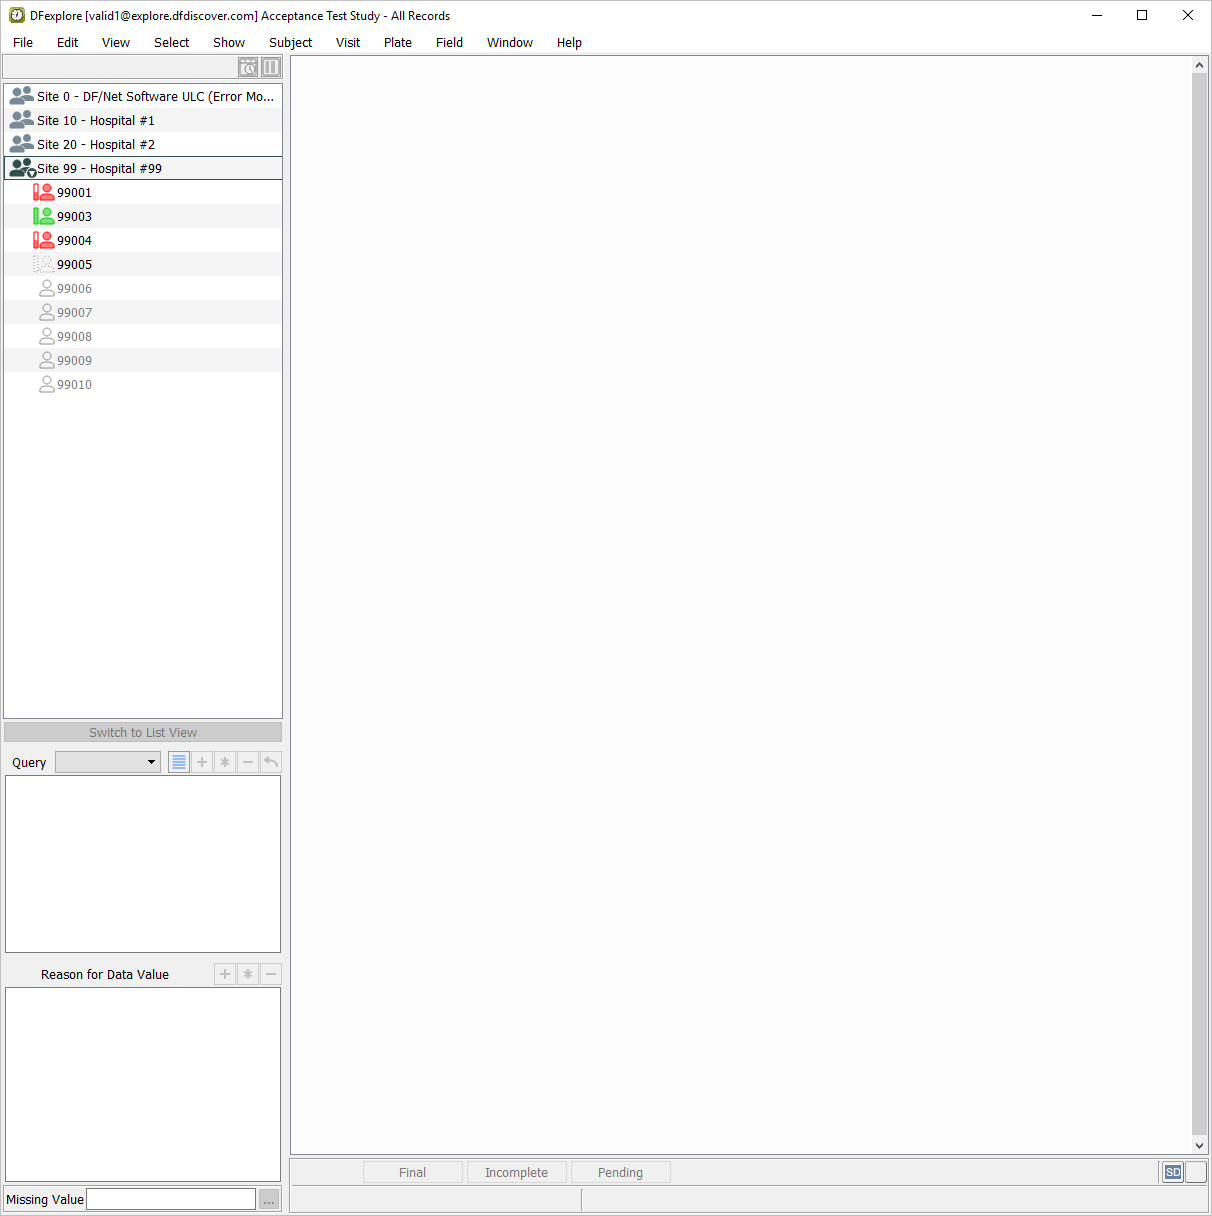
Double-click entry for Site 99 - Hospital #99 in the record list panel. The site opens to display the subject list. The subject list displays all enrolled subjects and the next 5 potential subjects for each site.
-
Double-click entry for Subject 99004 to list all visits for that subject. Select > . In the record list panel, locate the 6: Form 6 entry belonging to the Study Termination assessment. Click it to make it the active page in the main data window.
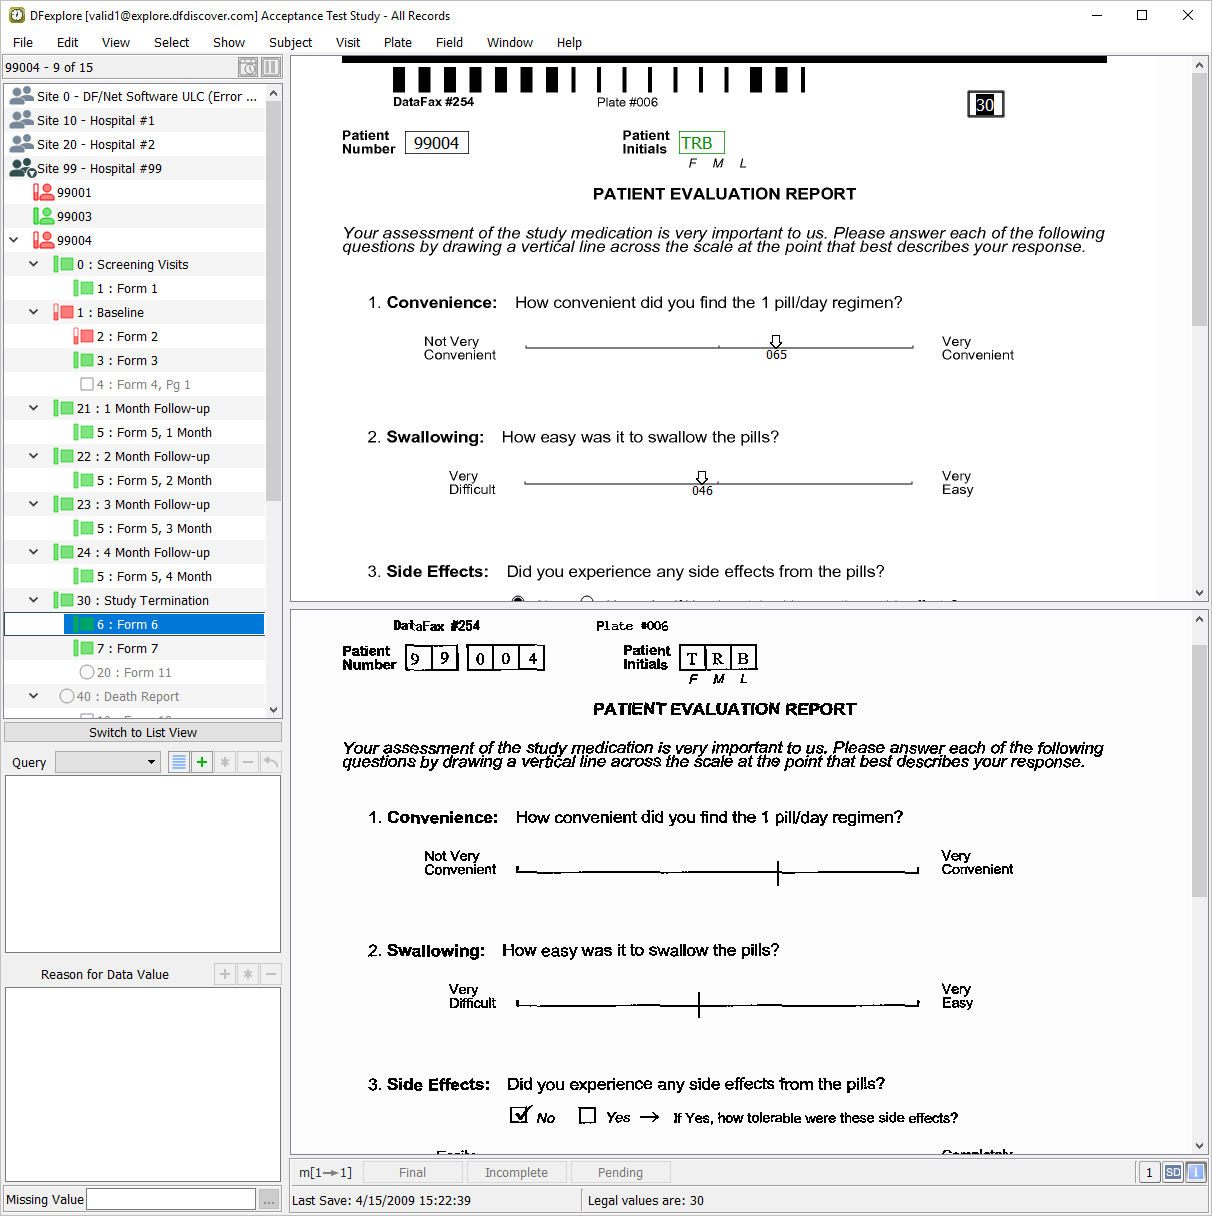
-
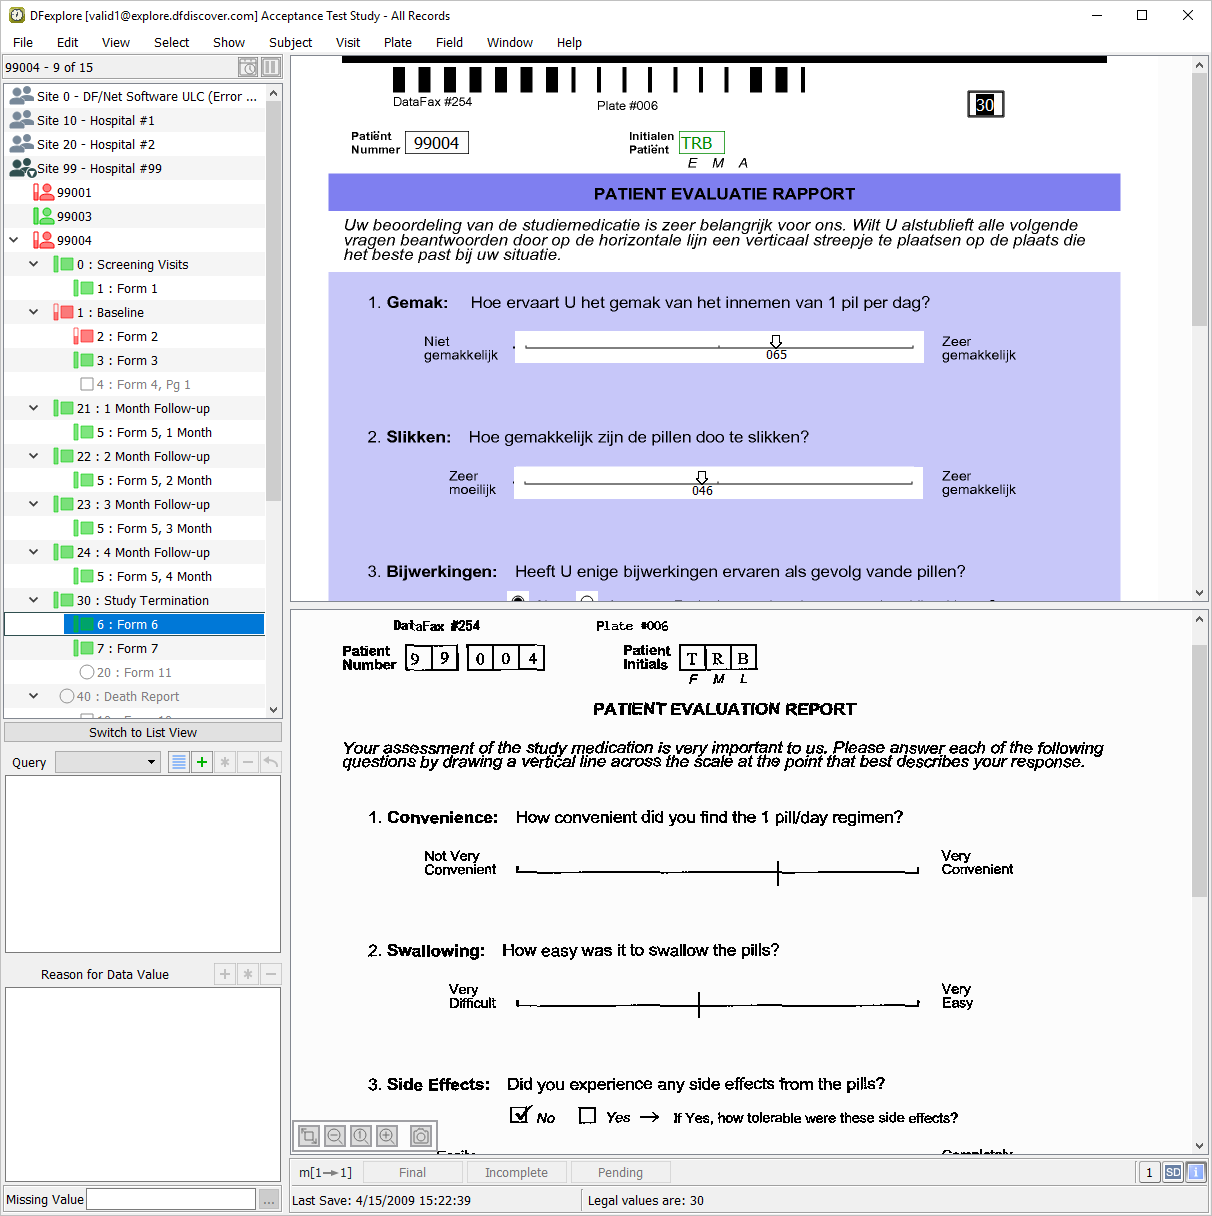
6: Form 6 has been defined in the study setup with colored, multi-language backgrounds as well as the default black/white English background for the data entry screen. Select > . In the Preferences dialog, change:
CRF Type from Default to Dutch
Click to save the preferences and close the dialog. Confirm that the background CRF in the data window has refreshed to the Dutch version.
-
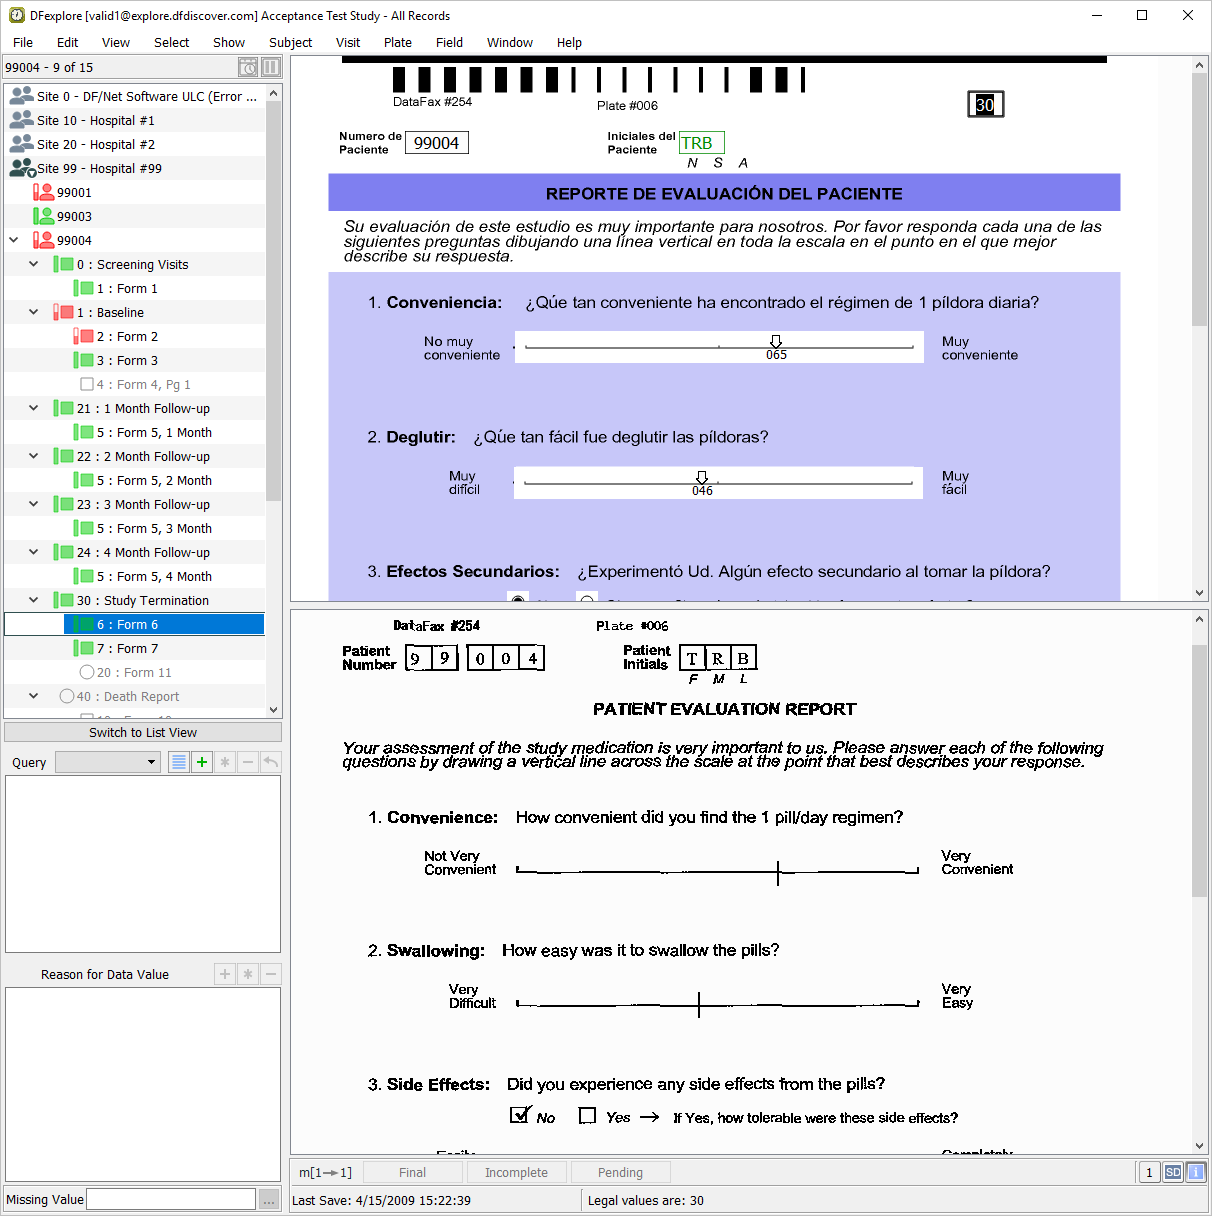
Re-select > . Change the Background Options choice for CRF Type from Dutch to Spanish. Click to apply the preferences and close the dialog.
-
Re-select > . Reset the Background Options for CRF Type to Default. Click to save the preferences and close the dialog.

-
Double-click entry for 99001. This closes 99004 and opens the list of visits for 99001. Select > to open all visits and pages for subject 99001. In the record list panel, locate 1: Form 1 under Screening Visits. Click it to open the page in the main data window.

-
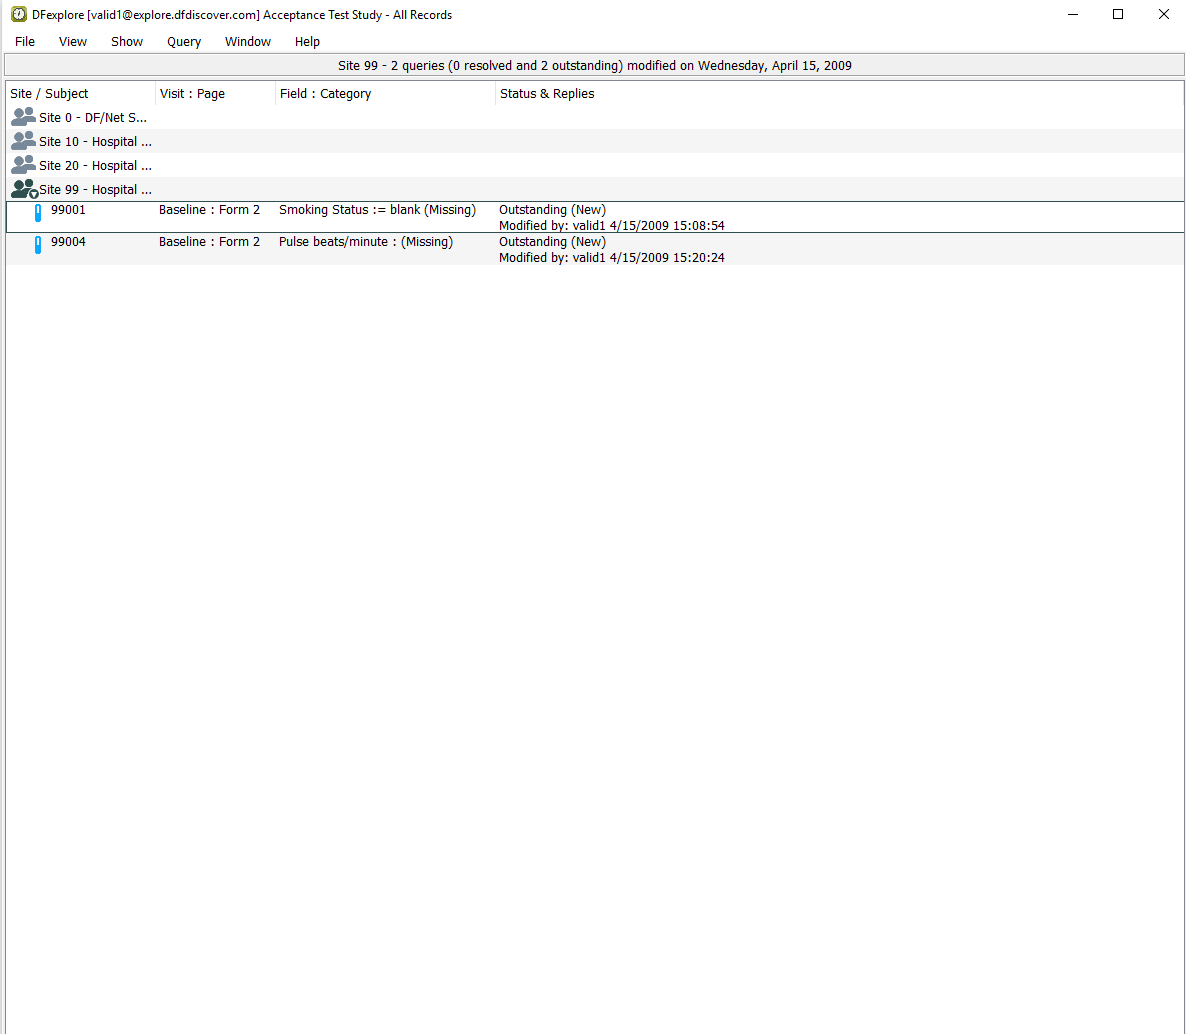
Select > to switch to Queries View. Select > to display all queries for the current subject.
-
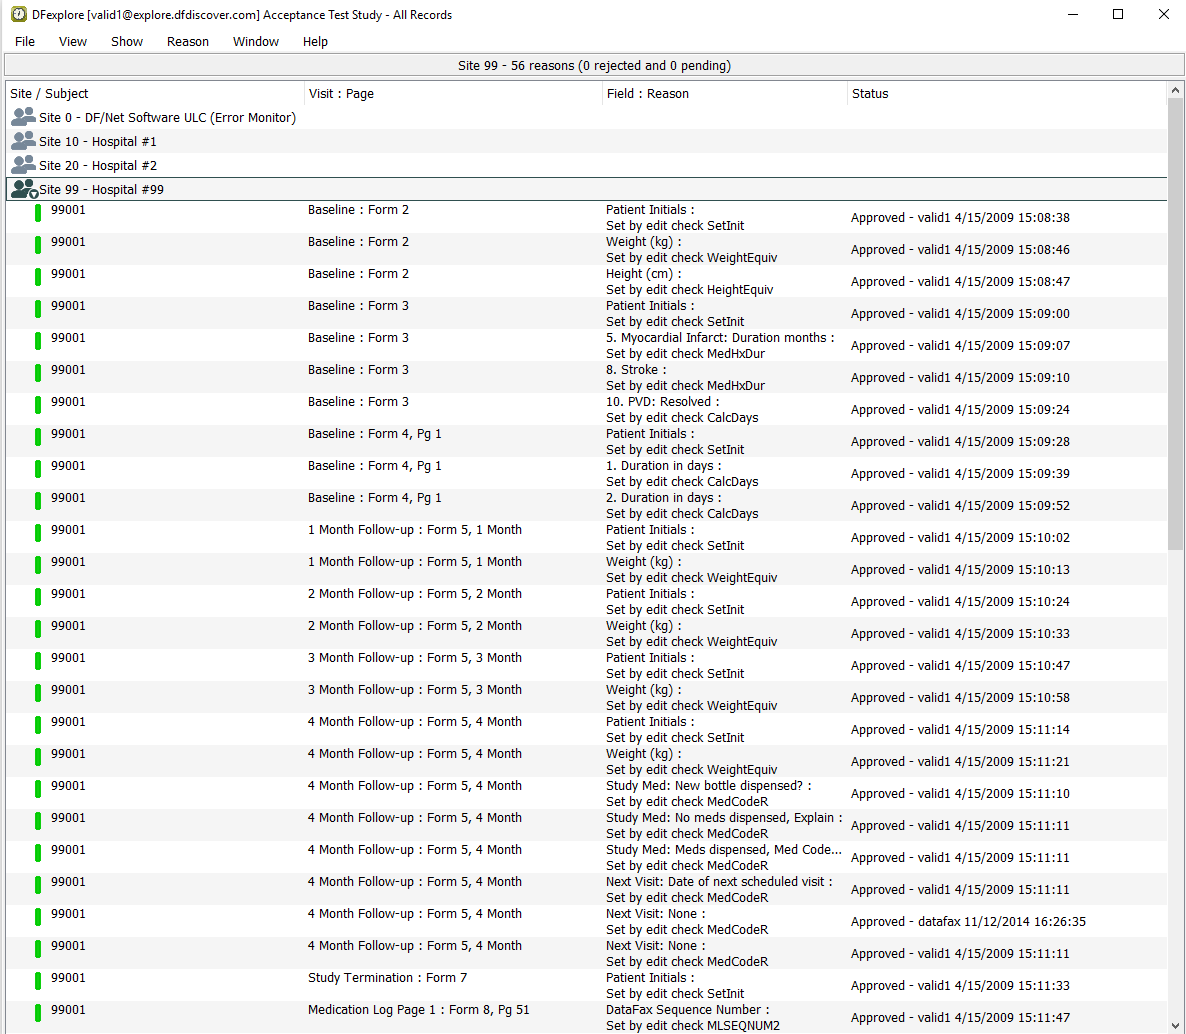
Select > to switch to Reasons View. Select > .
-
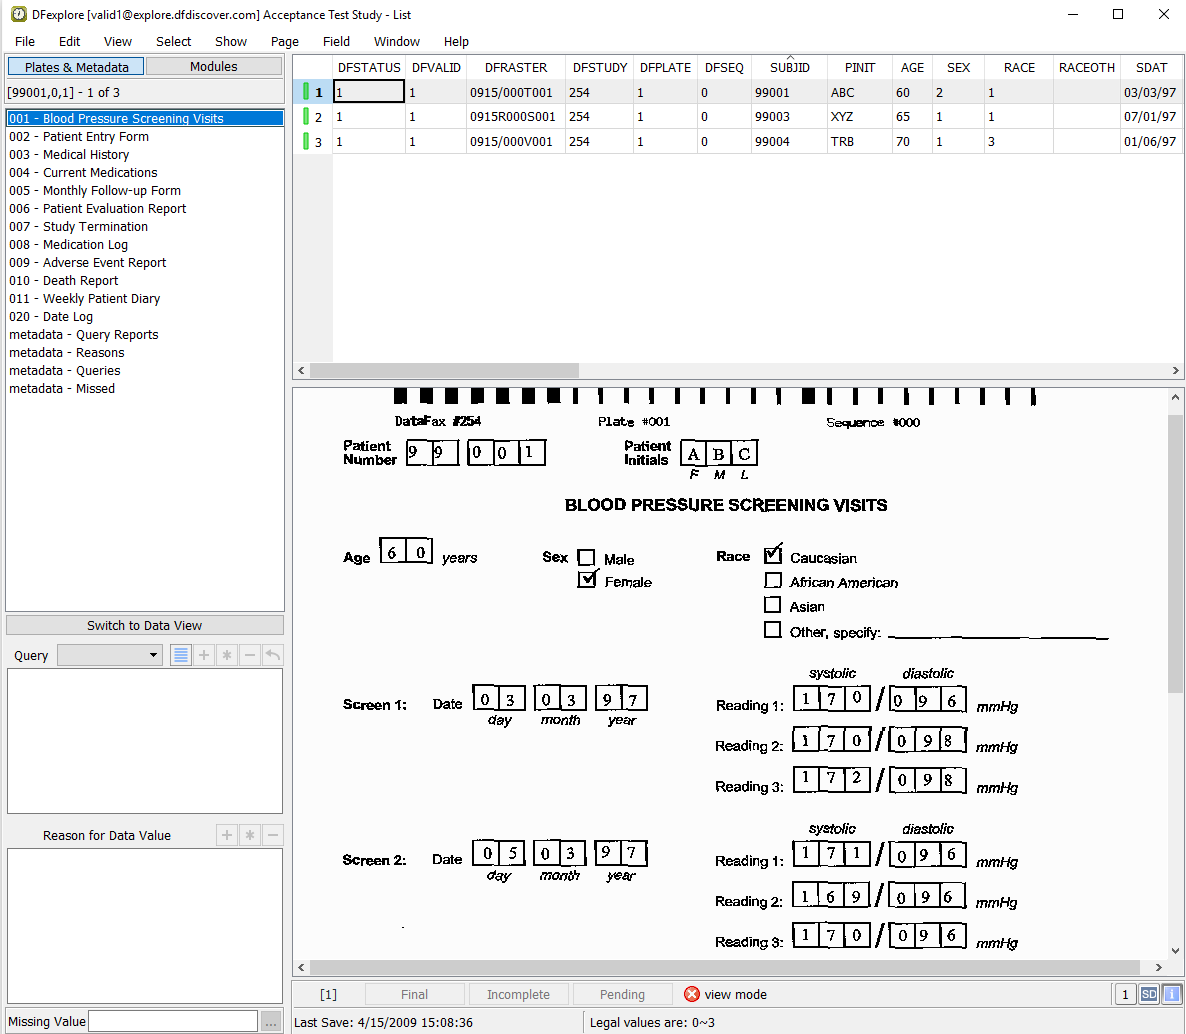
Select > to switch to List View. Confirm that the Plates & Metadata tab is highlighted at the top of the record list panel. Click 001 - Blood Pressure Screening Visits from the list of plates.
-
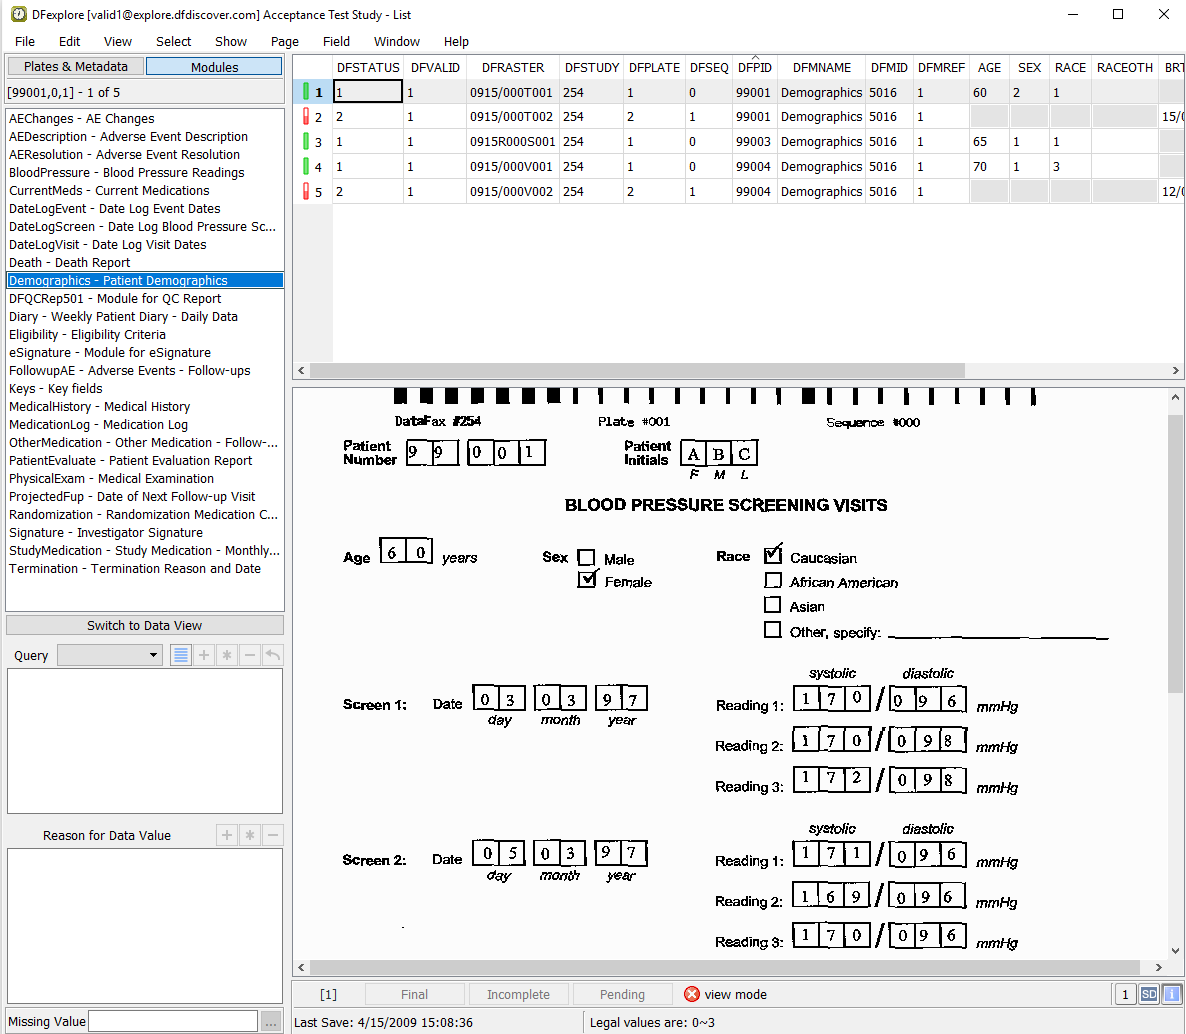
Choose the Modules tab at the top of the list panel to display a list of all modules defined for the study. Click Demographics - Patient Demographics module.
-
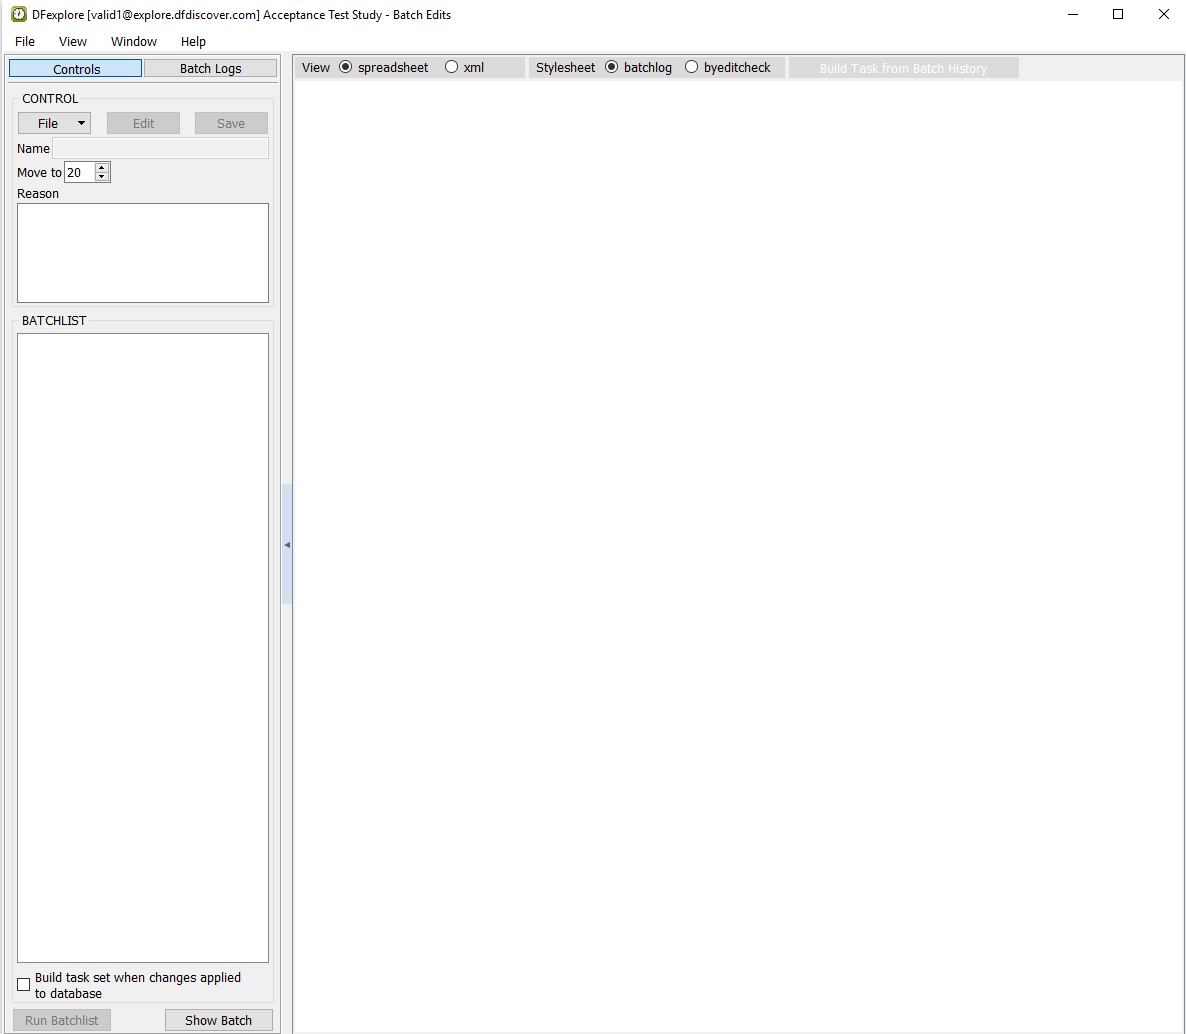
Select > to switch to Batch Edits View.
-
Select > to switch to Reports View. In the reports list panel, double-click DFdiscover Reports followed by Legacy Reports. Highlight the report DF_PTcrfs from the list of legacy reports.

-
In the Specify field, enter the report option
-i 99001. Click to run the report for subject 99001. Examine the output displayed in the output window.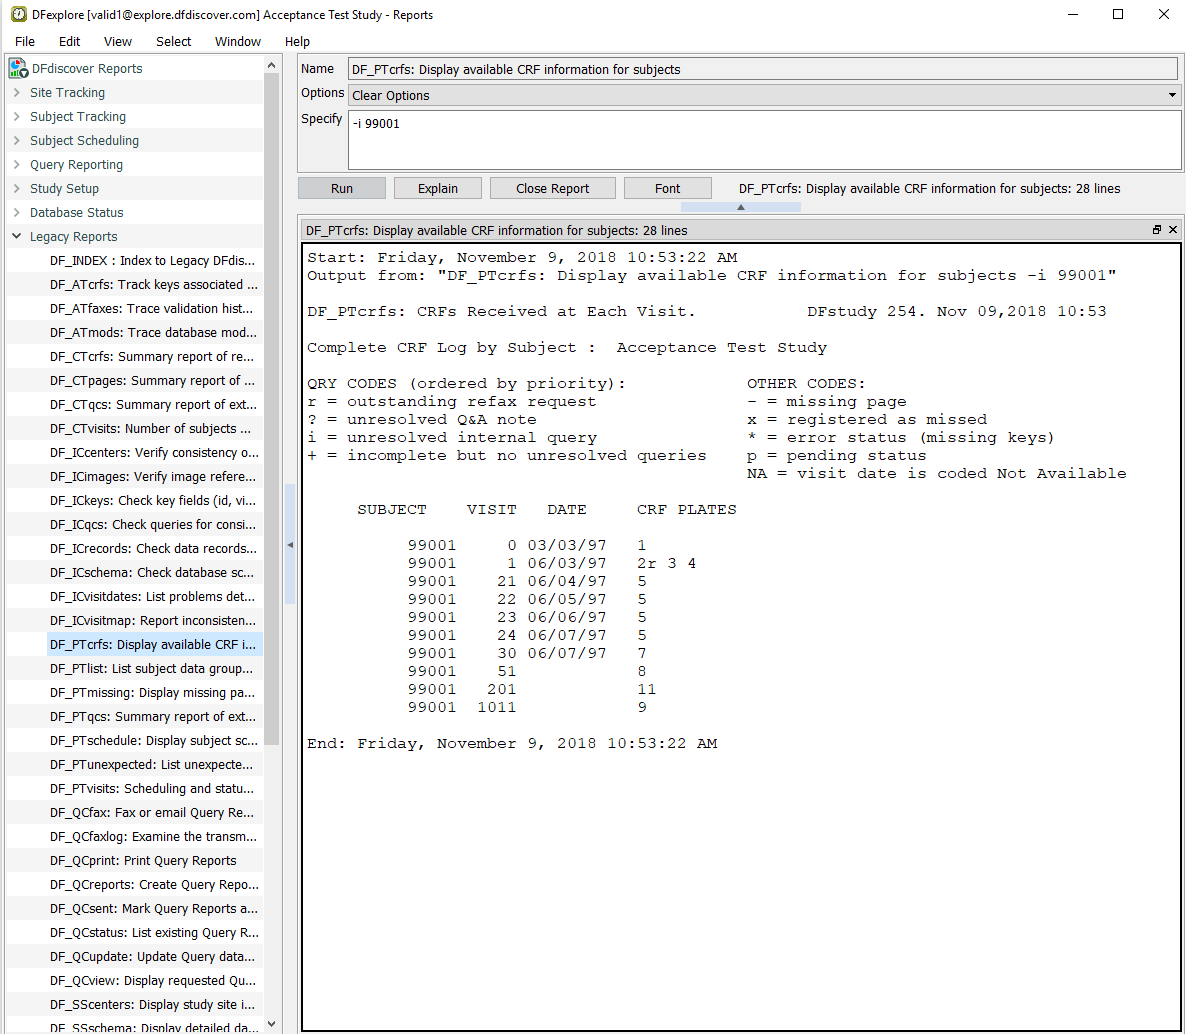
-
Select > to switch to Status View.
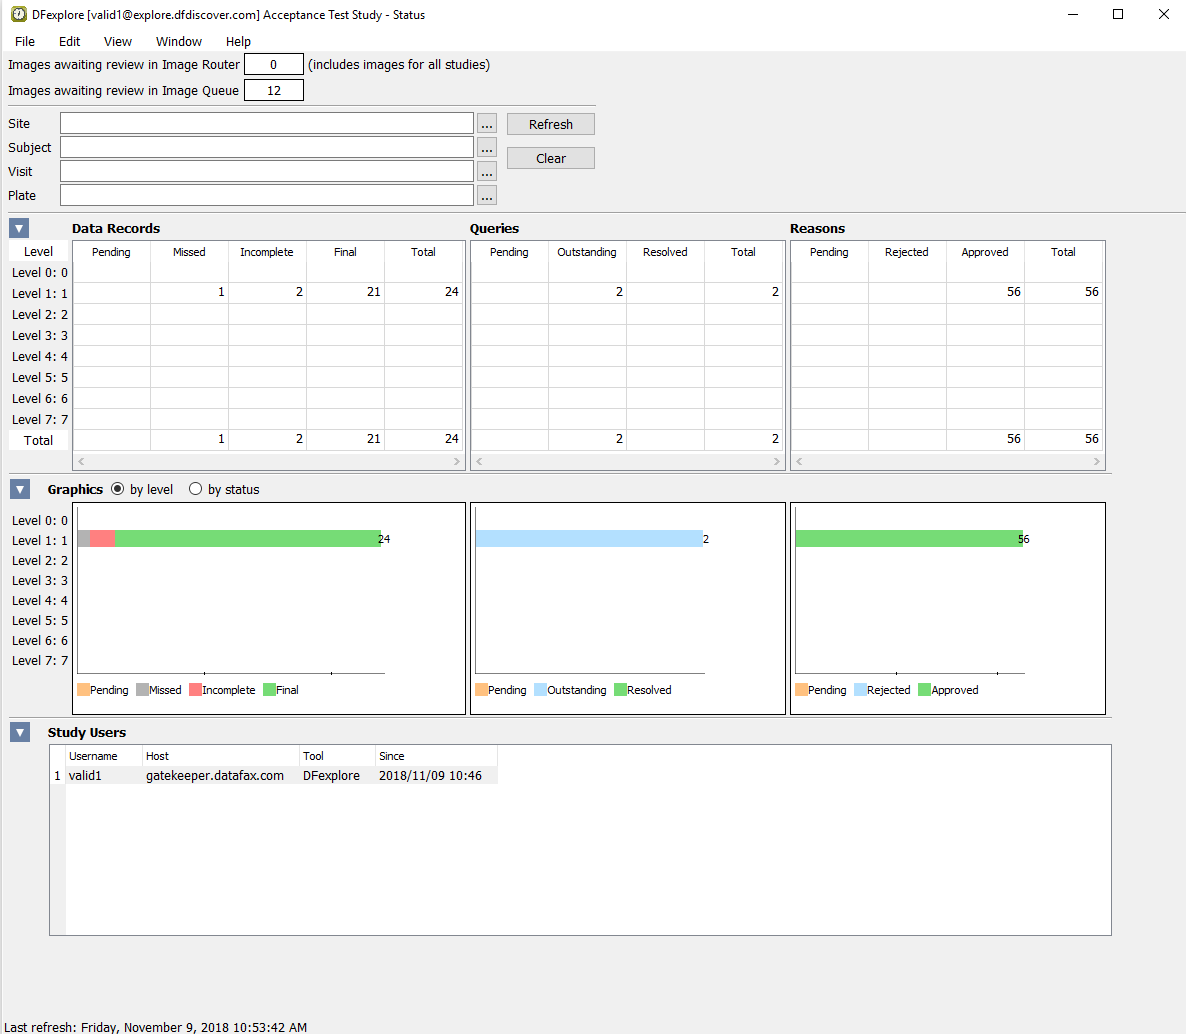
Note Any pages that have been received and which DFdiscover could not identify as study CRFs will be found in the Image Router. As a result, the number of Images awaiting review in Image Router may differ from what is shown here.
-
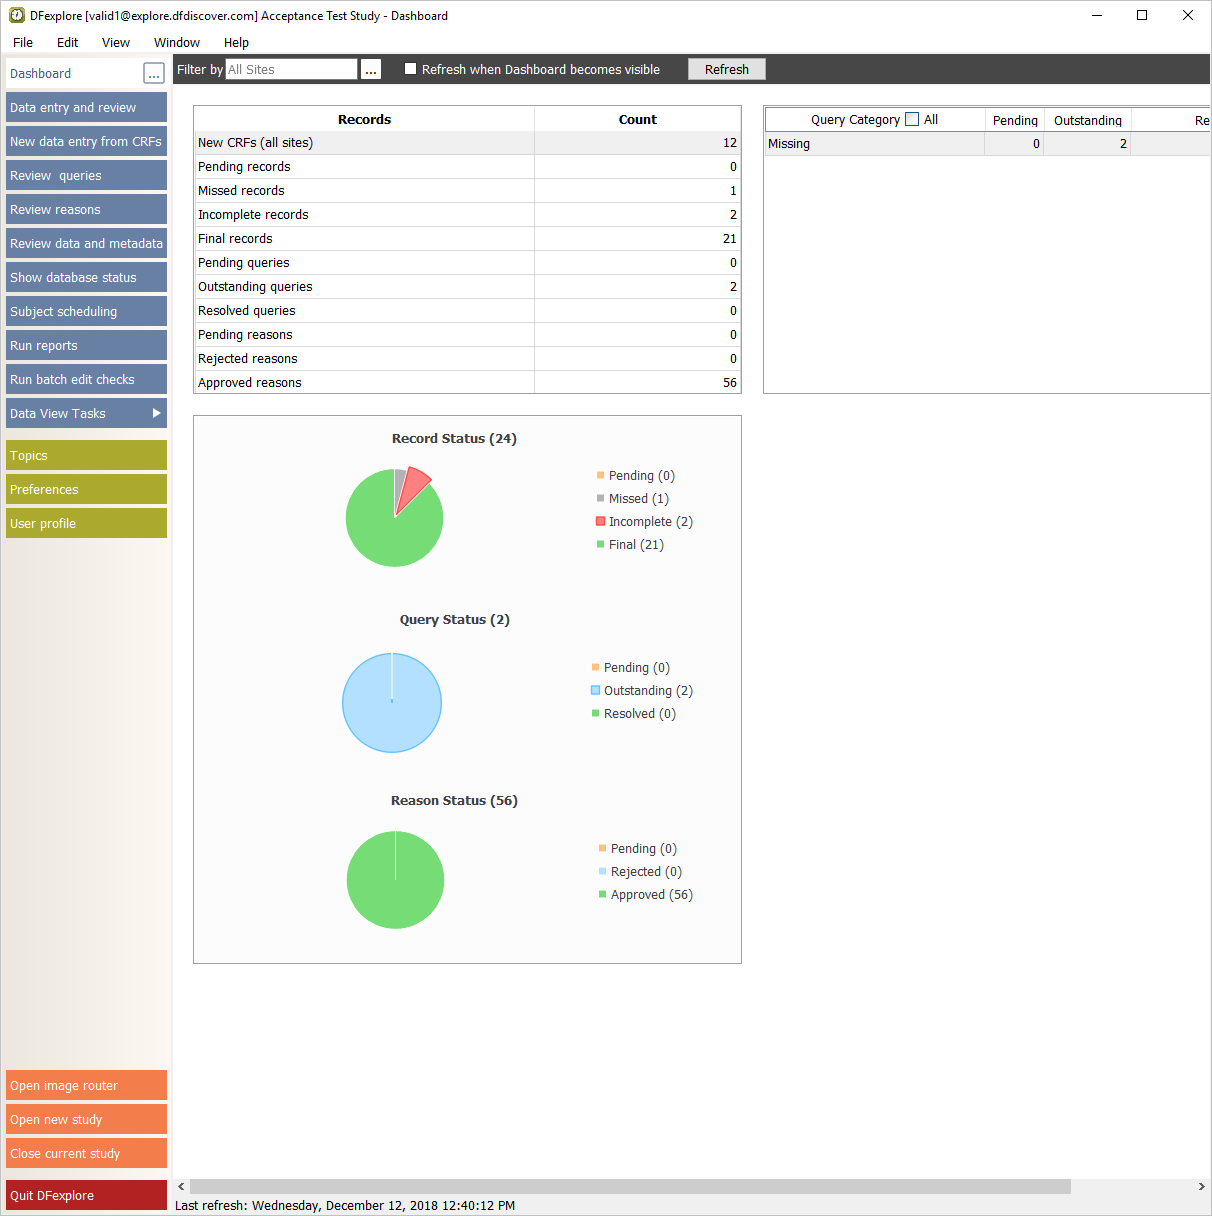
Select > to display the Dashboard View.
-
Enter the name for DFdiscover Server that has been provided by your administrator. Enter
valid1in the Username field and the previously assigned password in the Password field. Click to login.
-
In the studies selection dialog, highlight the entry for 254 Acceptance Test Study. Click to continue.

-
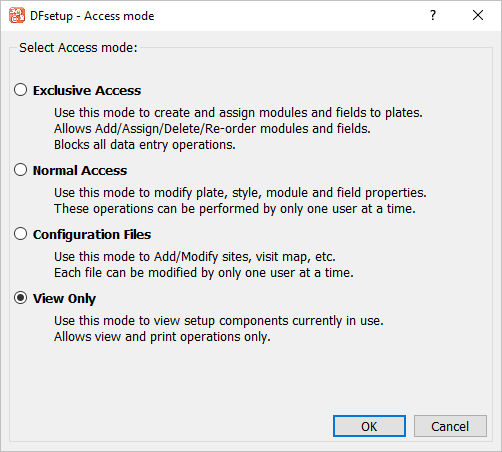
Choose View Only and click to continue. The main DFsetup window opens.
-
Select > to access the documentation. In the documentation window, confirm the documentation version number. Select > to dismiss the documentation window.
-
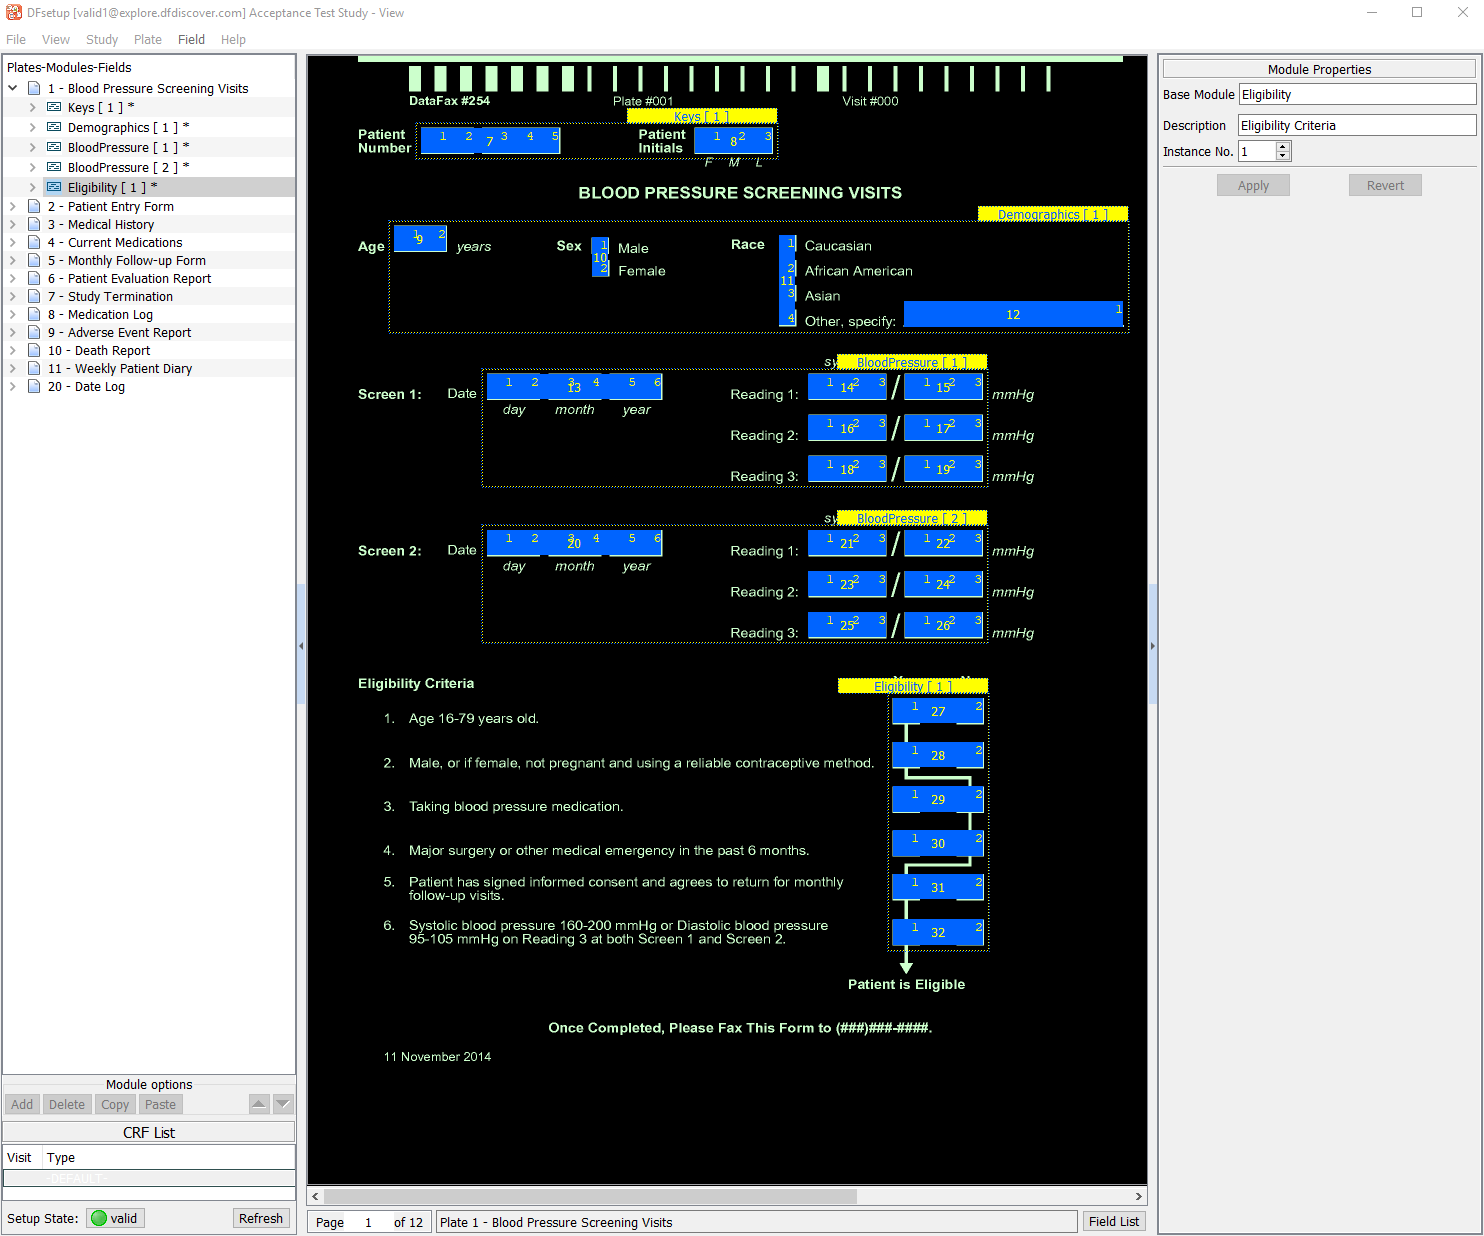
Select any plate entry in the Plates-Modules-Fields list panel to make that plate the active plate. The main window is refreshed with the CRF view of the plate definition, which includes widgets for all modules and fields. Click any field widget on the current plate to make that field the active field.
Note DFsetup remembers the last active plate from your previous DFsetup session so your main DFsetup window may display a different plate as the active plate.
-
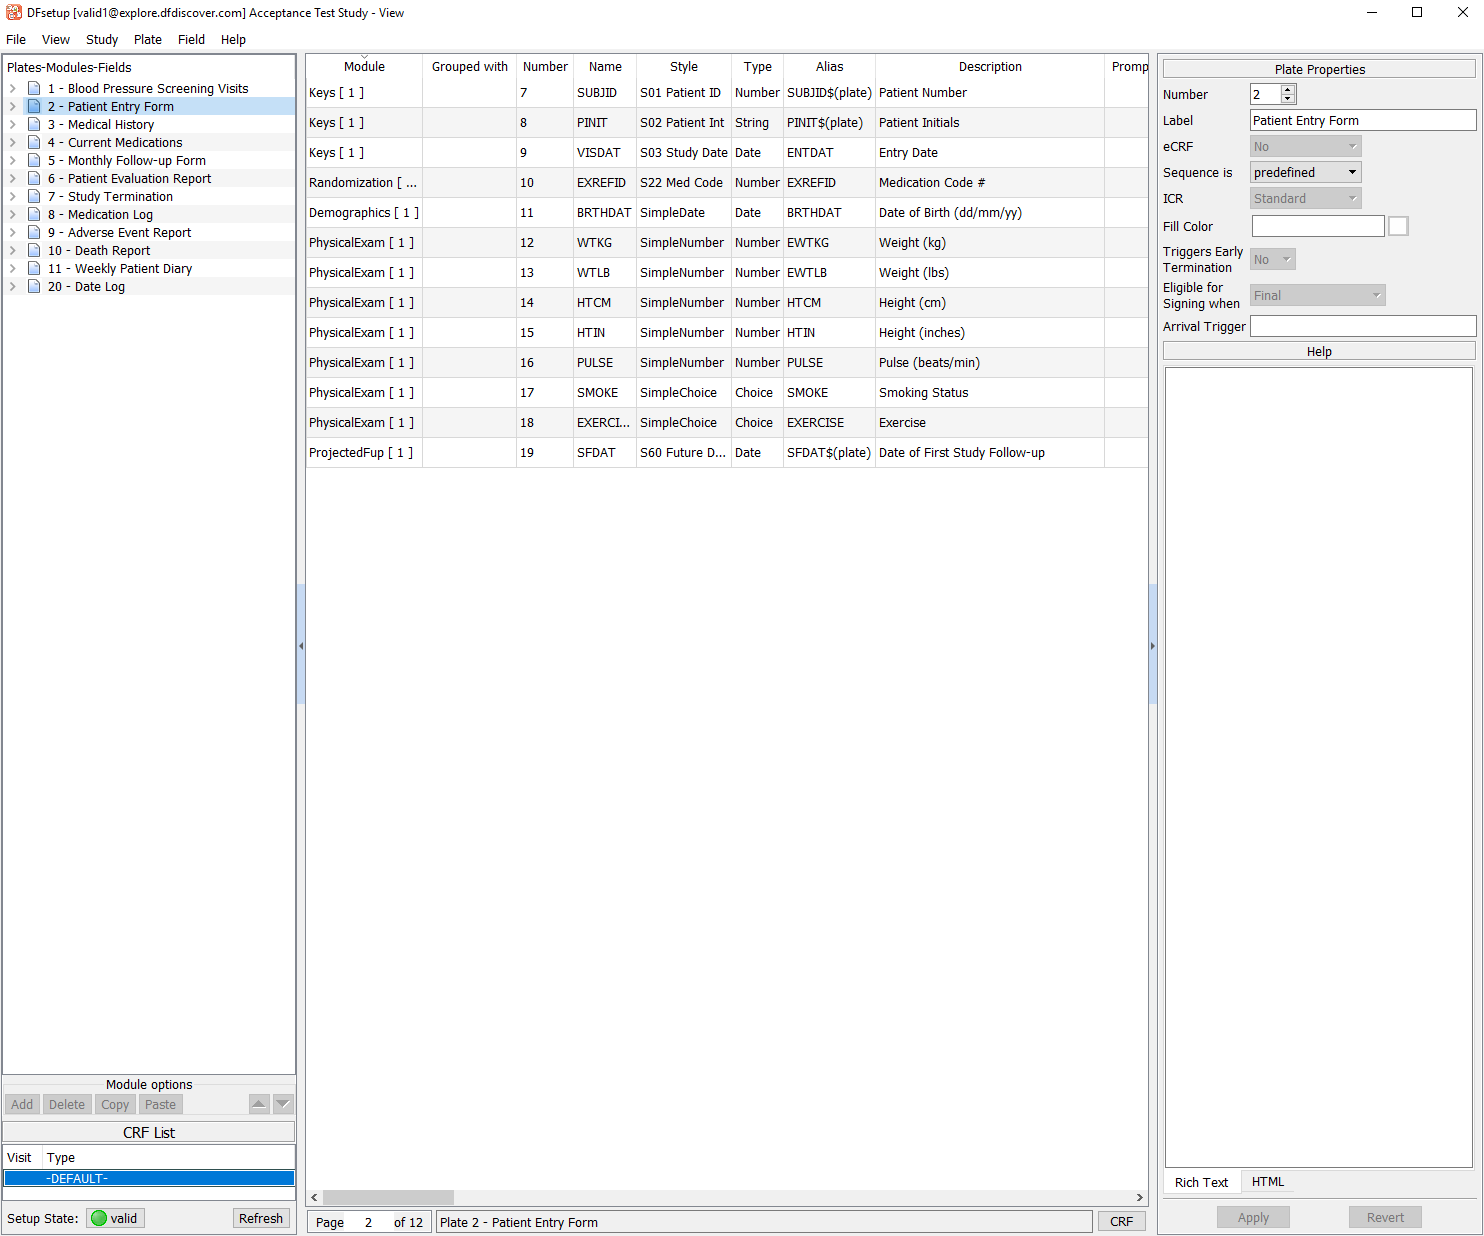
Select the 2 - Patient Entry Form entry from the list panel to make plate 2 the active plate. Click to replace the CRF view with a listing of all plate 2 fields and their properties. Click to return to the CRF view of plate 2.
-
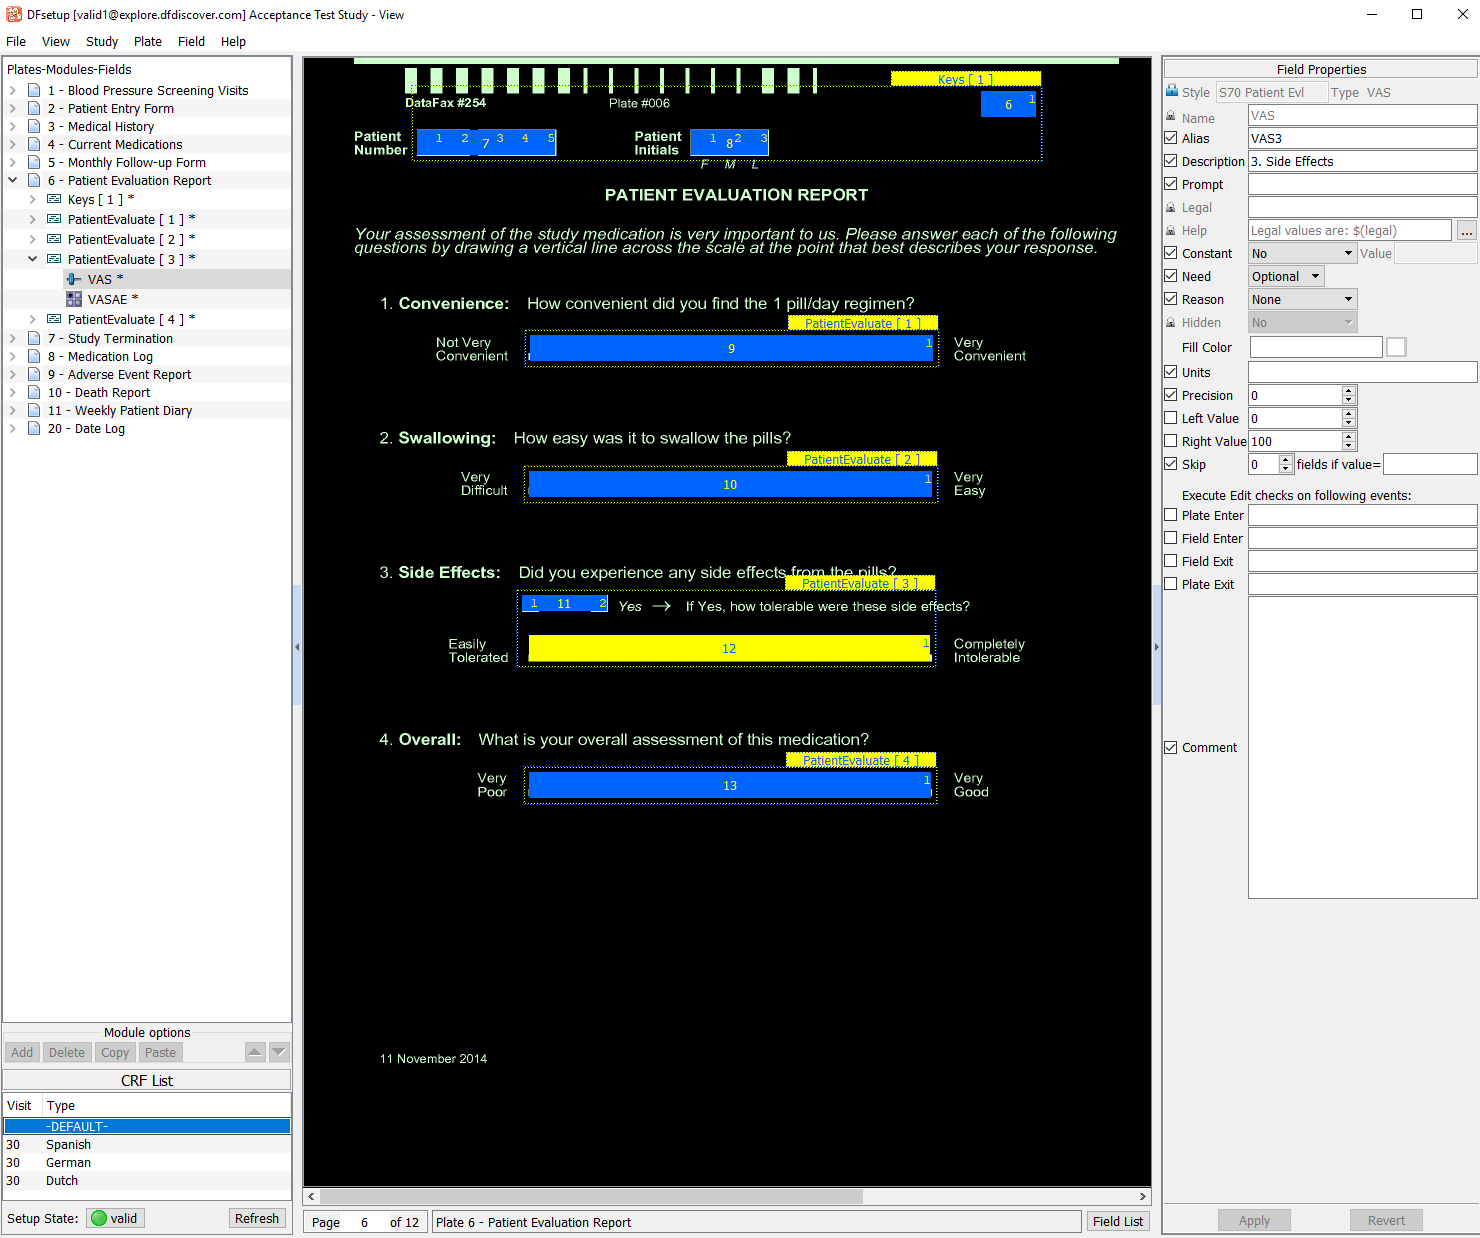
Select the entry for 6 - Patient Evaluation Report from the list panel to make plate 6 the active plate. Examine the CRF List panel displayed in the bottom-left of the screen. Each entry represents a unique multi-language color background associated with plate 6. This study database has been defined to include colored, multi-language CRF backgrounds for plate 6, with the default background being black/white English. The default English background and some of these multi-language backgrounds were accessed previously in Section 2.4, “Open the Acceptance Test Study and verify the standard DFexplore views.”.
-
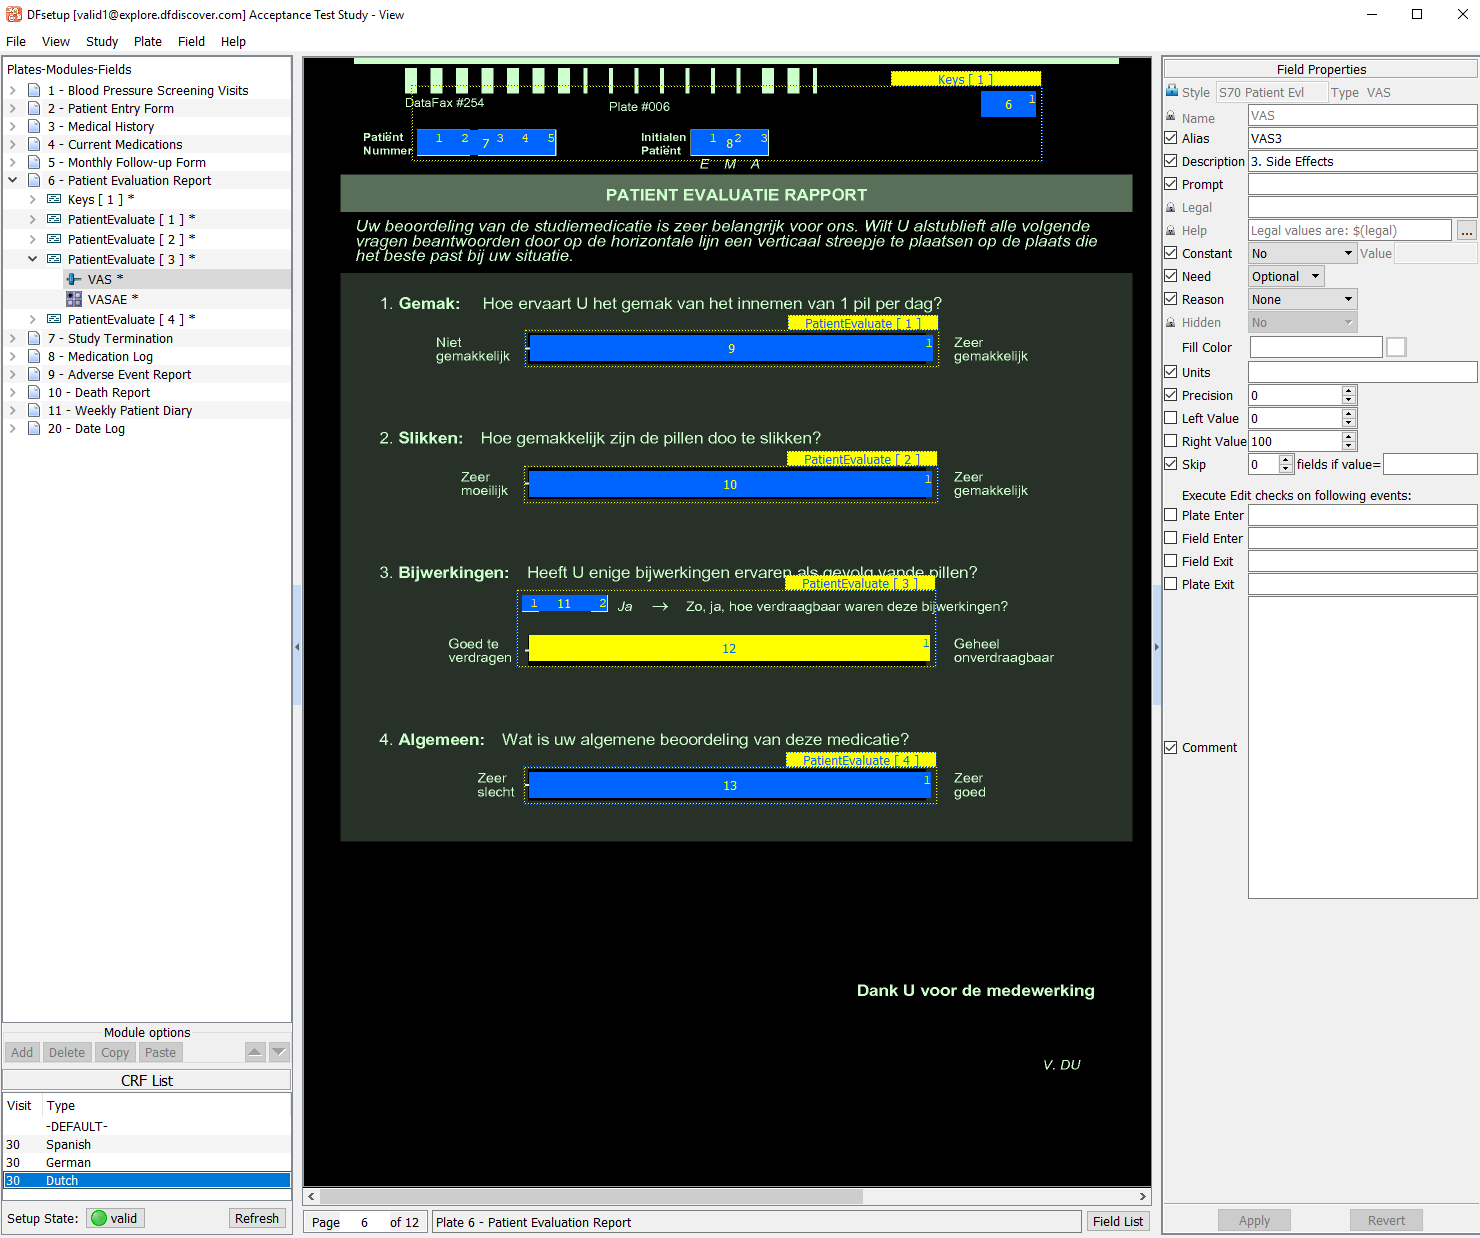
From the CRF List panel, choose the entry 30 Dutch.
-
Select > . In the Preferences dialog, choose Color for Background Color. Click to close the Preferences dialog.
-
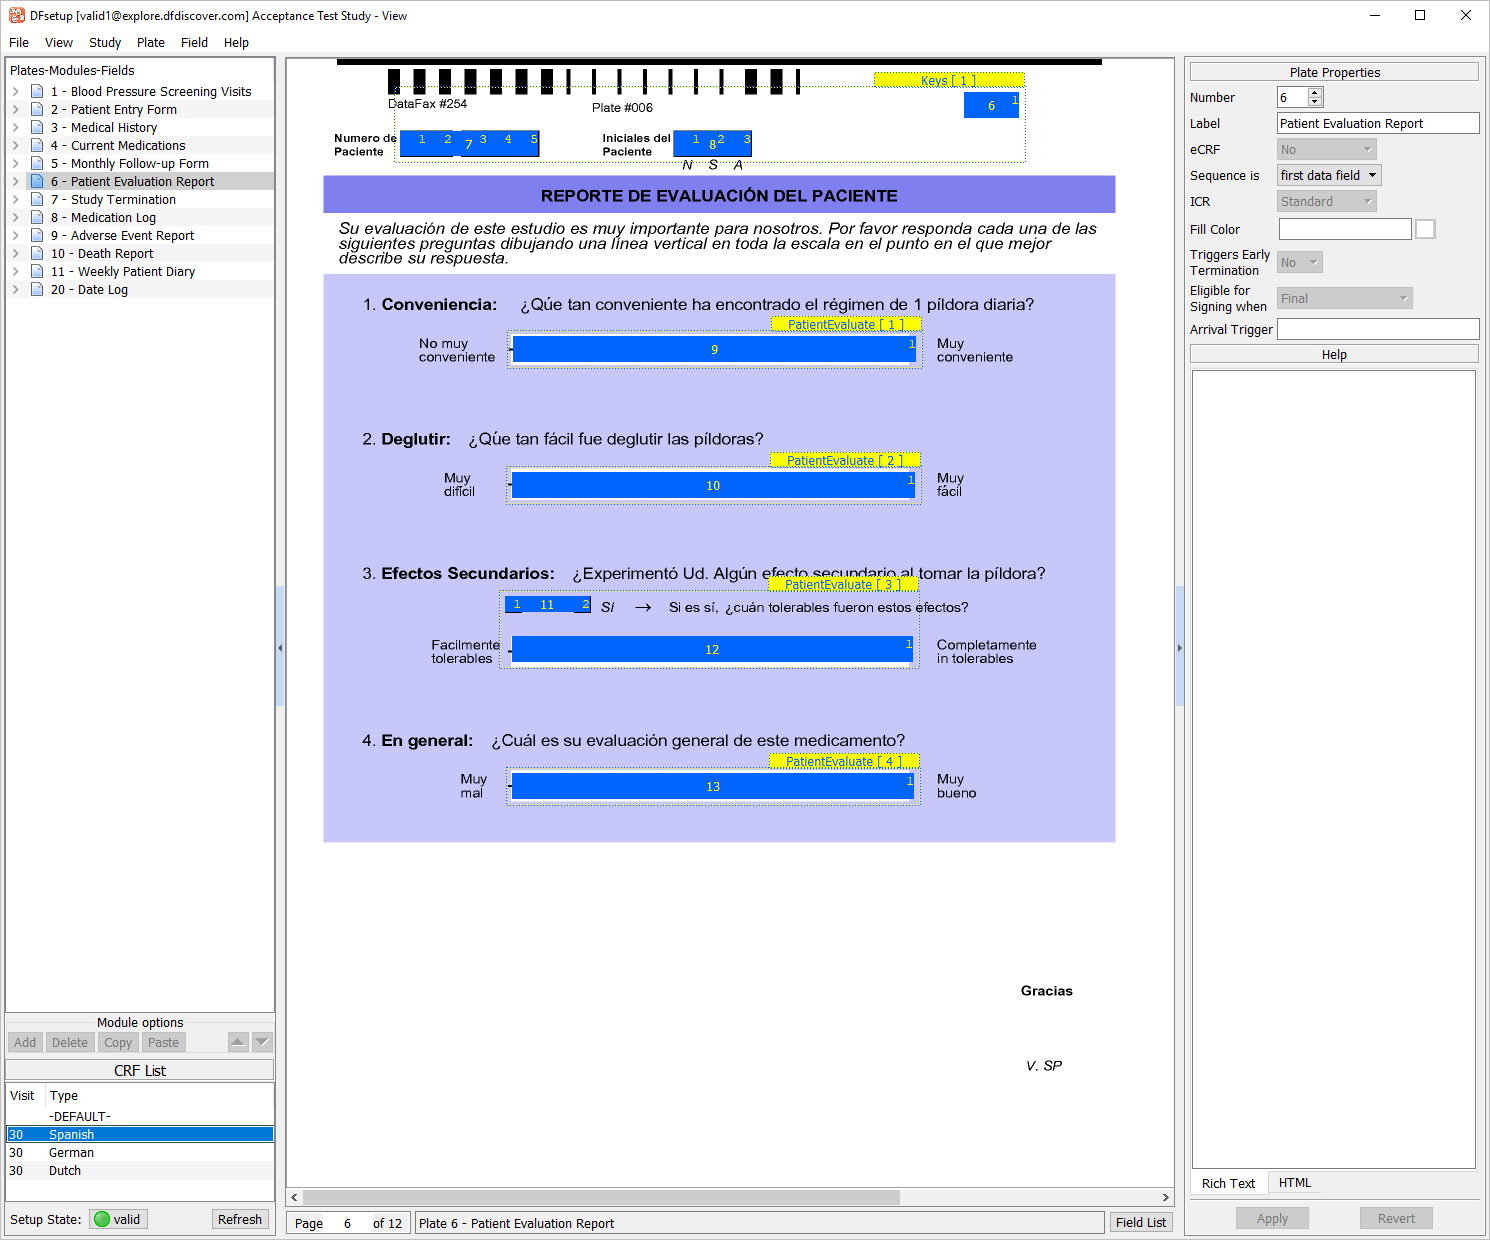
From the CRF List panel, choose the entry 30 Spanish.
-
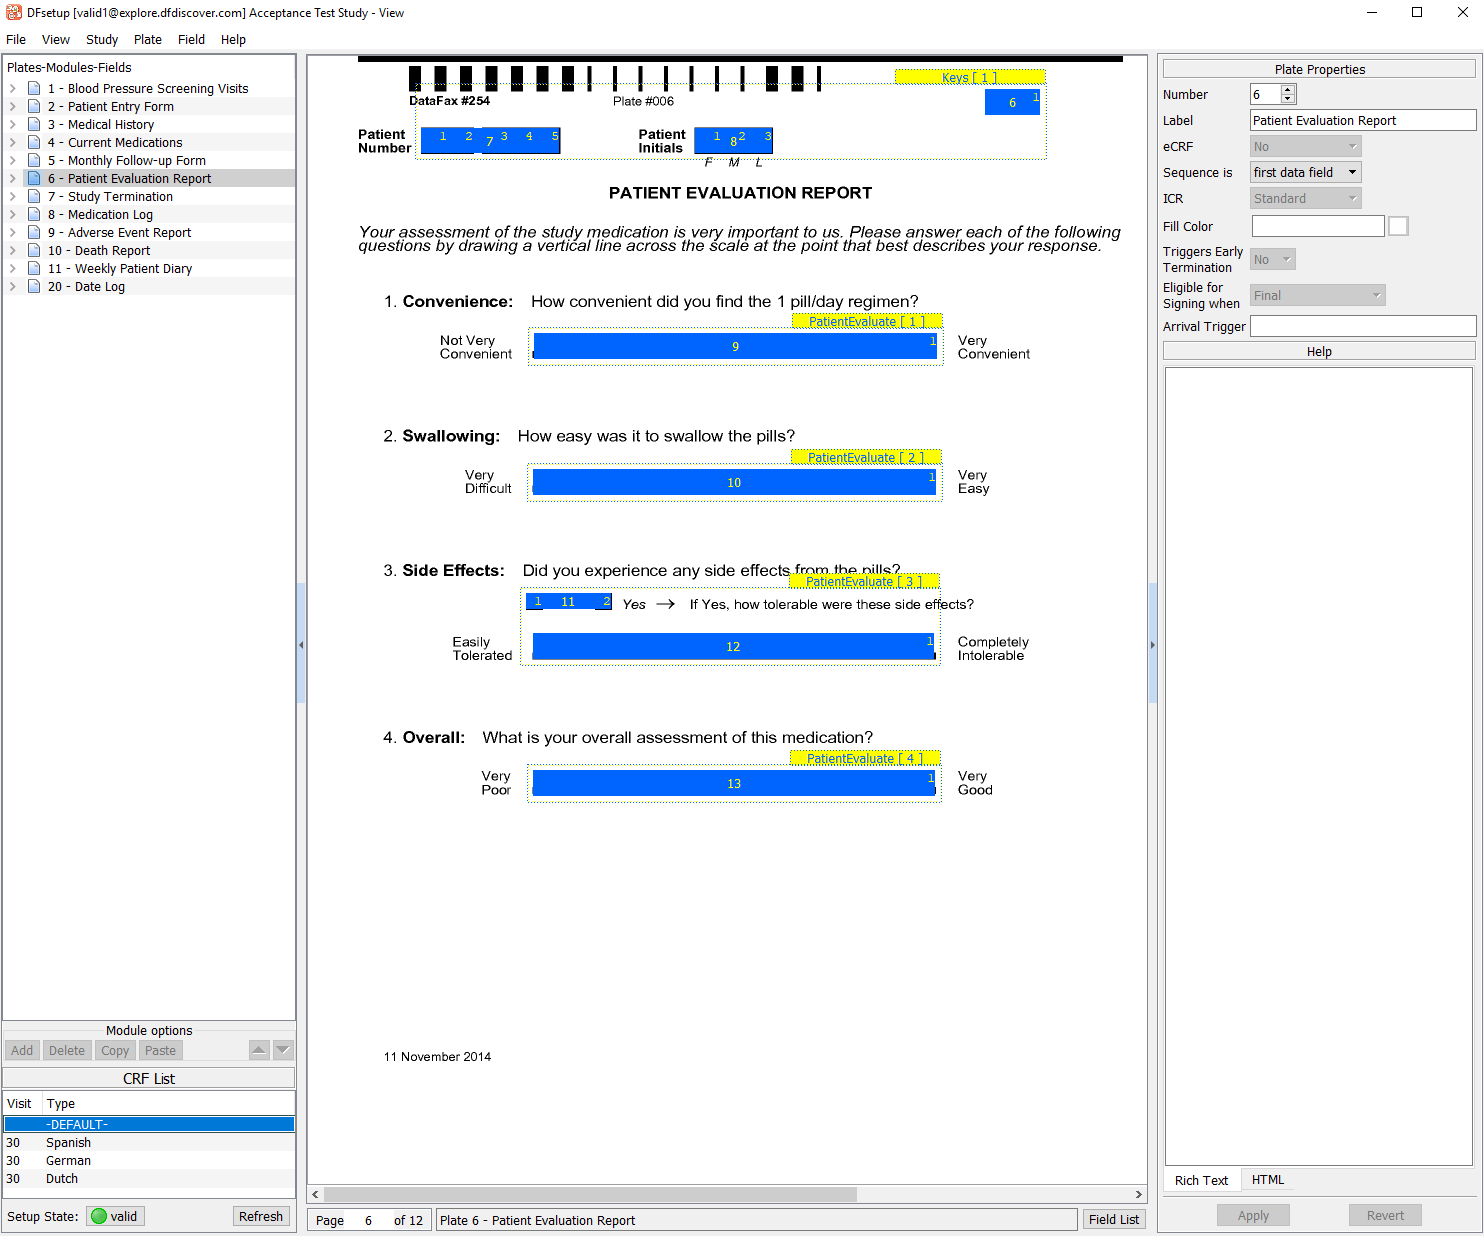
Return to the default (English) CRF background for plate 6 by choosing the DEFAULT in the CRF List panel.
-
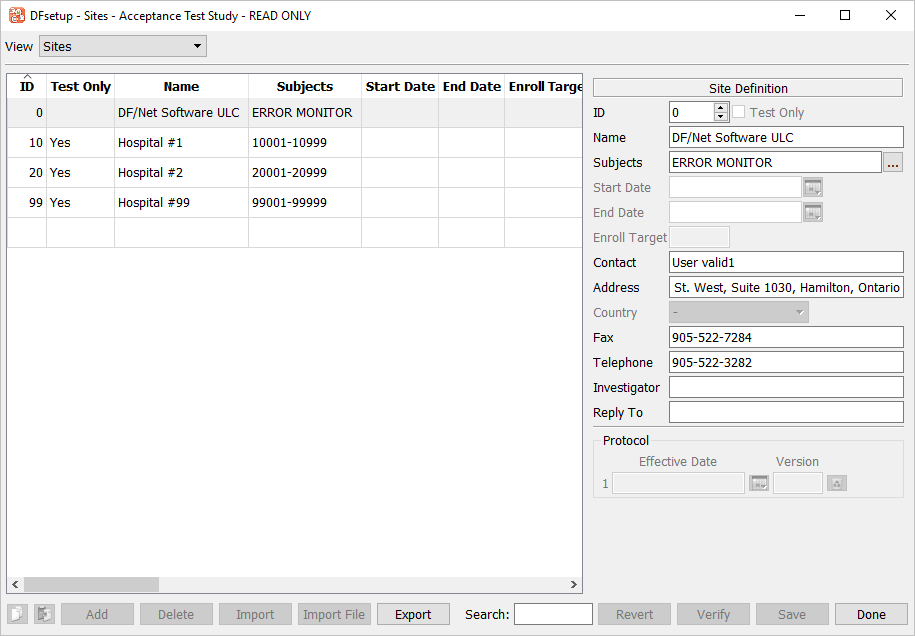
Select > to open the Sites editor. Review the contents.
-
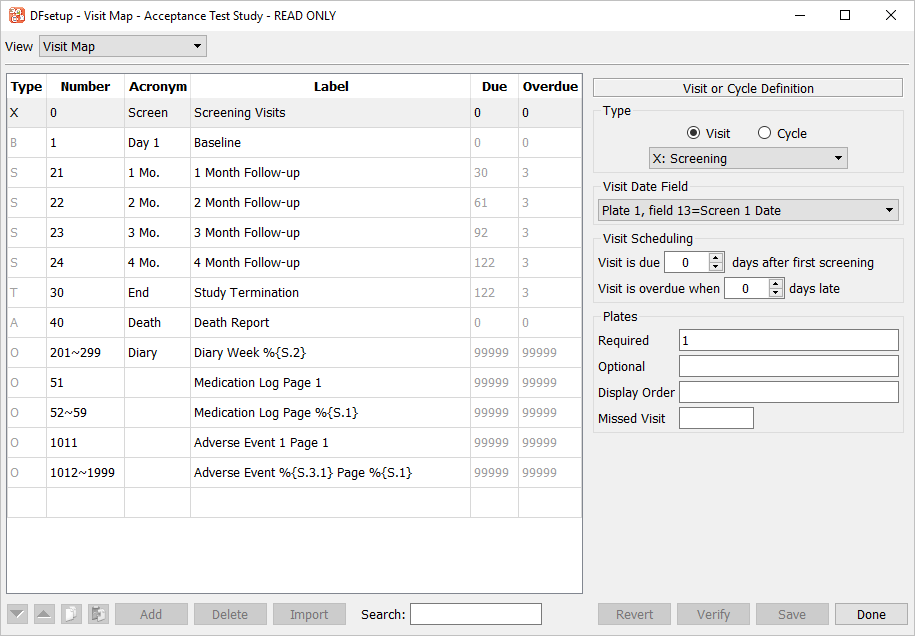
Select > to open the Visit Map editor. Visually confirm that the expected contents are displayed. Click to close the editor.