Table of Contents
This chapter provides troubleshooting assistance for the DFdiscover administrator.
DFdiscover is a complex system.
There are many applications that communicate with each
other, and each application relies on not only its own health but also on the
health of those applications that it communicates with. To alleviate some of this
complexity when errors occur, DFdiscover employs the
syslog facility
for errors and informational messages generated by the daemon and
server applications.
In addition, the client applications present most of their error messages in
dialog boxes as soon as the errors occur.
Errors, warnings and other messages, generated by DFdiscover daemon and server
applications, are sent to syslog,
which in turn writes the messages to the system log files,
as configured in /etc/syslog.conf.
By default, all messages from DFdiscover servers and daemons with a severity
level of err and higher are logged to
/var/log/messages.
In many cases the messages will not appear elsewhere, and client applications may not even be aware that an error has occurred on the server end.
As DFdiscover administrator, one should regularly review the system error log, particularly the end of the file, as that is where the most recent messages are.
Most DFdiscover messages are written to the
syslog "user" facility, with a severity level of
"err" or "crit" for more serious errors. DFdiscover daemon
messages are written to the syslog "daemon" facility.
The default severity level is "notice". DFedcservice also issues
login and study access messages at the "warning" level and
extensive logging messages at the "info" level that are ignored by
syslog using the default configuration.
The logged message includes a syslog message header and a message body. The message header consists of a facility indicator, a severity level indicator, a timestamp, a tag string, and optionally the process ID. The message body contains information specific to DFdiscover. This includes the hostname of the machine that it occurred on, and the application name that generated the error message.
The format of this header information is as follows:
SYSLOG_HEADER machine program[username:studynumber:PID]: message
(1)           (2)     (3)     (4)      (5)         (6)   (7)
|
The syslog message header, which may vary from system to system. | |
|
The hostname of the machine that the error occurred on | |
|
The name of the application that generated the message | |
|
The owner of the application instance | |
|
The study number associated with the application instance if known | |
|
The unique process identifier of the application instance | |
|
The actual text of the message |
When unexpected events or errors occur in a DFdiscover system, the first place to start looking is in the system error log.
This section describes some common messages that users may encounter during login while using DFdiscover applications such as DFexplore, DFsetup, DFadmin and DFATK.
Table 13.1. Login Dialog
| Message: | The DFdiscover Server is not reachable. Confirm the server name and network connection. |
| Possible Cause: | There is no internet connection available or server address/name entered is invalid. |
| Solution: | Confirm that your internet service is functioning properly. Confirm that you have correctly typed DFdiscover Server in the login dialog. Otherwise, contact your DFdiscover Study Coordinator or System Administrator. |
| Message: | The connection to the server was closed! Please re-login. |
| Possible Cause: | While using the Password Reset dialog, the internet connection was lost. |
| Solution: | Confirm that your internet connection is functioning properly, then exit and try again. Otherwise, contact your DFdiscover Study Coordinator or System Administrator. |
| Message: | Unable to connect to DFdiscover server! - Check if DFdiscover EDC Service is running! |
| Possible Cause: | DFdiscover is not running on the specified server or DFdiscover EDC Service is not running. |
| Solution: | Contact your DFdiscover Study Coordinator or System Administrator and confirm that the DFdiscover Server and DFdiscover EDC Service is running properly. |
| Message: | Error: No DFdiscover connection available - contact administrator |
| Possible Cause: | DFdiscover is not running on the specified server or DFdiscover EDC Service is not running. |
| Solution: | Contact your DFdiscover Study Coordinator or System Administrator and confirm that the DFdiscover Server and DFdiscover EDC Service is running properly. |
| Message: | Authorization Failed - incorrect username or password |
| Possible Cause: | Username or Password were either mistyped or could not be validated by the server. |
| Solution: | Re-enter your Login and Password, and attempt to login again. Contact your DFdiscover Study Coordinator or System Administrator and confirm that your login account is active. |
| Message: | Account locked because of repeated password errors... |
| Possible Cause: | Multiple attempts to login with incorrect password have blocked the account. |
| Solution: | Contact your DFdiscover Study Coordinator or System Administrator and request re-activation of your account. |
| Message: | Error: Not Administrator |
| Possible Cause: | Attempting to login to DFadmin application using a non-admin account. |
| Solution: | Only Study and System Administrators can use the DFadmin application. Contact your DFdiscover System Administrator. |
| Message: | ... - Check if DFdiscover server is running! |
| Possible Cause: | Connected to DFdiscover EDC service however DFdiscover Server is not available. |
| Solution: | Contact your DFdiscover System Administrator. Confirm that the DFdiscover Server and DFdiscover EDC Service is running properly. |
| Message: | Error: This client software is not compatible with this server |
| Possible Cause: | Connecting to DFdiscover server with incompatible version of DFdiscover client application. |
| Solution: | Contact your DFdiscover System Administrator to download a version of the DFdiscover application that is compatible with the DFdiscover server. |
| Message: | Error: No DFdiscover license available |
| Possible Cause: | All licensed seats are in use by other DFdiscover users. |
| Solution: | Wait for a seat to become available and try again. If the problem persists or recurs frequently contact your Study or System Administrator to suggest they consider adding additional seats to the DFdiscover server. |
DFdiscover creates a lock directory for those operations or activities that require exclusive access to a resource. DFdiscover creates the lock directory at the appropriate time and then deletes the lock directory when exclusive access is no longer required. In unusual circumstances, it may occur that the process that is controlling the lock directory exits prematurely, leaving the lock directory behind. In these cases, it will be necessary to remove the lock directory.
It is essential to the correct operation of DFdiscover that only one copy of the
process be running at any one time. When a DFmaster.rpcd process
is already running, the DFdiscover system and the UNIX system (through the
portmapper)
are able to enforce this requirement. However, when DFmaster.rpcd
is starting and before it has a chance to register itself with the portmapper,
it may occur that two independent processes or users attempt to start more than
one . To prevent this from occurring, the DFmaster.rpcd process
tests for and then creates the lock directory,
/opt/dfdiscover/work/DFmaster.rpcd.lock,
at the beginning of its initialization.
If the lock directory already exists, the following message appears:
DFmaster.rpcd[25859]: another process is starting a master daemon or the
daemon has been disabled - waiting 20 seconds before retry...
DFmaster.rpcd[25859]: another process is starting a master daemon or the daemon
has been disabled - waiting 40 seconds before retry...
DFmaster.rpcd[25859]: another process is starting a master daemon or the daemon
has been disabled - waiting 60 seconds before retry...
DFmaster.rpcd[25859]: another process is starting a master daemon or the daemon
has been disabled - waiting 80 seconds before retry...
DFmaster.rpcd: failed to start service
and the process exits without starting (as another DFmaster.rpcd is presumably starting at the same time). If the lock directory does not exist, it is created and subsequently removed by DFmaster.rpcd after it has successfully registered the UNIX portmapper.
When a slave process starts, it follows the same sequence of initialization
steps that the master does, and it too needs to ensure that only one slave
process is executing. In the case of the slave process it is however true that
there can be multiple slaves across a DFdiscover network, but never more than one
on any given computer. Hence, a starting slave creates a lock directory in a
directory that is local to the machine rather than in shared directory space.
In particular, the lock is created as
/tmp/DFslave.rpcd.hostname.lock.
On (mis-configured) systems where /tmp
is not writable by everyone, a DFdiscover
slave cannot be started (there will likely be other non-DFdiscover problems as
well). This is an administrative issue to keep in mind if the
/tmp directory is modified.
Occasionally, as a result of unusual circumstances, a study server
may exit and subsequently fail to restart.
In such a case, the DFstudyDiag utility is used to
determine why the study server will not start.
The utility begins a series of checks for consistency of server status.
The results of the checks are reported and may require
root privileges to complete the diagnosis.
It is safe to execute this utility at any time, however, in a larger networked environment with many slave machines, the diagnosis may require a long period of time to complete.
Diagnosing a study server
Execute DFstudyDiag
DFstudyDiag requires the study number of the study to diagnose. To start the utility, type:
#/opt/dfdiscover/utils/DFstudyDiag -s###where
###is the study number.Monitor the output from the diagnosis checks
It is possible that the diagnosis will find that the study server is fully operational, as in:
#/opt/dfdiscover/utils/DFstudyDiag -s 253Diagnosing study server 253 starting Mon Aug 14 09:36:09 2017... >> Trying to contact study server directly... << Study server is currently operational and responding.Apply the suggested corrective action
If the diagnosis detects a problem, it suggests a solution, as in this example:
#/opt/dfdiscover/utils/DFstudyDiag -s 253Diagnosing study server 253 starting Mon Aug 07 09:41:27 2017... >> Trying to contact study server directly... << Failed. >> Trying to load studies database from master... << OK. >> Contacting slaves on candidate hosts... >> Checking portmapper entries on candidate hosts... << OK. >> Looking for existing serverstatus file... << The file '/opt/dfdiscover/work/.serverstatus253' exists although no study server << appears to be running. The file should be removed. Please show this output to your DFdiscover administrator.Implement the suggested solution, and then attempt diagnosis again. Some solutions may require multiple steps that will not be detected by only a single diagnosis.
The DFdiscover processes log all unexpected events to the system message log. It is recommended that this file always be checked after an unexpected event. Messages in this file may not always make sense to a user or DFdiscover administrator but they can be very valuable to a DFdiscover support person.
UNIX permissions are a common source of problems within DFdiscover.
If a problem occurs with a DFdiscover executable, one can easily determine whether
or not permissions are a cause of (or contributor to) the problem.
As user datafax, re-run the problematic executable,
repeating the steps that led to the problem.
If the problem is not repeatable, then permissions are likely a cause of the
problem.
To verify the DFdiscover permissions for a study, use the DFstudyPerms utility. This application has the following usage:
% /opt/dfdiscover/utils/DFstudyPerms [-f] [-g group] #
where -f instructs the utility to fix any problems that it
finds, and -g indicates
the group name for the study, which is required when the group name is not
the default groupstudies.
To restore the DFdiscover permissions that were applied to the software at the time that it was installed, re-run the SETPERMS script that is part of the DFdiscover software and can be located in the /opt/dfdiscover directory.
All of the DFdiscover shell scripts are relatively quiet during their execution. They echo the occasional message. To make the shell script very verbose, add the statement:
set -x
as the second line of any existing shell script. Re-run the shell script and watch all of the output go by!
The remaining material is a compilation of troubleshooting information that has been collected over the years from telephone and web-based support.
Although this section is comprehensive, it is possible that your site may experience a failure or symptom that is not enumerated here. If you are unable to resolve the problem using this resource, contact DF/Net Research, Inc. using any of the methods listed in Getting Help.
Attempts to start client applications for a particular study database cause a
Study server not running on local network
message to appear on the user's screen.
The utility application DFstudyDiag must be run with
-s , where ## is the DFdiscover
study number, to determine the reason that the
study server cannot be started.
Example 13.1, “Using DFstudyDiag to evaluate the status of a study server”
illustrates use of DFstudyDiag on study 248.
Example 13.1. Using DFstudyDiag to evaluate the status of a study server
#/opt/dfdiscover/utils/DFstudyDiag -s 248Diagnosing study server 248 starting Tue May 8 12:12:25 2018... >> Trying to contact study server directly... << Failed. >> Trying to load studies database from master... << OK. >> Contacting portmapper on candidate hosts... << OK. >> Contacting slaves on candidate hosts... << OK. >> Checking portmapper entries on candidate hosts... << OK. >> Looking for existing serverstatus file... << The file '/opt/dfdiscover/work/.serverstatus248' exists although no study server << appears to be running. The file should be removed. Please show this output to your DFdiscover administrator.
The output will include instructions for resolving the problem.
The incoming fax daemons process incoming faxes in their own separate work directories (configured using DFadmin - Incoming). When a fax has been completely processed the fax page images are moved to either the study CRF pages directory or to the unidentified router. Thus if you find any pages remaining in an incoming daemon work directory after it has exited, something has gone wrong.
This situation may be brought to your attention by a user who indicates that 1 or more pages of a received fax appear to be missing or misplaced. They might report that in validating the data records for a new fax, they can get the first few pages to come up in DFexplore, but the last pages cannot be located. There are messages in the errors file similar to the following:
/opt/dfdiscover/work/001/1732: File exists
This message is a symptom that a previous DFinbound.rpc process terminated before completing the processing of a fax.
The application starts after the arrival of a new fax and exits when processing of the fax is complete. During this processing, DFinbound.rpc creates and manages several intermediate versions of fax image files, routing each of them before completion so that the work directory is always empty when it exits (it should also be empty before it starts). If DFinbound.rpc is terminated in-progress then it is possible for one or more intermediate files to be left behind. The next time that the DFinbound.rpc application processes a document in that working directory it notices that it is not empty and attempts to clean up the remaining files. In general, no action is required (other than to wait until the next fax is processed) to recover from this situation.
Your DFdiscover server should be paired with an uninterruptible power supply (UPS) that is configured to shut your server down should an interruption in power exceed the capacity of the UPS. If your server is not protected by a UPS or other source of emergency power and power is interrupted, there may be problems restarting your server or gaining access to DFdiscover.
The steps needed to recover from a power failure are as follows.
Verify that all DFdiscover processes are running
After the system has restarted, check to verify that all expected DFdiscover processes are running. This is easily accomplished from the command-line.
ps -ef | grep DF
The following output is typical of a running DFdiscover server (long output lines have been truncated).
 datafax 10369  5190   0 06:30:09 ?           0:00 /opt/dfdiscover/bin/../x86_linux/bin/DFoutbound.rpc -c ...
 datafax 10346  5190   0 06:30:06 ?           0:00 /opt/dfdiscover/bin/../x86_linux/bin/DFmaster.rpcd -c ...
 datafax 10370 10369   0 06:30:09 ?           0:00 /opt/dfdiscover/bin/../x86_linux/bin/DFoutbound_B ...
 datafax 10356  5190   0 06:30:06 ?           0:00 /opt/dfdiscover/bin/../x86_linux/bin/DFslave.rpcd -q
    root 24273 24269   0 13:50:39 pts/5       0:00 grep DF
 datafax 10363  5190   0 06:30:09 ?           0:00 /opt/dfdiscover/bin/../x86_linux/bin/DFedcservice
If your system is using HylaFAX, the DFprotusfax process will not appear.
Set DFuserdb locking to a known state
Use the following command to set the DFuserdb locking to a known state. Shut down the DFdiscover server and start it up again as follows:
DFshutdown
DFuserdb -unlock
DFbootstrap
Repeat step 1 to verify that the expected processes are running.
Remove any stale study server status files
Before your system lost power, any studies that were open at the time had a study server status file associated with them. These files may need to be removed when power is restored as they are stale and do not reflect the current status of your system. See Other troubleshooting areas for information diagnosing and fixing study server problems.
Remove any stale lock files
Before your system lost power, it may have been in the process of starting up. This can happen in cases where power interruption is intermittent. Review Locks and remove any stale locks, then restart the DFdiscover server using DFbootstrap. Repeat step 1 to verify that all expected processes are running.
Perform consistency checks on active studies
After your system has started, run all the DF_IC*** reports and fix any problems reported.
As you have no doubt already learned (or been reminded) in this chapter, disk maintenance in your DFdiscover environment is an important and ongoing requirement. To help protect your DFdiscover environment from unexpected problems that result from full filesystems, DFdiscover shuts down the incoming fax process when one or more full filesystems is detected. This does not mean that incoming fax transmissions are blocked. Faxes can still be received by the fax modems and HylaFAX during this time; it only means that any faxes received will not be processed through DFdiscover until space is made available in the affected filesystems. However, if this condition is left uncorrected for a period of time it can occur that the filesystem containing the incoming directory also fills, and then HylaFAX will shut down and incoming fax transmissions will no longer be received. This particular situation is discussed in greater detail at the end of this section.
Full filesystem problems are typically detected by the DFdiscover incoming daemon
when attempting to move CRF images from the incoming work
directory to a study pages or pages_hd directory. If the partition containing the study
pages or pages_hd directory is at 100% capacity or reaches 100% capacity during the
processing of an incoming document, DFdiscover will fail to complete the processing of
the incoming document, it will generate error messages, and finally it will create
the directory /opt/dfdiscover/work/DFfsfull.
Subsequent to this, each incoming
daemon that is started by the arrival of a new document will first check to see if
the directory /opt/dfdiscover/work/DFfsfull
exists, and if so processing will be aborted.
Each new document will remain in the incoming work directory until the
situation is corrected.
The steps needed to correct a full filesystem problem are as follows.
Determine which filesystem is full
The easiest way to determine which filesystem has reached 100% capacity is to inspect the system error message log file. Scan the messages near the end of the file that have the following appearance:
fax /opt/dfdiscover/incoming/fax00123.tif could not be moved to /opt/dfdiscover/archive/1810/0250;
free some disk space and then manually move the file
or
fax /opt/dfdiscover/work/001/1730/0020002 could not be renamed to /opt/studies/study123/pages/1730/0020002 -
contact your DFdiscover administrator
Acquire additional disk space in the affected filesystem(s)
If the archive filesystem is full (as was indicated in the first message), some or all of the existing archive files can be removed to secondary media and then deleted from primary storage. This topic was previously covered in Archive File Maintenance.
If one of the study pages directories is full (as was indicated in the second message), more disk space will need to be acquired.
Move any files that the DFdiscover software was unable to move
Once additional free disk space is available, resolve all of the problems that DFdiscover noted as errors in the system error message log file. The text of each problem message indicates the step that needs to be performed to resolve the problem. For example, to resolve the problem indicated by the first message, one would:
#mv /opt/dfdiscover/incoming/fax00123.tif /opt/dfdiscover/archive/1810/0250and similarly, to resolve the problem indicated by the second message, one would:
#mv /opt/dfdiscover/work/001/1730/0020002 /opt/studies/study123/pages/1730/0020002If the filesystem full situation occurred early in the processing of a multi-page fax, several of these problems may need to be resolved, typically one per fax that could not be moved. Be sure to resolve each of these problems.
Remove /opt/dfdiscover
/work/DFfsfullAt this point, the problems that may have occurred around the time that a full filesystem condition was detected have been resolved. Removal of the
DFfsfulldirectory will enable DFdiscover to resume processing new incoming faxes as they arrive. Any faxes that were received during the time that theDFfsfulldirectory existed are processed automatically on receipt of the next fax. To remove theDFfsfulldirectory:#rmdir /opt/dfdiscover/work/DFfsfull
The above scenario describes what occurs when a DFdiscover incoming daemon discovers that there is insufficient disk space available to process a fax. In that case, all incoming transmissions are left in the incoming directory defined by your HylaFAX configuration. If the problem is left uncorrected for a period of time such that the filesystem containing the incoming directory also fills, then the problem will escalate to the HylaFAX level. At the HylaFAX level, the HylaFAX software will no longer answer any incoming calls. This is now a serious situation as investigators will no longer be able to transmit case report forms to your site.
To correct this problem, you must first resolve the DFdiscover filesystem problems that were detected. Follow the steps described above to accomplish this. When these steps are completed the filesystem containing the incoming directory should no longer be at 100% capacity. The next incoming call will be answered by a fax modem and your operation will return to a normal state.
DFadmin connects to the DFdiscover master via network communication (even if the DFadmin is started on the same host as the master) and hence its operation will be affected by network interruptions and/or network failures. The behavior of DFadmin in response to such problems is outlined in the following sections:
There are two situations where auto logout can occur, one expected and one unexpected:
Expected - timeout: DFadmin will auto logout if there has been no interaction for the amount of time set in the DFadmin auto logout dialog, which allows a maximum value of 60 minutes. The following dialog will appear.

Unexpected - critical error. Any client application, will auto logout the connected user if a critical error, such as a loss of network connection, is detected. The dialog, DFexplore shown here, has the following appearance:
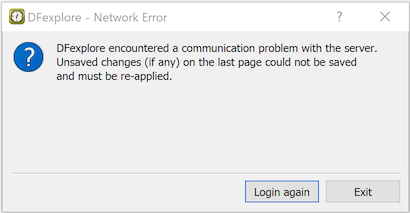
In both instances, the user will be logged out without saving any changes. For this reason, users are encouraged to save changes regularly and never leave a client application unattended.
Following an auto logout, the user will be notified on next login that their application auto logged out during its last use and when that occurred.
If a DFdiscover server (master or study database) does not respond to a DFadmin request within sixty seconds, a dialog will appear indicating that there has been no response from the DFdiscover server. If the suspects that the lengthy delay is a result of network congestion, the user can choose to wait until sixty seconds has elapsed. Otherwise, the user can exit the application (any unsaved changes will be lost).