Table of Contents
- 11.1. Tests & Requirements
- 11.2. Begin Module 11. Data Review.
- 11.3. Retrieve all data for Site 99 that exists at level 3.
- 11.4. Review and approve a pending reason for data value, and approve a selected query in a field that has multiple queries.
- 11.5. Review and move approved reasons for data values to a higher workflow level, and review queries in a field that has multiple queries.
- 11.6. Data review and add a query to inconsistent data.
- 11.7. Review and complete pending data for Subject 99007.
- 11.8. Confirm audit trail information for reviewed and modified data.
- 11.9. Run batch edit checks to verify data integrity.
- 11.10. Use a data expression to retrieve specific subject information.
- 11.11. Use cross-plate data criteria to retrieve specific subject information.
- 11.12. End Module 11. Data Review.
Retrieve all data for Site 99 that exists at level 3.
Review and approve a pending reason for data value, and approve a selected query in a field that has multiple queries.
Review and move approved reasons for data values to a higher workflow level, and review queries in a field that has multiple queries.
Data review and add a query to inconsistent data.
Review and complete pending data for Subject 99007.
Confirm audit trail information for reviewed and modified data.
Run batch edit checks to verify data integrity.
Use a data expression to retrieve specific subject information.
Use cross-plate data criteria to retrieve specific subject information.
Estimate of Time Required: 20 Minutes
-
Start DFATK as described in Module 1 (Installation & Initialization).
-
Click followed by to begin this module.
-
Click to email a copy of ID99007_module11.pdf to
site_monitor. Clicking more than once will result in multiple pages arriving to your email inbox.![[Note]](../../imagedata/note.png)
Note Refer to Section 1.8, “Creating user accounts and assigning study permissions.” as a valid email address is required for
site_monitorto receive the module specific PDF files.
-
Start DFexplore, login as user
data_managerand choose 254 Acceptance Test Study as described in Section 1.7, “How to start DFexplore”. -
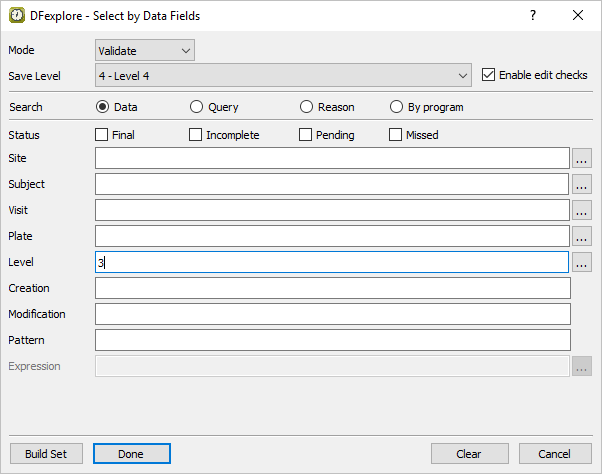
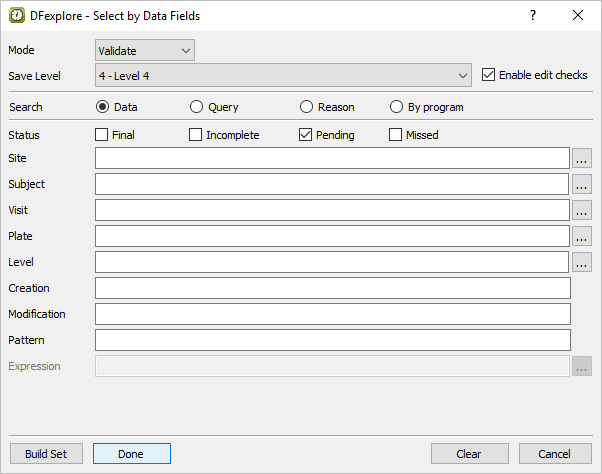
Select > from the menubar to open the Select By Data Fields retrieval dialog. In the dialog, set:
Mode = Validate
Save level = 4 - Level 4
Search = Data
Level = 3
Check (enable) Enable edit checks
-
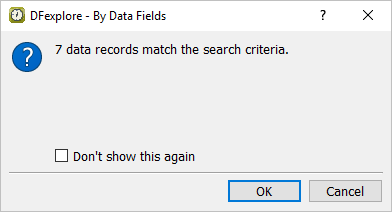
Click . In the confirmation dialog, click to retrieve data records that match the criteria.
-
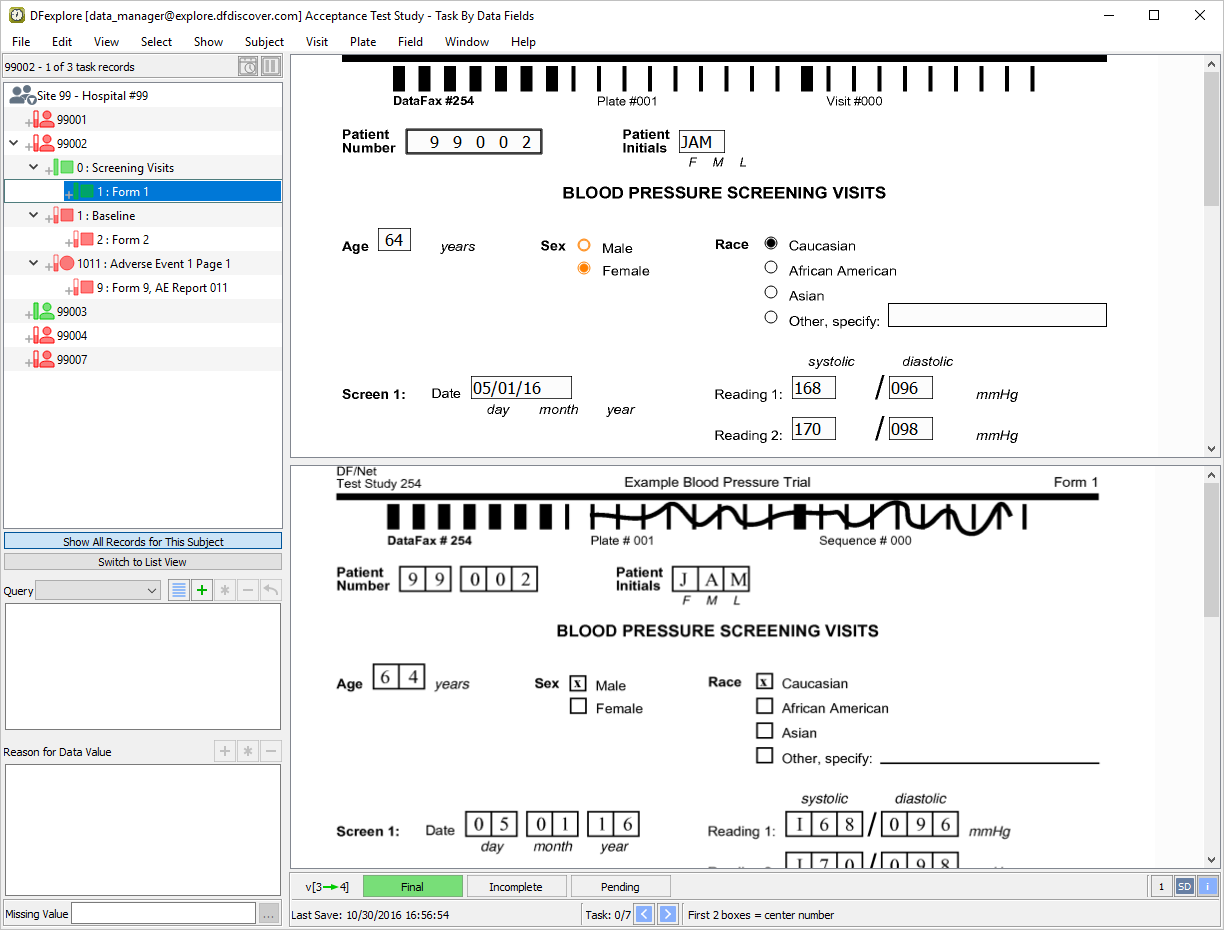
Double-click entry for Subject 99002 to open the subject binder.
-
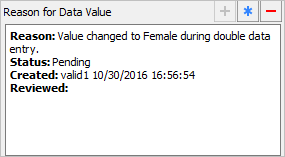
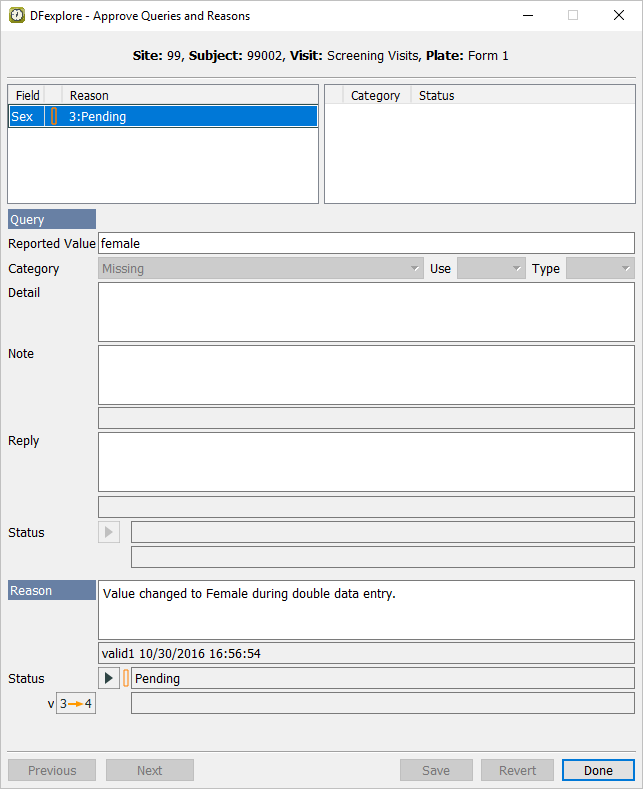
1: Form 1 (BLOOD PRESSURE SCREENING VISITS) for Subject 99002 is the active page. Press Tab to advance to the Sex field. Examine the information in the Reason for Data Value window.
-
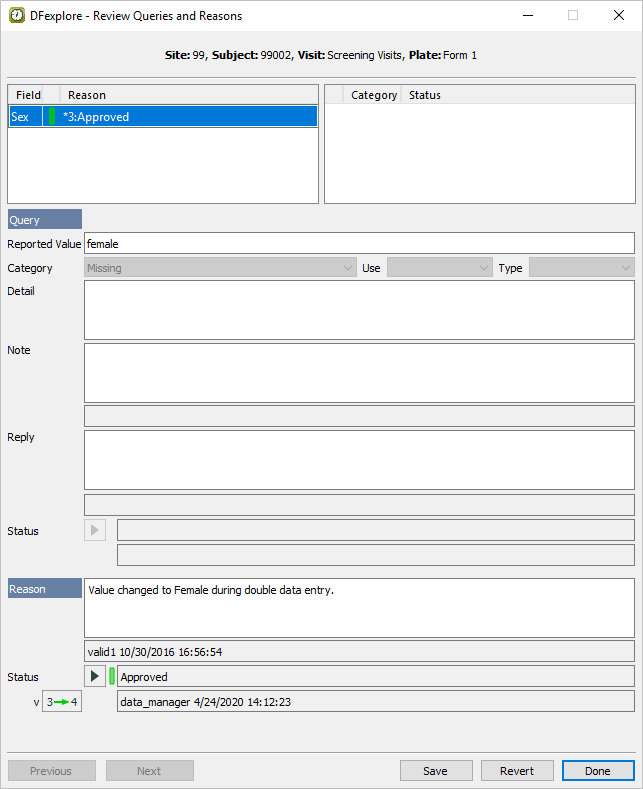
Select > . Examine the information in the dialog.
-
Select Approved from the Status pull-down. Confirm that the approved reason shows
 .
.
-
Click and to close the dialog.
-
Do not make any other changes to the data on the current page and press Tab to advance to the save buttons. Click to save the page and its reason at level 4.
-
Click 9: Form 9, AE Report 011.
-
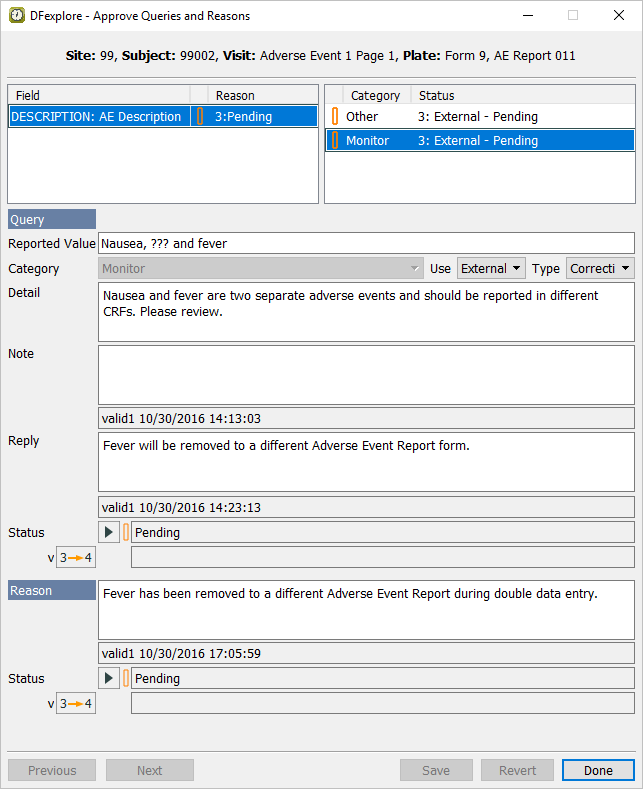
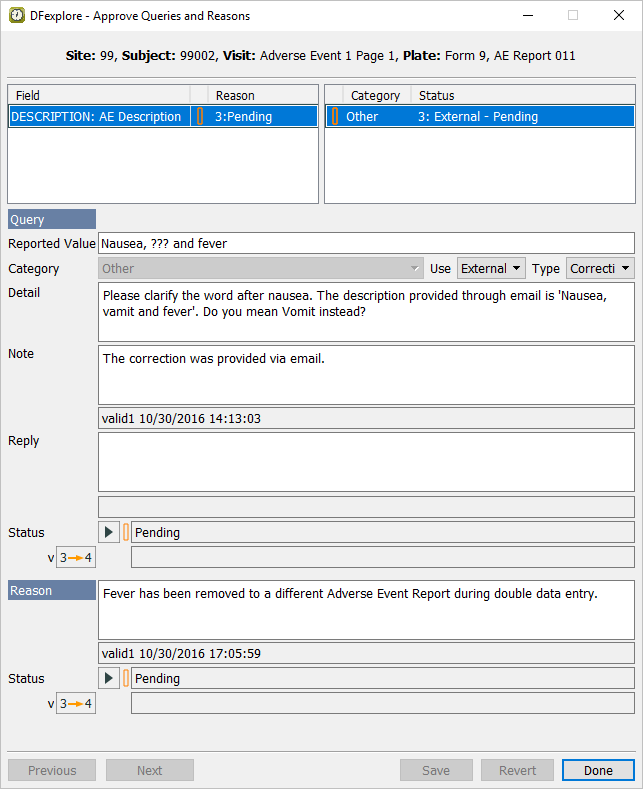
Click anywhere on the page background to make the fields active. Press Tab to advance to the Description field. Examine the information displayed in this field and the information in the corresponding Query window.

-
Select > . Select the Monitor query. Examine the information in the dialog.
-
Select Resolved corrected from the Status in the Query section. Confirm that the CRF will be moved from level
, and Status from Pending to Resolved corrected. 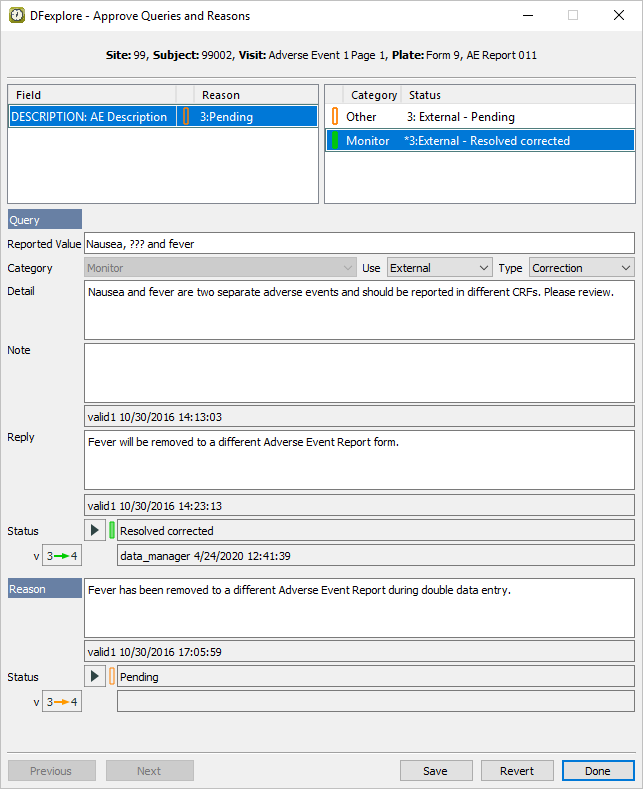
-
Click . The Approve Queries and Reasons dialog changes from displaying the query with category Monitor to displaying the query with catgeory Other as shown. Click .
-
Press Tab to exit the Description field. Upon leaving the field, the
DrugLookupedit check is executed and DFlookup:aecodes dialog appears. Click .
-
Do not make any other changes to the data and press Tab to advance to the save buttons. Click to save the page at level 4.
-
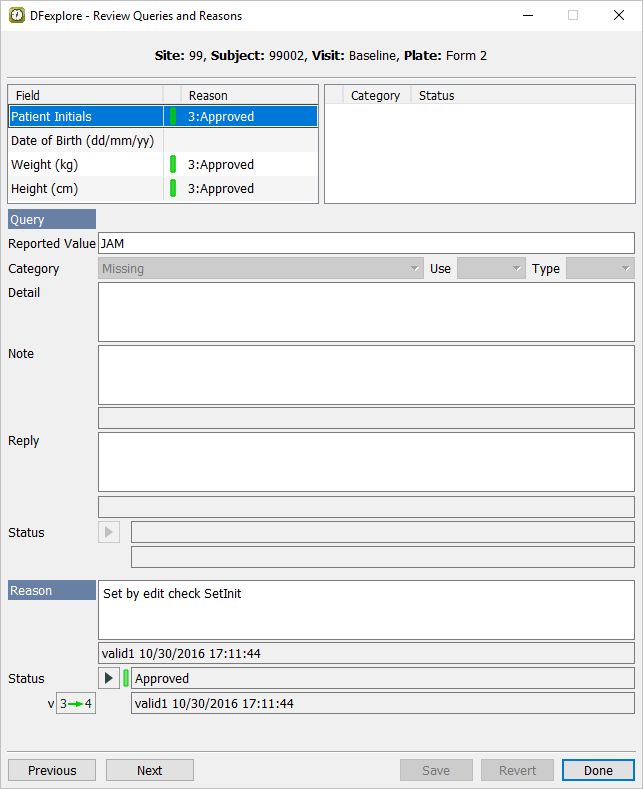
Double-click Subject 99002. Select entry for 2 : Form 2. Select > to review all queries and reasons that are present on the page.
-
Working with the highlighted entry for Patient Initials, confirm that the Status is set to Approved and the level button displays
. Click to move the approved reason from level 3 to level 4 without making any other modifications.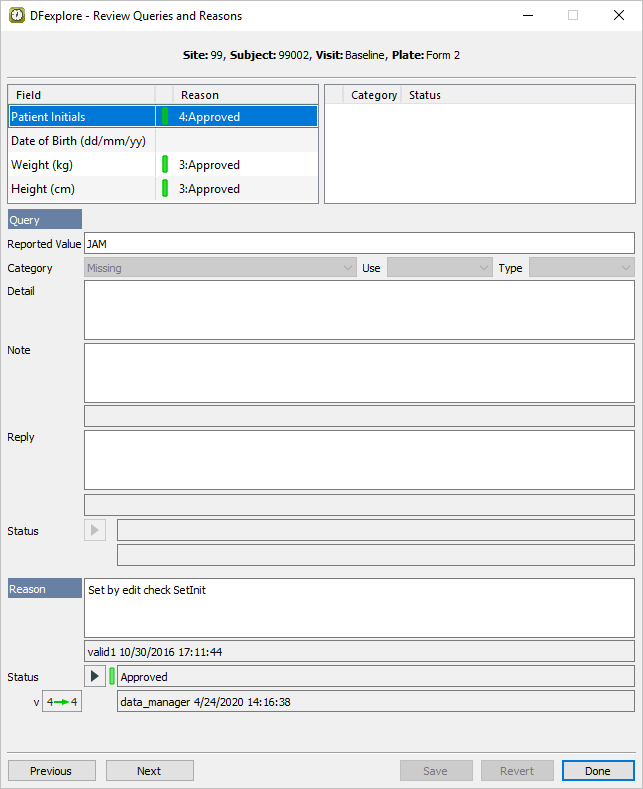
-
Select the 3rd Reason entry Weight (kg). Confirm that the Status is set to Approved and
is displayed. Click to move the approved reason from level 3 to level 4 without making any other modifications.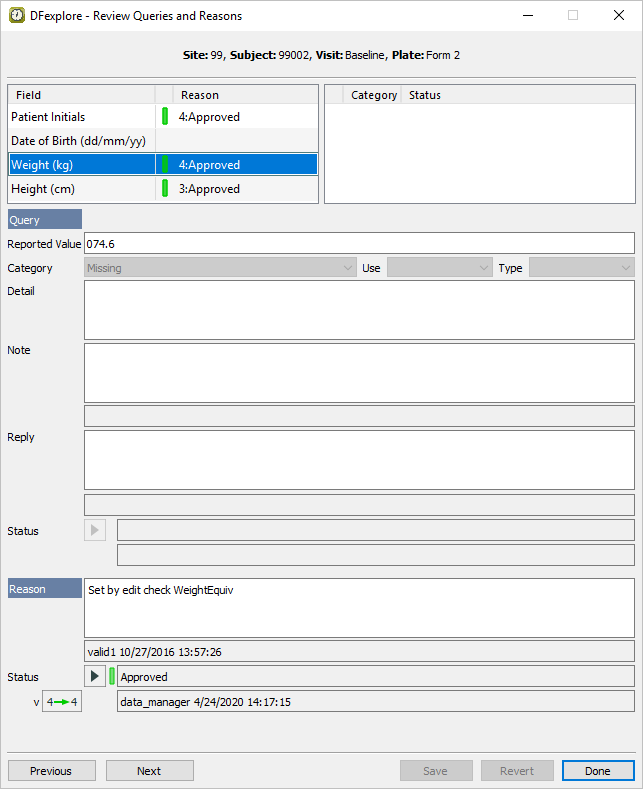
-
Select the 4th Reason entry Height (cm). Confirm that the Status is set to Approved and
is displayed. Click to move the approved reason from level 3 to level 4 without making any other modifications.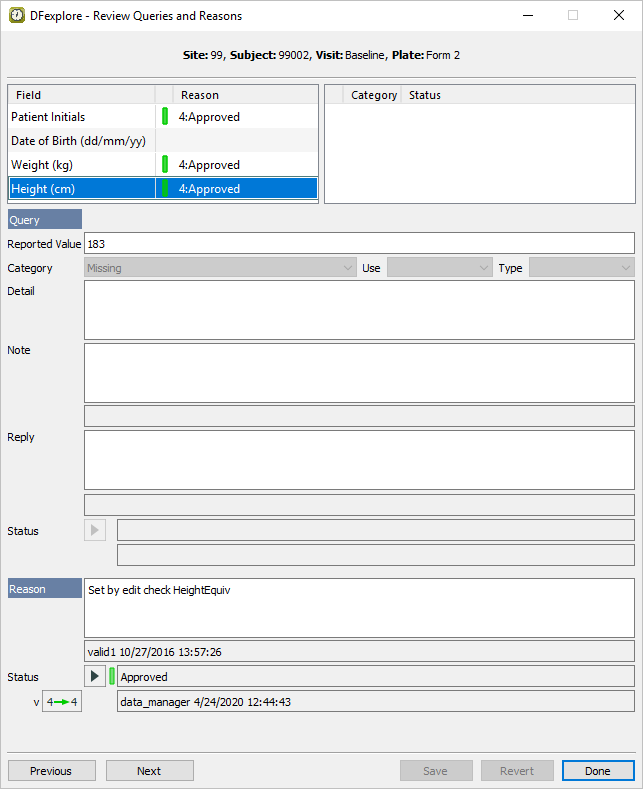
-
Once each of the 3 approved reasons have been reviewed, click .
-
As an outstanding query remains on the Date of Birth field, click to save.
-
Continuing with the ADVERSE EVENT REPORT as the current page, click anywhere in the data entry screen to make the page active. Press Tab to advance though the fields until the Description field becomes the current field. Select > . Examine the information in the dialog.

-
Click the second query with the Category type Monitor and a status of 4: External - Resolved corrected. Click to close the dialog.

-
Press Tab to exit the Description field. Upon leaving the Description field, the
DrugLookupedit check is executed and DFlookup:aecodes dialog appears. Click .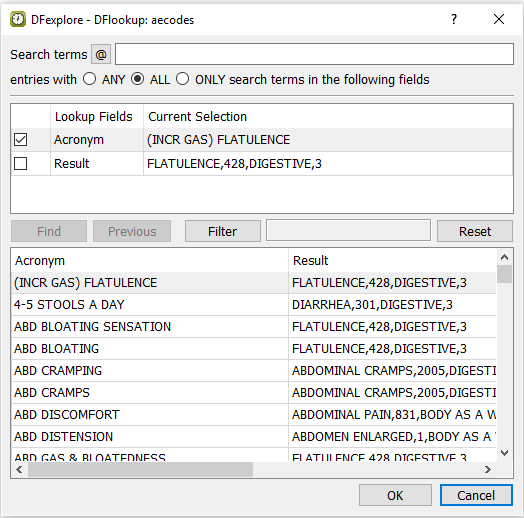
-
Do not make any other changes to the data on the current page and press Tab to advance to the save buttons. Click .
-
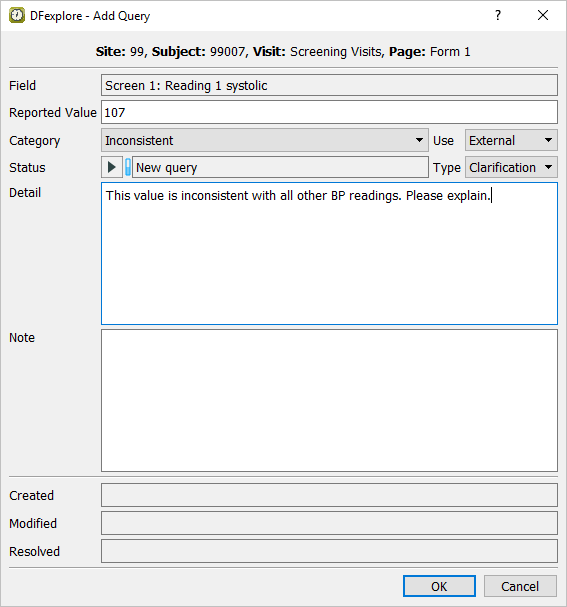
Double-click Subject 99007 entry in the record list to open task records for this subject. Press Tab to advance through the fields until Screen 1, Reading 1 systolic blood pressure becomes the current field.
-
Select > or click
 to open the Add Query dialog. In the dialog, set:
Category = Inconsistent
Use = External
Type = Clarification
Status = New query
Enter
This value is inconsistent with all other BP readings. Please explain.in the Detail field.
-
Click to apply the query.
-
Press Tab to advance through the remaining fields on the page until the save buttons become active. Click to save the page.
-
Release the current task set and retrieve all pages in the database that have been saved with status Pending. Do this by selecting > . In the dialog set:
Mode = Validate
Save level = 4 - Level 4
Search = Data
Status = Pending
Leave the retrieval Level field blank.
-
Click . In the confirmation dialog, click to retrieve data records that match the search criteria.
-
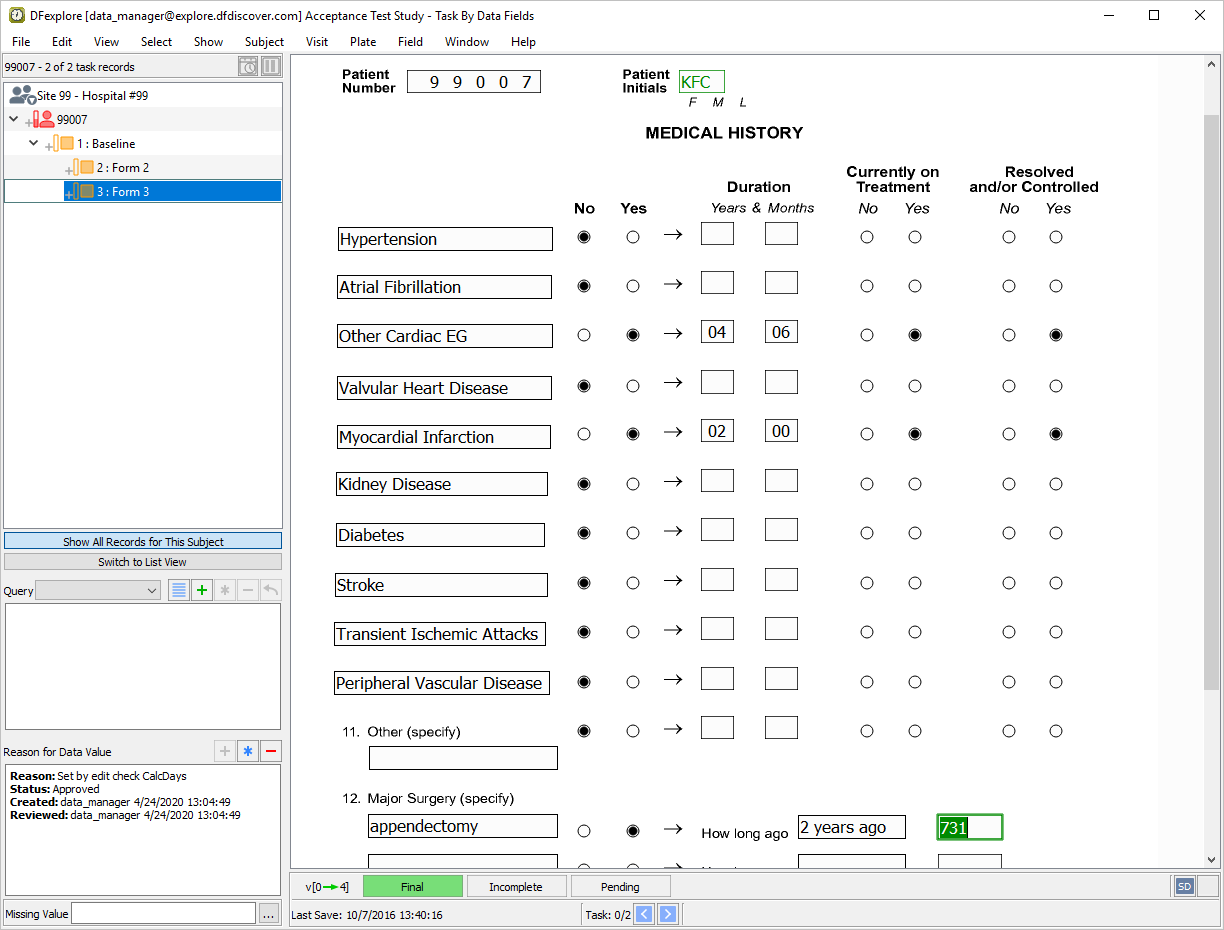
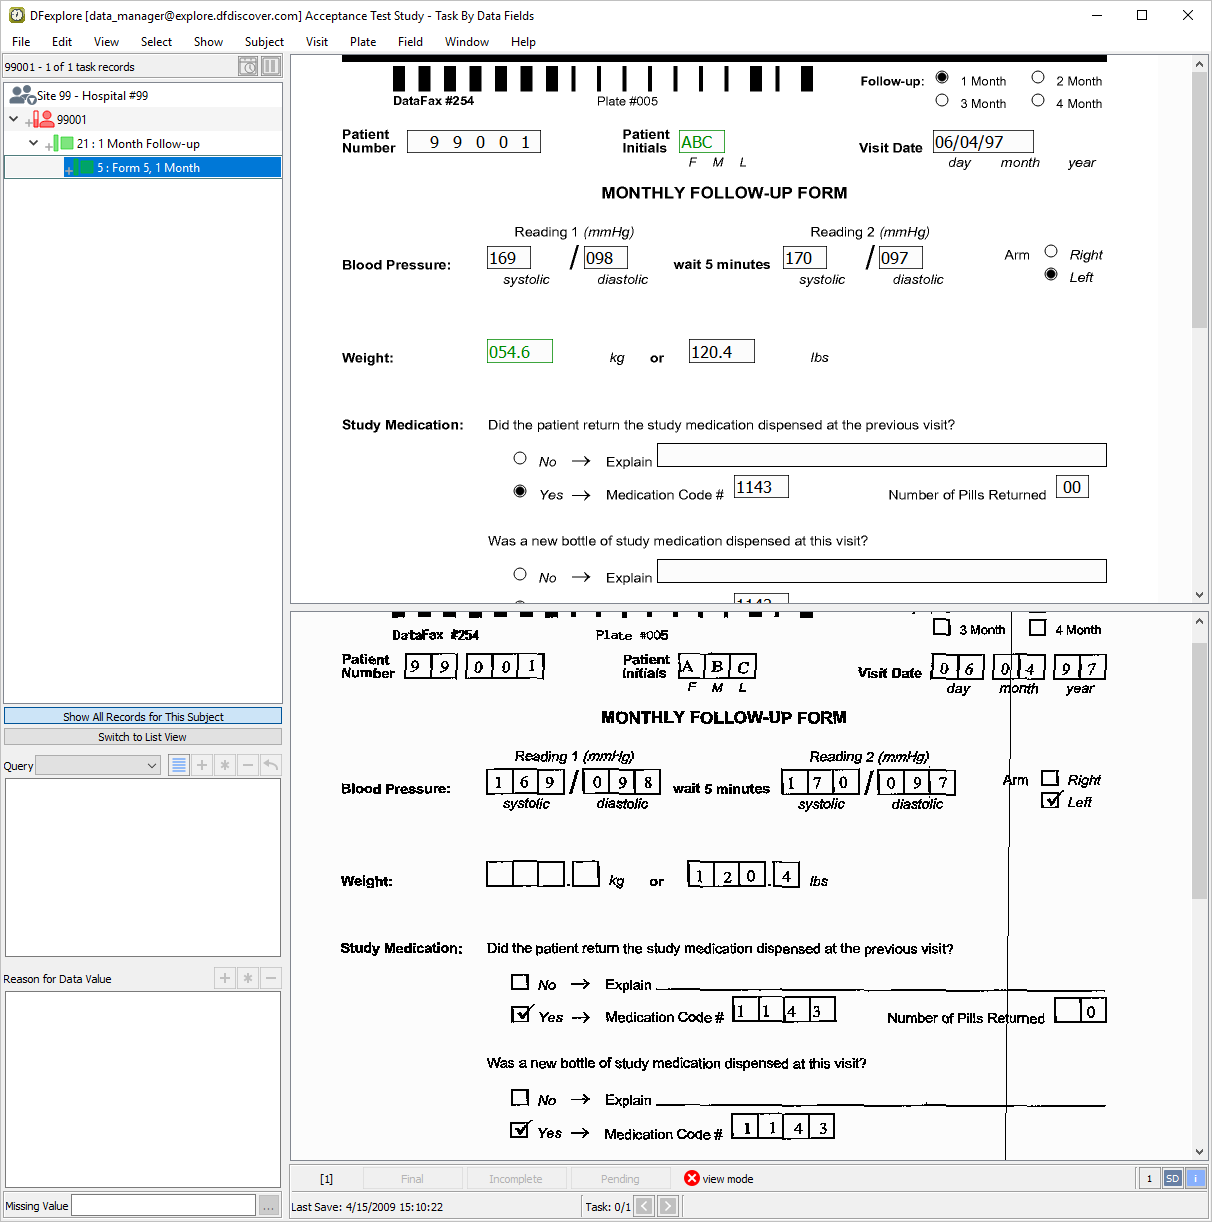
Select Subject 99007 > 1 : Baseline > 3: Form 3 from the record list and click anywhere on the page background to make it the active page. Beginning with the Patient Number field, press Tab to advance through the fields until the first Major Surgery text field is the current field. Enter all Major Surgery information as it appears in the following image. Press Tab to exit the last data field to make the save buttons active.
-
As there are no outstanding problems on the page and the data is now complete, click to change the page status from Pending to Final at level 4.
-
Select > to release all task records from the current set. Click in the dialog to clear the main Data View window.
-
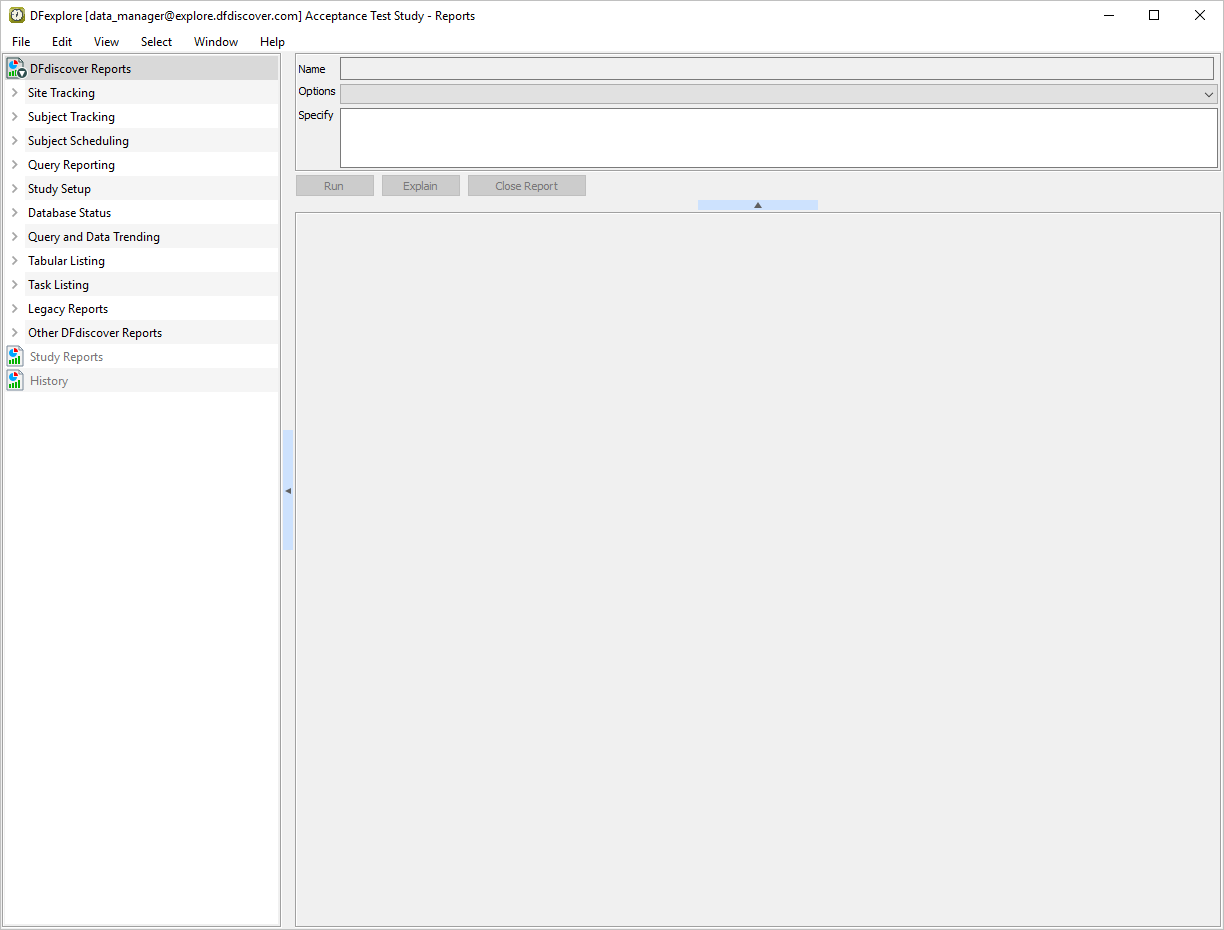
Select > , Reports View becomes the current view.
-
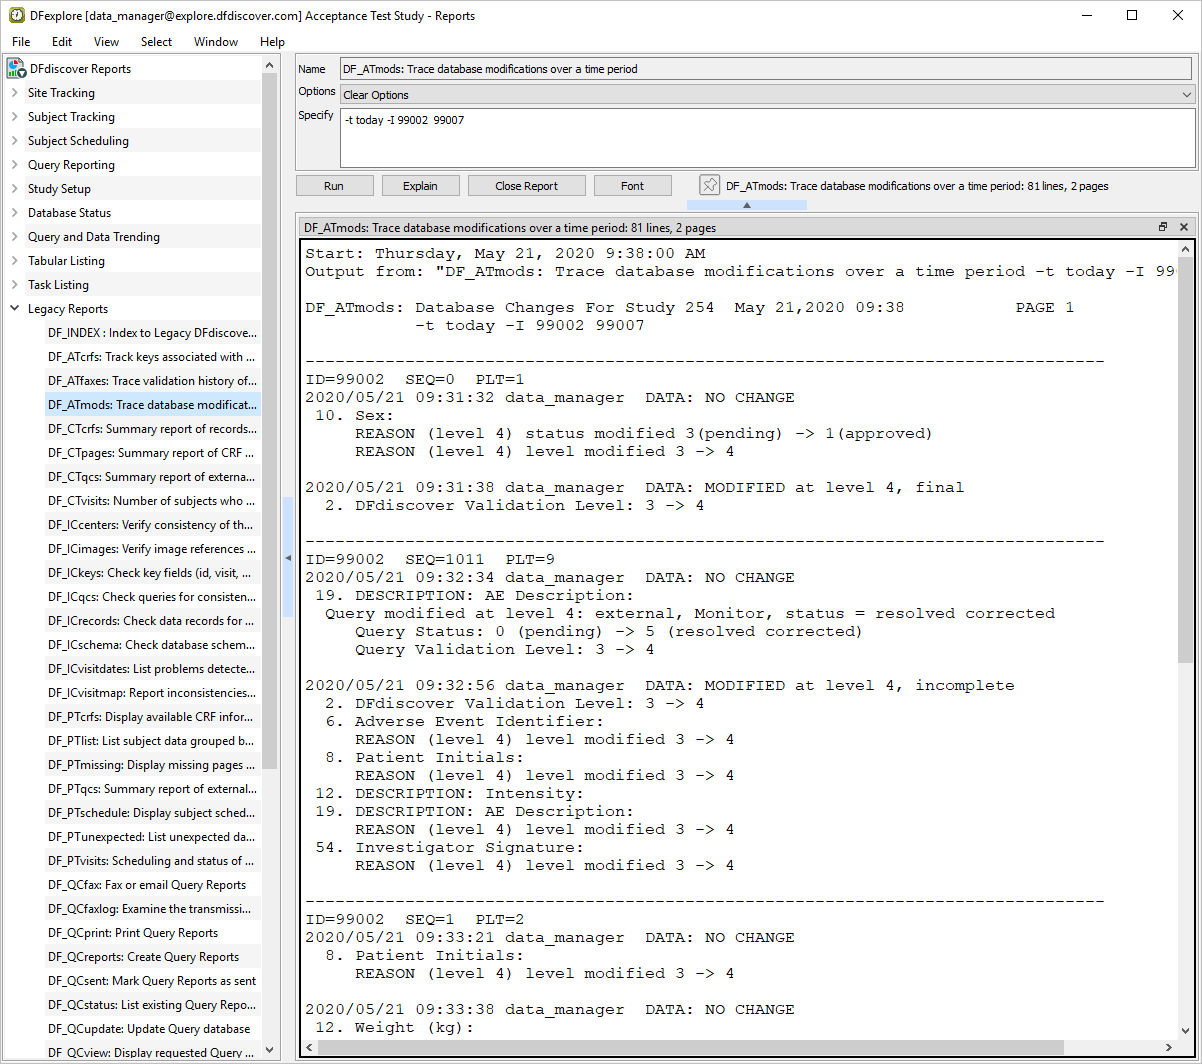
Click the Legacy Reports section and choose report DF_ATmods from the list of reports. To review all data modifications made to Subject 99002 and 99007. Enter
-t today -I 99002 99007in the Specify field.
-
Click to execute the DF_ATmods report. Examine the output.
-
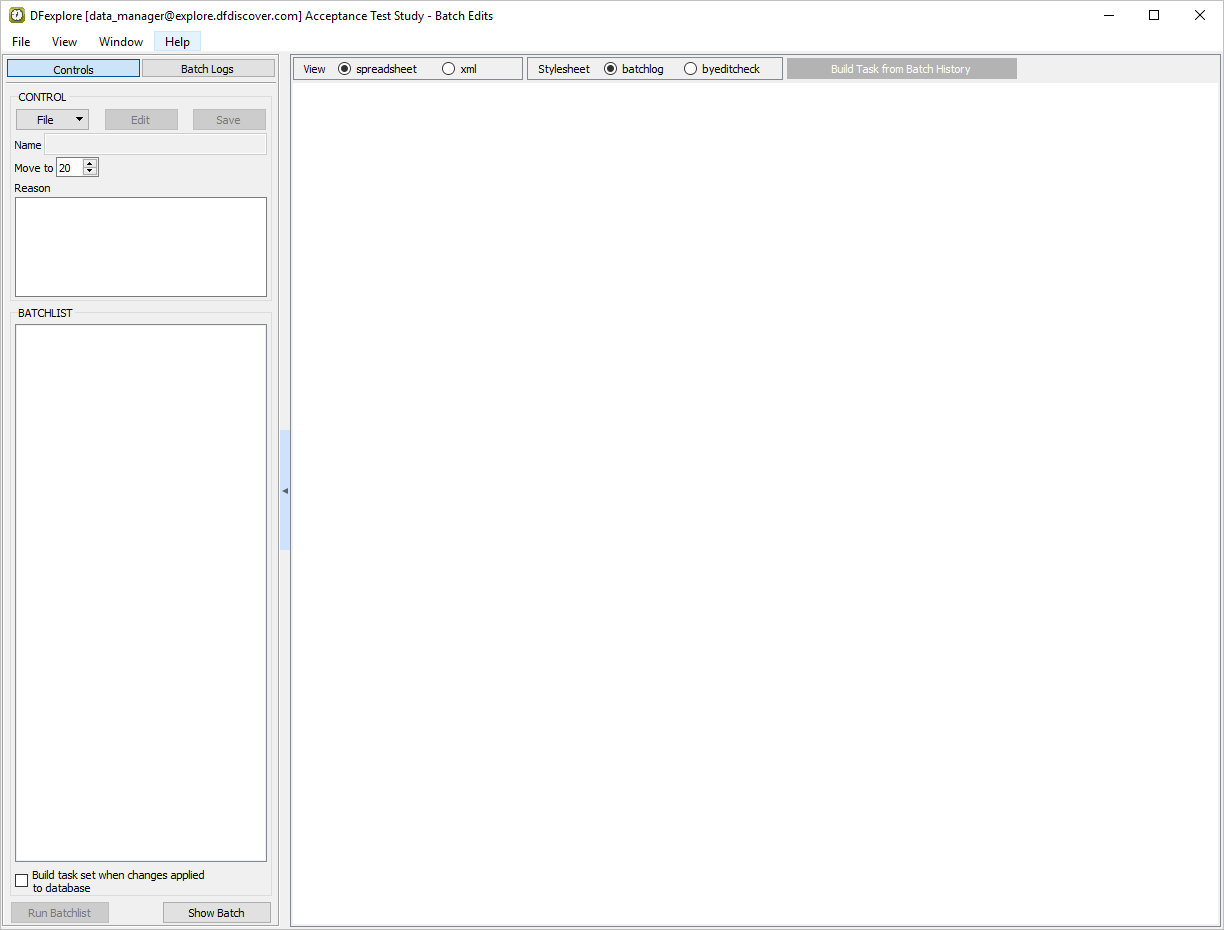
Select > . Batch Edits becomes the current view.
-
With the Controls tab as the current view. Click > from the drop-down list.
-
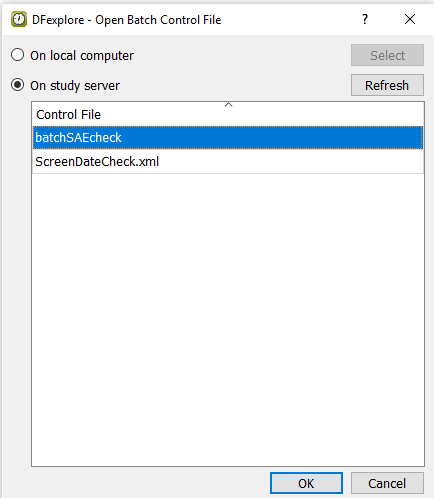
In the Open Batch Control File dialog, select (enable) the On study server option to display a list of available control files that are located on the study server for the 254 Acceptance Test Study. Choose
ScreenDateCheck.xmlfrom the list and click to load the control file.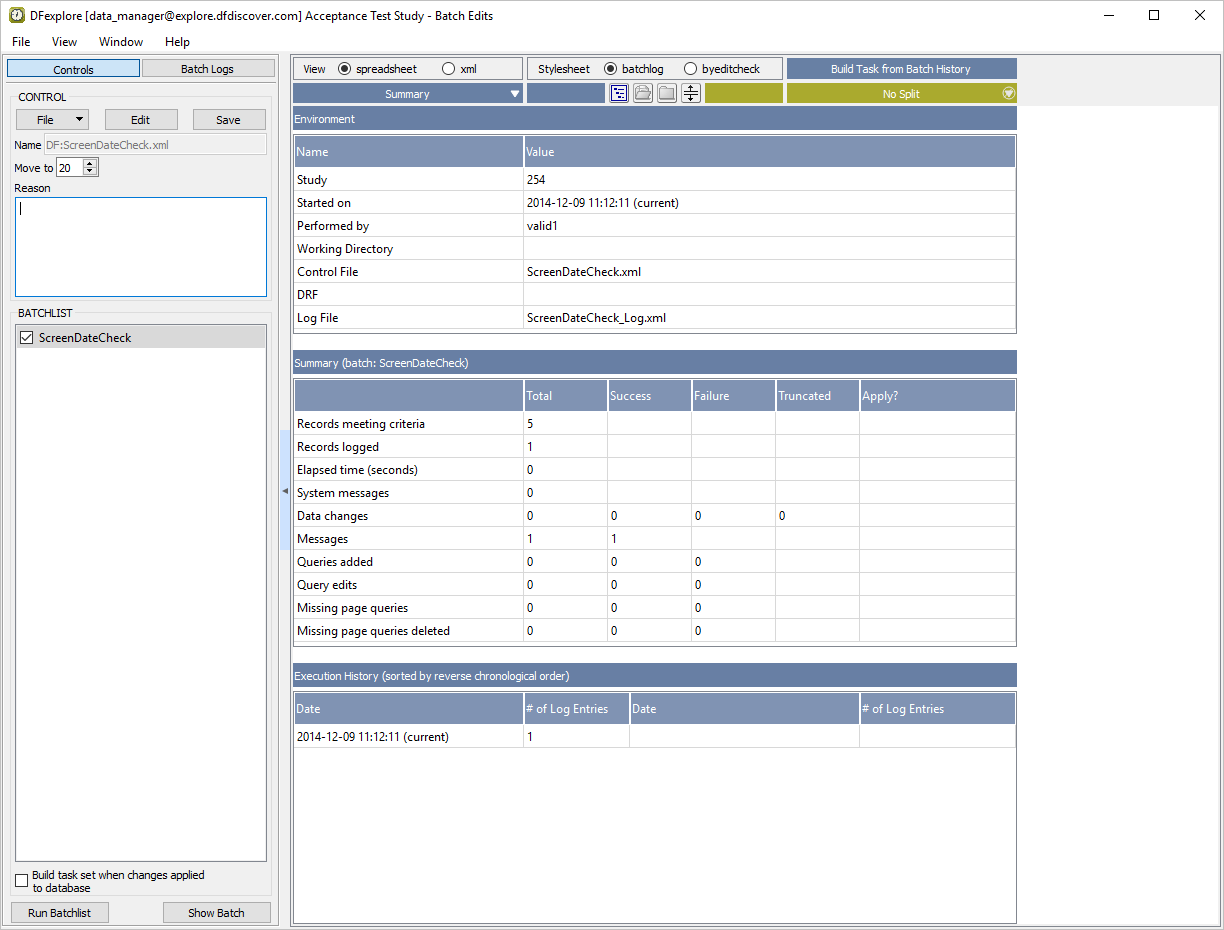
-
Click to ensure the settings are as shown below. Click to hide the settings.
Note The ScreenDateCheck.xml control file executes the edit check
ScreenDateswhich verifies that the Screen 1 and Screen 2 dates on all plate 1s (Blood Pressure Screening Form) are in sequential order with the Screen 1 date coming before the Screen 2 date.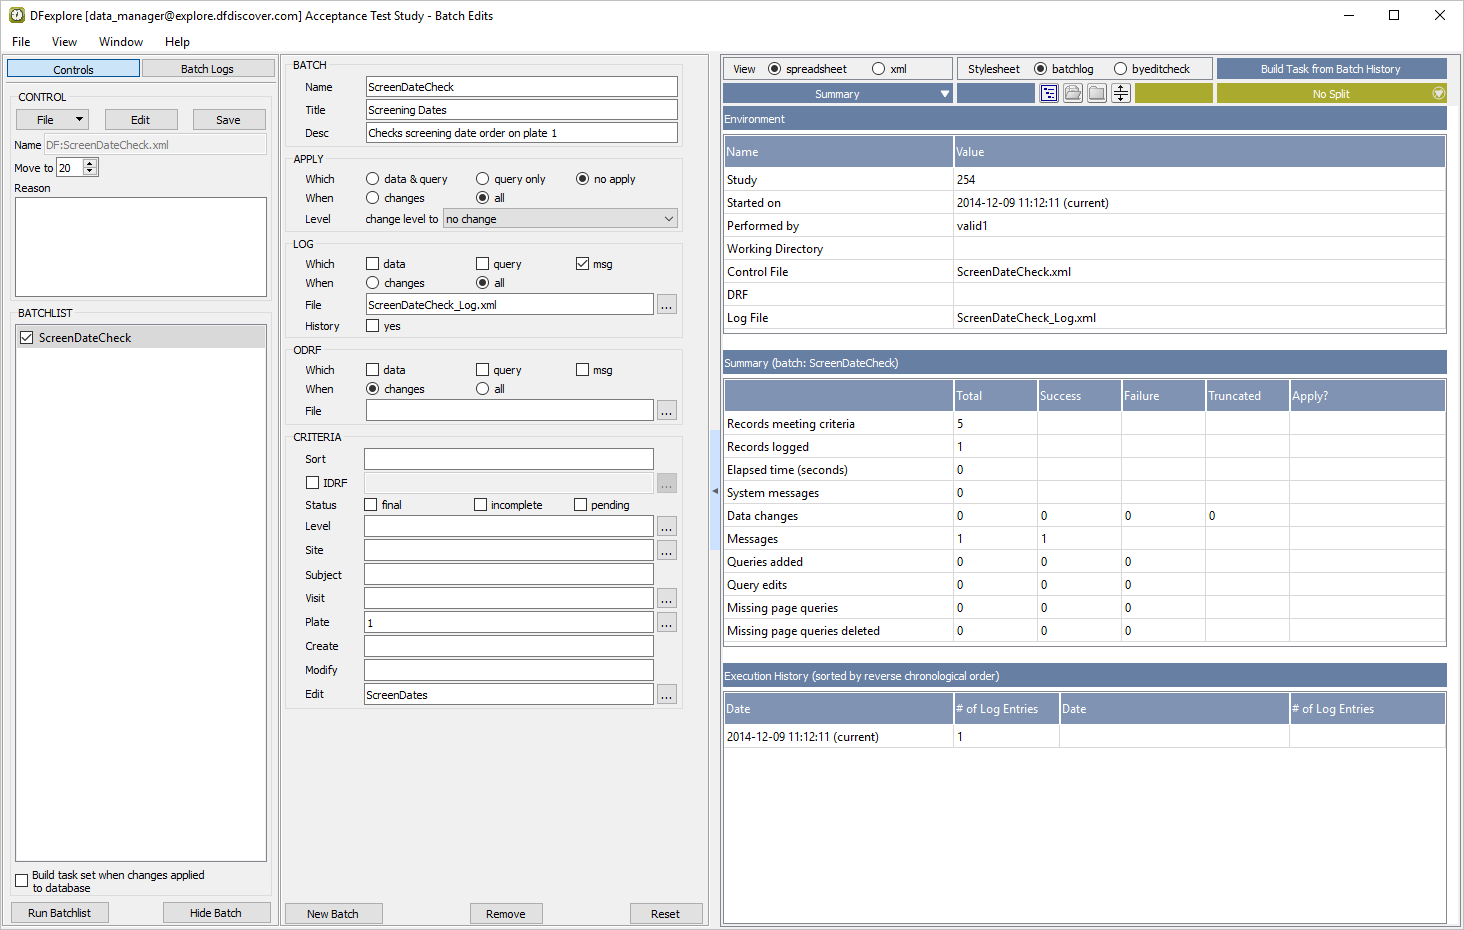
-
Click to run the current batch program. Click in the confirmation dialog.
-
From the Summary drop-down list, choose the item identified as '(current)'.
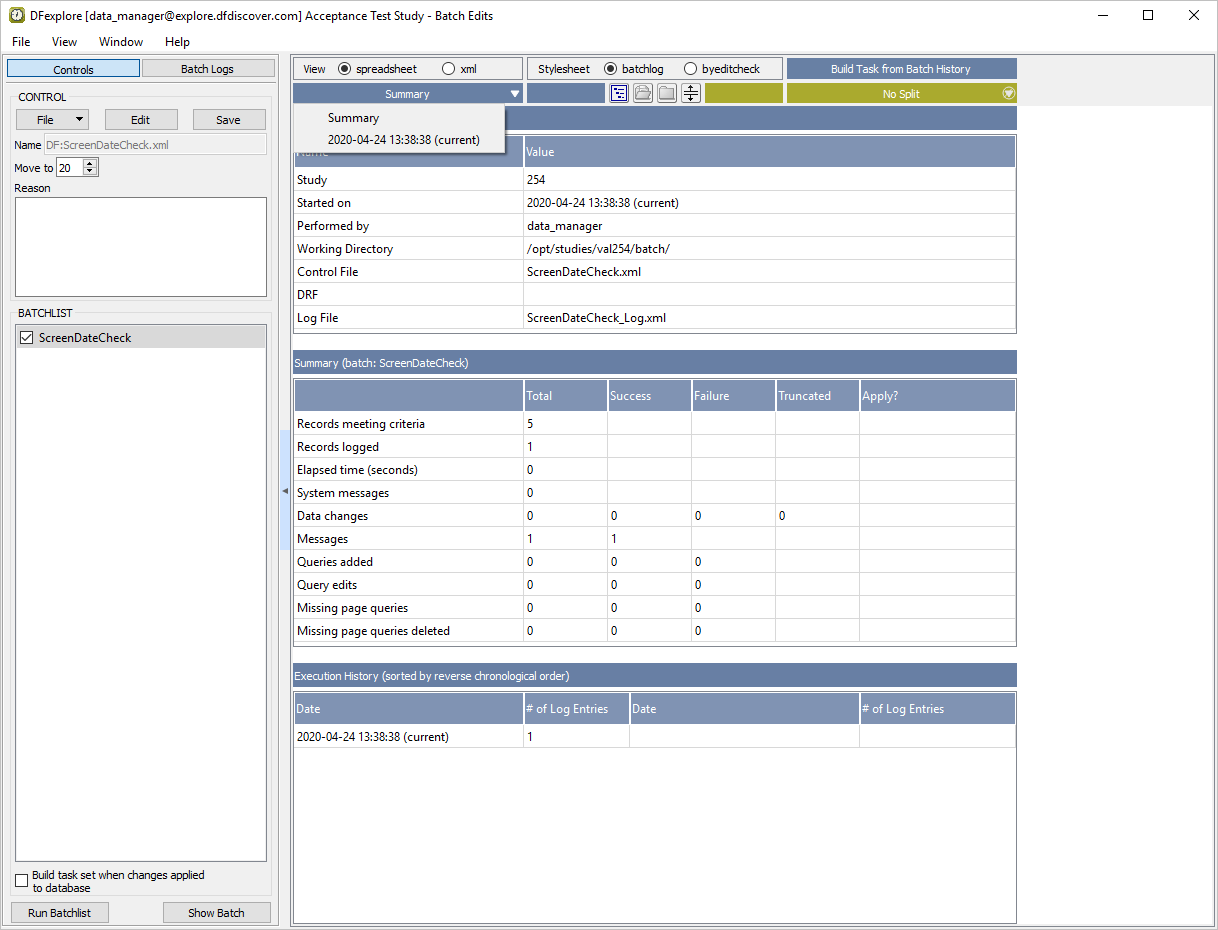
-
The edit check
ScreenDateschecks the Screen 1 and Screen 2 dates on Form 1 (plate 1) and determines if they are out of sequence. Examine the log entry message.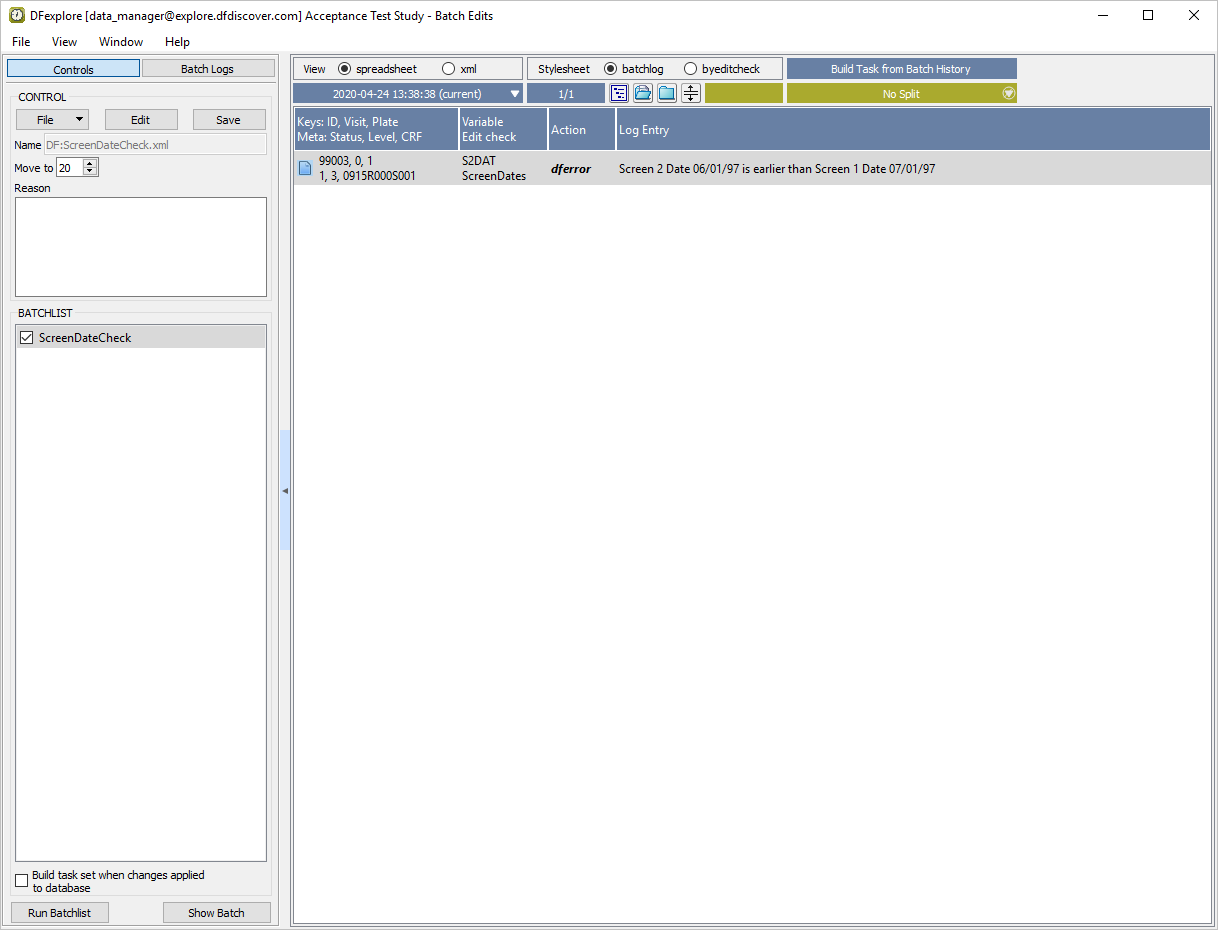
-
Double click the entry to be taken to Data View. Examine the values in the Screen 1 and Screen 2 date fields.
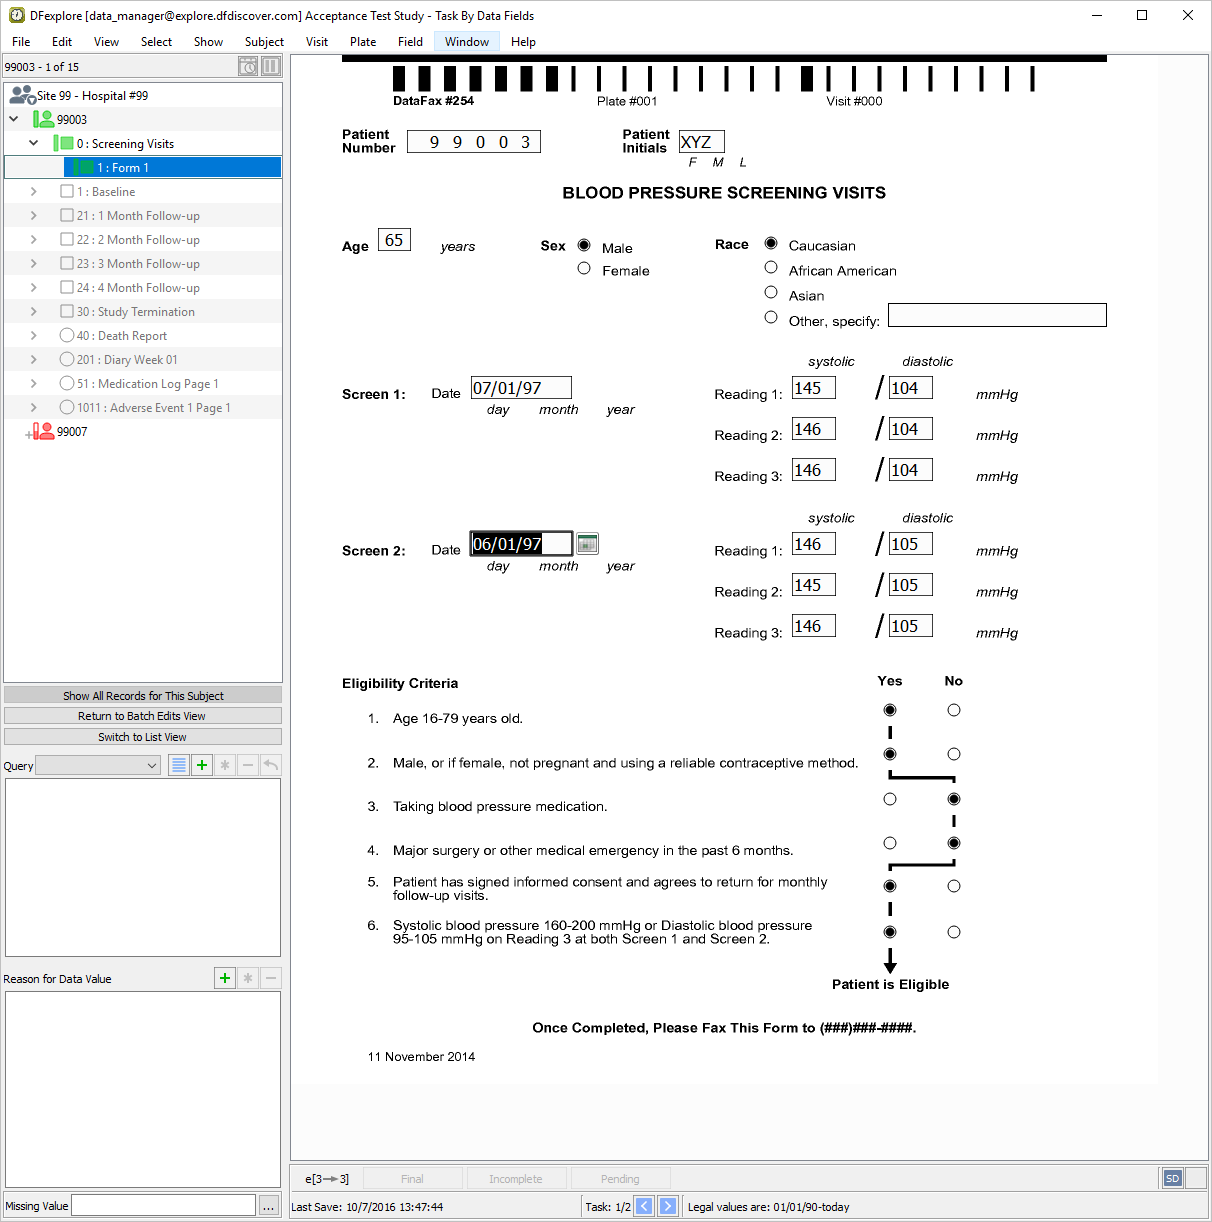
-
Select > . With the Controls tab as the current view, click > from the drop-down list.
-
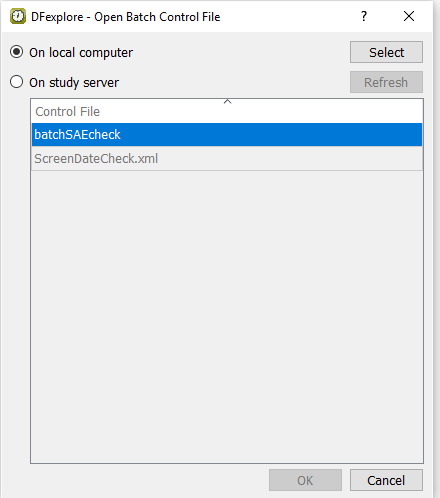
In the Open Batch Control File dialog, select (enable) the On study server option to display a list of available control files that are located on the study server for the 254 Acceptance Test Study. Choose batchSAEcheck from the list and click to load the control file.
-
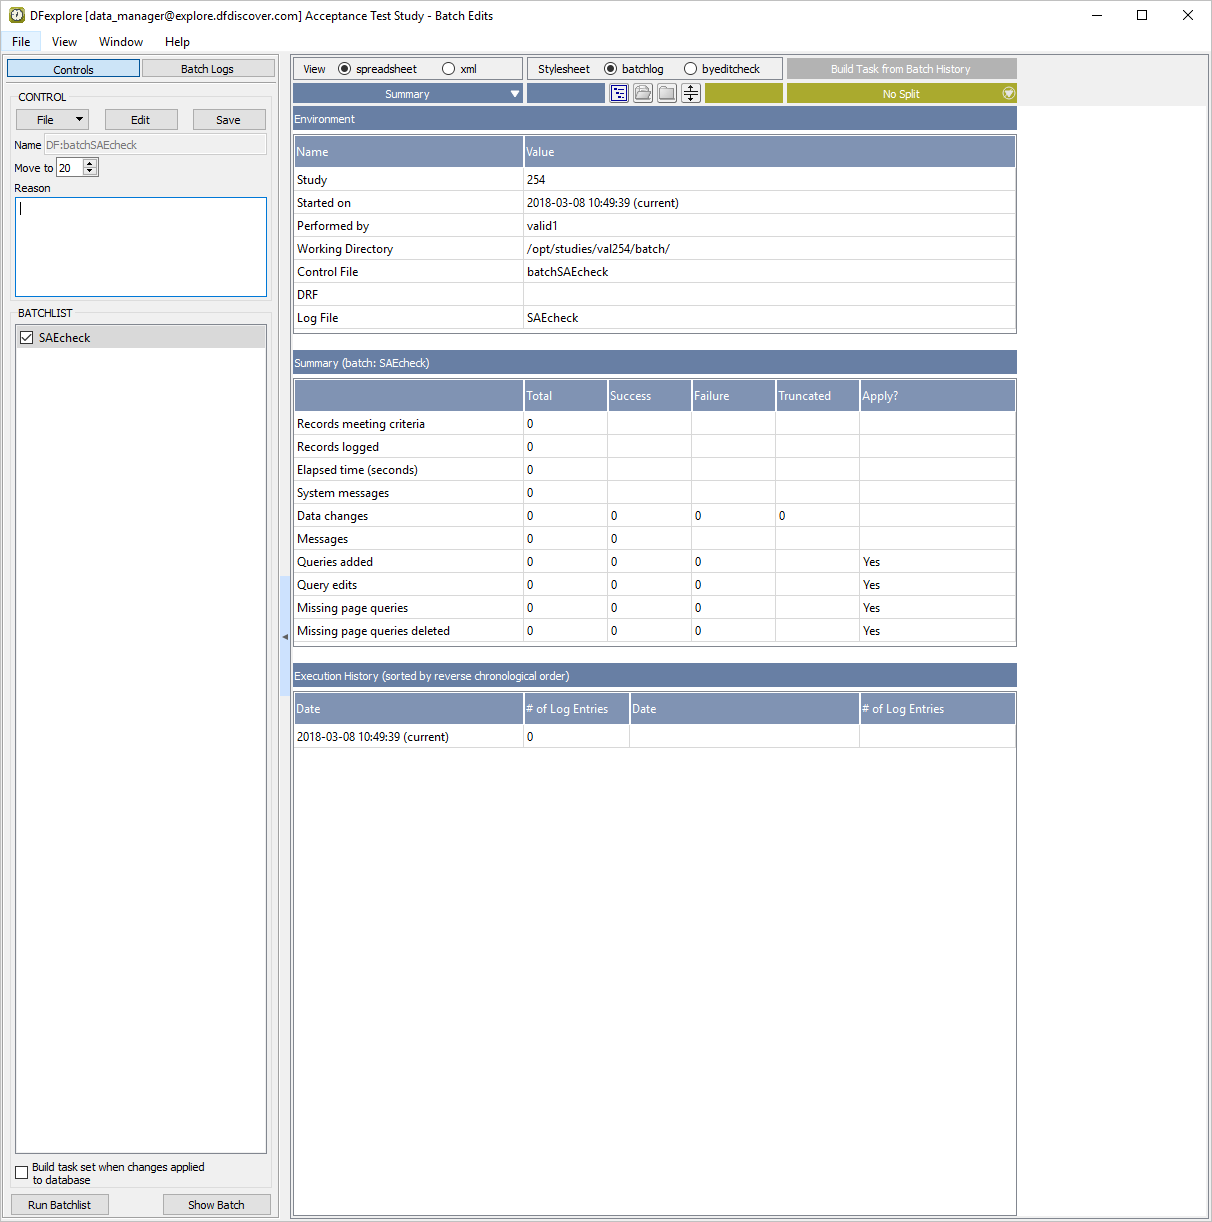
Click to ensure the settings are as shown below. Click to hide the settings.
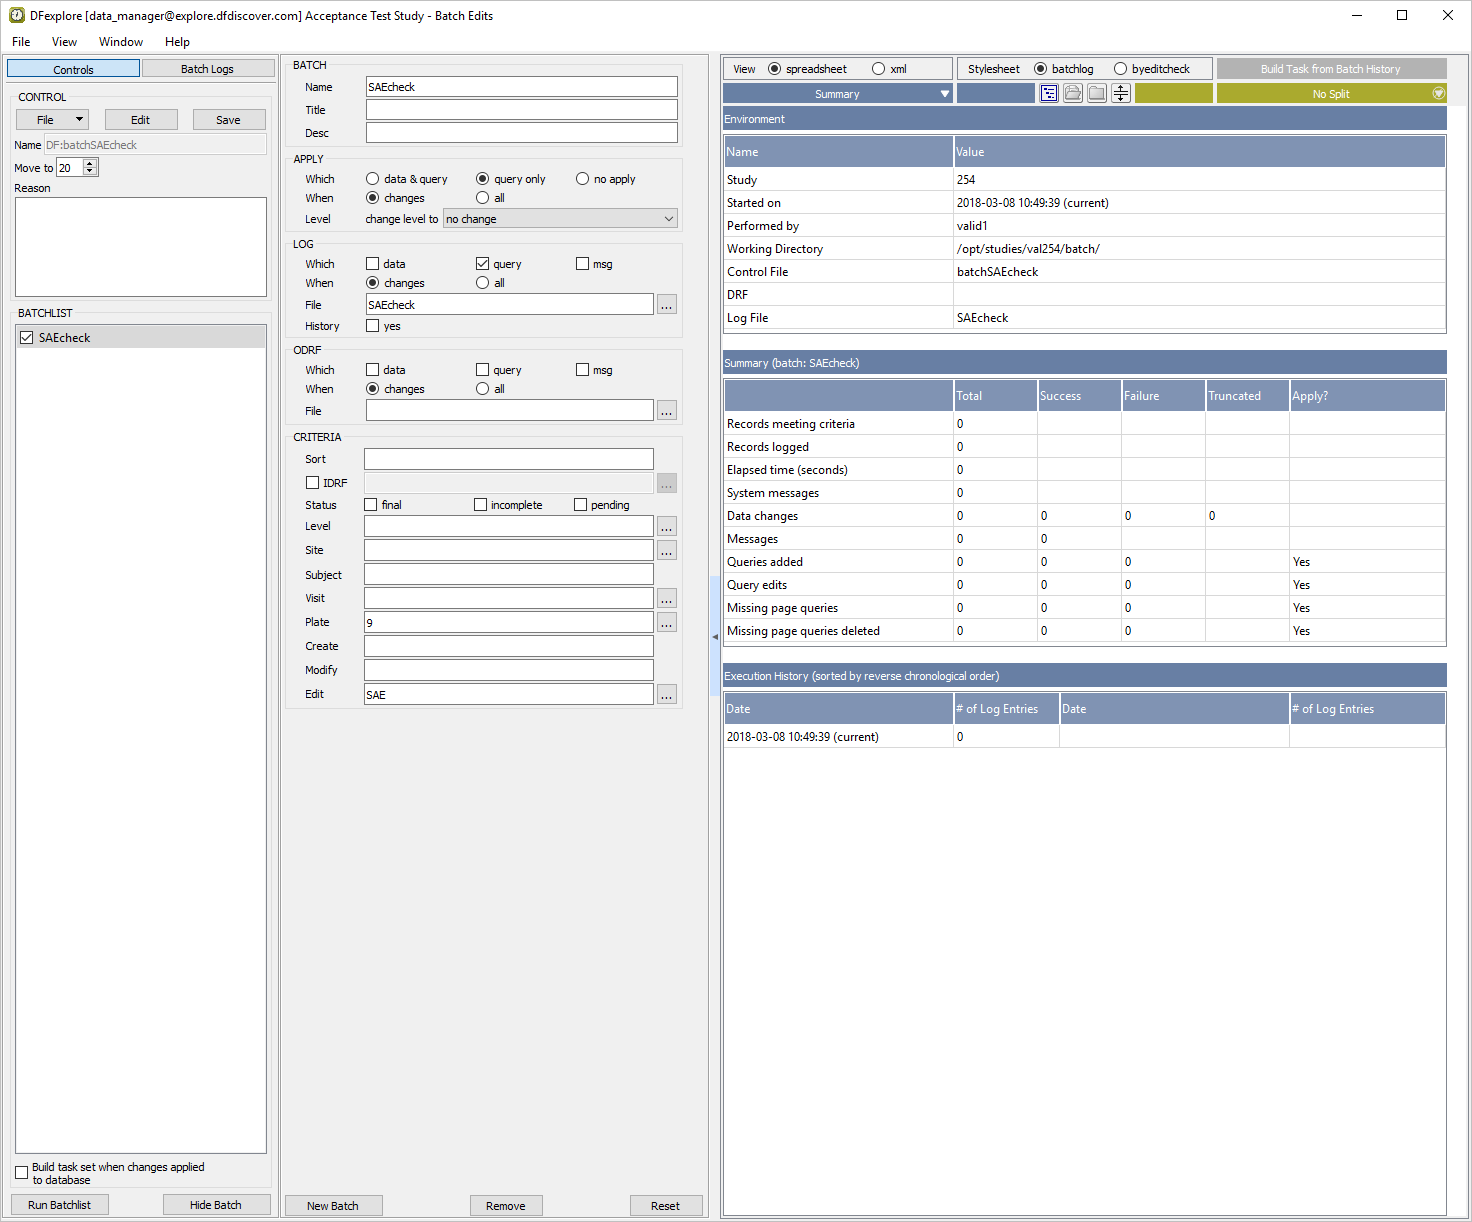
Note The
batchSAEcheck.xmlcontrol file applies a query to Is This A Serious Event field on plate 009 when the response to this field is inconsistent with the value in the Intensity field of the same plate. -
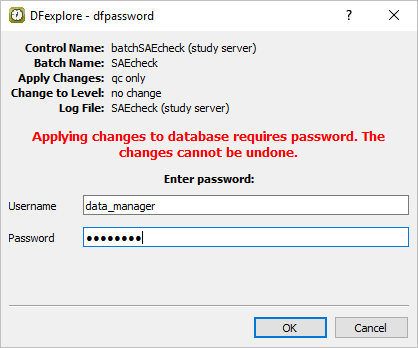
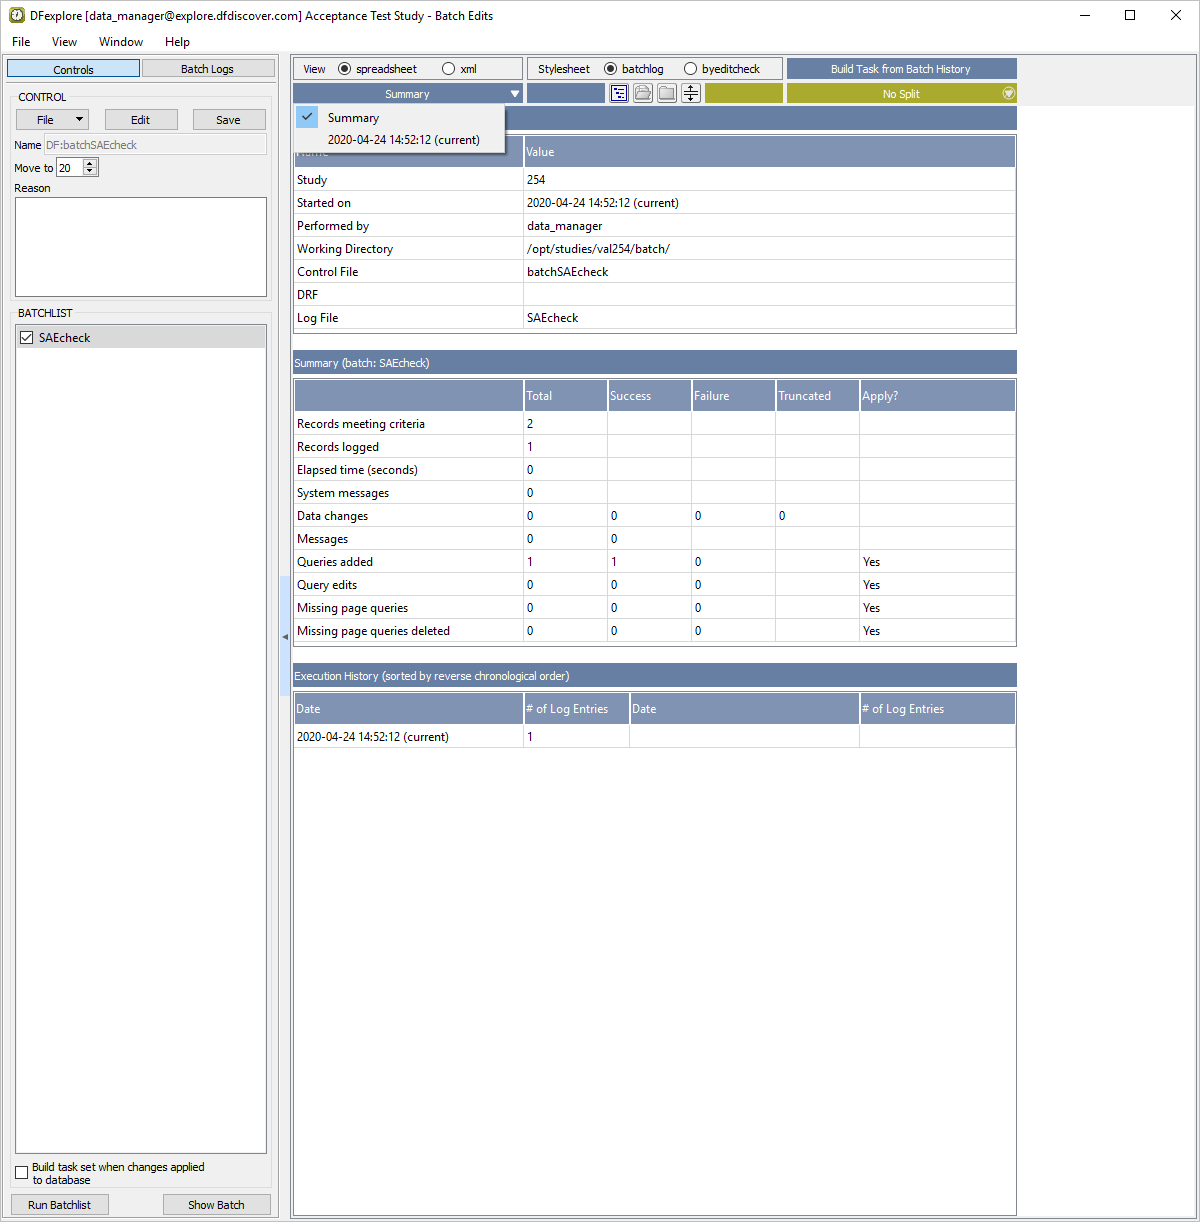
Click to run the current batch program. Enter the Username and Password of the current user, click .
-
From the Summary drop-down list, choose the item identified as '(current)'.
-
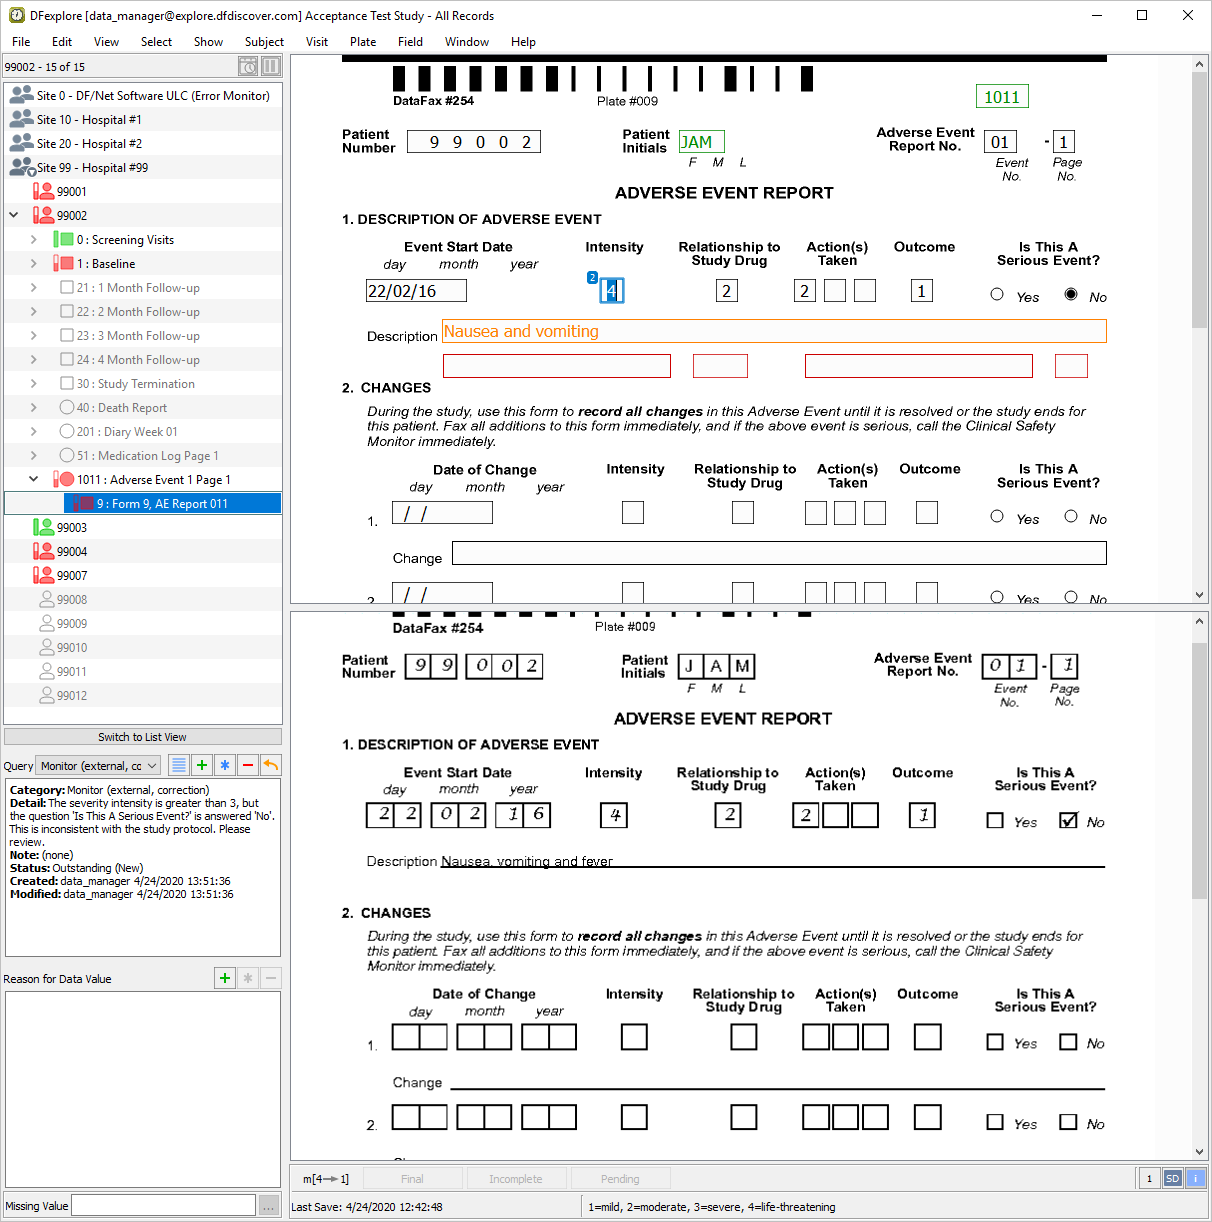
Double-click the entry to be taken to Data View.
-
The Intensity field becomes the current field. Verify that Intensity has a value of
4with the query count '2' displaying on the field widget and the field is blue. Continue tabbing through the fields until the field Is This A Serious Event? has the focus. Confirm that the 'No' box is marked for this field. -
Return back to the Intensity field by using Shift + Tab keys. With the focus on Intensity, examine the details in the Query window, and confirm that the batch edit check with the category Monitor has been added to this field.
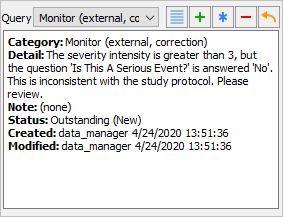
Note The query list is presented in accordance with the query sort order defined in Step 1.
-
Double-click Site 99 - Hospital #99 entry to close all subject binders.
-
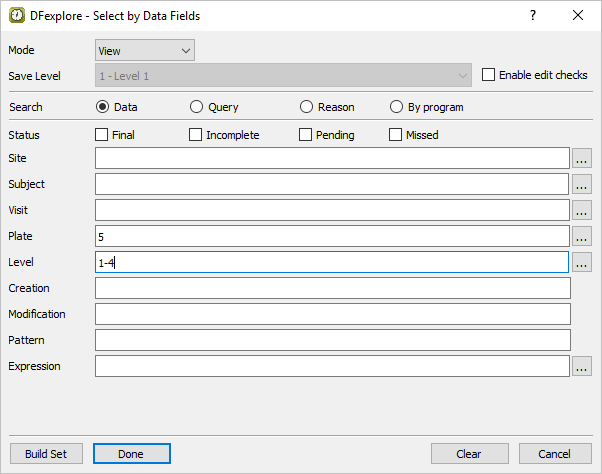
Still in Data View, determine which subjects have had adverse events. Do this by selecting > to open the Select by Data Fields window. In the dialog, set:
Mode = View
Plate = 5
Level = 1-4
Do not select any Status check box.
-
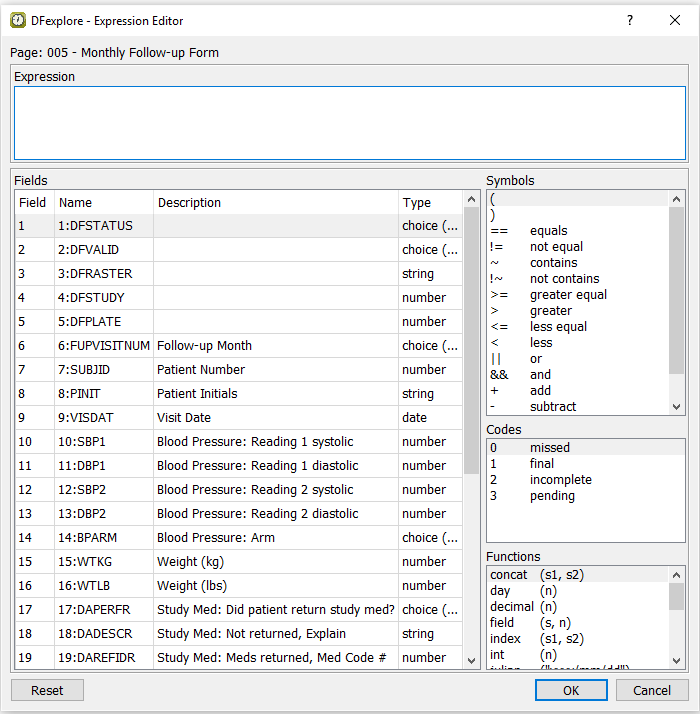
Click Expression to open the Expression Editor dialog.
-
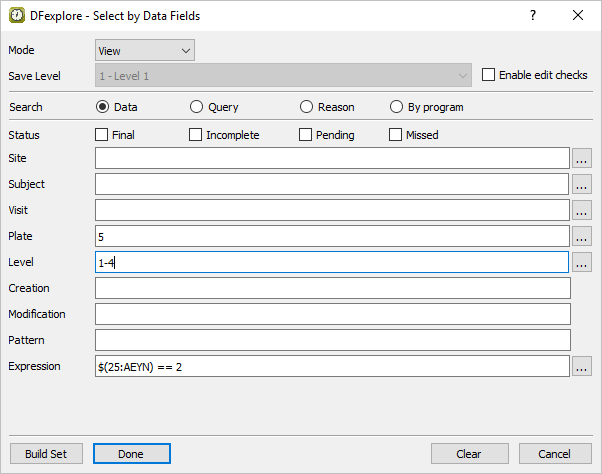
Do the following to build an expression that searches for the occurrence of adverse events: In the Expression Editor, select 25:AEYN from Fields. From the Symbols list choose == equals. From the Codes list choose 2 Yes. Click to add the expression to the Expression field in the Select by Data Fields retrieval dialog.
-
Click to apply the settings. Click in the confirmation dialog to retrieve the 1 data record that matches the expression and retrieval criteria.
-
Scroll down the current page for Subject 99001 to locate the adverse event question. Confirm that the Yes choice has been entered in response to the question Did the patient report any adverse events since the last visit?.
-
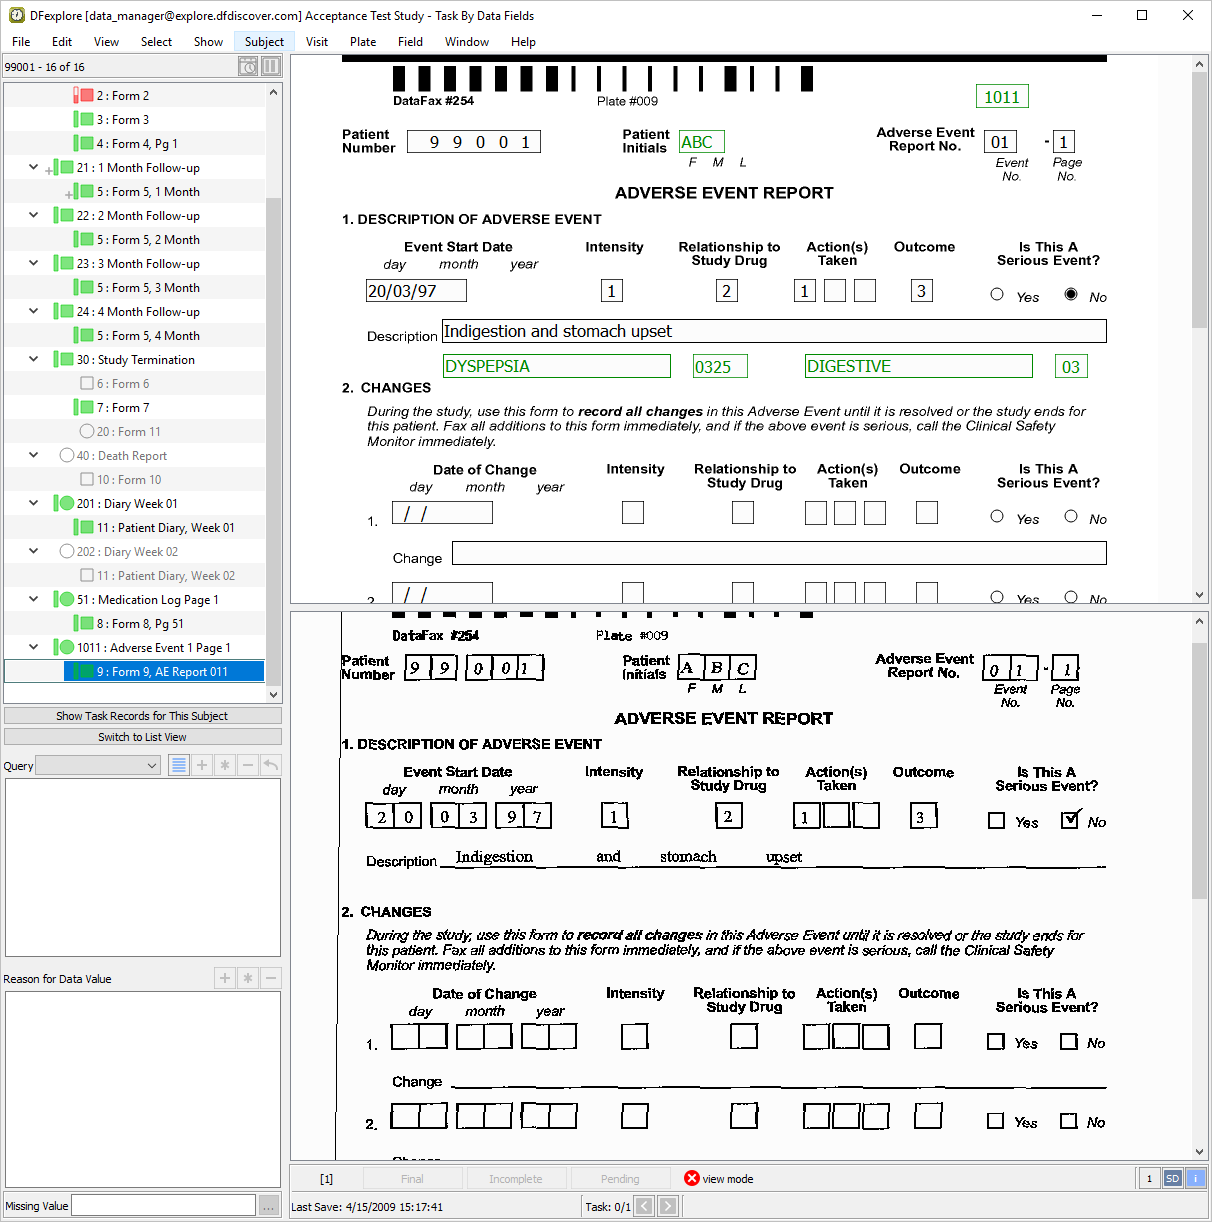
Confirm that a corresponding adverse event report has been submitted for Subject 99001. Do this by clicking located below the subject binder list. Scroll through the list of assessments until the 1011 : Adverse Event 1 Page 1 entry. Select the list entry for 9: Form 9, AE Report 011.
-
Select > to release all task records from the previous test. Click in the resulting confirmation dialog. Select > to open the Select by Data Fields dialog, click to clear the previous retrieval specifications and reset the dialog.

-
The steps that follow search for and retrieve all patients in the database that are >=50 years old, male and have a history of diabetes. Within the Select by Data Fields dialog, click next to the Subject field to open the Subjects dialog and then choose ALL as the value for Select subjects that match.

-
Begin by building an expression for the first subject criterion of Age. Working in the Criterion #1 block, specify Visit =
0. Click next to Plate to open a list of study plates. In the list double-click entry 001 - Blood Pressure Screening Visits to populate the Plate field (plate 1 contains the Age data field). Click next to Field to get a listing of all fields defined on the selected plate 1. Double-click AGE to populate the Field specification. Using the Condition drop-down menu, choose >= greater than or equal to assign a retrieval Condition. Finally, specify50in Value.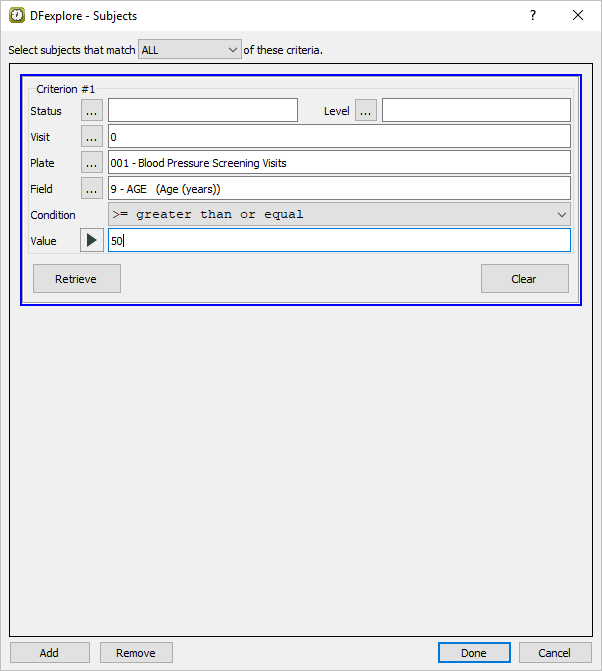
-
Click to retrieve the number of subjects that match the specified Age criterion. Click to add a new criterion block in preparation for the specification of the 2nd retrieval criterion (Male).
-
Build an expression for the second subject criterion of Male. Working in the Criterion #2 block, specify Visit =
0. Click next to Plate to open a list of study plates. In the list double-click entry 001 - Blood Pressure Screening Visits to populate the Plate field (plate 1 contains the Sex data field). Click next to Field to get a listing of all fields defined on plate 1. Double-click entry SEX to populate the Field specification. Using the Condition drop-down menu, choose == equal to assign a retrieval Condition. Select 1 Male from the Value pull-down.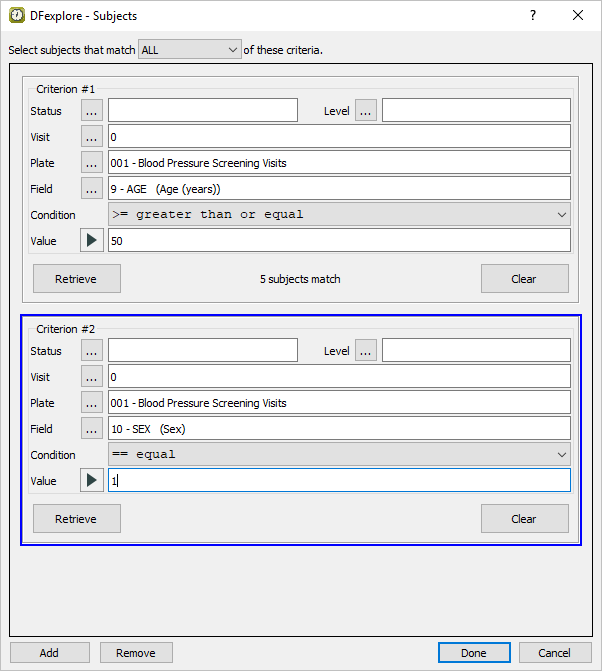
-
Click to retrieve the number of subjects that match the specified Sex criteria. Click to add a new criteria block in preparation for the specification of the 3rd retrieval criteria (history of diabetes).
-
Build an expression for the third subject criterion of diabetes history. Working in the Criterion #3 block, specify Visit =
1. Click next to the Plate label to open a list of study plates. In the list double-click entry 003 - Medical History to populate Plate (plate 3 contains the Diabetes data field). Click next to Field to get a listing of all fields defined on the selected plate 3. Double-click entry MHOCCUR (7. Diabetes: N/Y) to populate the Field specification. Using the Condition drop-down menu, choose == equal to assign a retrieval Condition. Select 2 Yes from the Value pull-down.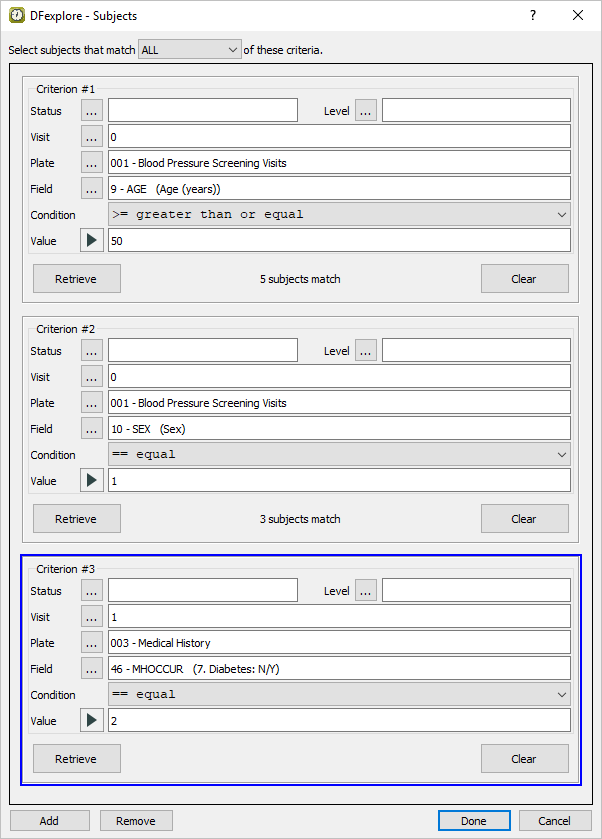
-
Click to retrieve the number of subjects that match the specified Diabetes history criteria. Click to find the subjects that match ALL three of the criteria specifications and close the Subject Criteria dialog.
-
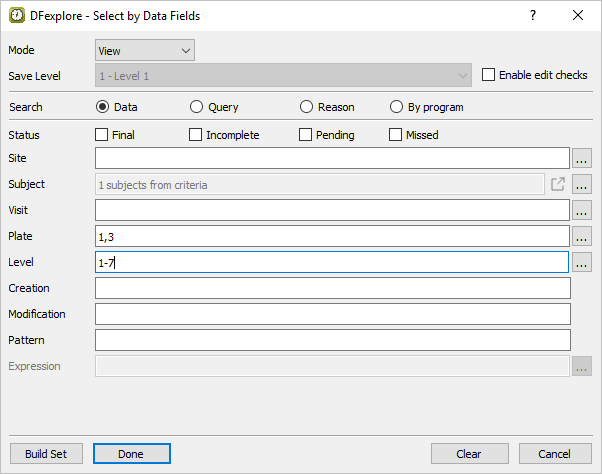
In the Select by Data Fields dialog, set:
Mode = View
Plate = 1,3
Level = 1-7
to retrieve only those plates having the Age, Sex and Diabetes history information for the matching subjects.
-
Click in the dialog to apply the settings. Click in the confirmation dialog to retrieve the 2 data records that match the subject, plate and level specifications.
-
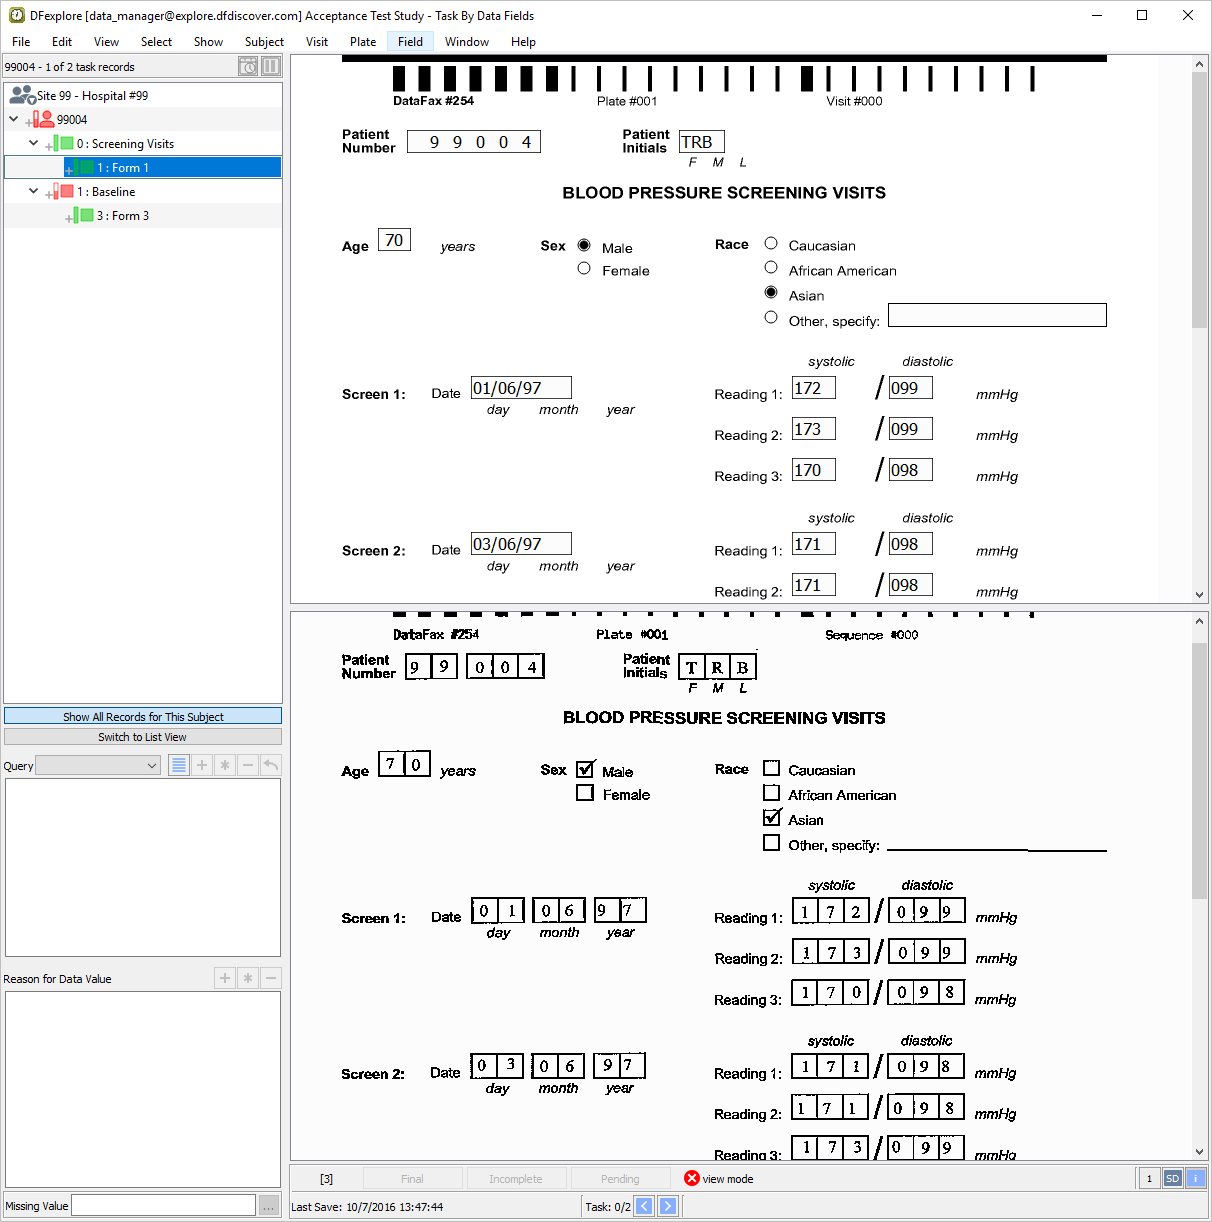
With 0 : Screening Visits, 1 : Form 1 for Subject 99004 as the active page, locate the Age and Sex fields. Confirm that the subject's Age >= 50 and Sex=male.
-
Select 1: Baseline, 3: Form 3 for Subject 99004 to open the Medical History page. Scroll down the page to locate the 7. Diabetes field. Confirm that this field is checked 'Yes'.
-
Select > to close Data View and exit DFexplore.