Table of Contents
Paper CRFs and eCRFs display the , , and in different locations.
eCRFs display the metadata buttons for each field on the same row as the field. Since all the buttons are visible, metadata on an eCRF can be quickly and easily viewed by scrolling through the fields.
Paper CRFs only display one set of , , and . These are located on the right side of the window. The buttons show and allow you to alter the metadata for the field that currently has the focus. Blue, green, and orange borders on a field indicate that the field has metadata, allowing you to quickly see the metadata on a paper CRF. A red border on a field indicates that there is an error on the field.
Queries are used to request corrections or clarifications about the data. There are four query dialogs: Add Query, Edit Query, Reply to Query, and Delete Query. The following sections explain in detail how to use these dialogs.
For studies where multiple queries per field are enabled, there is an additional dialog where users can add a new query or choose an existing query to reply to, edit, or delete. Further details are provided in Multiple Queries Dialog.
To add a query to a field, click . If there is no query on a field, the Add Query dialog opens. Select an appropriate category from the dropdown menu, and provide the query detail in the provided text field. Once complete, click to add a query to the field.
To edit a query, click . If the query is resolved, the Edit Query dialog open. Otherwise, the Reply to Query dialog opens. Click , and the Edit Query dialog opens. Select an appropriate category and status from the dropdown menu, and provide the query detail in the provided text field. Once complete, click to finish editing the query.
If a query is already resolved, it cannot be replied to. Otherwise, to reply to an outstanding query on a field, click . The Reply to Query dialog opens, displaying the query detail. Enter the query reply content in the provided text field. Once complete, click .
Queries are rarely deleted. Once a query is created, it should be resolved, perhaps as irrelevant.
If it is necessary to delete an existing query, click . If the query is outstanding or pending, the Reply to Query dialog opens. Click , and the Edit Query dialog opens. Click , the Delete Query dialog opens. In the Delete Query dialog, click to finish deleting the query on the field. At each step please ensure that the query really should be deleted.
In a study with multiple queries per field enabled, click for a field with an existing query to see the following multiple queries dialog:
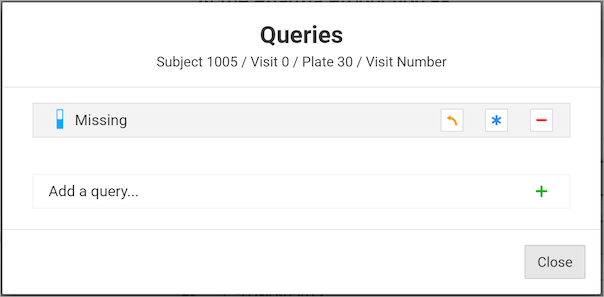
The icons used in the multiple queries dialog are:
-
 Reply
Reply
-
 Edit
Edit
-
 Delete
-
 Add
Add
Additionally, there is another difference between single and multiple query-enabled study query dialogs. In single query-enabled studies there are navigation buttons at the bottom of the dialogs to get from one dialog to another. These aren’t present on multiple query-enabled study query dialogs. Instead, the multiple query-enabled study query dialogs have a back arrow at the left top corner. The back arrow returns you to the Multiple Queries dialog.
Reasons are a way to provide additional information about existing data or to explain why data is changed. For each data field, the user can add a new reason or edit an existing reason using the Reason for Data Value dialog.
To add a reason to a field, click next to the field. The Reason for Data Value dialog opens. Select an appropriate status from the dropdown menu and enter reason detail in the provided text field. Click to add the reason to the field.
In some cases, the Reason for Data Value dialog may open automatically when a data value is changed. In these cases, a reason is required before the data change is accepted. If the data change was made in error, click in the Add Reason dialog to discard the data change.
To edit an existing reason, click to open the Reason for Data Value dialog. Change the reason status and/or detail and click to finish editing and close the dialog.
To delete an existing reason, click to open the Reason for Data Value dialog. Click and then click to confirm that the reason should be deleted.
Missing value codes provide a way to mark a data value as missing. Users may select a missing value for any data field that is not essential to indicate that the data value will not be entered.
To mark a data value as missing, click next to the input field. The Missing Value dialog opens. Select an approriate missing value from the dropdown menu, and click to finish.
After marking a data value as missing, the field value is set to the missing value code and the field is disabled. Disabled fields can still be tabbed to, however editing the field is not possible.
To enter data in a field that has been marked as missing, click next to it. In the Missing Value dialog, select the option from the dropdown menu, and click to finish. This enables the field for data entry and resets the field value to blank. can also be used at any time to clear a data value currently on that field.
Queries can be resolved via on the field.
Click , and then click for the query that is to be resolved. Select an appropriate Status from the dropdown menu, and add Detail and Note in the provided text areas as needed. Once complete, click to resolve the query.
DFweb allows users to attach documents to a plate, which accommodates adding more data and information in other formats.
DFweb allows user to upload, view and download PDFs, images, audio, and video. Specifically for images, DFweb supports JPG, JPEG, PNG, BMP, DICOM, DIC, and DCM format; for audio, DFweb supports MP3, and WAV format; for video, DFweb supports MP4, and AVI format. The file size limit is 25 MB.
Navigate to the Manage Documents dialog to
review documents.
This is available via the Manage Documents menu item under the CRF Menu  (without documents) or
  (with documents), in the top right corner of the plate. Click to choose from the dropdown menu items:
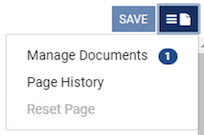
The number next to indicates the number of existing documents for this plate. Click to open the Manage Documents dialog. Below is an example of the Manage Documents dialog.
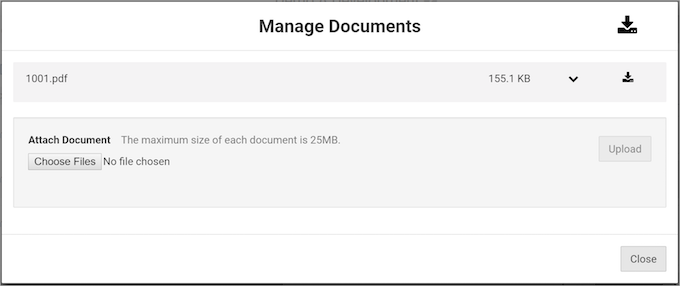
In the Manage Documents dialog, users can review documents. To review a document, click  to expand the collapsible content:
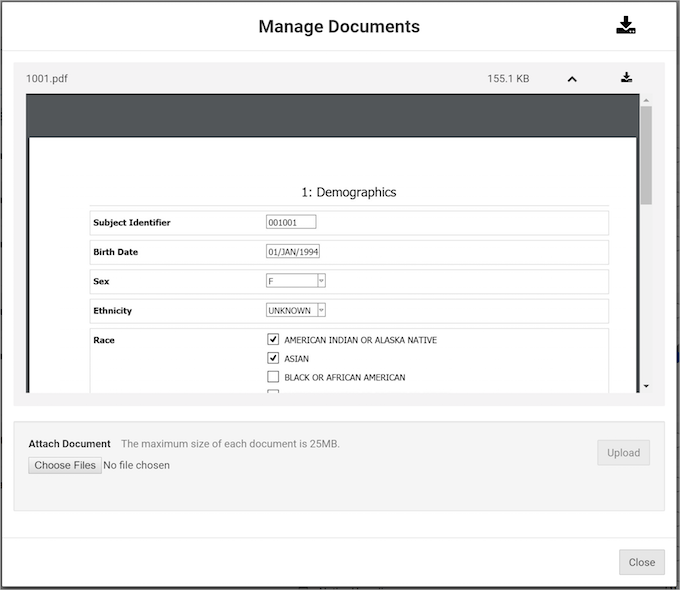
Click  to collapse the content.
Many document types can be previewed or played without downloading first, including PDF, JPG, JPEG, PNG, BMP, MP3, WAV, and MP4 format. For DICOM, DIC, DCM, AVI or other formats, they must be downloaded first.
Navigate to the Manage Documents dialog by following the instructions in Reviewing Documents.
Click to open the file browser and select one or more files from your computer. Once complete, click to add the file(s).
Navigate to Manage Documents dialog by following the instructions in Reviewing Documents.
Click  to the right of the file name to download that particular file. Click the large
  at the top of the dialog next to the Manage Documents title to download in a zip file all the documents listed.
The ability to share links minimizes the time and effort to navigate to a particular page.
Click the Application Menu,  , and then select from the dropdown menu. The copied URL can be re-visited at a future time, or shared with others.
When using a copied URL, the user is redirected to the login page first, where they are required to login. After successful login, the user is taken to the linked page.