Table of Contents
Estimate of Time Required: 20 Minutes
This module utilizes the use of Electronic case report forms (eCRFs) which you will create within DFsetup without needing to import a PostScript® or PDF file containing the form background image. eCRFs do not contain barcodes and are therefore only suitable for entry via EDC.
-
Start DFATK as described in Module 1 (Installation & Initialization).

-
Click followed by to begin this module.
-
This module requires user
valid1to have exclusive access to the 254 Acceptance Test Study database, the Control Panel must be closed. Click .
-
Start DFsetup.

-
In the DFsetup login dialog, enter the name for DFdiscover Server that has been provided by your administrator. Enter
valid1in the Username field and the previously assigned password in the Password field. Click to login.
Highlight 254 Acceptance Test Study and click . Choose Exclusive Access and click . Exclusive Access allows you to create and modify plates, styles and fields, and to define all setup configuration files.

![[Note]](../../imagedata/note.png)
Note The main DFsetup window displays the last plate to be active in the user's previous DFsetup session. For this reason, you may see a different plate from what is displayed in the above illustration.
-
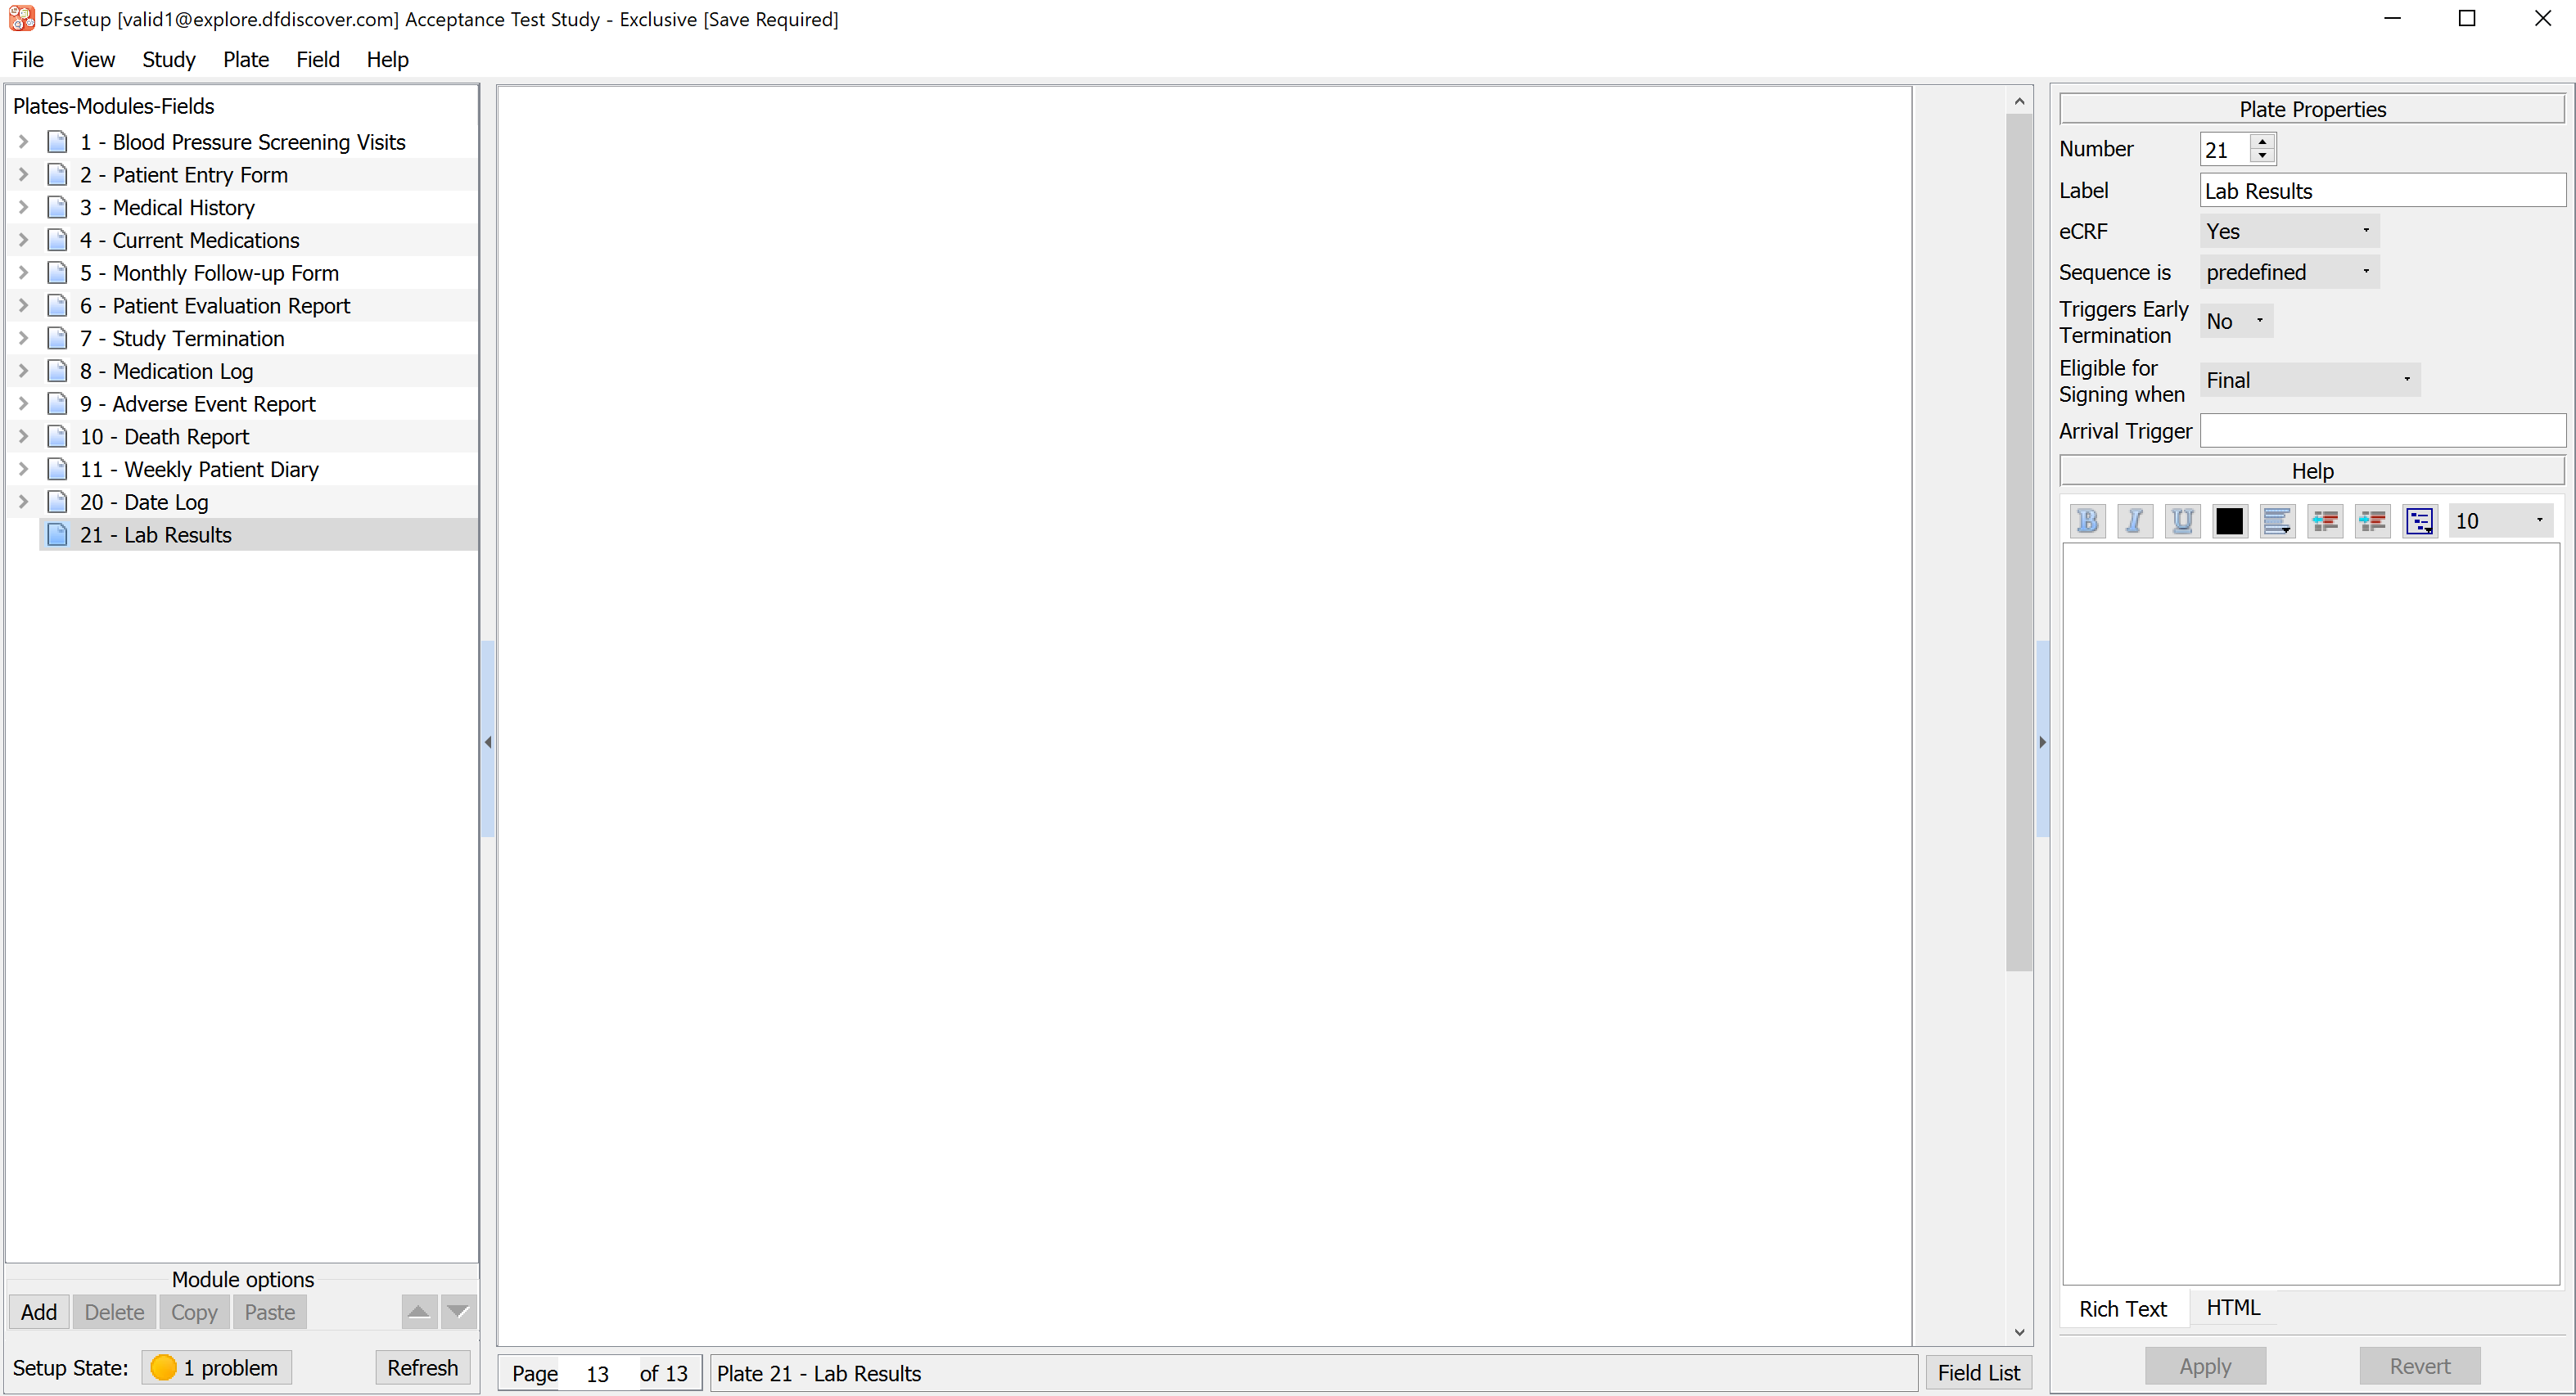
Select > in the DFsetup - Add eCRF Plate dialog enter a New Plate Number of 21. Click .

In the Plate Properties set:
Label =
Lab ResultseCRF = Yes
Sequence is = predefined
Triggers Early Termination = No
Eligible for Signing When = Final
Click .
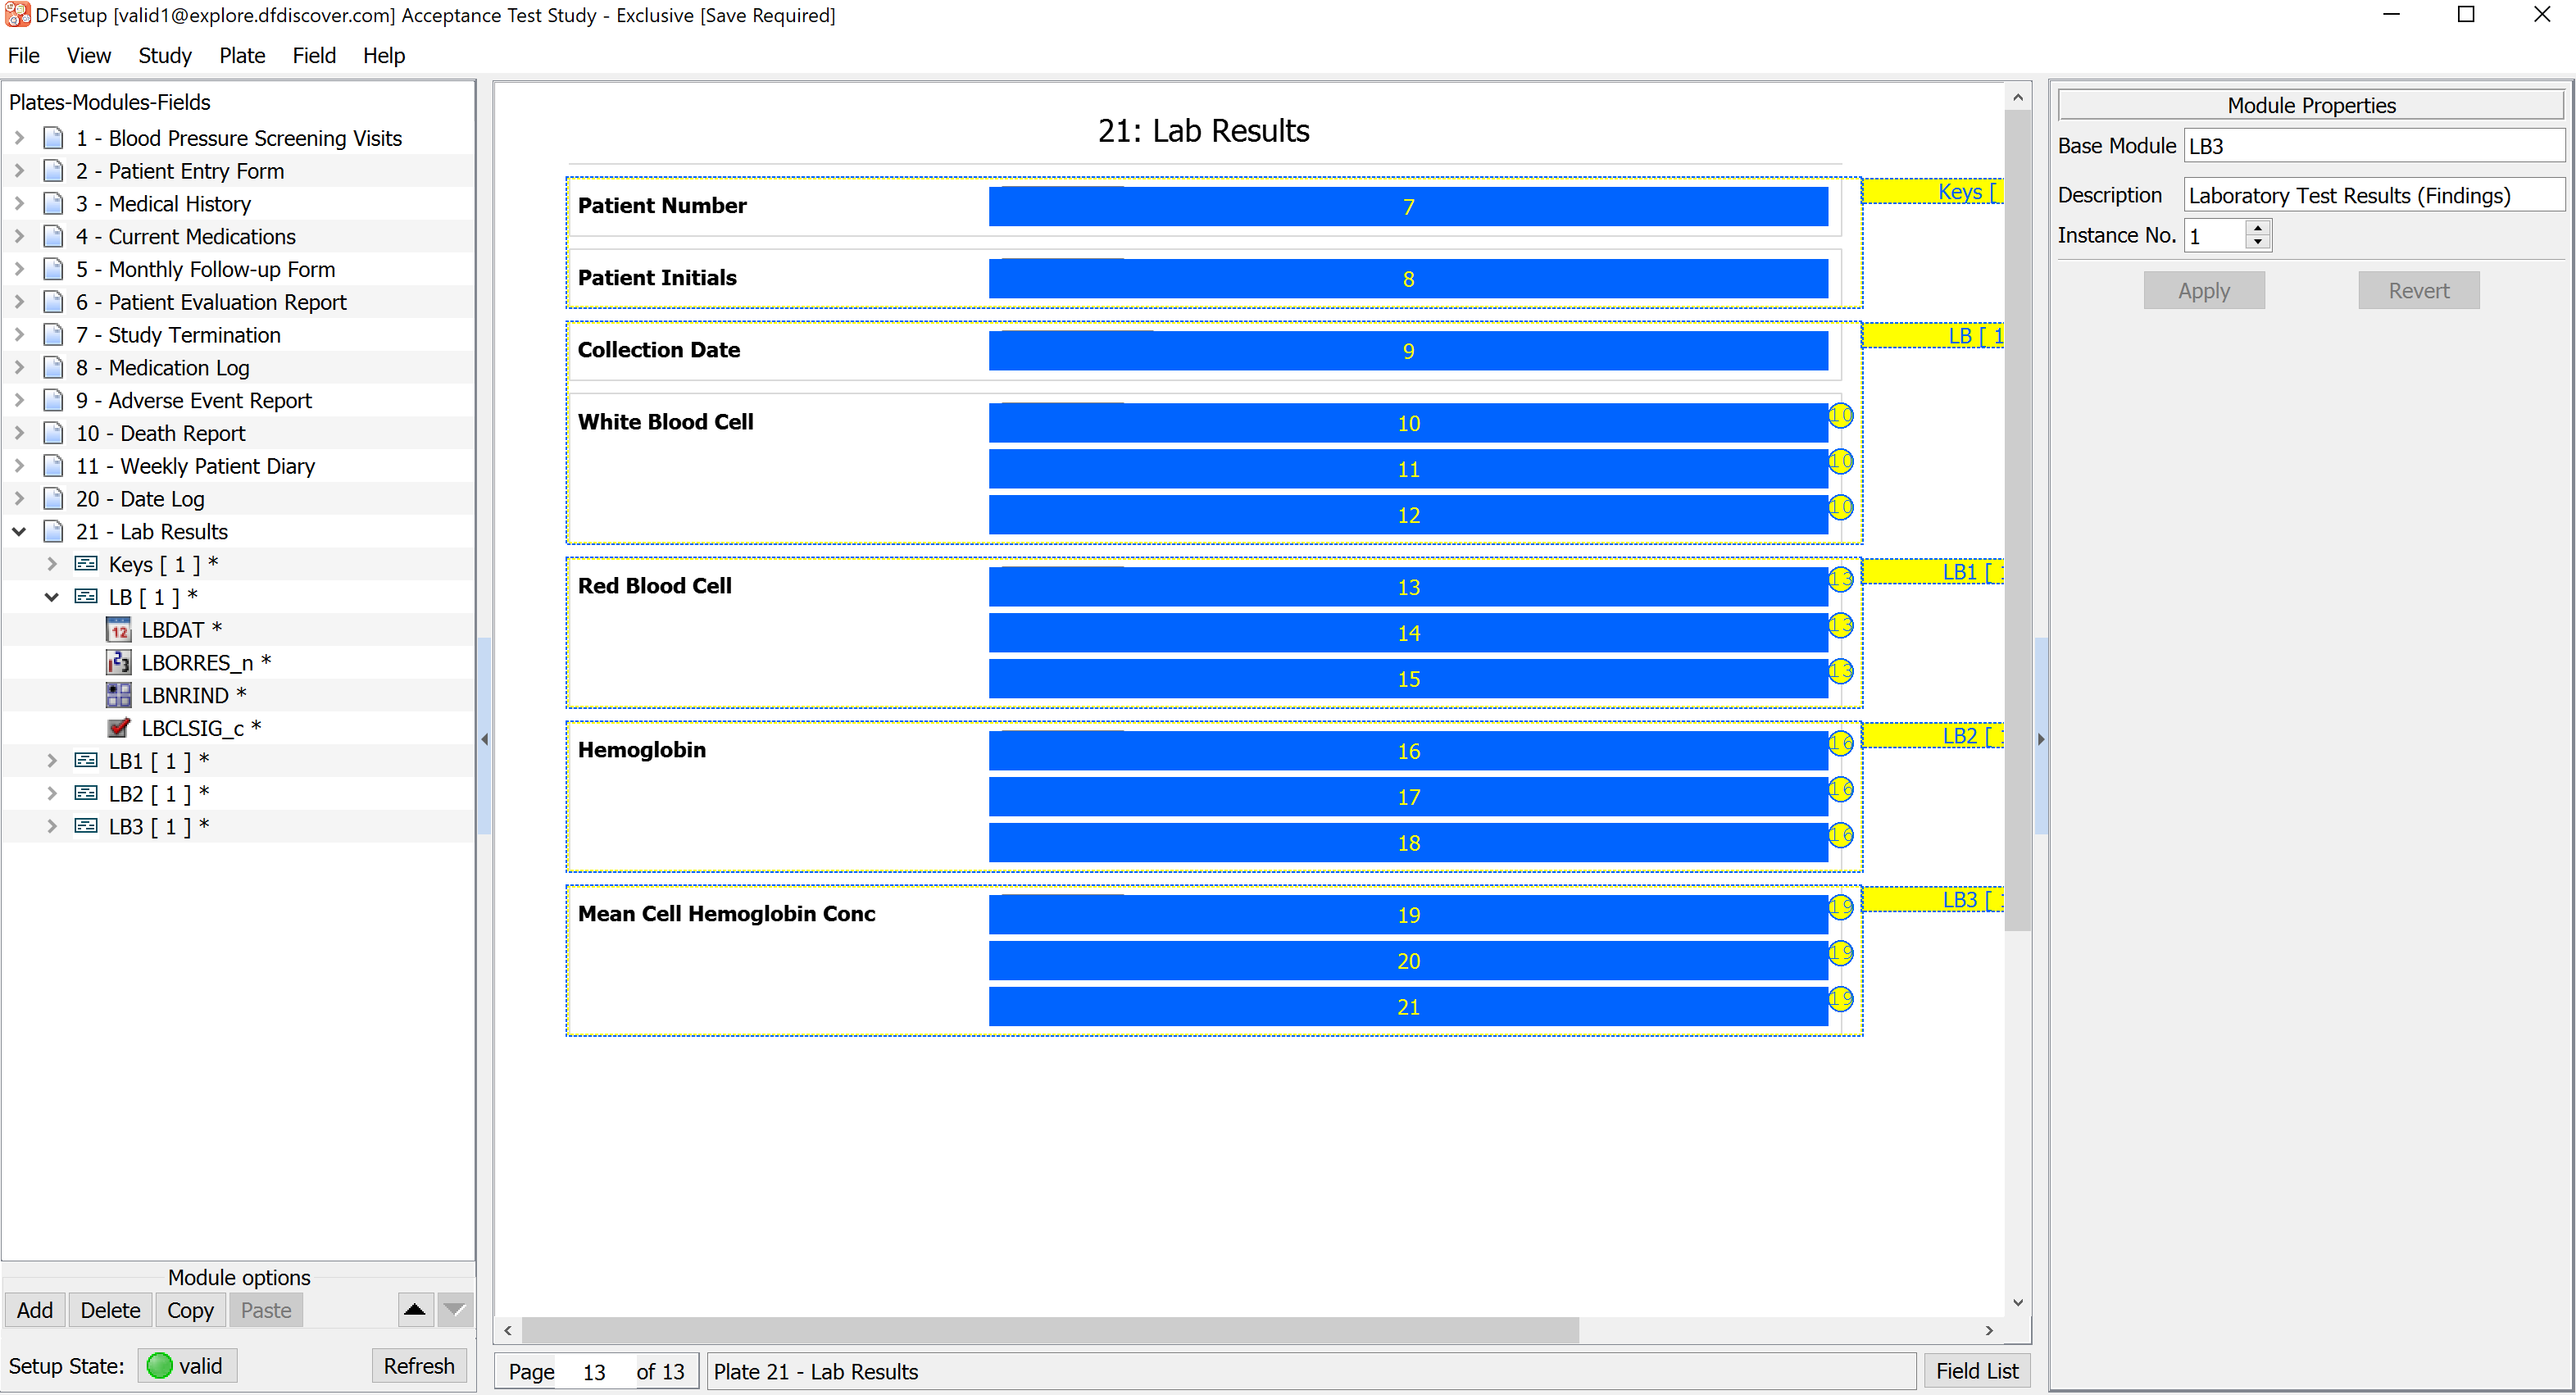
Within Plates-Modules-Fields Module options Click , Check Keys, LB, LB1, LB2, LB3 modules, click .

-
Double-click Keys [1] module to expand the list of fields. Using your mouse, click and drag the SUBJID and PINIT fields onto the 21: Lab Results eCRF.

-
Click LB [1] Module, drag the module onto the eCRF, select LBORRES_n, LBNRIND and LBCLSIG_c fields by holding Shift and clicking on the fields. Select > .

-
Click LB1 [1] Module, drag the module onto the 21: Lab Results eCRF. Select > .

-
Click LB2 [1] Module, drag the module onto the 21: Lab Results eCRF. Select > .

-
Click LB3 [1] Module, drag the module onto the 21: Lab Results eCRF. Select > .
-
Select > .
-
Select > to close DFsetup.
-
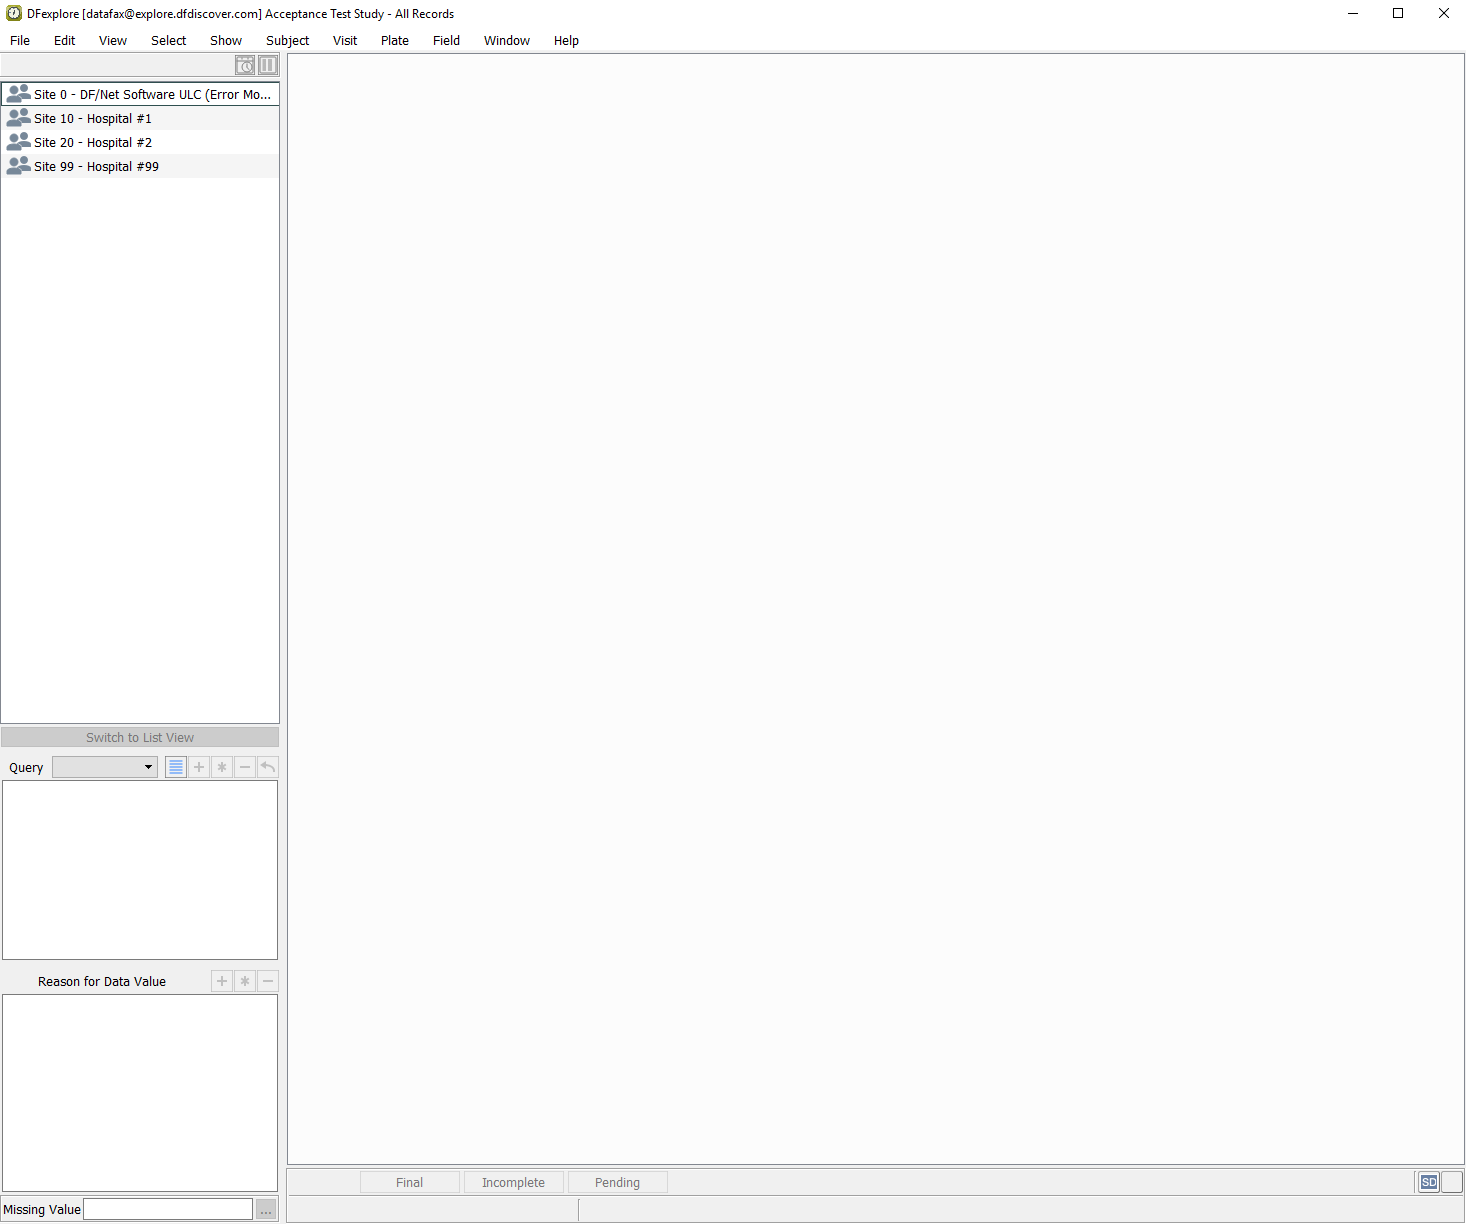
Open DFexplore.
-
In the DFexplore login dialog, enter the name for DFdiscover Server that has been provided by your administrator. Enter
valid1in the Username field and the previously assigned password in the Password field. Click to login.
-
In the DFexplore login dialog, select 254 Acceptance Test Study in the list of studies. Click to open the 254 Acceptance Test Study.
-
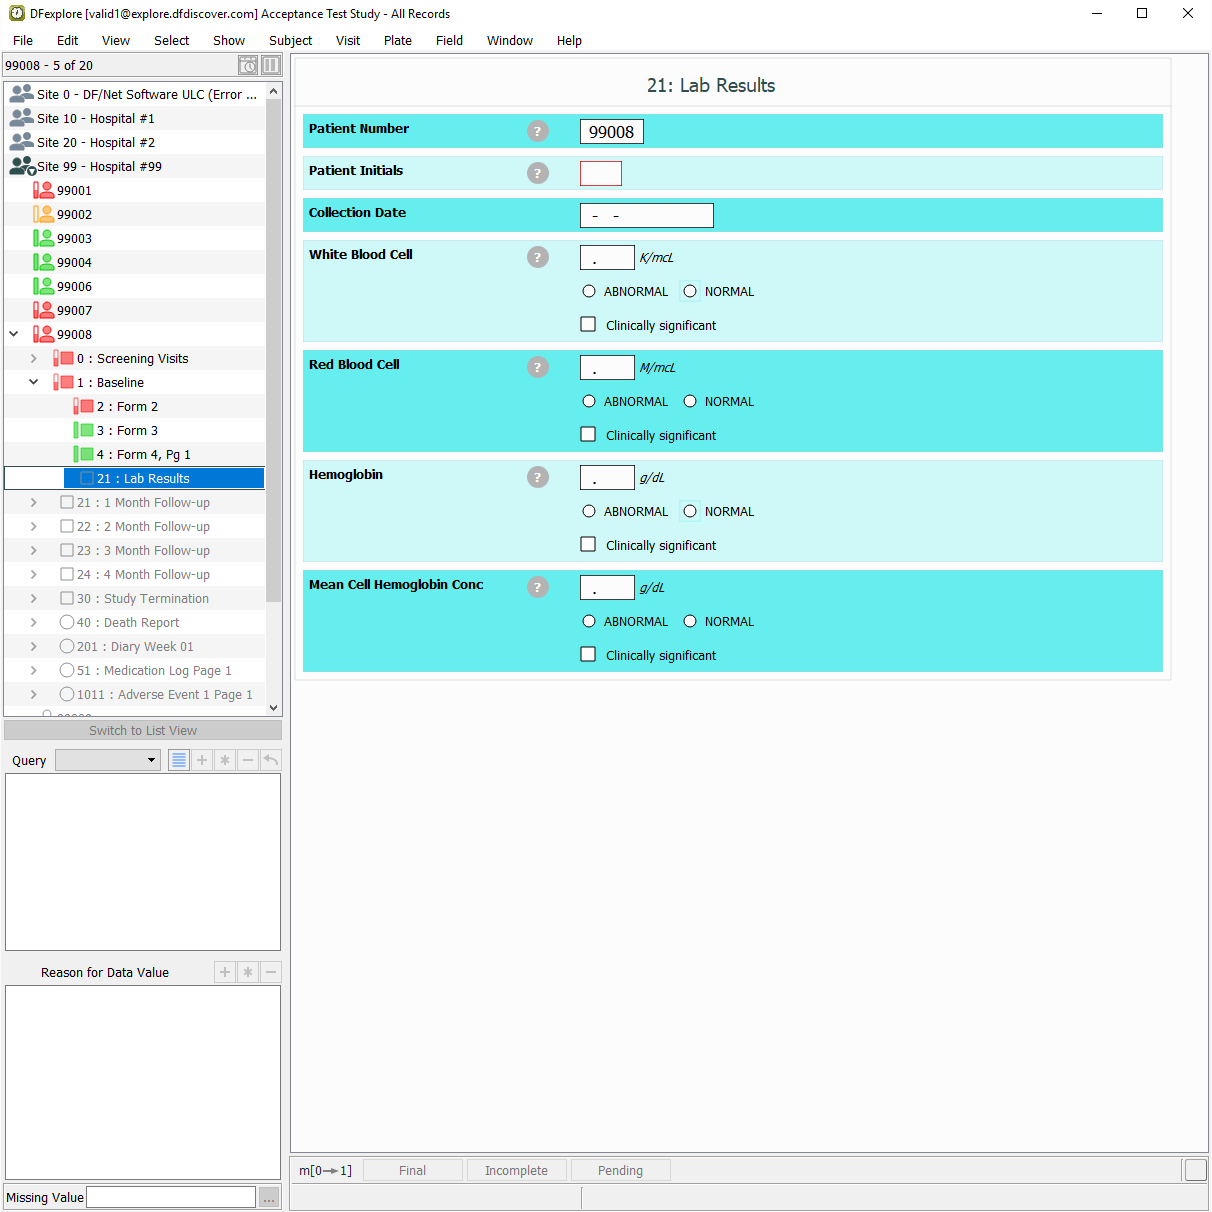
Click Site 99 - Hospital #99 > Subject 99008 > 1: Baseline > 21: Lab Results to make it the active page.
Note DFexplore stores previously defined user preferences. If
valid1previously used DFexplore and modified user preferences. You may see a different background than what is illustrated below.
-
Select > , click Background Options to expand the preferences. Click Color > to apply the changes.

-
Select > > Data Window, within eCRF background color, click
 to open the Select Color window.
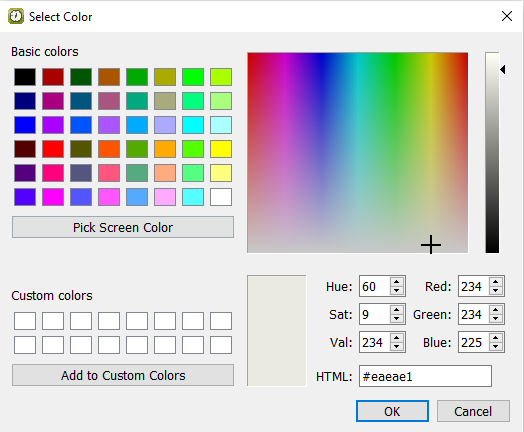
-
set HTML:
#66EEEE.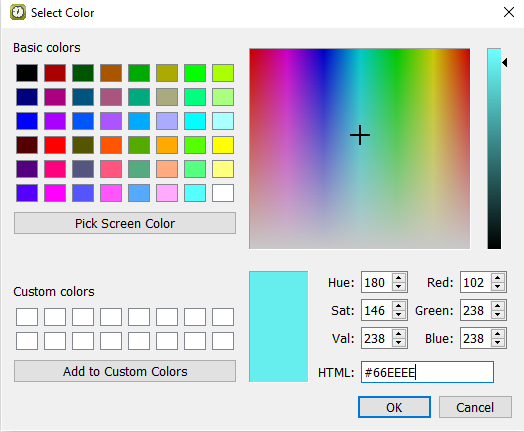
-
Click to close the Select Color window, click to apply your color preferences.
-
Click
 within the Patient Initials field to display the field level help. Click
  to close the help dialog.
-
With subject 99008 21: Lab Results still as the current eCRF. Click Patient Initials the initials automatically occupy this field as a result of the edit check
SetInitdescribed in Module 5: Fax Data Entry, set:Collection Date = 27-SEP-2018
White Blood Cell = 18.8, Check (enable) Abnormal.
Red Blood Cell = 4.7, Check (enable) Normal
Hemoglobin = 18.5, Check (enable) Normal
Mean Cell Hemoglobin Conc = 40.2, Check (enable) Normal
Click to save the data record.

-
Select > to close DFexplore.
Start DFATK as described in Module 1 (Installation & Initialization).
-
Click to confirm successful completion of Module 15.