Table of Contents
- 16.1. Introduction
- 16.2. Tests & Requirements
- 16.3. Begin Module 16.
- 16.4. Modify
valid1user permissions for DFweb entry. - 16.5. Verify DFweb version information, logging into DFweb and DFweb site certificate.
- 16.6. Copying URL and changing user passwords.
- 16.7. Creating a new subject, entering subject data.
- 16.8. Adding, modifying and resolving queries.
- 16.9. Adding, reviewing and downloading subject documents.
- 16.10. End Module 16.
![[Warning]](../../imagedata/warning.png) | Warning |
|---|---|
Optional Module. The DFweb Data Entry module requires the DFWS feature (web services API). If your DFdiscover server is not licensed for this feature, do not complete this module. DFweb is compatible with the following web browsers:
|
Modify
valid1user permissions for DFweb entry.Verify DFweb version information, logging into DFweb and DFweb site certificate.
Copying URL and changing user passwords.
Creating a new subject, entering subject data.
Adding, modifying and resolving queries.
Adding, reviewing and downloading subject documents.
Estimate of Time Required: 15 Minutes
-
Start DFATK as described in Module 1 (Installation & Initialization).

-
Click followed by to begin this module.
![[Note]](../../imagedata/note.png) | Note |
|---|---|
Save the Lab Report PDF files received via email to your local computer. This file is required to complete Section 16.9, “Adding, reviewing and downloading subject documents.”. Refer to Section 1.7, “Create a DFdiscover account for |
-
As user
datafaxopen the login dialog for DFadmin as described in (Section 1.5, “Define Acceptance Test Study to the DFdiscover server.”). Enter the login name and password for userdatafaxand select Login. Click to login.
-
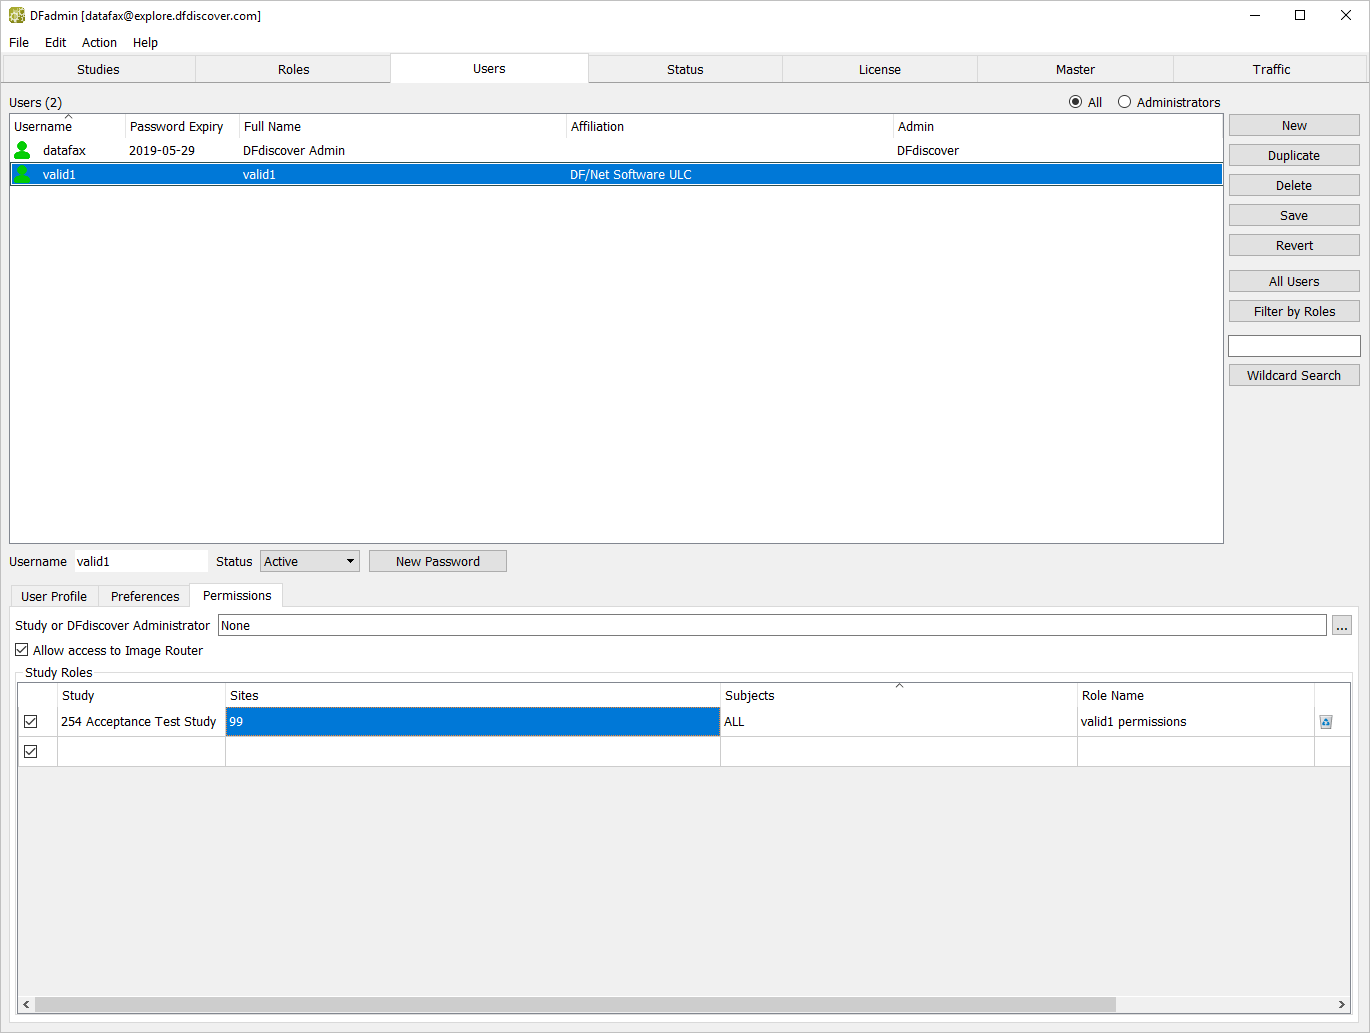
In DFadmin, click Users tab. Choose the entry for
valid1from the list of users.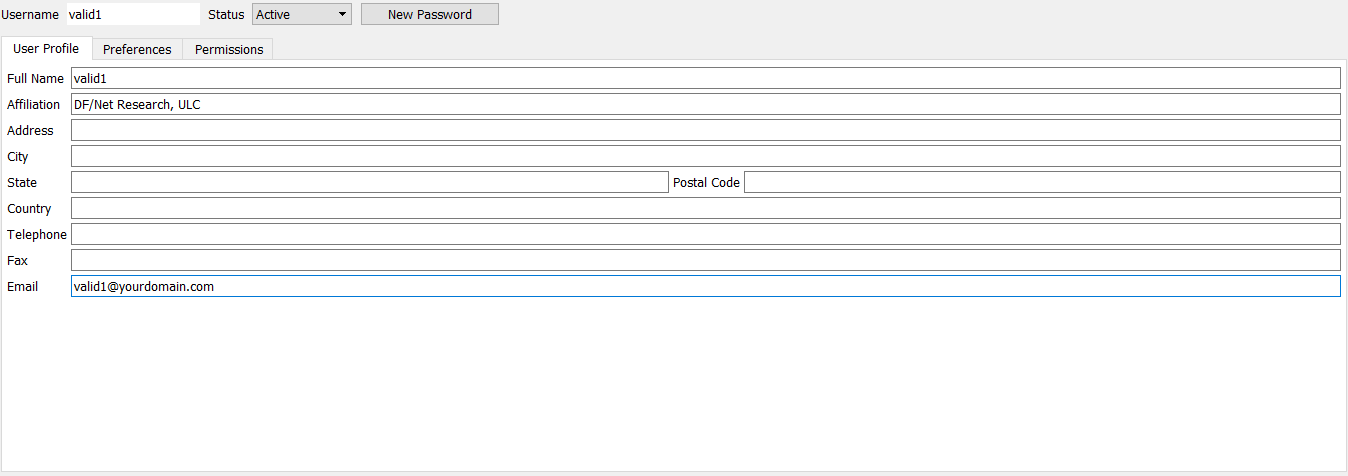
-
Select Permissions tab, modify the existing Sites permissions by replacing Sites 'ALL' with '99'.
-
Select > or click to apply and save the modifications to the role. Select > to exit DFadmin.
| Note |
|---|---|
All remaining tests performed in this module have been completed using Google Chrome. Results and/or test steps may vary. |
-
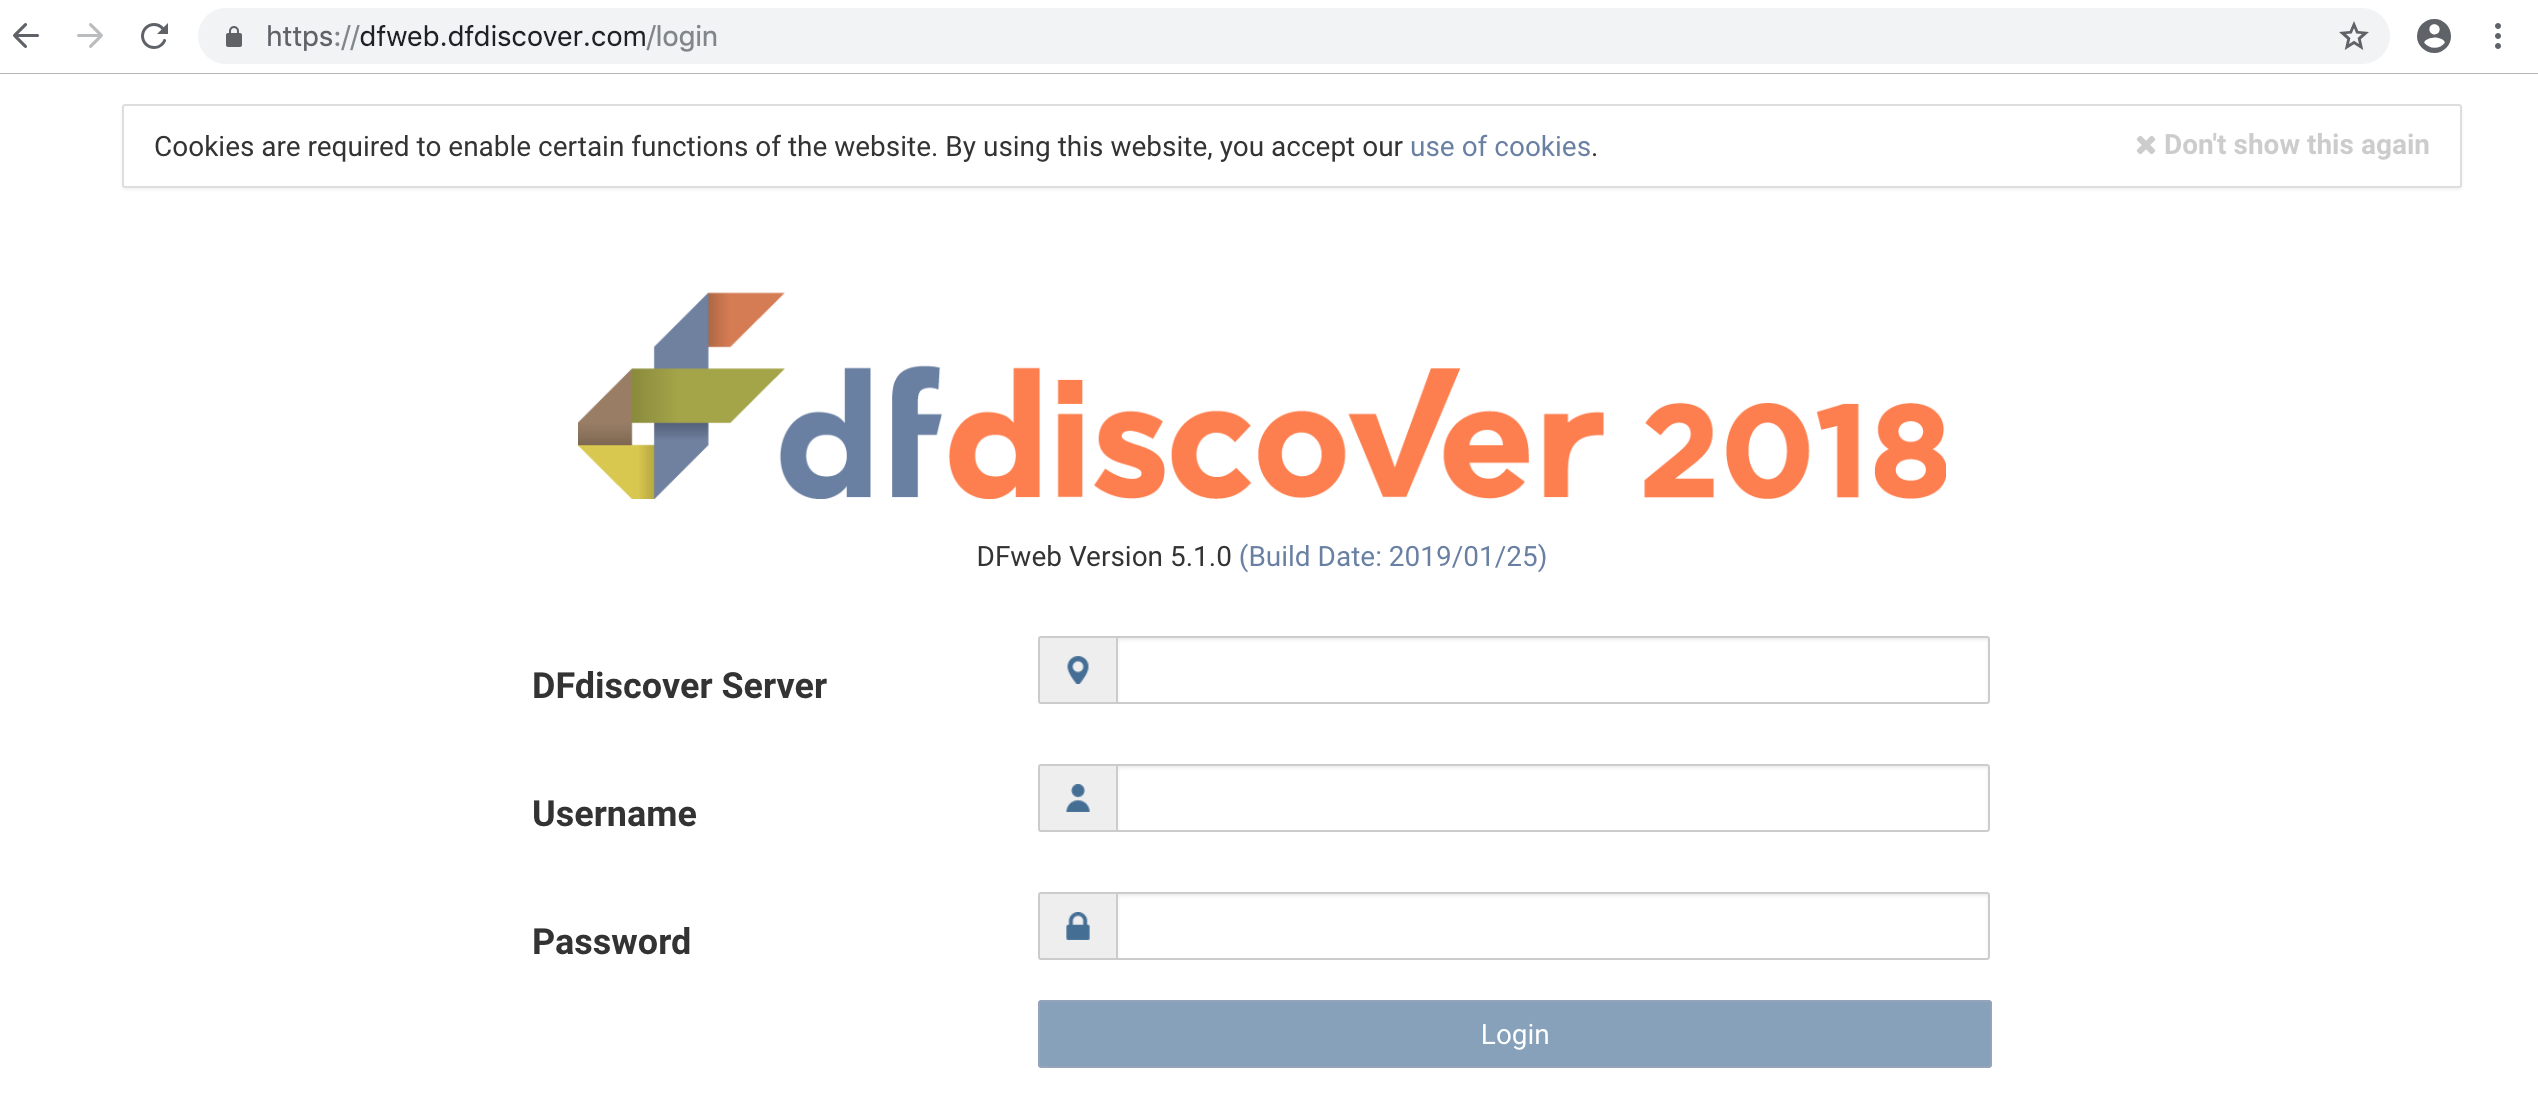
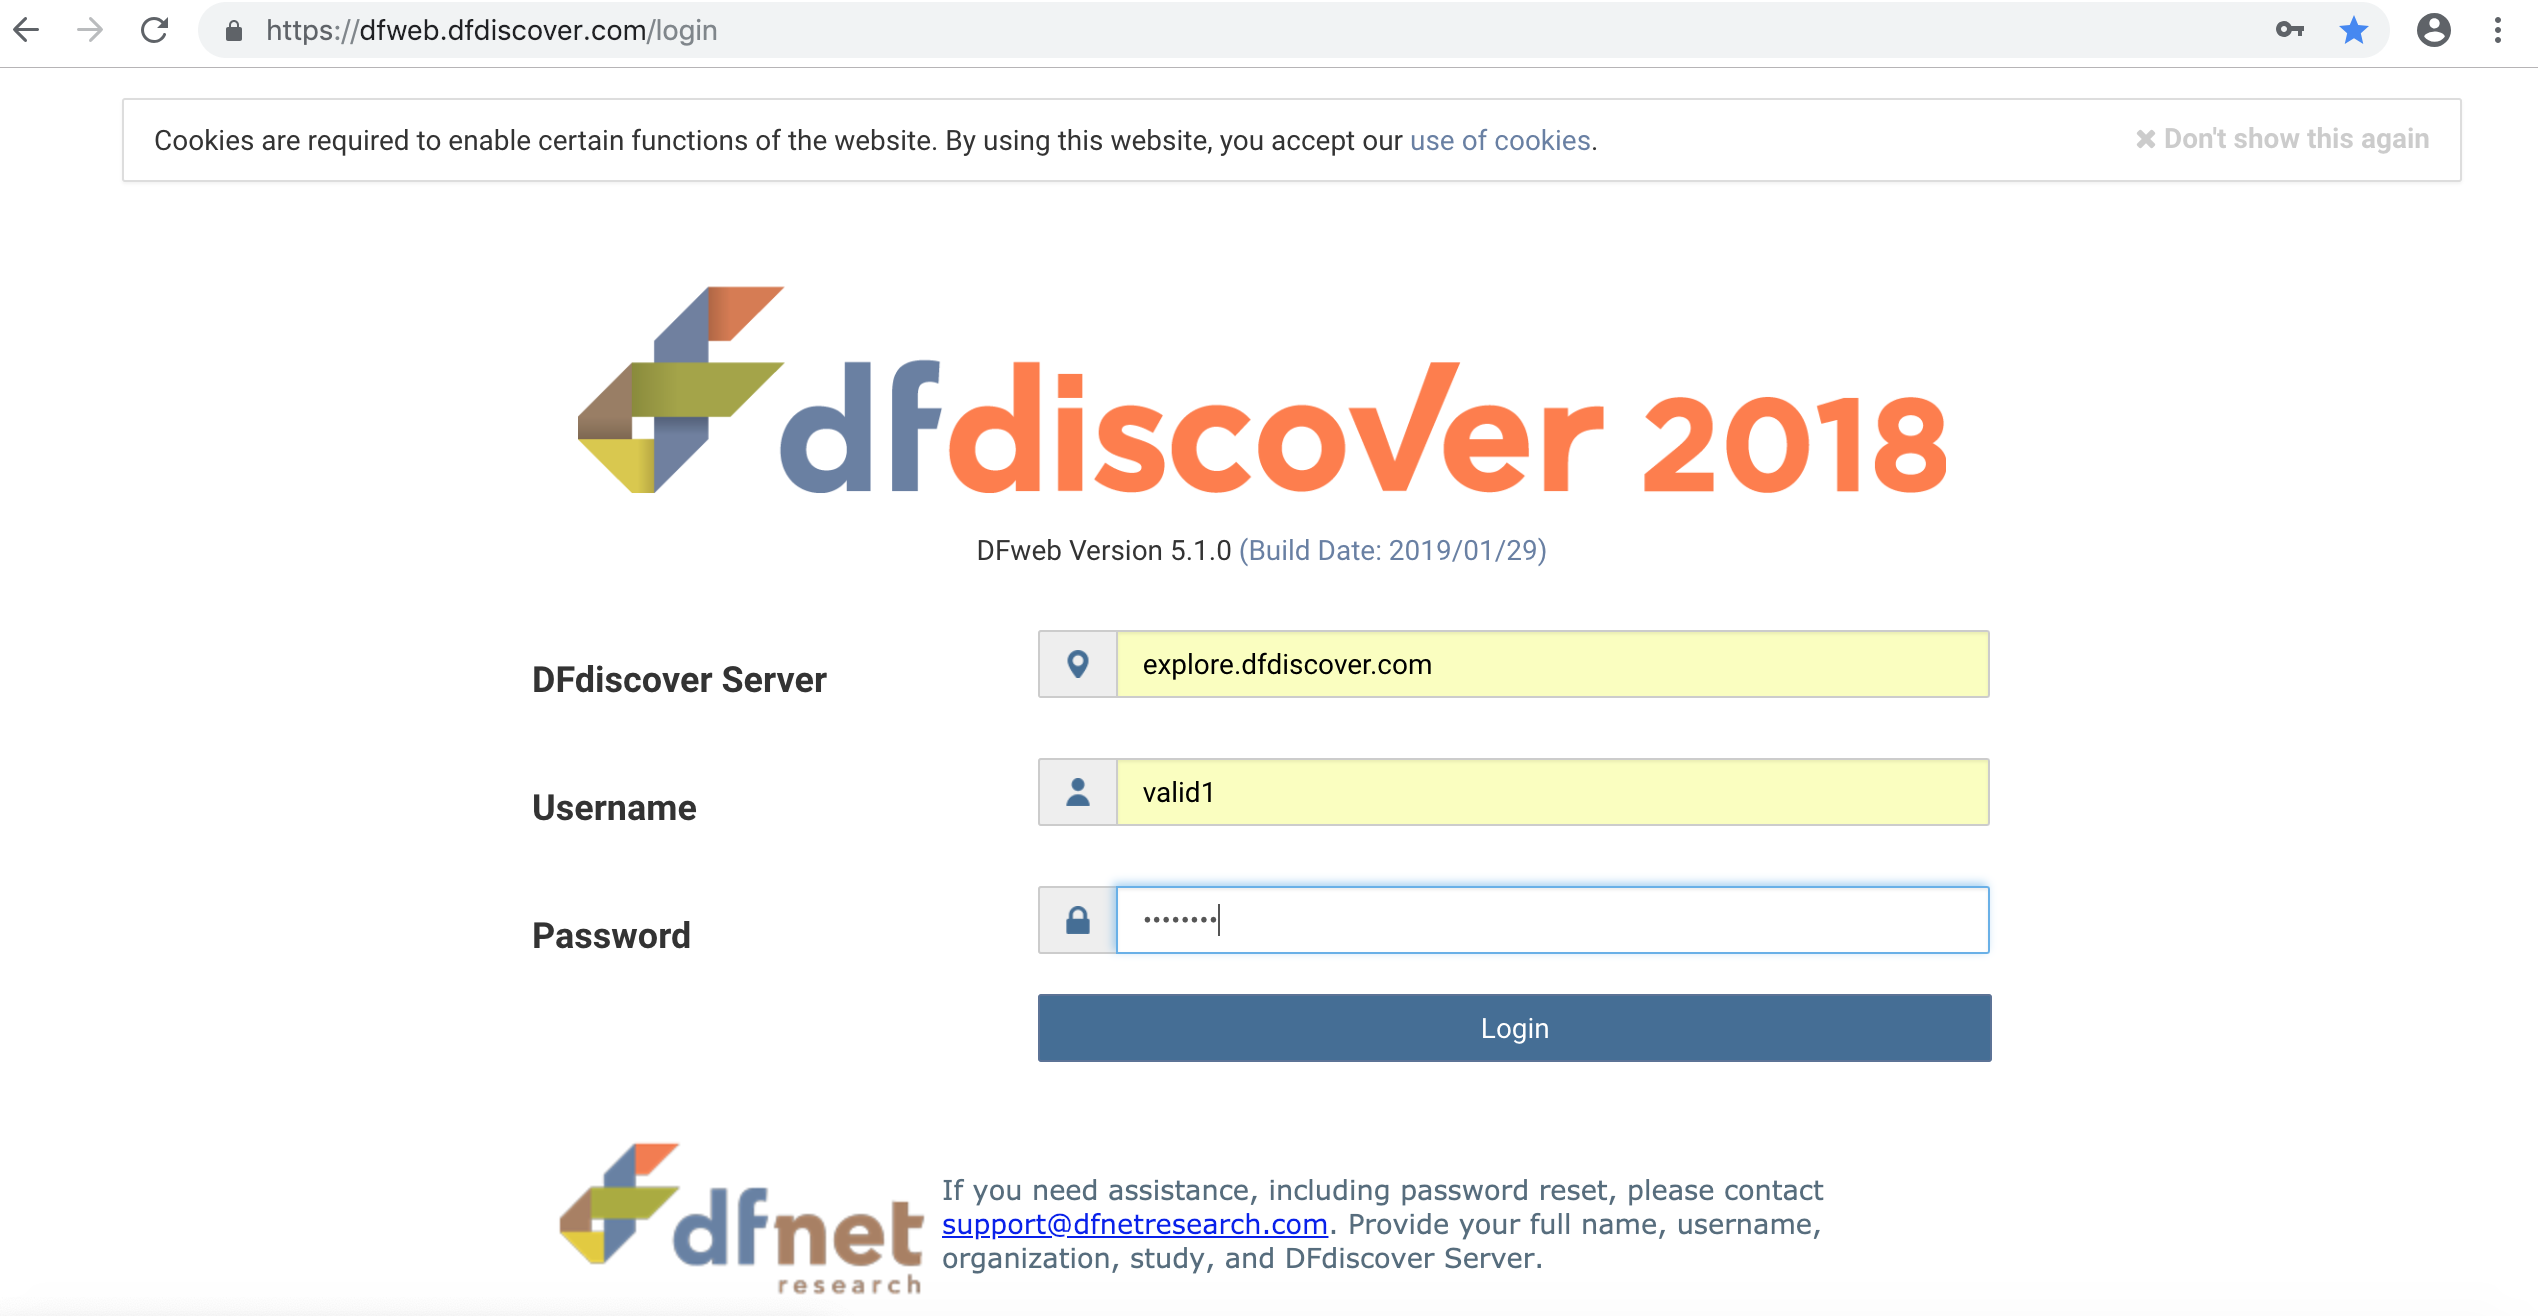
Open a web browser and navigate to https://dfweb.dfdiscover.com/login, verify the version information: DFweb Version 5.1.0 is displayed.
-
In the DFweb login dialog, enter the DFdiscover Server name that has been provided by your administrator. Enter
valid1in the Username field and the previously assigned password in the Password field. Click to login.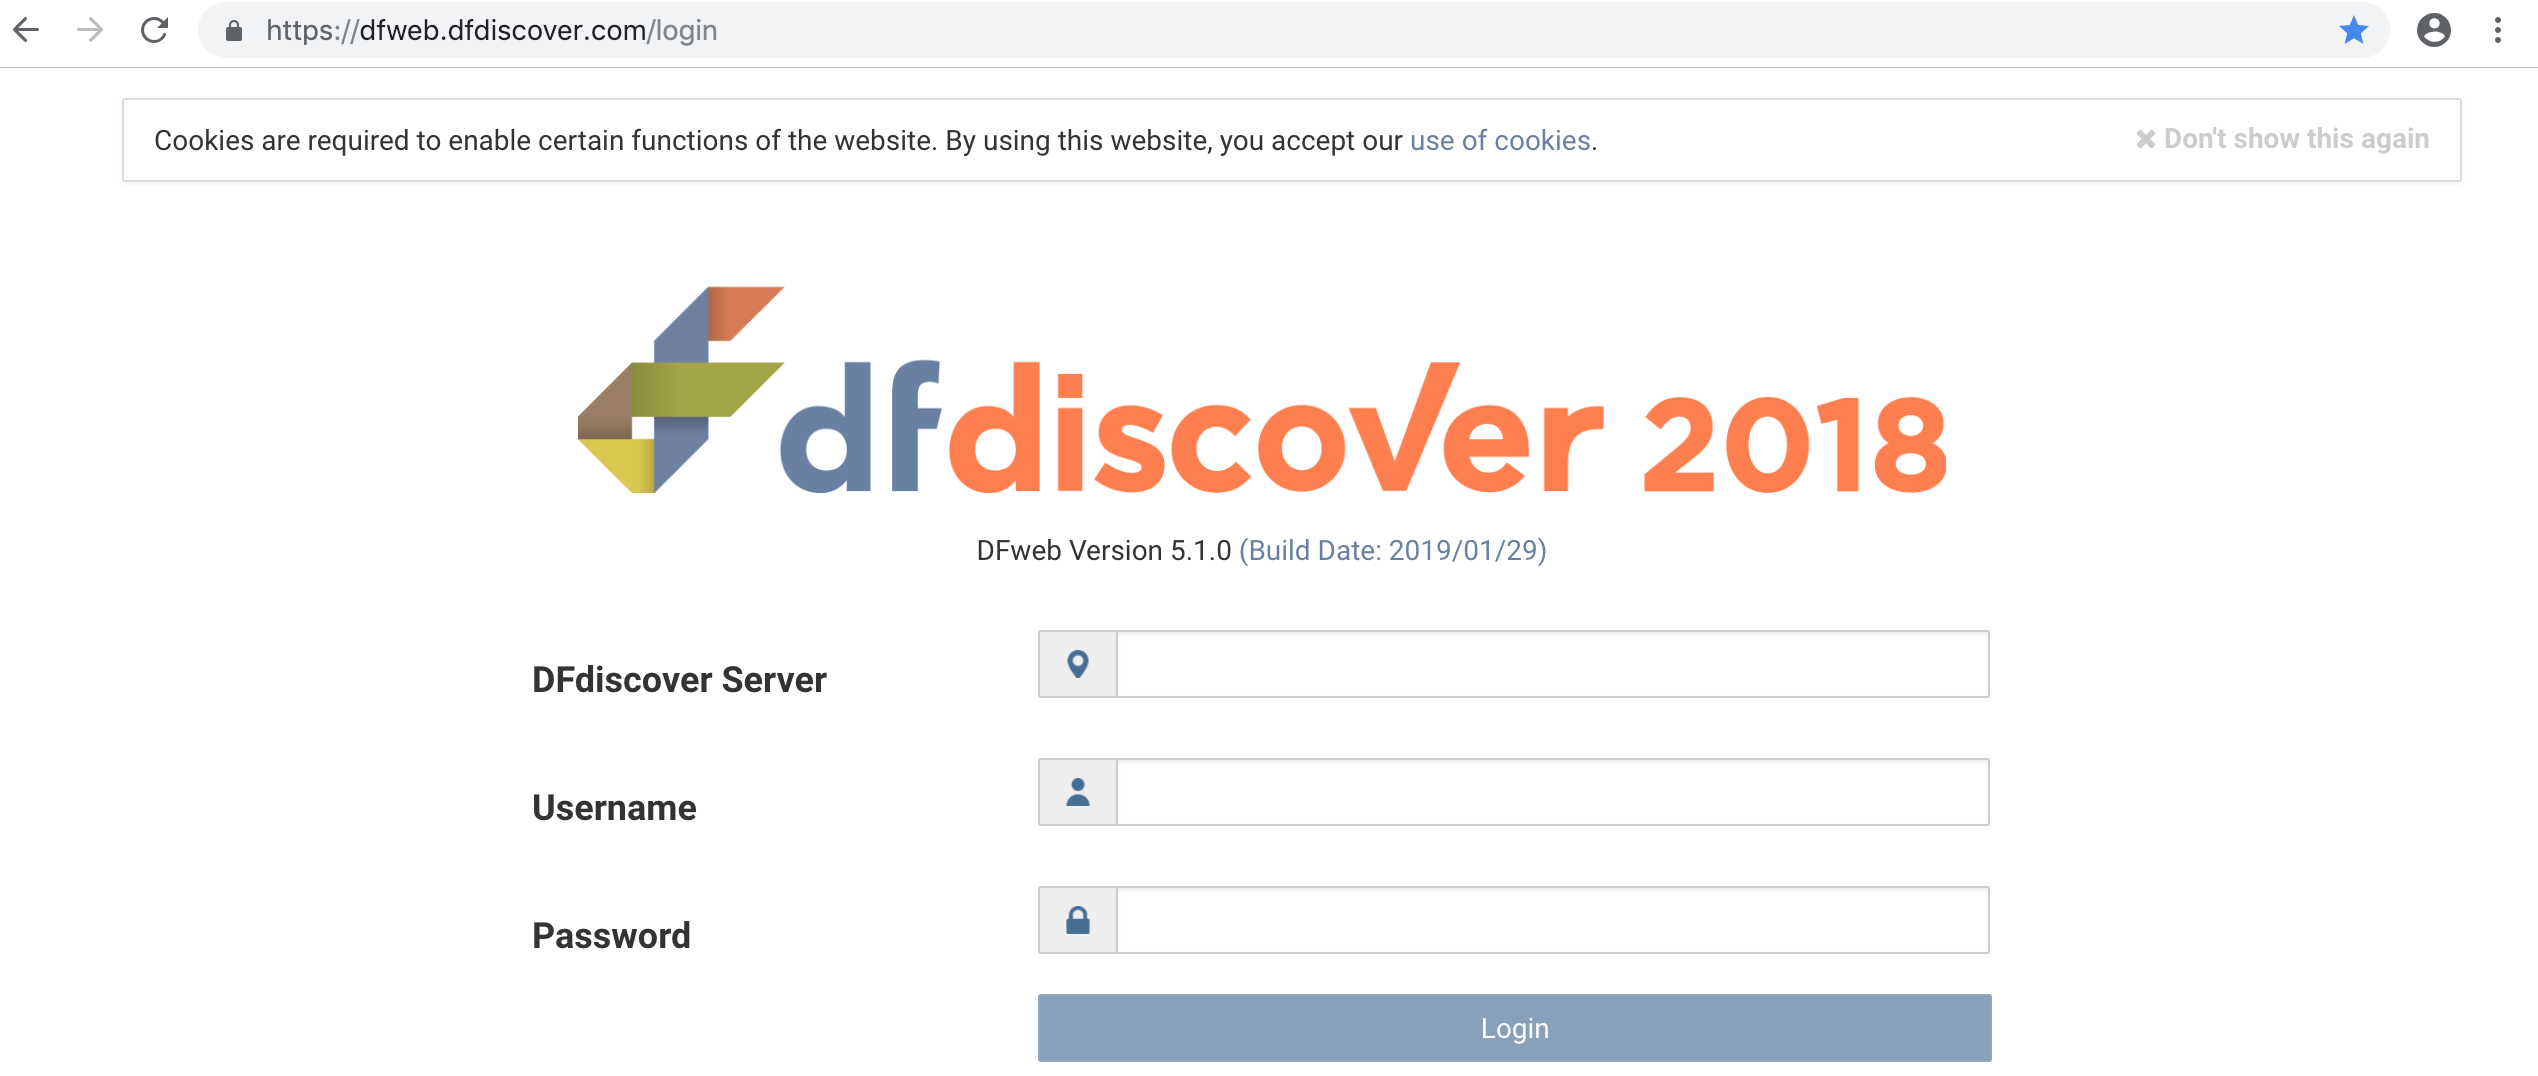
-
From the list of available studies, click 254 Acceptance Test Study to open its database.
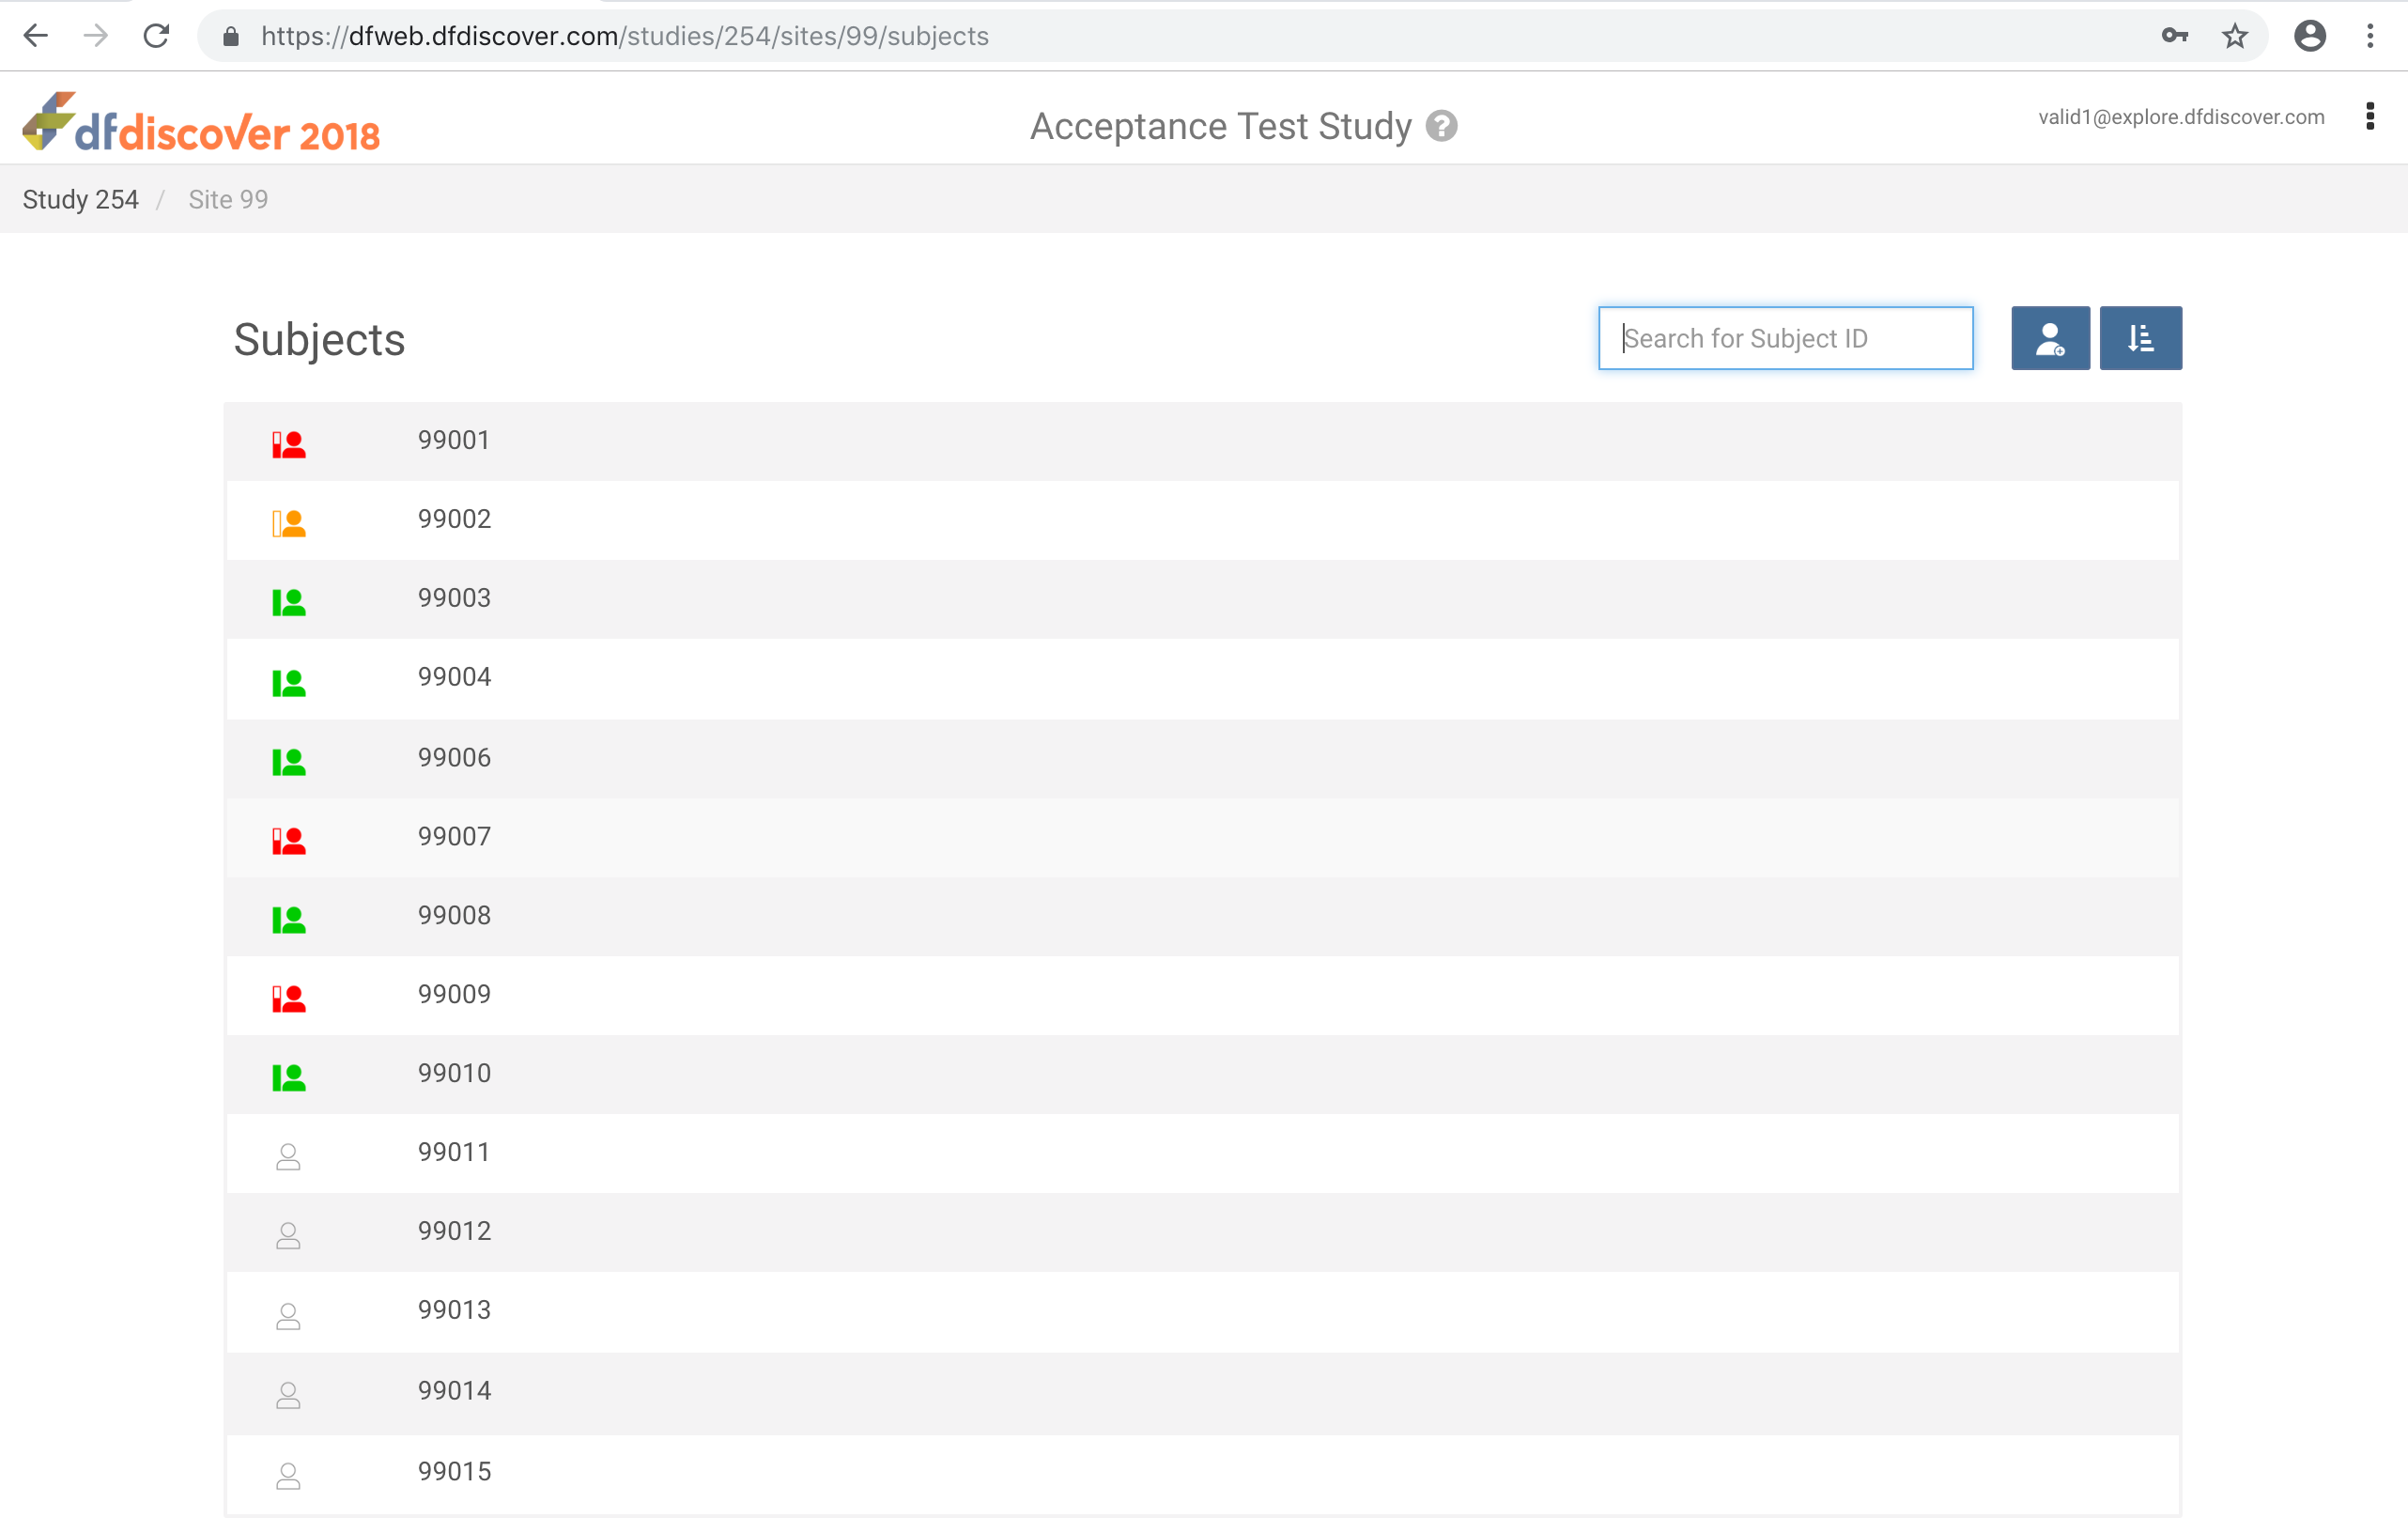
Note If
valid1only has access only to DFATK you will be taken directly to Site 99 Subjects view. -
Click
 from the web browser address bar. Select . The website trust certificate is displayed for the current DFweb address, click to close window.
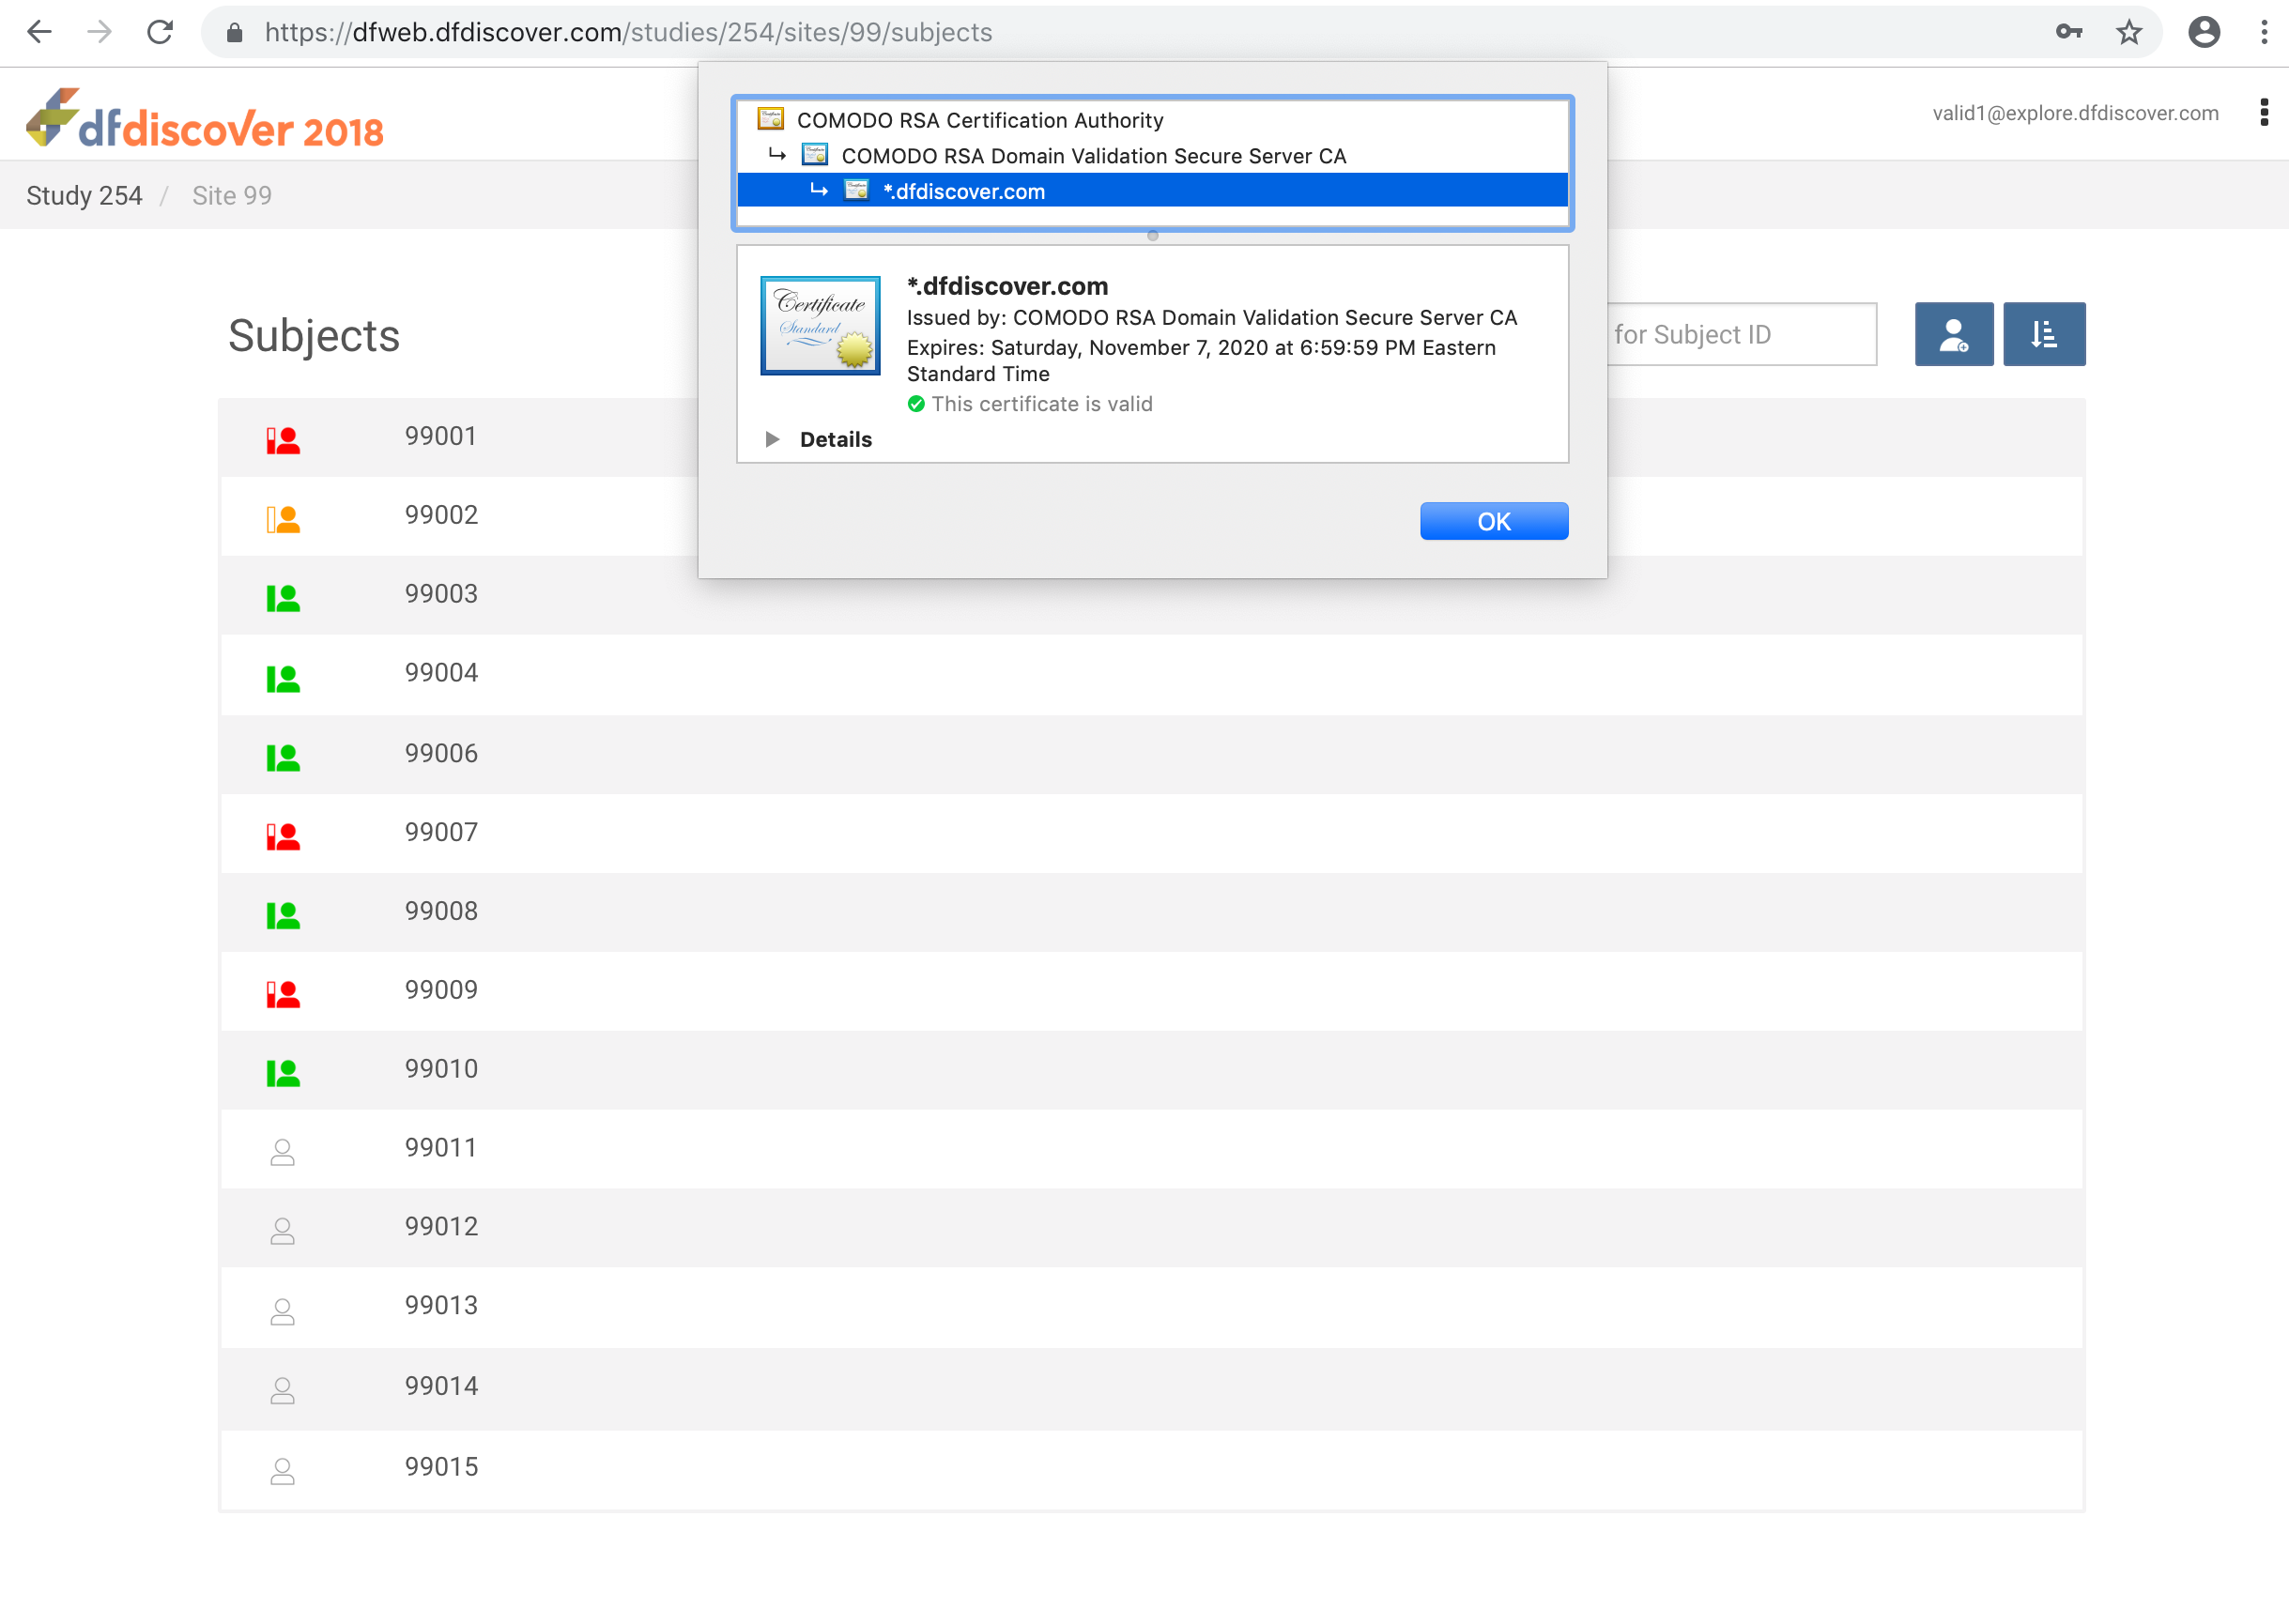
-
From the Subjects list, click Subject 99002 to open the 0: Screening Visits 1:Form 1 page.
-
Copy the DFweb URL by clicking
 > .
> . -
Open a new browser tab, paste the copied URL into the new browser tab, click Enter. The pasted URL in the new tab re-directs you to the DFweb login page. Login again using
valid1credentials, upon logging in you are taken to the same subject data record as the previous web browser tab. Close the web browser tab.Warning If you open a different browser program, you will be redirected to DFweb login page.
-
From the breadcrumb bar, click Site 99. Click
> to view the Change Password window. Click to close.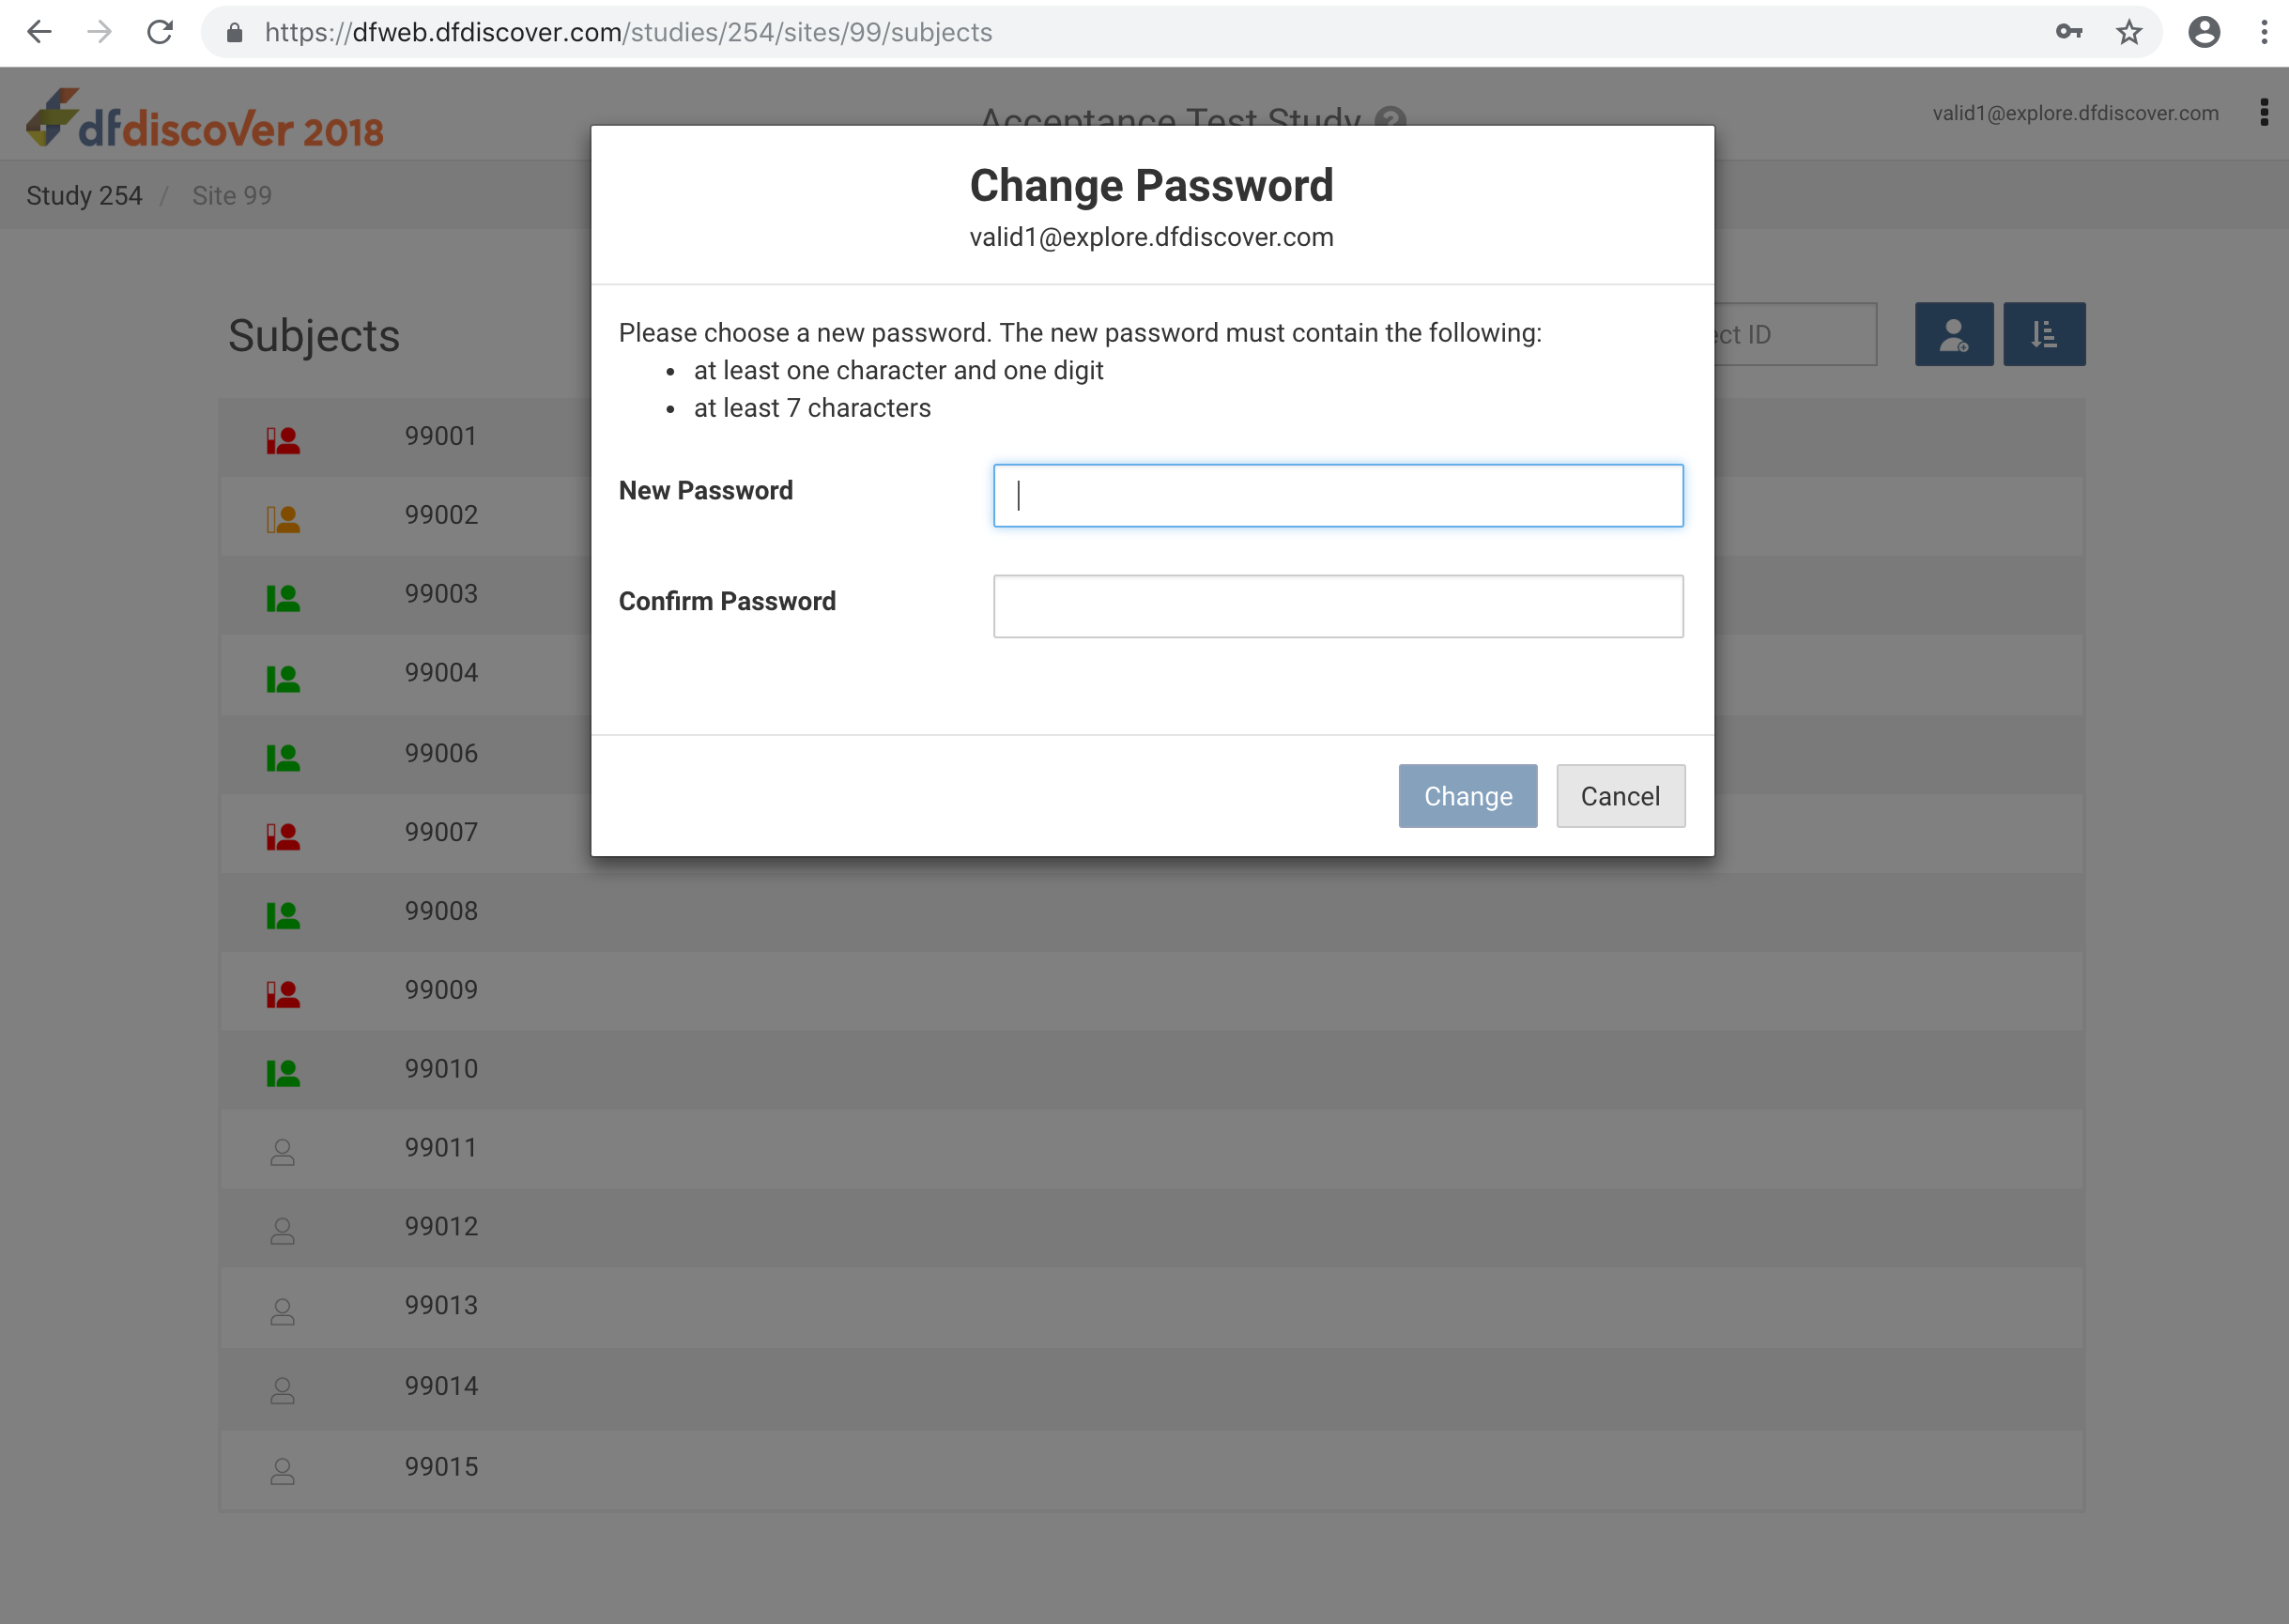
-
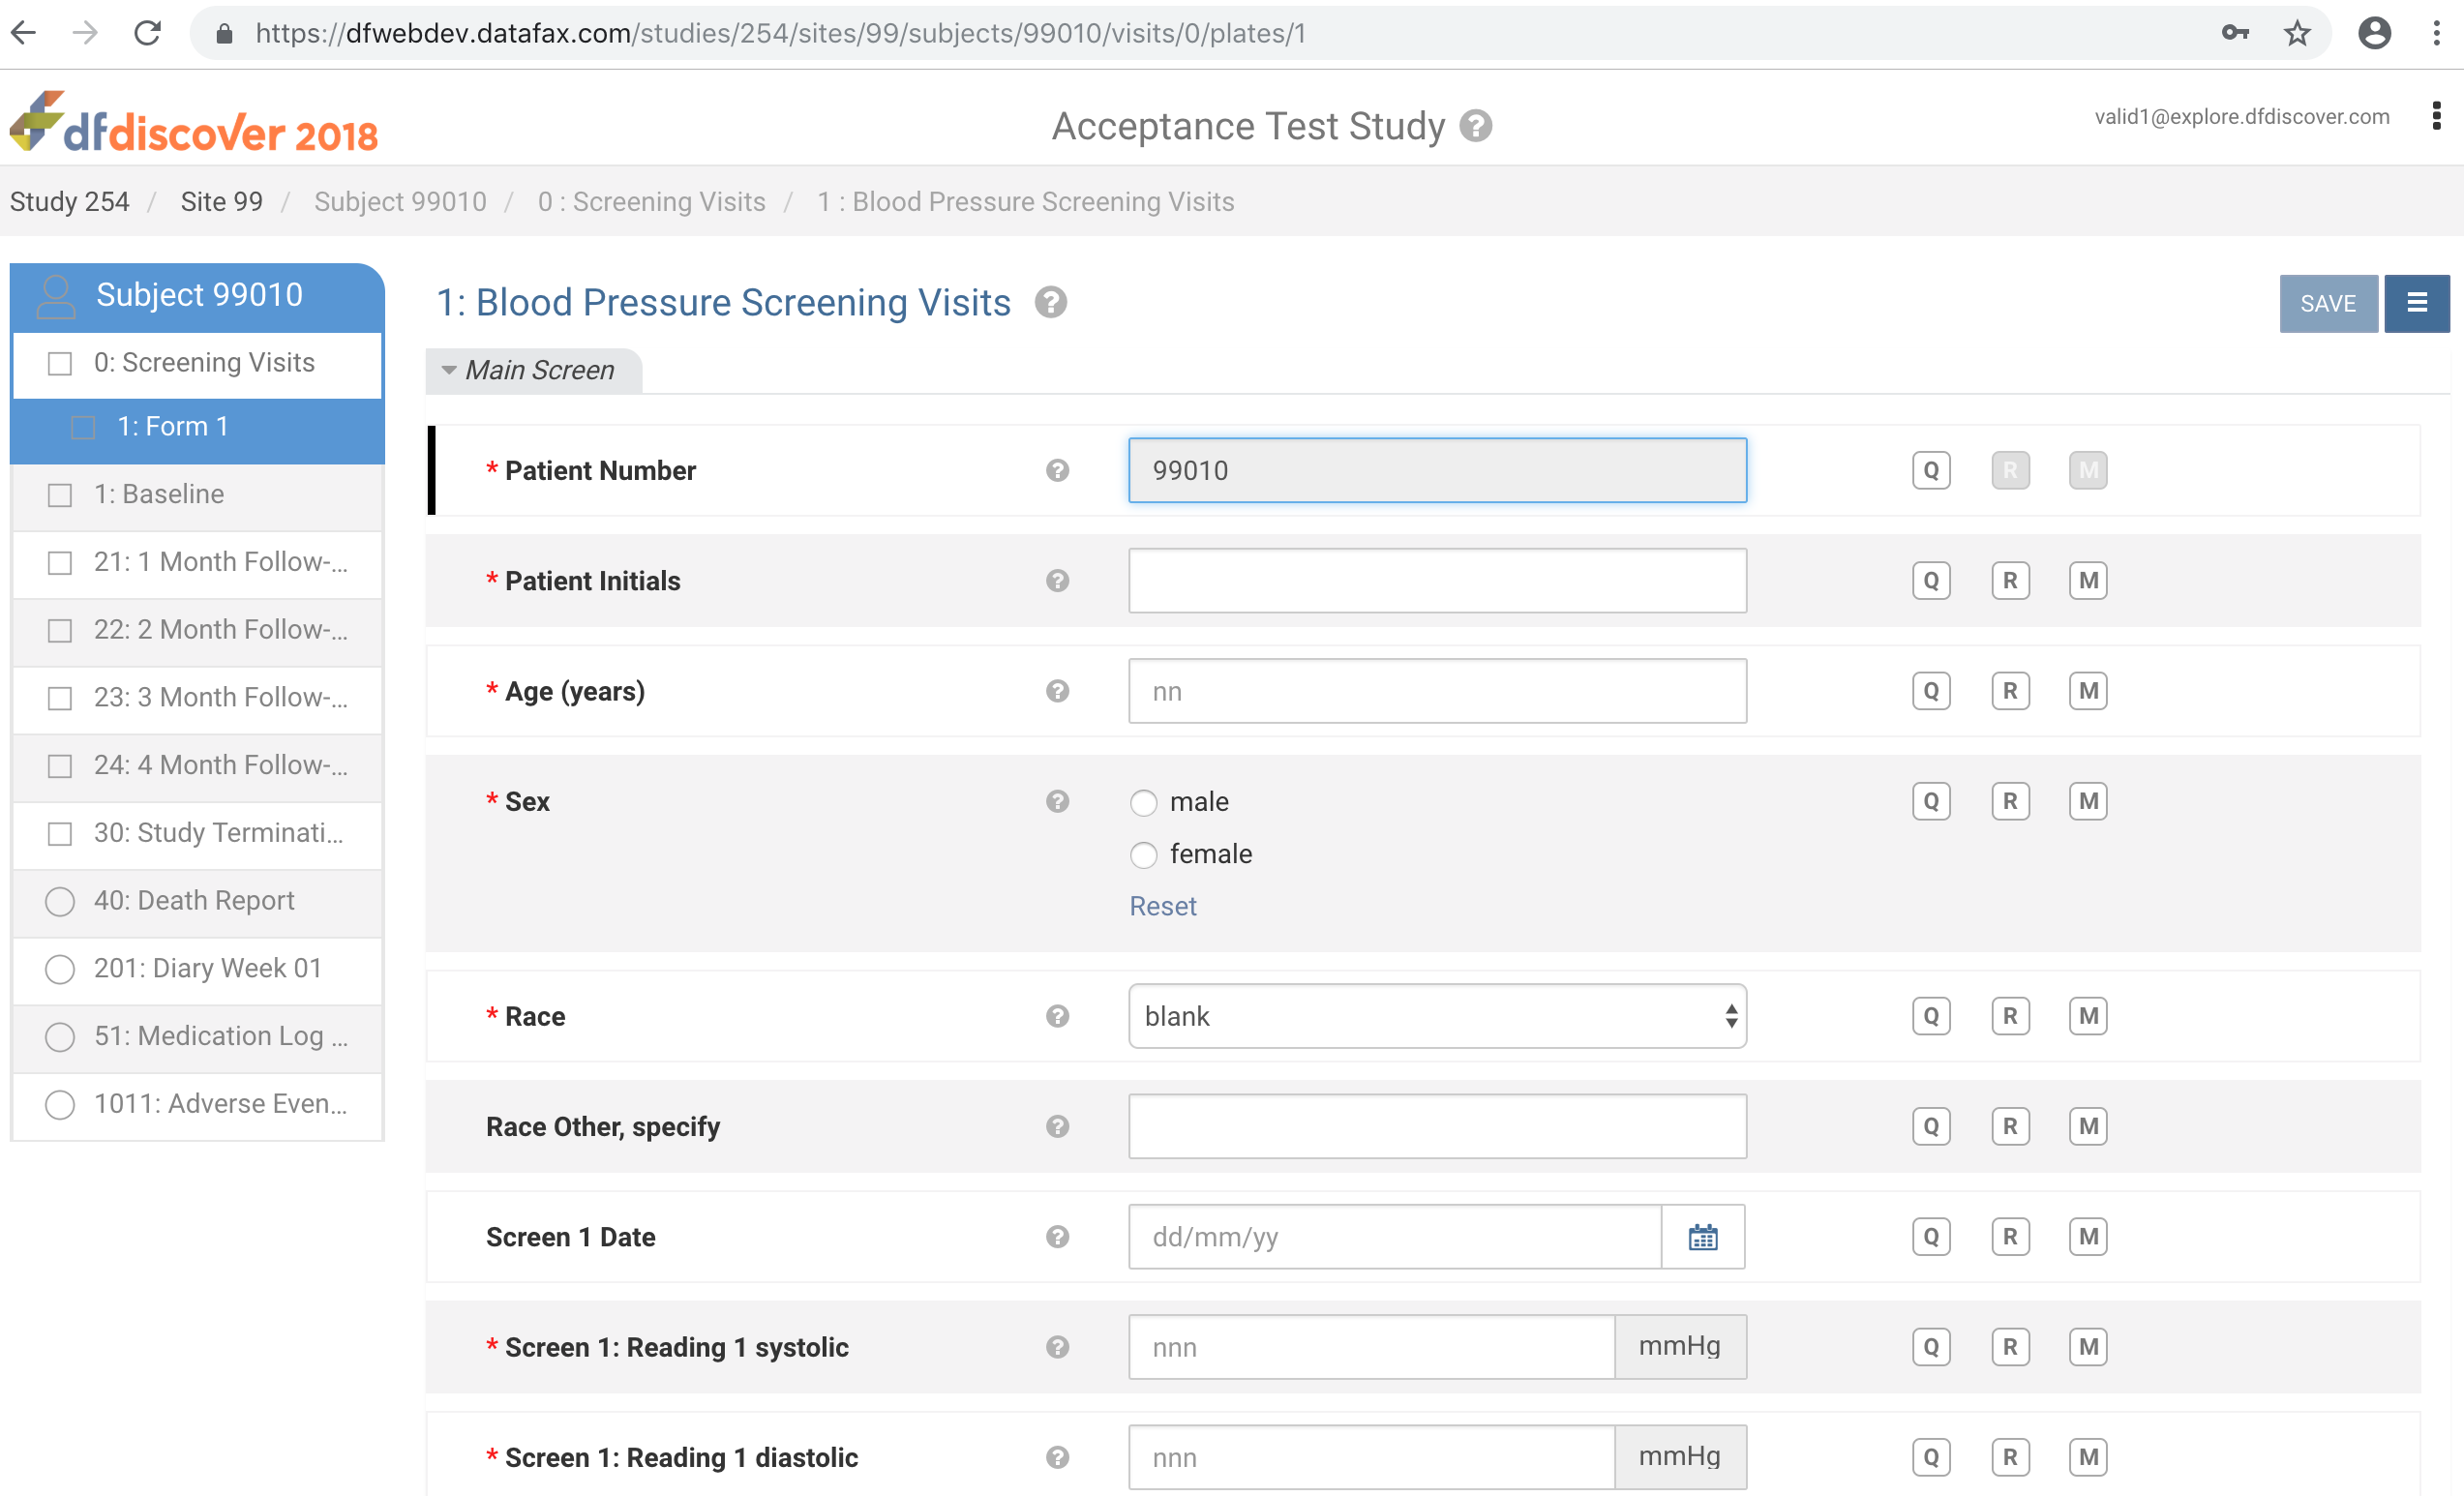
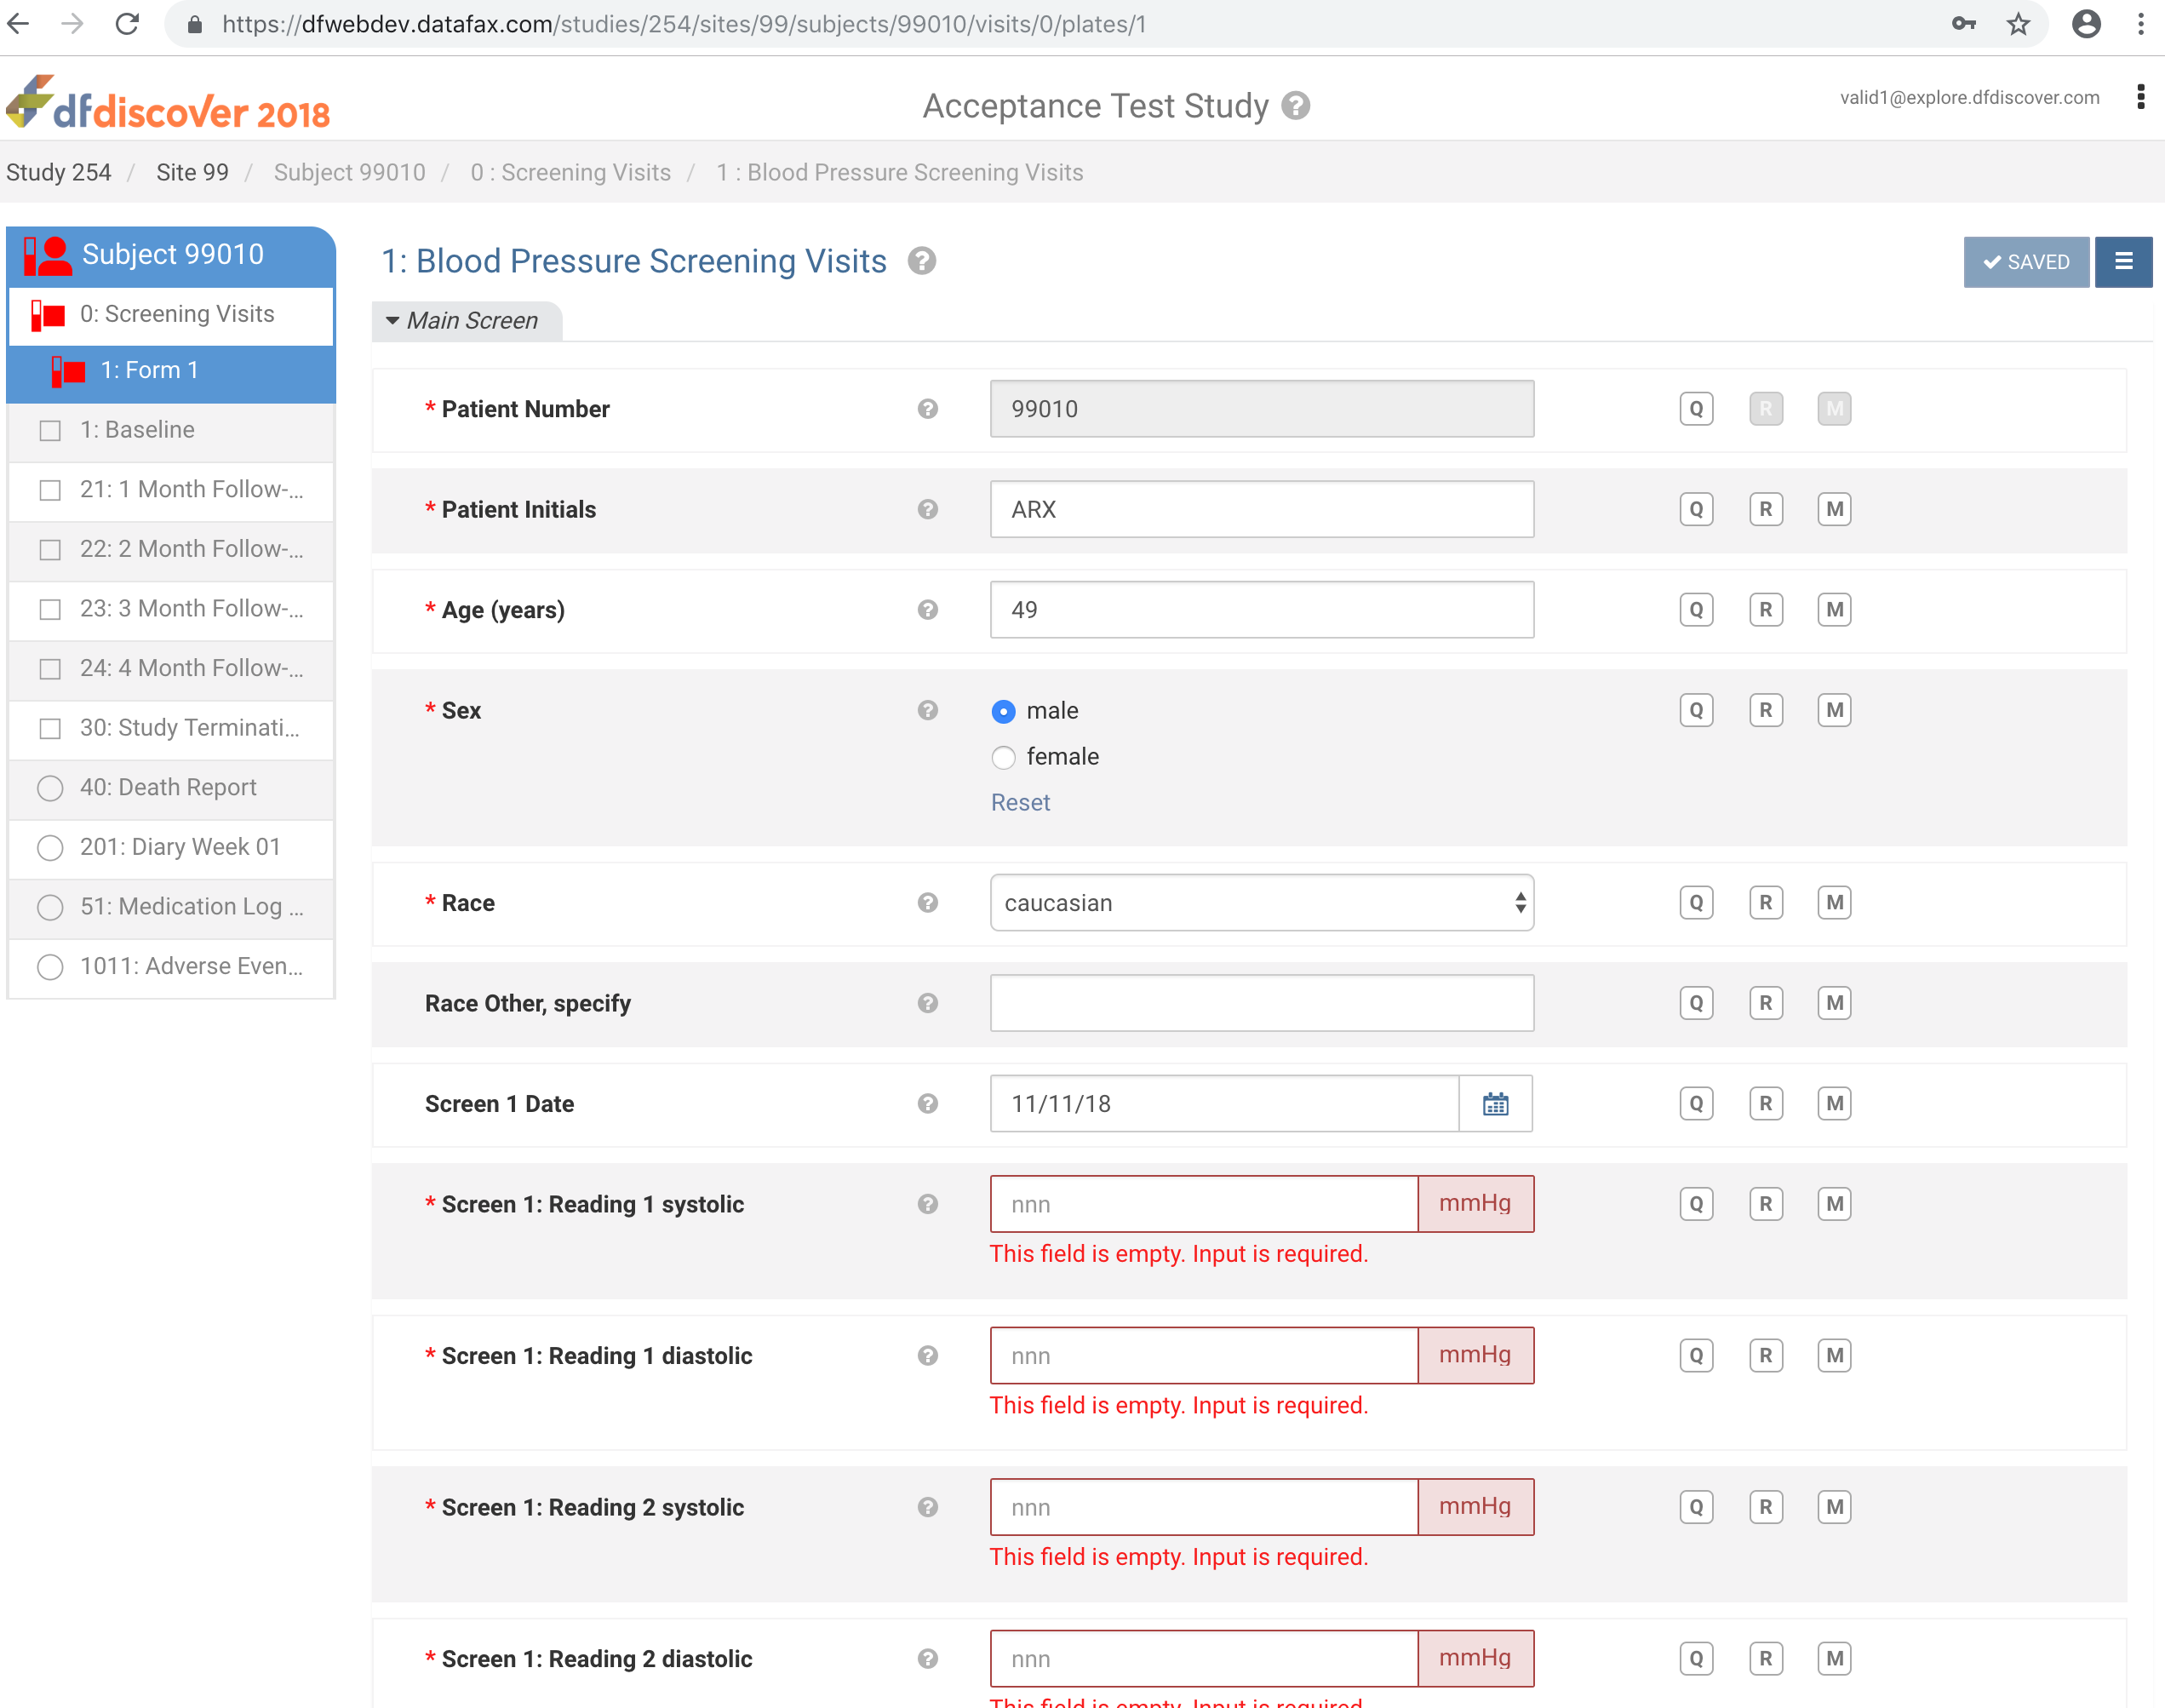
From the Subjects list, click Subject 99010 to open the 0: Screening Visits 1:Form 1 page.
-
Click Patient Initials enter
ARX, Set:Age (years) = 49
Sex = male
Race = caucasian
Screen 1 Date = Click
 icon, select
 11-Nov-2018
Click
 .
.
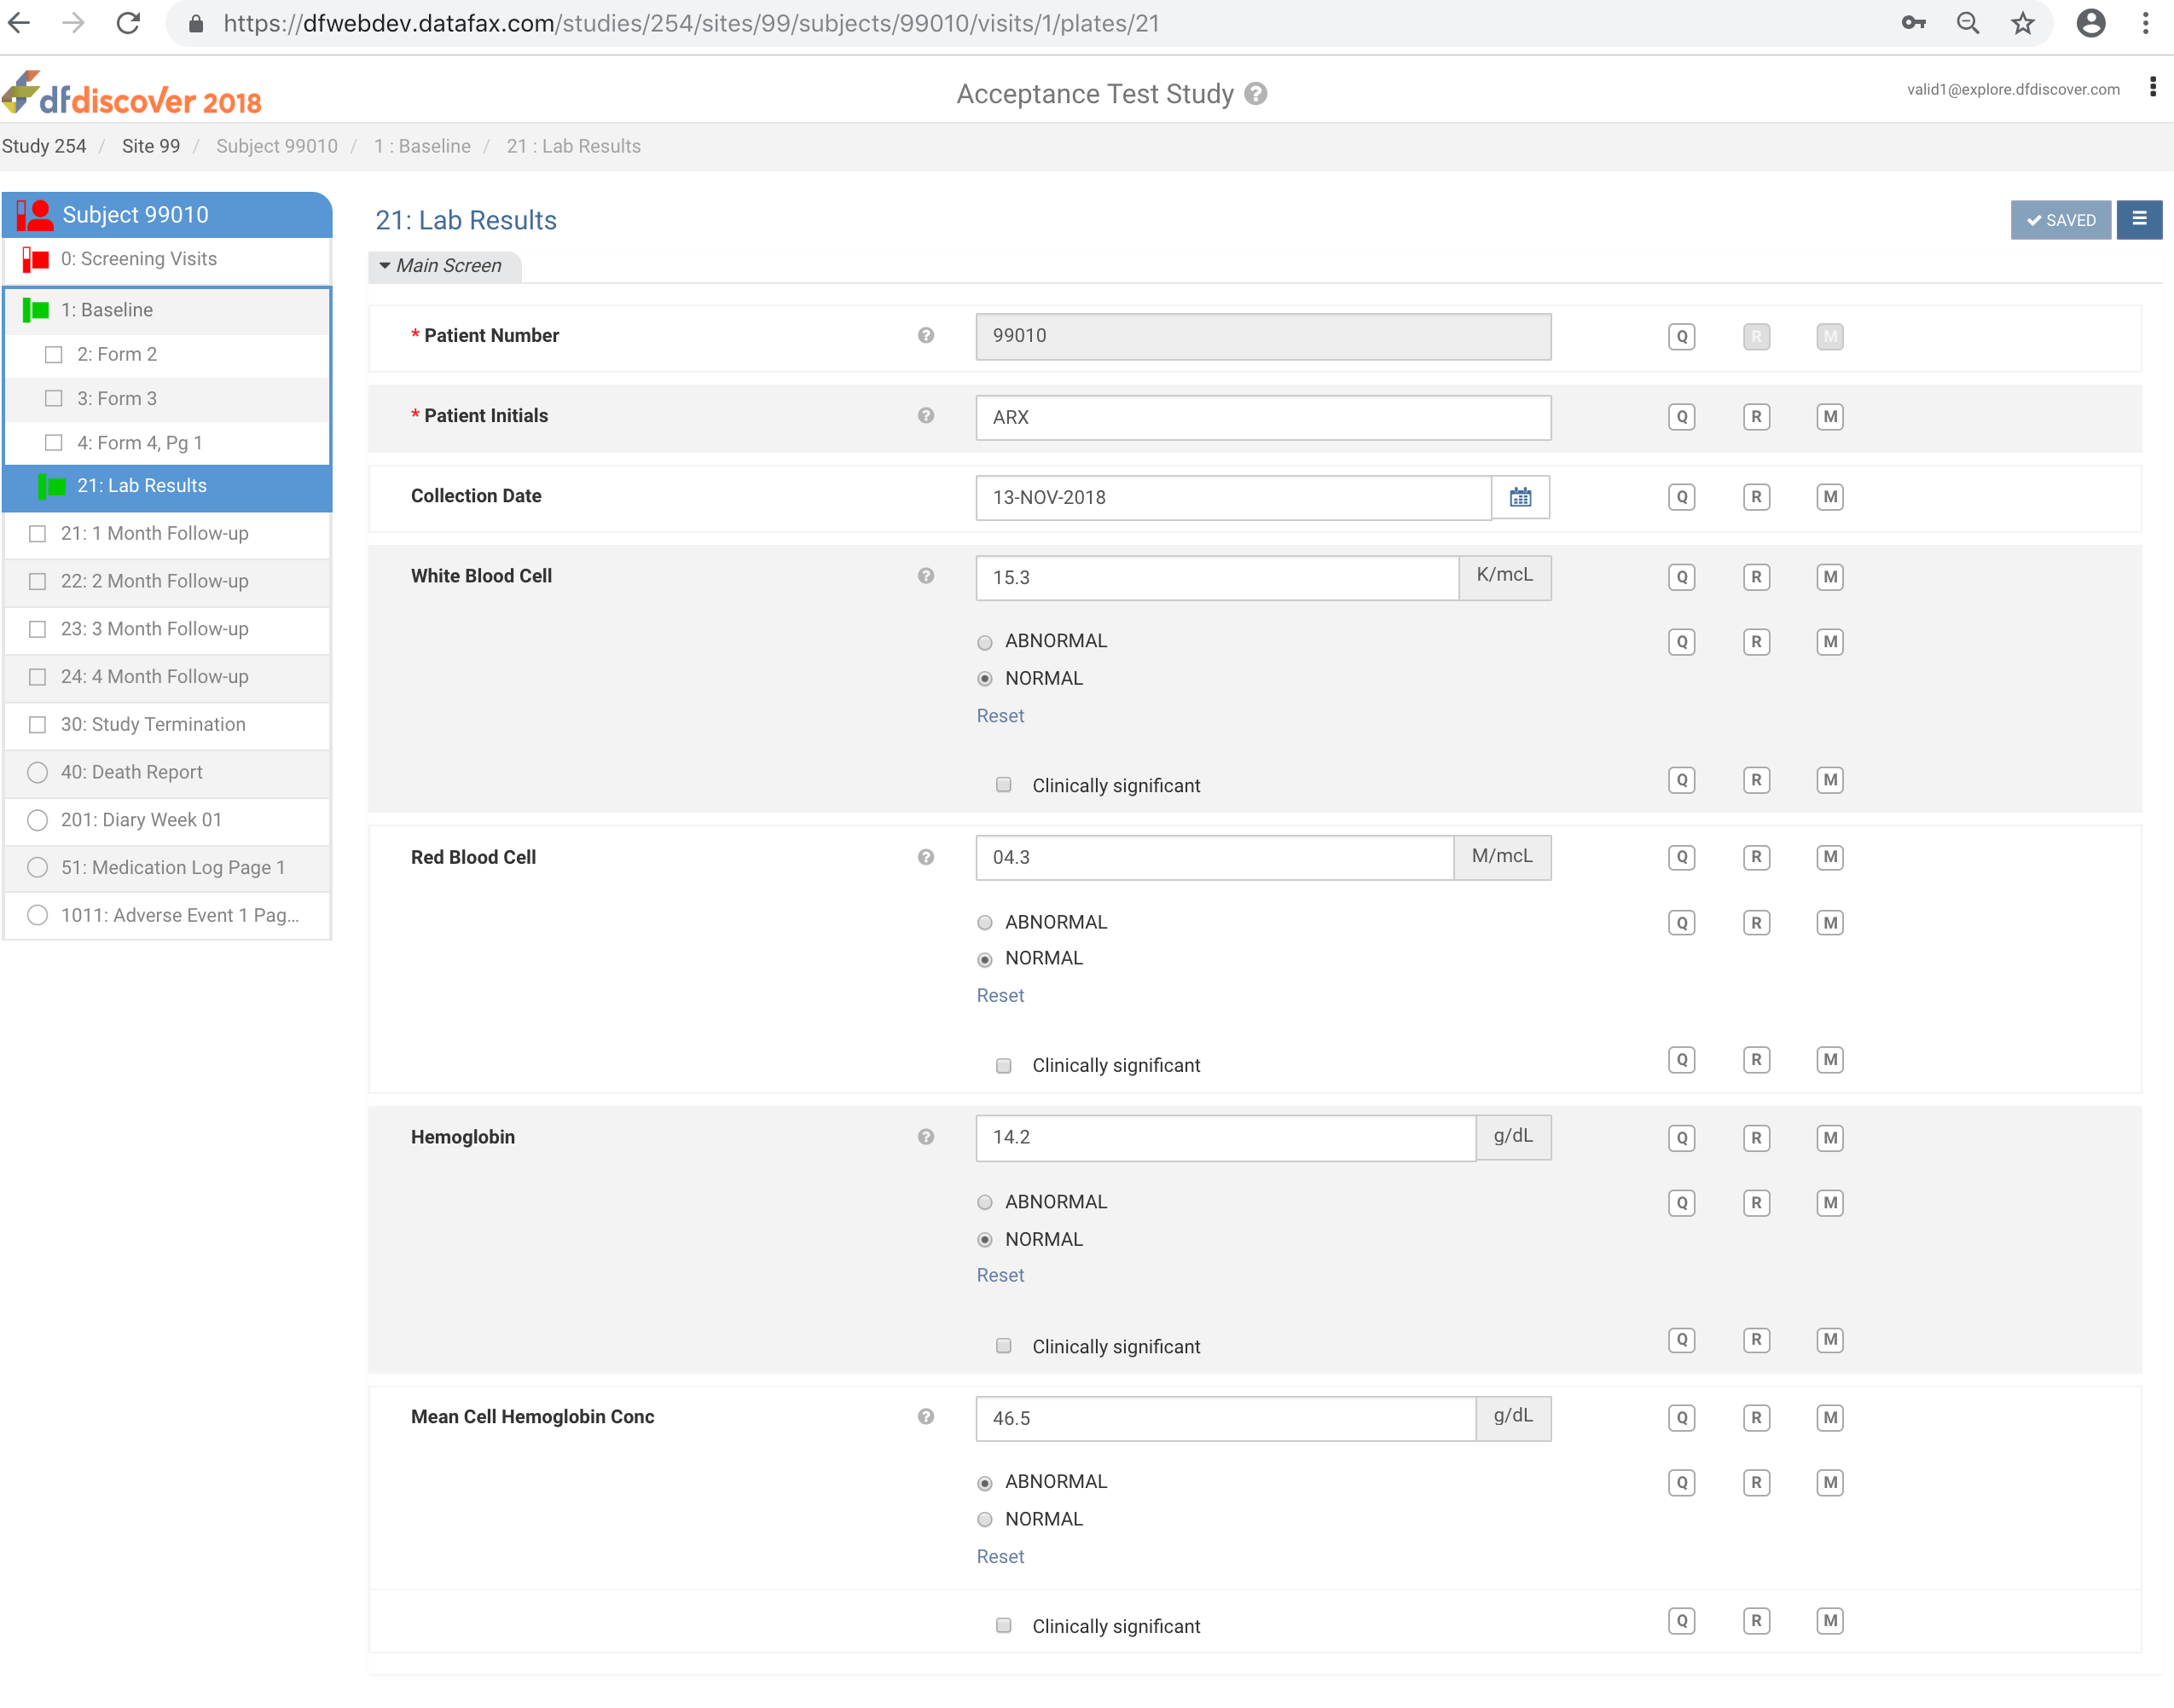
Select 1:Baseline > 21:Lab Results page, set:
Patient Initials = ARX
Collection Date = 13-NOV-2018
White Blood Cell = 15.3, Check (enable) NORMAL
Red Blood Cell = 04.3, Check (enable) NORMAL
Hemoglobin = 14.2, Check (enable) NORMAL
Mean Cell Hemoglobin Conc = 46.5, Check (enable) ABNORMAL
Click
.
From the breadcrumb bar, click Site 99 > Subject 99008 > 0:Screening Visits > 1:Blood Pressure Screening Visits. Change 6. Systolic and diastolic BP criteria from 'Yes' to 'No', Click
 then
then  , select Resolved from the Status drop-down list. Click , and to save the data record changes.
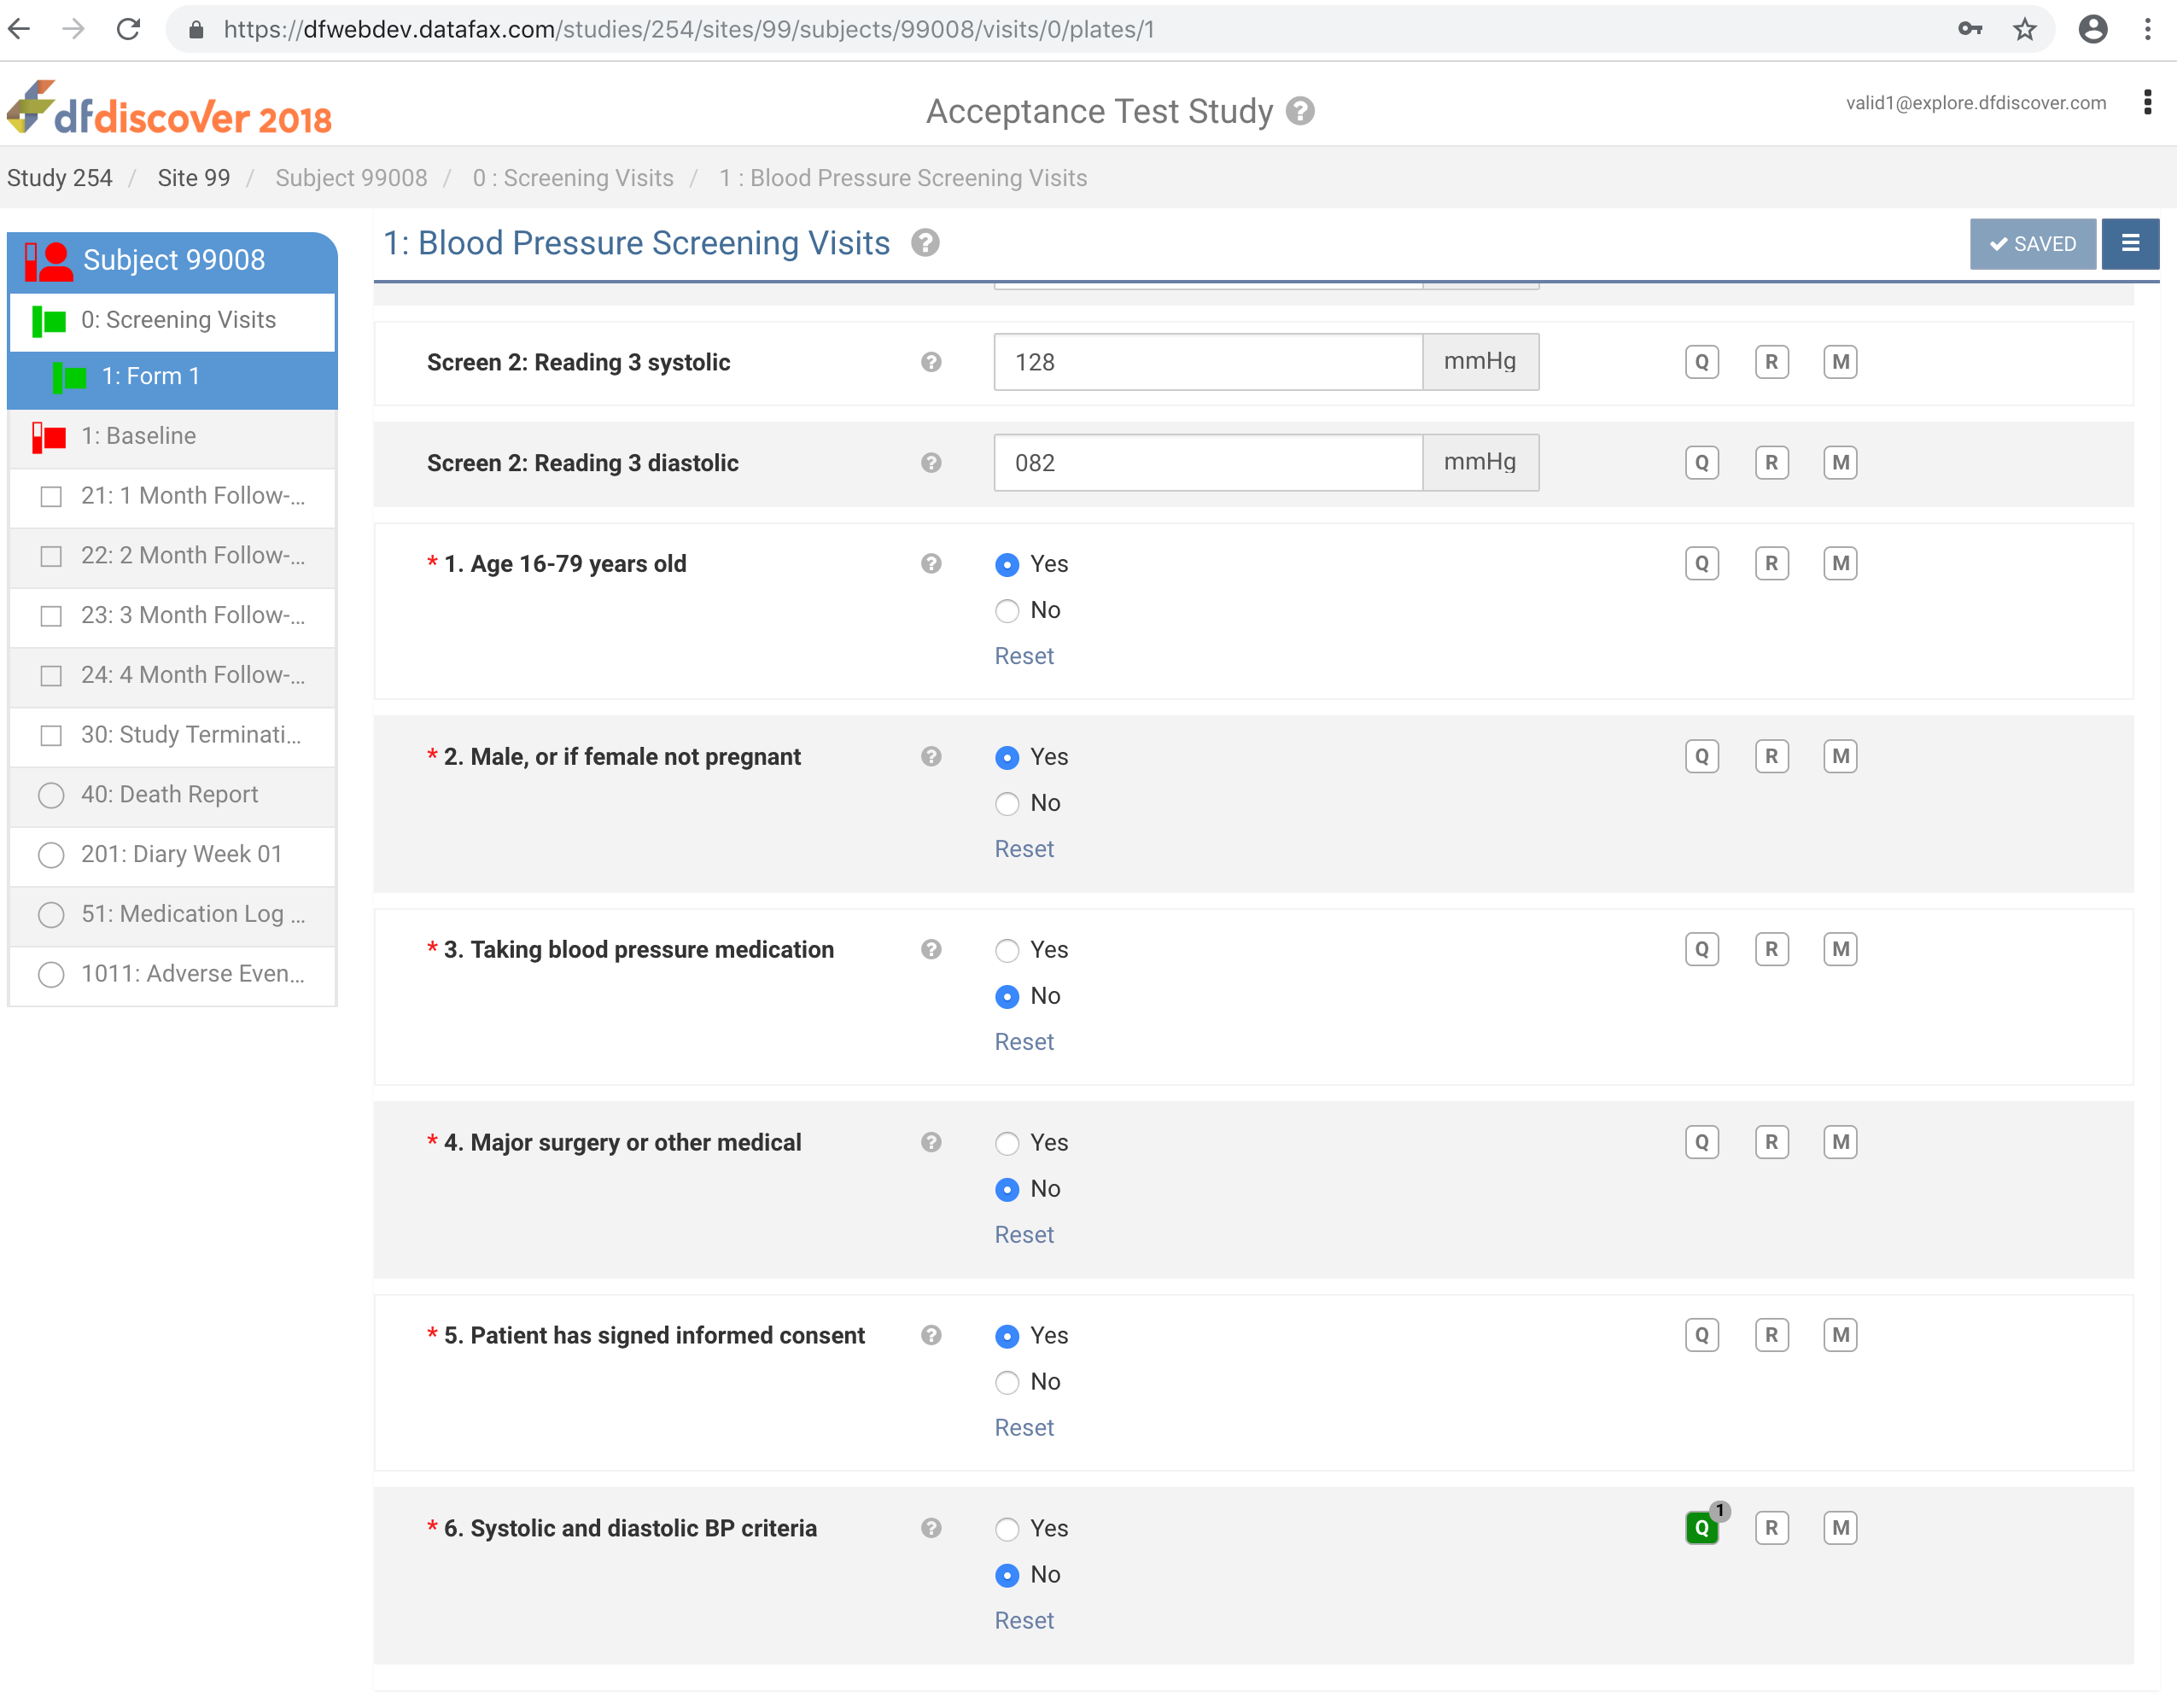
-
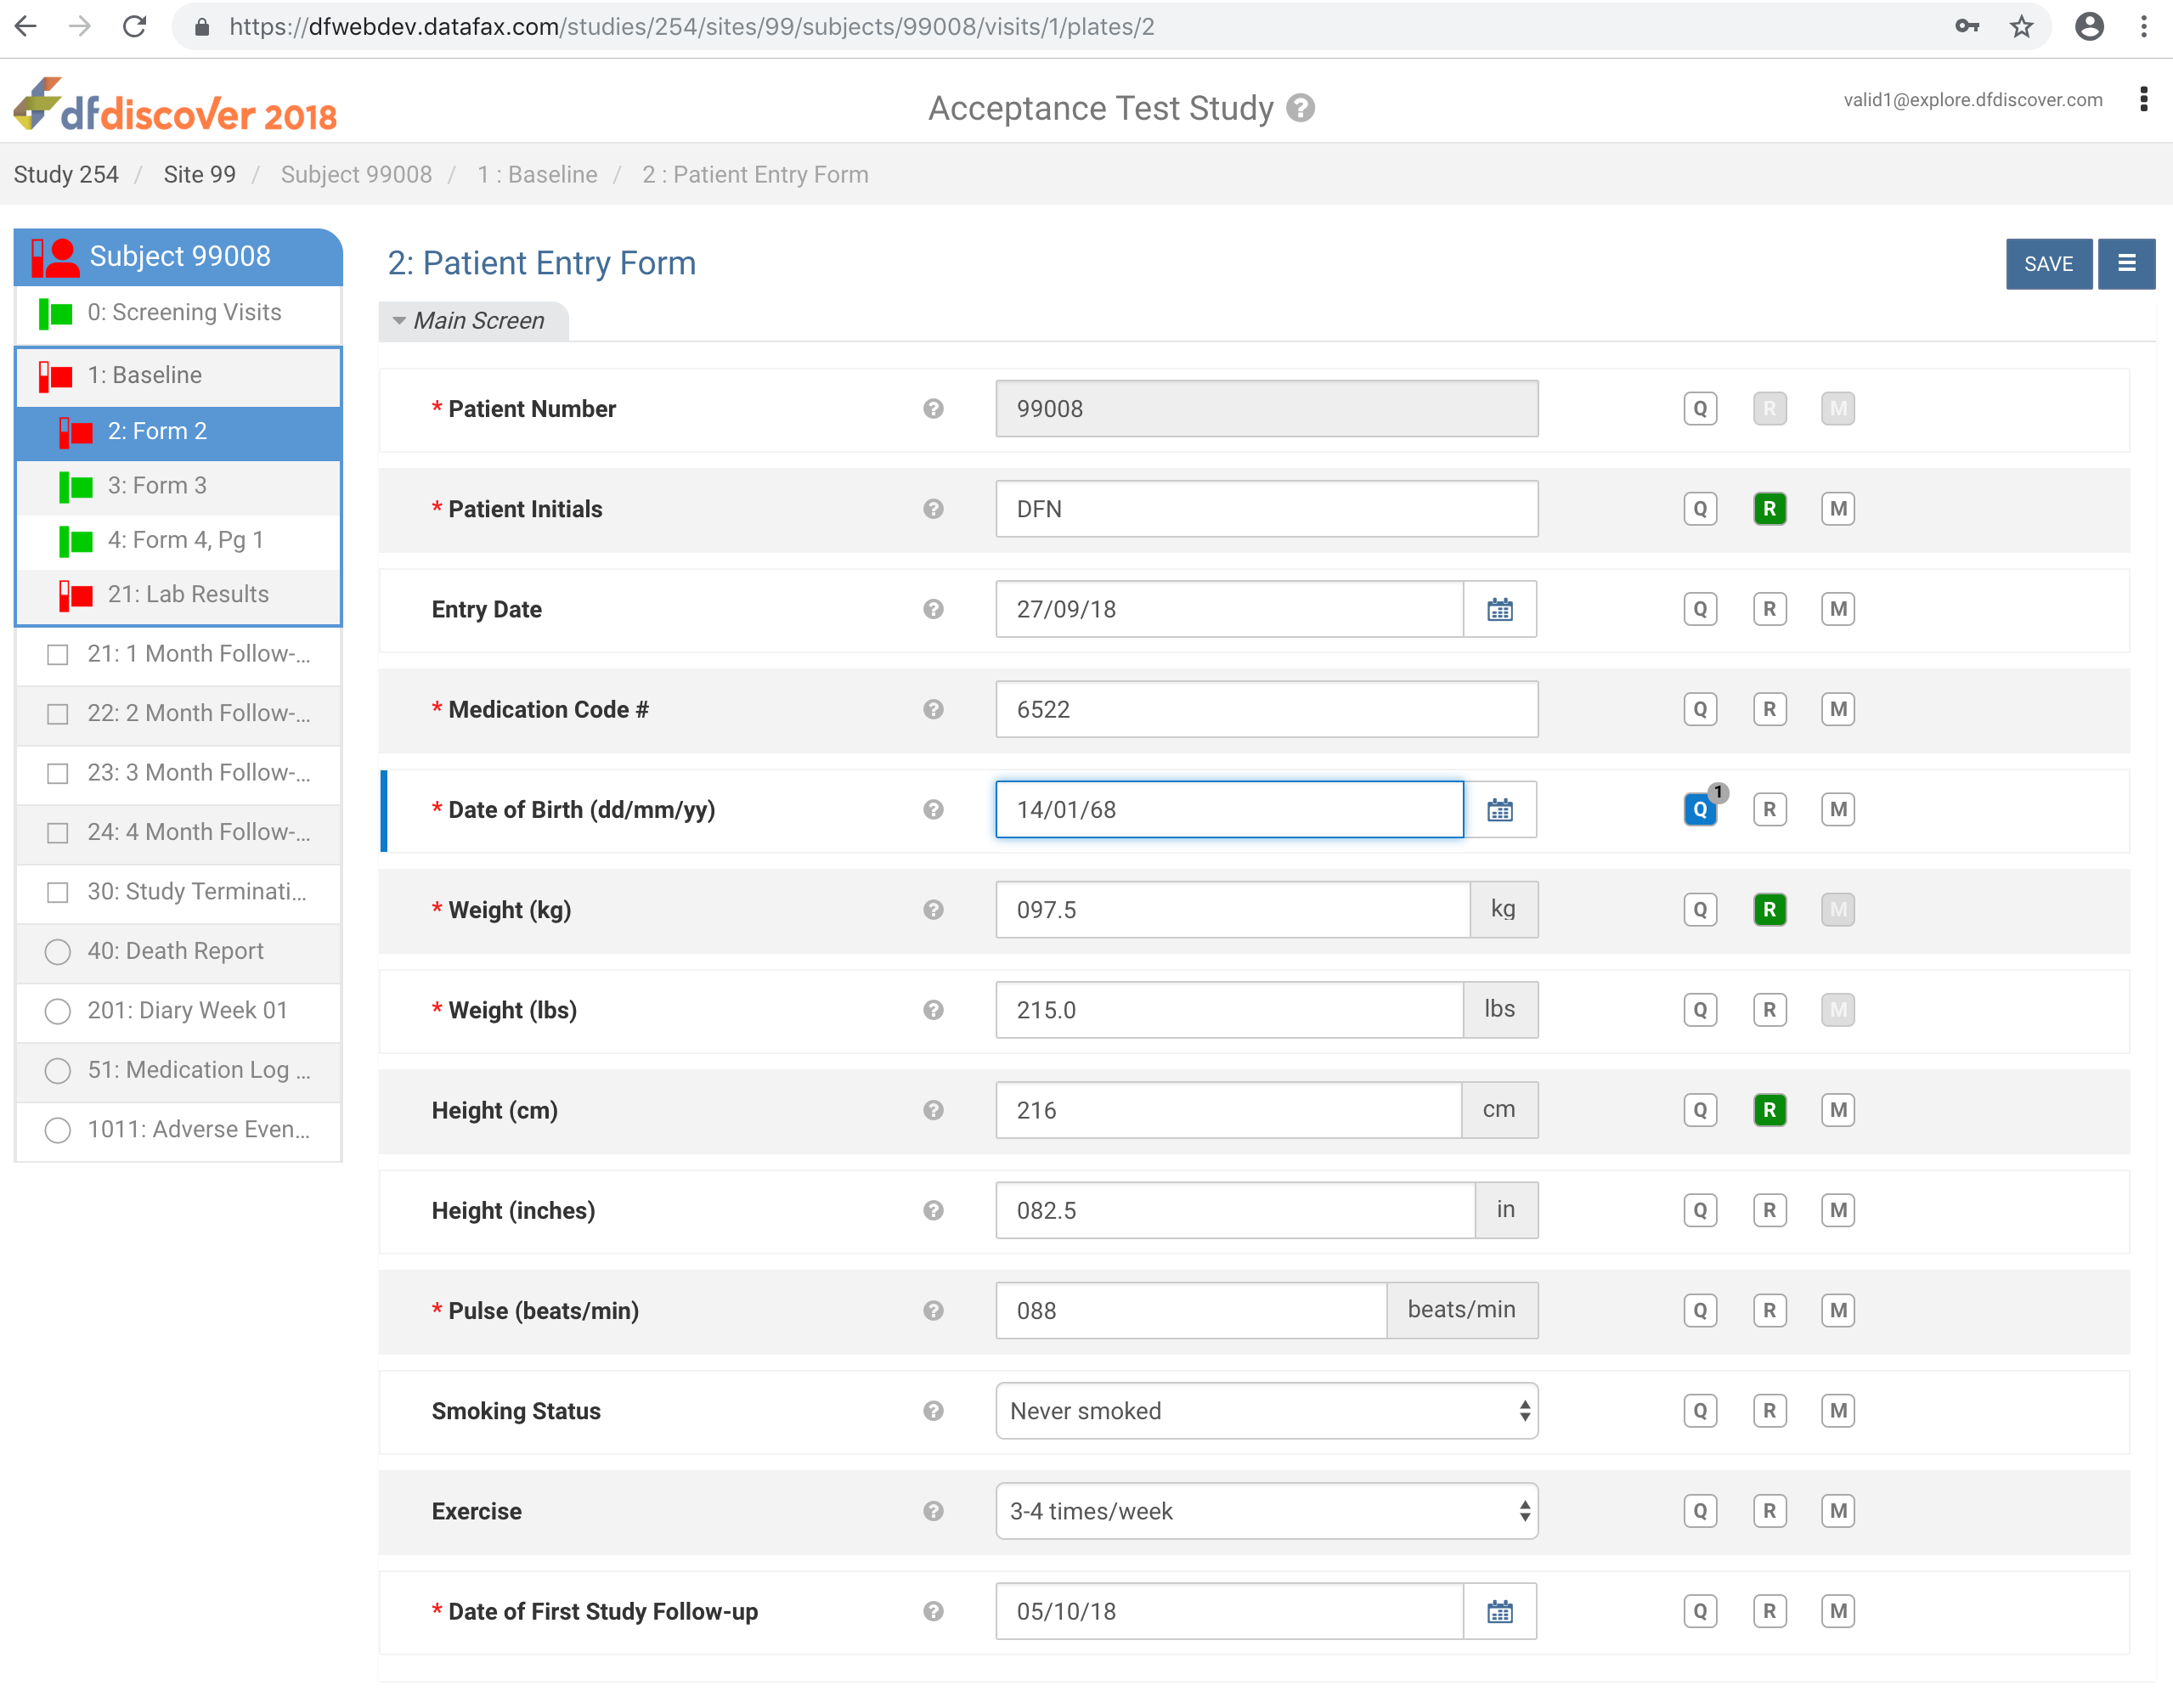
Click 1:Baseline > 2:Form 2. Correct Date of Birth (dd/mm/yy) to '14/01/68'.
-
Click
then , select Resolved from the Status drop-down list. Click , then to save the data record changes. Click .

-
From the breadcrumb bar, click Site 99 > Subject 99008 > 1:Baseline > 21:Lab Results next to Mean Cell Hemoglobin Conc “ABNORMAL/NORMAL” field click
 . Enter
 Lab value confirmed as out of range.in the Reason field. Click ,.

With subject 99008 21:Lab Results still the current record. Click
 > Manage documents to open the Manage documents window.
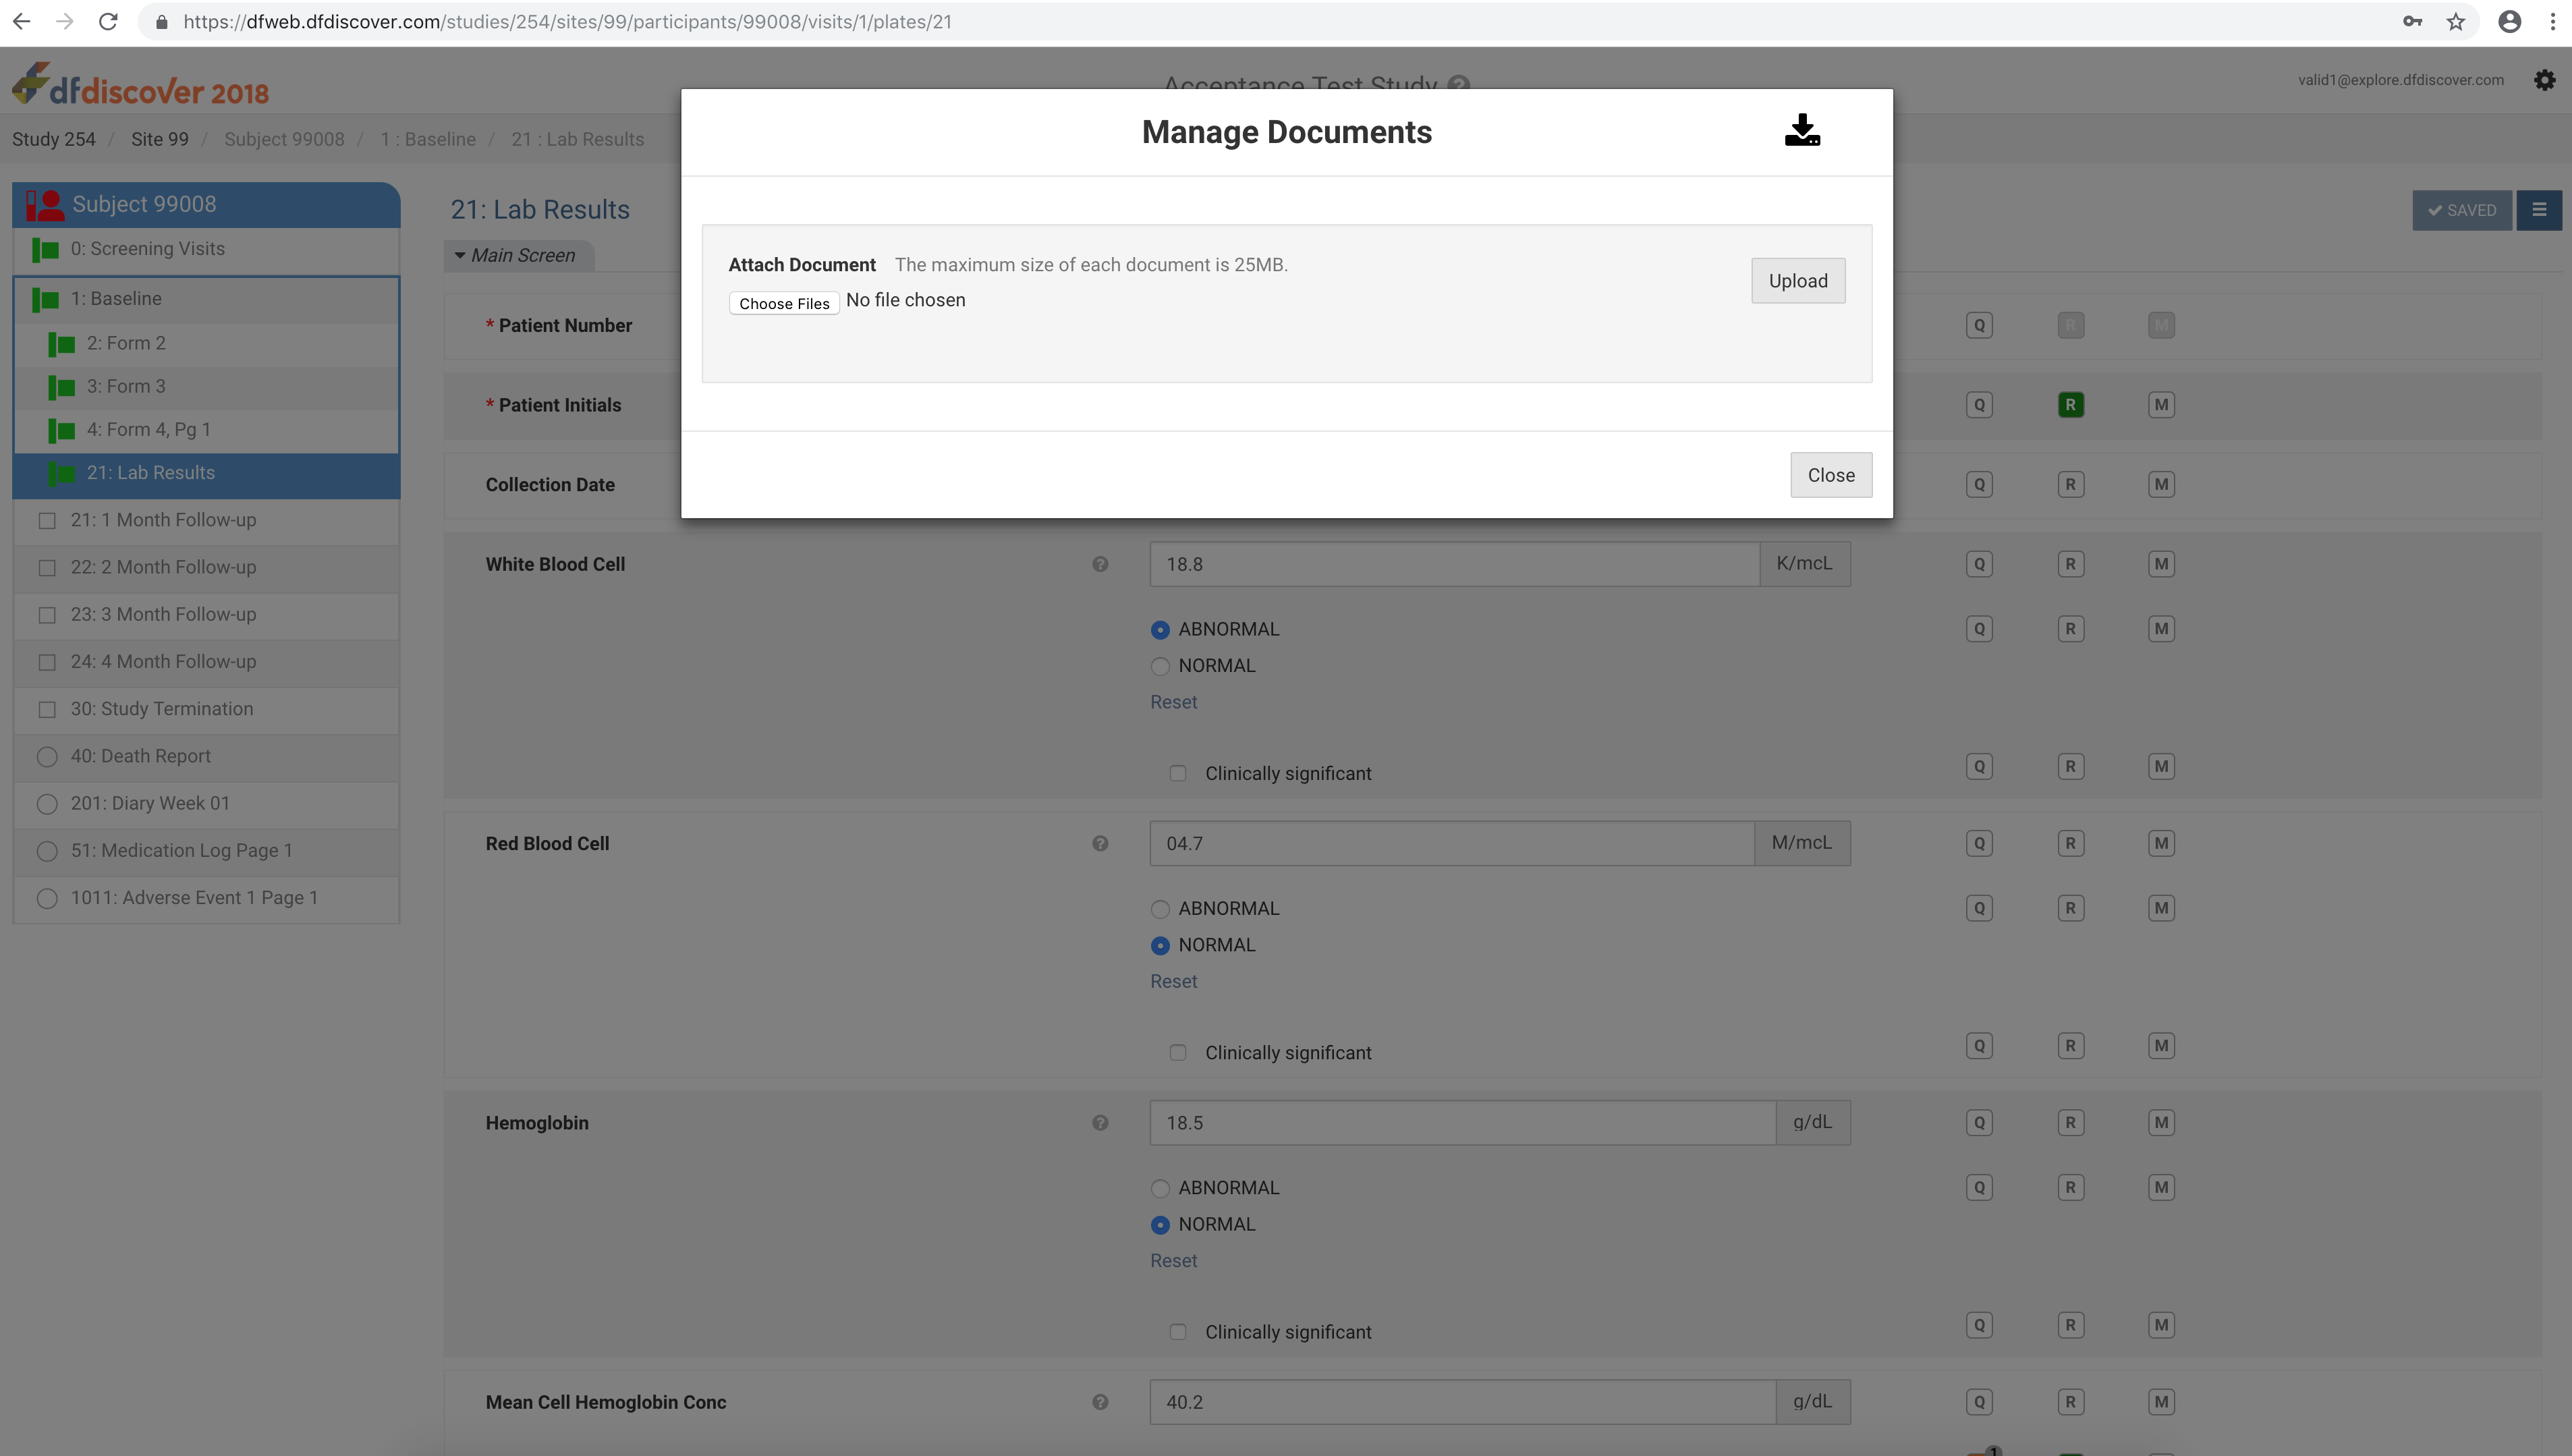
Click , select the previously saved labresults99008_module16.pdf (Refer to Step 2). Click > to upload the document to DFdiscover.
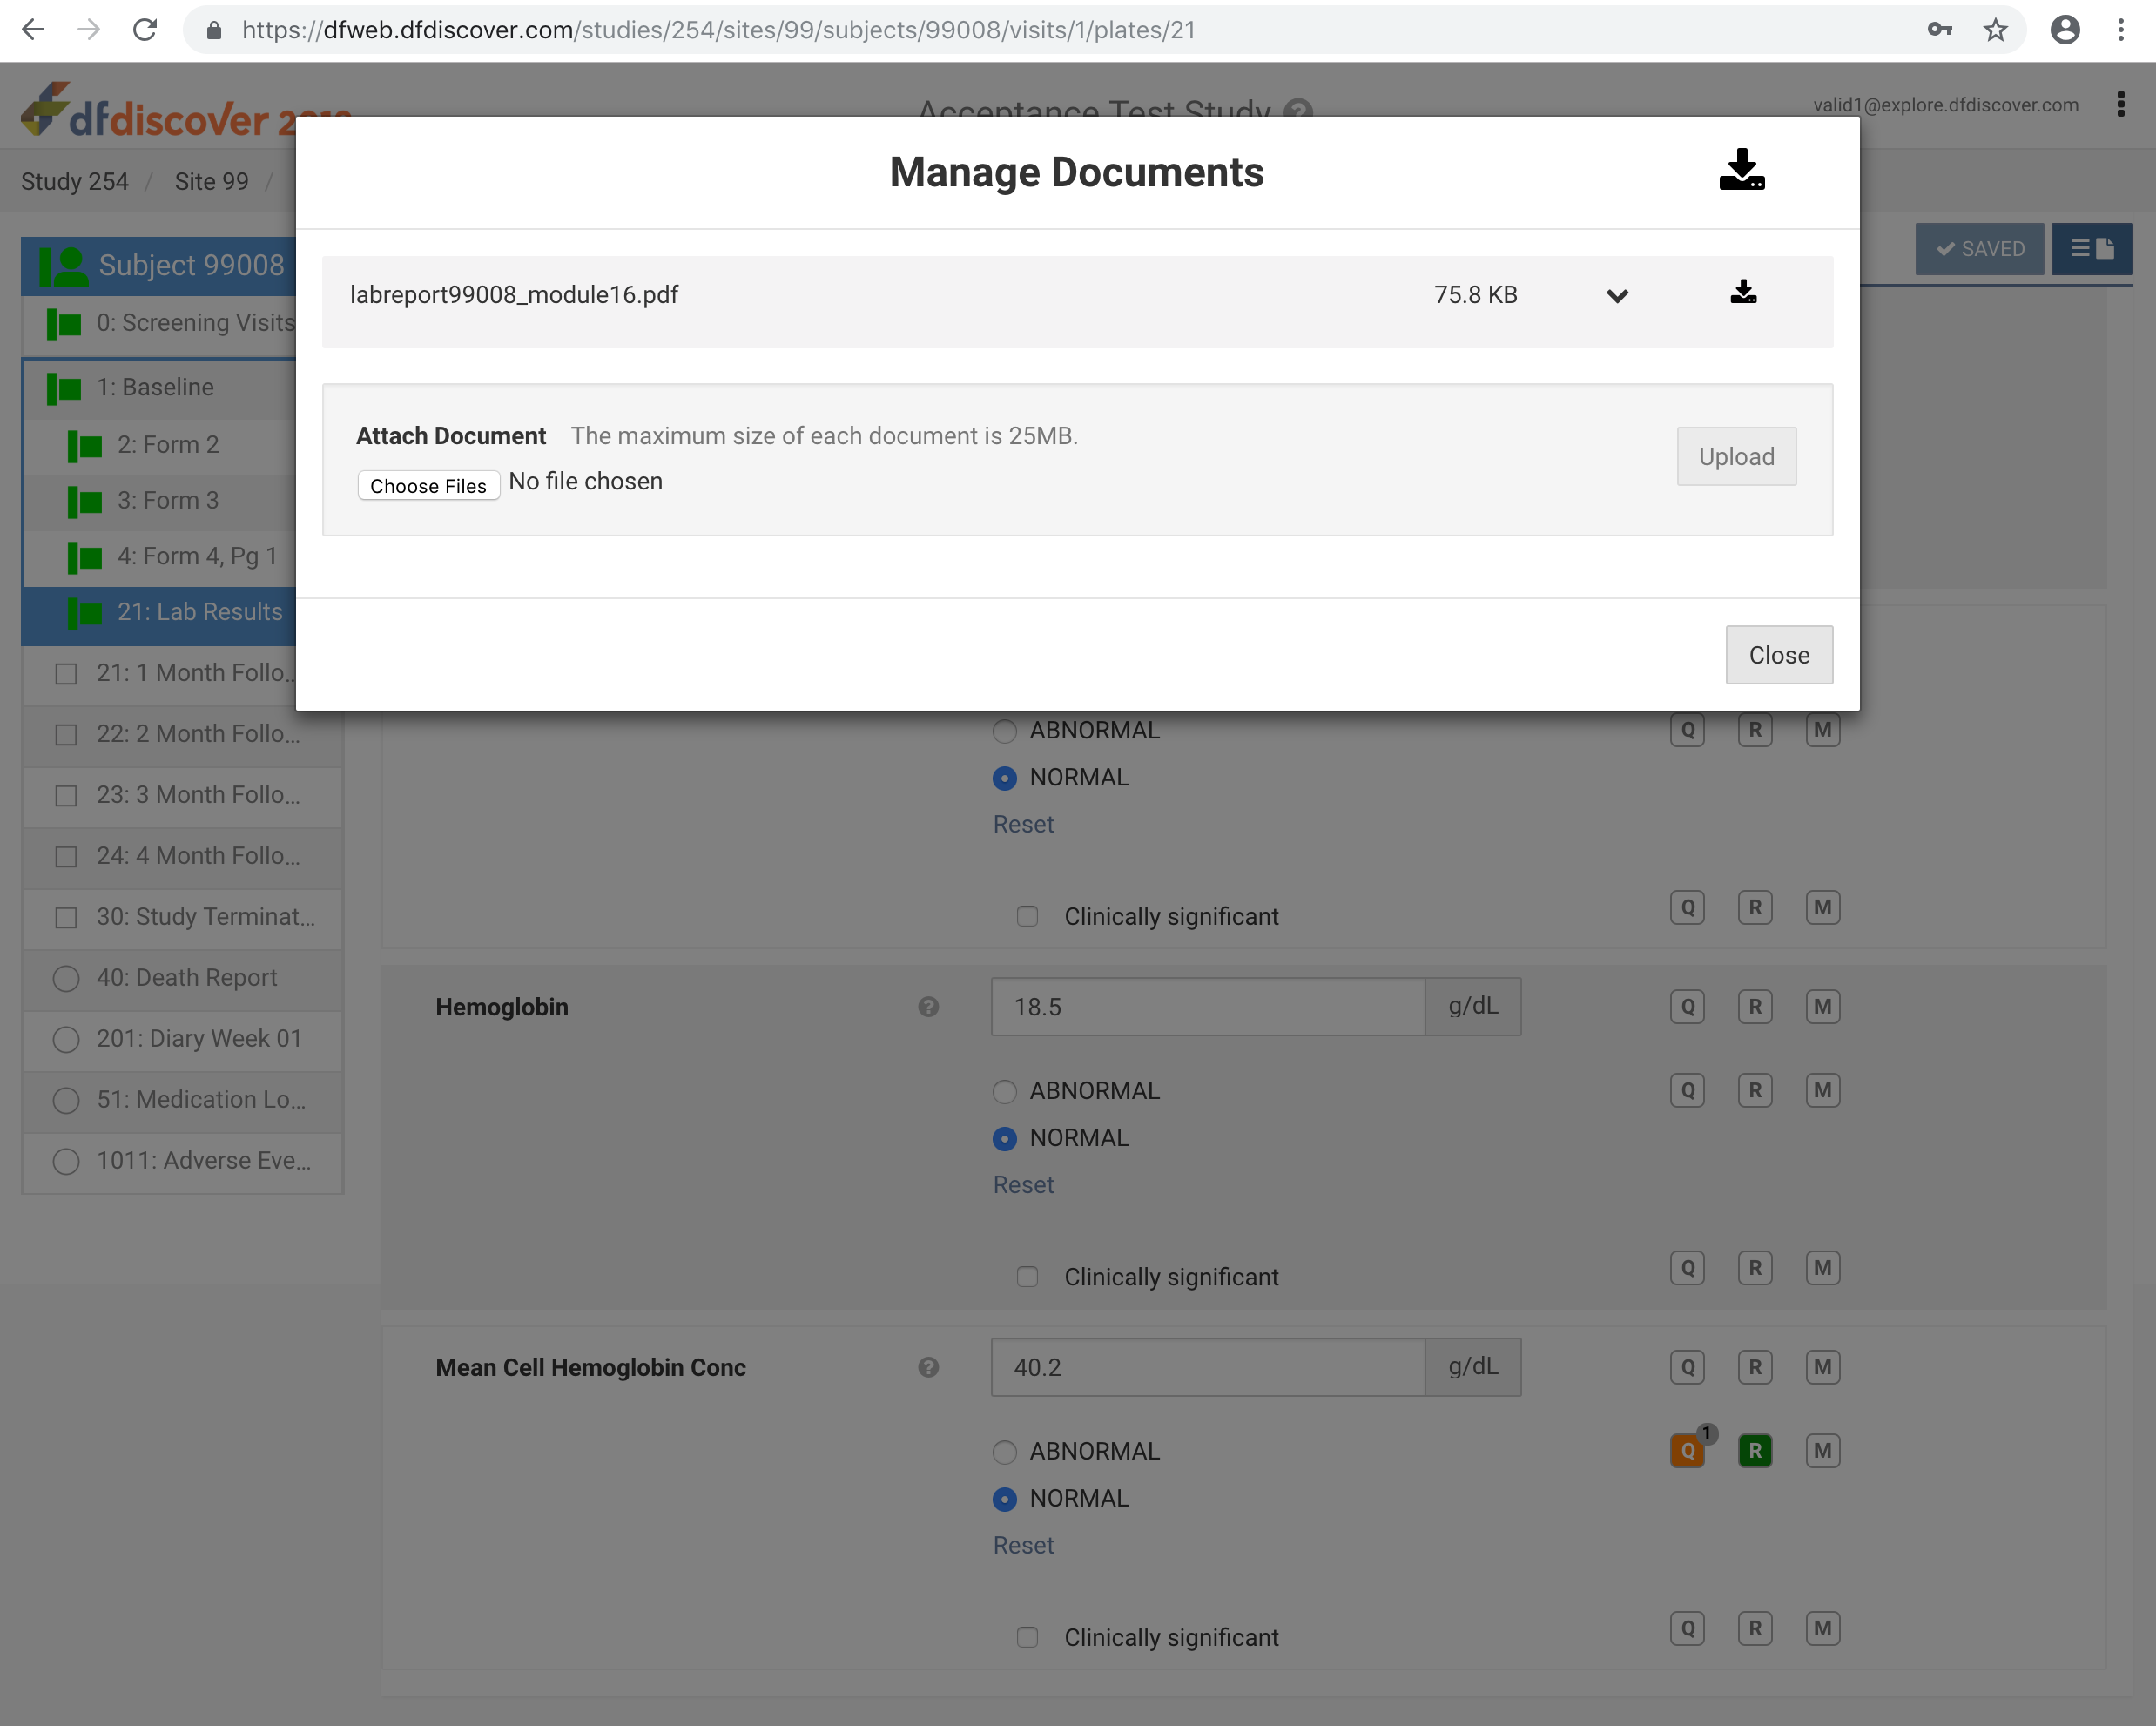
Click
 to view the newly uploaded document.
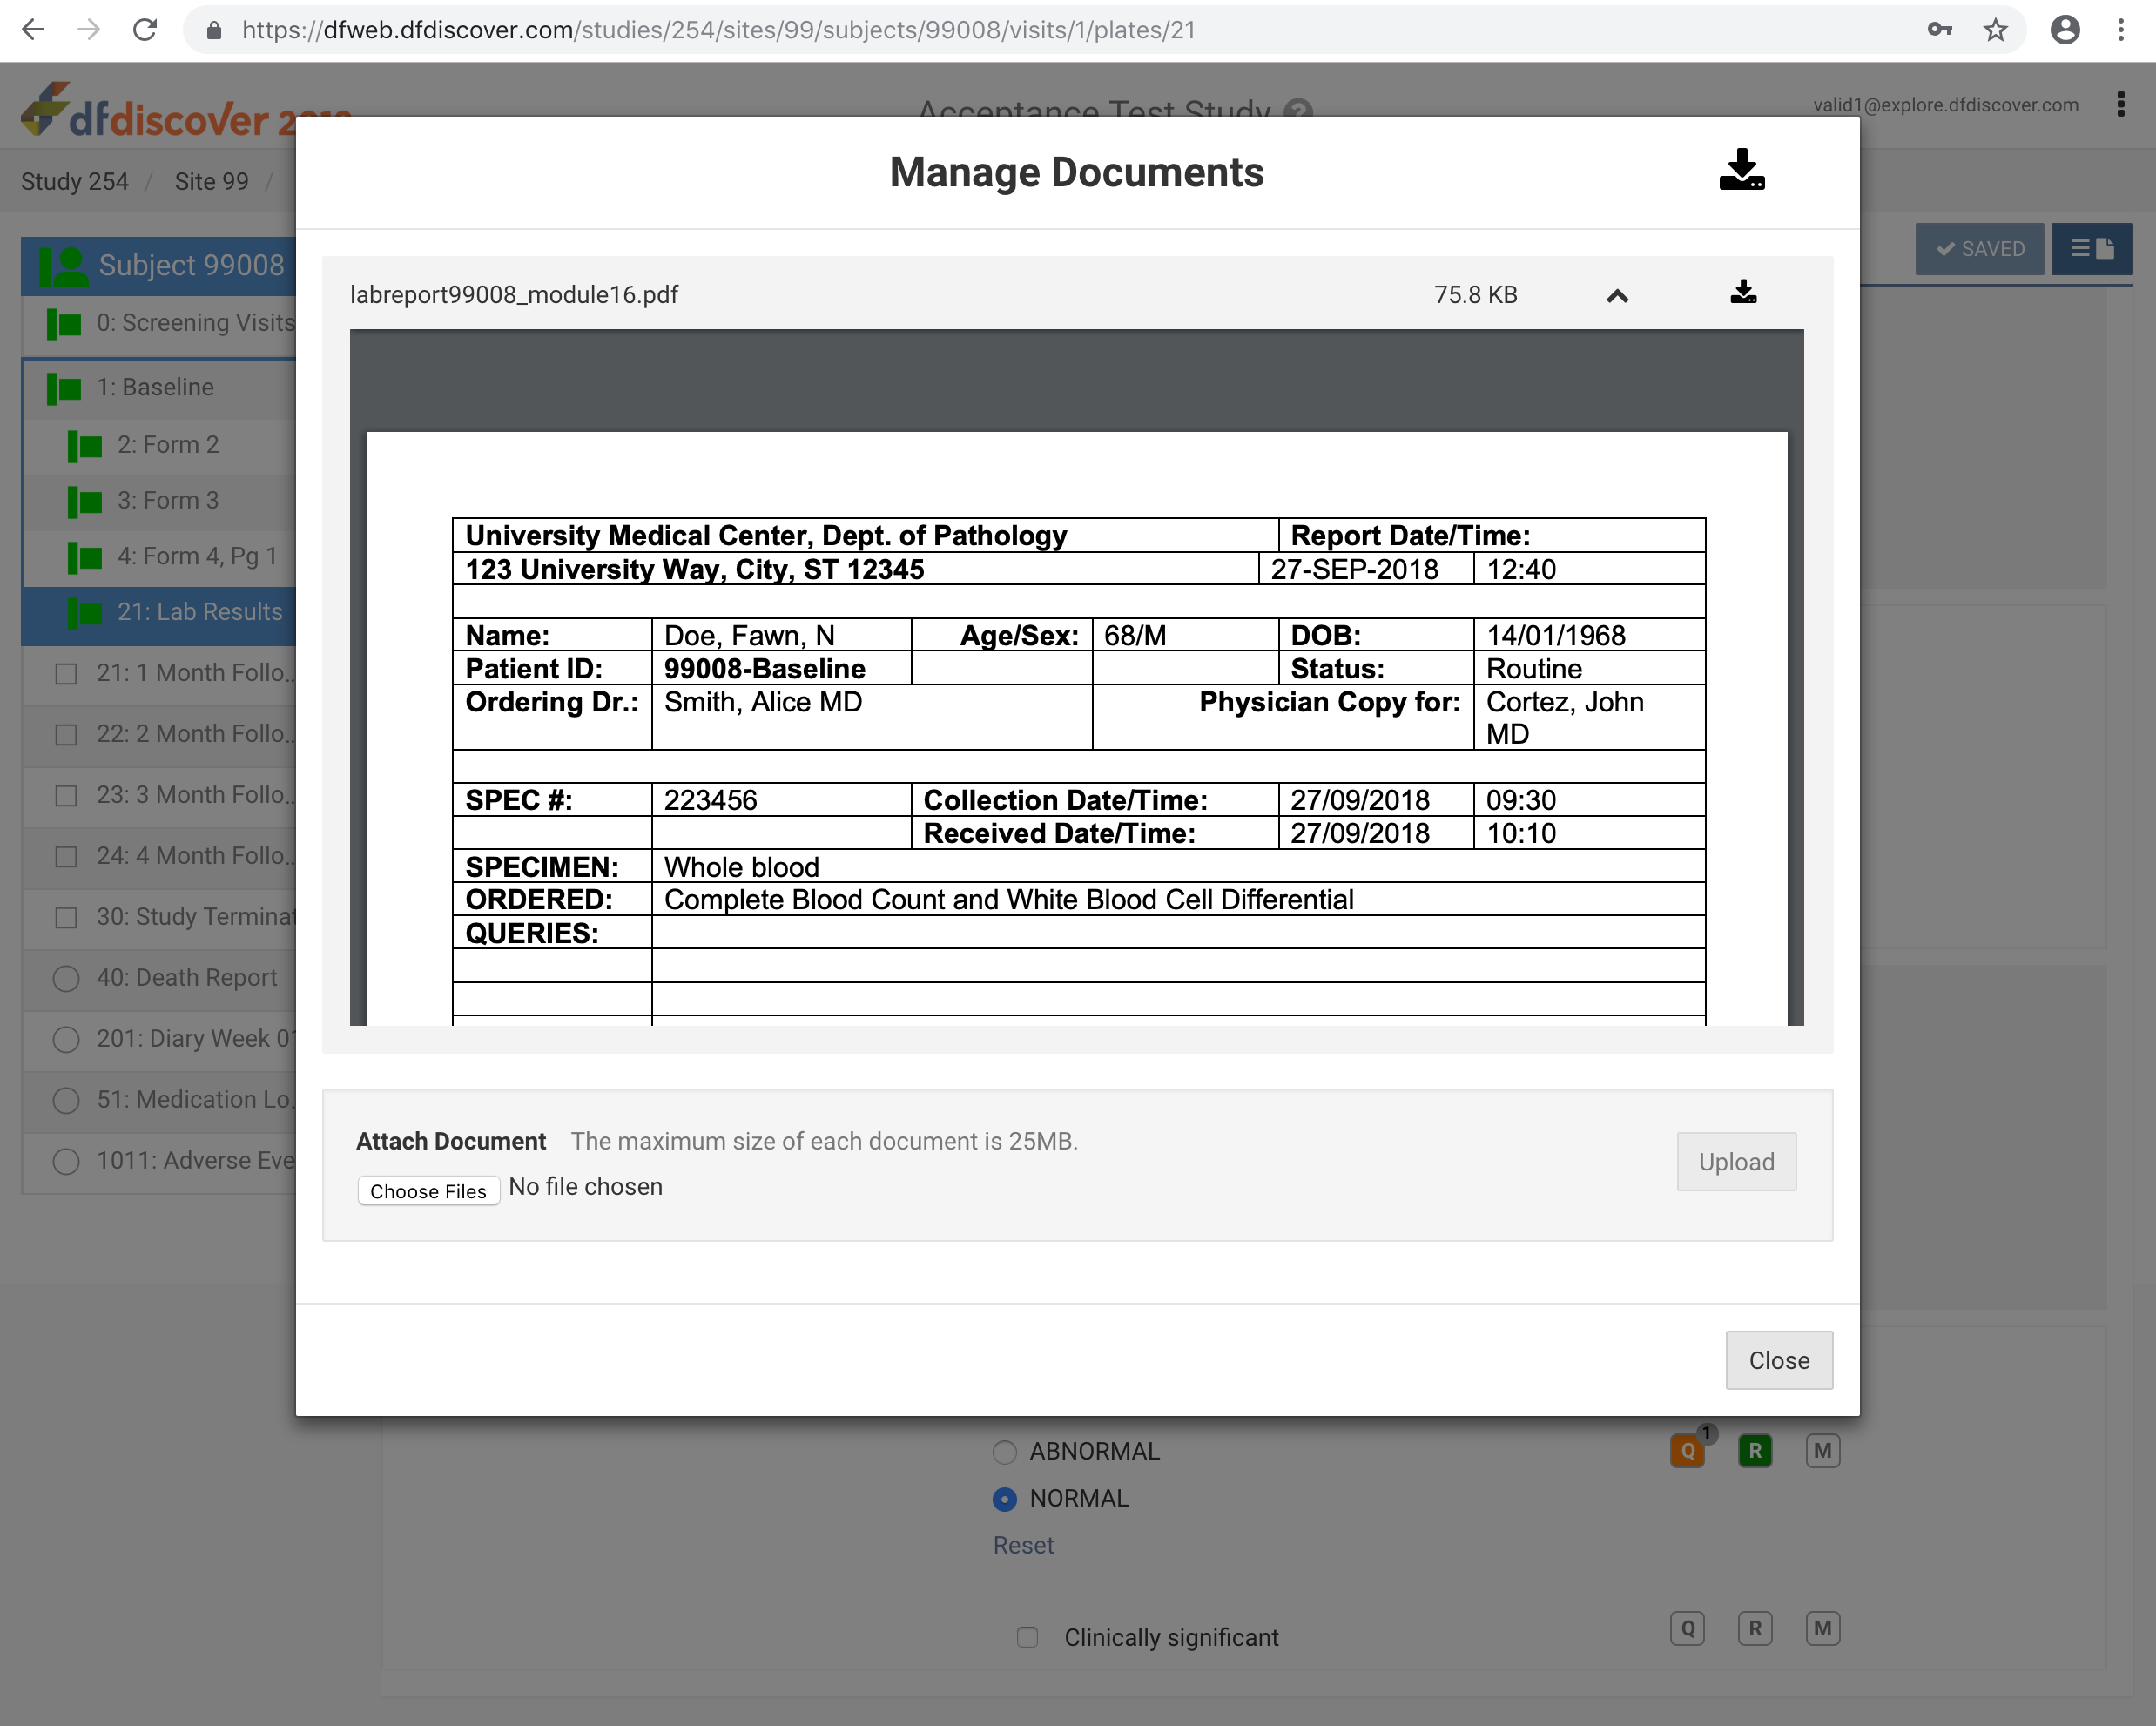
The document can be zoomed in/out by using the navigation buttons within the document window.
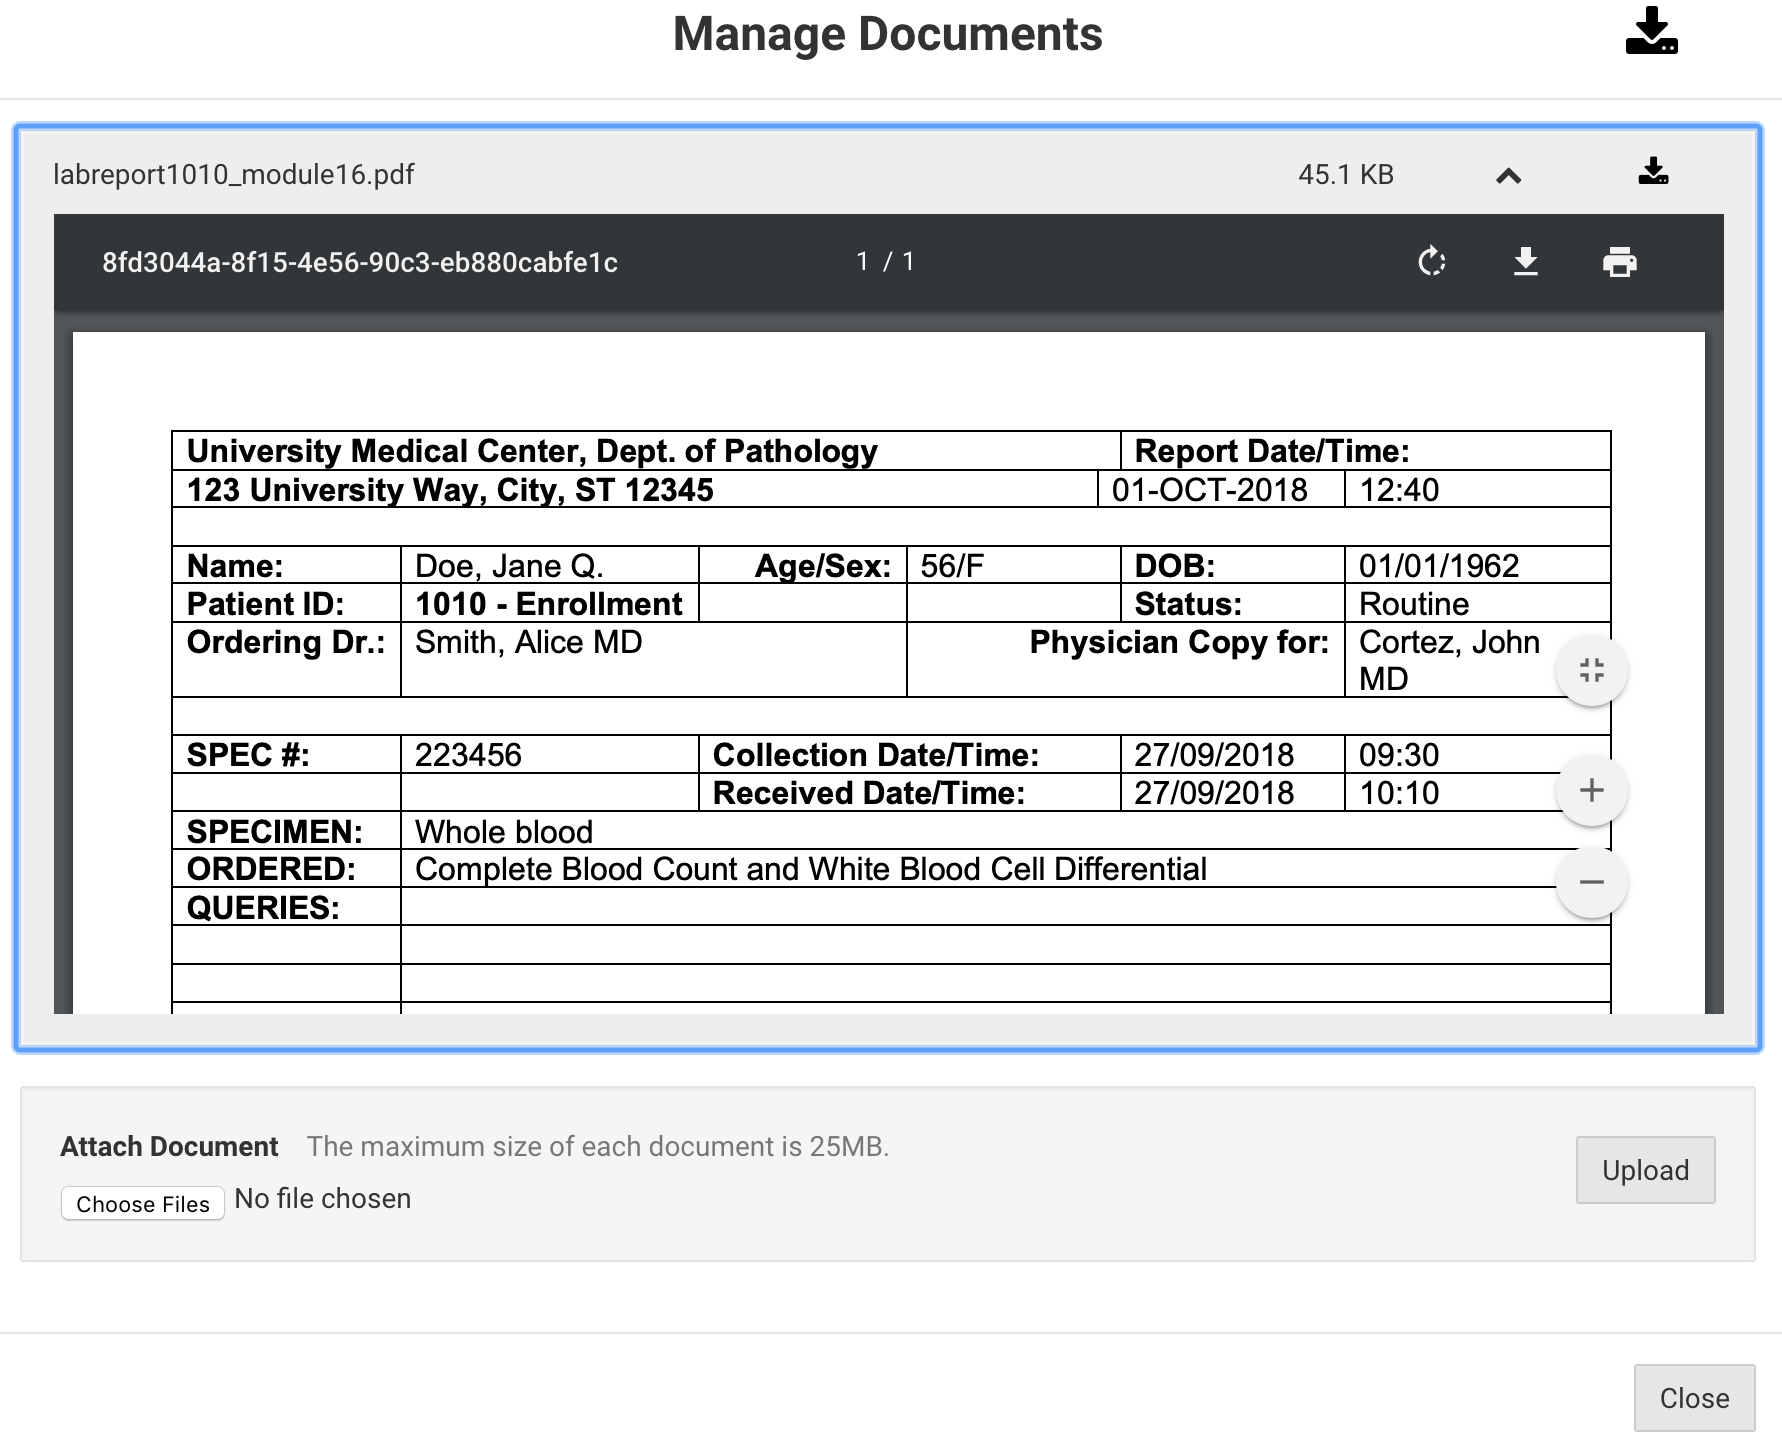
Click to close the Manage Documents window. Notice the
icon has now changed to  indicating the data record now has associated documents uploaded to DFdiscover.
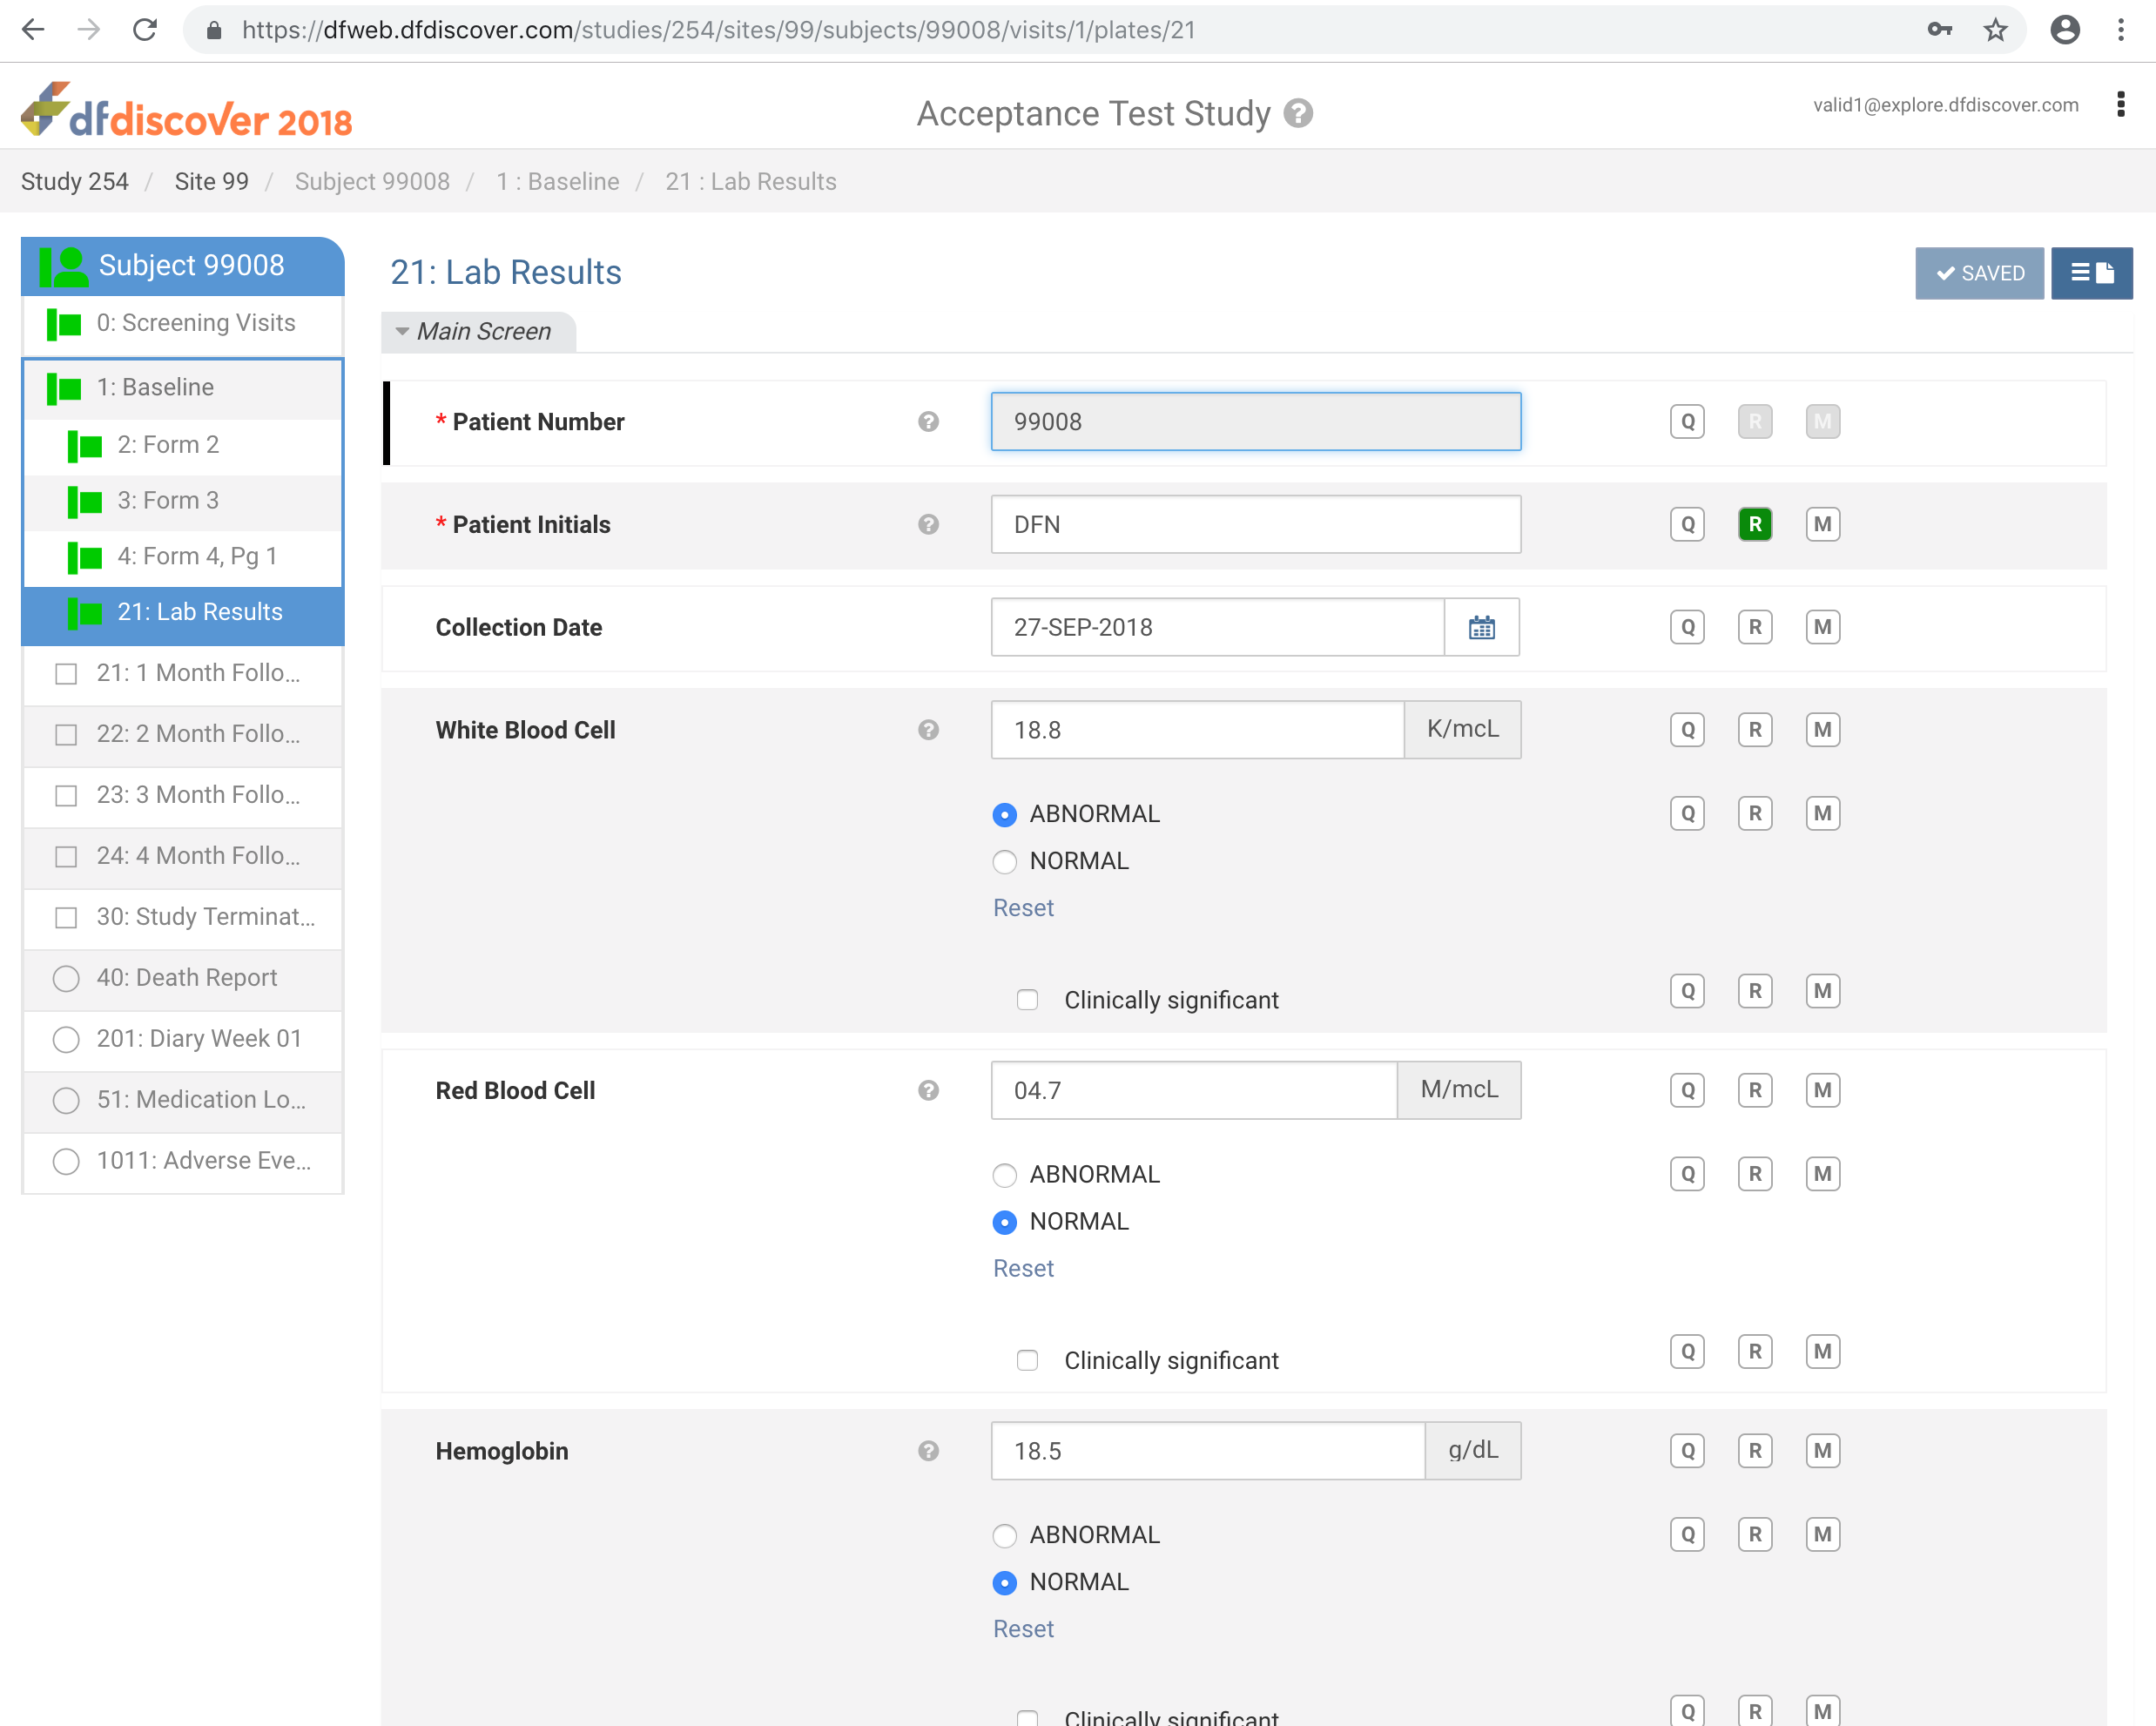
Click
> to exit DFweb.