Table of Contents
This chapter describes the functions located under the Study menu.
Global settings have an impact on subsequent work performed in DFsetup and thus should be considered first. Different global settings can be entered for each study.
Select > to access the Global Settings dialog.

In the dialog, settings are grouped by purpose and presented in separate views under the tabs Global, Help, Fields, Levels and Guides.
Study launched in the year. The study launch year is used by some DFdiscover standard reports and is available in DFschema for study specific reports.
Reason for Data Change. Users may be required to enter reasons for data change per field (specified at the field level), always (for all fields), or never.
per field, the reason specification set at the style or data field level is applied,
always, a reason is required for all data fields for any changes made to records at or above the workflow level specified.
If always is chosen, two additional options, Level and Only if changing a non-blank value become available. The value for Level overrides the reason level defined at the style or field level. By default, the value is set to 'Level 1'. By checking Only if changing a non-blank value a reason for data change is required only if the changed value was not blank prior to the change, and its record existed in the database at or above the level specified. By default, this option is unchecked, so a reason for data change is required for changes to all data fields regardless of their original value.
never, the style and data field reason specifications are ignored and a reason is never required, with one exception. If a field already has a reason for the current data value, then any change to the current value must be accompanied by a new reason. This rule applies regardless of the reason specifications at the global, style and data field levels.
DFexplore - Data View. If no New Subject Binders are displayed and the Start New Subject dialog is disabled, the only way a new subject can be started is in Image View, either when entering data from a faxed/scanned CRF or when entering a set of records in EDC Data Entry mode.
Run Edit checks in View mode.
This global setting is required if you want edit checks to do something,
when a user is working in view only mode or when a record is locked by
another user. For example, you might enable this option so you can display a message,
set user preferences in DFopen_study, or hide certain visits and plates
in DFopen_patient_binder.
If this option is enabled we recommend terminating any edit checks that would
make changes to data or metadata when users are working in view only mode
by including the following statement before statements that change data or metadata.
if( dfmode()=="view" || dfmode()=="locked" ) return; Otherwise, users see a warning message stating that a query could not be added, or a field could not be changed.
Allow Multiple Queries per field. This global setting is required if you want to add multiple queries on a single field. Once this option has been enabled, it cannot be disabled.
Help can be defined at the study level, plate level and field level. At each level, help can be defined in plain text, rich text or HTML formats.
Different formats can be used but they cannot be mixed within the same property. For example, a field can have rich text or HTML help, but it cannot have both. Another field or plate can use a different format. Once you start defining individual help in one format, it is not possible to switch to another format without discarding the existing content and starting over.
To specify HTML help, it may be easier to copy and paste HTML content
from a full featured HTML editor. In this view, raw HTML5 is
permitted and you can click the preview button
(  )
to see the rendered appearance of the HTML.
)
to see the rendered appearance of the HTML.
In this view, study level help is defined. DFexplore users see this help in the Dashboard View and when they select > .

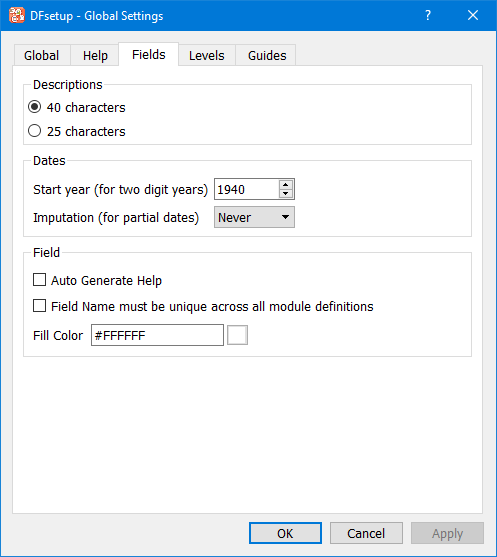
Descriptions. Field descriptions may be up to 40 characters long or limited to 25 characters for older versions of SAS® and to create more compact Query Reports. Reducing this setting from 40 to 25 characters after fields are defined does not truncate existing labels in the setup until the field is resaved in DFsetup, but oversized labels are truncated in the Query Reports.
Dates. The values specified here for dates, Start year and Imputation, can be used when defining styles and data fields.
Field.
When checked, Auto Generate Help
applies a default help
message, legal values are: $(legal),
so that fields may be defined more quickly.
When checked, Field Name must be unique across all module definitions, you are warned about any non-unique field names across all modules.
Fill Color is used to paint/fill the difference area between the data entry widget and CRF background color in DFexplore. Fill Color defined in global settings is inherited by plates as the default color.
Custom labels can be assigned to
each workflow level.
Default labels are Level 0,
Level 1, ... Level 7.
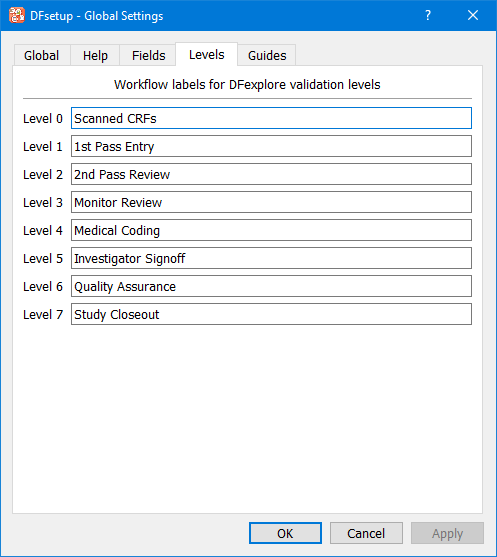
Labels may be up to 20 characters in length,
created from numbers, upper
and lowercase characters and symbols.
Pipe ( |) symbols are
not legal and cannot be entered.
Labels can also be left blank when the workflow level associated with the label is not used. Where custom labels are used, they are included in DFschema as attributes for DFVALID, output as WORKFLOWLABEL in xml export file, and appear in DFexplore in all views where save levels are specified or displayed.
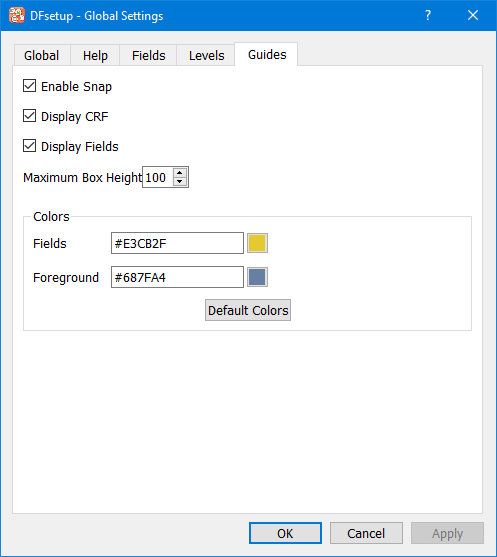
Enable Snap. Data field widgets snap into place when dragged near the boxes defining a data field on an imported CRF page.
Display CRF. When checked, makes the imported CRF visible.
Display Fields. When checked, makes any data fields defined on the CRF page visible.
Maximum Box Height. When creating a new data field by dragging out a widget, the widget height is always constrained to the recommended height (25 pixels, about 1/4 inch), but a different constraint can be specified for dragging in a downward direction.
Colors: Fields. Use this color to show the size and location of each data field.
Colors: Foreground. The foreground color is used to print the field number inside field widgets. Ideally, the Fields and Foreground colors have good contrast.
Study case report forms (CRFs) can be created in any word processing or graphics package. The data screens used in DFexplore are created by importing a copy of the CRFs and then creating data entry widgets over the data fields on each unique CRF page (aka plate). The imported CRF images become the DFexplore data entry screens that then look identical to a printed copy of the CRFs.
A study setup may include more than one data entry screen for each plate. Each imported CRF page can be tagged with the plate number and optionally also with a visit number and/or a type name. Pages tagged with a visit number are used as the data entry screen for the specified visits, and CRFs tagged with a type (e.g. a language) can be selected as an DFexplore user preference. Pages with only the plate number tag are referred to as 'Default' pages, and are displayed when no tagged page is available.
Before importing CRFs that are to be tagged by language, or some other categorization, the CRF Type Map must be defined.

One or more PDF files may be imported from a folder on the local computer.
Insert # at the beginning of any entry to skip that file during import.
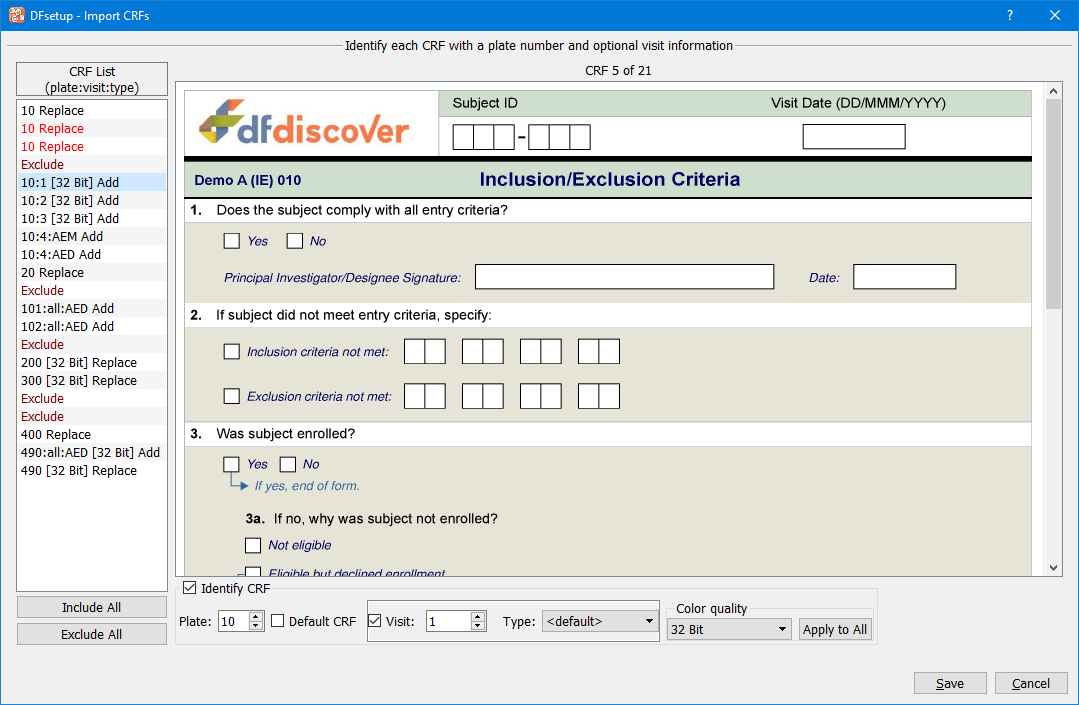
On importing CRF Pages:
The file is opened and the barcode (if any) is read on each page.
Pages are listed by plate number and pending action:
Exclude if the CRF Page has no barcode. Excluded plates are not imported.
Replace if the CRF Page has already been defined.
Add if the CRF Page is new.
Each page can be marked Exclude or assigned a plate number and optionally tagged by visit number and type, or identified as the 'Default CRF' for the specified plate.
marks all plates as Exclude.
marks all plates for import that have been tagged with a plate number.
Only 1 CRF Page can use a given plate, visit and type tag. Repetitions of the same set of tags appear in red and should be marked Discard.
Keyboard up/down arrows can be used to navigate the CRF List, and the 'E' key can be used to toggle between Exclude and Add or Replace.
Barcodes are not necessary for any plate that will be entered directly using DFexplore and not faxed/scanned. Such CRF pages will be labeled 'Exclude' on import but can be assigned plate number, visit and type tags to identify them.
Colored CRFs may be imported as plate backgrounds. Color quality may be set to Normal (recommended) or 32 Bit. Once Color quality is set, Apply to All can be used to apply the selected setting to all plates that are tagged for import.
![[Warning]](../../imagedata/warning.png) | Warning |
|---|---|
32 Bit Color quality should only be used where it is important that color detail in the source document be preserved. Plate backgrounds set to 32 Bit Color quality will require more time to load in DFexplore. Normal Color quality is recommended and is suitable for black/white CRFs and those with color graphics and minimal shading. |
When the CRF Page specifications are complete,
click to import the pages.
This creates and saves a screen resolution background file for DFsetup and
DFexplore and a higher resolution png file for printing from DFexplore.
These files are stored on the DFdiscover study server in the study
bkgd folder.
Although each CRF page can be tagged with only 1 visit number it is not necessary to import and tag a separate page for each visit, only for those that require different backgrounds. A set of visits may share the same background by completing the CRF Background Map.
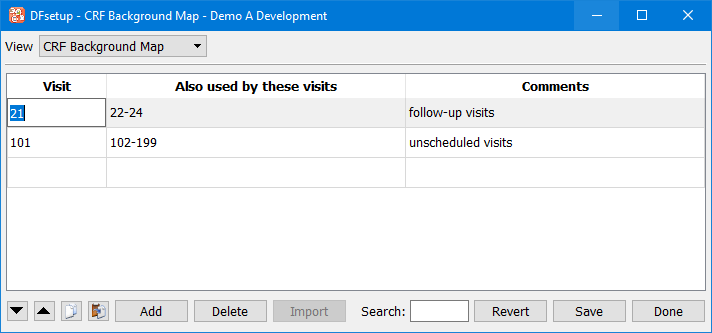
CRFs tagged with a specific visit number may also be used at other visits by completing this table.
Although multiple CRF pages may be tagged for each plate only one set of data fields can be defined for each plate, and they must appear in the same position on all versions of the data entry screens.
When data fields are positioned on the imported CRF pages to create the data entry screens used by DFexplore, any text or graphics hidden beneath the data entry widgets in DFsetup are also hidden in the DFexplore data entry screens.
It does not matter which version of the CRFs tagged for a plate is used to define the data fields on that plate, but after defining data fields you should toggle between each CRF background to confirm that field positioning works on all versions. If not, you will need to modify one or more of the CRF plates and re-import them.
DFexplore selects data entry screens for each plate in the following order:
CRF tagged with the current visit and type, else
CRF tagged with the current type only, else
CRF tagged with the current visit only, else
the untagged CRF, i.e. the 'default'
If the last step is reached and no default CRF has been defined for the current plate, the data entry screen displays the data fields on a blank background.
Data fields and styles can be imported from a central library database or any other study database for which the user has permission to view the study setup.
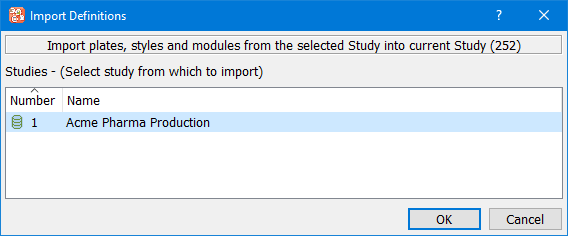
This dialog is used to select the DFdiscover database from which you want to import field and/or style definitions.

For each plate selected, styles and modules are automatically selected as well.
Modules or styles cannot be imported if a module or style with the same name already exists.
If a style or module is deselected the plate that needs it is automatically deselected.
Use to import a plate to a different plate number in the current study.
Style or module inconsistencies appear in red. If you want to see what inconsistencies exist, you can mouse over the name (details appear in a tool tip) or click if selected.
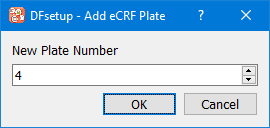
Electronic case report forms (eCRFs) are created within DFsetup without needing to import a PDF file containing the form background image. eCRFs do not contain barcodes and are therefore only suitable for entry via EDC.
Select > . Assign the new plate a unique plate number.
To add fields to an eCRF, begin by choosing the needed module(s) and adding them to the plate. Select > . From the Add Module dialog, select the modules to be added to the current plate. Click to add the selected modules.
Drag fields or modules to the eCRF window. Fields are numbered according to the order they are added to the eCRF. When adding entire modules to an eCRF fields are numbered according to the order that they were created in the module. Fields can be reordered by selecting > . On eCRF plates, field layout matches the field order. Reordering fields will cause the field layout to be updated on the eCRF; the field layout does not change with a traditional paper CRF-based plate.

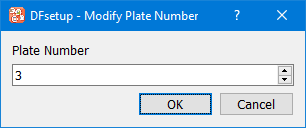
This can be used to correct plate numbers, but be careful not to create a conflict between the plate number that appears on faxed/scanned CRF pages and the plate number you specify here. When a plate's number is modified, any study data existing for the original plate number is permanently lost. A warning dialog asks you for confirmation before proceeding with the operation.
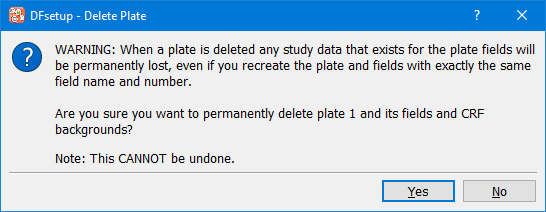
Select 'Yes' to permanently remove the current plate from the study setup, including all of its field definitions and background CRF images. Style definitions are not deleted even if they are no longer in use by any field. When a plate is deleted, any study data, queries and reasons existing for the plate are permanently lost, so exercise caution when performing this operation.