Table of Contents
- 9.1. Tests & Requirements
- 9.2. Begin Module 9. User-defined Query Category Types.
- 9.3. Retrieve an existing data record in DFexplore.
- 9.4. Apply a user-defined Category query.
- 9.5. Add a reason for Data Value to explain entered data.
- 9.6. Edit an existing query.
- 9.7. Delete a user-defined Query Category that is used by an existing query.
- 9.8. Delete a user-defined Category query.
- 9.9. End Module 9. User-defined Query Category Types.
Retrieve an existing data record in DFexplore.
Apply a user-defined Category query.
Add a reason for Data Value to explain entered data.
Edit an existing query.
Delete a user-defined Query Category that is used by an existing query.
Delete a user-defined Category query.
Estimate of Time Required: 30 Minutes
-
Start DFATK as described in Module 1 (Installation & Initialization).
-
Click followed by to begin this module.
-
Start DFexplore, login as
data_coordinatorand choose 254 Acceptance Test Study as described in Section 1.7, “How to start DFexplore”. -
Select > . Within the dialog, set:
Mode = Validate
Save level = 1 - Level 1
Check (enable) Enable edit checks
Click to apply these settings.

-
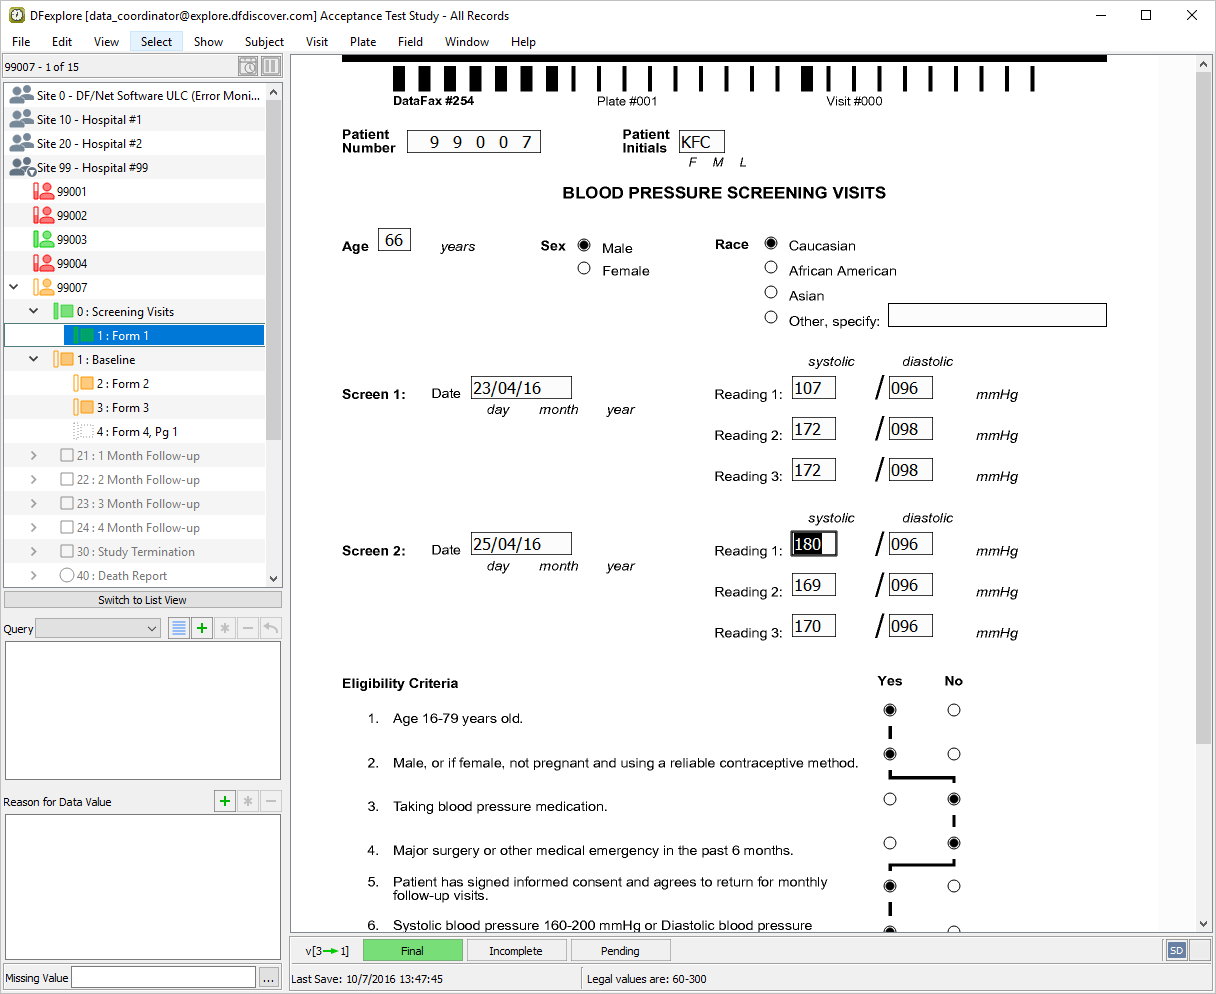
Double-click the folder for Site 99 and then double-click subject 99007 to open the subject binder. Locate 0: Screening Visits in the list of visits for subject 99007, and double-click this entry to open task records for this subject. Press Tab to advance through the fields until Screen 2, Reading 1 systolic blood pressure becomes the current field.
-
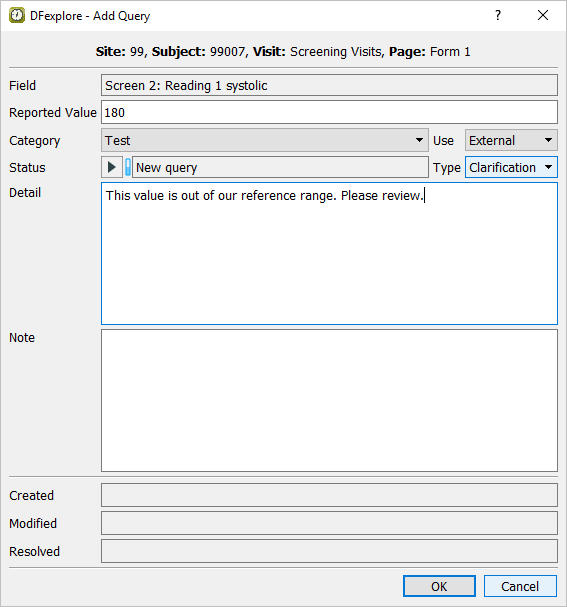
With Screen 2, Reading 1 systolic blood pressure as the current field, select > or click
 to open the Add Query dialog. In the dialog, confirm that Monitor, Test and Clinical QC are present in the Category pull-down list. Set:
Category = Test
Use = External
Type = Clarification
Status = New query
Detail =
This value is out of our reference range. Please review.
-
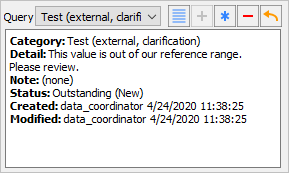
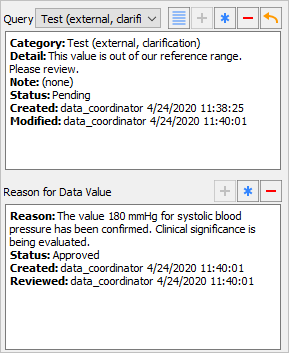
Click to apply the query to the Screen 2, Reading 1 systolic blood pressure field. Note that the field becomes blue. Examine the details in the Query window that appears near the bottom left of the screen.
-
Press Tab to advance through the remaining fields on the page without making any changes. Press Tab to advance to the save buttons at the bottom of the data screen. Click to save the page.
-
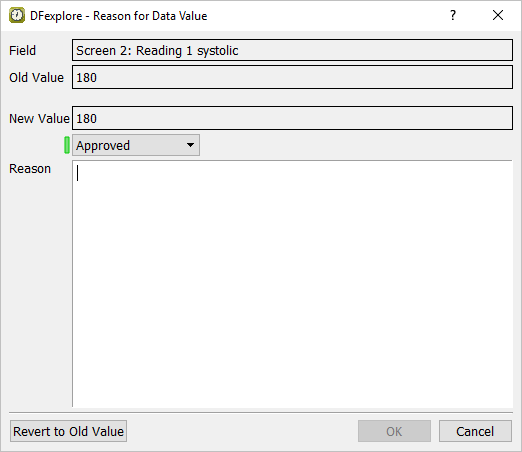
With BLOOD PRESSURE SCREENING VISITS as the active page, press Tab to advance through the fields until Screen 2, Reading 1 systolic blood pressure becomes the current field. Select > or click
to open Reason for Data Value dialog.
-
In the Reason field, enter
The value 180 mmHg for systolic blood pressure has been confirmed. Clinical significance is being evaluated..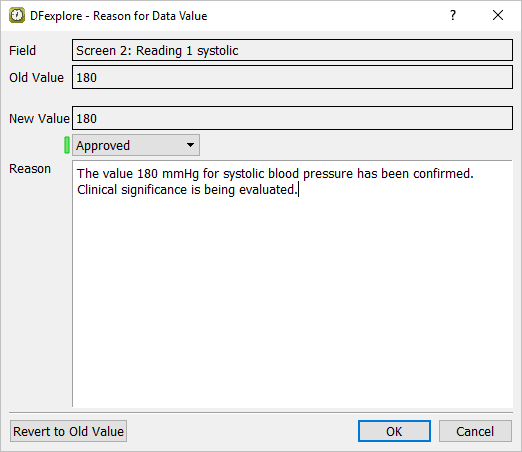
-
Click to apply the reason to the Screen 2, Reading 1 systolic blood pressure field. Note that this field is the current field and the field becomes orange. Examine the details in the Reason window that appears near the bottom left of the screen.
![[Note]](../../imagedata/note.png)
Note If a user-defined Category Code is defined with auto-resolution in DFsetup, adding a reason to a field that has a query with such a category will change the query status from outstanding to pending.
-
From the Screen 2, Reading 1 systolic blood pressure field, press Tab to advance through the remaining fields on the page without making any changes. Press Tab to advance to the Save buttons at the bottom of the data screen to make them active. Click to save the page.
-
Select > . Select > to display all pending queries for Site 99 - Hospital #99.

-
Double-click entry for subject 99007, Screening Visits: Form 1 to be taken directly to the page and the pending field.
-
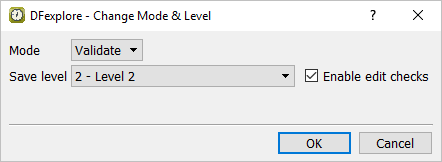
In Data View, select > . In the dialog, set:
Mode = Validate
Save level = 2 - Level 2
Check Enable edit checks
-
Click to apply and close the Change Mode & Level dialog. The current field is Screen 2, Reading 1 systolic blood pressure.
-
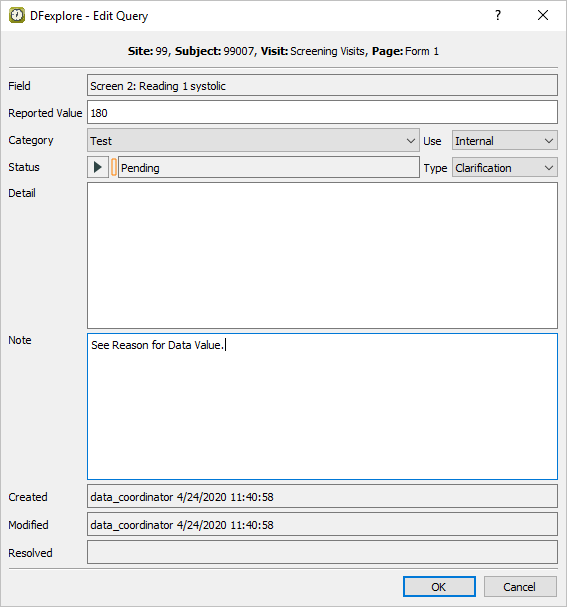
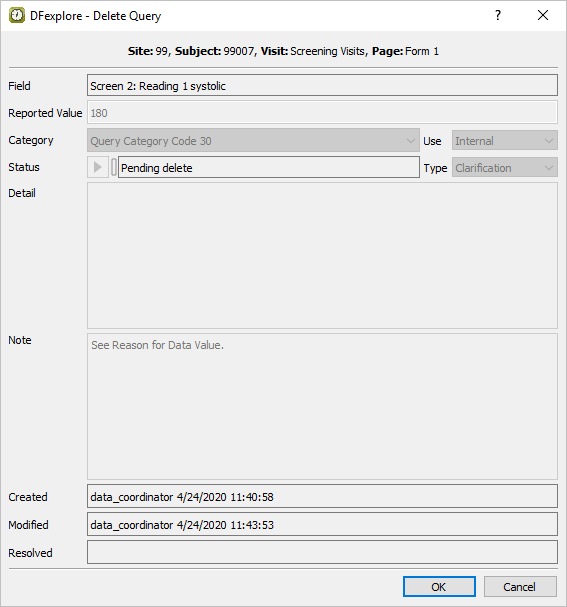
Select > or click
 . In the dialog,
 Set Use as Internal
Delete the existing text in the Detail field
Enter
See Reason for Data Value.in the Note field
Click to apply the edits.
-
From the Screen 2, Reading 1 systolic blood pressure field, press Tab to advance through the remaining fields on the page without making any changes. Press Tab to advance to the save buttons at the bottom of the data screen to make them active. Click .
-
Select > to close and exit DFexplore.
-
Start DFsetup, login as
data_managerand choose 254 Acceptance Test Study as described in Section 1.8, “How to start DFsetup”. -
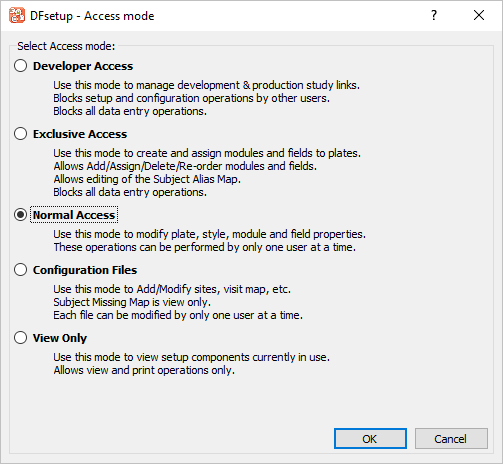
Choose Normal Access and click .
-
-
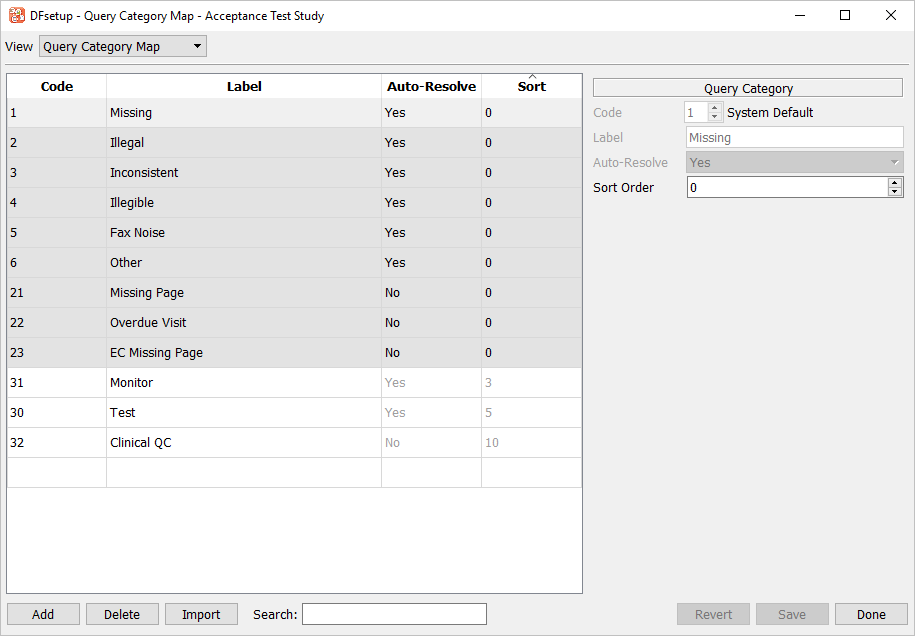
In the Query Category Map dialog, locate the entry that has Code 30 and Label
Test. Click the entry to highlight it, then click . Click and .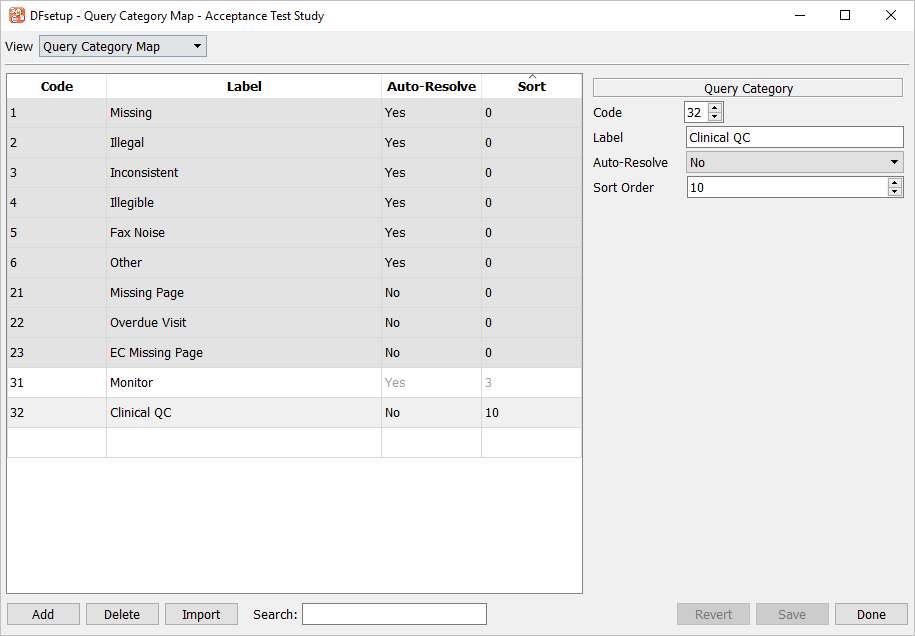
-
Select > to close DFsetup.
-
Start DFexplore, login as
data_coordinatorand choose 254 Acceptance Test Study as described in Section 1.7, “How to start DFexplore”. -
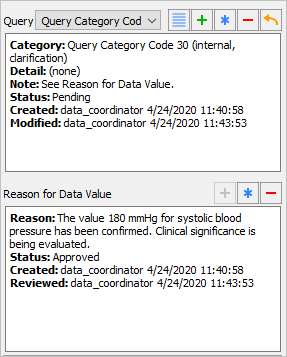
Double-click the folder for Site 99 - Hospital #99 to display a list of available subjects. Double-click subject entry 99007 in the subject list to open the subject binder. Locate the 0: Screening Visits visit for subject 99007 and double-click this entry. Press Tab to advance through the fields until Screen 2, Reading 1 systolic blood pressure becomes the current field. Examine the details in the Query window. If an existing query contains a user-defined category, and that category definition has been removed from DFsetup, the query in DFexplore displays Query Category Code 30.
-
Select > or click
 .
.
-
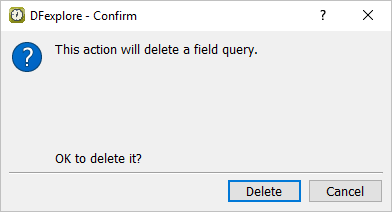
Click to perform the query deletion.
-
Click in the confirmation dialog.
-
Press Tab to advance through the remaining fields on the Blood Pressure Screening Visits page until the save buttons at the bottom of the screen become active. Click .
-
Click > to exit DFexplore.