Table of Contents
- 8.1. Tests & Requirements
- 8.2. Begin Module 8. Image Data Entry
- 8.3. Send PDF images to DFexplore.
- 8.4. Login to DFexplore and confirm the receipt of new pages in the Status View.
- 8.5. Login to the Image Router and route a misidentified page to the Acceptance Test Study new record queue.
- 8.6. Login to DFexplore and confirm receipt of the routed page in the Status View.
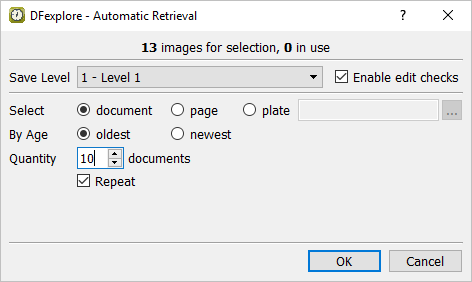
- 8.7. Retrieve new images in DFexplore Image View.
- 8.8. Enter Plate 1 (Form 1) for Subject 99002.
- 8.9. Enter Plate 2 (Form 2) for Subject 99002.
- 8.10. Enter Plate 3 (Form 3) for Subject 99002.
- 8.11. Enter Plate 4 (Form 4) for Subject 99002.
- 8.12. Compare the resolutions between Standard Definition (SD) and High Definition (HD).
- 8.13. Edit an existing query.
- 8.14. Delete an existing query.
- 8.15. Change data and record a reason for data change.
- 8.16. Batch validate all opened pages for Subject 99002 to level 2.
- 8.17. Confirm the status of entered pages in Status View.
- 8.18. End Module 8. Image Data Entry.
Submit PDF images to DFexplore.
Login to DFexplore and confirm the receipt of new pages in the Status View.
Login to the Image Router and route a misidentified page to the Acceptance Test Study new record queue.
Login to DFexplore and confirm receipt of the routed page in the Status View.
Retrieve new images in DFexplore Image View.
Enter Plate 1 (Form 1) for Subject 99002.
Enter Plate 2 (Form 2) for Subject 99002.
Enter Plate 3 (Form 3) for Subject 99002.
Enter Plate 4 (Form 4) for Subject 99002.
Compare the resolutions between Standard Definition (SD) and High Definition (HD).
Edit an existing query.
Delete an existing query.
Change data and record a reason for data change.
Batch validate all opened pages for Subject 99002 to level 2.
Confirm the status of entered pages in Status View.
Estimate of Time Required: 30 Minutes
-
Start DFATK as described in Module 1 (Installation & Initialization).
-
Click followed by to begin this module.
-
Click to email a copy of ID99002.pdf to
site_monitor. Clicking more than once will result in multiple pages arriving to your email inbox.![[Note]](../../imagedata/note.png)
Note Save the ID99002.pdf file received via email to your local computer. This file is required to complete the remainder of this module. Refer to Section 1.8, “Creating user accounts and assigning study permissions.” as a valid email address is required for
site_monitorto receive the module specific PDF files. -
Start DFsend as described in Section 1.9, “How to start DFsend”.
-
Click . From the Select PDF Files file selection dialog. Locate the previously saved ID99002.pdf file. Select the file. Click .
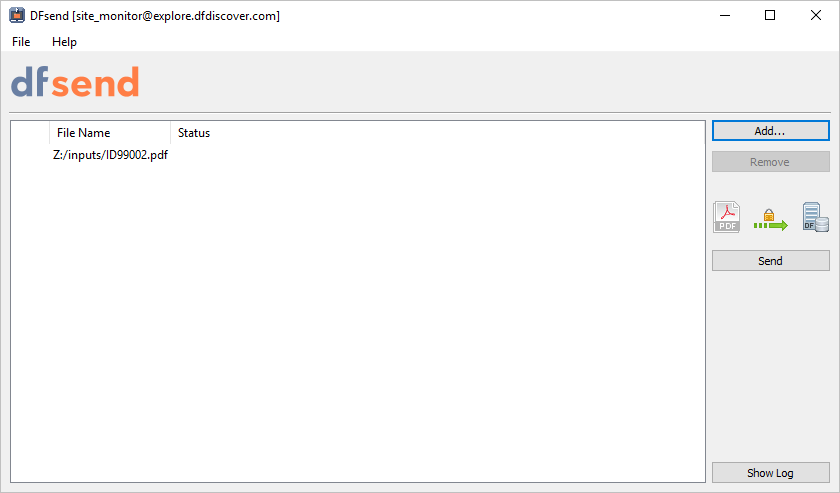
Note Documents can also be added by dragging-and-dropping the desired PDF files from a local file folder directly into the list area.
-
Click . In Verify Password dialog, enter
site_monitorin the Username field and the previously assigned password in the Password field. Click .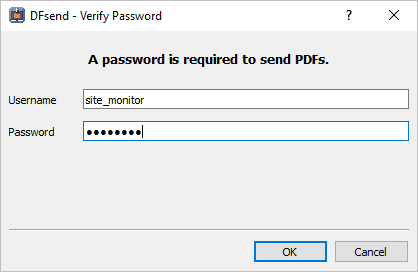
-
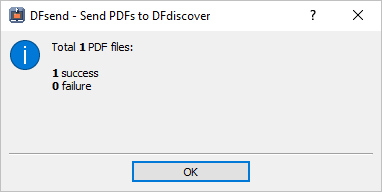
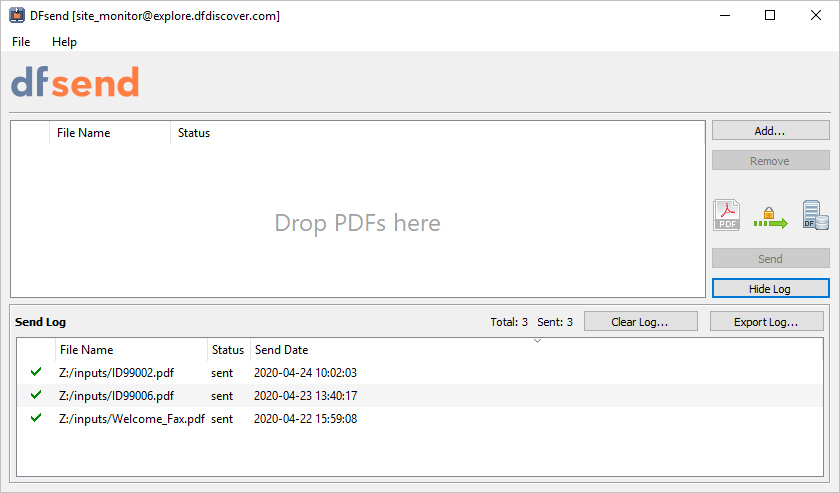
In the resulting Send PDFs to DFdiscover dialog, confirm 1 success and 0 failure are shown. Click .
-
Click to review the DFsend transmission history.
-
Select > .
Note Wait 2-3 minutes prior to proceeding to DFexplore.
-
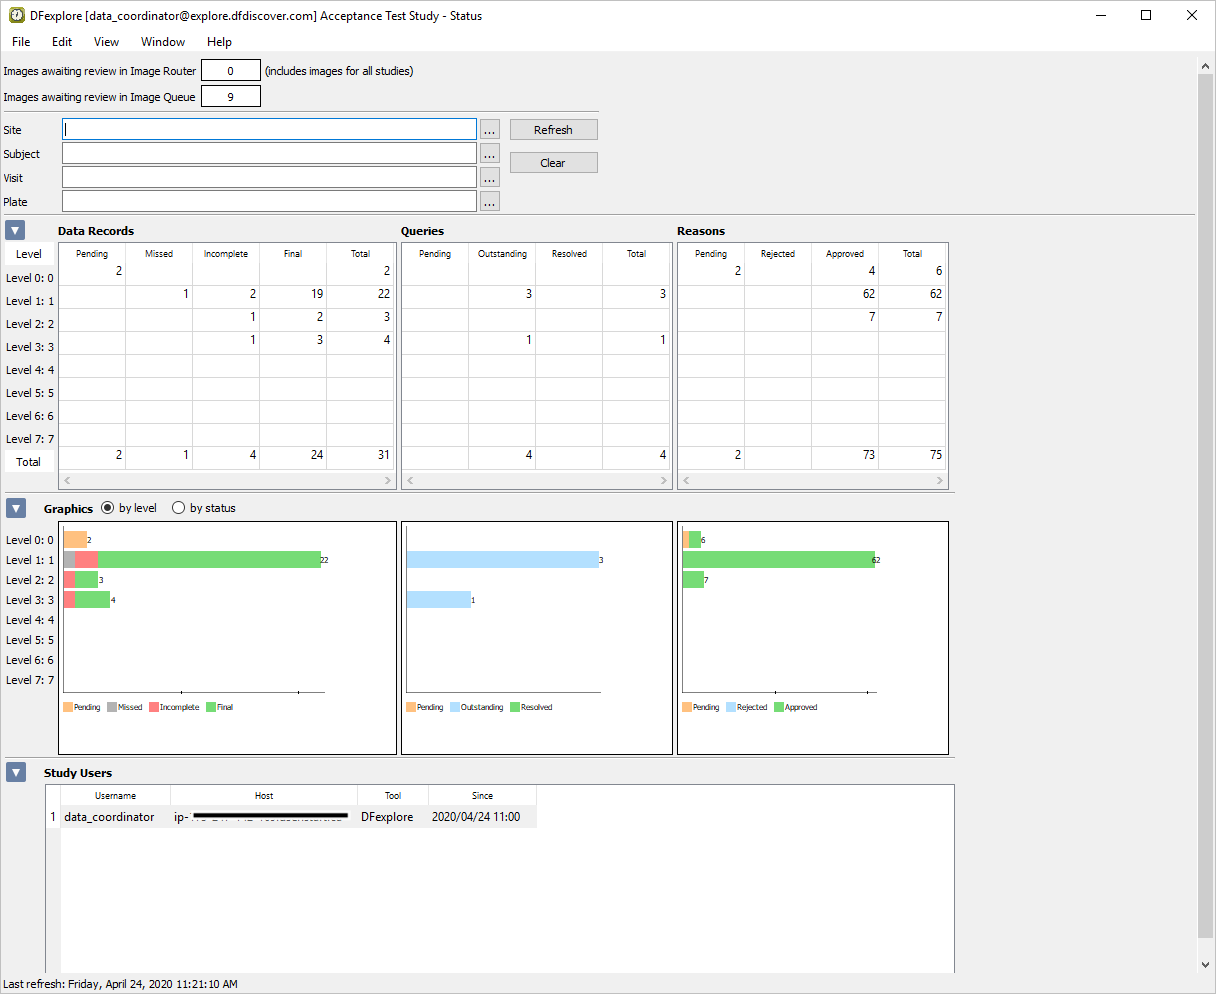
Start DFexplore and login as
data_coordinatorand choose 254 Acceptance Test Study as described in Section 1.7, “How to start DFexplore”. -
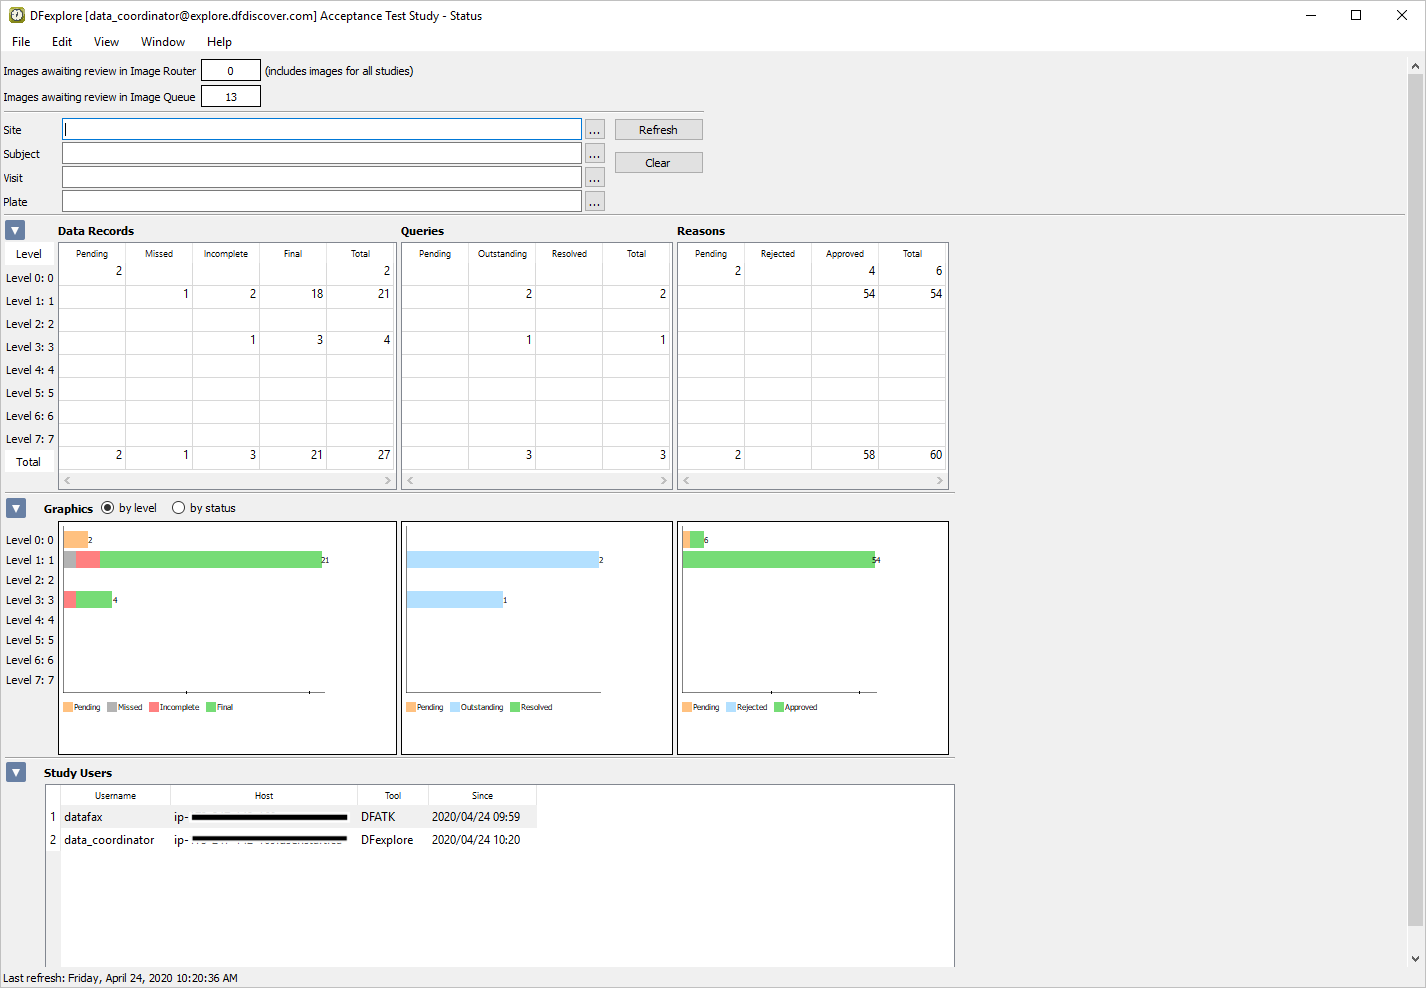
Select > . Examine the count displayed for Images awaiting review in Image Queue.
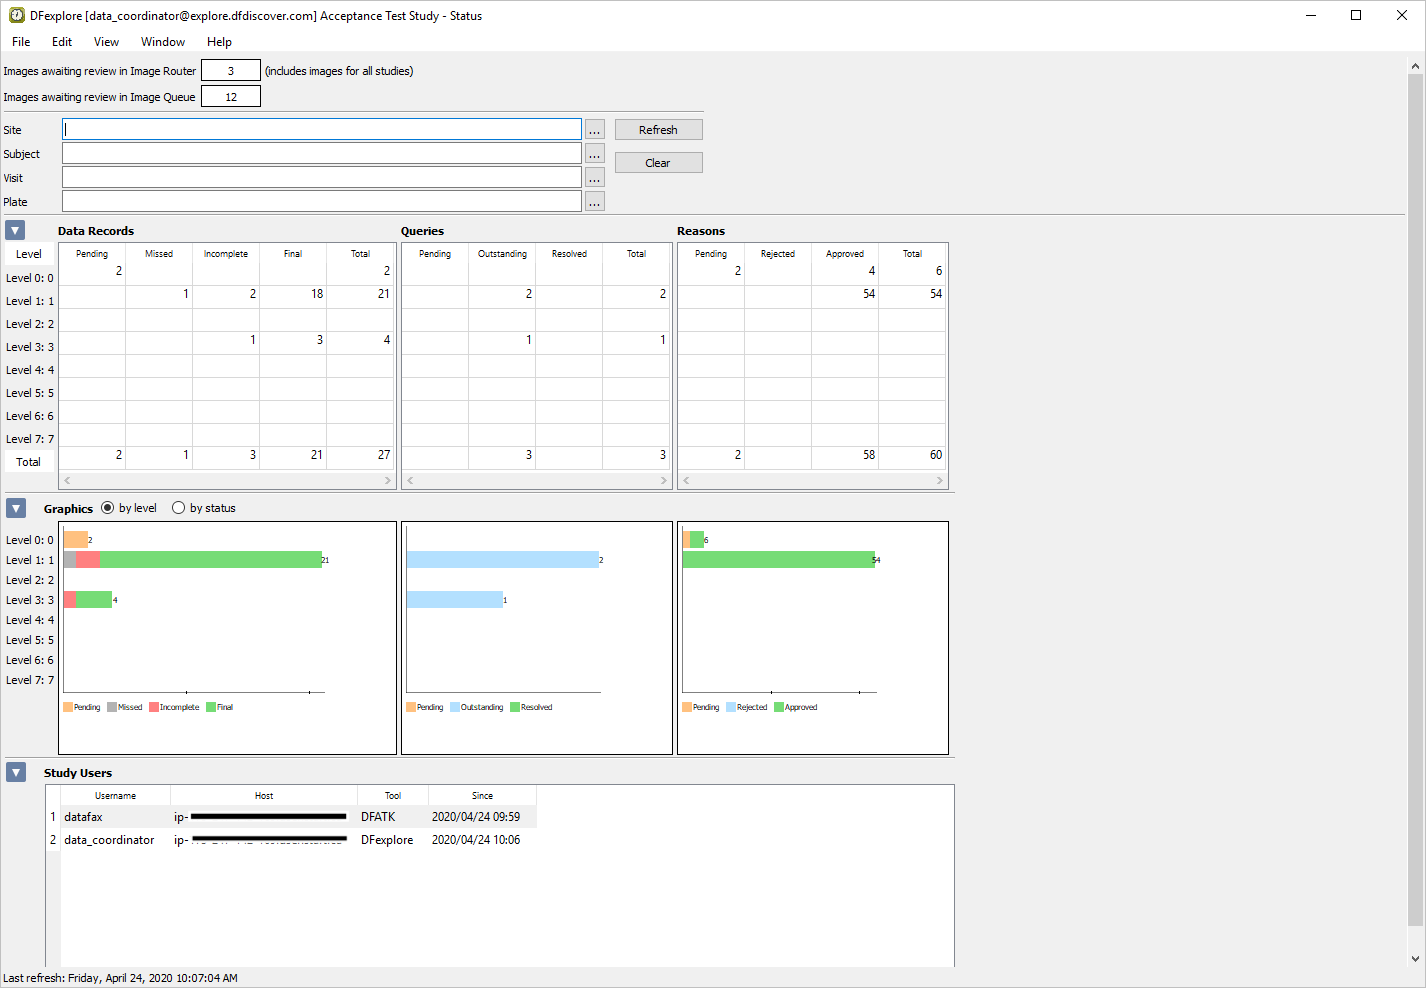
Note Although 13 records were submitted, only 12 will be awaiting validation. The first page in the document has an unreadable barcode. As the barcode could not be identified for the page, it has been routed to the Image Router instead of to 254 Acceptance Test Study.
-
Select > to return to the login dialog and list of available studies.
-
In the DFexplore login dialog, click to open the Image Router.
-
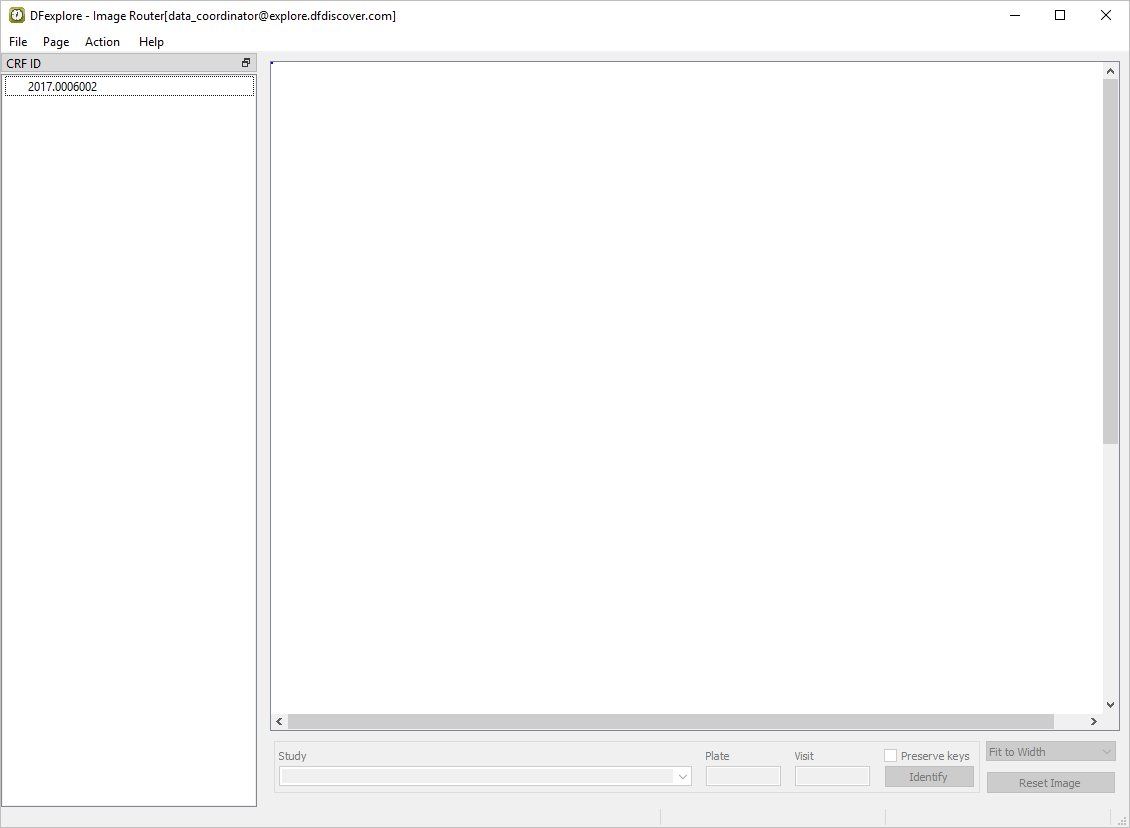
Locate the CRF for Subject Number 99002, Plate 1, Sequence 0 (Form 1), and select the page from the list of images in the CRF ID window.
Note Any pages that have been received and which DFdiscover could not identify as CRFs for any of the studies registered at your site, will be found in the Image Router. If there are more pages than those added by execution of the DFATK, you may need to locate the 254 Acceptance Test Study page in the listing of images.
-
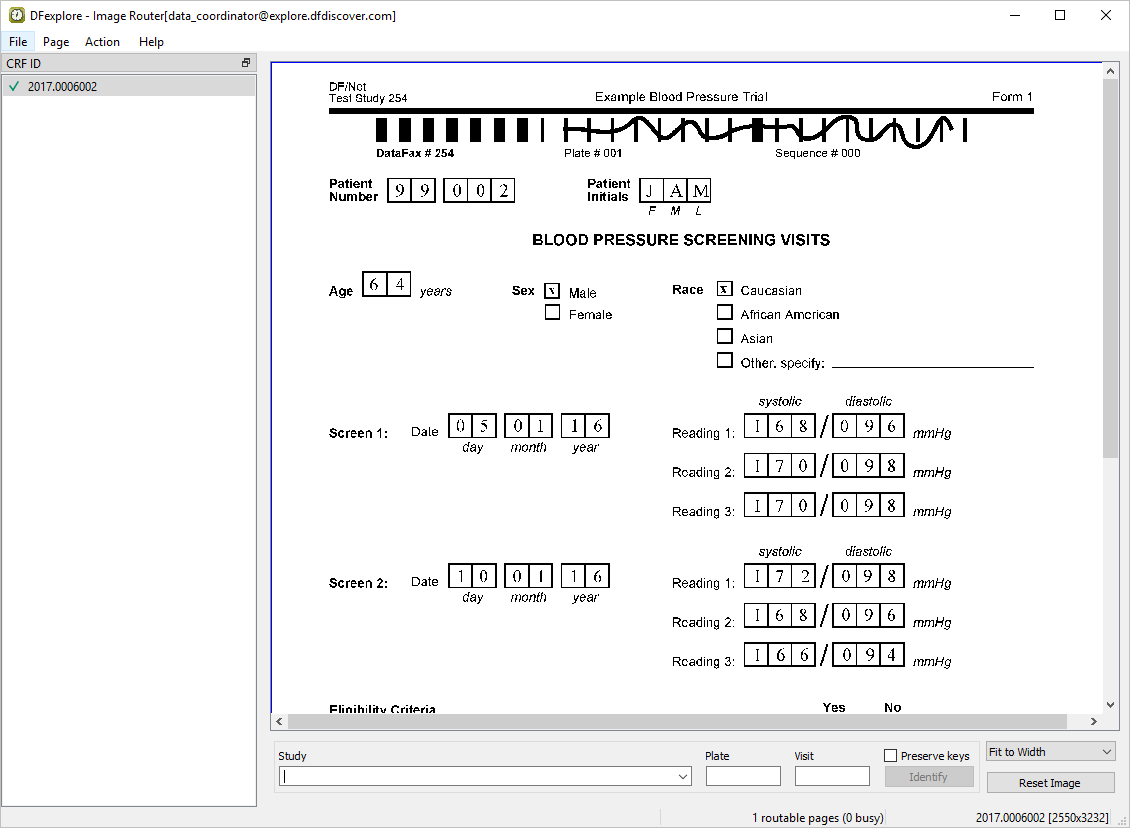
Select > to correctly identify the CRF for Subject 99002, Plate 1, Sequence 0.
-
Click leftmost end of the horizontal barcode line. Drag the cross-hairs across the solid barcode line then click rightmost end of the line.
-
Select 254 - Acceptance Test Study from the Study drop-down list. Enter Plate and Visit numbers, as illustrated. Click to identify the record.

-
Select > to exit the Image Router and return to the DFexplore login dialog.
-
Choose 254 Acceptance Test Study and click . If the list of studies closes before a selection is made you will need to log back into DFexplore by re-entering the Username and Password for user
data_coordinator. -
Select > to examine the count displayed for Images awaiting review in the Image Queue. This count has increased by 1 as a result of a misidentified page being routed.
-
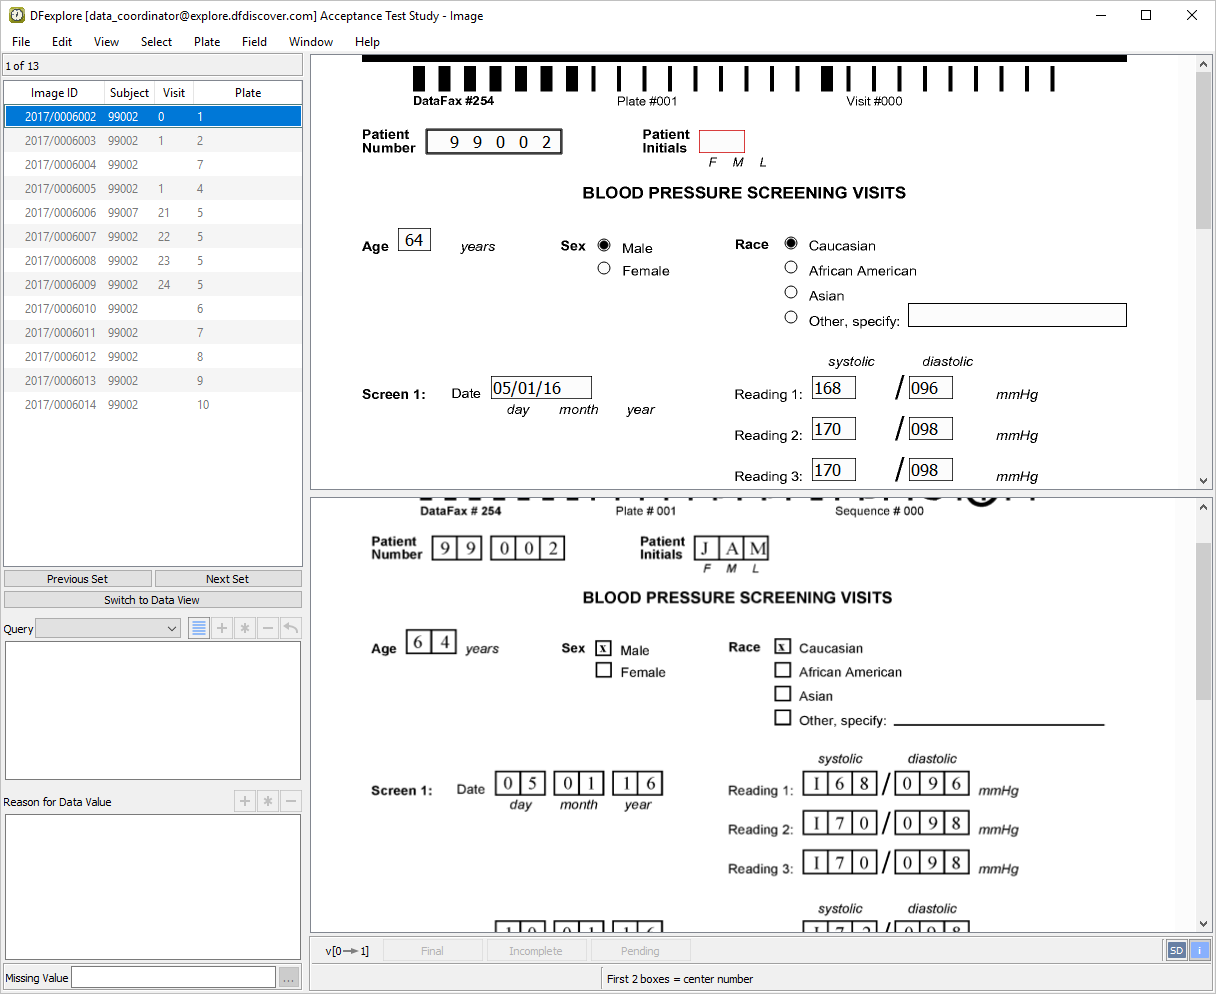
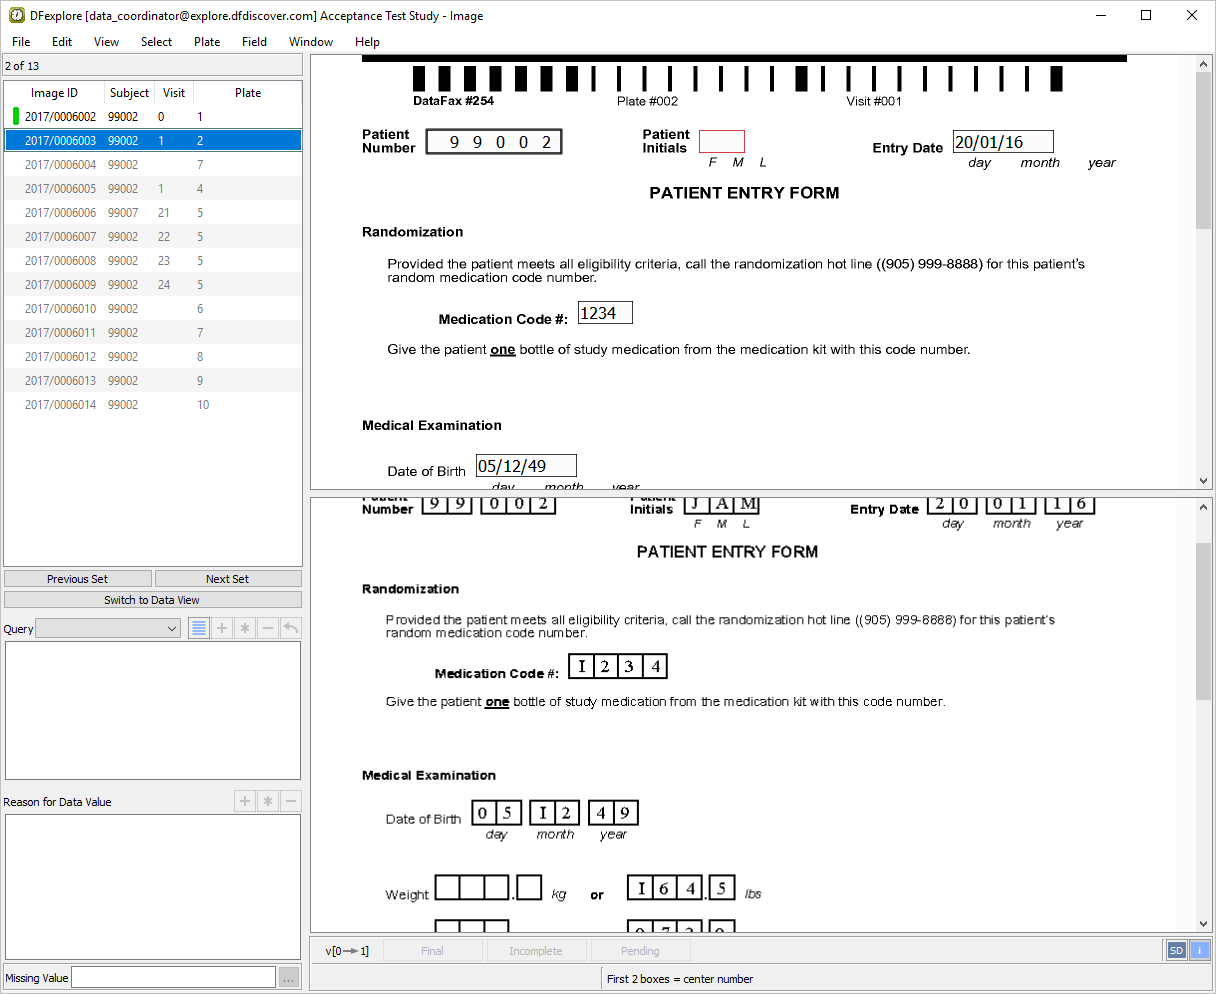
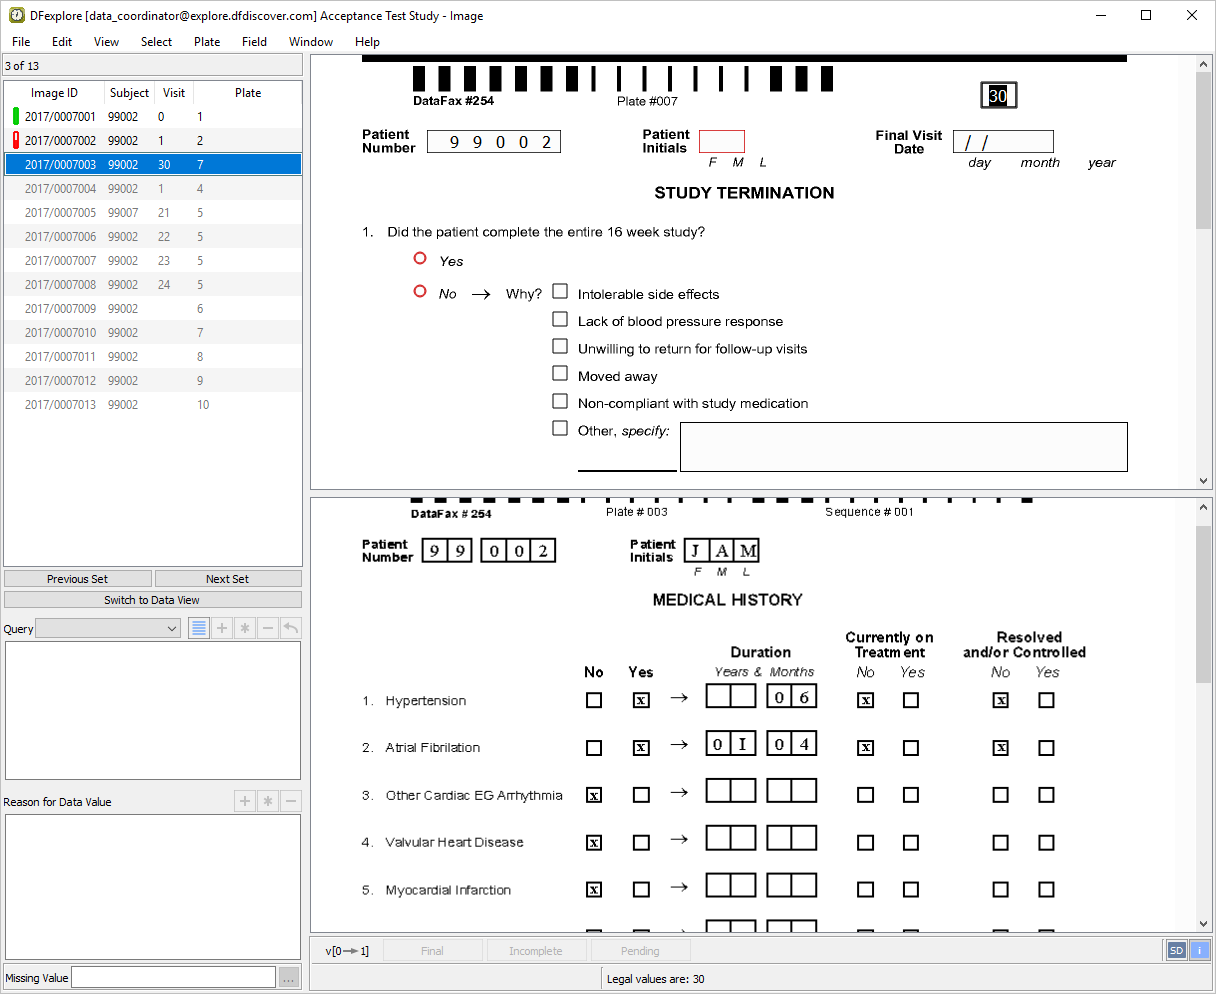
With the first page of BLOOD PRESSURE SCREENING VISITS for Subject 99002 displayed, make the page active for data entry by clicking anywhere on the page background using the mouse.
Note In your normal image entry process, you must always pay careful attention to the accuracy of the ICR data. You will need to do the same here. It is possible that the new pages contain ICR errors that you will need to correct during entry. In particular, it is important that you correct any key fields (visit and/or subject numbers) that may have been misread as these are critical to the identification and storage of the data. Note that the ICR data records on your screen may not match exactly those shown in the examples throughout this module.
-
Correctly enter Patient Number and Patient Initials as per the CRF image. Press Tab to advance to the Age field.
-
The
MissingQCedit check is programmed to pop up a Query note if any of the following fields are left blank: Age, Sex, Screen 1 Date and all Screen 1 blood pressure readings. Test this edit check on the Age field by making this field blank. Press Tab to exit the Age field. When the Add Query window pops up, click to ignore and return to complete the field as per the CRF image, before proceeding to the next field.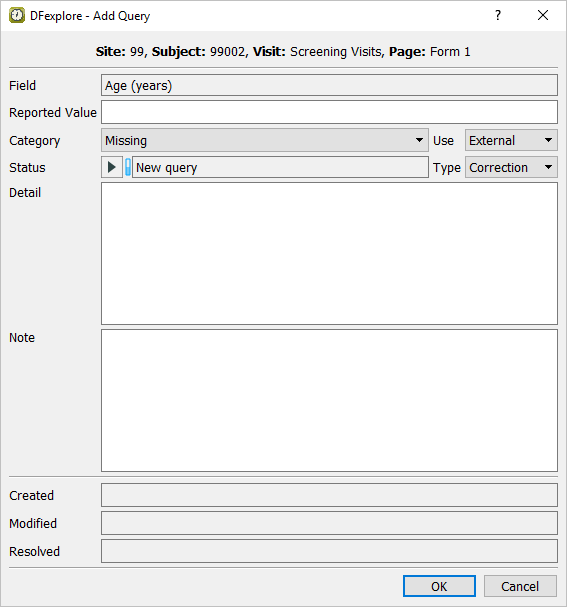
-
Enter the Sex and Race fields as they appear on the CRF image. Press Tab to advance to the Screen 1 date field and enter its value
05/01/16followed by all blood pressure readings for Screen 1 date. -
The
ScreenDatesedit check is executed on exit from the Screen 2 Date field. It checks that the Screen 2 Date follows the Screen 1 Date by at least one day. Enter a Screen 2 Date of04/01/16, which precedes the Screen 1 Date of05/01/16, then press Tab to exit the field. After verifying the message in the Add Query confirmation dialog, click .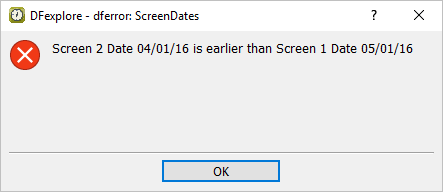
-
Return to the Screen 2 date field and enter the date and all Screen 2 blood pressure values as they appears on the CRF image.
-
Step 1 to Step 6 test the entry of specific data fields. Any field that has not been correctly entered (by you or the DFdiscover ICR) is now completed by entering the values as they appear on the CRF image. After entering the last data field Eligibility Criteria #6, press Tab to exit the field to make the Save buttons at the bottom of the data entry window active.
-
As no data problems exist on the entered page, the page can be saved to the database with a status of Final. Do this by clicking with the mouse or by pressing the space bar.
-
Correctly enter Patient Number per the CRF image. Press Tab to advance to the Patient Initials field. The
SetInitedit check automatically completes the Patient Initials field if the initials are available on the Screening Form (Plate 1).Note The Patient Number must be entered correctly on the data record for the
SetInitedit check to execute. When an edit check changes a field's value, the changed field will automatically be assigned a default reason and the field's color will change to green to show that an approved reason exists. -
Correctly enter the Entry Date, Medication Code # and Date of Birth values per the CRF image. The
CheckAgeedit check calculates the Subject's age from the Entry Date and Date of Birth fields, and compares this value with the value entered for Age on Plate 1. If these values disagree, an error message is displayed. Press Tab to exit Date of Birth field to execute theCheckAgeedit check.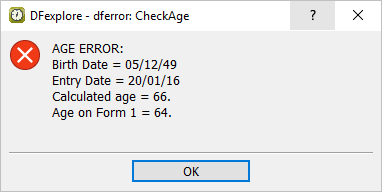
-
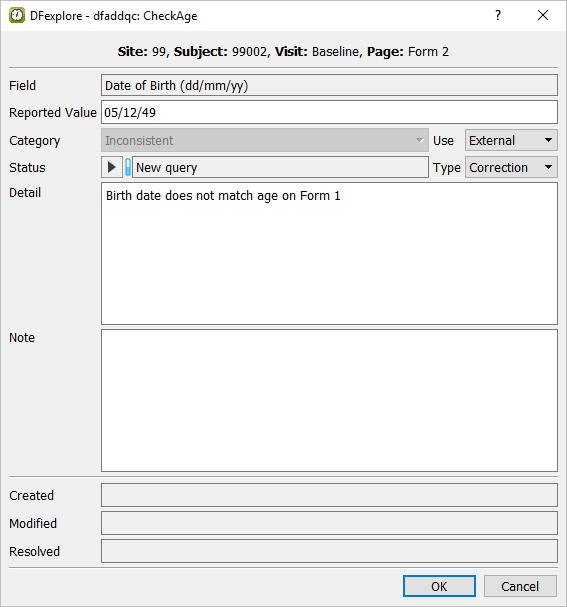
Click in the error message window to bring forward the query dialog. Click in the query dialog to attach a query to the Date of Birth field.
-
Press Tab to advance to the Weight (kg) field. Do not enter a value as the corresponding field on the CRF image is blank. Continue on to the Weight (lbs) field and enter the value that appears on the CRF image. If only one of the 2 weight fields are completed, the
WeightEquivedit check calculates and enters the equivalent value for the blank Weight field. Press Tab to exit the Weight (lbs) field executing theWeightEquivedit check. -
Press Tab to advance to the Height (cm) field. Do not enter a value as the corresponding field on the CRF image is blank. Continue on to the Height (in) field and enter the value that appears on the CRF image. If only one of the 2 height fields is completed, the
HeightEquivedit check calculates and enters the equivalent value for the blank Height field. Press Tab to exit the Height (in) field executing theHeightEquivedit check. -
Step 1 to Step 5 test specific data fields. Any field that has not been entered (by you or the DFdiscover ICR) is now completed by entering the values as they appear on the CRF image. After entering the last data field (Date of First Study Follow-up Visit), press Tab to exit the field to make the save buttons active.
-
As an outstanding query exists on the Date of Birth field, the page must be saved to the database with a status of Incomplete. Click with the mouse or by pressing the space bar.
Note If outstanding queries and/or illegal values exist on a data record, DFdiscover will never allow the record to be assigned the status Final.
-
Plate 3 has been incorrectly identified by DFdiscover as Plate 7 (the data record and CRF image do not match). Before data entry can begin, the record must first be correctly identified by correcting the barcode. To do this, select > .
-
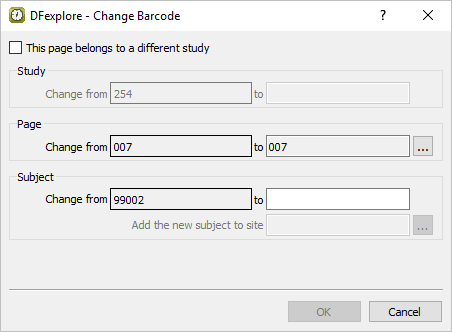
In the Change Barcode dialog, set the Page to 003. Do this by clicking to display a listing of all defined study plates, then select the entry 003 - Medical History from the list. Click to close the dialog.

-
Set the Visit by clicking to display a listing of all defined study visits, select 1 - Baseline from the list. Click to close the visit listing dialog. Click .

-
Confirm the change to the barcode by clicking in the warning dialog.
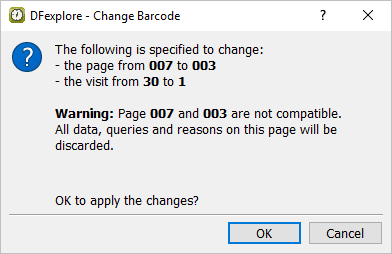
Note When a barcode is changed, all data fields on the data record (top half of the screen), will be blanked of their previous ICR values as these are no longer correct. The correct values must be entered manually.
-
Correctly enter Patient Number as per the CRF image. Press Tab to advance to the Patient Initials executing the
SetInitedit check as in Section 8.9, “Enter Plate 2 (Form 2) for Subject 99002.”. -
Press Tab to advance to the 1. Hypertension No/Yes field and check the response indicated on the CRF image. Press Tab to advance to the Duration, Years field and leave it blank as per the CRF image. Press Tab to advance to the Duration, Months field and enter the number of months
06as they appear on the CRF image. TheMedHxDuredit check completes the Duration fields by entering zeros into the Years field if only Months are given, and zeros into the Months field if only Years are given. Press Tab to exit the Duration, Months field to execute theMedHxDuredit check.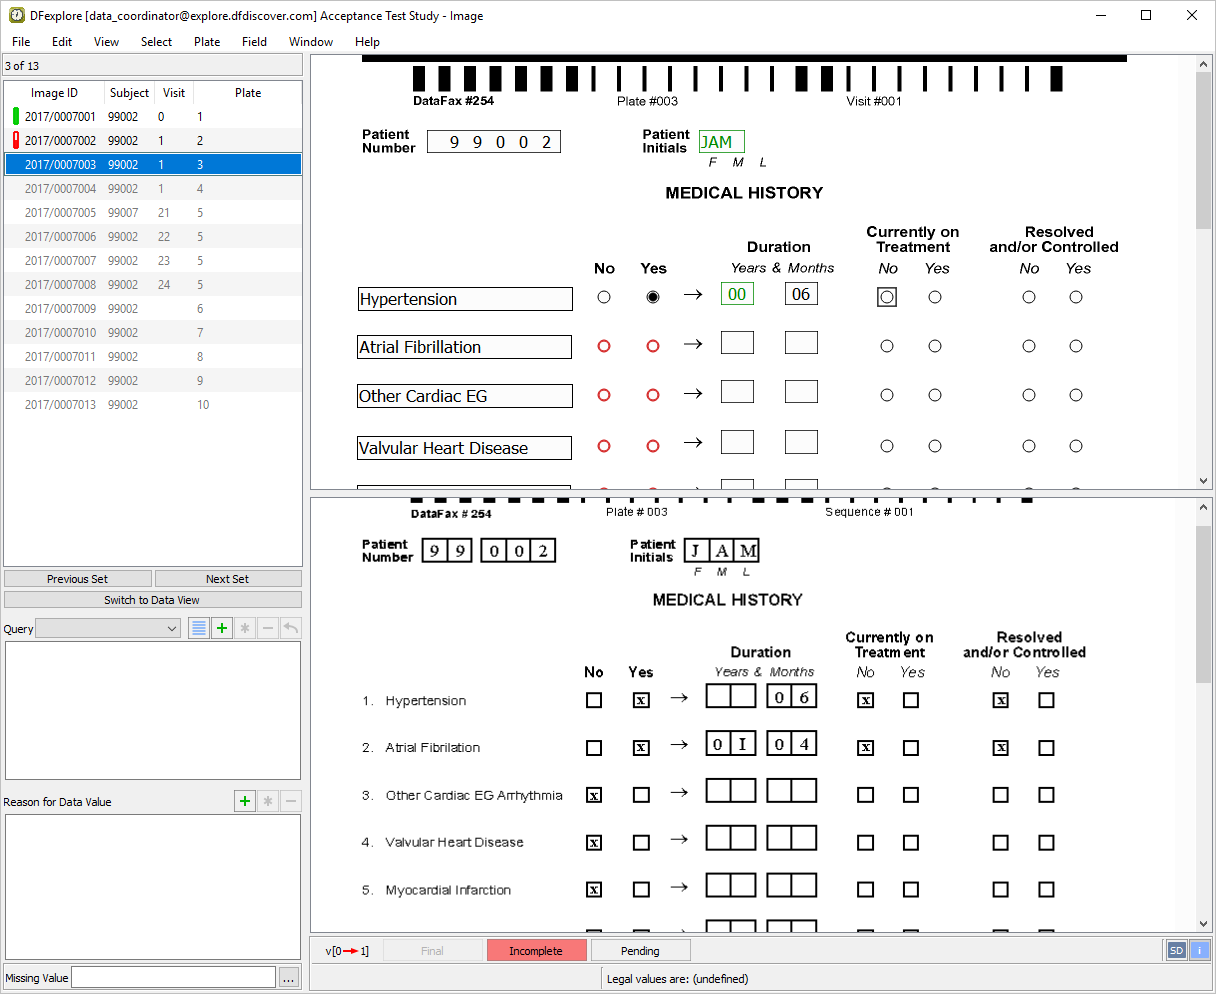
-
Enter the remaining values for 1. Hypertension and enter all fields for 2. Atrial Fibrillation. Press Tab to advance to the first No/Yes field for 3. Other Cardiac EG Arrhythmia.
-
A skip has been set on the No/Yes fields for each medical history item such that if "No" is selected, the remaining fields for that medical history item are skipped and the user is taken to the next item. Enter the correct values for medical history items 3. to 6. to execute the skip.
-
Enter all values for 7. Diabetes up to and including the Currently on Treatment field. Press Tab to advance to the Resolved and/or Controlled field which has been left blank on the CRF image. Select > or click
 . In the Add Query dialog, set:
Category = Missing
Status = New query
Use = External
Type = Correction
Click .
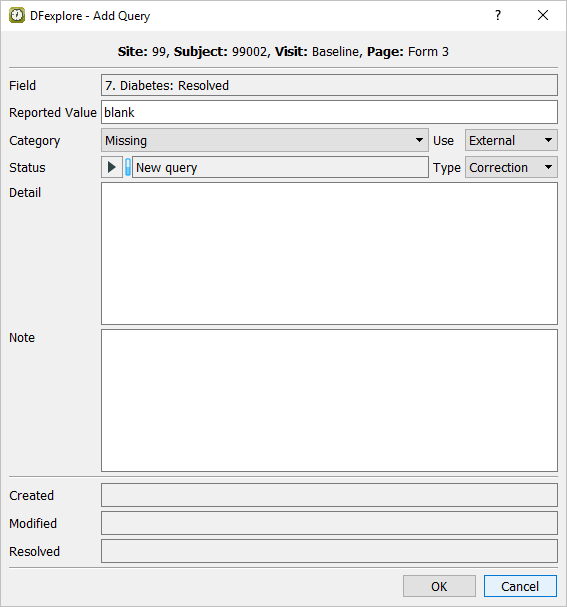
Note DFexplore attempts to infer the Category, Status, Use and Type information when a query is being added. It is important to verify the query settings and correct them if necessary, before applying the query to the data field.
-
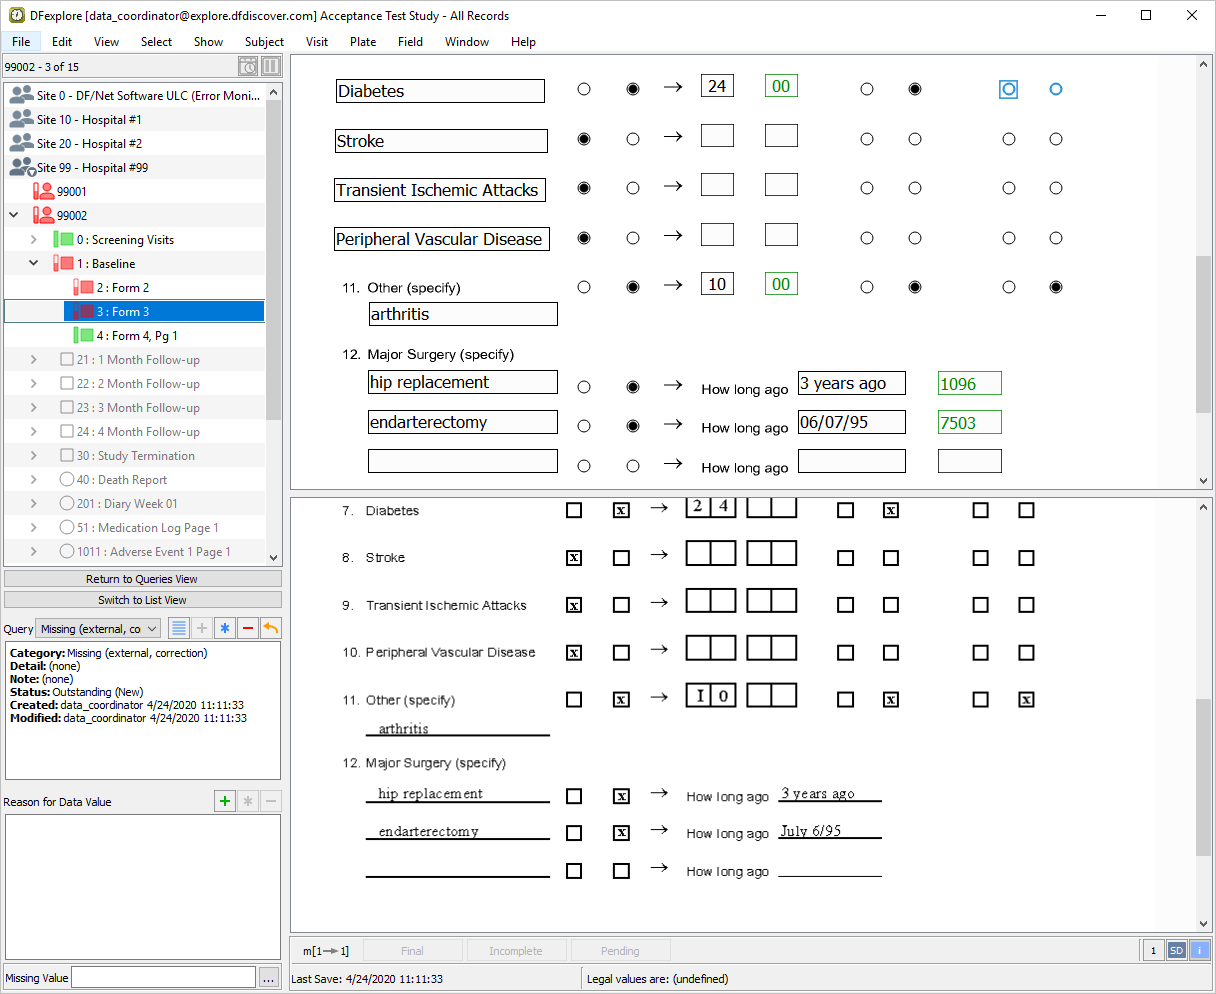
For medical history items 8. to 11., enter the appropriate values per the CRF image. Press Tab to advance to the text field for the first 12. Major surgery (specify) to make it the current field.
-
Enter the correct values in all fields for the first Major Surgery. Input
hip replacementup to and including the How long ago response. An edit check,CalcDays, attempts to read the How long ago text field to calculate the number of days prior to study entry that surgery occurred. The calculated value automatically populates the hidden field to the right of these text fields. Pressing Tab off the How long ago field executesCalcDaysedit check.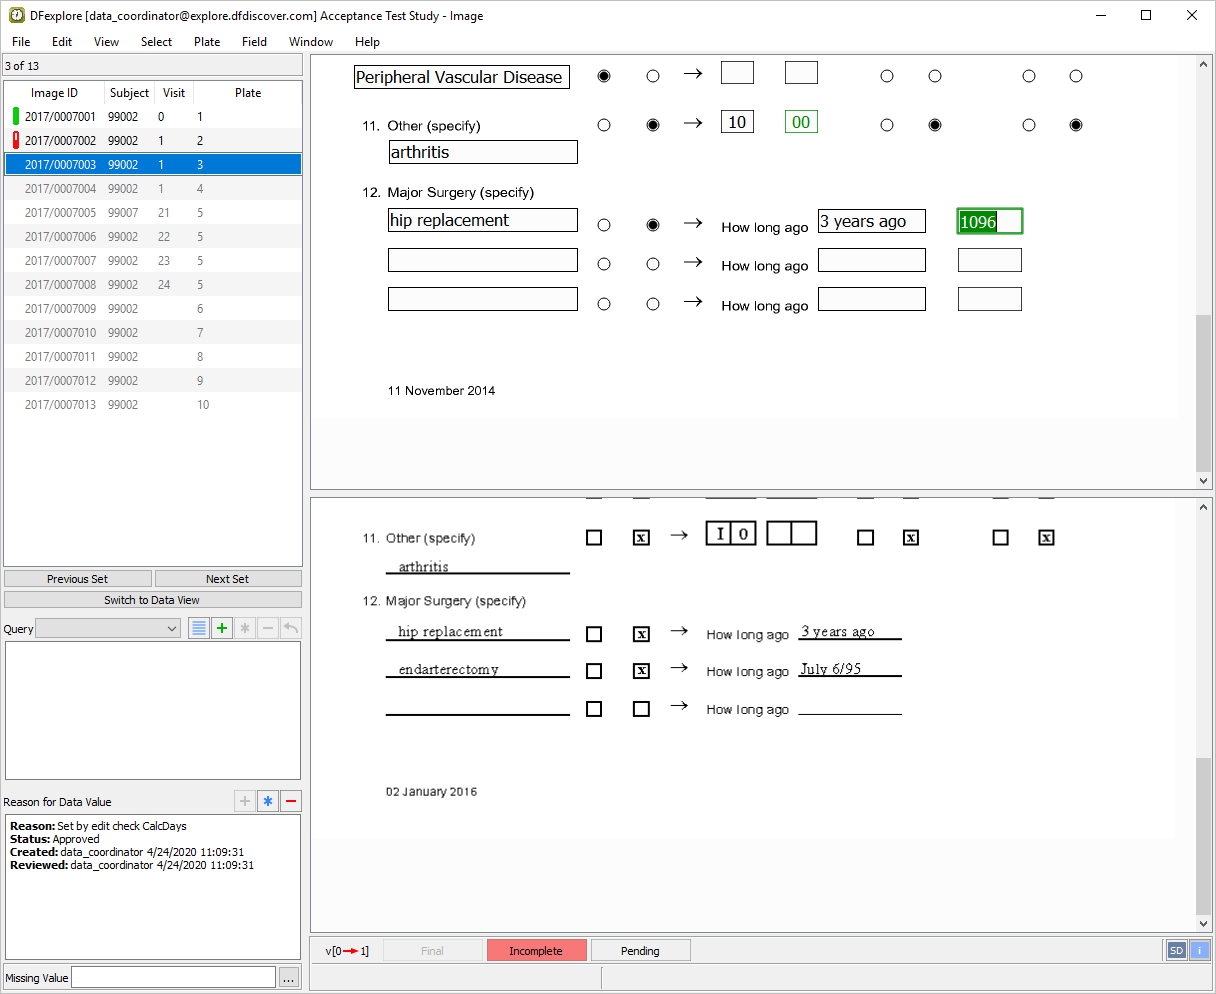
-
Press Tab to advance to the 2nd Major Surgery item. Input
endarterectomyand perform the same steps as in Step 11. Enter the date06/07/95forJuly 6/95in the How long ago field.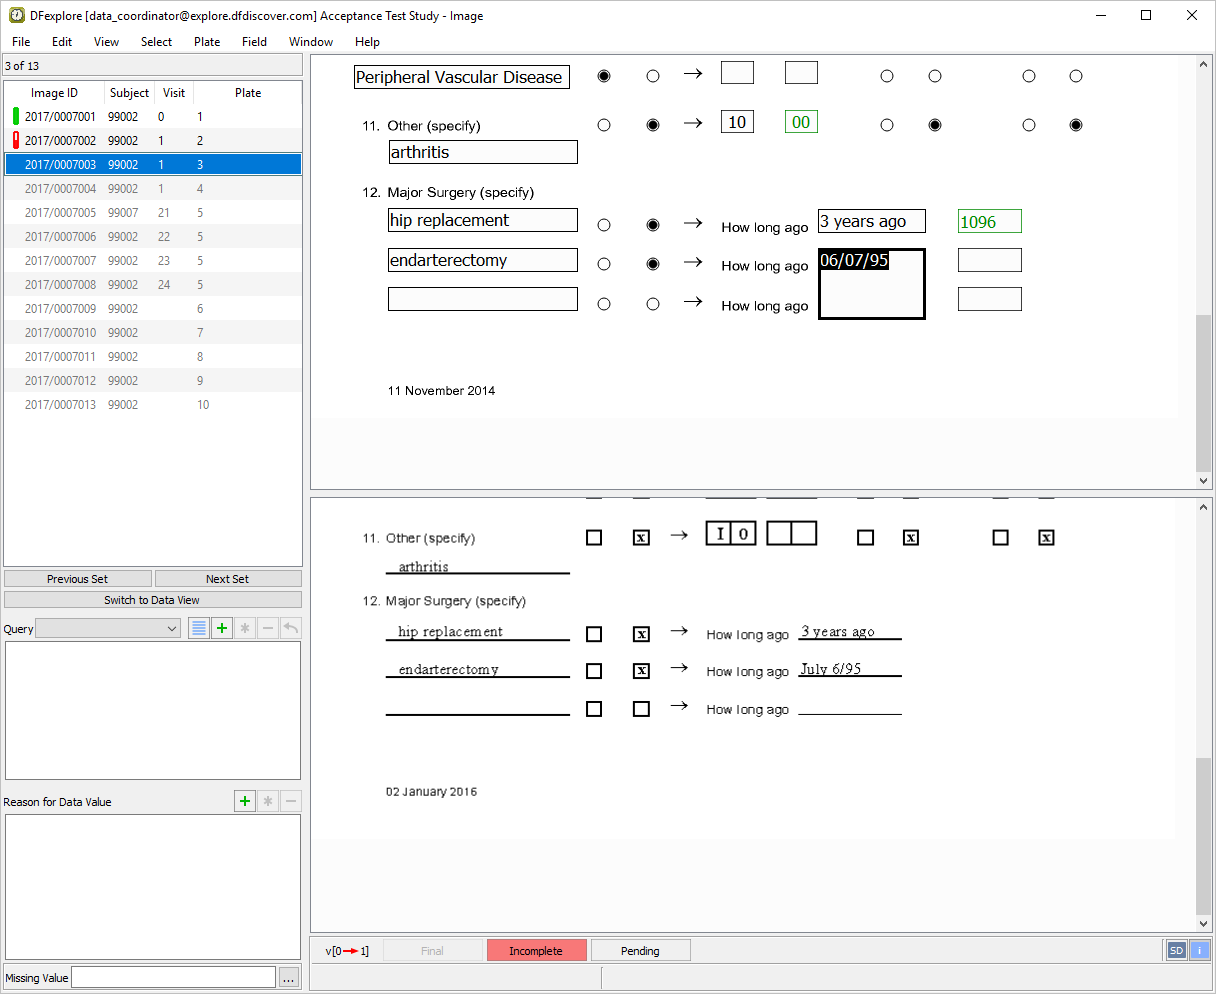
-
Step 5 to Step 12 test specific data fields. Any field that has not been entered (by you or the DFdiscover ICR) is now completed by entering the values as they appear on the CRF image. After entering the last data field, press Tab off the field to make the save buttons at the bottom of the data entry window active.
-
Click with the mouse or by pressing the space bar. As an outstanding query exists on the 7. Diabetes, Resolved and/or Controlled field, the page must be saved to the database with a status of Incomplete.
-
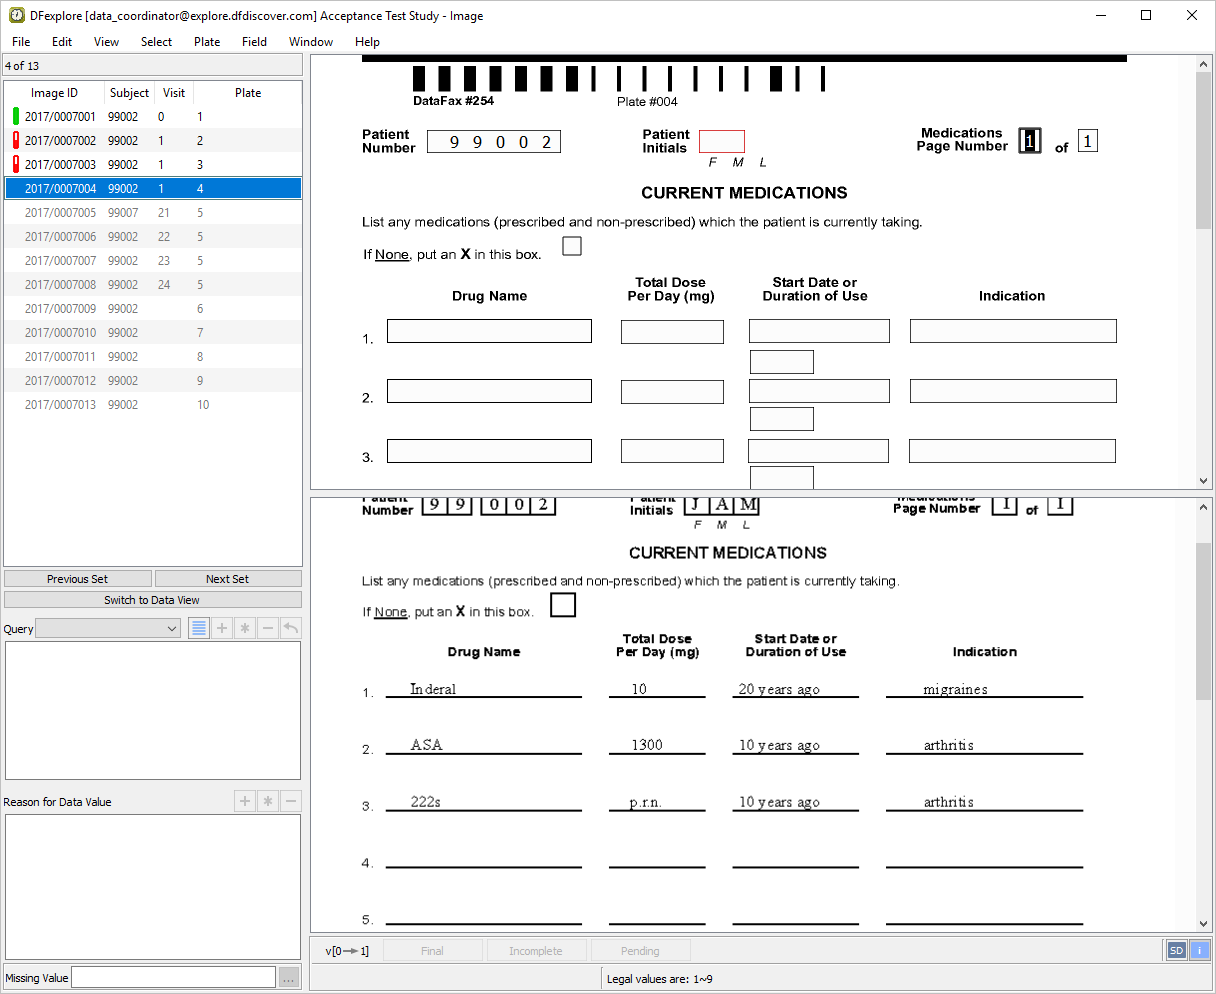
Correctly enter Patient Number, Patient Initials and both Medications Page Number fields per the CRF image. As for the previous pages, the
SetInitedit check automatically completes the Patient Initials field. Press Tab to advance to the 1. Drug Name field. -
In 1. Drug Name type the text Inderal as it appears on the CRF image. The Drug Name fields have been mapped to lower case in their setup definitions. Therefore, all entered text will appear as lower case regardless of the case typed.
-
Enter all data for the first 2 drugs (
Inderal and ASA) as it appears on the CRF image. TheCalcDaysedit check that is present on Plate 3 (Medical History) is also present on the Start Date or Duration of Use fields. During data entry, confirm that the hidden fields contain the calculated values as shown below.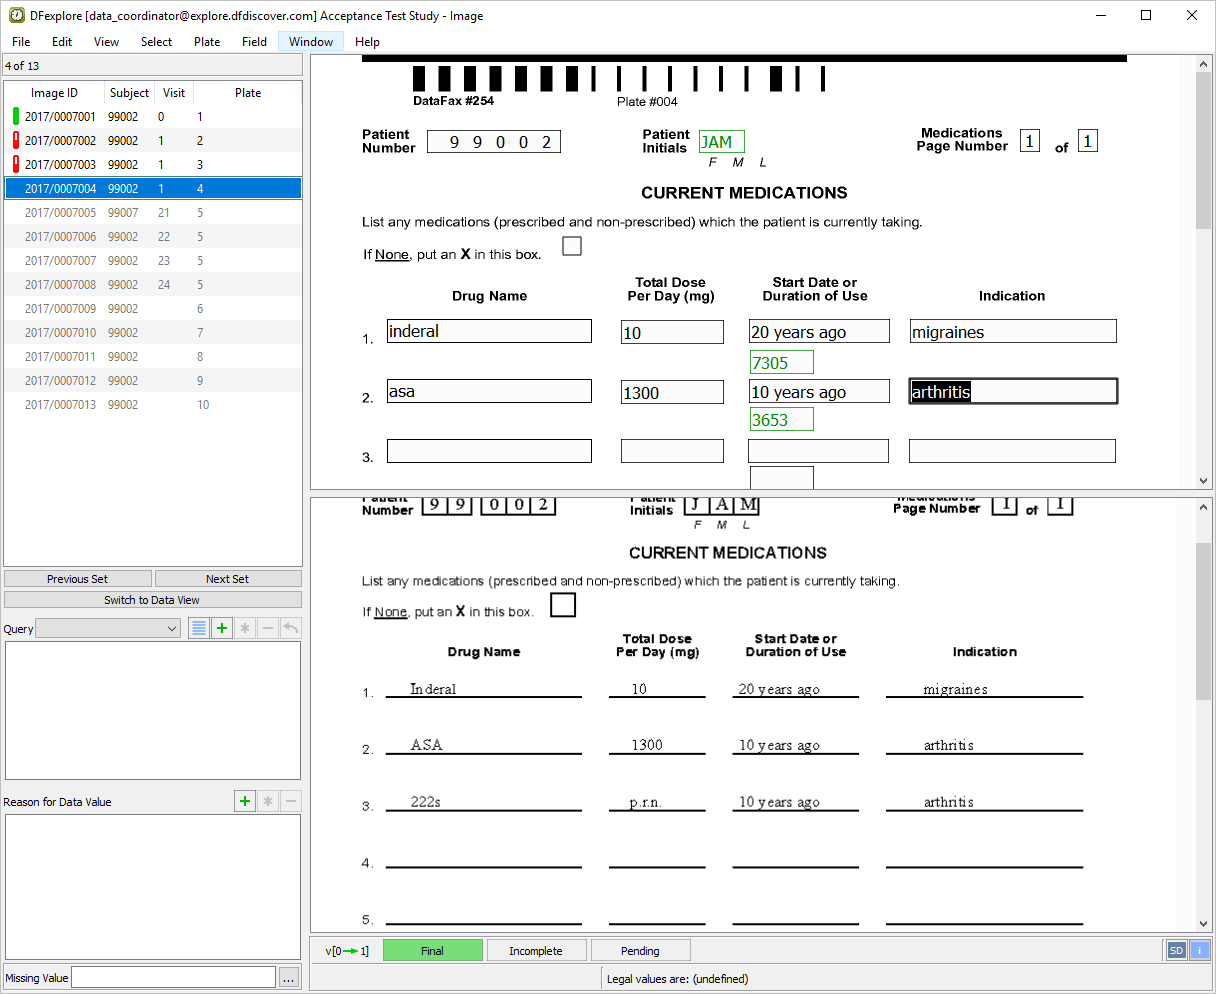
-
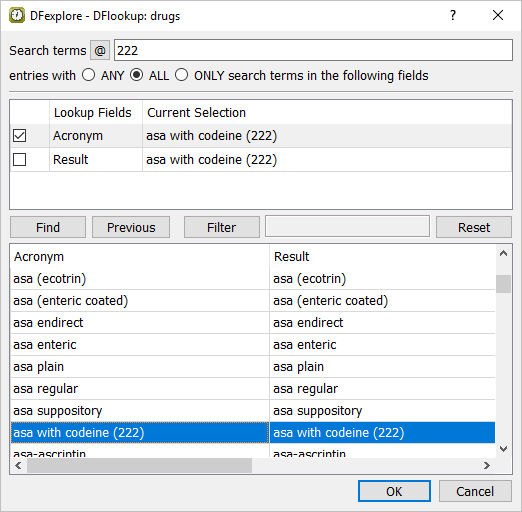
Press Tab to advance to the 3. Drug Name field. An edit check,
DrugLookup, has been programmed to match the entered drug text with an entry in a lookup table. Enter the 3rd drug name222sand press Tab to exit the field executingDrugLookupedit check. (If an entry can not be found in the lookup table, a search dialog is displayed.)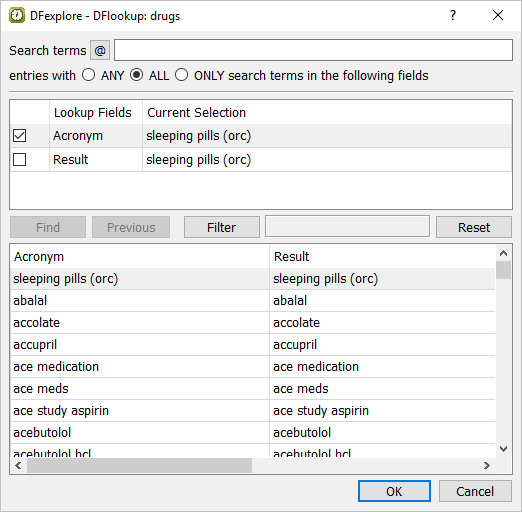
-
In the search dialog,
Check (enable) Acronym
Uncheck (disable) Result
Input (enter)
222in the Search terms
Click . Once the match asa with codeine (222) is found, click .
-
Enter the remaining values for the 3rd drug field and press Tab to advance to 4. Drug Name field. A skip has been set on each of the Drug Name fields such that if the field is blank, the remaining fields for that drug are skipped. Press Tab to advance through the remaining Drug name fields, and leave them blank as per the CRF image, to execute the skip.
-
Step 1 to Step 6 test specific data fields. Any field that has not been entered (by you or the DFdiscover ICR) is now completed by entering the values as they appear on the CRF image. After entering the last data field, press Tab to exit the field and make the save buttons at the bottom of the data entry window active.
-
As no data problems exist on the entered page, the page can be saved to the database with a status of Final. Do this by clicking or by pressing the space bar.
-
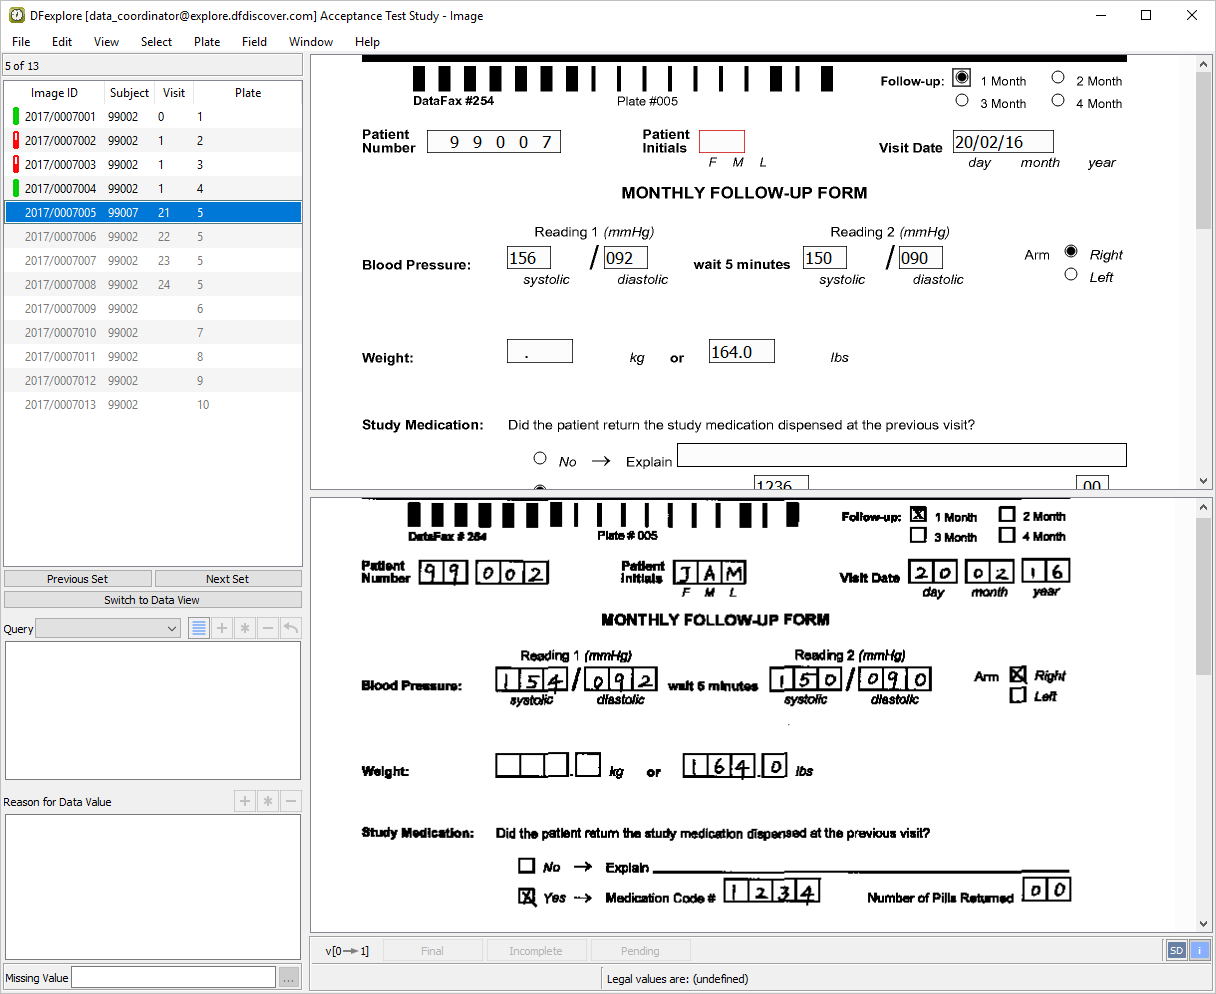
With MONTHLY FOLLOW-UP FORM for subject 99002 as the active page, verify that the
 button is shown at the bottom-right corner of the main data entry screen. Examine the quality of the SD image.
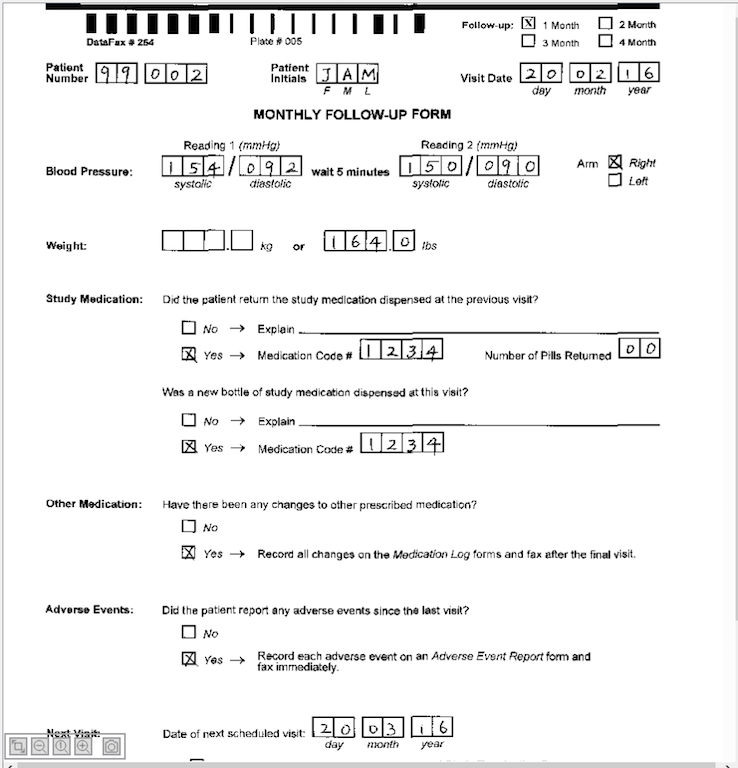
Note DFexplore remembers this setting from the last use. If module 8. Image Data Entry was previously executed, the button will already show
 . In this case, continue with
Section 8.13, “Edit an existing query.”.
. In this case, continue with
Section 8.13, “Edit an existing query.”.
-
Five hidden buttons
 ,
,  ,
,  ,
,  and
and  can be displayed and identified at the bottom-left corner of the main data entry screen. To show these buttons, place the mouse anywhere on the image. To identify each button, hover the mouse over top of it.
 -
Click
until the image reaches its maximum size. Examine the enlarged SD image. 
-
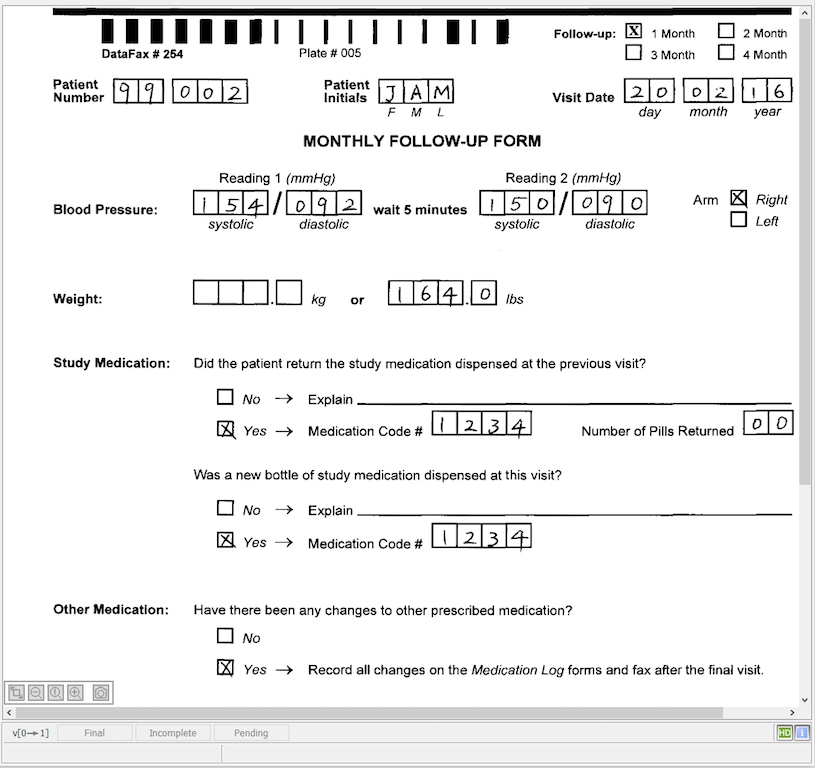
Click
at the bottom-right corner of the data entry screen, switching the label to
. Confirm that the background color of is green as shown.

-
Examine the HD image. Verify that the HD image is clearly visible and there is a noticeable difference between the HD image and the previous SD image.
-
Select > to change from Image View to Queries View.
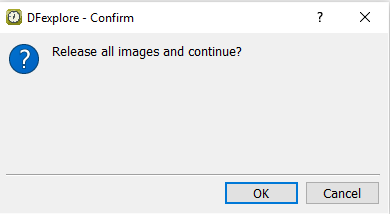
-
Click in the confirmation dialog to release the Image View records and open Queries View.

-
In the Queries View site list, double-click icon Site 99 - Hospital #99 to list the queries for that site. Select > to display all outstanding/unresolved queries for Site 99 - Hospital #99.
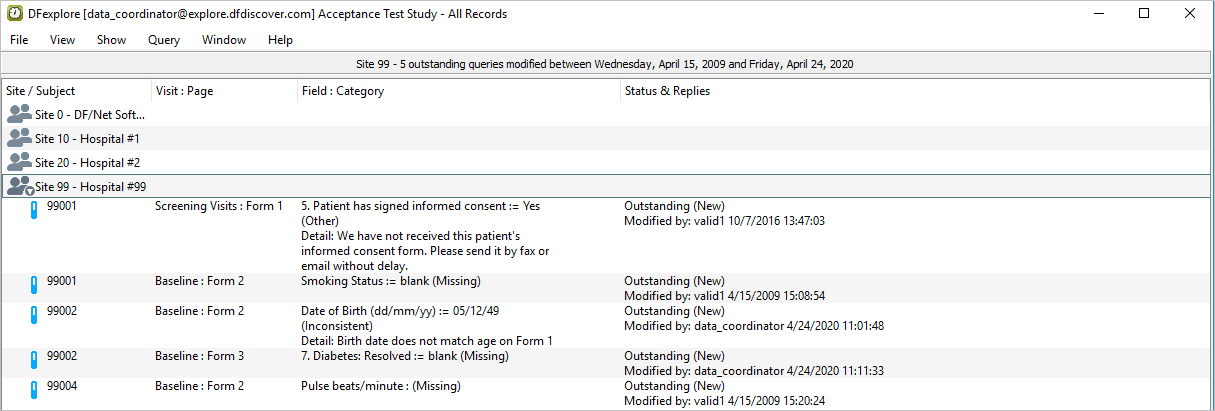
-
Locate the query for Subject 99002, Baseline : Form 3. This is the query that was added to the field 7. Diabetes, Resolved and/or Controlled in Section 8.10, “Enter Plate 3 (Form 3) for Subject 99002.”. Double-click the query to be taken directly to the page and queried field.
-
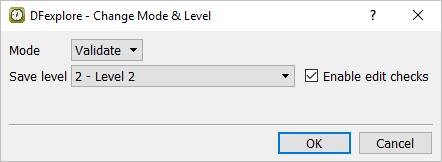
Select > . In the dialog, set:
Mode = Validate
Save level = 2 - Level 2
Check (enable) Enable edit checks
Click to apply the changes.
-
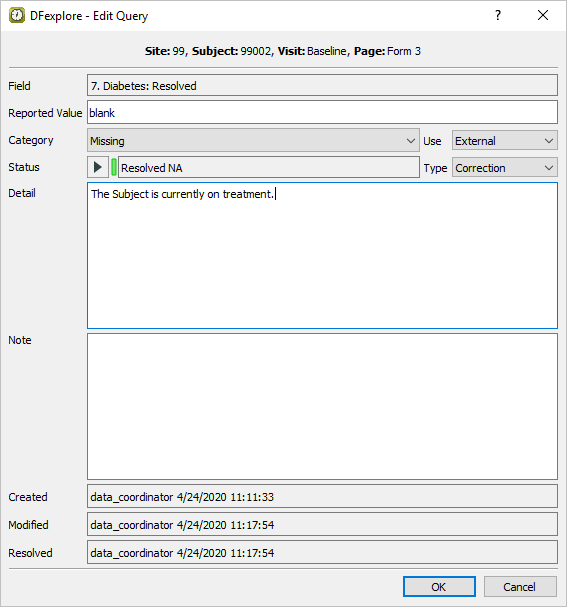
Select > or click
 . In the dialog, set:
 Status = Resolved NA from the pull-down list.
Enter
The Subject is currently on treatment.in the Detail field
Click to apply the edits.


-
With 3:Form 3, Medical History as the current page, press Tab to advance to 11. Other (specify). Change the existing data value of
arthritistoarthritis (knees)and select > or click.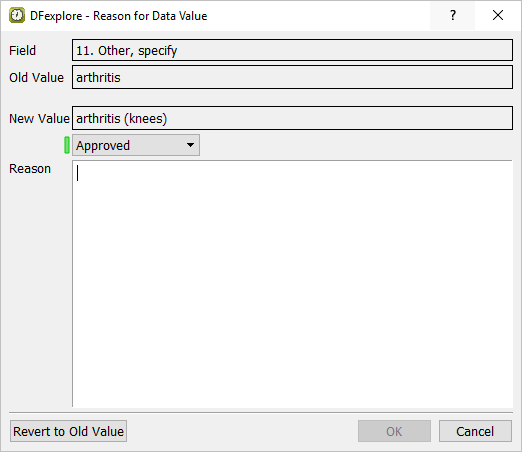
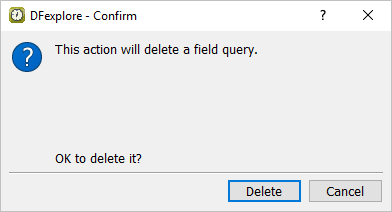
-
In the Reason for Data Value dialog, confirm that the Old Value and New Value fields display the data values shown. Choose Pending from the status list to change the reason's Status to Pending. Enter the text
Location of arthritis (knees) was provided verbally by the site.in the Reason field. Click to close the dialog and save the reason for data change to the database. Press Tab to advance to the next field.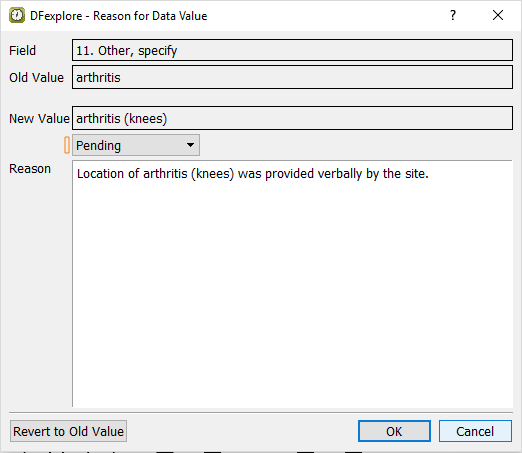
-
Press Tab to advance through the remaining fields on the Medical History page until the save buttons at the bottom of the screen become active. Click to save the modified page to the database at level 2.
-
Still working at Save Level 2 with the pages previously opened for Subject 99002, select > . Confirmed credentials are needed to complete ethis action.
-
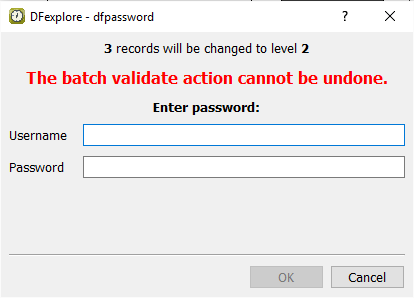
Choose 2-Level 2 from the Move record level to pull-down list. Choose All open pages for current subject. Click . Confirmed credentials are needed to complete this action.
-
Enter
data_coordinatoras the Username and the previously assigned password. Click to batch validate the selected records.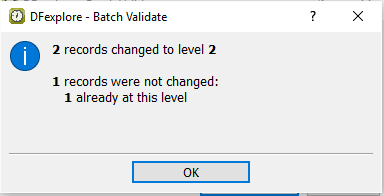
-
Click to close the summary dialog and complete the batch validation operation.