Table of Contents
- 7.1. Tests & Requirements
- 7.2. Begin Module 7.
- 7.3. Enable multiple queries per field in DFsetup.
- 7.4. Retrieve submitted CRF in DFexplore Image View.
- 7.5. Enter Plate 9 for Subject 99002.
- 7.6. Apply multiple queries to a field.
- 7.7. Select and edit an existing query in a field that has multiple queries.
- 7.8. Select and reply to an existing query in a field that has multiple queries.
- 7.9. Select and delete an existing query in a field that has multiple queries.
- 7.10. End Module 7
Submit a CRF to DFexplore.
Enable multiple queries per field in DFsetup.
Retrieve submitted CRF in DFexplore Image View.
Enter Plate 9 for Subject 99002.
Apply multiple queries to a field.
Select and edit an existing query in a field that has multiple queries.
Select and reply to an existing query in a field that has multiple queries.
Select and delete an existing query in a field that has multiple queries.
Estimate of Time Required: 30 Minutes
-
Start DFATK as described in Module 1 (Installation & Initialization).
-
Click followed by to begin this module.
-
Click to simulate submitting a case report form. Clicking more than once will result in multiple copies arriving in the new image queue. Wait for 2-3 minutes before proceeding.
-
The following steps require exclusive access to the 254 Acceptance Test Study database. To facilitate exclusive access, close DFATK by clicking .
-
Start DFsetup.

-
Complete the login dialog with the correct value for DFdiscover Server in your environment. Enter
datafaxin Username and the matching account password in Password.Click .
-
Select the 254 Acceptance Test Study then click to open its database.
-
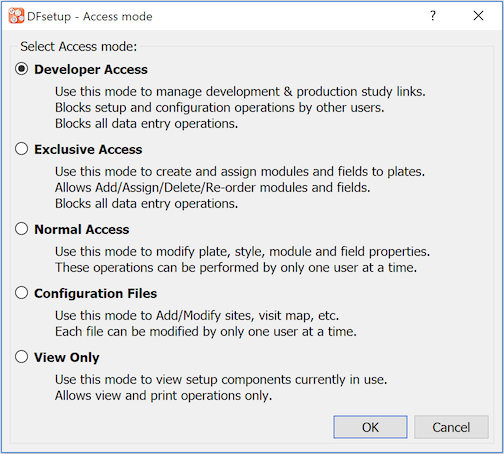
Choose Developer Access in the Access mode dialog, click .
-
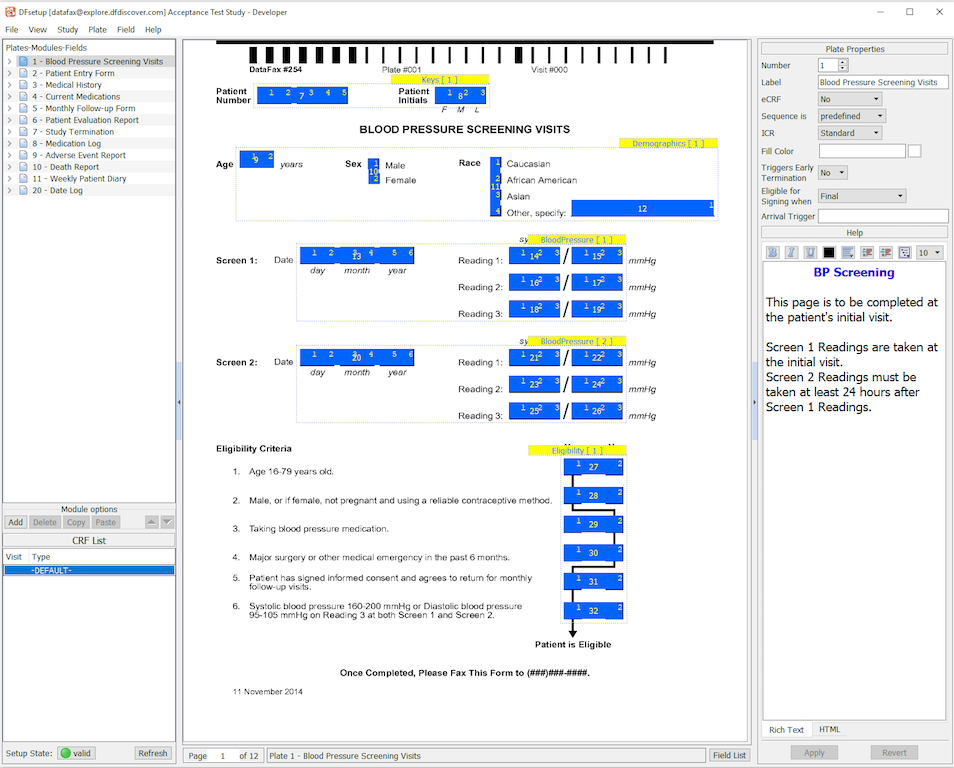
The main window for DFsetup is displayed. Select > .
-
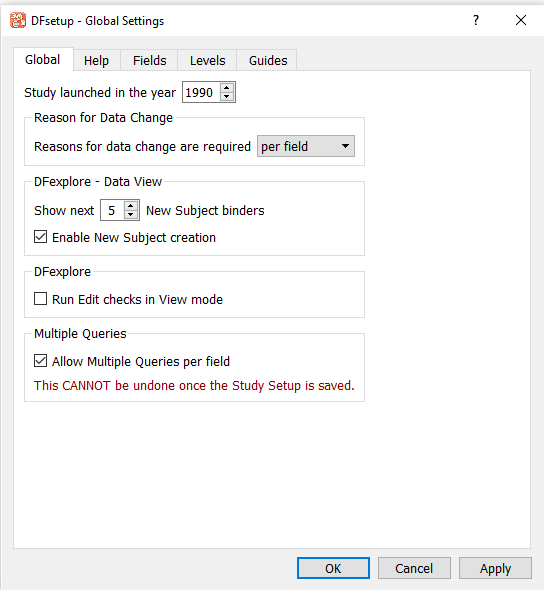
Click Global tab in the dialog.
Check (enable) if not already checked Allow multiple queries per field.
The warning message: This CANNOT be undone once the Study Setup is saved is displayed.
-
Click to close the Global Settings dialog.
-
Select > , followed by > .
-
Start DFexplore.

-
Complete the login dialog with the correct value for DFdiscover Server in your environment. Enter
valid1in Username and the matching account password in Password.Highlight the entry for 254 Acceptance Test Study. Click to continue.

-
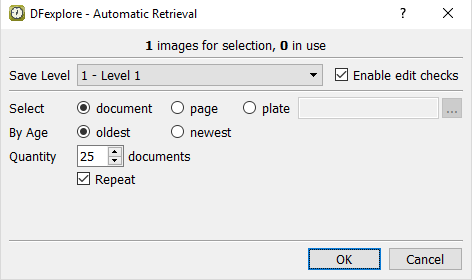
In the Automatic Retrieval dialog, set:
-
Save level = 1 - Level 1
-
Check (enable) Enable Edit Checks
Select = document
By Age = Oldest
Quantity __ documents = 25
Check (enable) Repeat
Confirm the settings.
Click .
-
-
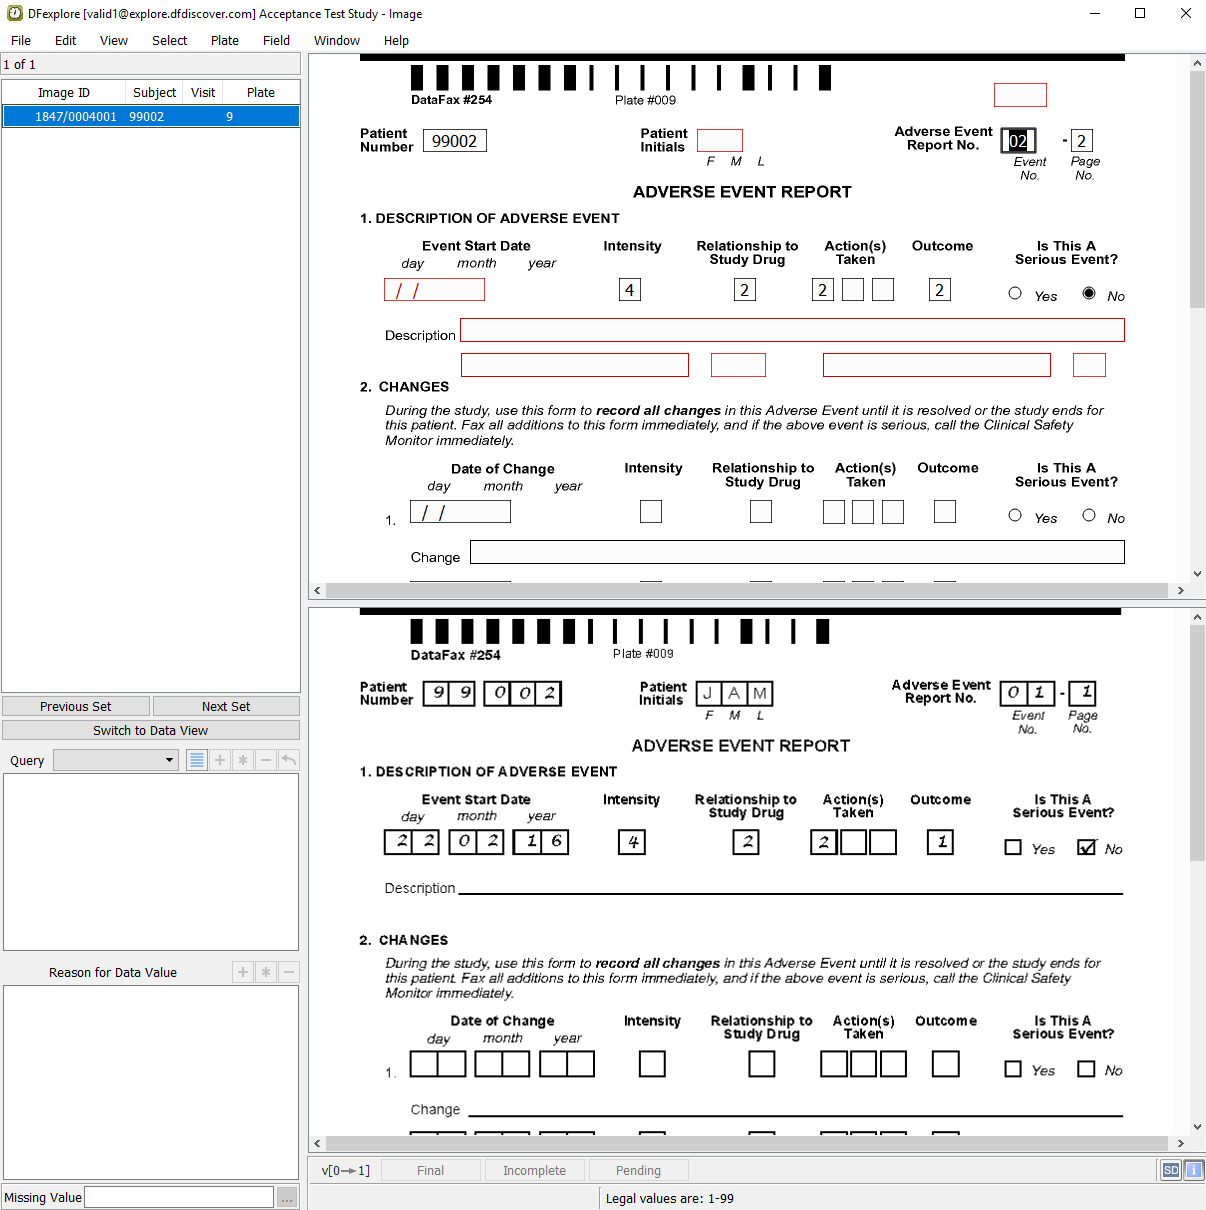
The first image retrieved is the Adverse Event Report CRF.
-
The Adverse Event Report No. field is highlighted as the current field. Enter the value from the CRF image if it is not already correctly auto-filled. Press Tab to advance to the AE Identifier field. The
AESEQNUM2edit check executes upon entry to the AE Identifier field. The data value in the field is updated.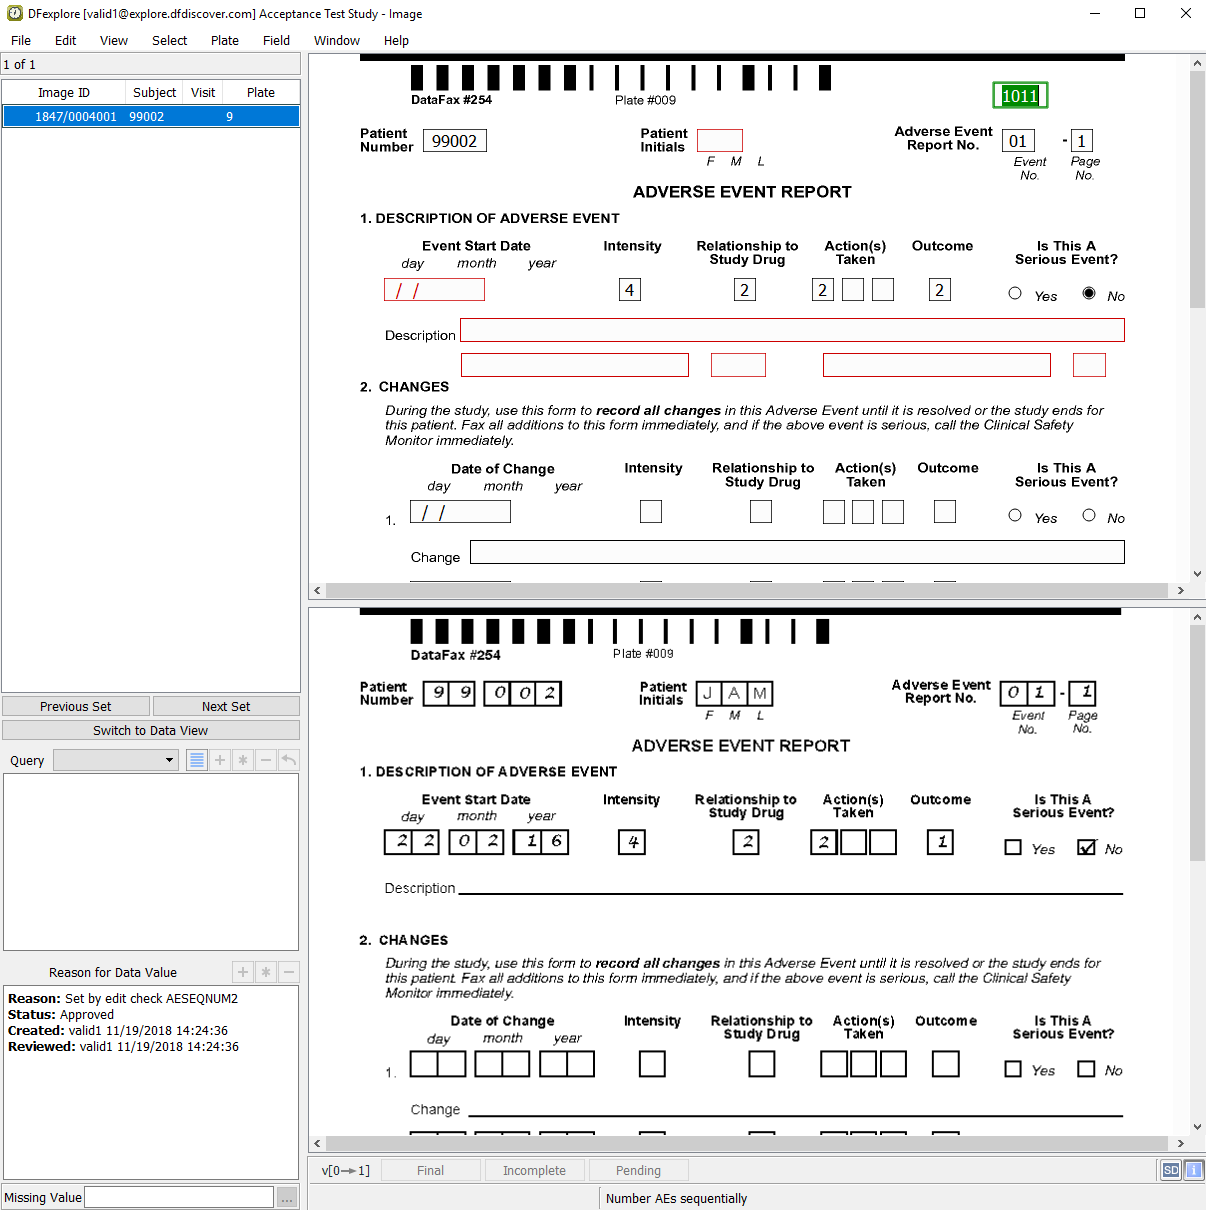
-
Press Tab to advance to the Patient Number field.
-
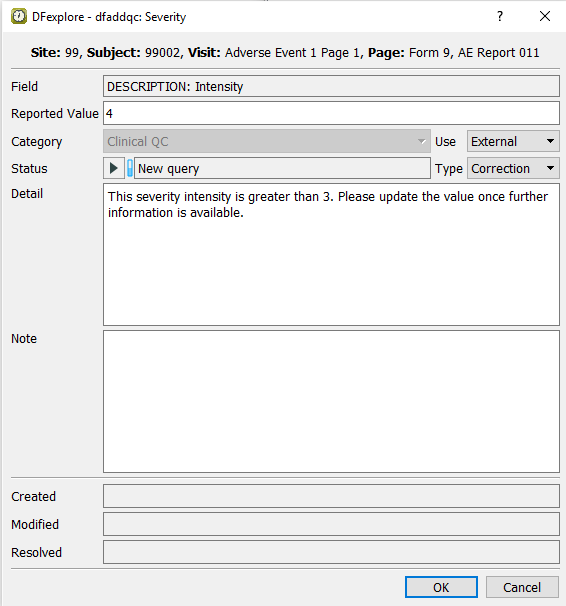
Beginning at the Patient Number field, correctly enter the data per the CRF image, up to and including the Intensity field. Tabbing from the Intensity field, a user-defined edit check executes and the dfaddqc: Severity dialog is displayed.
-
Click to apply the edit check. The field becomes blue, and the next field Relationship to Study Drug becomes the current field.
-
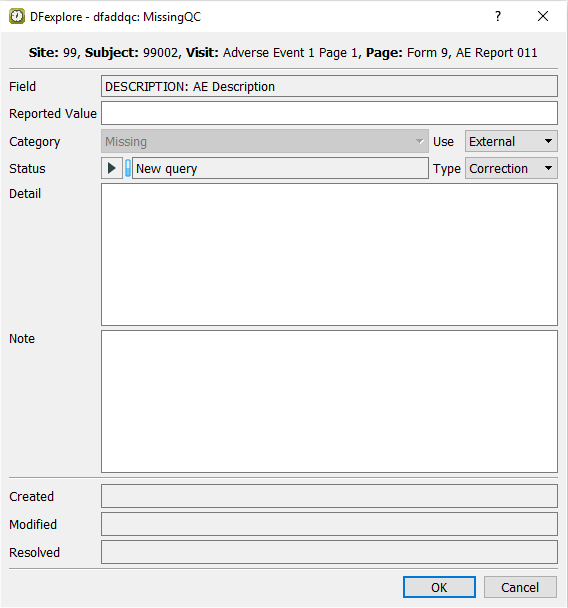
Correctly enter each data field on the page per the CRF image, up to and including the Description field.
Do not enter any text in the Description field as the corresponding field on the CRF image is blank. Upon tabbing off this field, the dfaddqc: MissingQC dialog appears.
Confirm that Missing is displayed in the Query category field.
-
Click . This applies the edit check to the Description field. The field becomes blue, and the AECOTERM becomes the current field.
-
From the AECOTERM field, press Tab through all remaining fields until the Investigator's Signature field becomes the current field.
Tabbing from the Investigator's Signature field, the DFlookup: investigators dialog appears. Highlight
Dr. John Snowand click .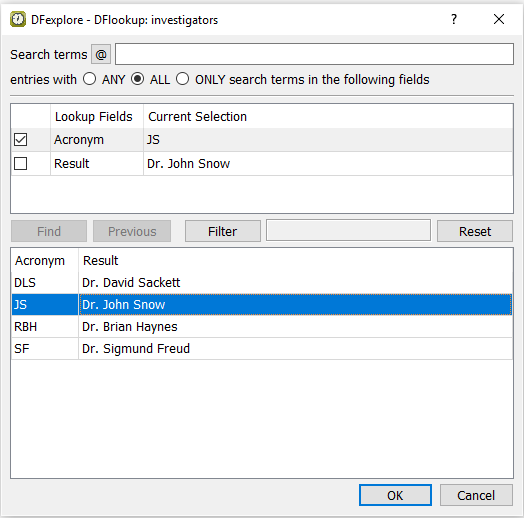
-
Enter the Date field value. Press Tab to advance to the save status bar to make it active. Click .
-
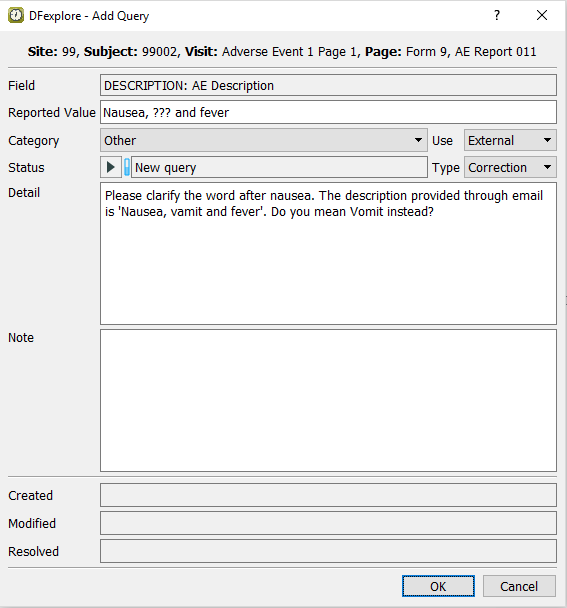
With the Adverse Event Report displayed as the current page, make the page active by clicking anywhere on the page background using the mouse. Press Tab to advance through the fields until Description becomes the current field. Note that the Description field is blank and has an unresolved query with the category Missing (external, correction). Enter the text
Nausea, ??? and fever.
-
Select > or click
 . In the dialog, confirm Category type Missing is disabled. Set:
Category = Other
Use = External
Type = Correction
Status = New query
Detail =
Please clarify the word after nausea. The description provided through email is 'Nausea, vamit and fever'. Do you mean Vomit instead?
![[Note]](../../imagedata/note.png)
Note Multiple queries can be added to a single field, but each query must have a unique Query Category type. Therefore, a Query category will be disabled if it has been previously used on the same field where a new query is to be added.
-
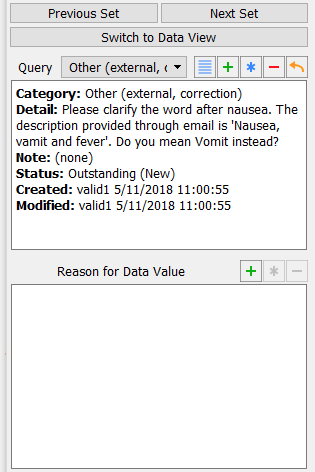
Click to apply the query. Confirm that the Description field is the current field with the query count '2' displaying on the top left corner of the field widget, and the field becomes blue.

-
With the focus still on the Description field, examine the details in the Query window that appears at the bottom left corner of the main data entry screen.
-
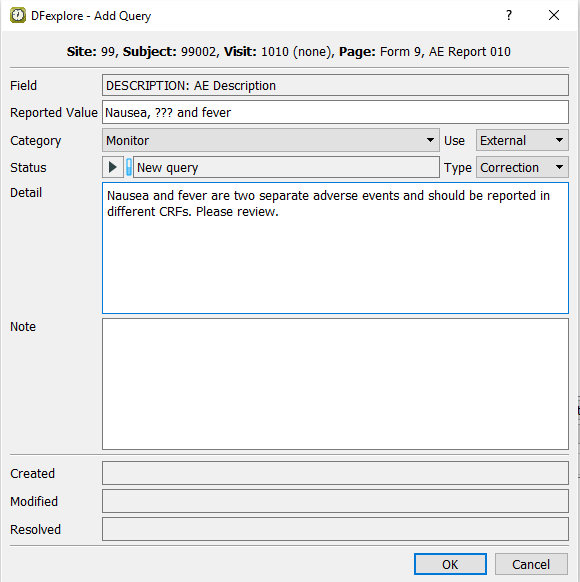
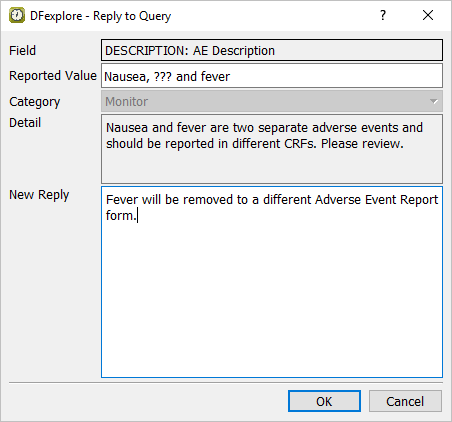
Select > or click
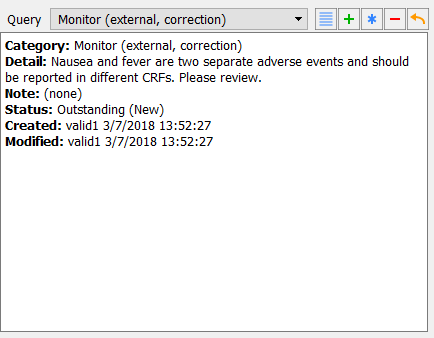
to add the third query to the Description field. In the dialog, set:Category = Monitor
Use = External
Type = Correction
Status = New query
Detail =
Nausea and fever are two separate adverse events and should be reported in different CRFs. Please review.
-
Click to apply the query. Confirm that the Description field is the current field with the query count 3 displaying on the top left corner of the field widget, and the field becomes blue.

-
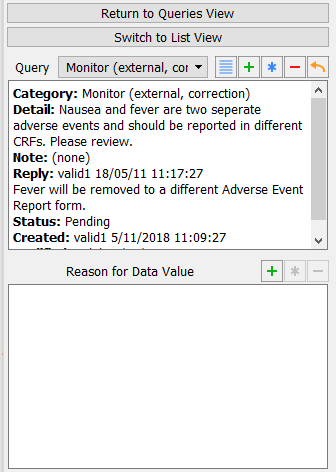
With the focus still on the Description field, examine the details in the Query window that appears at the bottom left corner of the main data entry screen.
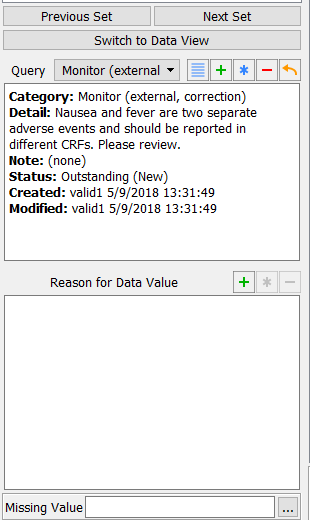
Note The query list is presented in accordance with the query sort order that has been defined by the user in DFsetup Query Category Map.
-
Press Tab to exit the Description field, and a
DFlookup: aecodeswindow appears. Click in the window to close the dialog. The next field AECOTERM becomes the current field.
-
Press Tab to advance through the remaining fields on the page without making any changes. Press Tab to advance to the save buttons at the bottom of the data screen to make them active. Click .
-
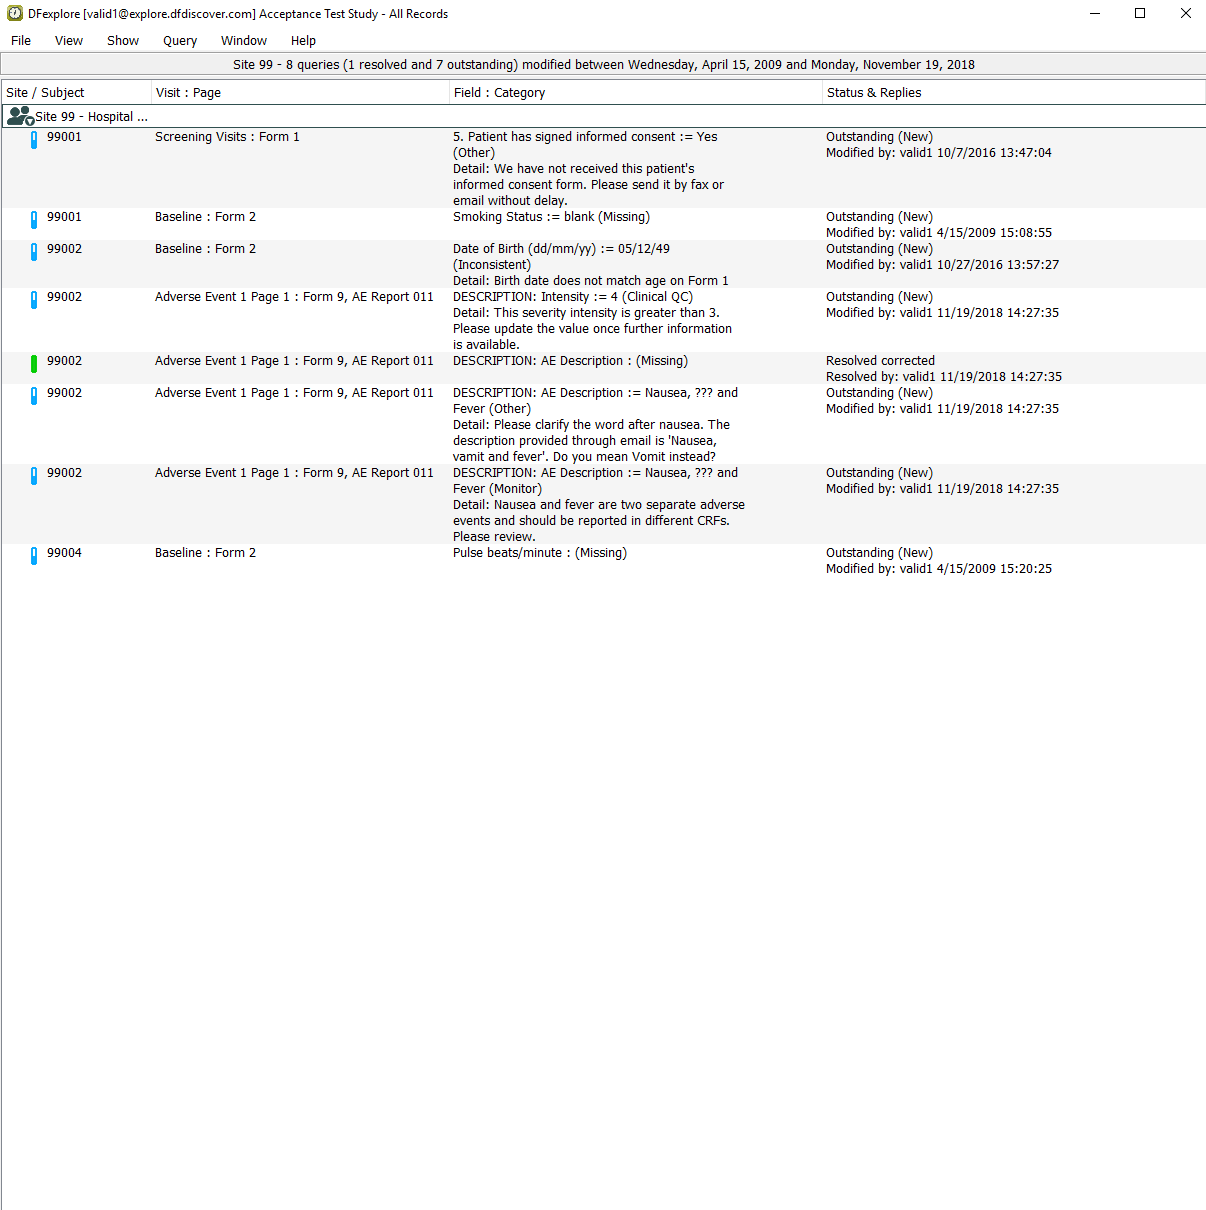
With the Adverse Event Report page still being the active page, select > to open the Queries View window. In the resulting confirmation dialog, click to release all Image records. Select > . Double-click Site 99 - Hospital #99. Locate and confirm that the Queries window displays the three queries that have been applied to the AE Description field for Subject 99002.
-
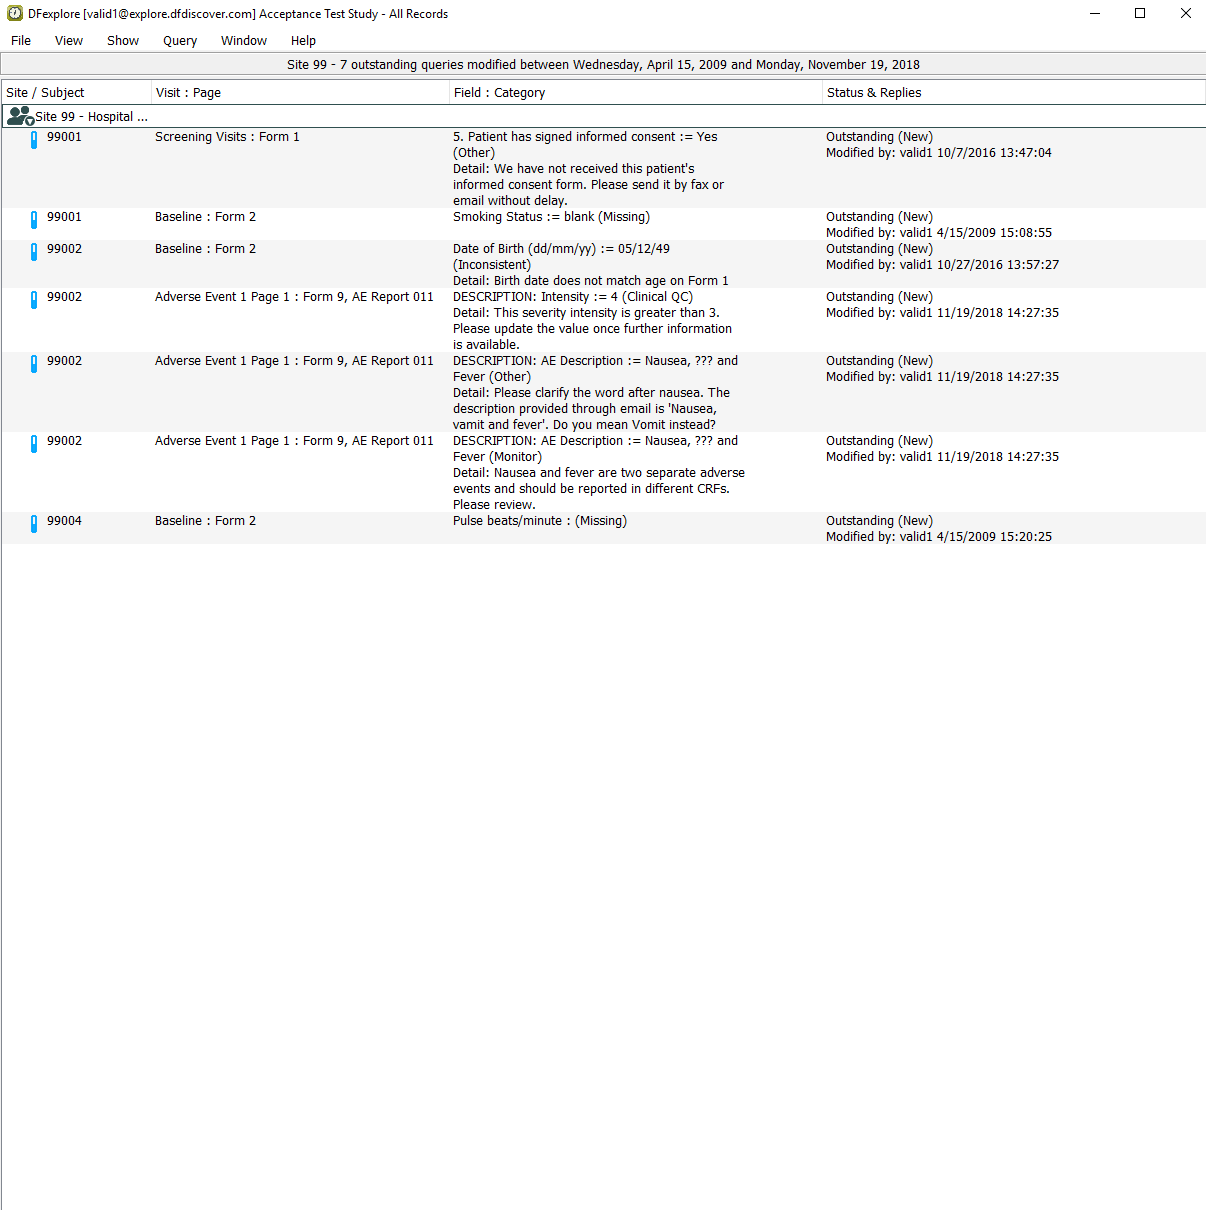
Select > . Locate and confirm that two unresolved queries with categories Other and Monitor on the AE Description field of Subject 99002 are displayed.
-
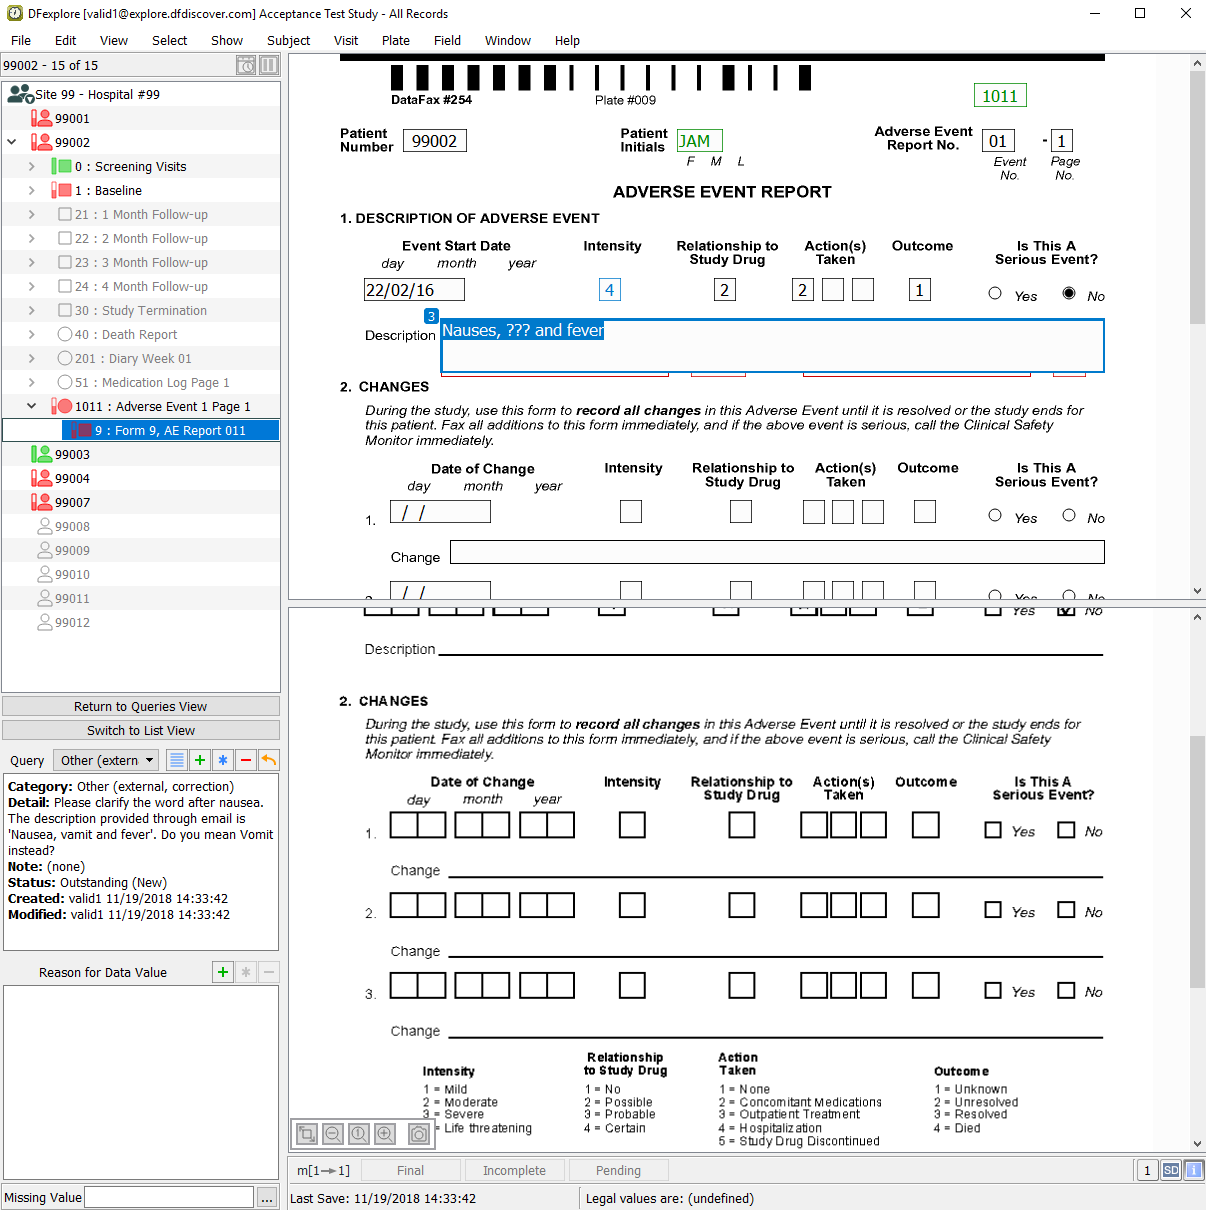
Double-click entry containing the query category Other in the Description field of Subject 99002, Adverse Event 1 Page 1: Form 9, AE Report 011.
-
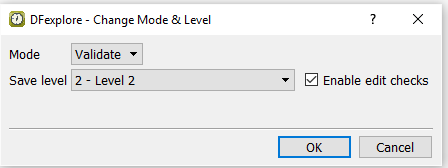
Select > . In the dialog, set:
Mode = Validate
Save level = 2 - Level 2
Check (enable) Enable edit checks
Click to apply the changes.
-
Delete the text
???in the description field and entervomitinginstead. Examine the query window. From the Query drop-down choose Other (external, correction) query in the query list.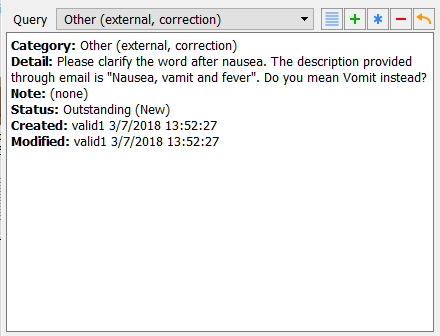
-
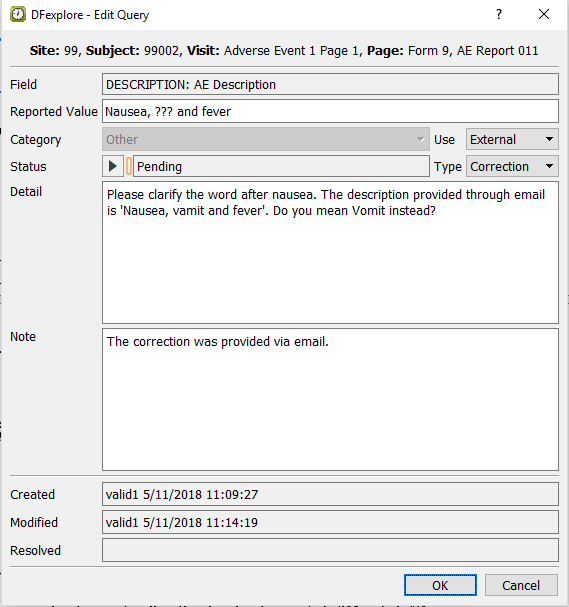
With the focus on the Other (external, correction) query Description field, select > , or click the
 to open the dialog. set:
-
Select Pending from the Status pull-down.
Enter
The correction was provided via email.in the Note field.
Click to apply the edits.
-

-
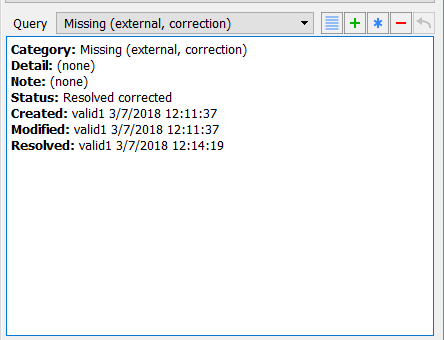
Choose Missing (external, correction) from the Query pull-down list. The query list in the query window displays the Missing (external, correction) query. Confirm that the first query is defined with Category: Missing (external, correction) and a Status: Resolved corrected.
-
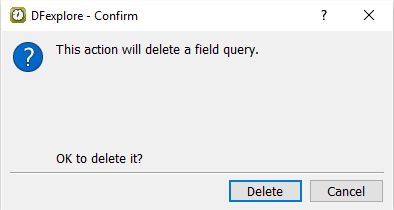
Select > or click
 to open the Delete Query window.
-
Click to perform the query deletion.
-
Click in the Delete Query confirmation dialog. Confirm that the Description field remains as the active field and has the query count 2 displaying on the top left corner of the field widget.

-
Press Tab to exit the Description field, and a
DFlookup: aecodeswindow appears. Click in the window to close the dialog. The next field AECOTERM becomes the current field.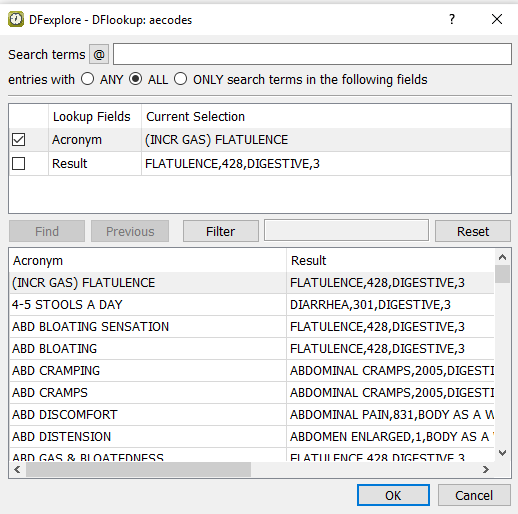
-
Press Tab to advance through the remaining fields on the Adverse Event Report page until the at the bottom of the screen becomes active. Click to save the modified page to the database.
-
Select > to close and exit DFexplore.
