Table of Contents
Importing and Modifying Subject Alias Map using DFsetup.
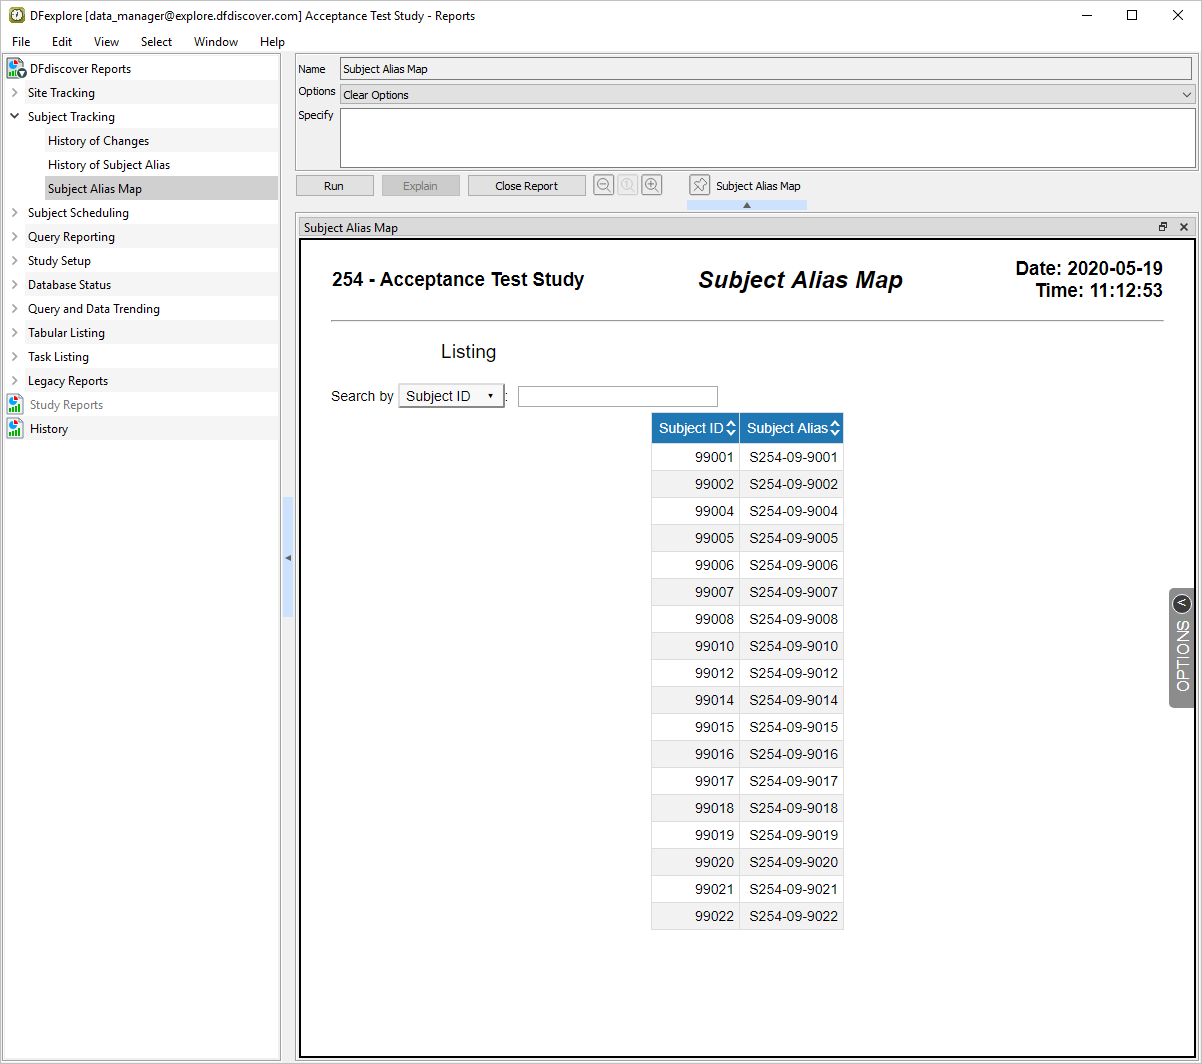
Subject Alias Tracking (Reports).
Exporting Subject Alias data.
Estimate of Time Required: 20 Minutes
-
Start DFATK as described in Module 1 (Installation & Initialization).

-
Click followed by to begin this module.
-
Click to email a copy of subject_alias_map.csv to
data_manager. Clicking more than once will result in multiple files arriving to your email inbox.![[Note]](../../imagedata/note.png)
Note Save the subject_alias_map.csv file received via email to your local computer. This file is required to complete the remainder of this module. Refer to Section 1.8, “Creating user accounts and assigning study permissions.” as a valid email address is required for
data_managerto receive the module specific files. -
This module requires user
data_managerto have exclusive access to the 254 Acceptance Test Study database, the Control Panel must be closed. Click .
-
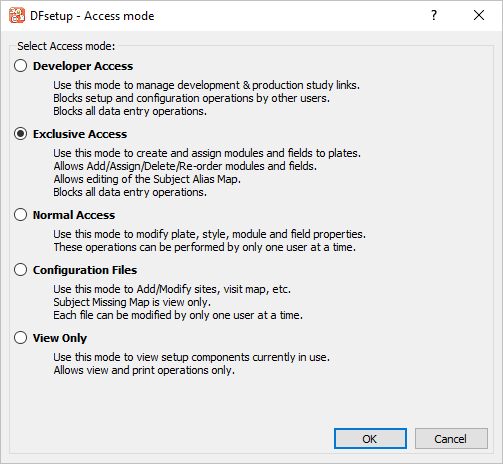
Start DFsetup, login as user
data_managerand choose 254 Acceptance Test Study as described in Section 1.8, “How to start DFsetup”. Choose Exclusive Access and click . Exclusive Access allows you to edit the Subject Alias Map.
-
Select > .

-
Click . From the file selection dialog, locate the previously saved
subject_alias_map.csvfile.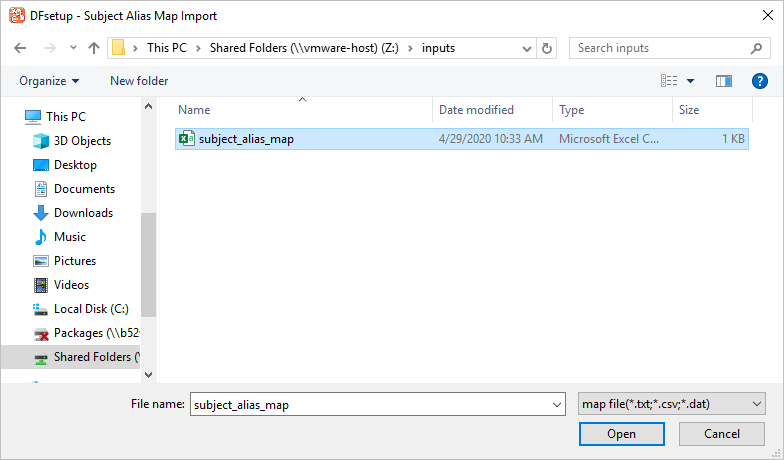
-
Select the file, click , then .
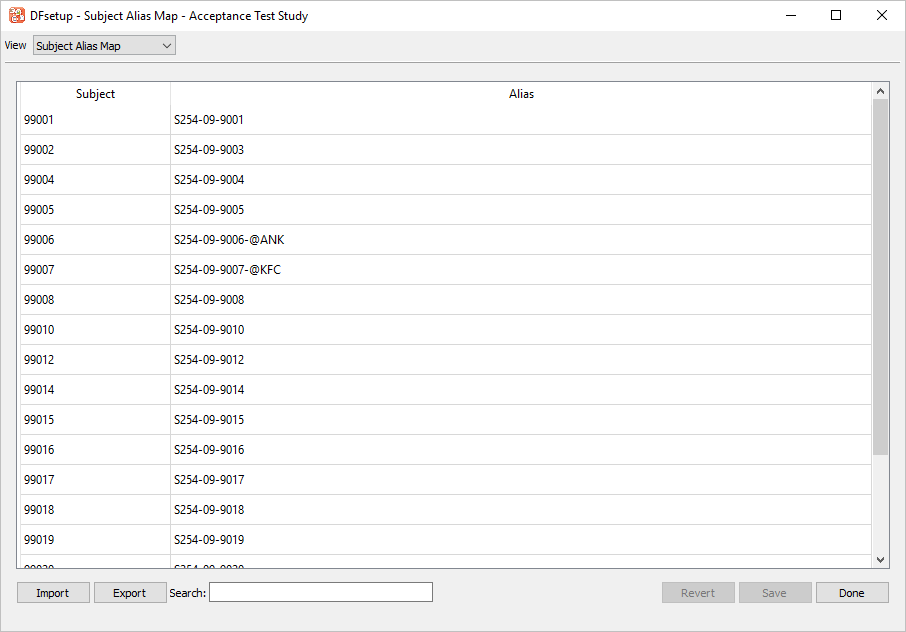
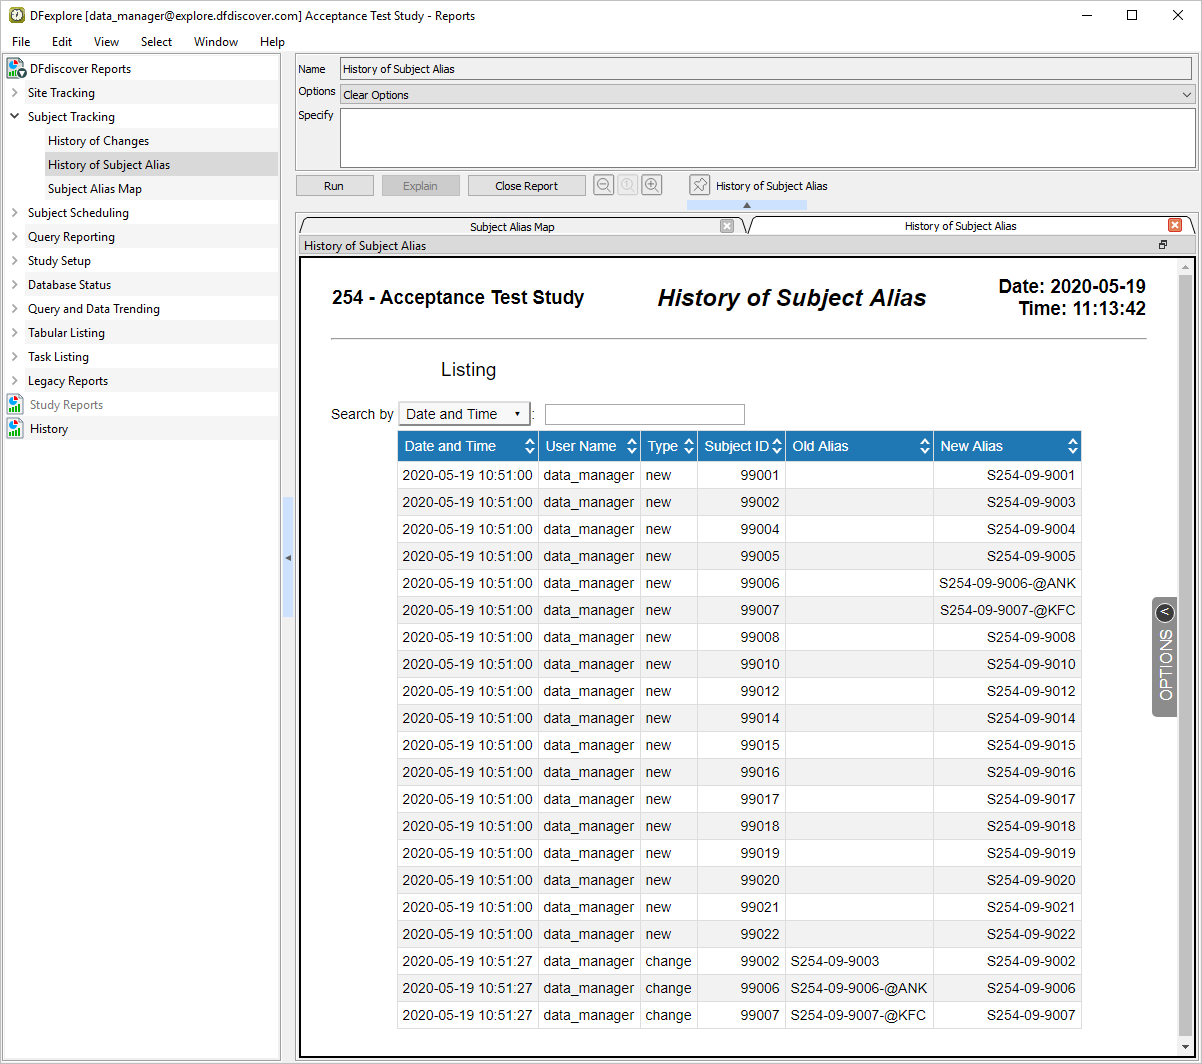
Note Clicking triggers the initial import of the Subject Alias Map to be logged in
DFsubjectaliasmap.logwhich leads to the output produced in Section 6.5, “Subject Alias Tracking (Reports).”. -
Modify the following Alias definitions:
99002fromS254-09-9003toS254-09-900299006fromS254-09-9006-@ANKtoS254-09-900699007fromS254-09-9007-@KFCtoS254-09-9007
-
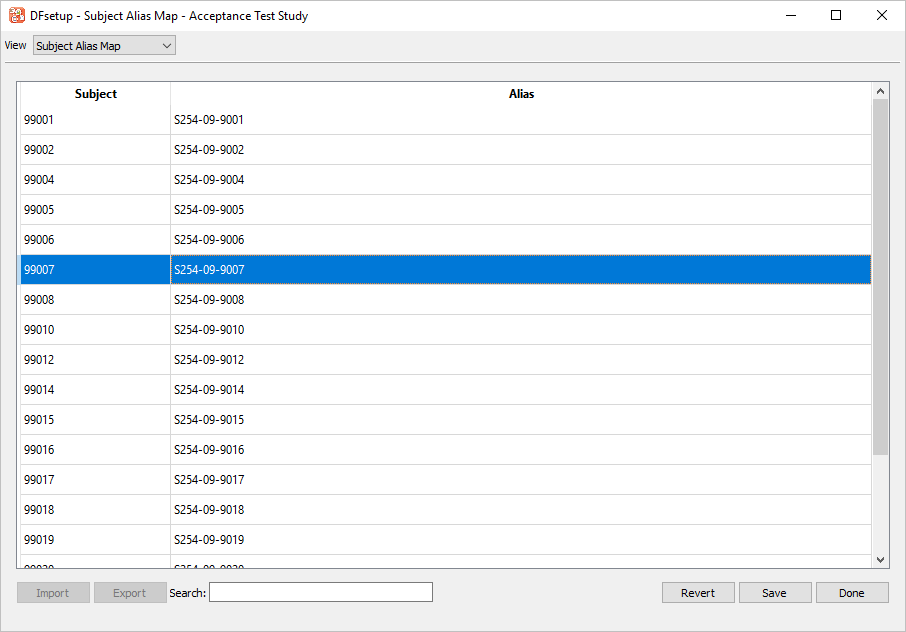
Click then to apply the modifications to the Subject Alias Map.
-
Select > to close DFsetup.
-
Start DFexplore , login as user
data_managerand choose 254 Acceptance Test Study as described in Section 1.7, “How to start DFexplore”. -
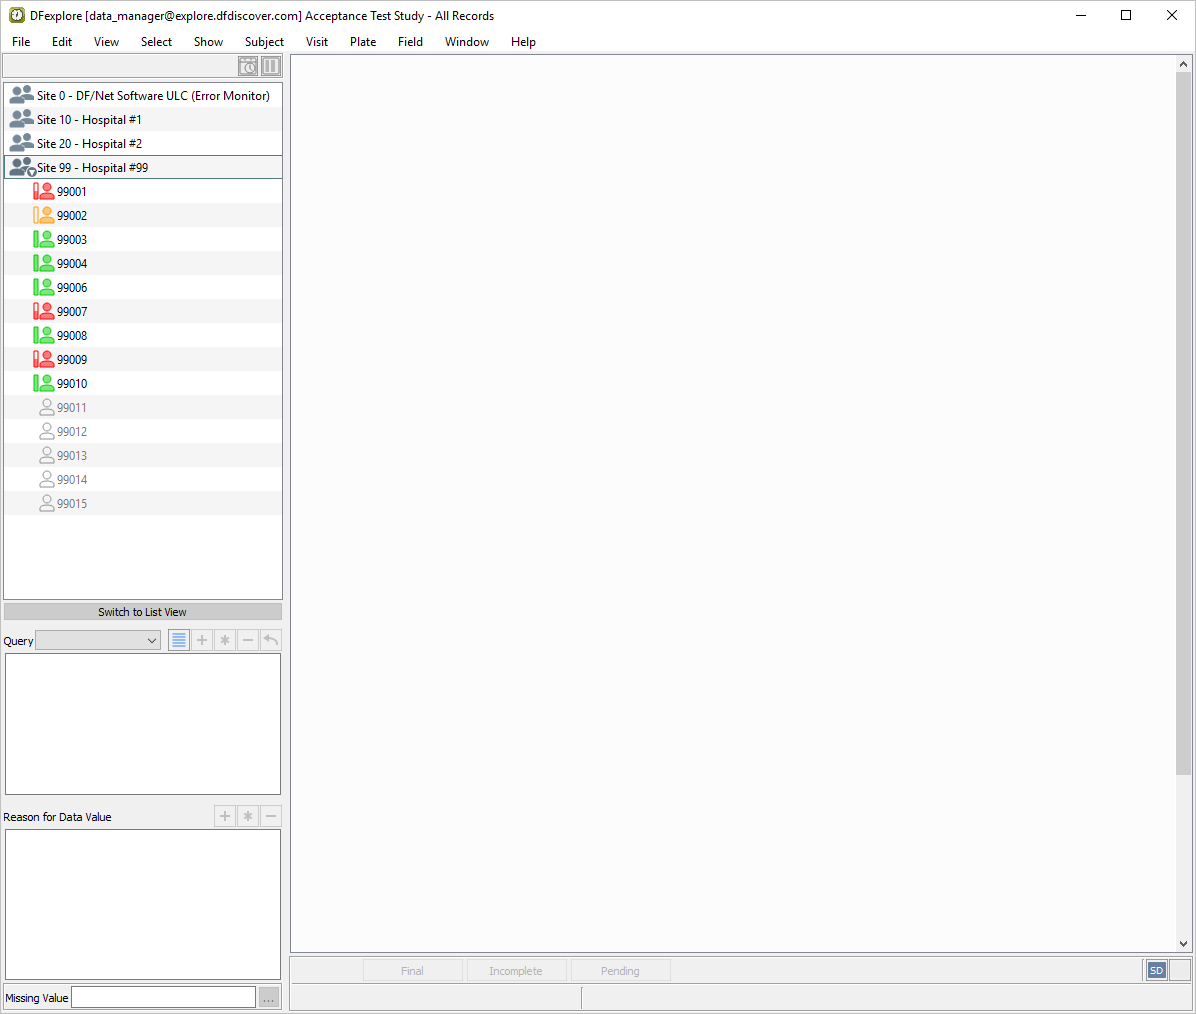
Double-click Site 99 - Hospital #99 to open the list of available subjects.
-
Select > . Check (enable) Use subject alias. Click . The Subject ID list now displays the Subject Alias Mapping as defined in DFsetup.

-
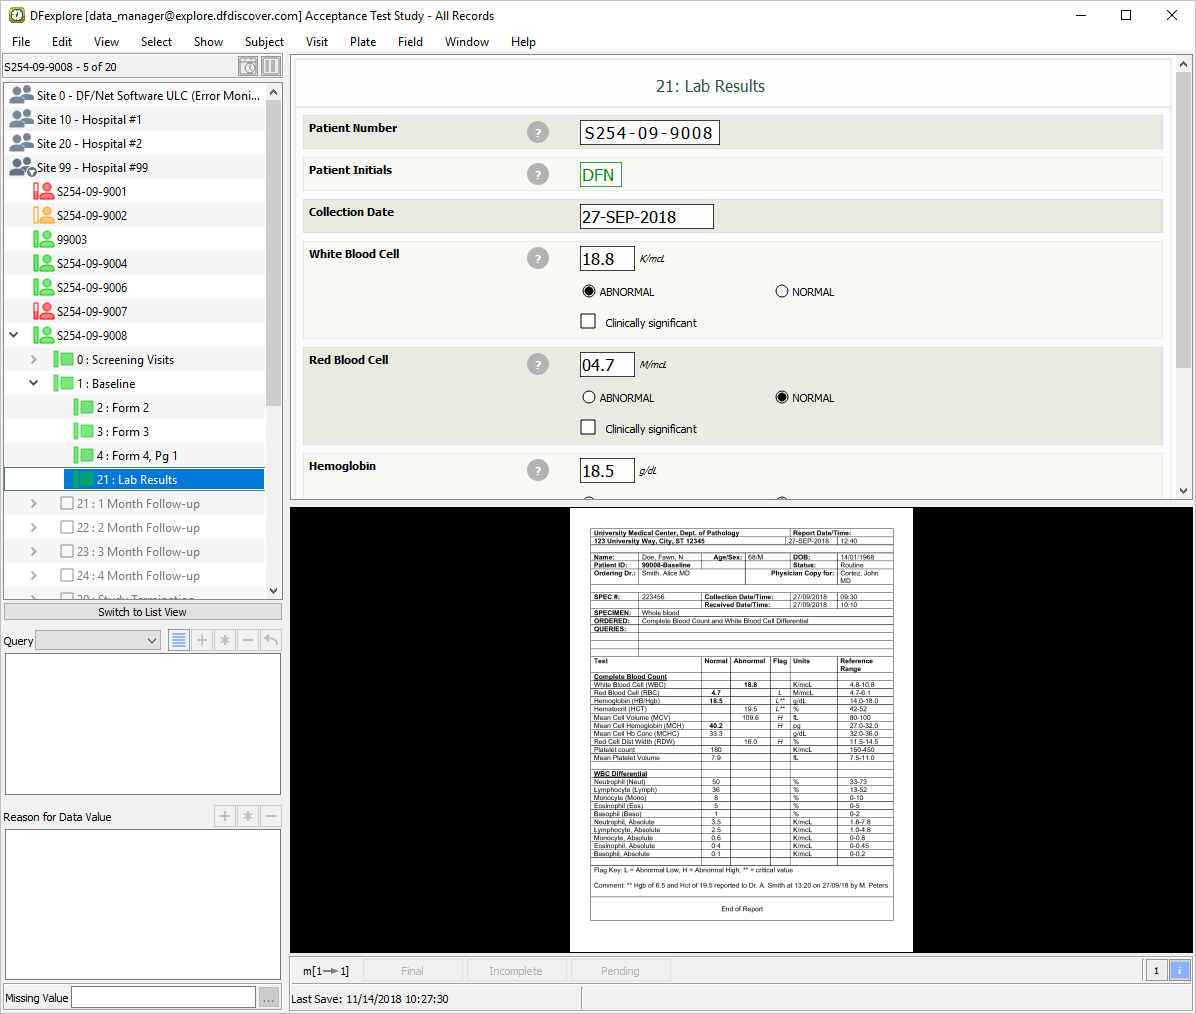
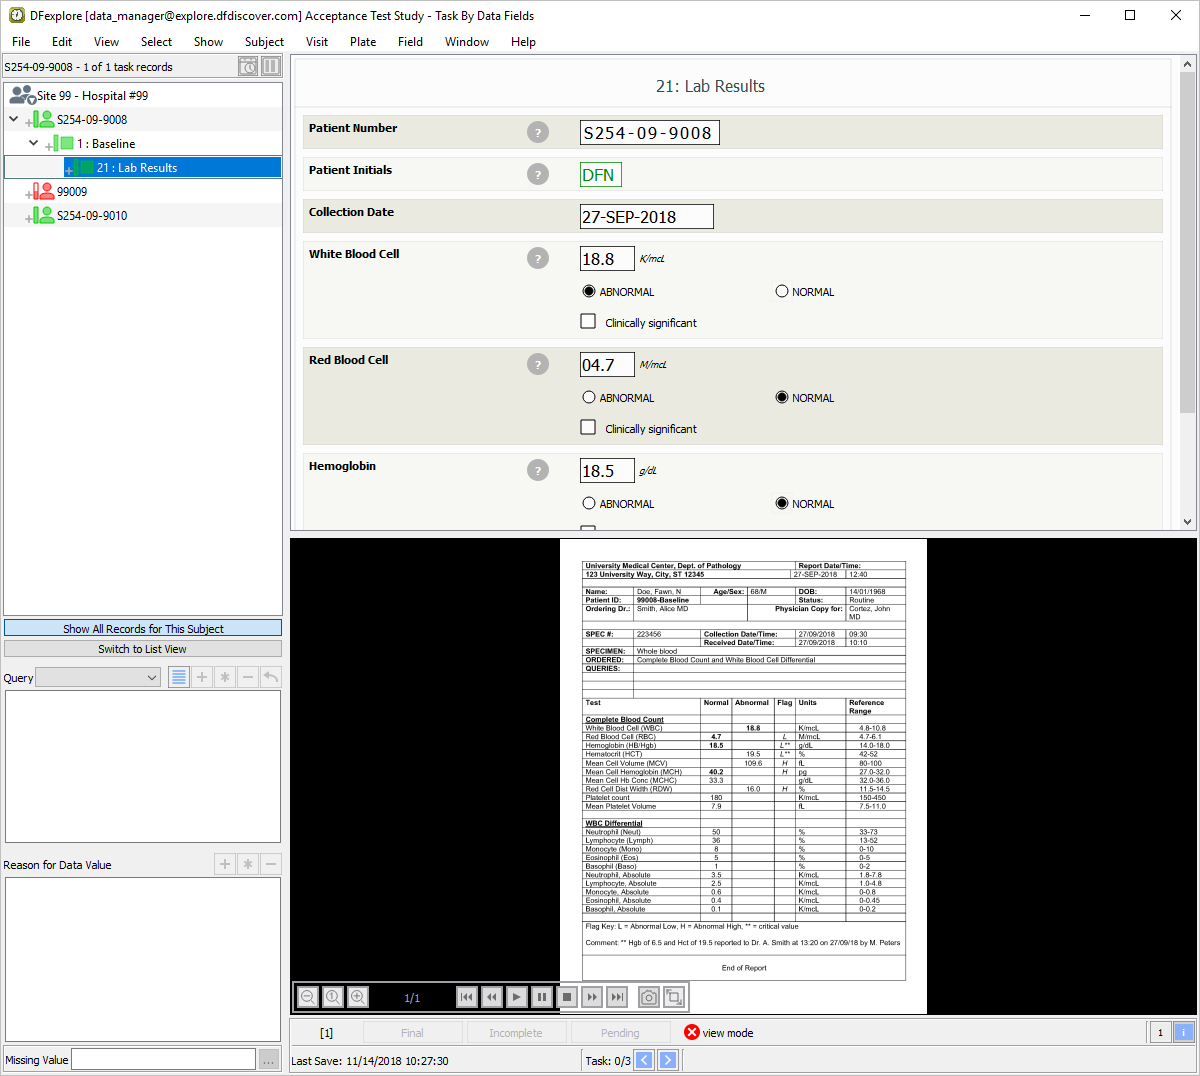
Click Site 99 - Hospital #99 > S254-09-9008 > 1: Baseline > 21: Lab Results to make it the active page.
-
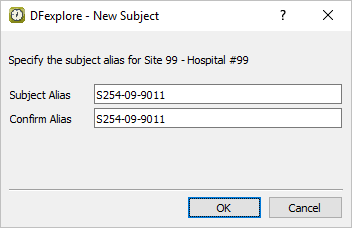
Select > . Set:
Subject Alias =
S254-09-9011Confirm Alias =
S254-09-9011
Click .
-
The message This subject alias does not exist is displayed. Click to dismiss the New Subject dialog.
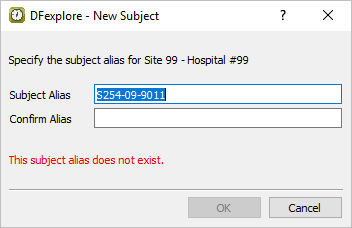
Note All Subject Alias definitions are required to be defined within DFsetup. Users are unable to add new Subject Alias definitions within DFexplore.
-
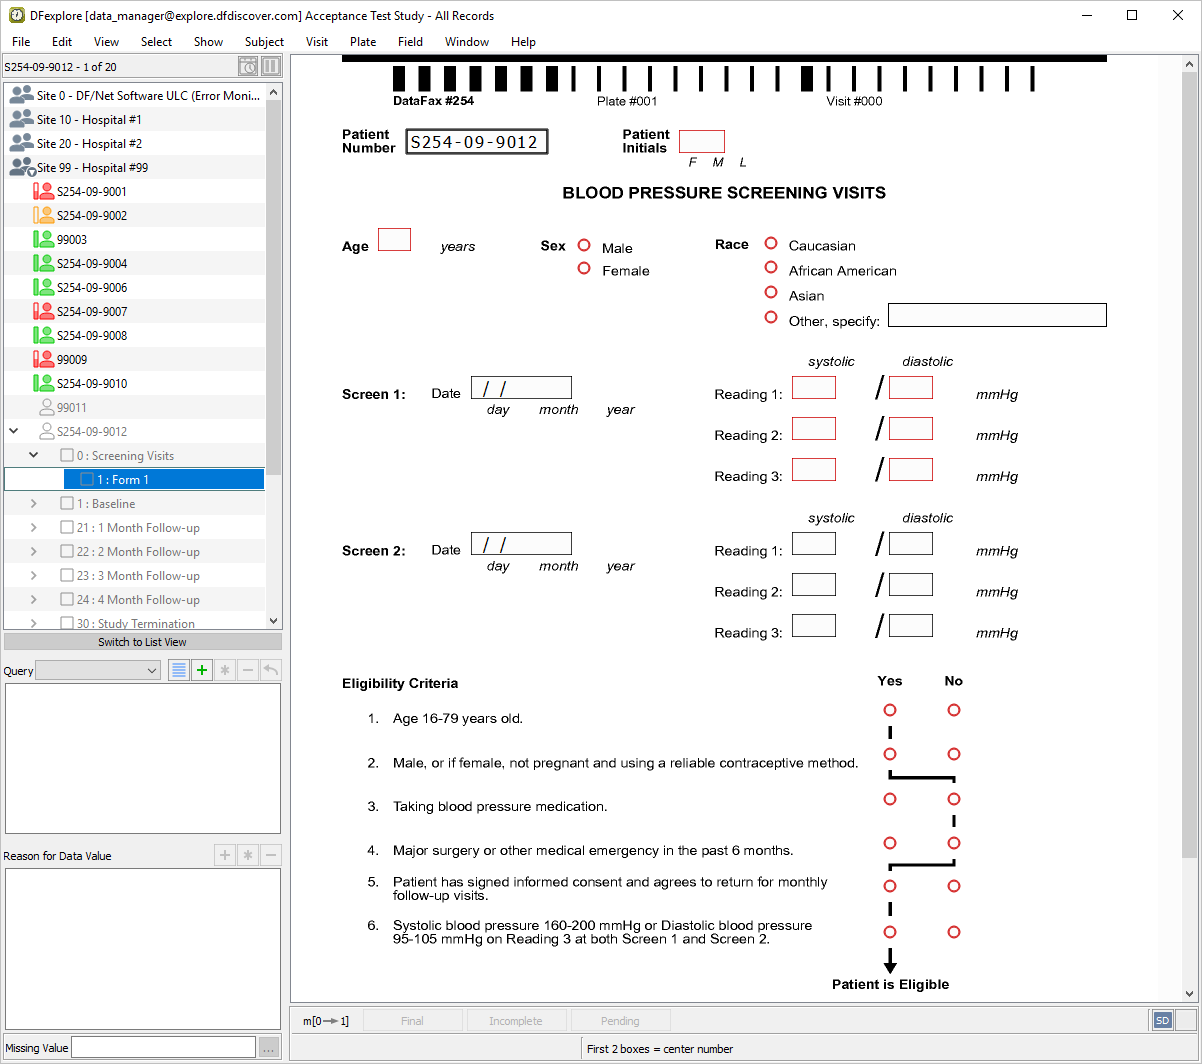
Double-click S254-09-9012 then entry for 0 : Screening Visits to display the list of pages belonging to the visit. Page 1 : Form 1 becomes the active page. The data window redraws with the plate background and related data entry fields.
-
Click anywhere on the plate background - this moves the mouse and keyboard focus to the data window.
-
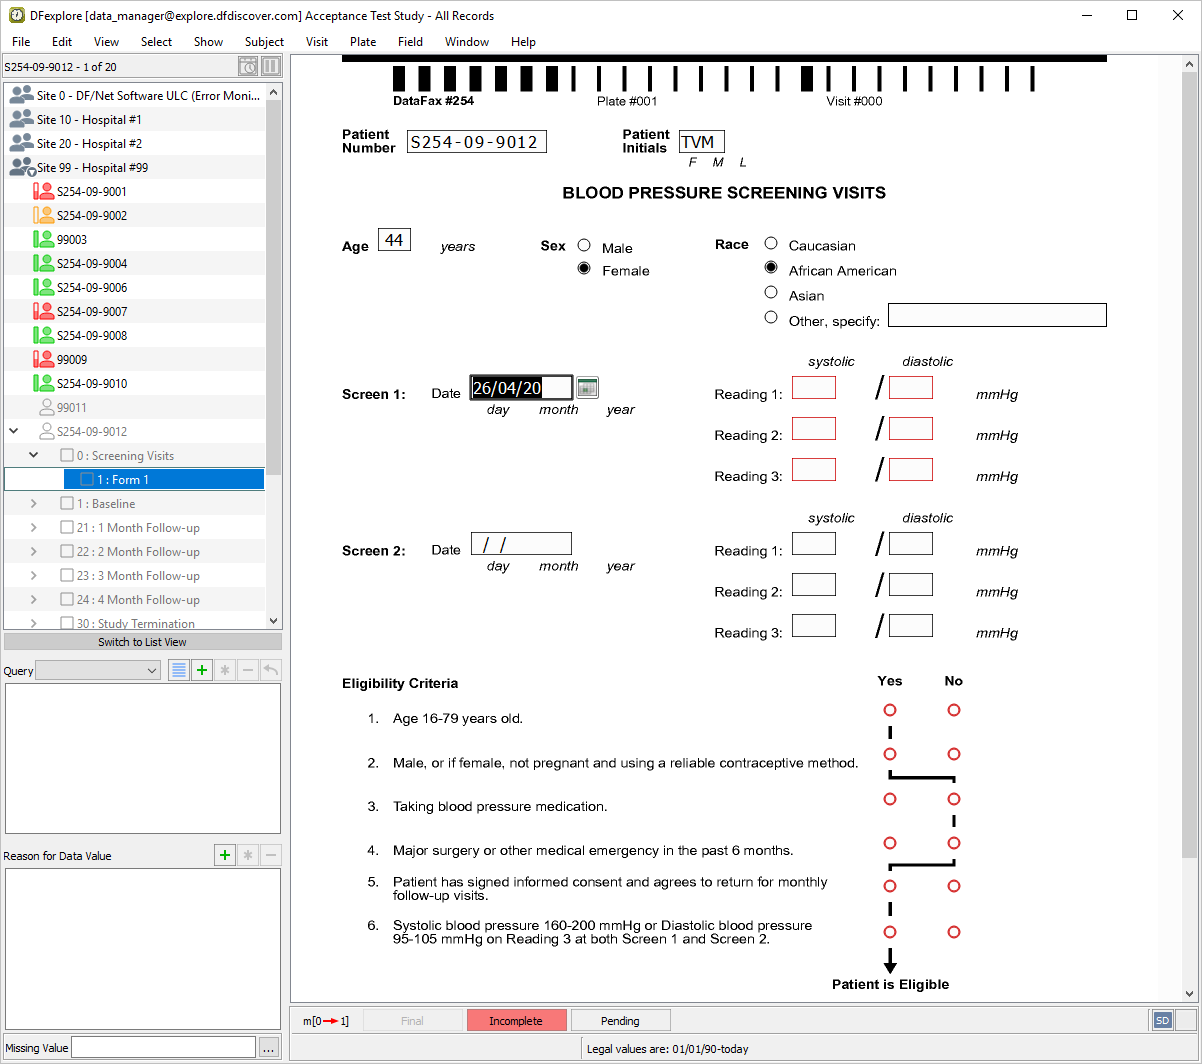
Beginning at the Patient Number field, press Tab to advance to the Patient Initials. Enter the initials
TVMPress Tab to advance to the Age field. -
Beginning with the Age field set the following values:
Age =
44Sex = Female
Race = African American
Screen 1 =
26/04/20
-
As outstanding required data fields exist on the page it must be saved to the database with a status of Incomplete. Click .
-
Select > . Select 001 - Blood Pressure Screening Visits.
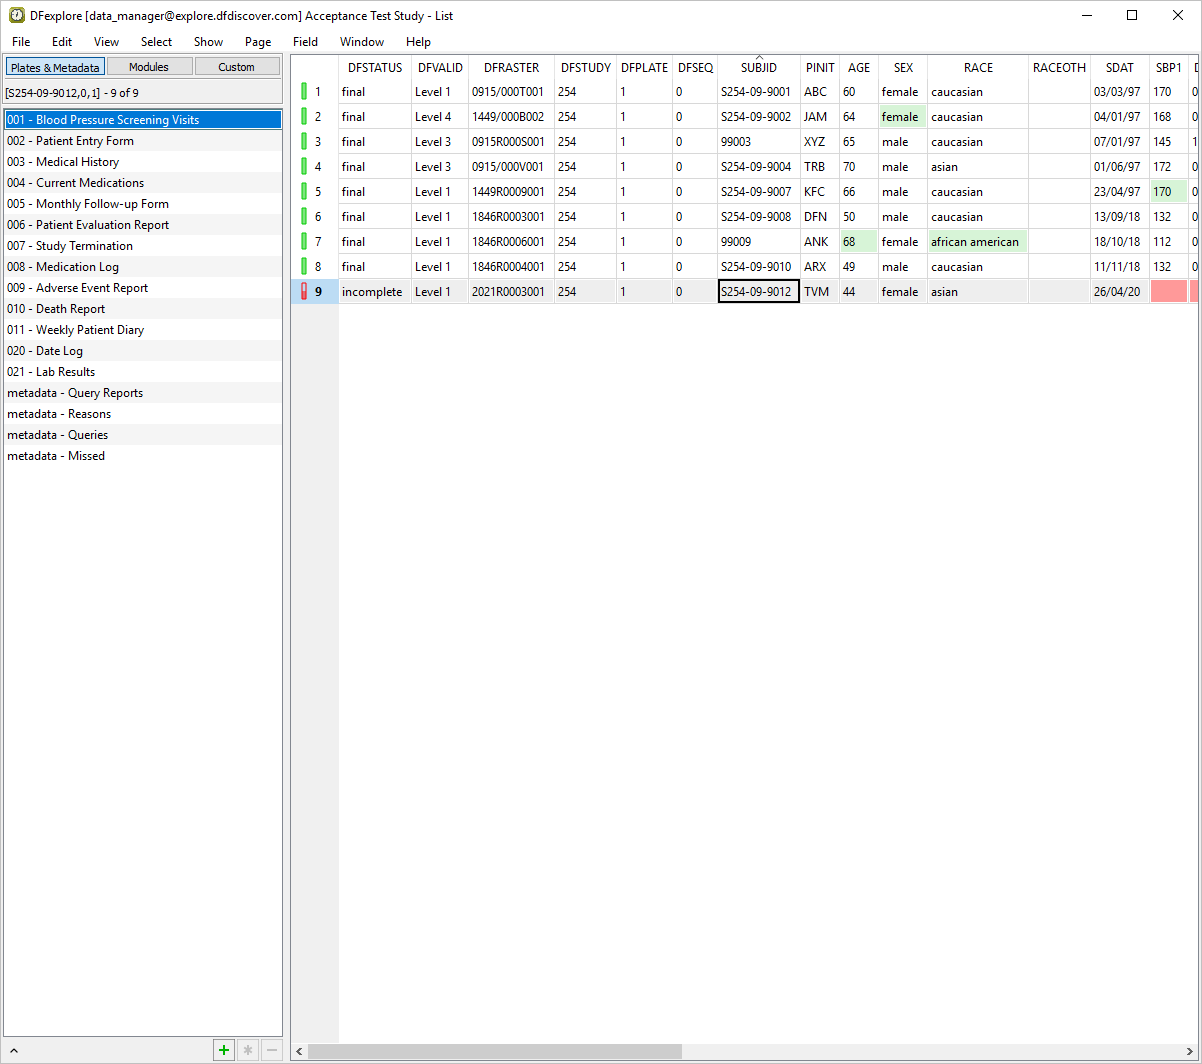
-
Confirm an entry exists for S254-09-9012.
Select > .
Confirm that 001 - Blood Pressure Screening Visits is still the active plate.

Select > .
In Export Data dialog set:
Format = Excel
Check (Enable) Include header as the first record in the output file.
Check (enable) Open output file after export
-
Click Output File . In the file selection dialog, choose a directory in which to save the Excel file. Once a directory has been chosen, append the file name
module6_dataexport.xlsxto the directory name. Click .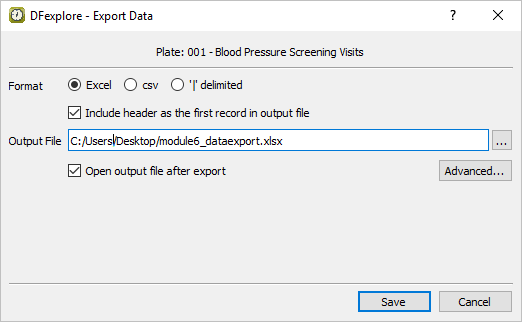
After saving, the file
module6_dataexport.xlsxopens. The SUBJID displays the Subject Aliases.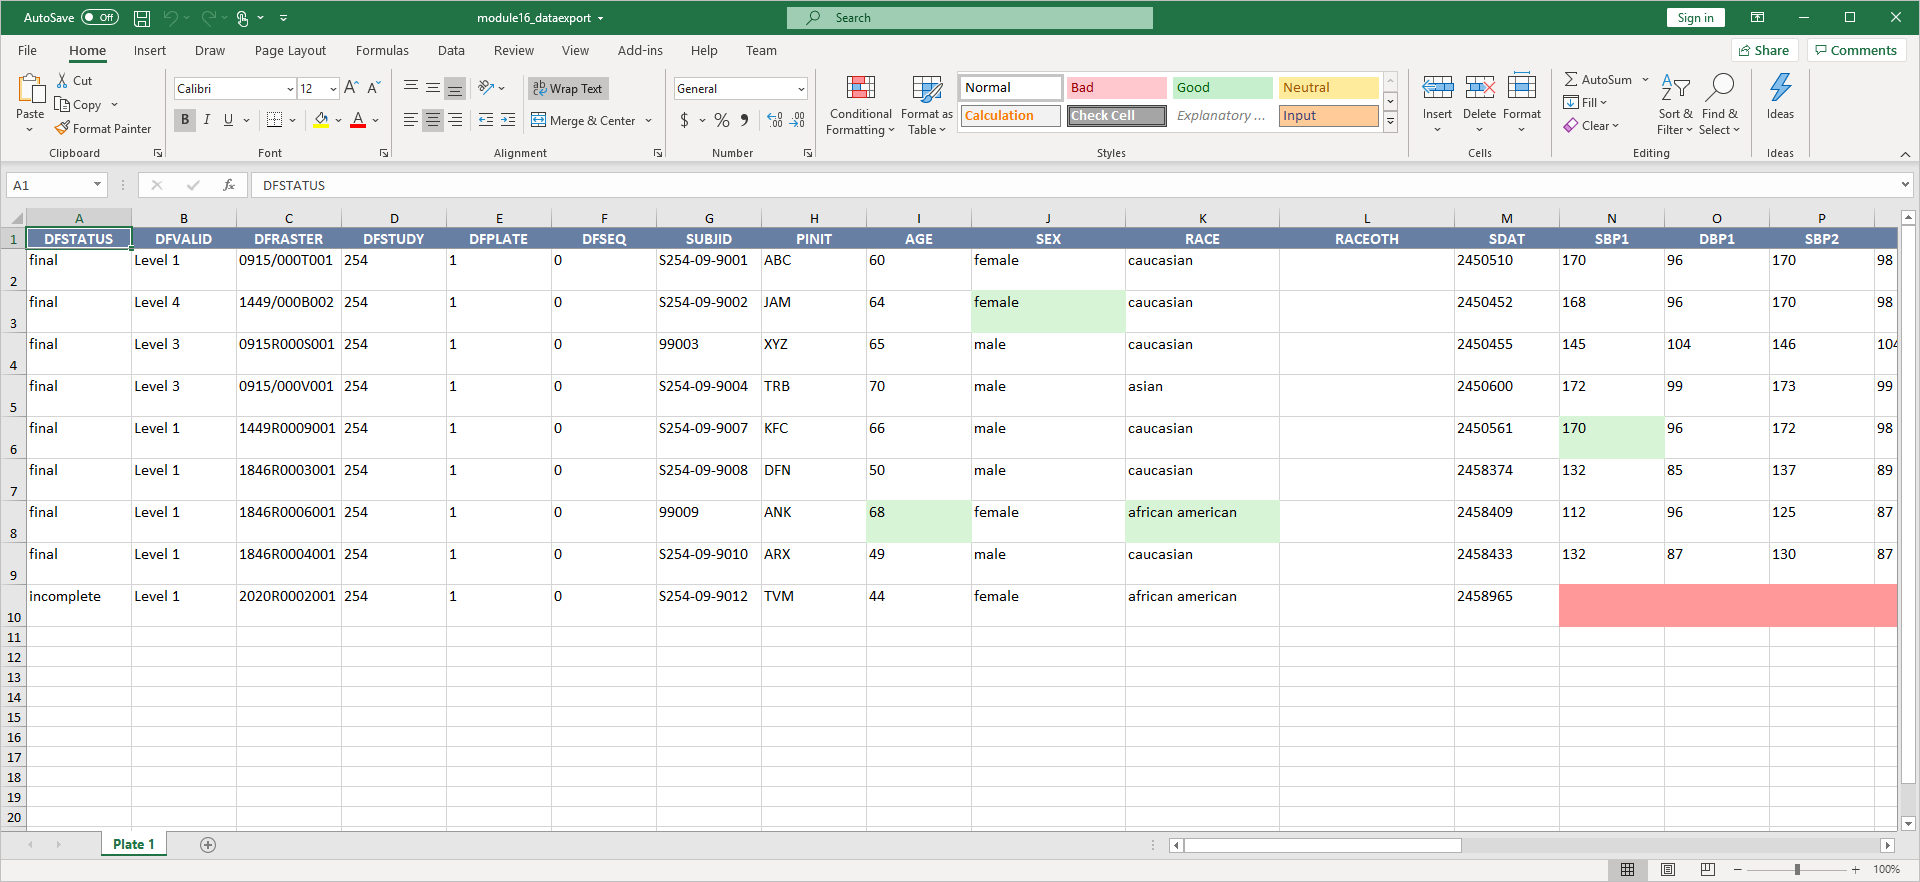
Return to DFexplore. Select > .
Create a task record set by selecting > . Set:
Mode = View
Plate = 21
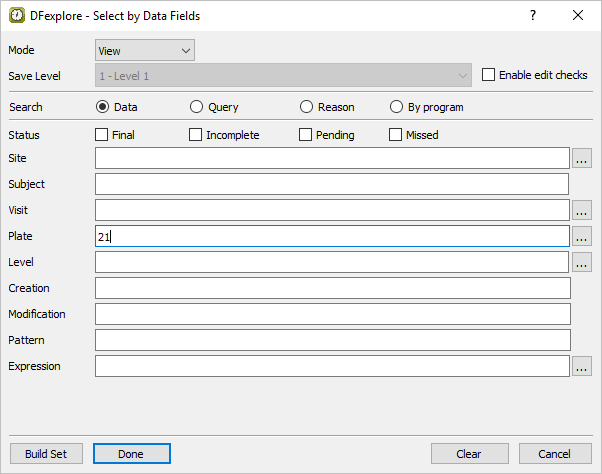
Click then .
-
Select > .
-
In the Selection Criteria panel,
Select (enable) Data and images followed by current task set
In the Save Options panel,
Check (enable) Data records and expand text fields for plates
Check (enable) Apply field color for completed plates
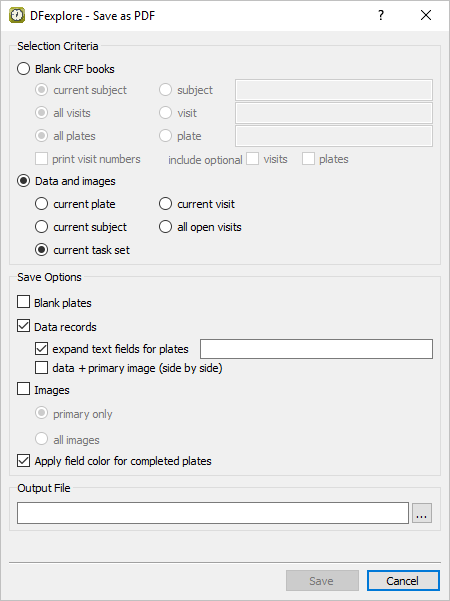
Click Output File . In the file selection dialog, choose a directory in which to save the PDF.
Once a directory has been chosen, append the file name
subjectalias.pdfto the directory name. Click .-
Complete the specification by clicking . There will be a busy pause while the PDF of completed data pages and their primary images is created.
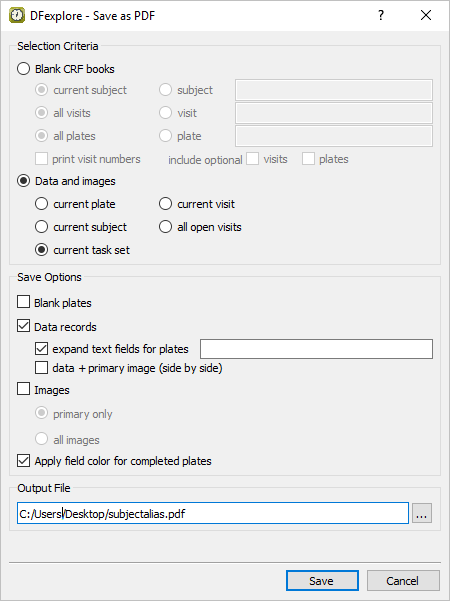
Locate and open the previously saved
subjectalias.pdffile. Confirm the Patient Number fields within the PDF are identical to that shown in DFexplore Data View.Select > . Uncheck (disable) Use subject alias. Click .
Select > to close DFexplore.
Start DFATK as described in Module 1 (Installation & Initialization).
-
Click to confirm successful completion of Module 6. Subject Alias.