Table of Contents
- 5.1. Tests & Requirements
- 5.2. Begin Module 5. User-defined Properties.
- 5.3. Defining User-defined property tags in DFsetup.
- 5.4. Adding Global User-defined property values.
- 5.5. Adding Plate, Module and Variable level User-defined property values
- 5.6. Exporting User-defined property tags in DFsetup.
- 5.7. Edit checks execution of User-defined property tags.
- 5.8. Creating subject data lists and exporting data views.
- 5.9. DFexplore Database Definition Report exporting.
- 5.10. End Module 5. User-defined Properties.
Defining User-defined property tags in DFsetup.
Adding Global User-defined property values.
Adding Plate, Module and Variable level User-defined property values
Exporting User-defined property tags in DFsetup.
Edit checks execution of User-defined property tags.
Creating subject data lists and exporting data views.
DFexplore Database Definition Report exporting.
Estimate of Time Required: 30 Minutes
-
Start DFATK as described in Module 1 (Installation & Initialization).
-
Click followed by to begin this module.
-
This module requires user
data_managerto have exclusive access to the 254 Acceptance Test Study database, the Control Panel must be closed. Click .
-
Start DFsetup, login as
data_managerand choose 254 Acceptance Test Study as described in Section 1.8, “How to start DFsetup”. Choose Exclusive Access and click . Exclusive Access allows you to create and modify plates, styles and fields, and to define all setup configuration files.
-
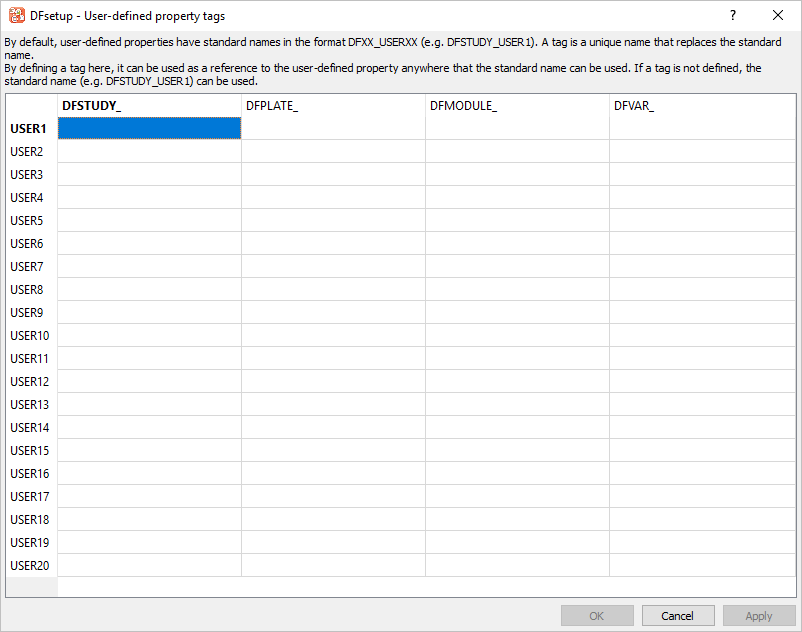
Select > .
-
Click the empty cell for DFSTUDY_ USER1 to make it the active field.
-
Beginning with DFSTUDY_ USER1 column. Enter the User-defined property tags for DFSTUDY_ property tags as follows:
USER1 =
TITLEUSER2 =
SPONSORUSER3 =
PLANSUBJECTSUSER4 =
TRIALPHASEUSER5 =
TRIALTYPEUSER6 =
LENGTHUSER7 =
REGID

-
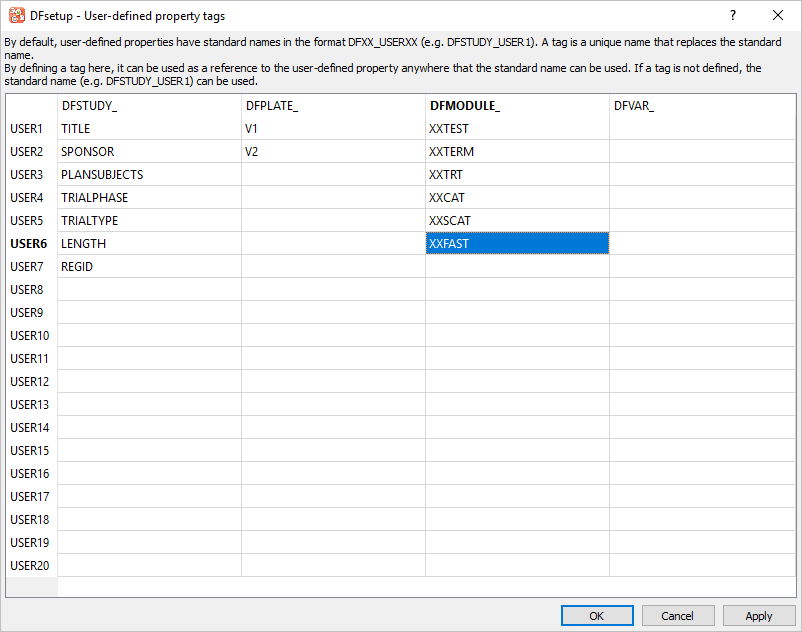
Click DFPLATE_ USER1, column. Enter the User-defined property tags for DFPLATE_ property tags as follows:
USER1 =
V1USER2 =
V2

-
Click DFMODULE_ USER1 column. Enter the User-defined property tags for DFMODULE_ property tags as follows:
USER1 =
XXTESTUSER2 =
XXTERMUSER3 =
XXTRTUSER4 =
XXCATUSER5 =
XXSCATUSER6 =
XXFAST
-
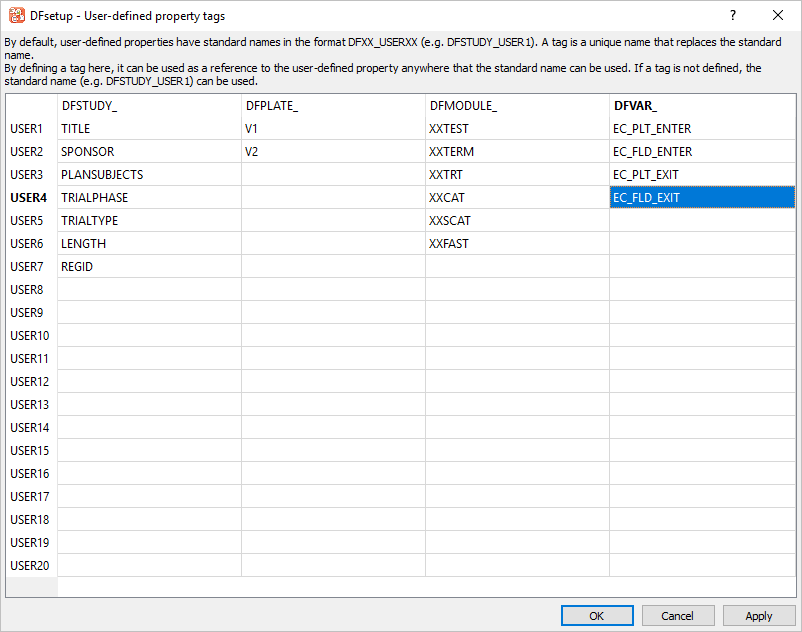
Click DFVAR_ USER1 column. Enter the User-defined property tags for DFVAR_ property tags as follows:
USER1 =
EC_PLT_ENTERUSER2 =
EC_FLD_ENTERUSER3 =
EC_PLT_EXITUSER4 =
EC_FLD_EXIT
-
Click to apply the newly defined properties.

-
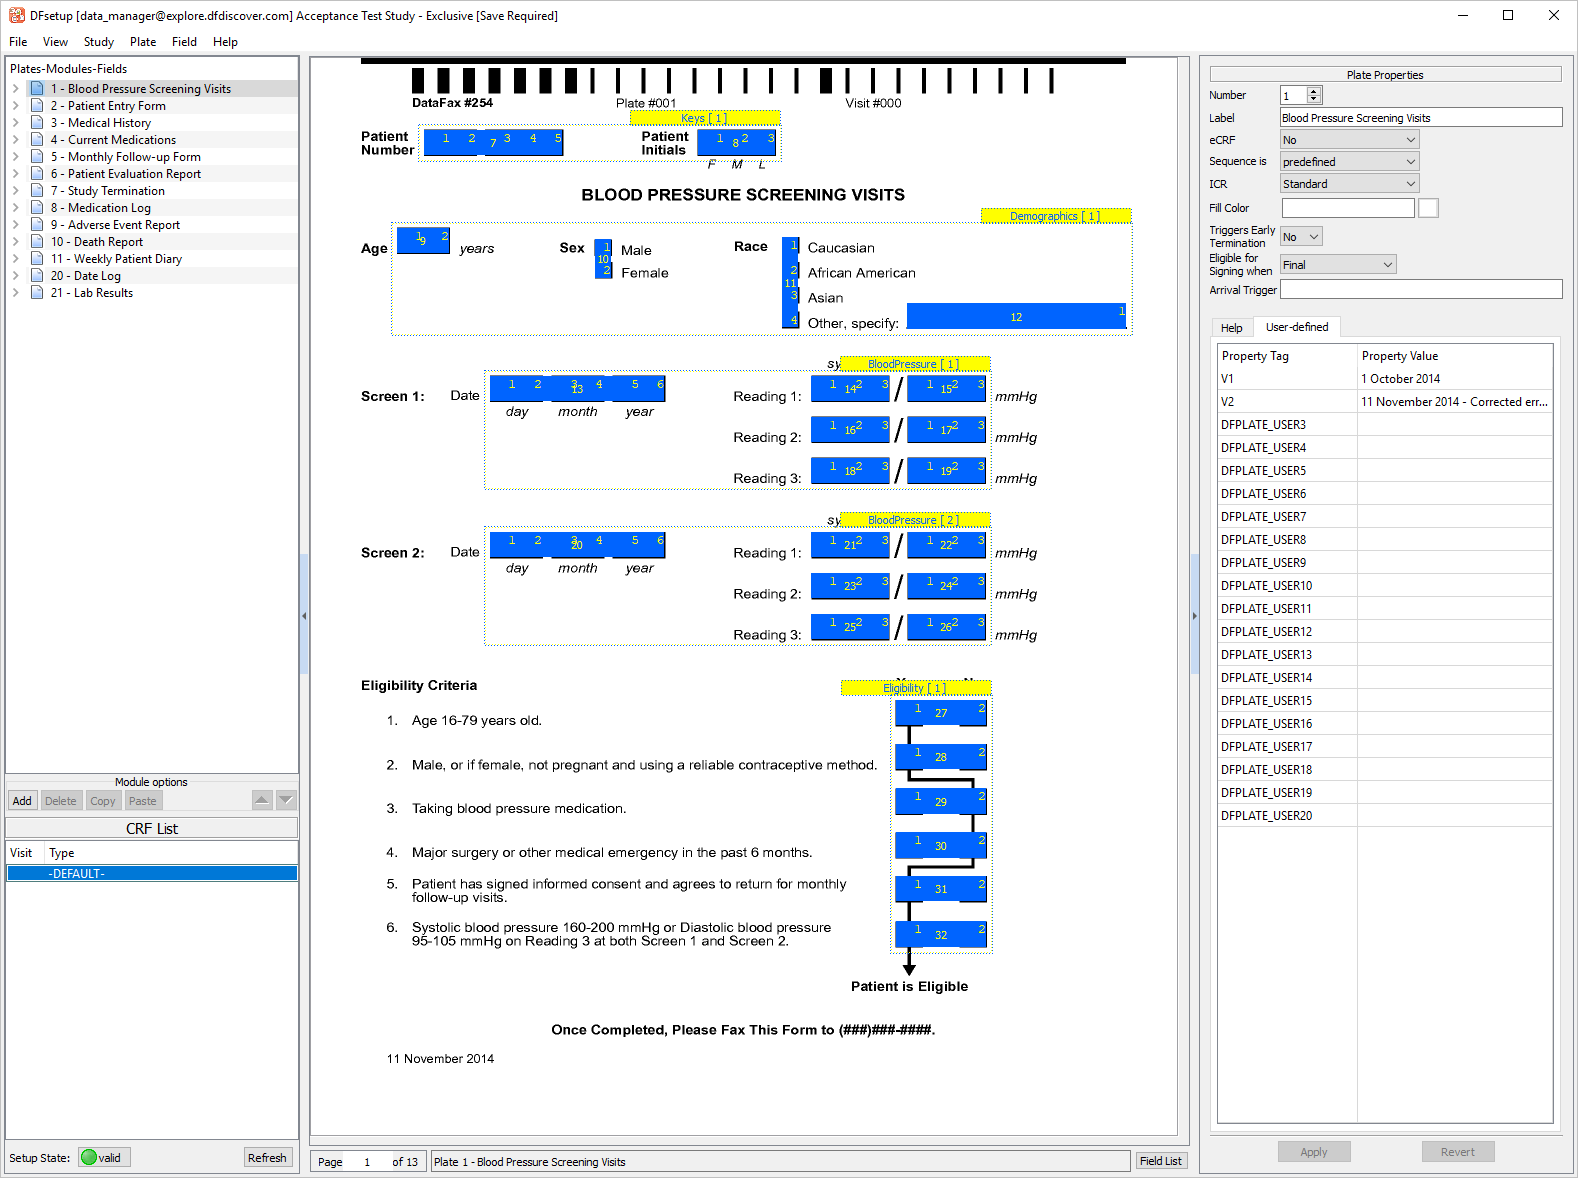
Click 1 - Blood Pressure Screening Visits to make it the active page. Within the Plate Properties window click User-defined tab.
-
Enter the Property Value tags as follows:
V1 =
1 October 2014V2 =
11 November 2014 - Corrected error in Eligibility Criteria item 6.
Click .
-
Select > .
-
Within row 2 Patient Entry Form navigate to the V1 column. Enter
1 October 2014. In the V2 column enter11 November 2014 - Updated randomization instructions.. Click , .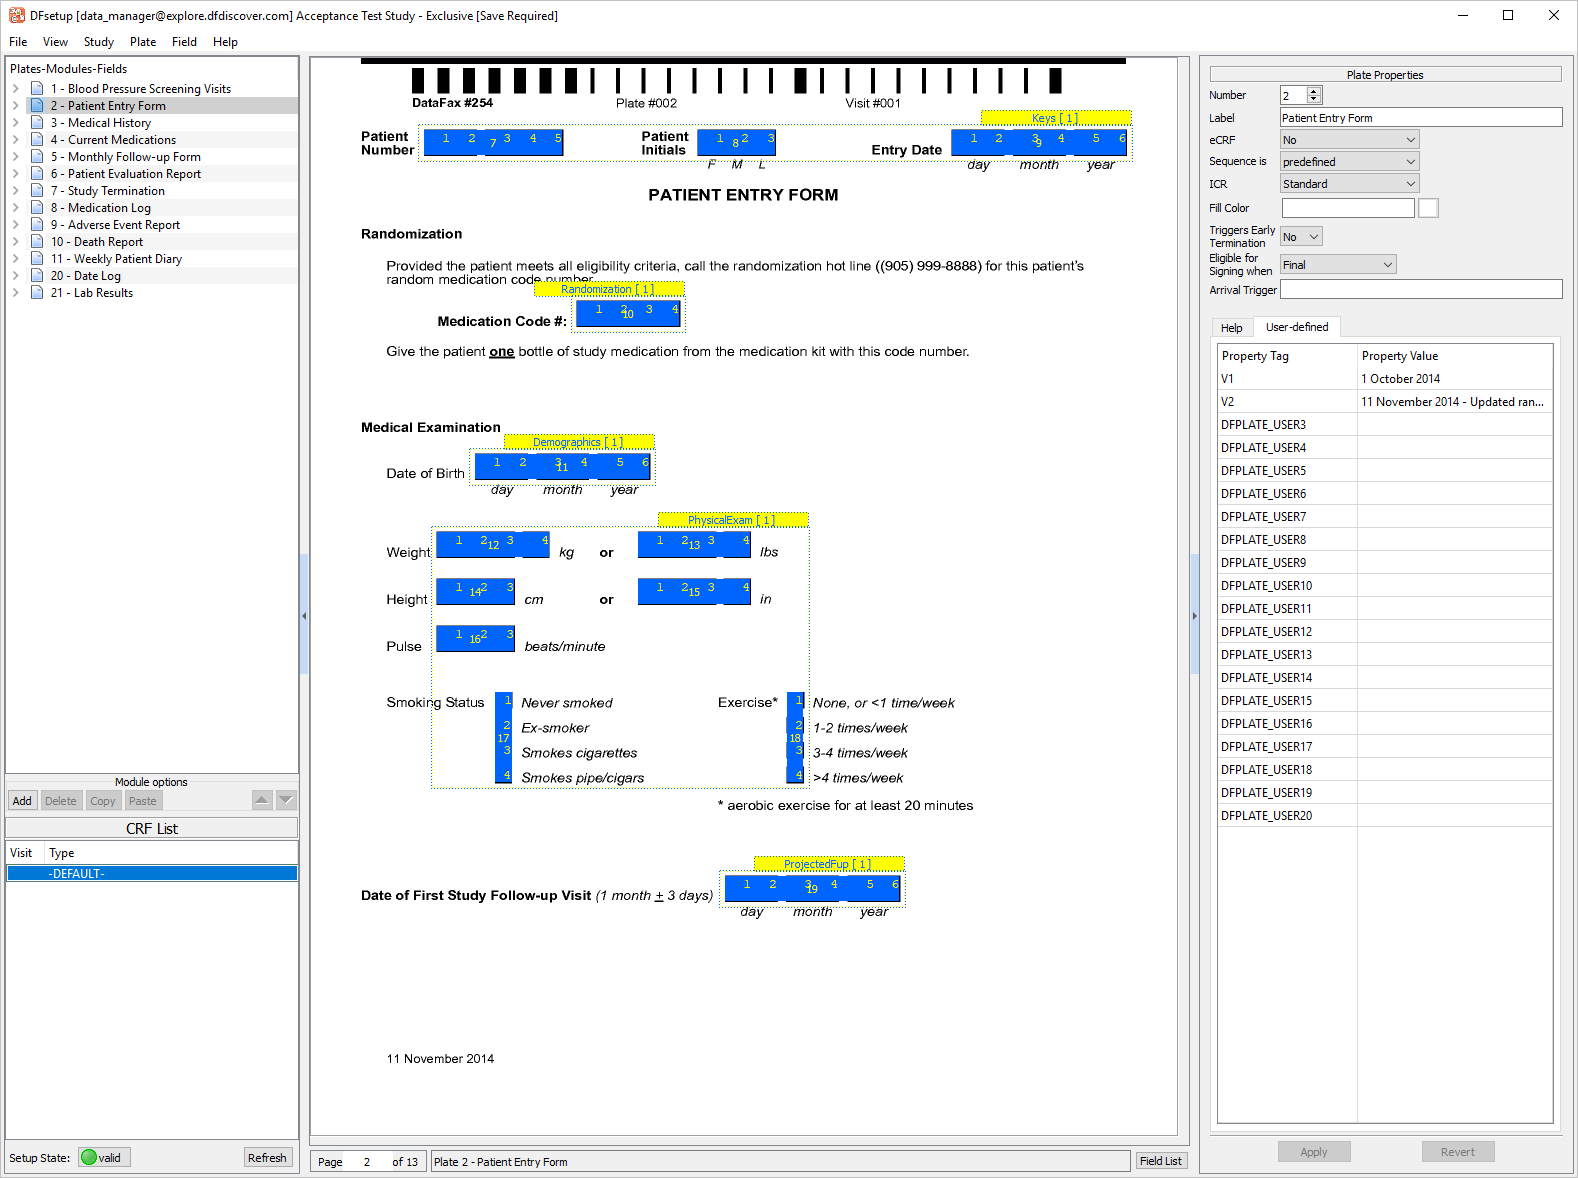
-
From the Plates-Modules-Fields window double-click 2 - Patient Entry Form. Click Keys [1] to make the module active.
-
In the Module Properties window specify
PTKEYSfor the XXTEST Property Value. Click .
-
Double-click Randomization [1]. In the Module Properties window specify
RANDCODEfor the XXTEST Property Value. Click .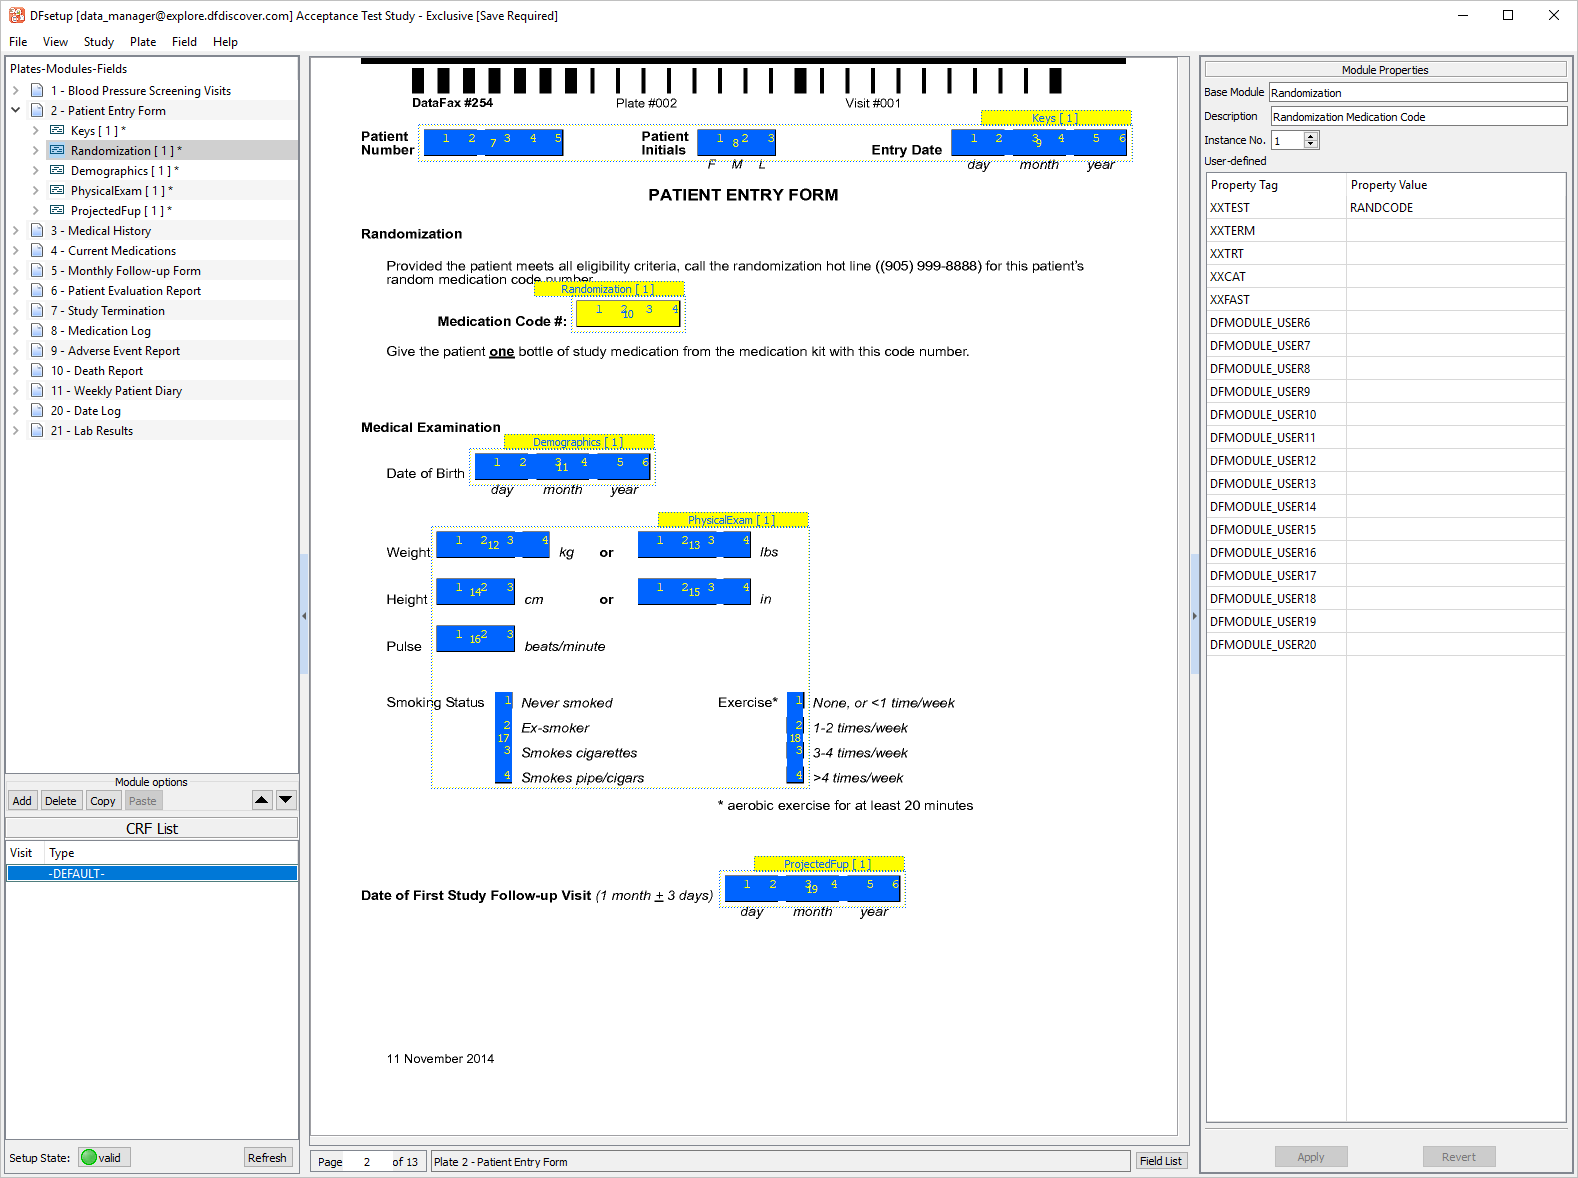
-
Select Medication Code # field. Click User-defined from the Field Properties window.
-
Enter
[MissingQC] Response is required.in the EC_FLD_EXIT Property Value.
-
Click Edit checks tab within the Field Properties window.
-
Enter
MissingQC, sdvnext to Field Exit, click .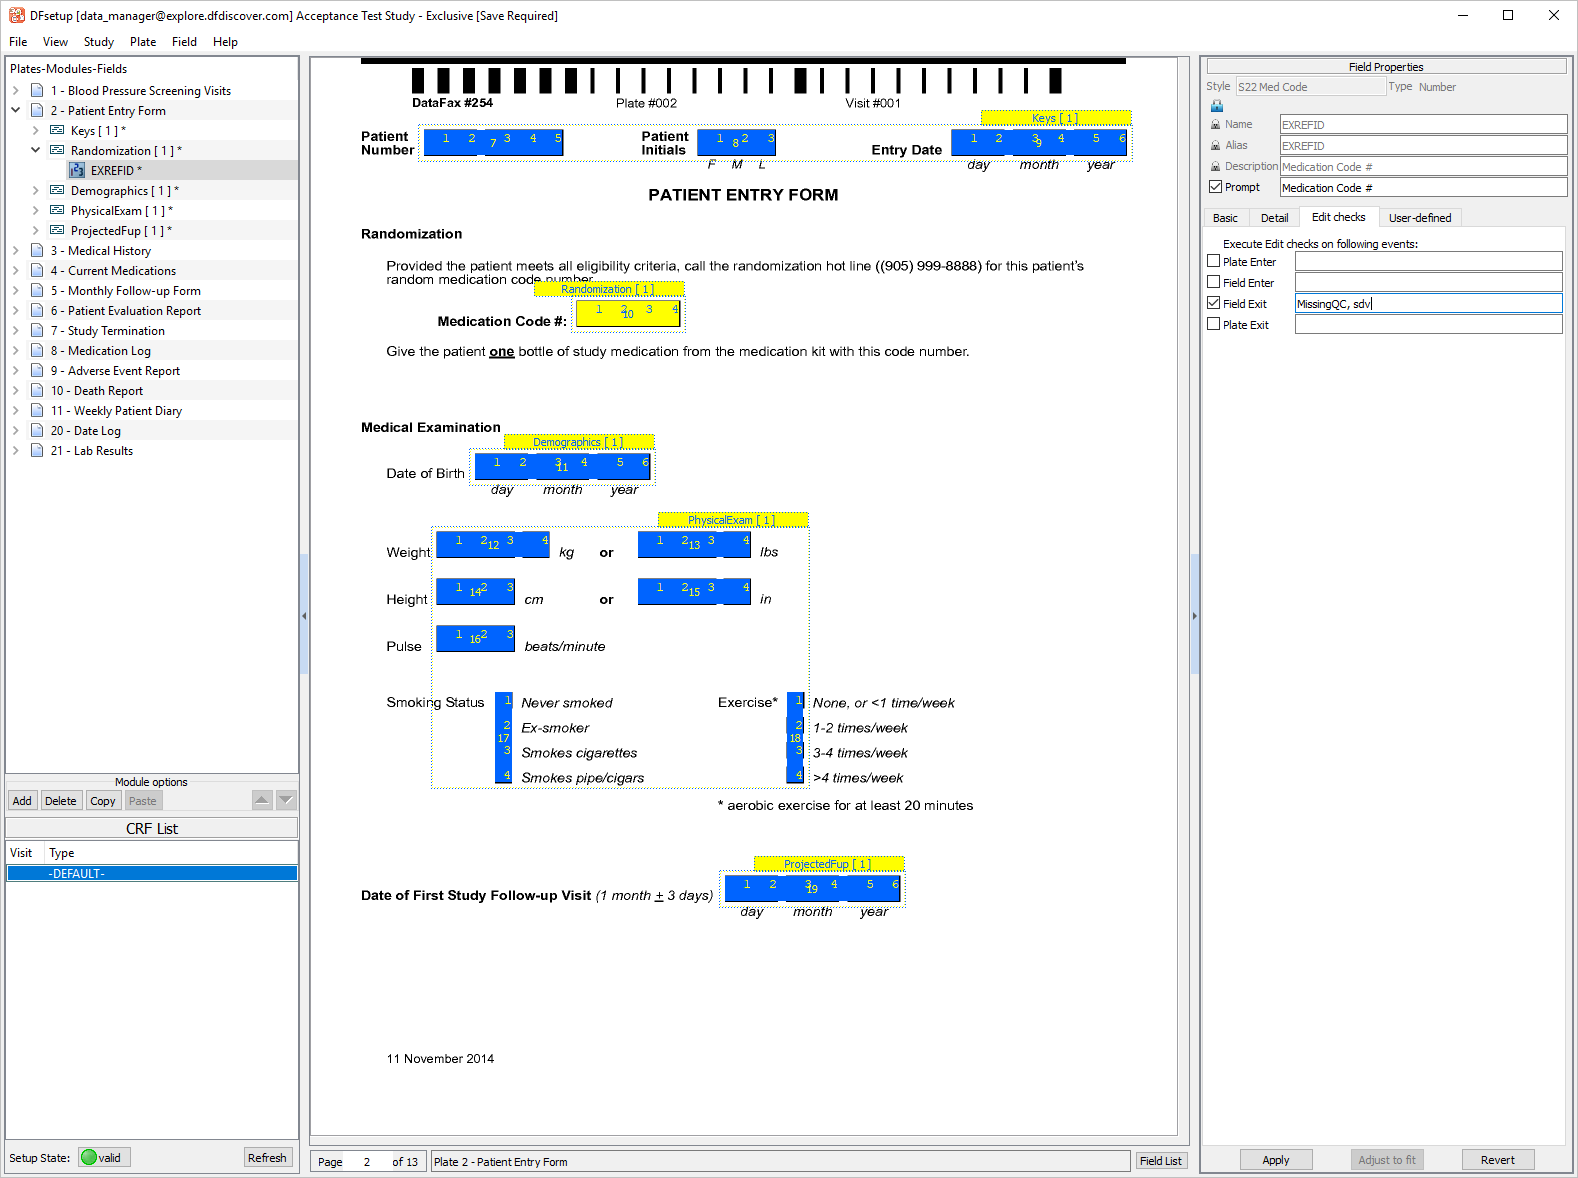
-
Click Weight (lbs) field, then User-defined. Enter
[WeightEquiv] Weight conversion.in the EC_FLD_EXIT Property Value. Click .
-
Select > .
-
Select > >.
-
Click Field Properties .
-
In the resulting dialog, click .
-
Select Name, Alias, Description, EC_PLT_ENTER, EC_FLD_ENTER, EC_PLT_EXIT and EC_FLD_EXIT. Click .
-
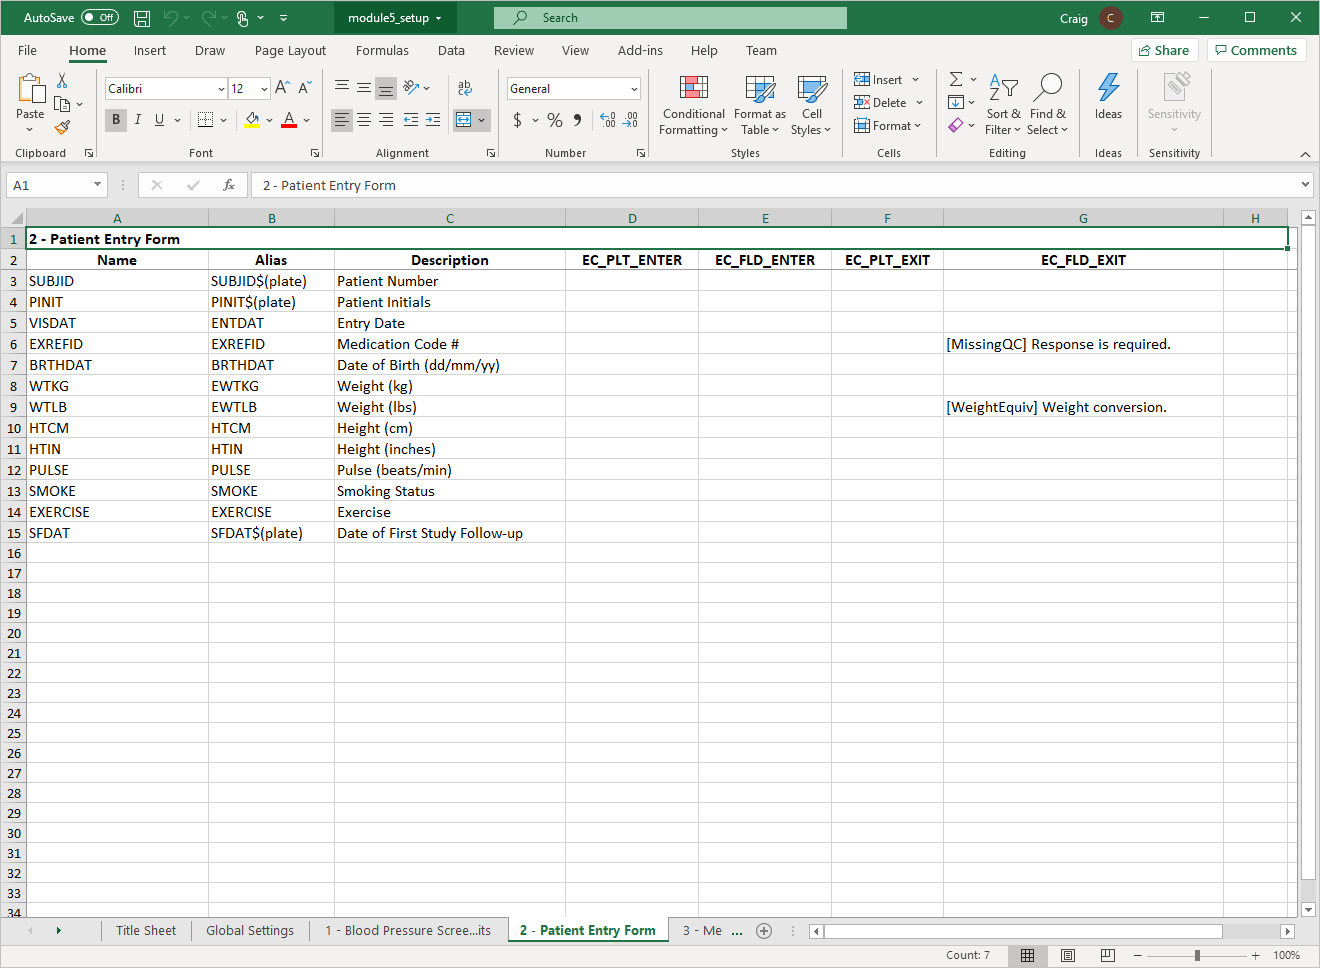
Specify
module5_setup.xlsxas the Output File name, enable (check) Open output file after export.. Click .
-
In the exported Excel file open the Global Settings tab to view the newly defined Global Property tags.

-
Click 2 - Patient Entry Form to view the newly defined Plate Property tags. Return to DFsetup.
-
Select > to close DFsetup.
-
Start DFexplore, login as
data_coordinatorand choose 254 Acceptance Test Study as described in Section 1.7, “How to start DFexplore”. Upon logging in adfmessageedit check dialog is displayed containing the DFsetup-Global Settings User-defined property tags defined in Section 5.3, “Defining User-defined property tags in DFsetup.”. Click to close the dialog.
-
Select > , click Background Options to expand the preferences. Click Color then to apply the changes.
-
Select > . Set:
Mode = Validate
Save level = 3 - Level 3
Check (enable) Enable edit checks.
Click .

-
Double-click Site 99 - Hospital #99 > 99010 > 1 : Baseline > 2 : Form 2.
-
Click anywhere on the page background to make the fields active. Press Tab to advance to the Medication Code # field.

-
Press Tab to exit the field and execute the
sdvedit check.
-
Click to add the edit check containing the User-Defined Property Value's added in Section 5.3, “Defining User-defined property tags in DFsetup.”.
-
Press Tab to advance through the remainder of the fields on the Patient Entry Form page. Verify that the Save information bar at the bottom of the screen indicates that the saved page will be assigned a record level of 3. Click .
-
Select > .
-
Click 002 - Patient Entry Form.
-
Select > to show the listing of all data fields and their metadata properties defined for the plate. In the Data Fields window, click
 next to fields 7:SUBJID
, 10:EXREFID
, 12:WTKG
, 13:WTLB.
next to fields 7:SUBJID
, 10:EXREFID
, 12:WTKG
, 13:WTLB.
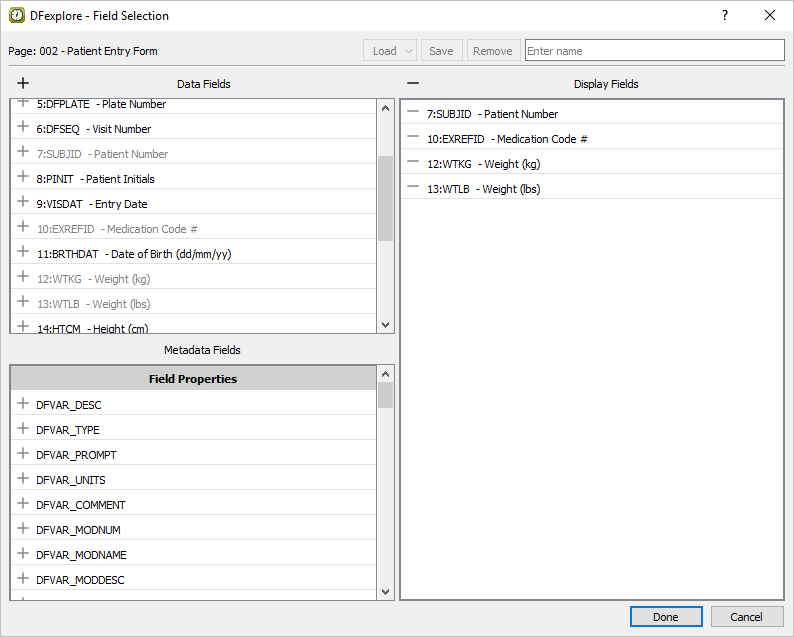
![[Note]](../../imagedata/note.png)
Note Alternatively fields can also be added by dragging-and-dropping the desired fields from the Data Fields or Metadata Fields windows to the Display Fields window.
-
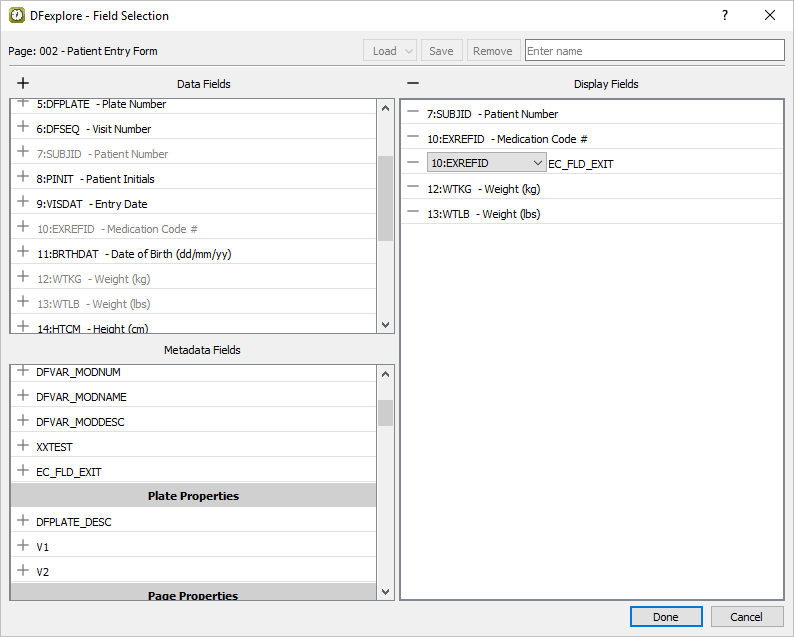
In the Metadata Fields window, click
next to field EC_FLD_EXIT to add the field to the Display Fields window.
From the drop-down select 10:EXREFID, click and drag the field to be below the 10:EXREFID - Medication Code # field.
-
Return to the Metadata Fields window, click
next to field EC_FLD_EXIT to add the field to the Display Fields window. From the drop-down select 13:WTLB.

-
Click to apply the field selection criteria and close the dialog.

-
Select > to save the data to a local file. In the dialog, set:
Format = Excel
Check (enable) Include header as the first record in output file.
-
Click next to Output File. Choose a directory in the file selection dialog, enter
module5_data.xlsxas the filename, and click . Click to create/write the file and close the dialog.

Start DFATK as described in Module 1 (Installation & Initialization).
-
Click to confirm successful completion of Module 5. User-defined Properties.